Are you looking to add a unique touch to your landscaping with drilled rocks? Rockscapes.net provides expert insights into drilling holes in large rocks, transforming them into stunning water features, artistic sculptures, or functional elements in your outdoor space. We’ll guide you through the process, ensuring safety and success. Unleash your creativity with rock drilling techniques and achieve breathtaking results.
1. Why Drill Holes In Large Rocks?
Drilling holes in large rocks opens up a world of creative possibilities for your landscape design. Whether you envision a captivating water feature, a unique garden sculpture, or a practical element like a rock planter, understanding how to drill properly is essential.
1.1. Aesthetic Enhancement
Drilled rocks add a touch of natural elegance and sophistication to any outdoor space. The contrast between the rough texture of the rock and the smooth, precisely drilled hole creates visual interest and intrigue.
1.2. Functional Applications
Beyond aesthetics, drilled rocks can serve practical purposes. They can be transformed into fountains, bird baths, or even used as supports for climbing plants. The possibilities are endless.
1.3. Personalization
Drilling allows you to customize rocks to fit your specific design vision. You can choose the size, shape, and placement of the holes to create a truly unique and personalized landscape feature.
2. Essential Tools And Equipment
Before you start drilling, gather the necessary tools and equipment to ensure a safe and efficient process.
2.1. Rotary Hammer Drill
A rotary hammer drill is specifically designed for drilling into hard materials like rock. It combines rotation with a hammering action, making it much more effective than a standard drill.
2.2. Carbide-Tipped Drill Bits
Carbide-tipped drill bits are essential for drilling through rock. They are made of hardened steel with carbide inserts that can withstand the abrasive nature of stone. Choose bits specifically designed for concrete or masonry.
2.3. Safety Glasses
Protect your eyes from flying rock chips and debris by wearing safety glasses at all times.
2.4. Dust Mask
Drilling rock creates a significant amount of dust, which can be harmful to your lungs. Wear a dust mask or respirator to prevent inhalation.
2.5. Water Source
Water is crucial for cooling the drill bit and reducing dust. A garden hose or a bucket of water with a sponge will work.
2.6. Marking Tools
Use a marker or pencil to mark the exact location where you want to drill the hole.
2.7. Gloves
Protect your hands from abrasions and sharp edges by wearing gloves.
3. Choosing The Right Rock
Selecting the right type of rock is crucial for a successful drilling project. Consider the following factors:
3.1. Rock Type
Different types of rocks have varying hardness and densities. Softer rocks like sandstone and limestone are easier to drill than harder rocks like granite and basalt.
3.2. Size And Shape
Choose a rock that is appropriate for your intended use. Consider the size and shape of the rock and how it will fit into your landscape design.
3.3. Structural Integrity
Inspect the rock for any cracks or weaknesses. Avoid rocks that are heavily weathered or damaged, as they may be more prone to breaking during drilling.
4. Safety Precautions
Safety should be your top priority when drilling rocks. Follow these precautions to prevent accidents and injuries:
4.1. Wear Protective Gear
Always wear safety glasses, a dust mask, and gloves when drilling.
4.2. Secure The Rock
Ensure the rock is stable and secure before drilling. Use clamps or wedges to prevent it from moving or shifting.
4.3. Use Water
Water helps to cool the drill bit and reduce dust. Apply water continuously while drilling.
4.4. Avoid Overheating
Do not force the drill bit. Let the drill do the work and avoid overheating the bit, which can damage it.
4.5. Take Breaks
Take frequent breaks to avoid fatigue and maintain focus.
5. Step-By-Step Guide To Drilling Holes In Large Rocks
Follow these steps to drill holes in large rocks safely and effectively:
5.1. Prepare The Rock
Clean the rock surface and remove any loose debris. Use a wire brush to remove any dirt or moss.
5.2. Mark The Hole Location
Use a marker or pencil to mark the exact location where you want to drill the hole. Double-check your measurements to ensure accuracy.
5.3. Start With A Pilot Hole
Begin by drilling a small pilot hole. This will help guide the larger drill bit and prevent it from wandering.
5.4. Drill Slowly And Steadily
Apply steady pressure and drill slowly. Allow the drill bit to do the work. Avoid forcing the bit, as this can cause it to break or overheat.
5.5. Use Water
Apply water continuously while drilling to cool the bit and reduce dust.
5.6. Check The Depth
Periodically check the depth of the hole to ensure you are drilling to the desired depth.
5.7. Drill From Both Sides (Optional)
For larger rocks, it may be helpful to drill from both sides to prevent chipping and ensure a clean hole.
5.8. Clean The Hole
Once you have finished drilling, clean the hole with a brush or compressed air to remove any debris.
6. Drilling Techniques For Different Rock Types
The drilling technique may vary depending on the type of rock you are working with.
6.1. Sandstone And Limestone
These softer rocks are relatively easy to drill. Use a standard rotary hammer drill with carbide-tipped bits. Apply moderate pressure and use plenty of water.
6.2. Granite And Basalt
These harder rocks require more patience and a more powerful rotary hammer drill. Use high-quality carbide-tipped bits and apply firm, steady pressure. Use plenty of water to keep the bit cool.
6.3. Fieldstone
Fieldstone, due to its often irregular shape and composition, requires a careful approach. Secure the stone firmly and use a slow, steady drilling motion.
7. Troubleshooting Common Problems
Even with careful planning, you may encounter some common problems when drilling rocks.
7.1. Drill Bit Slipping
If the drill bit is slipping, try starting with a smaller pilot hole. You can also use a center punch to create a small indentation to guide the bit.
7.2. Drill Bit Overheating
If the drill bit is overheating, reduce the pressure and apply more water. You may also need to take breaks to allow the bit to cool down.
7.3. Rock Chipping
To prevent chipping, drill slowly and steadily. You can also try drilling from both sides of the rock.
7.4. Drill Bit Breaking
If the drill bit breaks, stop drilling immediately. Use pliers to remove the broken bit from the hole. To prevent breakage, use high-quality drill bits and avoid applying excessive pressure.
8. Creative Applications For Drilled Rocks
Once you have mastered the art of drilling rocks, you can explore a wide range of creative applications.
8.1. Water Features
Drilled rocks can be transformed into stunning water features. Create a bubbling rock fountain or a cascading waterfall by drilling holes and connecting them to a pump.
8.2. Garden Sculptures
Drill holes in rocks and use them as pedestals for sculptures or planters. You can also create unique rock sculptures by drilling multiple holes and connecting them with metal rods or wires.
8.3. Rock Planters
Drill holes in rocks and fill them with soil to create unique rock planters. These planters add a touch of natural beauty to any garden or patio.
8.4. Lighting Fixtures
Incorporate lighting into drilled rocks to create stunning visual effects. Drill holes to accommodate LED lights and illuminate your landscape at night.
8.5. Bird Baths
Create a natural bird bath by drilling a shallow depression in a large rock. The birds will appreciate a natural place to bathe and drink.
9. Maintaining Your Drilled Rock Features
Proper maintenance will help to ensure that your drilled rock features last for years to come.
9.1. Cleaning
Clean the rocks regularly to remove dirt, algae, and mineral deposits. Use a brush and water to scrub the surface.
9.2. Sealing
Consider sealing the rocks to protect them from weathering and staining. Use a sealant specifically designed for stone.
9.3. Winterizing
In cold climates, protect your drilled rock features from freezing temperatures. Drain water features and cover the rocks with a tarp to prevent damage.
10. Finding Inspiration And Resources At Rockscapes.Net
Ready to take your rock drilling skills to the next level? Rockscapes.net is your ultimate resource for inspiration, information, and expert advice.
10.1. Design Ideas
Explore our gallery of stunning landscape designs featuring drilled rocks. Get inspired by creative applications and discover new ways to incorporate rocks into your outdoor space.
10.2. Product Information
Learn about different types of rocks, drilling tools, and accessories. We provide detailed product information and recommendations to help you choose the right materials for your project.
10.3. Expert Advice
Consult with our team of experienced landscape designers and rock drilling experts. We can answer your questions, provide guidance, and help you troubleshoot any problems you may encounter.
10.4. Community Forum
Connect with other rock enthusiasts in our online community forum. Share your projects, ask questions, and learn from the experiences of others.
10.5. Local Supplier Directory
Find local suppliers of rocks, drilling tools, and landscaping materials. We have compiled a comprehensive directory of reputable suppliers in your area.
11. Exploring Rock Types For Drilling: Properties And Considerations
When embarking on a rock drilling project, understanding the properties of different rock types is essential for success. Each type presents unique challenges and opportunities.
11.1. Granite
Granite, an igneous rock, is known for its hardness and durability. According to research from Arizona State University’s School of Earth and Space Exploration, granite’s crystalline structure makes it resistant to weathering. However, this also makes it more difficult to drill.
| Property | Description |
|---|---|
| Hardness | Very Hard |
| Porosity | Low |
| Best Use | Durable landscape features, sculptures |
| Drilling Tips | Use a powerful rotary hammer and high-quality diamond or carbide-tipped bits. |
| Potential Issues | Overheating of drill bits, chipping |
11.2. Limestone
Limestone, a sedimentary rock, is softer than granite and easier to drill. Its porous nature allows for better water absorption, making it ideal for water features.
| Property | Description |
|---|---|
| Hardness | Moderate |
| Porosity | High |
| Best Use | Water features, garden accents |
| Drilling Tips | Use a standard rotary hammer drill with carbide-tipped bits. |
| Potential Issues | Cracking, crumbling |
11.3. Sandstone
Sandstone, another sedimentary rock, is composed of sand grains cemented together. It is relatively soft and easy to shape, but can be prone to crumbling.
| Property | Description |
|---|---|
| Hardness | Soft to Moderate |
| Porosity | High |
| Best Use | Decorative elements, pathways |
| Drilling Tips | Use a gentle drilling motion to prevent crumbling. |
| Potential Issues | Excessive dust, crumbling |
11.4. Basalt
Basalt, a volcanic rock, is dense and hard, similar to granite. Its dark color and unique texture make it a popular choice for modern landscape designs.
| Property | Description |
|---|---|
| Hardness | Very Hard |
| Porosity | Low |
| Best Use | Modern landscape features, water features |
| Drilling Tips | Requires a powerful rotary hammer drill and high-quality drill bits. |
| Potential Issues | Overheating, drill bit wear |
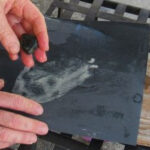
11.5. Slate
Slate, a metamorphic rock, is known for its layered structure and smooth surface. It is often used for paving and wall cladding.
| Property | Description |
|---|---|
| Hardness | Moderate |
| Porosity | Low |
| Best Use | Paving, wall cladding, decorative accents |
| Drilling Tips | Drill along the layers to prevent splitting. |
| Potential Issues | Splitting, cracking |
12. Advanced Drilling Techniques: Coring And Angle Drilling
For more complex rock drilling projects, consider these advanced techniques.
12.1. Core Drilling
Core drilling involves using a hollow drill bit to extract a cylindrical core of rock. This technique is ideal for creating large holes or for obtaining samples for analysis.
12.2. Angle Drilling
Angle drilling allows you to drill holes at an angle, creating unique design effects. This technique requires careful planning and precise execution.
13. The Role Of Water In Rock Drilling: Cooling And Dust Suppression
Water plays a vital role in rock drilling, serving two primary functions: cooling and dust suppression.
13.1. Cooling
Drilling generates a significant amount of heat due to friction between the drill bit and the rock. Water acts as a coolant, preventing the drill bit from overheating and prolonging its lifespan.
13.2. Dust Suppression
Drilling rock produces a large amount of dust, which can be harmful to your lungs. Water helps to suppress the dust, reducing the risk of respiratory problems.
14. Innovative Lighting Techniques For Drilled Rock Features
Enhance the beauty of your drilled rock features with innovative lighting techniques.
14.1. In-Hole Lighting
Install LED lights inside the drilled holes to create a dramatic glow. This technique is particularly effective for water features.
14.2. Uplighting
Position lights at the base of the rocks to highlight their texture and shape.
14.3. Backlighting
Place lights behind the rocks to create a silhouette effect.
15. Incorporating Drilled Rocks Into Water Features: Design Ideas
Drilled rocks are a natural fit for water features. Here are some design ideas to inspire you.
15.1. Bubbling Rock Fountains
Create a bubbling rock fountain by drilling a hole through a rock and connecting it to a pump. The water will bubble up through the hole, creating a soothing sound and visual effect.
15.2. Cascading Waterfalls
Arrange drilled rocks to create a cascading waterfall. The water will flow over the rocks, creating a beautiful and dynamic water feature.
15.3. Rock Pools
Line a depression with rocks and fill it with water to create a natural rock pool. Drill holes in some of the rocks to create small fountains or waterfalls.
16. Environmental Considerations For Rock Drilling Projects
Consider the environmental impact of your rock drilling project.
16.1. Dust Control
Implement effective dust control measures to minimize air pollution. Use water to suppress dust and consider using a dust collection system.
16.2. Waste Disposal
Dispose of rock debris and drilling fluids properly. Do not dump them in waterways or on public lands.
16.3. Noise Pollution
Minimize noise pollution by using mufflers on your drilling equipment and by working during reasonable hours.
17. The Art Of Rock Balancing: Combining Drilling And Sculpture
Combine the art of rock balancing with rock drilling to create unique and captivating sculptures.
17.1. Drilling For Stability
Drill holes in rocks to create stable points for balancing.
17.2. Creating Visual Interest
Use drilled holes to add visual interest and texture to your rock sculptures.
18. Case Studies: Successful Drilled Rock Projects
Learn from successful drilled rock projects.
18.1. The Arizona Desert Oasis
A homeowner in Arizona transformed their backyard into a desert oasis by incorporating drilled rocks into a dry creek bed. The rocks were drilled to create small waterfalls and bubbling fountains, creating a soothing and visually stunning landscape.
18.2. The Colorado Mountain Retreat
A mountain retreat in Colorado incorporated drilled rocks into a retaining wall. The rocks were drilled to accommodate drainage pipes, preventing water buildup behind the wall.
19. Trends In Rock Drilling For Landscape Design
Stay up-to-date with the latest trends in rock drilling for landscape design.
19.1. Naturalistic Designs
Naturalistic designs that mimic natural rock formations are becoming increasingly popular.
19.2. Sustainable Practices
Sustainable practices, such as using recycled rocks and minimizing waste, are gaining traction.
20. Q&A: Answers To Your Burning Questions About Drilling Rocks
Let’s tackle some frequently asked questions about drilling rocks.
20.1. What is the best type of drill for drilling rocks?
A rotary hammer drill is the best option for drilling rocks.
20.2. What kind of drill bit should I use for drilling rocks?
Use carbide-tipped drill bits designed for concrete or masonry.
20.3. How do I prevent the drill bit from slipping when drilling rocks?
Start with a pilot hole and use a center punch to create an indentation.
20.4. How do I keep the drill bit cool when drilling rocks?
Apply water continuously while drilling.
20.5. How do I prevent the rock from chipping when drilling?
Drill slowly and steadily, and consider drilling from both sides.
20.6. What safety precautions should I take when drilling rocks?
Wear safety glasses, a dust mask, and gloves.
20.7. Can I drill any type of rock?
Some rocks are easier to drill than others. Softer rocks like sandstone and limestone are easier to drill than harder rocks like granite and basalt.
20.8. How do I clean drilled rock features?
Use a brush and water to scrub the surface.
20.9. How do I seal drilled rock features?
Use a sealant specifically designed for stone.
20.10. Where can I find inspiration and resources for drilled rock projects?
Rockscapes.net is an excellent resource for design ideas, product information, and expert advice.
21. Contact Rockscapes.net For Expert Assistance
Ready to transform your landscape with drilled rocks? Contact Rockscapes.net today.
21.1. Address
1151 S Forest Ave, Tempe, AZ 85281, United States.
21.2. Phone
+1 (480) 965-9011.
21.3. Website
rockscapes.net.
At rockscapes.net, we’re passionate about helping you create stunning and unique outdoor spaces with the beauty of natural stone. Our team of experts is ready to assist you with every step of the process, from choosing the right rocks to mastering the art of drilling. Let’s turn your landscape dreams into reality!