Fixing a wicker rocking chair is totally achievable, and rockscapes.net is here to guide you through it. Whether it’s repairing damaged wicker or refreshing its overall look, our comprehensive guide provides simple solutions to restore your favorite seat. Revitalize your outdoor space with expert advice, and find the perfect materials and inspiration for a DIY restoration project.
1. Why is Wicker Rocking Chair Repair Important?
Repairing a wicker rocking chair is important because it preserves a piece of furniture that offers both comfort and style. Addressing damage early prevents further deterioration, maintaining its aesthetic appeal and structural integrity.
- Extends Lifespan: Regular maintenance and timely repairs prevent minor damages from escalating, significantly prolonging the chair’s lifespan.
- Maintains Aesthetic Appeal: A well-maintained wicker chair enhances the look of your indoor or outdoor space, preserving its original charm.
- Cost-Effective: Repairing is often more economical than replacing the entire chair, saving you money in the long run.
- Environmental Benefits: By repairing instead of replacing, you reduce waste and contribute to a more sustainable lifestyle, aligning with eco-conscious practices.
- Personal Satisfaction: Restoring a beloved piece of furniture can be a rewarding DIY project, adding a personal touch to your home.
According to a study by the Environmental Protection Agency (EPA) in 2023, repairing and reusing furniture significantly reduces landfill waste and lowers carbon emissions compared to manufacturing new items.
2. What Tools and Materials Do I Need to Fix a Wicker Rocking Chair?
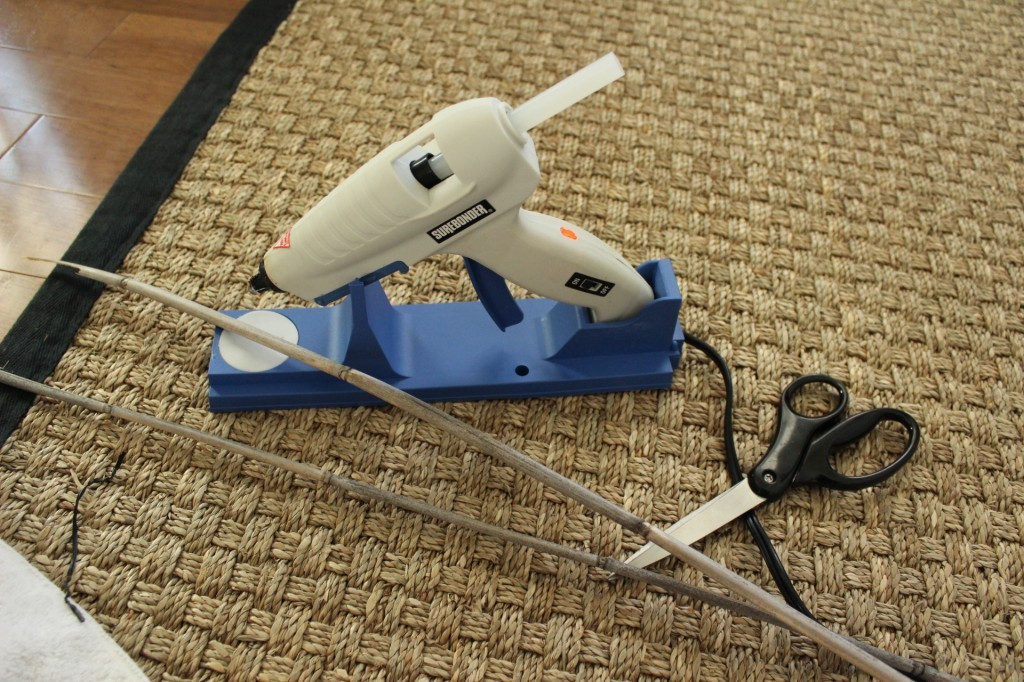
To fix a wicker rocking chair, gather these essential tools and materials:
- Wicker Repair Material: Choose natural or synthetic wicker that matches your chair’s existing material.
- Sharp Scissors or Utility Knife: For precise cutting of the wicker.
- Wood Glue: To secure the wicker strands to the frame.
- Hot Glue Gun: Provides a quick and strong bond for smaller repairs.
- Clamps: To hold the wicker in place while the glue dries.
- Sandpaper: For smoothing rough edges and preparing surfaces for repair.
- Paint or Stain: To match the existing color and protect the wicker.
- Paintbrushes: For applying paint or stain evenly.
- Protective Gloves and Mask: To ensure safety during the repair process.
- Soft Cloth: For cleaning and applying finishes.
- Measuring Tape: To measure and cut the wicker accurately.
Having these tools on hand will streamline the repair process and ensure a professional finish. Rockscapes.net can provide guidance on where to source high-quality materials for your repair project.
3. How Do I Identify the Type of Wicker on My Rocking Chair?
Identifying the type of wicker on your rocking chair is crucial for a seamless repair. The primary types are natural wicker, made from materials like rattan, reed, and bamboo, and synthetic wicker, typically made from resin or plastic.
- Natural Wicker:
- Rattan: Strong, durable, and flexible, often used for the frame and intricate weaves.
- Reed: Lightweight and easy to work with, ideal for detailed patterns.
- Bamboo: Provides a sturdy and sustainable option, known for its strength and flexibility.
- Synthetic Wicker:
- Resin Wicker: Weather-resistant and durable, perfect for outdoor furniture. It mimics the look of natural wicker but requires less maintenance.
- Plastic Wicker: Affordable and easy to clean, suitable for casual settings.
How to Identify:
- Visual Inspection: Natural wicker has a more textured, irregular appearance, while synthetic wicker looks uniform and smooth.
- Touch: Natural wicker feels cooler and more porous, whereas synthetic wicker feels smoother and may have a plastic-like texture.
- Smell: Natural wicker may have a faint earthy scent, while synthetic wicker can have a slight plastic odor, especially when new.
- Burn Test (Use with Caution): In an inconspicuous area, carefully use a lighter. Natural wicker will burn and smell like wood, while synthetic wicker will melt and smell like plastic.
Matching the wicker type ensures the repair blends seamlessly with the original design. Visit rockscapes.net for expert advice and resources to help you identify and source the correct wicker for your rocking chair.
4. How to Repair Broken Wicker Strands on a Rocking Chair?
Repairing broken wicker strands on a rocking chair involves several steps to ensure a durable and aesthetically pleasing result.
Steps:
- Prepare the Area: Clean the damaged area with a soft brush to remove dust and debris.
- Assess the Damage: Determine the length and type of wicker needed for the repair.
- Cut Replacement Wicker: Cut the new wicker strand slightly longer than the damaged section to allow for overlap.
- Soak the Wicker (for Natural Wicker): Soak the replacement wicker in warm water for about 30 minutes to make it more pliable and prevent cracking.
- Apply Glue: Apply wood glue to the ends of the existing wicker strands and the corresponding ends of the replacement wicker.
- Attach the Replacement: Carefully weave the replacement wicker into the existing pattern, overlapping the glued ends.
- Secure with Clamps: Use small clamps to hold the repaired section in place while the glue dries, typically for 24 hours.
- Trim Excess: Once the glue is dry, trim any excess wicker with sharp scissors or a utility knife.
- Sand Smooth: Gently sand any rough edges to ensure a smooth finish.
- Apply Finish: Apply paint or stain to match the original color, blending the repair seamlessly.
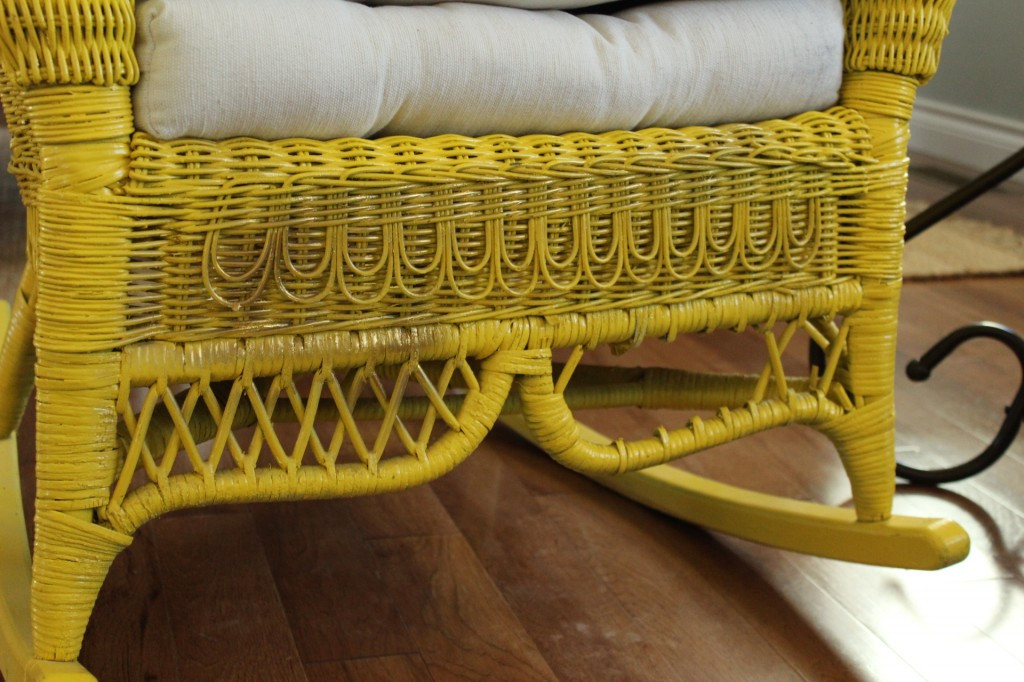 Damaged wicker requiring repair on a rocking chair
Tips:
- For complex weaves, take photos before disassembly to guide your repair.
- Use a hot glue gun for quick fixes on smaller breaks.
- Consider using a specialized wicker repair kit for comprehensive solutions.
Rockscapes.net offers detailed tutorials and expert advice to help you tackle even the most challenging wicker repairs.
5. Can I Replace an Entire Section of Wicker on My Rocking Chair?
Yes, you can replace an entire section of wicker on your rocking chair. This is necessary when a large area is severely damaged or beyond simple repair.
Steps:
- Remove the Damaged Section: Carefully cut away the damaged wicker, leaving a clean edge on the surrounding areas. Use a utility knife or sharp scissors to avoid splintering.
- Measure the Area: Accurately measure the dimensions of the section you need to replace.
- Cut the Replacement Wicker: Cut the new wicker piece to match the measured dimensions, adding extra length for securing the edges.
- Soak the Wicker (for Natural Wicker): Submerge the replacement wicker in warm water for about 30 minutes to make it flexible and prevent cracking during installation.
- Attach the New Section: Apply wood glue to the frame where the new wicker will attach. Weave the new section into the existing pattern, ensuring a tight fit.
- Secure with Clamps: Use clamps to hold the new section in place while the glue dries, typically for 24-48 hours.
- Trim Excess: Once the glue is fully dry, trim any excess wicker with sharp scissors or a utility knife.
- Sand Smooth: Sand any rough edges or uneven spots for a smooth and uniform surface.
- Apply Finish: Paint or stain the repaired section to match the original color, blending it seamlessly with the rest of the chair.
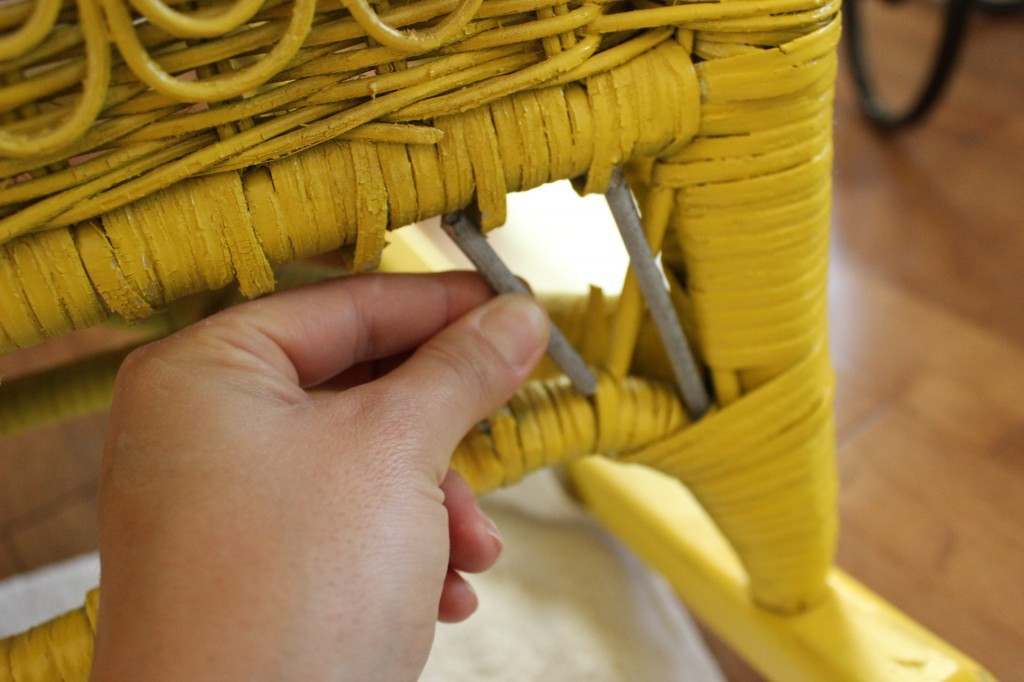
 Applying glue to wicker strands for secure attachment during repair
Considerations:
- For intricate patterns, consider creating a template to ensure accuracy.
- Use a combination of wood glue and small nails or staples for added stability, especially on larger sections.
- Rockscapes.net provides resources and expert tips for selecting the right materials and techniques for replacing wicker sections on your rocking chair.
6. How to Tighten Loose Wicker on a Rocking Chair?
Tightening loose wicker on a rocking chair can restore its structural integrity and appearance. Follow these steps to effectively tighten the loose strands:
Steps:
- Clean the Area: Use a soft brush or vacuum to remove any dirt, dust, or debris from the loose wicker and surrounding areas.
- Moisten the Wicker (for Natural Wicker): Lightly mist the loose wicker with water or use a damp cloth to dampen it. This will make the wicker more pliable and easier to manipulate.
- Apply Wood Glue: Carefully apply a small amount of wood glue to the points where the loose wicker connects to the frame or other strands.
- Reposition the Wicker: Gently push the loose wicker back into its original position, ensuring it aligns correctly with the surrounding strands.
- Secure with Clamps or Tape: Use clamps or tape to hold the repositioned wicker in place while the glue dries. This will ensure a tight and secure bond.
- Allow to Dry: Let the glue dry completely, usually for 24-48 hours, before removing the clamps or tape.
- Check and Reapply (if necessary): After the glue is dry, check the tightness of the wicker. If it is still loose, repeat the process, applying more glue and securing it again.
- Apply a Protective Finish: Once the wicker is tight and the glue is dry, apply a protective finish, such as varnish or lacquer, to seal the repaired area and prevent future loosening.
Tips:
- Use a toothpick or small brush to apply glue precisely to avoid excess buildup.
- For larger areas, weave additional strands of wicker through the loose sections to provide extra support.
- Rockscapes.net offers specialized adhesives and tools designed for tightening wicker, ensuring a professional and long-lasting repair.
By following these steps, you can effectively tighten loose wicker, restoring your rocking chair to its original condition.
7. How to Fix a Sagging Wicker Seat on a Rocking Chair?
Fixing a sagging wicker seat on a rocking chair requires reinforcing the base to provide better support. Here’s how you can address this issue:
Steps:
- Inspect the Frame: Check the frame beneath the seat for any damage, such as broken supports or loose joints. Repair or reinforce the frame as needed.
- Add Additional Supports: Install additional wooden or metal supports under the seat to distribute weight more evenly. These supports can be attached with screws or bolts.
- Replace Damaged Wicker: If the wicker itself is damaged or stretched, replace the sagging section with new wicker strands. Weave the new wicker tightly to create a firm surface.
- Use a Support Board: Cut a piece of plywood or solid wood to fit snugly inside the seat frame. Place this board under the wicker to provide a solid base.
- Secure the Support Board: Attach the support board to the frame with screws or adhesive. Ensure the board is level and provides uniform support across the seat.
- Reinforce the Weave: Apply a coat of clear resin or varnish to the wicker seat to strengthen the weave and prevent further sagging.
- Add Padding (Optional): Place a cushion or padding on top of the seat to enhance comfort and distribute weight evenly.
 Applying protective finish to recently repaired wicker strands
Tips:
- Use marine-grade plywood for outdoor chairs to resist moisture damage.
- Consider adding springs or elastic webbing under the wicker for extra cushioning and support.
- Rockscapes.net offers a variety of materials and expert advice for reinforcing and repairing sagging wicker seats.
8. How to Clean and Prepare a Wicker Rocking Chair for Repair?
Cleaning and preparing a wicker rocking chair before repair is crucial for ensuring a successful and long-lasting result. Follow these steps to properly prepare your chair:
Steps:
- Remove Cushions and Accessories: Take off any cushions, pillows, or accessories from the chair to allow full access to the wicker surface.
- Vacuum the Surface: Use a vacuum cleaner with a brush attachment to remove loose dirt, dust, and debris from the wicker. Pay attention to crevices and hard-to-reach areas.
- Wash the Wicker:
- Mild Soap Solution: Mix a mild dish soap with warm water.
- Soft Brush: Dip a soft brush into the soapy water and gently scrub the wicker surface. Avoid using too much water to prevent damage.
- Rinse: Rinse the wicker with a clean, damp cloth to remove any soap residue.
- Dry the Wicker:
- Air Dry: Allow the wicker to air dry completely. Place the chair in a well-ventilated area or outside in the sun.
- Avoid Direct Heat: Do not use a hairdryer or other direct heat sources, as this can damage the wicker.
- Inspect for Damage: Carefully inspect the wicker for any signs of damage, such as broken strands, loose weaves, or mildew.
- Remove Mildew (if present):
- Vinegar Solution: Mix equal parts white vinegar and water.
- Apply and Scrub: Apply the solution to the mildewed areas and scrub gently with a soft brush.
- Rinse and Dry: Rinse with a clean, damp cloth and allow to dry thoroughly.
- Sand Rough Edges: Use fine-grit sandpaper to smooth any rough edges or splinters on the wicker surface.
- Prepare for Repair: Ensure the surface is clean, dry, and smooth before starting any repairs.
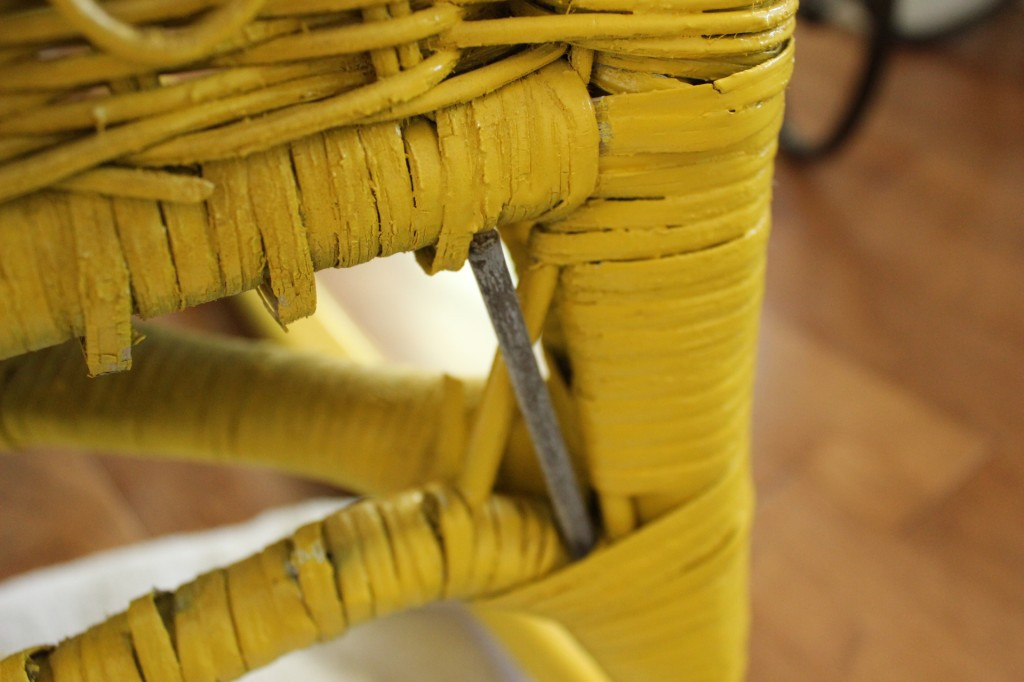
 Using tools to carefully weave and repair damaged wicker
Tips:
- Test any cleaning solutions on a small, inconspicuous area first to ensure they do not damage the wicker.
- Use a toothbrush or cotton swab to clean tight crevices and intricate patterns.
- Rockscapes.net offers specialized cleaning products and tools designed for wicker furniture, ensuring a safe and effective cleaning process.
By following these steps, you can properly clean and prepare your wicker rocking chair for repair, ensuring a successful and long-lasting restoration.
9. What Kind of Glue is Best for Repairing Wicker?
Choosing the right glue is essential for a durable and lasting repair of your wicker rocking chair. The best types of glue for repairing wicker are wood glue and hot glue.
- Wood Glue:
- Pros: Provides a strong, permanent bond, ideal for structural repairs. It is water-resistant and dries clear.
- Cons: Requires clamping and a longer drying time (24-48 hours).
- Best For: Securing new wicker strands, reinforcing joints, and repairing broken frames.
- Hot Glue:
- Pros: Quick-drying and easy to use, suitable for smaller repairs and temporary fixes.
- Cons: Not as strong as wood glue, may become brittle over time, and not water-resistant.
- Best For: Attaching decorative elements, securing loose ends, and quick fixes on minor breaks.
- Specialized Wicker Repair Adhesives:
- Pros: Specifically designed for wicker, offering excellent adhesion and flexibility.
- Cons: May be more expensive than সাধারণ wood glue or hot glue.
- Best For: Comprehensive repairs requiring specialized adhesives for optimal performance.
Tips for Application:
- Clean Surfaces: Ensure the surfaces are clean and dry before applying glue.
- Apply Sparingly: Use a small amount of glue to avoid excess buildup.
- Clamp When Possible: Use clamps to hold the pieces together while the glue dries for a stronger bond.
- Ventilation: Work in a well-ventilated area when using adhesives.
Rockscapes.net offers a variety of high-quality adhesives and expert advice for selecting the best glue for your wicker repair project.
10. How Do I Match the Color When Painting or Staining Repaired Wicker?
Matching the color when painting or staining repaired wicker is essential for achieving a seamless and professional look. Here’s how to ensure the repaired area blends perfectly with the original finish:
Steps:
- Identify the Original Color:
- Examine Unexposed Areas: Check areas that are less exposed to sunlight, such as the underside of the chair or inner parts, to find the original color.
- Professional Color Matching: Take a piece of the original wicker to a paint store for professional color matching. They can use a scanner to determine the exact shade.
- Choose the Right Product:
- Paint: Use acrylic or latex paint for a durable and long-lasting finish. Choose a paint with UV protection for outdoor chairs.
- Stain: Use a stain that is specifically designed for wicker or wood. Consider the type of wood the wicker is made from (e.g., rattan, reed) when selecting the stain.
- Prepare the Surface:
- Clean: Ensure the repaired area is clean, dry, and free of any dust or debris.
- Sand: Lightly sand the repaired area to create a smooth surface for the paint or stain.
- Prime (if necessary): Apply a primer to the repaired area if using paint, especially if the original finish is significantly different.
- Test the Color:
- Inconspicuous Area: Test the paint or stain on a small, inconspicuous area of the chair to ensure it matches the original color.
- Allow to Dry: Let the test area dry completely before assessing the color match.
- Apply the Finish:
- Thin Coats: Apply the paint or stain in thin, even coats, allowing each coat to dry completely before applying the next.
- Brushstrokes: Use a high-quality brush and follow the grain of the wicker to achieve a uniform finish.
- Blend the Finish:
- Feathering: Feather the edges of the painted or stained area to blend it seamlessly with the original finish.
- Multiple Coats: Apply multiple thin coats to build up the color and achieve a perfect match.
- Seal the Finish:
- Protective Coating: Apply a clear sealant or varnish to protect the finish and enhance its durability.
- UV Protection: Choose a sealant with UV protection for outdoor chairs to prevent fading.
Tips:
- Mix small amounts of different paint colors to create a custom match.
- Use a matte finish for a more natural look or a glossy finish for added shine.
- Rockscapes.net offers a variety of paints, stains, and sealants specifically designed for wicker furniture, along with expert advice on color matching and application techniques.
By following these steps, you can seamlessly match the color when painting or staining repaired wicker, ensuring your rocking chair looks as good as new.
11. How to Protect My Wicker Rocking Chair After Repair?
Protecting your wicker rocking chair after repair is essential for maintaining its condition and prolonging its lifespan. Here are effective strategies to shield your chair from damage:
Strategies:
- Apply a Protective Sealant:
- Choose the Right Sealant: Use a high-quality sealant specifically designed for wicker or outdoor furniture. Look for sealants with UV protection to prevent fading and discoloration.
- Apply Evenly: Apply the sealant in thin, even coats, following the manufacturer’s instructions. Ensure all surfaces are covered, including hard-to-reach areas.
- Allow to Dry: Let the sealant dry completely before using the chair or exposing it to the elements.
- Use Furniture Covers:
- Waterproof Covers: Invest in waterproof furniture covers to protect your wicker rocking chair from rain, snow, and sun.
- Breathable Fabric: Choose covers made from breathable fabric to prevent moisture buildup and mildew growth.
- Secure Fit: Ensure the covers fit snugly and securely to prevent them from being blown away by the wind.
- Store Indoors During Off-Season:
- Ideal Storage: Store your wicker rocking chair indoors during the off-season (e.g., winter) to protect it from harsh weather conditions.
- Clean Before Storing: Clean the chair thoroughly before storing it to remove any dirt, dust, or debris.
- Cover During Storage: Cover the chair with a breathable fabric to protect it from dust and scratches while in storage.
- Regular Cleaning:
- Gentle Cleaning: Clean your wicker rocking chair regularly with a mild soap and water solution. Use a soft brush to remove any dirt or debris.
- Avoid Harsh Chemicals: Avoid using harsh chemicals or abrasive cleaners, as they can damage the wicker.
- Dry Thoroughly: Ensure the chair is completely dry after cleaning to prevent mildew growth.
- Avoid Direct Sunlight:
- UV Protection: Prolonged exposure to direct sunlight can cause the wicker to fade and become brittle.
- Shaded Areas: Place your wicker rocking chair in a shaded area, such as under a patio umbrella or awning, to minimize sun exposure.
- Maintain Moisture Levels:
- Humid Climates: In humid climates, use a dehumidifier to reduce moisture levels and prevent mildew growth.
- Dry Climates: In dry climates, occasionally mist the wicker with water to prevent it from becoming too dry and brittle.
Tips:
- Reapply sealant annually or as needed to maintain its protective properties.
- Inspect your wicker rocking chair regularly for any signs of damage or wear and address them promptly.
- Rockscapes.net offers a variety of protective products and expert advice to help you maintain and protect your wicker furniture.
By implementing these strategies, you can effectively protect your wicker rocking chair after repair, ensuring it remains in excellent condition for years to come.
12. What are Common Mistakes to Avoid When Repairing Wicker?
Avoiding common mistakes when repairing wicker can save you time, money, and frustration. Here are some key pitfalls to steer clear of:
Mistakes:
- Using the Wrong Materials:
- Mismatching Wicker: Using wicker that doesn’t match the original material in terms of type, size, or color can result in a mismatched and unprofessional look.
- Incorrect Adhesives: Using the wrong type of glue (e.g., super glue instead of wood glue) can lead to weak bonds and failed repairs.
- Solution: Always identify the type of wicker and adhesive used originally and source compatible materials for repairs.
- Skipping Preparation:
- Not Cleaning the Surface: Failing to clean the wicker before repair can prevent adhesives from bonding properly and lead to a weak repair.
- Ignoring Damage Assessment: Not thoroughly assessing the extent of the damage can result in incomplete repairs and recurring issues.
- Solution: Always clean the wicker thoroughly and assess the damage carefully before starting any repairs.
- Applying Too Much Adhesive:
- Excess Glue: Applying too much glue can create a messy appearance and weaken the wicker.
- Solution: Use adhesives sparingly and wipe away any excess with a damp cloth.
- Rushing the Drying Process:
- Premature Use: Not allowing adhesives or finishes to dry completely before using the chair can compromise the repair and lead to further damage.
- Solution: Always allow adhesives and finishes to dry completely according to the manufacturer’s instructions.
- Neglecting Support:
- Ignoring Frame Issues: Failing to address underlying frame issues, such as loose joints or broken supports, can cause the wicker to sag or break again.
- Solution: Always inspect and repair the frame as needed before repairing the wicker.
- Using Harsh Cleaning Products:
- Damaging Cleaners: Using harsh chemicals or abrasive cleaners can damage the wicker and cause it to become brittle or discolored.
- Solution: Use mild soap and water to clean wicker and avoid harsh chemicals.
- Ignoring Safety Precautions:
- Lack of Protection: Not wearing gloves or safety glasses when using adhesives or cutting tools can lead to injuries.
- Solution: Always wear appropriate safety gear when repairing wicker.
Tips:
- Take your time and be patient when repairing wicker.
- Follow instructions carefully and don’t be afraid to ask for help if needed.
- Rockscapes.net offers expert advice and tutorials to help you avoid common mistakes and achieve professional results when repairing wicker.
13. How Can Rockscapes.Net Help Me With My Wicker Rocking Chair Repair?
Rockscapes.net is your go-to resource for all things related to restoring and maintaining your wicker rocking chair. We provide expert advice, high-quality materials, and comprehensive guides to help you achieve professional-looking results.
How Rockscapes.net Helps:
- Expert Advice:
- Detailed Tutorials: Access step-by-step tutorials and guides on repairing various types of wicker damage.
- Troubleshooting Tips: Get expert advice on troubleshooting common issues and finding the right solutions.
- Personalized Support: Contact our team of experts for personalized support and guidance tailored to your specific needs.
- High-Quality Materials:
- Wide Selection: Shop a wide selection of high-quality wicker repair materials, including natural and synthetic wicker, adhesives, finishes, and tools.
- Trusted Brands: We partner with trusted brands to ensure you get the best products for your repair project.
- Material Matching: Get help matching the right materials to your existing wicker to ensure a seamless repair.
- Comprehensive Guides:
- Cleaning and Preparation: Learn how to properly clean and prepare your wicker rocking chair for repair.
- Repair Techniques: Master various repair techniques, from fixing broken strands to replacing entire sections of wicker.
- Finishing and Protection: Discover the best ways to finish and protect your repaired wicker to prolong its lifespan.
- Community Support:
- Forums and Discussions: Connect with other DIY enthusiasts in our forums and discussion boards to share tips, ask questions, and get inspiration.
- Project Showcases: Showcase your completed wicker repair projects and inspire others with your creativity.
- Local Resources:
- Supplier Directory: Find local suppliers of wicker repair materials and tools.
- Professional Services: Locate professional wicker repair services in your area if you prefer to hire an expert.
Why Choose Rockscapes.net:
- Comprehensive Resources: We offer a comprehensive range of resources to support you through every step of your wicker rocking chair repair project.
- Expertise and Experience: Our team of experts has extensive knowledge and experience in wicker repair and restoration.
- Commitment to Quality: We are committed to providing high-quality materials and services to ensure your satisfaction.
Whether you’re a seasoned DIYer or a beginner, Rockscapes.net is here to help you restore your wicker rocking chair to its former glory. Visit our website today to explore our resources and get started on your repair project!
Address: 1151 S Forest Ave, Tempe, AZ 85281, United States
Phone: +1 (480) 965-9011
Website: rockscapes.net
FAQ: Fixing a Wicker Rocking Chair
1. How do I know if my wicker rocking chair can be repaired, or if it needs to be replaced?
Assess the extent of the damage. Minor issues like broken strands or loose weaves are repairable. Extensive damage, such as a severely broken frame, might warrant replacement.
2. What is the best way to clean a wicker rocking chair before starting repairs?
Vacuum the chair to remove loose dirt, then wash it gently with mild soap and water. Rinse with a damp cloth and allow it to air dry thoroughly.
3. Can I use any type of glue to repair wicker?
No, use wood glue for structural repairs or hot glue for quick fixes. Specialized wicker repair adhesives are also a good option.
4. How do I prevent the new wicker from cracking when I’m making repairs?
Soak natural wicker in warm water for about 30 minutes before using it. This makes it more pliable and less likely to crack.
5. What should I do if the wicker seat is sagging?
Reinforce the frame beneath the seat, add additional supports, or insert a piece of plywood under the wicker to provide a solid base.
6. How can I protect my repaired wicker rocking chair from the weather?
Apply a protective sealant with UV protection, use furniture covers, and store the chair indoors during the off-season.
7. What’s the best way to match the color when painting or staining repaired wicker?
Take a piece of the original wicker to a paint store for professional color matching or test different colors in an inconspicuous area until you find a match.
8. How often should I clean my wicker rocking chair?
Clean it regularly, about once a month, or more often if it’s exposed to dirt and debris.
9. What are some signs that my wicker rocking chair needs professional repair?
If you’re dealing with extensive damage, intricate weaves, or structural issues that are beyond your DIY skills, it’s best to seek professional help.
10. Where can I find high-quality wicker repair materials?
rockscapes.net offers a wide selection of high-quality wicker repair materials, including natural and synthetic wicker, adhesives, and finishes.