How Much Is One Yard Of Rock? Figuring out the cost of a yard of rock is essential for any landscaping or construction project. At rockscapes.net, we help you understand the pricing factors, calculate the amount you need, and explore different rock types to enhance your outdoor spaces. Get ready to transform your landscape with the perfect rocks! We’ll cover everything from gravel and river rock to crushed stone, ensuring you have the knowledge to make informed decisions, plus LSI keywords like landscaping materials, rock prices, and stone cost guide.
1. Understanding the Basics: What is a Yard of Rock?
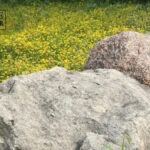
A yard of rock is a unit of volume, specifically a cubic yard, representing a space that measures 3 feet in length, 3 feet in width, and 3 feet in height. This measurement is crucial when determining the amount of rock needed for various landscaping and construction projects. One cubic yard equals 27 cubic feet, making it a standard unit for bulk materials like rocks, gravel, and soil.
1.1 Why is a Cubic Yard Important for Rock Calculation?
Using cubic yards simplifies estimating the quantity of rock needed for a project. Instead of dealing with smaller units like cubic feet, which can be cumbersome, cubic yards provide a manageable measurement for larger areas. This unit helps in accurate ordering and cost estimation, ensuring you purchase the right amount of material without overspending. According to the National Stone, Sand & Gravel Association (NSSGA), understanding volume measurements is key to efficient material management in construction and landscaping.
1.2 Common Projects That Use Rock Measured in Cubic Yards
Cubic yards of rock are frequently used in a variety of projects:
- Landscaping: Creating rock gardens, pathways, and decorative features.
- Driveways: Providing a stable base for gravel driveways.
- Drainage: Constructing French drains and erosion control systems.
- Construction: Forming foundations and backfilling retaining walls.
Alt text: Beautiful garden featuring various types of landscaping rock for a natural and elegant look.
1.3 How to Visualize a Cubic Yard
Imagine a cube that’s 3 feet on each side. That’s a cubic yard. It’s a substantial amount of material, often delivered in a large truck or container. Visualizing this volume can help you better understand the scale of your project and the quantity of rock you’ll need.
2. Factors Affecting the Cost of One Yard of Rock
The price of one yard of rock can vary widely based on several factors. Understanding these elements will help you budget accurately for your project and make informed decisions.
2.1 Type of Rock
The type of rock you choose significantly impacts the cost. Here’s a look at some common types and their general price ranges:
- Gravel: Typically the most affordable option, ranging from $20 to $50 per cubic yard.
- River Rock: More decorative and slightly more expensive, costing around $40 to $80 per cubic yard.
- Crushed Stone: Used for construction and drainage, priced between $30 and $70 per cubic yard.
- Lava Rock: Lightweight and visually striking, ranging from $60 to $100 per cubic yard.
- Flagstone: Used for patios and walkways, commanding a higher price of $100 to $300 per cubic yard.
- Decomposed Granite: Ideal for pathways and garden beds, priced from $30 to $60 per cubic yard.
According to the University of Arizona’s College of Agriculture and Life Sciences, the availability and extraction costs of these materials also influence their prices.
2.2 Location
Geographic location plays a crucial role in determining the cost of rock. Areas closer to quarries or rock deposits typically have lower prices due to reduced transportation costs. Conversely, regions far from these sources will see higher prices. For example, rock in Arizona, where rockscapes.net is located, may be more affordable than in states where it needs to be transported over long distances.
2.3 Quality and Color
Higher quality rocks with consistent color and shape usually cost more. Rocks that are carefully sorted and processed to meet specific aesthetic standards will be priced at a premium compared to those that are less uniform. If you’re aiming for a specific look in your landscape design, be prepared to invest in better quality materials.
2.4 Size and Shape
The size and shape of the rocks also affect the price. Smaller, uniformly sized rocks like pea gravel are generally cheaper than larger, irregularly shaped rocks like boulders. The processing and sorting required for specific sizes can add to the cost.
2.5 Supplier
Different suppliers offer varying prices based on their overhead, sourcing, and customer service. Local suppliers may offer better deals due to lower transportation costs, while larger national chains might provide competitive pricing through bulk purchasing. Researching and comparing quotes from multiple suppliers can help you find the best deal.
2.6 Delivery Costs
Delivery costs can significantly impact the overall price, especially for large quantities. Some suppliers include delivery in their price, while others charge a separate fee. The distance from the supplier to your project site, as well as the accessibility of the site, can influence delivery charges. In urban areas, delivery might be more expensive due to traffic and logistical challenges.
3. Types of Rock and Their Average Costs Per Yard
Choosing the right type of rock for your project involves considering both its aesthetic appeal and its functional properties. Here’s a detailed look at common rock types and their average costs per yard in the USA.
3.1 Gravel
Gravel is a versatile and cost-effective option for driveways, pathways, and drainage. It comes in various sizes and colors, making it suitable for a range of applications.
- Average Cost: $20 – $50 per cubic yard
- Common Uses: Driveways, walkways, drainage systems, and as a base material.
Alt text: A well-maintained gravel driveway leading to a house, showcasing the practicality and aesthetic appeal of gravel.
3.2 River Rock
River rock is smooth, rounded stones that are ideal for decorative purposes, such as creating rock gardens, lining ponds, and adding visual interest to landscapes.
- Average Cost: $40 – $80 per cubic yard
- Common Uses: Decorative landscaping, rock gardens, pond linings, and erosion control.
3.3 Crushed Stone
Crushed stone is angular rock produced by crushing larger rocks. It’s commonly used in construction for creating a stable base under roads, patios, and retaining walls.
- Average Cost: $30 – $70 per cubic yard
- Common Uses: Base material for construction, drainage, and pathways.
3.4 Lava Rock
Lava rock is a lightweight, porous rock that adds a unique texture and color to landscapes. It’s often used in xeriscaping (dry landscaping) and as a mulch alternative.
- Average Cost: $60 – $100 per cubic yard
- Common Uses: Xeriscaping, decorative landscaping, and mulch alternative.
3.5 Flagstone
Flagstone is flat, sedimentary rock used for creating patios, walkways, and stepping stones. It’s known for its natural beauty and durability.
- Average Cost: $100 – $300 per cubic yard
- Common Uses: Patios, walkways, stepping stones, and wall cladding.
3.6 Decomposed Granite
Decomposed granite (DG) is a fine, gravel-like material that’s perfect for pathways, garden beds, and erosion control. It compacts well and provides a natural look.
- Average Cost: $30 – $60 per cubic yard
- Common Uses: Pathways, garden beds, erosion control, and base material.
4. Calculating How Much Rock You Need: Step-by-Step Guide
Accurately calculating the amount of rock needed for your project is crucial to avoid material waste and extra costs. Here’s a step-by-step guide to help you determine the right quantity.
4.1 Measure the Area
Start by measuring the area you want to cover with rock. For rectangular or square areas, measure the length and width. For circular areas, measure the diameter. For irregular shapes, divide the area into smaller, manageable sections and measure each one separately.
4.2 Determine the Desired Depth
Decide on the desired depth of the rock layer. This will depend on the application. For example, a driveway might need a depth of 4-6 inches, while a decorative rock garden might only need 2-3 inches.
4.3 Convert Measurements to Feet
Ensure all measurements are in feet. If you measured in inches, convert to feet by dividing by 12.
4.4 Calculate the Volume in Cubic Feet
To calculate the volume in cubic feet, use the following formulas:
- Rectangular or Square Area: Volume = Length (ft) x Width (ft) x Depth (ft)
- Circular Area: Volume = π (3.14) x (Radius (ft))^2 x Depth (ft)
- Triangular Area: Volume = 0.5 x Base (ft) x Height (ft) x Depth (ft)
4.5 Convert Cubic Feet to Cubic Yards
Since there are 27 cubic feet in a cubic yard, divide the total cubic feet by 27 to get the volume in cubic yards:
Volume (cubic yards) = Volume (cubic feet) / 27
4.6 Add Extra for Waste
It’s always a good idea to add an extra 5-10% to your calculation to account for waste, settling, and uneven distribution. This ensures you have enough material to complete your project without running short.
4.7 Example Calculation
Let’s say you have a rectangular area that is 20 feet long and 10 feet wide, and you want to cover it with a 4-inch layer of gravel:
- Measure the Area: Length = 20 ft, Width = 10 ft
- Determine the Depth: Depth = 4 inches = 4/12 ft = 0.33 ft
- Calculate the Volume in Cubic Feet: Volume = 20 ft x 10 ft x 0.33 ft = 66 cubic feet
- Convert Cubic Feet to Cubic Yards: Volume = 66 cubic feet / 27 = 2.44 cubic yards
- Add Extra for Waste: 2.44 cubic yards + 5% = 2.56 cubic yards
Therefore, you would need approximately 2.56 cubic yards of gravel for your project.
5. Where to Buy Rock: Local Suppliers vs. Big Box Stores
Choosing the right supplier for your rock can impact the price, quality, and overall experience. Here’s a comparison of local suppliers and big box stores.
5.1 Local Rock Suppliers
Pros:
- Expertise: Local suppliers often have specialized knowledge about different rock types and their applications.
- Quality: They may offer higher quality rocks sourced from regional quarries.
- Personal Service: You can receive personalized advice and support for your project.
- Competitive Pricing: Local suppliers can sometimes offer better prices due to lower overhead.
Cons:
- Limited Selection: They may have a smaller selection of rock types compared to larger stores.
- Variable Pricing: Prices can vary significantly depending on the supplier.
5.2 Big Box Stores (e.g., Home Depot, Lowe’s)
Pros:
- Convenience: Big box stores offer a wide range of products under one roof, making it easy to combine your rock purchase with other landscaping needs.
- Consistent Pricing: Prices are usually consistent and transparent.
- Wide Selection: They typically offer a broad selection of rock types and sizes.
Cons:
- Less Expertise: Staff may not have specialized knowledge about rocks and their applications.
- Lower Quality: The quality of rocks may be lower compared to those from specialized suppliers.
- Higher Prices: Prices can be higher due to the store’s overhead and marketing costs.
5.3 Online Retailers
Pros:
- Convenience: Shop from the comfort of your home.
- Wide Selection: Access to a variety of rock types from different suppliers.
- Price Comparison: Easy to compare prices and find the best deals.
Cons:
- Shipping Costs: Shipping can be expensive, especially for heavy materials like rocks.
- Inability to Inspect: You can’t physically inspect the rocks before buying.
- Return Policies: Return policies may be restrictive or costly.
5.4 Tips for Choosing a Supplier
- Read Reviews: Check online reviews to gauge the supplier’s reputation and customer service.
- Visit the Supplier: If possible, visit the supplier to inspect the rocks in person and discuss your project.
- Get Quotes: Obtain quotes from multiple suppliers and compare prices, delivery costs, and other fees.
- Ask Questions: Don’t hesitate to ask questions about the rock types, quality, and suitability for your project.
6. DIY vs. Professional Installation: Which is Right for You?
Deciding whether to install the rock yourself or hire a professional depends on your skills, time, and budget. Here’s a comparison to help you make the right choice.
6.1 DIY Installation
Pros:
- Cost Savings: You save on labor costs, which can be a significant portion of the total project expense.
- Flexibility: You have complete control over the project and can work at your own pace.
- Personal Satisfaction: Completing the project yourself can be rewarding and fulfilling.
Cons:
- Time Commitment: DIY projects can take a significant amount of time, especially if you’re inexperienced.
- Physical Labor: Installing rock can be physically demanding, requiring lifting, carrying, and spreading heavy materials.
- Potential for Errors: Without proper knowledge and skills, you might make mistakes that could compromise the project’s quality.
6.2 Professional Installation
Pros:
- Expertise: Professionals have the knowledge and experience to ensure the project is done correctly and efficiently.
- Time Savings: They can complete the project much faster than you could on your own.
- Quality Assurance: Professionals typically offer warranties or guarantees on their work.
- Reduced Effort: You don’t have to lift a finger; they handle all the physical labor.
Cons:
- Higher Cost: Professional installation can be expensive, adding significantly to the overall project cost.
- Less Control: You have less control over the project details and timeline.
6.3 Factors to Consider
- Project Complexity: For simple projects like spreading gravel in a small area, DIY might be suitable. For more complex projects like building a retaining wall or installing a large rock garden, professional installation is recommended.
- Physical Ability: If you have physical limitations or health concerns, hiring a professional is a safer option.
- Time Availability: If you’re short on time or have other commitments, professional installation can save you valuable time and effort.
- Budget: Compare the cost of DIY versus professional installation to determine which option fits your budget.
According to a study by the American Society of Landscape Architects (ASLA), professional installation often results in higher property values and longer-lasting landscapes.
7. Tools and Equipment Needed for Rock Installation
Whether you’re tackling a DIY project or working with a professional, having the right tools and equipment is essential for efficient and effective rock installation.
7.1 Essential Tools
- Shovels: For scooping and moving rocks.
- Wheelbarrow: For transporting rocks and other materials.
- Rakes: For spreading and leveling rocks.
- Gloves: To protect your hands from cuts and abrasions.
- Safety Glasses: To protect your eyes from flying debris.
- Measuring Tape: For accurate measurements.
- Level: To ensure surfaces are even.
- Landscape Fabric: To prevent weed growth.
7.2 Optional but Helpful Tools
- Plate Compactor: For compacting gravel and crushed stone.
- Sod Cutter: For removing existing grass or vegetation.
- Rock Hammer: For breaking larger rocks into smaller pieces.
- Tamper: For compacting soil and base materials.
- Utility Knife: For cutting landscape fabric.
7.3 Safety Equipment
- Work Boots: To protect your feet and provide traction.
- Hearing Protection: To protect your ears from loud noises.
- Back Support Belt: To prevent back injuries when lifting heavy objects.
7.4 Rental Options
For tools you don’t own or use frequently, consider renting from a local equipment rental company. This can save you money and storage space.
8. Maintaining Your Rock Landscape
Proper maintenance is essential to keep your rock landscape looking its best and prevent common issues like weed growth and erosion.
8.1 Weed Control
Weeds can quickly detract from the beauty of your rock landscape. Here are some tips for effective weed control:
- Landscape Fabric: Install landscape fabric under the rocks to prevent weeds from sprouting.
- Hand Pulling: Regularly pull weeds by hand, especially after rain when the soil is moist.
- Herbicides: Use herbicides sparingly and follow the manufacturer’s instructions carefully. Choose a product that is safe for your plants and the environment.
- Vinegar Solution: A natural weed killer can be made by mixing vinegar, salt, and dish soap. Spray the solution directly on the weeds, avoiding contact with desirable plants.
8.2 Erosion Control
Erosion can cause rocks to shift and wash away, especially on slopes. Here are some strategies for erosion control:
- Terracing: Create terraces to slow down water runoff and prevent soil erosion.
- Retaining Walls: Build retaining walls to support slopes and prevent soil from sliding.
- Drainage Systems: Install drainage systems to divert water away from vulnerable areas.
- Ground Cover Plants: Plant ground cover plants among the rocks to help hold the soil in place.
8.3 Cleaning and Refreshing
Over time, rocks can become dirty and discolored. Here are some tips for cleaning and refreshing your rock landscape:
- Hose Down: Rinse the rocks with a garden hose to remove dirt and debris.
- Pressure Washing: Use a pressure washer for a more thorough cleaning, but be careful not to damage the rocks or surrounding plants.
- Rake and Level: Rake the rocks periodically to keep them evenly distributed and level.
- Replenish Rocks: Add new rocks as needed to maintain the desired depth and appearance.
8.4 Seasonal Maintenance
- Spring: Remove any debris that has accumulated over the winter and replenish any rocks that have washed away.
- Summer: Monitor for weed growth and water your rock landscape regularly to prevent dust and dryness.
- Fall: Remove fallen leaves and debris and prepare your rock landscape for winter by ensuring proper drainage.
- Winter: Protect your rock landscape from snow and ice by removing excess accumulation and avoiding the use of harsh chemicals that can damage the rocks.
9. Cost-Saving Tips for Your Rock Project
Embarking on a rock landscaping project can be budget-friendly with the right strategies. Here are some tips to help you save money without compromising on quality or aesthetics.
9.1 Plan Ahead
Careful planning is the cornerstone of cost savings. Start by creating a detailed design of your rock landscape, specifying the types and quantities of rocks needed. This prevents over-ordering and reduces waste.
9.2 Choose Local Materials
Opting for locally sourced rocks can significantly reduce transportation costs. Check with local quarries and suppliers for the best deals on materials available in your area.
9.3 Buy in Bulk
Purchasing rocks in bulk is often more economical than buying smaller quantities. Inquire about bulk discounts from your supplier and consider coordinating with neighbors or friends to buy together.
9.4 Consider Alternative Materials
Explore alternative materials that offer similar aesthetic appeal at a lower cost. For example, decomposed granite or pea gravel can be used as substitutes for more expensive options like river rock or flagstone.
9.5 DIY Installation
Taking on the installation yourself can save you a significant amount on labor costs. With some basic tools and a willingness to learn, you can complete many rock landscaping projects without professional help.
9.6 Time Your Purchase
Rock prices can fluctuate depending on the season and demand. Buying during the off-season, such as fall or winter, can often result in lower prices.
9.7 Negotiate with Suppliers
Don’t be afraid to negotiate with suppliers to get the best possible price. Ask about discounts for cash payments, volume purchases, or repeat business.
9.8 Reuse and Recycle
Consider reusing existing rocks from other areas of your property or sourcing recycled rocks from demolition sites or landscaping companies. This can be a sustainable and cost-effective option.
9.9 Compare Quotes
Obtain quotes from multiple suppliers and compare prices, delivery costs, and other fees. This will help you identify the best deal and ensure you’re not overpaying for your materials.
9.10 Minimize Waste
Carefully measure your project area and calculate the exact amount of rock needed to minimize waste. Use leftover rocks in other areas of your landscape or offer them to friends or neighbors.
10. Common Mistakes to Avoid When Buying Rock
Purchasing rock for landscaping or construction projects requires careful consideration to avoid costly mistakes. Here are some common pitfalls to watch out for.
10.1 Inaccurate Measurement
Failing to accurately measure the project area is a common mistake that can lead to under- or over-ordering materials. Always double-check your measurements and use a reliable calculator to determine the required amount of rock.
10.2 Neglecting Depth
Forgetting to account for the desired depth of the rock layer is another frequent error. Be sure to consider the depth when calculating the volume of rock needed, especially for applications like driveways or drainage systems.
10.3 Choosing the Wrong Type of Rock
Selecting the wrong type of rock for your project can lead to functional and aesthetic issues. Research different rock types and their properties to ensure you choose the right material for your specific needs.
10.4 Ignoring Drainage
Failing to address drainage issues can cause problems like erosion, weed growth, and water damage. Incorporate proper drainage solutions, such as landscape fabric and drainage systems, to prevent these issues.
10.5 Overlooking Quality
Compromising on quality to save money can result in long-term problems. Choose high-quality rocks that are durable, weather-resistant, and free from contaminants.
10.6 Not Considering Maintenance
Neglecting to consider maintenance requirements can lead to a landscape that quickly deteriorates. Choose low-maintenance rock types and implement proper maintenance practices to keep your rock landscape looking its best.
10.7 Forgetting Delivery Costs
Failing to factor in delivery costs can throw off your budget. Always inquire about delivery fees and consider whether it’s more cost-effective to transport the rocks yourself.
10.8 Not Checking Supplier Reputation
Choosing a supplier without checking their reputation can lead to issues like poor quality materials, unreliable service, and hidden fees. Read online reviews and ask for references to ensure you’re working with a reputable supplier.
10.9 Ignoring Safety Precautions
Neglecting to take proper safety precautions when handling rocks can result in injuries. Wear gloves, safety glasses, and work boots to protect yourself from cuts, abrasions, and other hazards.
10.10 Rushing the Project
Rushing the project can lead to mistakes and oversights that could have been avoided with careful planning and execution. Take your time, follow best practices, and don’t hesitate to seek professional advice if needed.
FAQ: Frequently Asked Questions About Rock Prices and Usage
How much does a cubic yard of river rock cost?
A cubic yard of river rock typically costs between $40 and $80, depending on location, quality, and supplier.
What is the best way to calculate how much rock I need?
Measure the length, width, and desired depth of the area in feet, multiply these values to get the volume in cubic feet, and then divide by 27 to convert to cubic yards. Add extra for waste.
Can I buy rock online?
Yes, many online retailers offer rock for sale. However, consider shipping costs and the inability to inspect the rocks before purchasing.
What are the benefits of using lava rock in my landscape?
Lava rock is lightweight, porous, and adds a unique texture and color to landscapes. It’s ideal for xeriscaping and as a mulch alternative.
Is it cheaper to buy rock in bulk?
Yes, buying rock in bulk is generally more economical than buying smaller quantities.
How do I prevent weeds from growing in my rock landscape?
Install landscape fabric under the rocks and regularly pull weeds by hand. You can also use herbicides sparingly or try a natural vinegar solution.
What is decomposed granite, and what is it used for?
Decomposed granite (DG) is a fine, gravel-like material that’s perfect for pathways, garden beds, and erosion control. It compacts well and provides a natural look.
What tools do I need for rock installation?
Essential tools include shovels, a wheelbarrow, rakes, gloves, safety glasses, and a measuring tape.
How do I maintain my rock landscape?
Regularly clean and refresh the rocks, control weeds, and address erosion issues. Seasonal maintenance includes removing debris and ensuring proper drainage.
What factors affect the cost of rock?
The type of rock, location, quality, size, supplier, and delivery costs all affect the price.
Transform Your Landscape with Rockscapes.net
Ready to start your rock landscaping project? At rockscapes.net, we offer a wide variety of rocks to suit every style and budget. Whether you’re creating a stunning rock garden, building a durable driveway, or enhancing your outdoor space with decorative features, we have the perfect materials for you. Explore our website for inspiration, detailed product information, and expert advice. Let us help you bring your vision to life!
Address: 1151 S Forest Ave, Tempe, AZ 85281, United States
Phone: +1 (480) 965-9011
Website: rockscapes.net
Alt text: A diverse selection of landscaping rocks, perfect for adding texture and beauty to any outdoor space. Consider using rockscapes.net.
Unlock the beauty and potential of your landscape with rockscapes.net today!