Curing rock for your saltwater tank is vital for a healthy reef aquarium. Rockscapes.net provides the knowledge you need to properly prepare your live or dry rock, ensuring a thriving aquatic environment. By focusing on the proper curing process, you’ll establish a stable biological foundation. This leads to improved water quality and a flourishing ecosystem. Explore different types of rockscapes, reef environments, and saltwater ecosystems with us.
Table of Contents
- What is Rock Curing and Why is it Important?
- Understanding the Different Types of Rock
- Curing Live Rock: A Step-by-Step Guide
- Curing Dry Rock: A Detailed Process
- Essential Equipment for Rock Curing
- Monitoring Water Parameters During Curing
- Troubleshooting Common Curing Problems
- Combining Wet and Dry Rock for Optimal Results
- Enhancing Your Cured Rock with Microfauna
- Frequently Asked Questions (FAQs) About Rock Curing
1. What is Rock Curing and Why is it Important?
Rock curing is the process of preparing live or dry rock for use in a saltwater aquarium. It involves removing unwanted organic matter and establishing a stable biological filter. The curing process is essential because it prevents ammonia spikes, stabilizes water parameters, and creates a healthy environment for marine life. Properly cured rock supports a thriving reef ecosystem.
Curing rock for a saltwater tank is an absolutely essential step. It’s what sets the stage for a healthy, vibrant aquarium. Imagine building a house on a shaky foundation; that’s what happens when you skip or rush the curing process. The main goal here is to get rid of all the dead and decaying organic stuff that’s on the rock. This prevents nasty ammonia spikes, which can be lethal to your fish and corals.
By taking the time to cure your rock properly, you’re also helping to establish a stable biological filter. This filter is made up of beneficial bacteria that convert harmful ammonia and nitrite into less toxic nitrate. Think of it as the life support system for your tank. Plus, well-cured rock becomes a happy home for all sorts of beneficial critters like copepods and amphipods. These little guys help keep your tank clean and provide a natural food source for your fish and corals.
So, curing your rock is not just a chore; it’s an investment in the long-term health and beauty of your saltwater aquarium. Rockscapes.net is here to provide you with all the necessary steps and resources for aquarium maintenance and promote sustainable ecosystems. This will help you create your own underwater paradise.
2. Understanding the Different Types of Rock
There are primarily two types of rock used in saltwater aquariums: live rock and dry rock. Live rock is rock that has been collected from the ocean and contains a diverse array of living organisms, including bacteria, algae, and invertebrates. Dry rock, on the other hand, is rock that has been dried and sterilized, making it free of any living organisms. Understanding the pros and cons of each type is crucial for proper curing and tank management.
Live Rock
Live rock is essentially the cornerstone of a thriving reef tank, teeming with beneficial bacteria, algae, and other organisms that contribute to a healthy ecosystem. Sourced directly from the ocean, each piece is unique. It brings a slice of the natural reef into your aquarium.
Pros of Live Rock:
- Biodiversity: Live rock introduces a wide range of beneficial organisms, which aids in the establishment of a natural reef environment.
- Natural Filtration: The bacteria on live rock efficiently convert ammonia and nitrite into less harmful substances, acting as a natural biological filter.
- Aesthetic Appeal: With its varied shapes, colors, and textures, live rock enhances the visual appeal of your aquarium.
Cons of Live Rock:
- Potential Pests: Live rock can harbor unwanted hitchhikers like aiptasia anemones, bristle worms, and nuisance algae.
- Curing Required: Live rock needs to be cured to remove dead organic matter and prevent ammonia spikes.
- Cost: Live rock tends to be more expensive than dry rock.
Dry Rock
Dry rock is a popular alternative to live rock. It offers a clean slate for aquascaping and biological colonization. This type of rock has been dried and sterilized, ensuring it is free from any unwanted pests or hitchhikers.
Pros of Dry Rock:
- Pest-Free: Dry rock is free from unwanted pests and parasites, providing a clean start for your aquarium.
- Aquascaping Flexibility: Dry rock allows for easy aquascaping without the risk of harming existing organisms.
- Cost-Effective: Dry rock is generally more affordable than live rock.
Cons of Dry Rock:
- Lack of Biodiversity: Dry rock requires seeding with beneficial bacteria to establish a biological filter.
- Longer Cycling Time: It takes longer to cycle a tank with dry rock compared to live rock.
- Less Natural Look: Dry rock may lack the natural colors and textures of live rock initially.
Artificial Rock
Artificial rock is a man-made alternative designed to mimic the appearance and function of natural rock. Made from materials like ceramic or resin, it offers a lightweight and customizable option for aquascaping.
Pros of Artificial Rock:
- Lightweight: Easy to handle and aquascape.
- Customizable: Available in various shapes and sizes.
- Pest-Free: Free from unwanted pests and parasites.
Cons of Artificial Rock:
- Less Natural: May lack the natural look and texture of live or dry rock.
- Requires Colonization: Needs to be seeded with beneficial bacteria.
- Potential Leaching: Some materials may leach chemicals into the water.
No matter which type of rock you choose, Rockscapes.net offers a wealth of information, sustainable practices, and resources to help you maintain a healthy and beautiful reef aquarium.
 Live rock teeming with beneficial organisms
3. Curing Live Rock: A Step-by-Step Guide
Curing live rock is essential to remove dead organic matter and establish a healthy biological filter. Follow these steps for a successful curing process:
- Initial Inspection and Cleaning: Inspect the live rock for any visible pests or dead organisms. Use a stiff brush to remove any loose debris or algae.
- Quarantine Tank Setup: Set up a quarantine tank with saltwater, a heater, a powerhead for circulation, and a protein skimmer.
- Rock Placement: Place the live rock in the quarantine tank, ensuring adequate spacing for water flow.
- Water Testing: Test the water daily for ammonia, nitrite, and nitrate levels.
- Water Changes: Perform 100% water changes whenever ammonia levels exceed 5-6 ppm.
- Curing Duration: Continue the curing process until ammonia and nitrite levels are consistently at 0 ppm and nitrate levels stabilize.
- Final Rinse: Rinse the cured live rock with clean saltwater before placing it in the main display tank.
Detailed Steps for Curing Live Rock
Curing live rock is a crucial step in setting up a saltwater aquarium. Here’s a detailed breakdown to guide you:
Step 1: Initial Inspection and Cleaning
Begin by carefully inspecting each piece of live rock. Look for any visible pests like aiptasia anemones or bristle worms. Also, remove any large, dead organisms or decaying matter. Use a stiff brush to gently scrub the surface of the rock. Remove any loose debris, algae, or sponges that are likely to die off during the curing process.
Step 2: Quarantine Tank Setup
Set up a separate quarantine tank specifically for curing the live rock. This tank should be filled with saltwater made from RO/DI water to avoid introducing any unwanted chemicals or phosphates. Equip the tank with a heater to maintain a consistent temperature between 75-80°F (24-27°C). This temperature range helps speed up the curing process. Add a powerhead to ensure strong water circulation around the rocks. This will help to remove detritus and provide oxygen for the beneficial bacteria. A protein skimmer is also highly recommended. It helps to remove excess nutrients and dissolved organic compounds that leach out of the rock.
Step 3: Rock Placement
Place the live rocks in the quarantine tank, ensuring that there is adequate space between each piece. This spacing allows for proper water flow around all surfaces of the rock. Maximize the surface area exposed to the water. This helps to facilitate the decomposition of organic matter and the growth of beneficial bacteria. Avoid stacking the rocks too closely together. This can create anaerobic areas where harmful bacteria can thrive.
Step 4: Water Testing
Regular water testing is essential during the curing process. Test the water daily for ammonia, nitrite, and nitrate levels using a reliable test kit. These tests will help you monitor the progress of the curing process and determine when water changes are necessary. High ammonia and nitrite levels indicate that the rock is still releasing organic matter and that the biological filter is not yet fully established.
Step 5: Water Changes
Perform a 100% water change whenever ammonia levels exceed 5-6 ppm. This helps to remove the excess ammonia and prevent it from harming the beneficial bacteria. During the water change, siphon out any detritus or dead material that has accumulated at the bottom of the tank. Refill the tank with freshly made saltwater that is properly aerated and at the correct temperature.
Step 6: Curing Duration
Continue the curing process until ammonia and nitrite levels consistently read 0 ppm, and nitrate levels stabilize. This indicates that the biological filter is fully established and can effectively process waste. The curing process can take anywhere from one week to several months. This depends on the quality of the rock and the amount of organic matter present. Patience is key during this stage. Rushing the process can lead to problems later on.
Step 7: Final Rinse
Before transferring the cured live rock to your main display tank, give it a final rinse with clean saltwater. This will help to remove any remaining detritus or loose particles. Inspect the rock one last time for any unwanted pests or algae. Ensure that the rock is fully cured before adding it to your display tank. This helps maintain a healthy and stable environment for your marine life.
By following these detailed steps, you can successfully cure live rock. This helps ensure a healthy and thriving saltwater aquarium. Visit Rockscapes.net for more expert tips and resources on reef keeping.
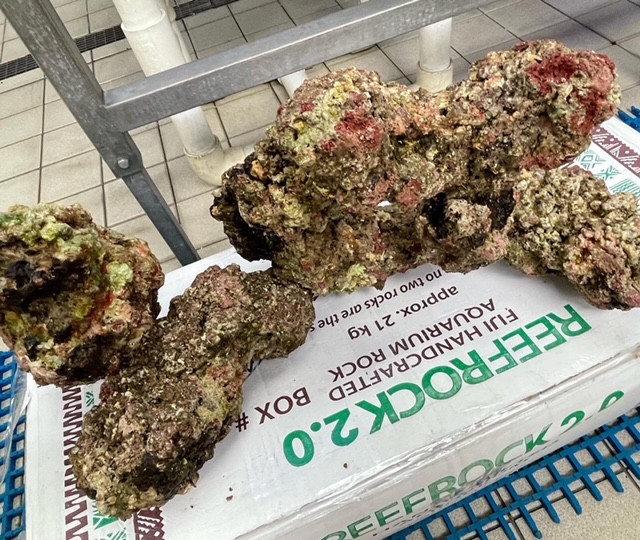 Freshly imported live rock before curing
4. Curing Dry Rock: A Detailed Process
Curing dry rock involves a different approach than curing live rock. The goal is to prepare the rock to become a suitable habitat for beneficial bacteria and other marine life. Here’s a detailed process:
- Bleach Treatment: Soak the dry rock in a diluted bleach solution (600-700 ml of bleach per 10 liters of freshwater) for 7-10 days to remove any potential contaminants.
- Thorough Rinsing: After the bleach treatment, rinse the rock thoroughly with clean RO/DI water to remove all traces of bleach.
- Cycling Process: Place the rinsed rock in a cycling tank with saltwater, a heater, and a powerhead.
- Adding Bacteria: Introduce bottled bacteria and a source of ammonia (e.g., ammonia hydroxide, a pinch of fish food) to kickstart the nitrogen cycle.
- Monitoring Water Parameters: Test the water regularly for ammonia, nitrite, and nitrate levels.
- Ammonia Dosing: Continue to dose ammonia until ammonia and nitrite levels consistently read 0 ppm.
- Water Changes: Perform regular water changes to remove any accumulated detritus.
- Secondary Cycling (Optional): Introduce cured live rock to the dry rock tank to further inoculate the rock with beneficial organisms.
Detailed Steps for Curing Dry Rock
Curing dry rock is essential for establishing a healthy biological filter in your saltwater aquarium. Here’s a detailed breakdown of the process:
Step 1: Bleach Treatment
The first step in curing dry rock is to treat it with a diluted bleach solution. This helps to remove any potential contaminants or unwanted organic matter that may be present on the rock. Place the dry rock in a large container such as a plastic tub or Rubbermaid trough. Ensure that the container is clean and free from any residues.
Prepare a diluted bleach solution using unscented household bleach. A general guideline is to use approximately 600-700 ml of bleach per 10 liters of freshwater. This concentration is effective in disinfecting the rock without causing harm. Fill the container with RO/DI water and add the appropriate amount of bleach. Mix the solution thoroughly to ensure an even distribution of the bleach.
Submerge the dry rock completely in the bleach solution. Ensure that all surfaces of the rock are in contact with the solution. Use a weight or another object to keep the rock submerged if necessary. Allow the rock to soak in the bleach solution for 7-10 days. This duration ensures that any contaminants are effectively neutralized.
Step 2: Thorough Rinsing
After the bleach treatment, it’s crucial to thoroughly rinse the dry rock with clean RO/DI water. This step removes all traces of bleach. Residual bleach can be harmful to beneficial bacteria and marine life.
Remove the rock from the bleach solution and place it in a separate clean container. Fill the container with fresh RO/DI water. Rinse each piece of rock individually under the running water. Use a scrub brush to gently scrub the surface of the rock and remove any remaining debris or residue.
Repeat the rinsing process multiple times. Use fresh RO/DI water each time to ensure that all traces of bleach are eliminated. Soak the rock in fresh RO/DI water for 24 hours. This helps to further dilute and remove any residual bleach.
Step 3: Cycling Process
Once the dry rock has been thoroughly rinsed, it’s time to start the cycling process. This process establishes a biological filter in the rock.
Set up a cycling tank with saltwater, a heater, and a powerhead. The cycling tank can be a separate container or your main display tank. Ensure that the water is made from RO/DI water and is properly aerated.
Place the rinsed dry rock in the cycling tank. Arrange the rock in a way that allows for good water flow and maximizes surface area exposure. Maintain the water temperature between 75-80°F (24-27°C) using a heater. This temperature range promotes the growth of beneficial bacteria.
Step 4: Adding Bacteria
To kickstart the nitrogen cycle, introduce bottled bacteria and a source of ammonia to the cycling tank.
Add a commercial bacteria supplement to the tank. This helps to introduce beneficial bacteria. Follow the manufacturer’s instructions for dosing. These supplements contain various strains of bacteria. They are essential for converting ammonia and nitrite into less harmful substances.
Introduce a source of ammonia to feed the bacteria. This can be in the form of ammonia hydroxide, a pinch of fish food, or a piece of frozen shrimp or fish. Start with a small amount of ammonia. Avoid contaminating the tank. Monitor the ammonia levels closely.
Step 5: Monitoring Water Parameters
Regular monitoring of water parameters is crucial during the cycling process. Test the water regularly for ammonia, nitrite, and nitrate levels using a reliable test kit. Record the results to track the progress of the cycling process.
Initially, ammonia levels will rise as the ammonia source decomposes. Over time, beneficial bacteria will start to convert the ammonia into nitrite. Nitrite levels will then rise. Eventually, another group of bacteria will convert the nitrite into nitrate. The presence of nitrate indicates that the cycling process is progressing.
Step 6: Ammonia Dosing
Continue to dose ammonia as needed to keep the bacteria fed. The goal is to maintain a consistent level of ammonia. This helps the bacteria to multiply and establish a stable biological filter.
Monitor the ammonia levels daily. Add more ammonia if the levels drop to zero. Continue this process until the ammonia and nitrite levels consistently read 0 ppm. This indicates that the biological filter is fully established and can effectively process waste.
Step 7: Water Changes
Perform regular water changes to remove any accumulated detritus and excess nutrients. This helps to maintain water quality. It prevents the buildup of unwanted substances.
Perform a 50-100% water change after the cycling process is complete. This removes any remaining nitrate and resets the water parameters. Use fresh saltwater made from RO/DI water for the water change.
Step 8: Secondary Cycling (Optional)
To further enhance the colonization of beneficial organisms, consider introducing cured live rock to the dry rock tank.
Add a few pieces of cured live rock to the dry rock tank. This introduces a diverse range of beneficial bacteria, sponges, and microfauna to the system. Monitor the water parameters closely during this phase. Ensure that the addition of live rock does not cause any significant spikes in ammonia or nitrite levels.
By following these detailed steps, you can successfully cure dry rock. This helps create a stable and thriving saltwater aquarium. Rockscapes.net provides comprehensive resources. This ensures that your reef-keeping journey is both enjoyable and successful.
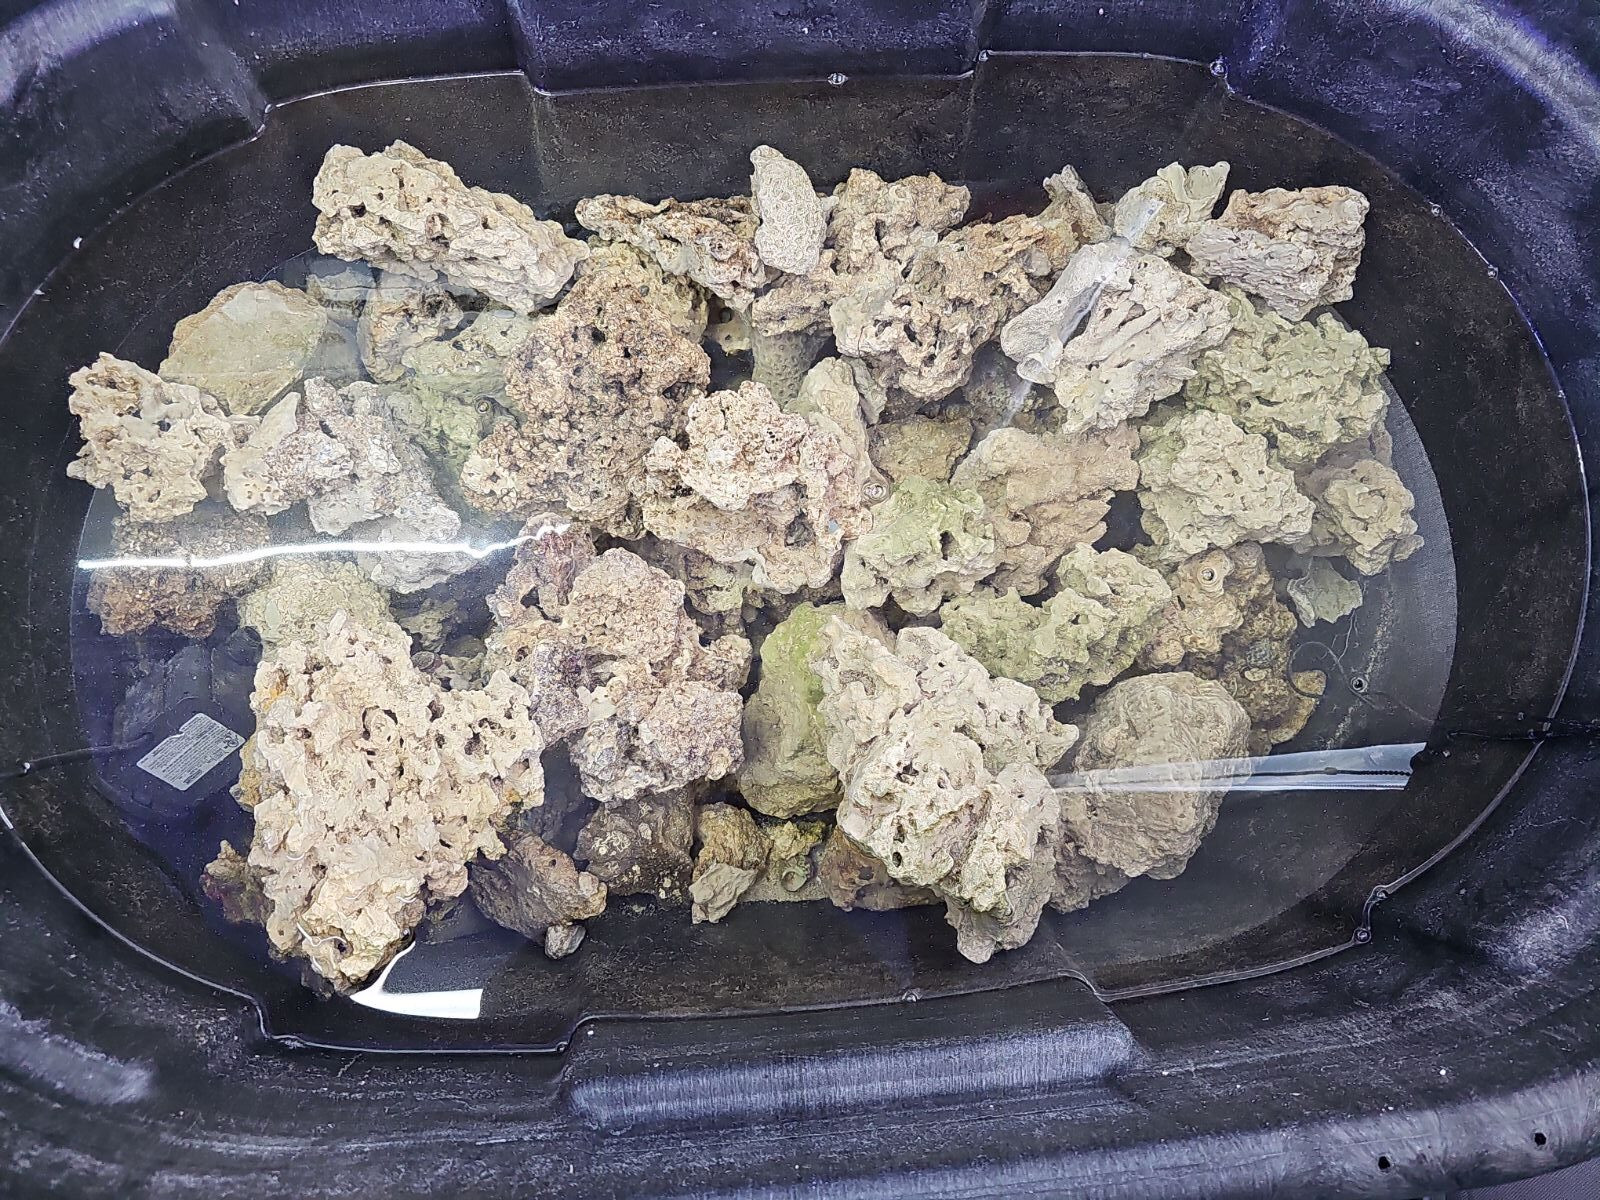 Dry rock in a vessel ready for curing
5. Essential Equipment for Rock Curing
Having the right equipment can make the rock curing process more efficient and effective. Here is a list of essential equipment:
| Equipment | Description |
|---|---|
| Quarantine Tank | A separate tank used for curing live rock or cycling dry rock, preventing contamination of the main display tank. |
| Heater | Maintains a stable temperature (75-80°F) to promote the growth of beneficial bacteria. |
| Powerhead | Provides strong water circulation to remove detritus and ensure oxygenation. |
| Protein Skimmer | Removes excess nutrients and dissolved organic compounds from the water. |
| Test Kits | Essential for monitoring ammonia, nitrite, and nitrate levels to track the progress of the curing process. |
| RO/DI System | Produces pure water free from contaminants, ensuring a clean and stable environment for curing. |
| Salt Mix | High-quality salt mix to create saltwater with the correct salinity for the curing process. |
| Buckets and Tubs | Used for mixing saltwater, rinsing rocks, and performing water changes. |
| Scrub Brush | Used to remove loose debris, algae, and dead organisms from the rock. |
| Ammonia Source | Ammonia hydroxide, fish food, or frozen shrimp to initiate the nitrogen cycle in dry rock curing. |
| Bacteria Supplement | Bottled bacteria to seed dry rock with beneficial microorganisms. |
6. Monitoring Water Parameters During Curing
Regularly monitoring water parameters is crucial during the rock-curing process. Accurate readings help you track the progress of the nitrogen cycle and ensure a stable environment for beneficial bacteria to thrive.
Key Water Parameters to Monitor
- Ammonia (NH3/NH4+): Ammonia is the first nitrogen compound to appear as organic matter decomposes. High levels of ammonia are toxic to marine life and indicate that the curing process is still in its early stages.
- Nitrite (NO2-): Nitrite is produced as ammonia is broken down by bacteria. Like ammonia, nitrite is also toxic to marine life. The presence of nitrite indicates that the nitrogen cycle is progressing but not yet complete.
- Nitrate (NO3-): Nitrate is the end product of the nitrogen cycle. It is significantly less toxic than ammonia and nitrite. Rising nitrate levels indicate that the biological filter is maturing.
- pH: Maintaining a stable pH is important for the health of beneficial bacteria. The ideal pH range for saltwater aquariums is between 8.1 and 8.4.
- Temperature: Temperature affects the rate of biological processes. Maintaining a consistent temperature between 75-80°F (24-27°C) is optimal for curing.
Testing Frequency and Methods
- Ammonia, Nitrite, and Nitrate: Test daily during the initial stages of curing. Reduce testing to every other day as levels stabilize. Use a reliable test kit. Liquid test kits are generally more accurate than test strips.
- pH: Test pH weekly to ensure it remains within the ideal range. Use a digital pH meter or a liquid test kit.
- Temperature: Monitor temperature daily using a digital thermometer. Ensure the heater maintains a consistent temperature.
Interpreting Test Results
- High Ammonia, Low Nitrite and Nitrate: Indicates that the curing process is just beginning. Perform water changes to reduce ammonia levels.
- High Nitrite, Low Ammonia and Nitrate: Indicates that the bacteria are converting ammonia to nitrite. Continue monitoring and perform water changes as needed.
- High Nitrate, Low Ammonia and Nitrite: Indicates that the nitrogen cycle is nearing completion. Perform water changes to reduce nitrate levels.
- Zero Ammonia and Nitrite, Stable Nitrate: Indicates that the curing process is complete. The rock is ready to be moved to the main display tank.
Corrective Actions
- High Ammonia or Nitrite: Perform a 100% water change to reduce levels. Ensure adequate water circulation and oxygenation.
- Low pH: Add a buffer to raise the pH. Check the alkalinity levels.
- High Nitrate: Perform regular water changes to maintain nitrate levels below 20 ppm.
By diligently monitoring water parameters and taking appropriate corrective actions, you can ensure a successful rock-curing process. This creates a stable and healthy environment for your saltwater aquarium.
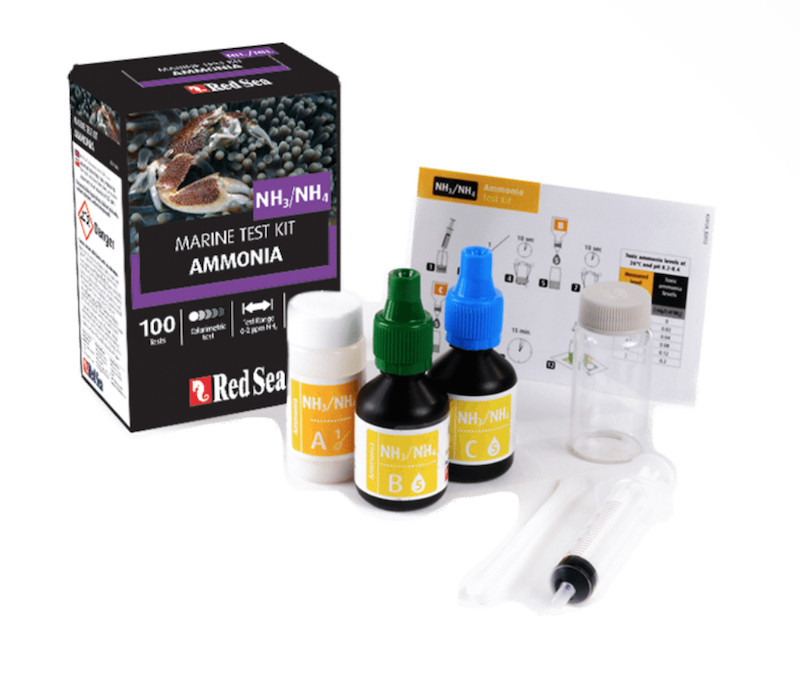 Ammonia test kit for curing live rock
7. Troubleshooting Common Curing Problems
Even with careful planning, you may encounter issues during the rock-curing process. Here are some common problems and how to address them:
| Problem | Possible Cause | Solution |
|---|---|---|
| Persistent High Ammonia | Excessive organic matter, inadequate water circulation, insufficient beneficial bacteria. | Perform frequent water changes (50-100%), increase water circulation with a stronger powerhead, add a bacteria supplement to boost the biological filter. |
| Slow Cycling Process | Low temperature, insufficient ammonia source, poor water quality. | Ensure the temperature is within 75-80°F, increase the ammonia source gradually, perform water changes to improve water quality. |
| Unpleasant Odors | Anaerobic bacteria producing hydrogen sulfide due to lack of oxygen. | Increase water circulation, ensure no areas of the rock are deprived of oxygen, consider adding an air stone for additional oxygenation. |
| Algae Growth | High nutrient levels, excessive light exposure. | Reduce light exposure by keeping the curing tank in a dark room, perform water changes to lower nutrient levels, add algae-eating snails or crabs to the curing tank (if appropriate for the type of rock being cured). |
| Pest Outbreaks | Introduction of pests from live rock (e.g., aiptasia, bristle worms). | Manually remove pests as they appear, consider using natural predators like peppermint shrimp for aiptasia, use traps for bristle worms, dip the rock in a pest control solution (ensure it is reef-safe and rinse thoroughly afterwards). |
| pH Instability | Lack of buffering capacity, high levels of organic acids. | Test and adjust alkalinity levels, perform water changes to remove organic acids, add a buffer to stabilize pH. |
| Cloudy Water | Bacterial bloom, excessive detritus. | Perform water changes to reduce bacterial load and remove detritus, ensure adequate water circulation and filtration. |
8. Combining Wet and Dry Rock for Optimal Results
Combining wet (live) and dry rock can offer the best of both worlds. This approach allows you to benefit from the biodiversity and natural filtration of live rock while minimizing the risk of pests and reducing costs with dry rock.
Benefits of Combining Wet and Dry Rock
- Faster Cycling: Live rock introduces beneficial bacteria. This helps accelerate the cycling process compared to using dry rock alone.
- Enhanced Biodiversity: Live rock brings a variety of beneficial organisms to the aquarium. This supports a more natural and stable ecosystem.
- Cost Savings: Using a combination of live and dry rock can reduce the overall cost. This is especially true for larger tanks.
- Pest Control: Dry rock is free from pests. This reduces the risk of introducing unwanted organisms to your aquarium.
How to Combine Wet and Dry Rock Effectively
- Cure Live Rock Separately: Cure the live rock in a separate quarantine tank to remove any dead organic matter and stabilize its biological activity.
- Prepare Dry Rock: Clean and prepare the dry rock. Follow the curing process outlined earlier.
- Aquascaping: Arrange the dry rock in the main display tank to create the desired aquascape. Leave space for the live rock.
- Introduce Live Rock: Once the live rock is fully cured and the dry rock is partially cycled, introduce the live rock into the display tank.
- Monitor Water Parameters: Closely monitor water parameters (ammonia, nitrite, nitrate, pH) during the initial weeks after introducing the live rock. Adjust as needed.
- Seed Dry Rock: Place the live rock in areas where it can seed the dry rock with beneficial bacteria and other organisms.
Tips for Success
- Start Small: Begin with a small amount of live rock (10-20% of the total rock volume) and gradually increase it as needed.
- Choose High-Quality Live Rock: Select live rock from reputable sources to minimize the risk of introducing pests or diseases.
- Maintain Good Water Circulation: Ensure adequate water circulation to distribute beneficial bacteria and nutrients throughout the tank.
- Be Patient: Allow the biological filter to establish fully before adding livestock.
 Wet and dry rock used in combination
9. Enhancing Your Cured Rock with Microfauna
Once your rock is cured and the aquarium is cycled, enhancing the rock with microfauna can significantly improve the health and stability of your reef tank. Microfauna, such as copepods, amphipods, and beneficial worms, play a crucial role in nutrient cycling and provide a natural food source for fish and corals.
Benefits of Adding Microfauna
- Nutrient Cycling: Microfauna consume detritus and uneaten food, helping to prevent the buildup of nitrates and phosphates.
- Natural Food Source: They serve as a natural and nutritious food source for many fish and corals.
- Improved Water Quality: By controlling detritus and algae, microfauna help maintain pristine water quality.
- Enhanced Biodiversity: They contribute to a more diverse and balanced ecosystem within the aquarium.
How to Introduce Microfauna
- Purchase Microfauna Cultures: Obtain cultures of copepods, amphipods, and other beneficial microfauna from reputable suppliers.
- Acclimate Carefully: Acclimate the microfauna to the aquarium water by slowly dripping water from the tank into the culture container over several hours.
- Release at Night: Release the microfauna into the aquarium at night to minimize predation by fish.
- Provide Hiding Places: Offer plenty of hiding places, such as porous rock, refugiums, or dedicated microfauna breeding boxes.
Creating a Thriving Microfauna Population
- Refugium: A refugium is a separate compartment in the aquarium system. It provides a safe haven for microfauna to breed and multiply.
- Nutrient Control: Maintain low nutrient levels (nitrates and phosphates) to prevent algae blooms that can outcompete microfauna.
- Avoid Over-Medication: Be cautious with medications, as many can harm microfauna populations.
- Regular Observation: Monitor the microfauna population regularly to ensure they are thriving.
By enhancing your cured rock with microfauna, you can create a more natural, stable, and thriving reef aquarium.
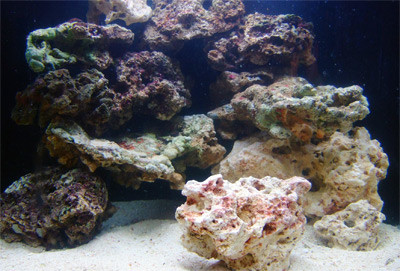
 Cured live rock with bacteria, sponges, microfauna, and coralline algae
10. Frequently Asked Questions (FAQs) About Rock Curing
| Question | Answer |
|---|---|
| How long does it take to cure live rock? | The curing process for live rock can take anywhere from 1 to 8 weeks, depending on the rock’s condition and the efficiency of your setup. Regular monitoring of water parameters will help you determine when the rock is fully cured. |
| Can I cure live rock in my main display tank? | It’s not recommended. Curing live rock releases significant amounts of ammonia, which can harm existing inhabitants. A separate quarantine tank is ideal. |
| What are the signs that my live rock is fully cured? | The primary indicators are stable water parameters: 0 ppm ammonia, 0 ppm nitrite, and a stable nitrate level. The rock should also have a clean, earthy smell, not a foul or decaying odor. |
| Is it necessary to use a protein skimmer during the curing process? | While not strictly necessary, a protein skimmer can significantly improve the efficiency of the curing process by removing excess organic compounds and nutrients. This helps maintain better water quality and speeds up the cycling process. |
| Can I use tap water to cure live rock? | No, tap water often contains chlorine, chloramine, and other contaminants that can harm beneficial bacteria. Always use RO/DI water for curing live rock. |
| How often should I perform water changes during live rock curing? | Perform 100% water changes whenever ammonia levels exceed 5-6 ppm. Regular water changes help to remove excess ammonia and maintain water quality. |
| What is the best temperature for curing live rock? | Maintain a stable temperature between 75-80°F (24-27°C) to promote the growth of beneficial bacteria. |
| How do I know if my dry rock is fully cycled? | Similar to live rock, the indicators are 0 ppm ammonia, 0 ppm nitrite, and a stable nitrate level. The rock should also show signs of colonization by beneficial bacteria, such as a change in color and texture. |
| Can I speed up the cycling process for dry rock? | Yes, you can use bottled bacteria supplements and introduce a small amount of live rock to seed the dry rock with beneficial organisms. However, it’s important not to rush the process, as a stable biological filter takes time to establish. |
| What is the purpose of the bleach treatment for dry rock? | The bleach treatment helps to remove any potential contaminants or unwanted organic matter from the dry rock. It’s important to rinse the rock thoroughly after the bleach treatment to remove all traces of bleach. |
At Rockscapes.net, we understand the challenges and rewards of creating a thriving reef aquarium. Proper rock curing is just the beginning. We offer a wealth of resources to guide you every step of the way. From selecting the perfect rocks to designing stunning aquascapes, Rockscapes.net is your trusted partner in building the underwater paradise of your dreams.
Ready to transform your aquarium? Explore our extensive collection of rocks and aquascaping supplies. Discover expert tips and tutorials. Get personalized advice from our team of experienced reef keepers. Visit Rockscapes.net today and bring your vision to life!
Address: 1151 S Forest Ave, Tempe, AZ 85281, United States
Phone: +1 (480) 965-9011
Website: rockscapes.net