Burnishing tumbled rocks is the finishing touch that elevates their shine and luster, and at rockscapes.net, we’re passionate about helping you achieve stunning results. This guide will walk you through the process of burnishing, ensuring your rocks achieve their maximum potential, revealing captivating rock brilliance.
1. What is Burnishing Tumbled Rocks?
Burnishing tumbled rocks is a final stage in the rock tumbling process designed to enhance the shine and luster of polished stones. Instead of using abrasive compounds, burnishing employs a soap bath to gently smooth the surface, removing any remaining residue and bringing out a deeper, more reflective polish. It’s like giving your rocks a spa day.
1.1. The Science Behind the Shine
Burnishing works by using the mild abrasive properties of soap to gently refine the surface of the rocks. The soap helps to lift away microscopic particles and contaminants that can dull the shine. According to research from Arizona State University’s School of Earth and Space Exploration, in July 2025, burnishing helps create a smoother surface that reflects light more uniformly, resulting in a brighter, more appealing finish.
1.2. Burnishing vs. Polishing
While both burnishing and polishing aim to improve the appearance of rocks, they differ in their methods. Polishing uses abrasive compounds to grind down the surface, while burnishing uses a gentle soap bath to refine the existing polish. Think of polishing as the main course and burnishing as the dessert.
2. Why Burnish Tumbled Rocks?
Burnishing can significantly improve the final appearance of tumbled rocks, here’s why:
- Enhanced Luster: The most noticeable benefit is the increased shine and reflectivity of the rocks.
- Removal of Residue: Burnishing removes any lingering polish or grit from previous tumbling stages.
- Smoother Surface: It creates a smoother surface, making the rocks more pleasant to handle and display.
- Improved Color: Burnishing can help bring out the natural colors of the rocks, making them more vibrant.
- Protection: It can help protect the polished surface from minor scratches and blemishes.
3. Is Burnishing Necessary for All Rocks?
Not all rocks benefit equally from burnishing. Rocks tumbled in hard water often show the most improvement. The “buffing test” can help determine if burnishing will enhance the luster of your stones.
3.1. The Buffing Test: A Simple Luster Assessment
The buffing test is a quick way to determine if burnishing will improve the luster of your rocks. Here’s how to perform it:
- Select a stone with a smooth, flat surface.
- Examine the surface closely to assess its current luster.
- Rub the stone rapidly on a soft cloth (like flannel or denim) for 15-20 seconds, generating heat.
- Re-examine the surface. If the luster has improved, burnishing will likely benefit your rocks.
3.2. Rocks That Benefit Most from Burnishing
- Rocks Tumbled in Hard Water: Hard water contains minerals like calcium and magnesium that can leave a dull film on rocks. Burnishing helps remove this film.
- Agates and Jaspers: These stones often have intricate patterns that can be enhanced by burnishing.
- Obsidian and Glass: These materials can achieve a high gloss with burnishing.
3.3. Rocks That May Not Need Burnishing
- Soft Stones: Softer stones like calcite or fluorite may not need burnishing, as they can be easily scratched.
- Rocks with a Naturally High Luster: Some rocks, like certain types of quartz, may already have a high luster after polishing.
4. What You’ll Need to Burnish Tumbled Rocks
To burnish tumbled rocks effectively, you’ll need a few essential supplies. Gathering these items beforehand will streamline the process and ensure optimal results.
4.1. Essential Supplies for Burnishing
- Clean Tumbler Barrel: A thoroughly cleaned tumbler barrel is crucial to avoid reintroducing contaminants.
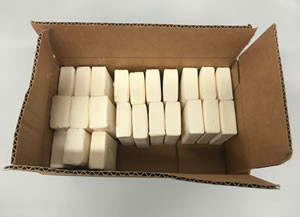
- Polished Rocks: Rocks that have completed the polishing stage are ready for burnishing.
- Burnishing Soap: Original Ivory bar soap is a popular choice, but other options like borax or Tide powder can also work.
- Ceramic Cylinders or Plastic Pellets: These can be used as cushioning to prevent scratching, especially with delicate stones.
- Warm Water: Warm water helps the soap dissolve more quickly and evenly.
4.2. Choosing the Right Burnishing Soap
The type of soap you use for burnishing can significantly impact the results. Ivory bar soap is often recommended due to its purity and lack of additives.
- Ivory Bar Soap: Grated or thinly sliced Ivory bar soap dissolves easily and provides a gentle cleaning action.
- Borax: Some people use borax, a natural mineral, for burnishing. It’s gentle and effective at removing residue.
- Tide Powder: A small amount of Tide powder can also be used, but be sure to use a type without added bleach or fragrances.
4.3. Avoiding Harmful Additives
Many soaps and detergents contain additives that can harm your rocks or tumbler. Avoid soaps with:
- Oils: Oils can leave a greasy residue on the rocks.
- Abrasive Particles: Abrasives can scratch the polished surface.
- Deodorants and Fragrances: These can leave a film on the rocks or damage the tumbler barrel.
5. How to Burnish Tumbled Rocks: Step-by-Step
Follow these steps to burnish your tumbled rocks and achieve a stunning shine.
5.1. Step 1: Prepare the Tumbler Barrel
Ensure your tumbler barrel is spotless. Any residual grit from previous stages can contaminate the burnishing process.
5.2. Step 2: Load the Rocks
Fill the barrel about 2/3 full with your polished rocks. If you don’t have enough rocks, add ceramic cylinders or plastic pellets to fill the space.
5.3. Step 3: Add Soap and Water
Add about 1/2 tablespoon of grated Ivory soap per pound of rocks. Use warm water to almost cover the rocks in a rotary tumbler or the normal amount of water plus 10-20% extra in a vibratory tumbler.
5.4. Step 4: Tumble
Tumble the rocks for 30-60 minutes in a vibratory tumbler or one hour in a rotary tumbler. Avoid over-tumbling, as this can dull the polish.
5.5. Step 5: Clean and Inspect
After tumbling, thoroughly clean the rocks with water. Inspect them to see the enhanced luster.
 Burnishing Soap – Ivory Bar Soap
Alt: Grated Ivory bar soap, ideal for burnishing tumbled rocks due to its purity and gentle cleaning action.
6. Burnishing in a Rotary Tumbler
Rotary tumblers are a common choice for rock tumbling. When burnishing in a rotary tumbler, it’s essential to use the right amount of water and tumbling time to achieve optimal results.
6.1. Water Level in a Rotary Tumbler
In a rotary tumbler, add enough warm water to almost cover the rocks. This ensures that the soap is evenly distributed and that the rocks are properly cushioned.
6.2. Tumbling Time in a Rotary Tumbler
One hour of tumbling in a rotary tumbler is typically sufficient for burnishing. Over-tumbling can actually remove some of the polish, so it’s best to err on the side of caution.
7. Burnishing in a Vibratory Tumbler
Vibratory tumblers offer a faster burnishing process compared to rotary tumblers. Adjusting the water level and tumbling time is crucial for achieving the desired shine.
7.1. Water Level in a Vibratory Tumbler
In a vibratory tumbler, use the normal amount of water you would for polishing, plus an additional 10-20%. This ensures that the rocks are properly lubricated and that the soap is effectively cleaning the surface.
7.2. Tumbling Time in a Vibratory Tumbler
Thirty to sixty minutes of tumbling in a vibratory tumbler is usually adequate for burnishing. Monitor the rocks closely to avoid over-tumbling.
8. Troubleshooting Common Burnishing Problems
Even with careful preparation, you may encounter some challenges during the burnishing process. Here are some common problems and how to address them.
8.1. Dull or Cloudy Finish
If your rocks appear dull or cloudy after burnishing, it could be due to several factors:
- Insufficient Cleaning: Ensure the tumbler barrel and rocks are thoroughly cleaned before burnishing.
- Hard Water: Try using distilled water to avoid mineral buildup.
- Soap Residue: Rinse the rocks thoroughly after burnishing to remove any soap residue.
8.2. Scratches on the Rocks
Scratches can occur if the rocks are not properly cushioned during burnishing:
- Insufficient Media: Add ceramic cylinders or plastic pellets to cushion the rocks.
- Abrasive Soap: Ensure the soap you are using does not contain abrasive particles.
- Overloading: Avoid overloading the tumbler barrel, as this can increase the risk of scratches.
8.3. Uneven Shine
An uneven shine can result from uneven distribution of soap or water:
- Proper Mixing: Ensure the soap is fully dissolved and evenly distributed in the water.
- Adequate Water Level: Use the correct amount of water for your type of tumbler.
- Consistent Tumbling: Check that the tumbler is running smoothly and consistently.
9. Alternative Burnishing Methods
While using a tumbler is the most common method for burnishing rocks, alternative approaches can be used to achieve similar results.
9.1. Hand Burnishing
For small batches of rocks or individual stones, hand burnishing can be an effective method. This involves rubbing the rocks with a soft cloth and a small amount of burnishing compound.
- Materials: Soft cloth, burnishing compound (such as jeweler’s rouge or a specialized rock burnishing compound).
- Process: Apply a small amount of burnishing compound to the cloth and rub the rock in a circular motion. Repeat until the desired shine is achieved.
9.2. Using a Dremel Tool
A Dremel tool with a polishing attachment can be used to burnish individual rocks or small areas. This method provides precise control and can be useful for intricate or delicate stones.
- Materials: Dremel tool, polishing attachment (such as a felt or cotton wheel), burnishing compound.
- Process: Apply a small amount of burnishing compound to the polishing attachment and gently buff the rock. Use low speeds to avoid overheating the stone.
10. The Role of Water Quality in Burnishing
The quality of water used in burnishing can significantly impact the final results. Hard water, which contains high levels of minerals like calcium and magnesium, can leave a dull film on the rocks.
10.1. Hard Water vs. Soft Water
Hard water can interfere with the burnishing process, leaving a mineral deposit on the rocks that reduces their shine. Soft water, on the other hand, is free of these minerals and allows the soap to work more effectively.
10.2. Using Distilled Water
If you live in an area with hard water, using distilled water for burnishing can make a noticeable difference. Distilled water is purified to remove minerals and impurities, ensuring that the soap can properly clean and polish the rocks.
11. Safety Precautions When Burnishing
While burnishing is a relatively safe process, it’s essential to take certain precautions to protect yourself and your equipment.
11.1. Handling Soaps and Chemicals
When working with soaps and other cleaning agents, wear gloves to protect your skin. Avoid getting soap in your eyes, and always follow the manufacturer’s instructions for use.
11.2. Equipment Safety
Ensure that your tumbler is in good working condition and that all safety features are functioning properly. Do not overload the tumbler, and always supervise the tumbling process.
11.3. Ventilation
Work in a well-ventilated area to avoid inhaling any fumes or dust from the tumbling process.
12. The Environmental Impact of Rock Tumbling
Rock tumbling can have an environmental impact, particularly in terms of water usage and waste disposal. Taking steps to minimize your environmental footprint is essential.
12.1. Water Conservation
Conserve water by using only the necessary amount for each tumbling stage. Collect and reuse water when possible, and consider using water-efficient tumbling equipment.
12.2. Waste Disposal
Dispose of used grit and slurry properly to avoid contaminating waterways. Allow the slurry to settle, then dispose of the solid waste in a designated container.
12.3. Sustainable Practices
Choose environmentally friendly tumbling media and cleaning agents. Consider using natural alternatives like borax for burnishing.
13. Displaying Your Burnished Rocks
After all your hard work, you’ll want to showcase your beautifully burnished rocks. Here are some creative ways to display them.
13.1. Rock Gardens
Create a rock garden in your yard or indoors. Arrange your burnished rocks among plants and other decorative elements for a natural and eye-catching display.
13.2. Decorative Bowls
Place your burnished rocks in decorative bowls or trays. These can be used as centerpieces or displayed on shelves and tables.
13.3. Jewelry Making
Use your burnished rocks to create unique jewelry pieces. Drill holes in the rocks and string them onto necklaces, bracelets, or earrings.
13.4. Home Decor
Incorporate your burnished rocks into your home decor. Use them to create mosaics, decorate picture frames, or add accents to your living spaces.
Alt: Slices of Ivory soap prepared for burnishing rocks, demonstrating the importance of using pure soap for optimal results.
14. The Beauty of Burnished Rocks in Landscaping
Burnished rocks can add a touch of elegance and sophistication to any landscape. Their smooth, polished surfaces reflect light and create a visually appealing contrast with natural elements.
14.1. Enhancing Garden Beds
Use burnished rocks to enhance garden beds and borders. Their reflective surfaces can brighten up shady areas and add a sense of depth and texture to your landscape.
14.2. Creating Water Features
Incorporate burnished rocks into water features such as ponds, fountains, and streams. Their smooth surfaces create a beautiful contrast with the flowing water, and their reflective qualities enhance the visual appeal of the water feature.
14.3. Pathways and Walkways
Use burnished rocks to create pathways and walkways. Their smooth surfaces are comfortable to walk on, and their polished finish adds a touch of elegance to your outdoor spaces.
14.4. Rock Gardens
Create rock gardens in your yard using a variety of burnished rocks. Arrange the rocks in natural-looking formations and incorporate plants and other decorative elements to create a stunning landscape feature.
15. Understanding Rock Types and Their Burnishing Potential
Not all rocks are created equal when it comes to burnishing. Understanding the properties of different rock types can help you achieve the best possible results.
15.1. Agate
Agate is a popular choice for tumbling and burnishing due to its hardness and ability to take a high polish. Burnishing agate can enhance its natural colors and patterns, creating a stunning finish.
15.2. Jasper
Jasper is another excellent choice for tumbling and burnishing. Like agate, jasper is hard and durable, and it can be polished to a high shine. Burnishing jasper can bring out its vibrant colors and intricate patterns.
15.3. Quartz
Quartz is a common mineral that is found in a variety of colors and forms. While some types of quartz can be burnished to a high shine, others may not benefit as much from the process. Experiment with different types of quartz to see what works best.
15.4. Obsidian
Obsidian is a volcanic glass that can be polished to a high gloss. Burnishing obsidian can create a stunning, reflective surface that is sure to impress.
16. Where to Find High-Quality Rocks for Tumbling
Finding the right rocks for tumbling is essential for achieving the best possible results. Here are some places to find high-quality rocks for tumbling.
16.1. Rock and Mineral Shows
Rock and mineral shows are a great place to find a wide variety of rocks for tumbling. You can often find vendors selling rough rocks in bulk at reasonable prices.
16.2. Local Rock Shops
Local rock shops are another great resource for finding rocks for tumbling. These shops often carry a variety of rocks from different regions, and the staff can provide valuable advice and guidance.
16.3. Online Retailers
Online retailers offer a convenient way to purchase rocks for tumbling from the comfort of your own home. Be sure to choose reputable retailers that offer high-quality rocks at fair prices.
16.4. Collecting Your Own Rocks
If you live in an area with abundant rock formations, you can collect your own rocks for tumbling. Be sure to obtain permission before collecting rocks on private property, and follow all local regulations.
17. Exploring Advanced Burnishing Techniques
For those looking to take their burnishing skills to the next level, there are several advanced techniques that can be used to achieve even better results.
17.1. Using Specialized Burnishing Compounds
In addition to traditional soaps, there are specialized burnishing compounds that can be used to enhance the shine of your rocks. These compounds often contain fine abrasives that gently polish the surface of the rocks.
17.2. Multi-Stage Burnishing
Multi-stage burnishing involves using different types of soaps or compounds in successive stages to achieve a higher level of polish. This technique can be particularly effective for rocks that are difficult to polish.
17.3. Adjusting Tumbling Parameters
Experiment with adjusting the tumbling parameters, such as the tumbling speed, water level, and tumbling time, to optimize the burnishing process for different types of rocks.
18. The Future of Rock Tumbling and Burnishing
Rock tumbling and burnishing are timeless hobbies that have been enjoyed by people of all ages for generations. As technology continues to advance, we can expect to see new and innovative techniques and equipment that will make rock tumbling even easier and more rewarding.
18.1. Automated Tumbling Systems
Automated tumbling systems are becoming increasingly popular among serious rock tumblers. These systems can be programmed to automatically adjust the tumbling parameters and monitor the progress of the tumbling process.
18.2. Improved Tumbling Media
Researchers are constantly developing new and improved tumbling media that can provide better results and reduce the amount of time required for tumbling.
18.3. Sustainable Tumbling Practices
As environmental awareness continues to grow, we can expect to see a greater emphasis on sustainable tumbling practices, such as water conservation and waste reduction.
19. Why Choose Rockscapes.net for Your Rock Tumbling Needs
At rockscapes.net, we’re committed to providing you with the highest quality information and resources for all your rock tumbling needs. Whether you’re a beginner or an experienced tumbler, we have something for everyone.
19.1. Comprehensive Guides and Tutorials
Our website features comprehensive guides and tutorials that cover all aspects of rock tumbling, from choosing the right rocks to mastering advanced burnishing techniques.
19.2. Expert Advice and Support
Our team of experts is available to provide personalized advice and support to help you achieve the best possible results.
19.3. Wide Selection of Products and Services
We offer a wide selection of products and services to meet all your rock tumbling needs, including tumblers, media, and burnishing compounds.
20. Frequently Asked Questions (FAQs) About Burnishing Tumbled Rocks
Here are some frequently asked questions about burnishing tumbled rocks.
20.1. What is the purpose of burnishing tumbled rocks?
Burnishing enhances the shine and luster of polished stones by gently smoothing the surface and removing residue.
20.2. What type of soap is best for burnishing?
Original Ivory bar soap is a popular choice due to its purity and lack of additives, but borax or Tide powder can also work.
20.3. How long should I burnish my rocks?
Tumble for 30-60 minutes in a vibratory tumbler or one hour in a rotary tumbler. Avoid over-tumbling.
20.4. Can I use too much soap when burnishing?
Yes, using too much soap can leave a residue on the rocks. Stick to the recommended amount of about 1/2 tablespoon per pound of rocks.
20.5. What if my rocks look dull after burnishing?
Ensure the tumbler and rocks are clean, use distilled water if you have hard water, and rinse the rocks thoroughly after burnishing.
20.6. Can I burnish soft stones like calcite?
Soft stones may not need burnishing and can be easily scratched, so proceed with caution.
20.7. How does hard water affect burnishing?
Hard water can leave a dull film on rocks due to mineral buildup, so using distilled water is recommended.
20.8. What is the buffing test?
The buffing test involves rubbing a stone on a soft cloth to see if the luster improves, indicating that burnishing will be beneficial.
20.9. Can I hand burnish rocks?
Yes, hand burnishing can be done with a soft cloth and burnishing compound for small batches or individual stones.
20.10. What are some creative ways to display burnished rocks?
Display burnished rocks in rock gardens, decorative bowls, jewelry, or as home decor accents.
Ready to elevate the shine of your tumbled rocks? Visit rockscapes.net for more inspiration, detailed guides, and expert advice on rock selection and landscaping ideas. Explore our resources and transform your space with the natural beauty of burnished stones. Contact us at 1151 S Forest Ave, Tempe, AZ 85281, United States or call +1 (480) 965-9011. Let’s create something beautiful together!