Attaching a rock to a stick is achievable using various methods, enhancing your rock crafting and landscape design projects. At rockscapes.net, we provide insights and inspiration for incorporating natural stone into your outdoor spaces. Keep reading to learn about rock mounting solutions, secure bonding methods, and the best materials for lasting results in your stone and stick creations!
1. Why Attach a Rock to a Stick? Unveiling the Possibilities
Attaching a rock to a stick might seem like a simple task, but it opens up a world of creative and practical possibilities. Why would someone want to do this? Let’s explore some compelling reasons.
1.1. Decorative Purposes: Enhancing Your Space with Natural Art
Attaching rocks to sticks can create unique and eye-catching decorative elements for both indoor and outdoor spaces. These natural art pieces bring a touch of rustic charm and can be used in a variety of ways.
- Garden Ornaments: Imagine a series of rock-topped sticks lining a garden path, adding vertical interest and a whimsical feel. These can be further enhanced with paint or natural dyes.
- Indoor Decor: Smaller versions can serve as unique paperweights, shelf decorations, or even as part of a larger terrarium or indoor garden display.
- Themed Projects: Depending on the type of rock and stick used, these creations can fit into various themes, from a beachy, coastal vibe to a more rugged, woodland aesthetic.
1.2. Practical Applications: Functionality Meets Nature
Beyond aesthetics, attaching a rock to a stick can serve practical purposes, blending functionality with natural elements.
- Markers and Signage: A rock attached to a stick can act as a natural marker for garden plots, hiking trails, or even as a unique signpost for events.
- Tools and Implements: In survival or outdoor scenarios, a rock securely attached to a stick can serve as a makeshift hammer, digging tool, or even a primitive weapon.
- Educational Purposes: Crafting these items can be a fun and educational activity, teaching about nature, simple mechanics, and resourcefulness.
1.3. Crafting and DIY Projects: Unleash Your Creativity
For DIY enthusiasts, this simple project is a gateway to more complex and creative endeavors.
- Kids’ Crafts: It’s a safe and engaging activity for children, encouraging them to explore nature and develop their crafting skills.
- Art Projects: Artists can use this technique as a base for creating sculptures, mobiles, or mixed-media art pieces.
- Therapeutic Activities: The act of gathering materials and assembling them can be a relaxing and meditative activity, perfect for stress relief and creative expression.
2. Gathering Your Materials: The Foundation of Your Project
The success of your rock-to-stick attachment project hinges on selecting the right materials. Let’s delve into what you’ll need and how to choose them wisely.
2.1. Selecting the Right Rock: Size, Shape, and Type
The rock is a crucial element, and its characteristics will influence the overall look and functionality of your project.
- Size and Weight: Consider the size of the stick you’re using. A small stick won’t support a large, heavy rock. Match the rock’s size to the stick’s strength and stability.
- Shape: Look for rocks with a relatively flat surface for easier attachment. Arrowhead-shaped or naturally angular rocks can add visual interest.
- Type: The type of rock affects its durability and appearance.
| Rock Type | Characteristics | Best For |
|---|---|---|
| Granite | Durable, coarse-grained, available in various colors. | Outdoor projects, decorative pieces. |
| Slate | Fine-grained, layered, and often used for its unique texture. | Garden markers, decorative accents. |
| Sandstone | Porous, relatively soft, and comes in earthy tones. | Rustic-themed projects, indoor decor. |
| River Rock | Smooth, rounded, and comes in a variety of sizes and colors. | Garden ornaments, water features. |
| Quartz | Hard, crystalline, and can add a sparkling effect. According to research from Arizona State University’s School of Earth and Space Exploration, quartz is known for its piezoelectric properties. | Decorative pieces, special projects. |
2.2. Choosing the Perfect Stick: Strength, Length, and Aesthetics
The stick provides the structural support and should be chosen with care.
- Strength and Durability: Opt for hardwood sticks like oak, maple, or hickory for outdoor projects. These are less likely to rot or break. Softwood sticks like pine or fir are suitable for indoor projects.
- Length: The length of the stick depends on the intended use. Shorter sticks are ideal for small decorations, while longer sticks are better for garden markers or tools.
- Aesthetics: Consider the color, texture, and shape of the stick. A naturally gnarled or interestingly shaped stick can add character to your project.
2.3. Adhesives and Binding Materials: Ensuring a Secure Hold
The adhesive or binding material is what holds the rock and stick together, so choose it carefully based on the project’s needs.
- Epoxy: A strong, waterproof adhesive that’s ideal for outdoor projects. It creates a permanent bond and can fill gaps between the rock and stick.
- Construction Adhesive: Similar to epoxy, construction adhesive is designed for bonding heavy materials. It’s weather-resistant and provides a long-lasting hold.
- Twine or Rope: Natural twine or rope can add a rustic touch and is suitable for projects where aesthetics are as important as strength. Ensure it’s durable enough to withstand the elements.
- Wire: For a more industrial look, wire can be used to tightly bind the rock to the stick. Use galvanized or stainless steel wire to prevent rust.
- Hot Glue: Best for indoor projects, hot glue is easy to use and dries quickly. However, it’s not as durable or weather-resistant as other options.
2.4. Tools and Safety Equipment: Preparing for the Task
Having the right tools and safety equipment will make the process smoother and safer.
- Saw or Knife: For cutting and shaping the stick.
- Drill: To create holes for additional reinforcement.
- Sandpaper: To smooth rough edges and improve adhesion.
- Gloves: To protect your hands from adhesives and sharp edges.
- Safety Glasses: To protect your eyes from flying debris.
 Arrowhead shaped stone
3. Step-by-Step Methods: Attaching Rock to Stick
Now that you’ve gathered your materials, let’s explore different methods for attaching a rock to a stick. Each method offers a unique approach, catering to various preferences and project requirements.
3.1. The Slot and Bind Method: A Secure and Rustic Approach
This method involves creating a slot in the stick to hold the rock, then binding it securely with twine or rope.
- Prepare the Stick: Use a saw or knife to create a slot in one end of the stick. The slot should be slightly smaller than the rock to ensure a snug fit.
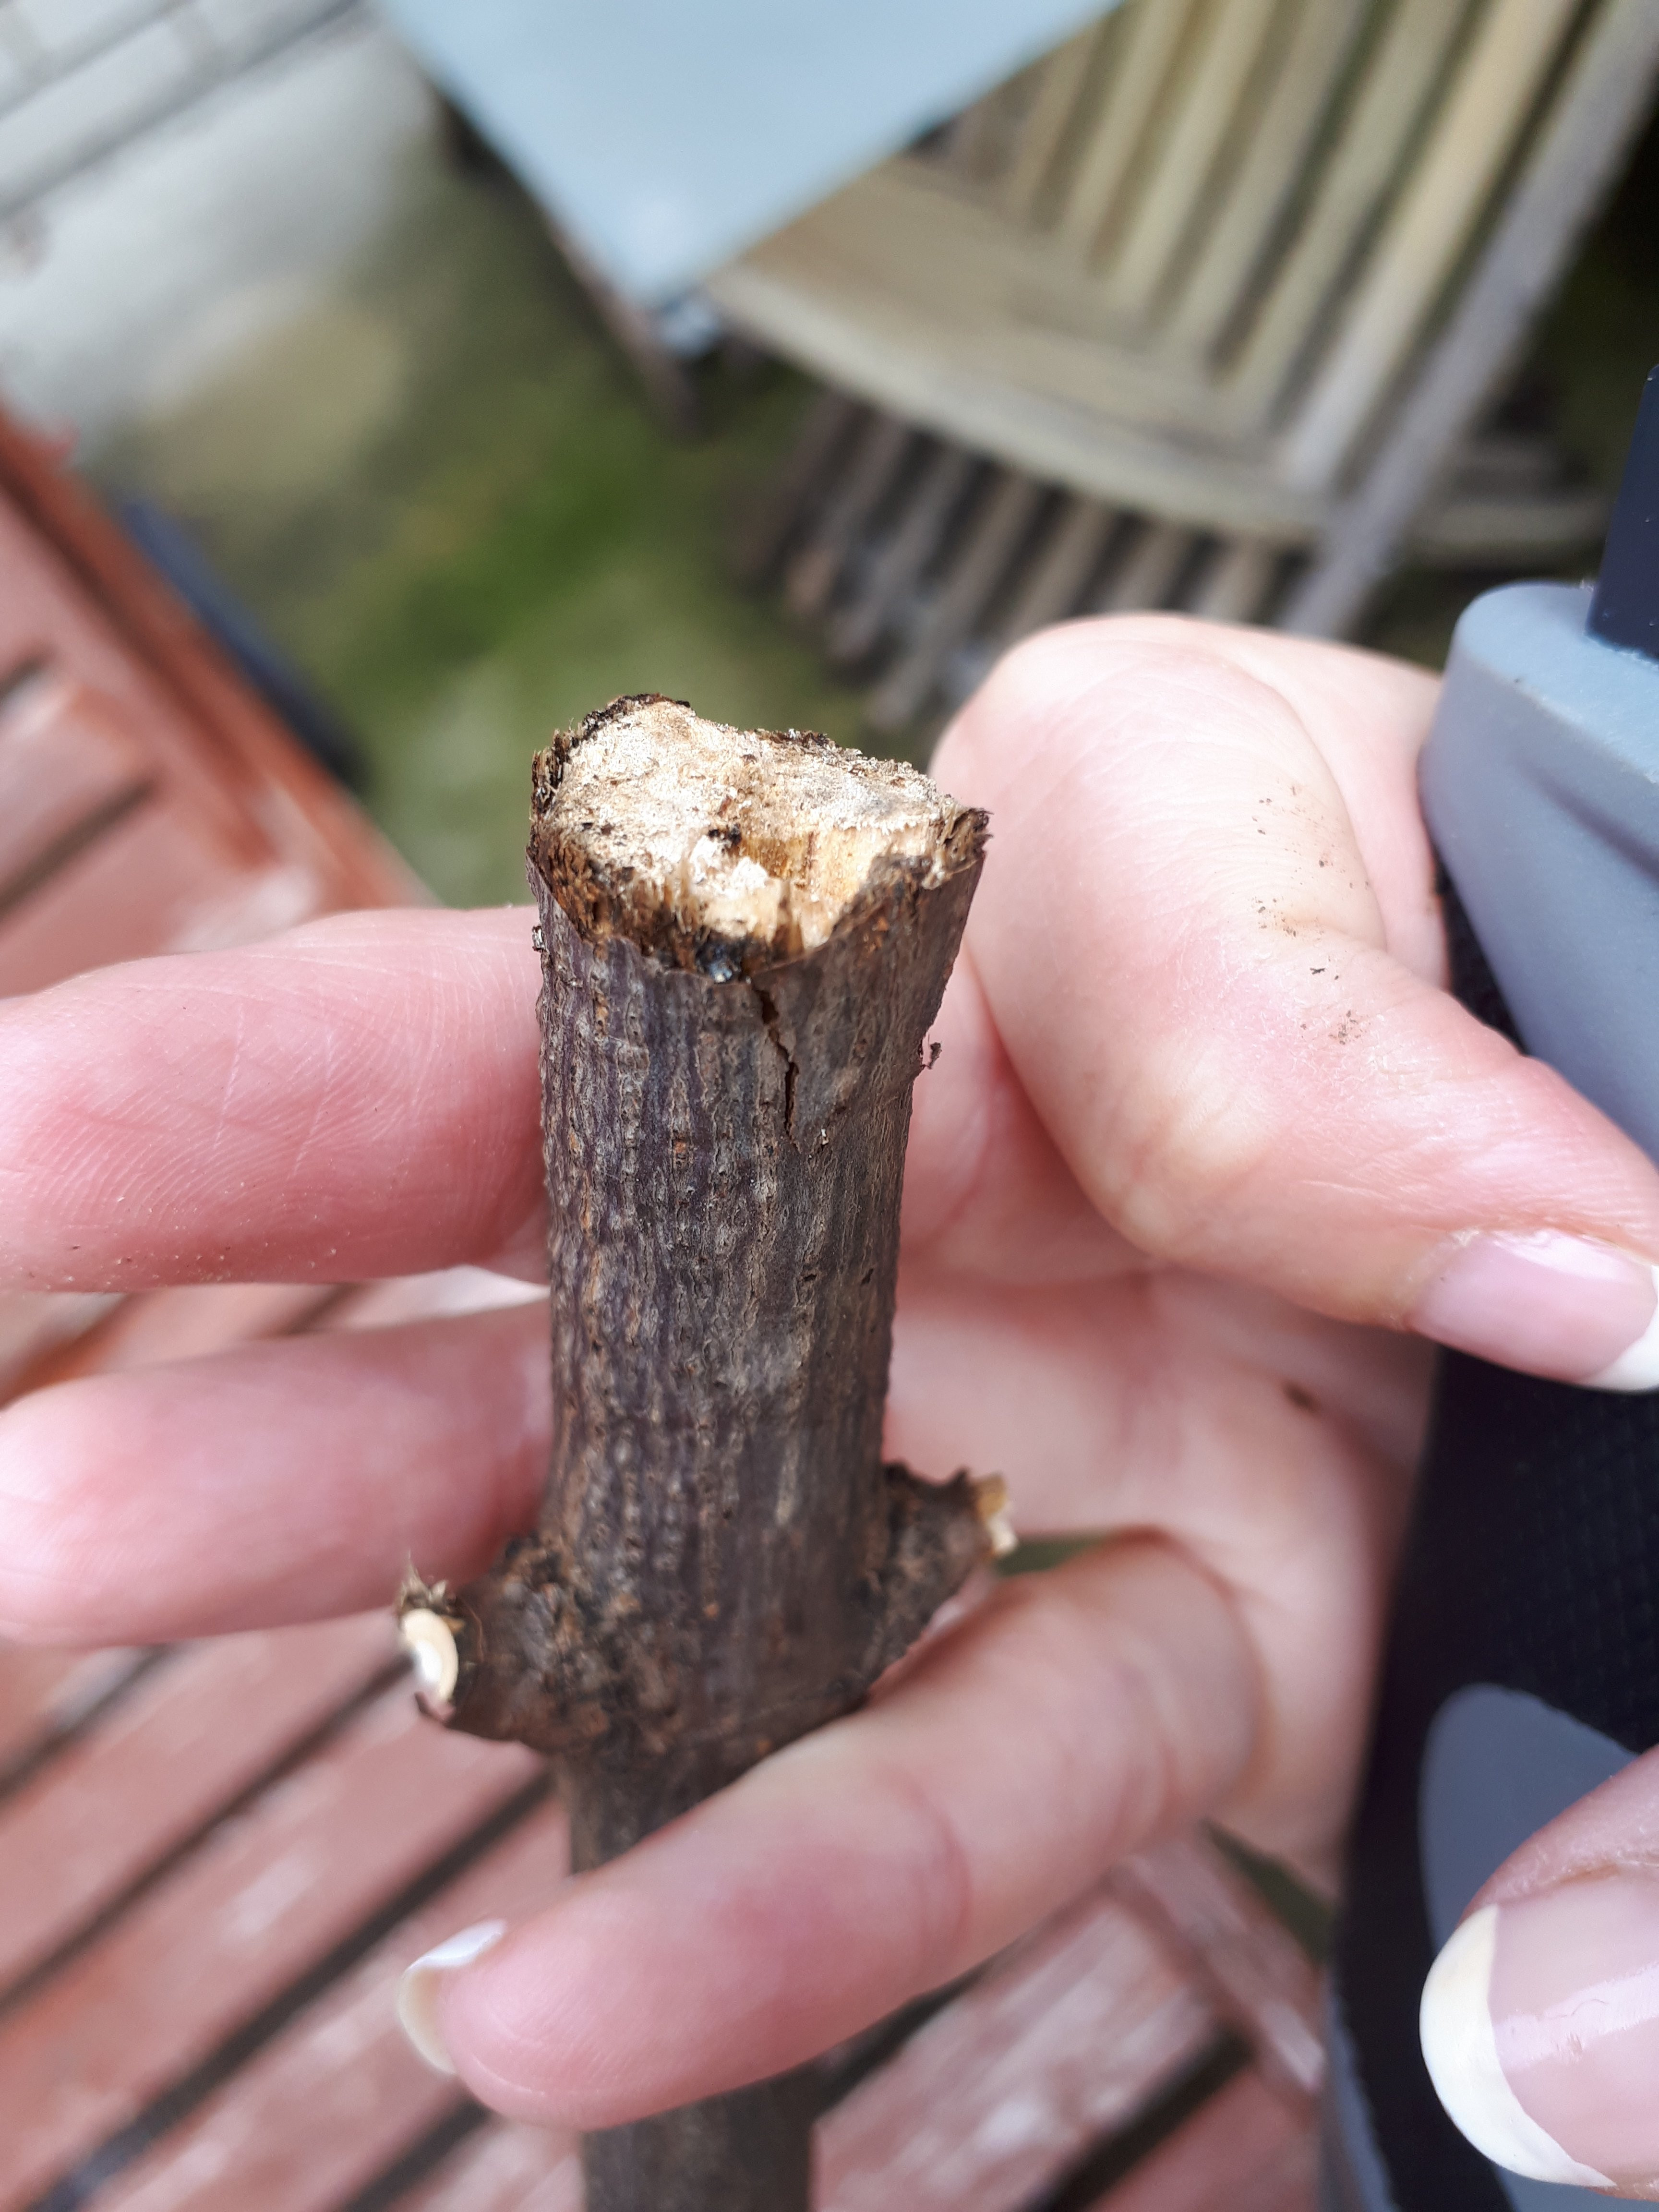 Cut the end of the stick so it’s flat
 - Insert the Rock: Carefully insert the rock into the slot, ensuring it sits securely.
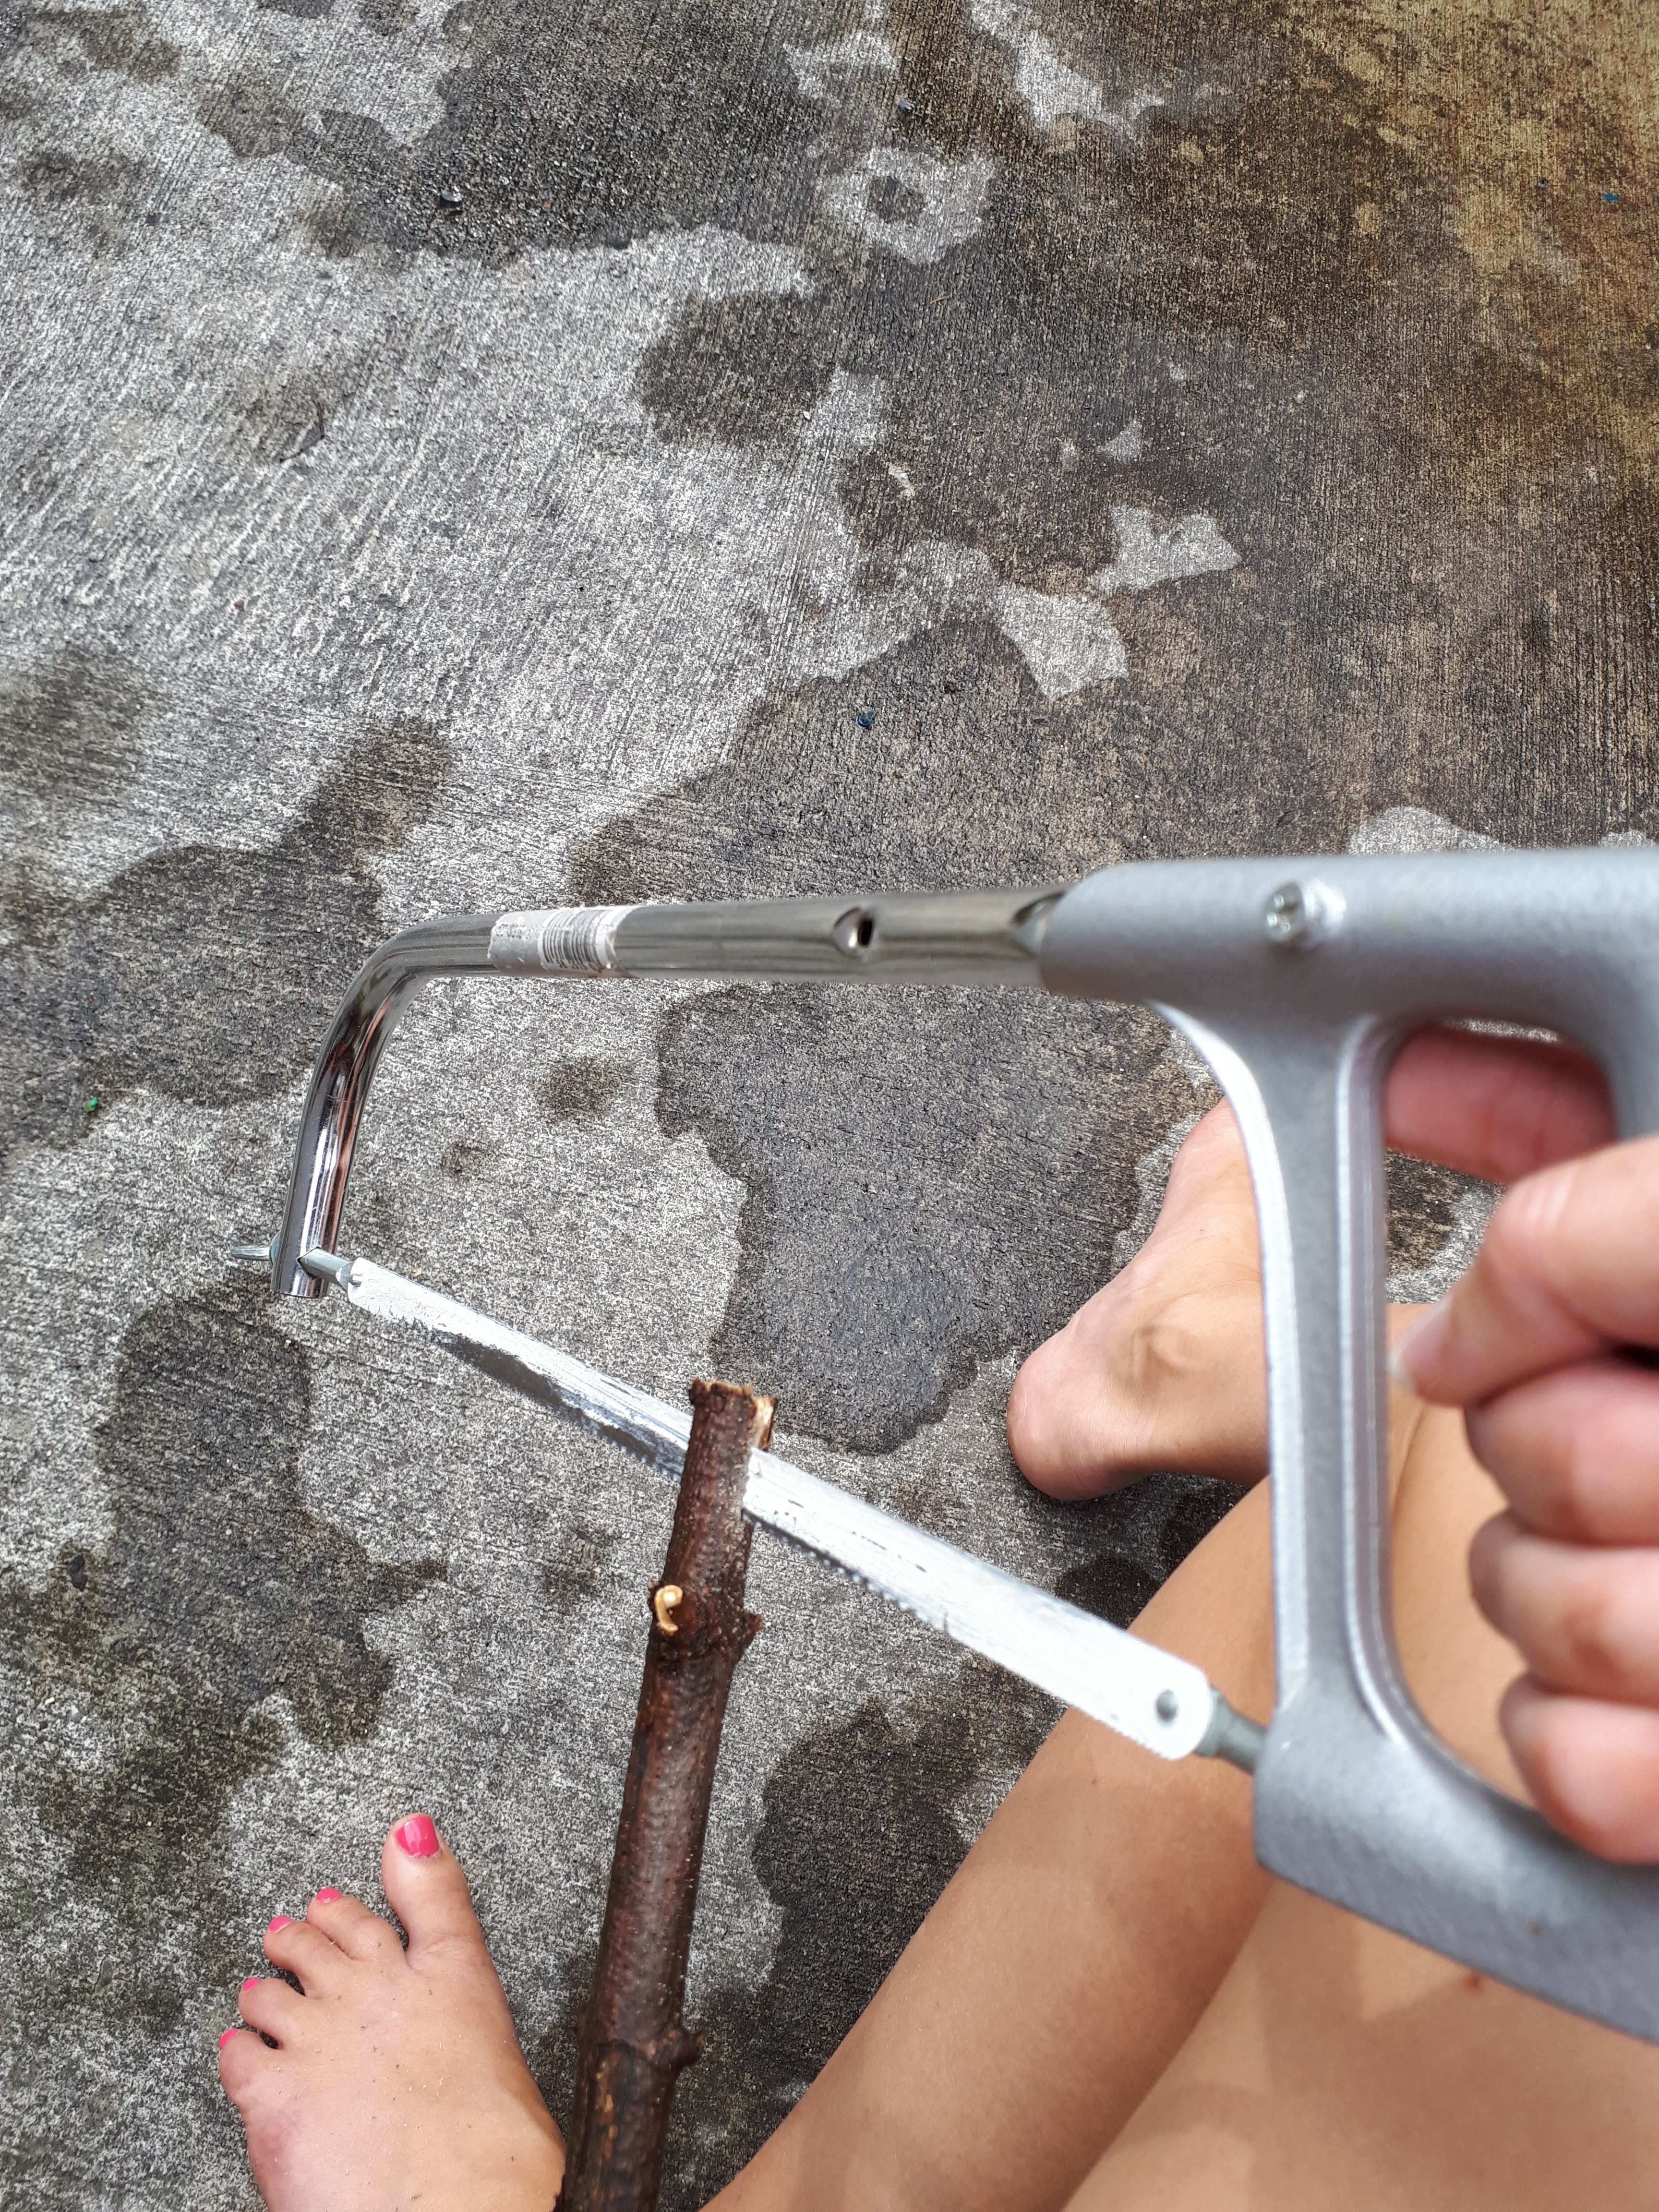 Cut the stick lengthwise
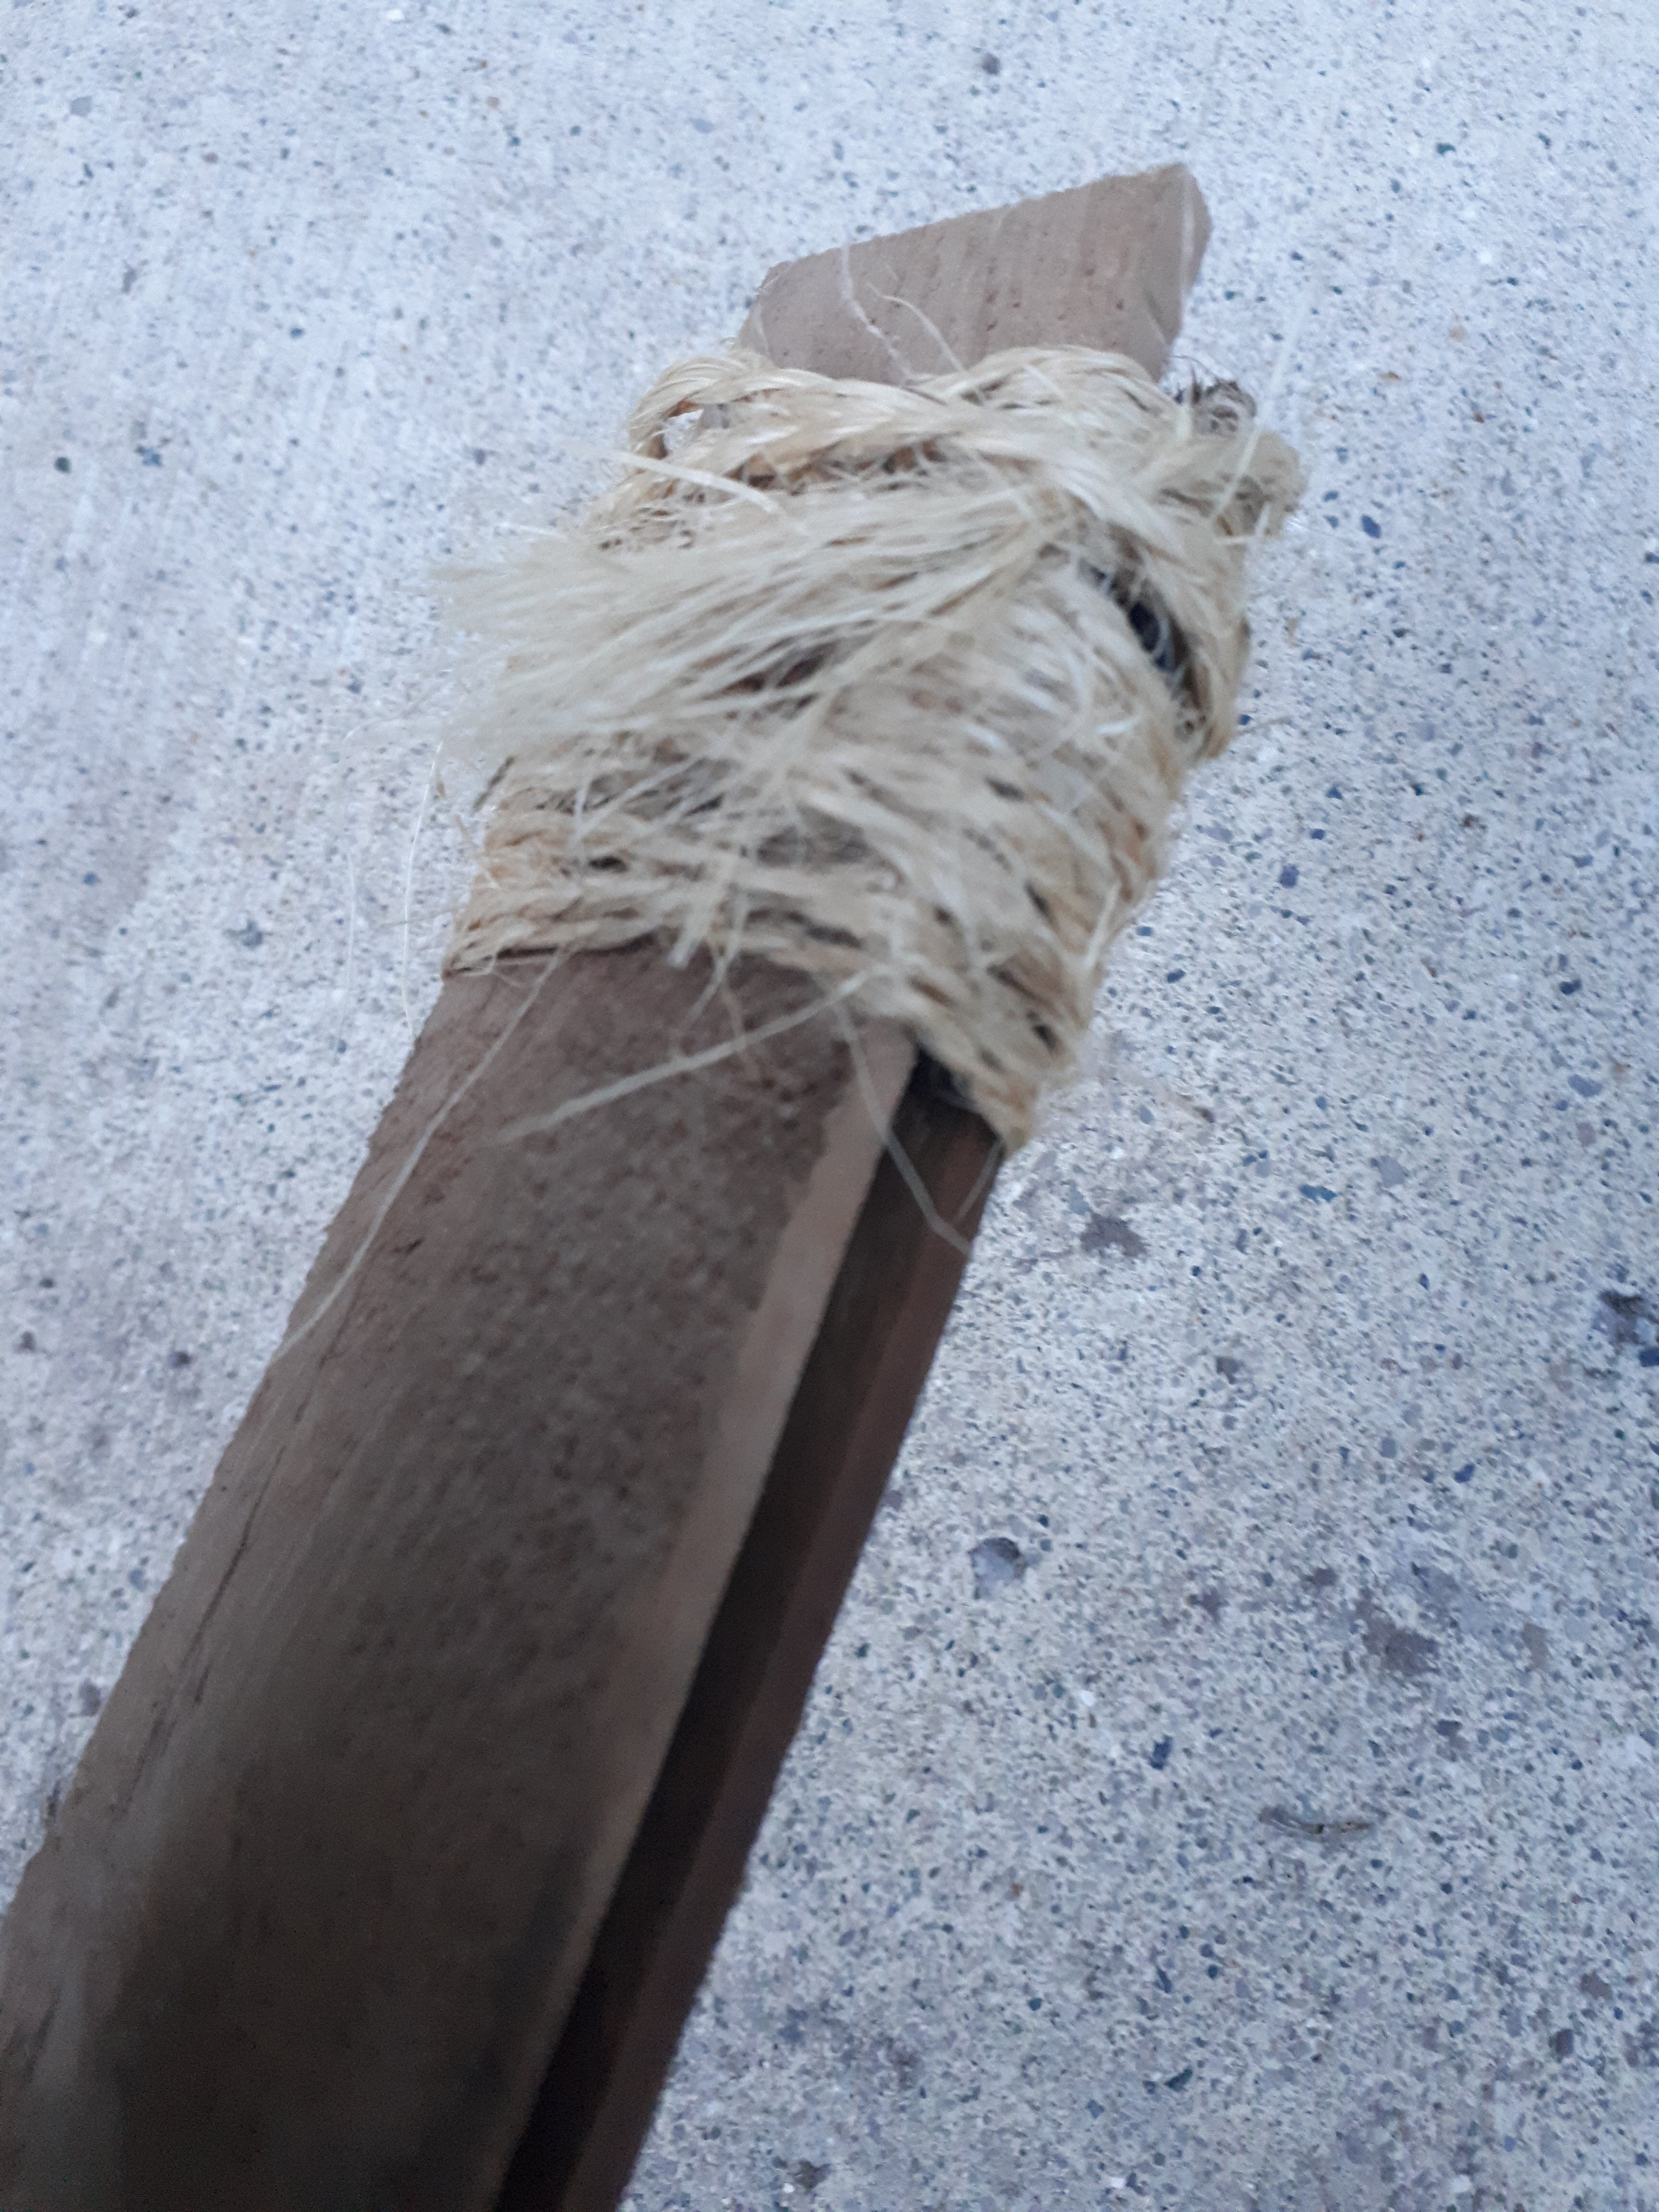
 - Bind the Rock: Wrap twine or rope tightly around the stick, directly below the rock. Tie a secure knot and trim any excess twine.
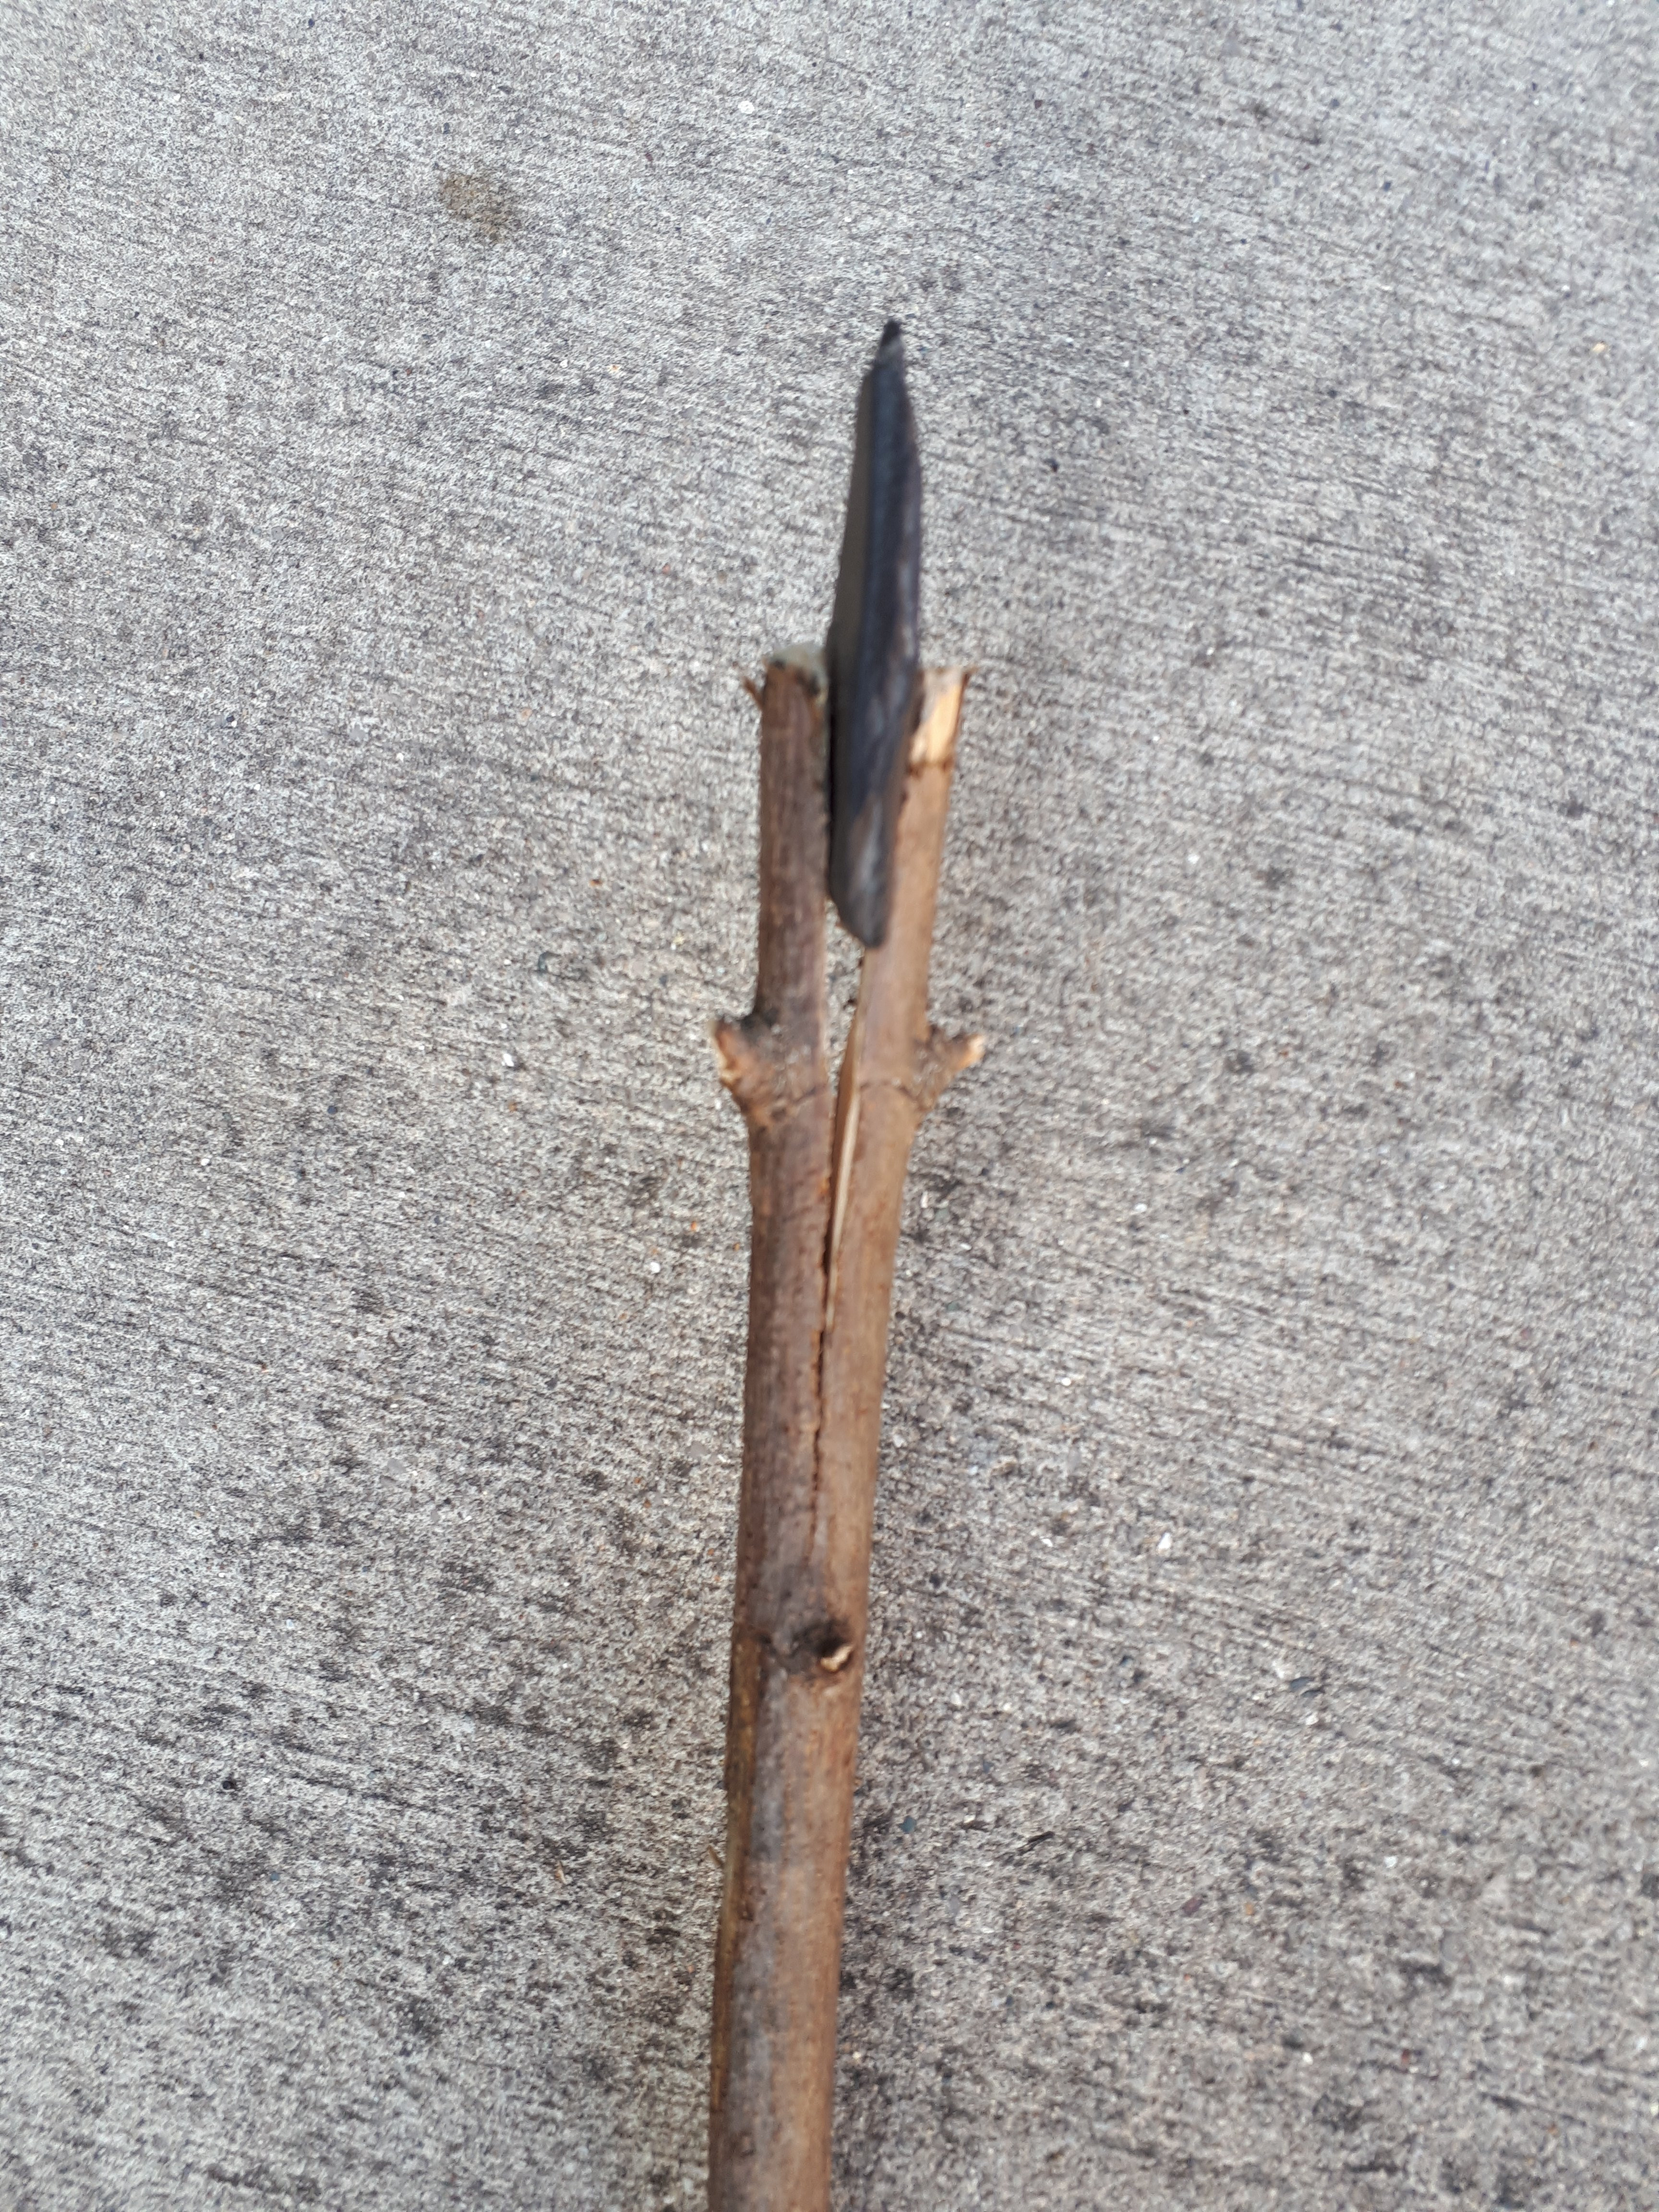 Insert Stone into gap
 - Reinforce (Optional): For added security, apply a small amount of epoxy or construction adhesive to the slot before inserting the rock.
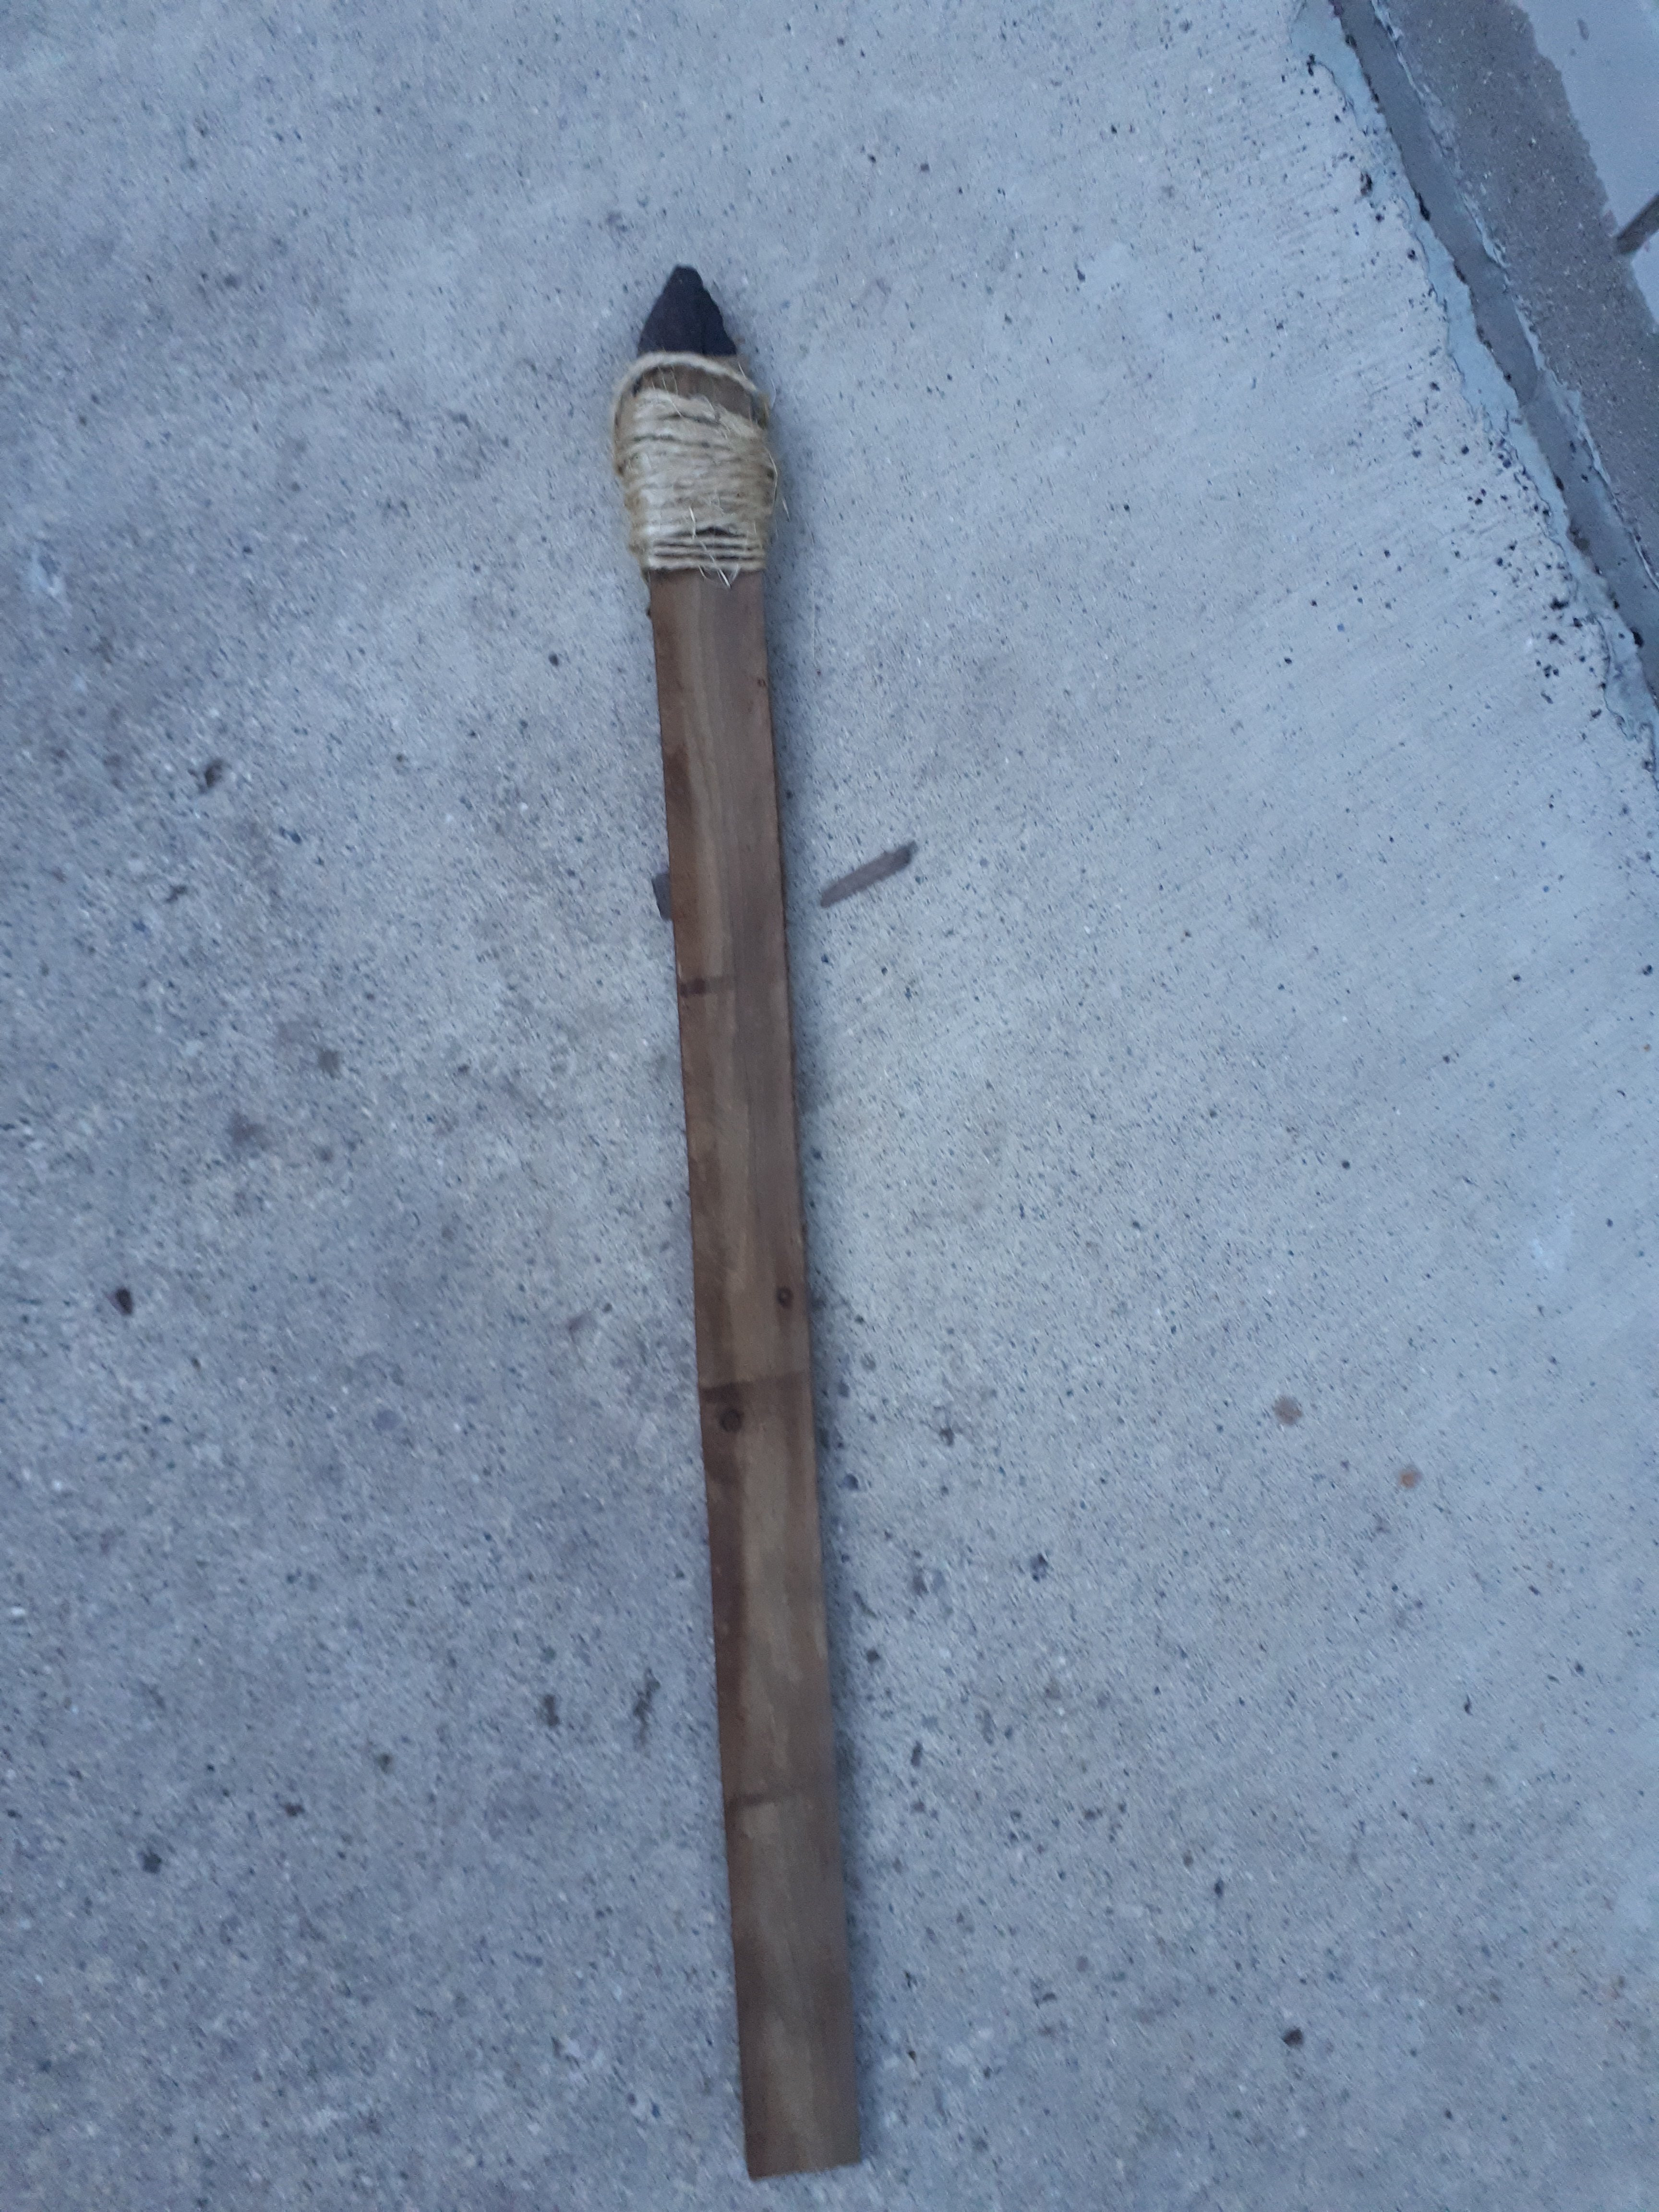
 Wrap the string tightly around the stick
Pros:
- Rustic appearance
- Secure hold
- Minimal use of adhesives
Cons:
- Requires precise cutting
- May not be suitable for all rock shapes
3.2. The Adhesive Bond Method: A Clean and Simple Solution
This method relies on a strong adhesive to bond the rock directly to the stick.
- Prepare the Surfaces: Clean the surfaces of both the rock and the stick with sandpaper to remove any dirt or debris.
- Apply Adhesive: Apply a generous amount of epoxy or construction adhesive to the area where the rock will attach to the stick.
- Attach the Rock: Press the rock firmly onto the adhesive, ensuring good contact.
- Secure and Cure: Use tape or clamps to hold the rock in place while the adhesive cures. Follow the manufacturer’s instructions for curing time.
Pros:
- Simple and straightforward
- Clean appearance
- Suitable for various rock shapes
Cons:
- Relies heavily on adhesive strength
- May not be as visually appealing as other methods
3.3. The Wire Wrap Method: An Industrial and Durable Approach
This method involves using wire to tightly wrap the rock to the stick, creating a strong and visually interesting connection.
- Prepare the Wire: Cut a length of galvanized or stainless steel wire, ensuring it’s long enough to wrap around the rock and stick several times.
- Position the Rock: Place the rock against the stick in the desired position.
- Wrap the Wire: Begin wrapping the wire tightly around the rock and stick, securing the rock in place. Overlap the wire wraps for added strength.
- Secure the Ends: Twist the ends of the wire together tightly and trim any excess.
Pros:
- Extremely durable
- Industrial aesthetic
- Can be used with irregular rock shapes
Cons:
- Requires wire handling skills
- May not be suitable for all aesthetics
3.4. The Double Stick Method: Creating a Natural Embrace
This method utilizes two sticks to cradle the rock, providing a secure and visually balanced attachment.
- Gather Two Sticks: Select two flat sticks of similar size and shape.
- Position the Rock: Place the rock between the two sticks, ensuring it sits snugly.
 Place the end of the stone in between the sticks
 - Bind the Sticks: Wrap rope or twine tightly around both ends of the sticks, securing them together and holding the rock in place.
 Wrap rope around both ends of the stick
Pros:
- Natural and balanced appearance
- Easy to assemble
- Minimal tools required
Cons:
- Requires specific stick shapes
- May not be as durable as other methods
4. Design Ideas and Inspiration: Unleashing Your Creativity
Now that you know How To Attach A Rock To A Stick, let’s explore some design ideas to spark your imagination.
4.1. Garden Markers: A Natural Way to Label Your Plants
Use small, flat rocks attached to sticks to create charming garden markers. Paint the names of the plants on the rocks or use stencils for a more polished look. These markers add a personal touch to your garden and help you keep track of your plants.
4.2. Decorative Garden Stakes: Adding Whimsy to Your Outdoor Space
Create decorative garden stakes by attaching colorful or uniquely shaped rocks to longer sticks. These stakes can be placed throughout your garden to add visual interest and a touch of whimsy. Consider painting the sticks or adding embellishments like beads or ribbons.
4.3. Rock and Stick Sculptures: Creating Natural Art
Combine multiple rocks and sticks to create unique sculptures for your garden or home. Experiment with different sizes, shapes, and textures to create eye-catching art pieces. These sculptures can be simple or complex, depending on your skill level and creativity.
4.4. Walking Sticks: A Functional and Stylish Accessory
Attach a larger, more comfortable rock to the top of a sturdy stick to create a unique walking stick. This project combines functionality with natural aesthetics, providing a practical tool that’s also a stylish accessory for hikes and walks.
4.5. Indoor Decor: Bringing Nature Inside
Use smaller rocks and sticks to create indoor decor items like paperweights, shelf decorations, or terrarium accents. These natural elements bring a touch of the outdoors inside and add a unique, organic feel to your home.
5. Maintenance and Care: Ensuring Longevity
To ensure your rock-to-stick creations last, proper maintenance and care are essential.
5.1. Protecting Against the Elements: Weatherproofing Your Creations
For outdoor projects, protect your creations from the elements by applying a sealant or varnish. This will help prevent the wood from rotting and the adhesive from deteriorating. Reapply the sealant annually or as needed.
5.2. Regular Cleaning: Keeping Your Creations Looking Their Best
Clean your rock-to-stick creations regularly to remove dirt and debris. Use a soft brush and mild soap to gently scrub the surfaces. Avoid using harsh chemicals or abrasive cleaners, as these can damage the materials.
5.3. Storage Tips: Preserving Your Creations During Off-Season
During the off-season, store your outdoor rock-to-stick creations in a dry, sheltered location. This will help protect them from extreme weather conditions and prolong their lifespan.
6. Safety Considerations: A Safe Crafting Experience
Safety should always be a top priority when working on DIY projects.
6.1. Handling Tools Safely: Preventing Accidents
Use caution when handling saws, knives, and drills. Always wear safety glasses to protect your eyes and gloves to protect your hands. Keep your work area clean and organized to prevent accidents.
6.2. Working with Adhesives: Ventilation and Skin Protection
When working with adhesives, ensure proper ventilation to avoid inhaling harmful fumes. Wear gloves to protect your skin from irritation. Follow the manufacturer’s instructions for safe handling and disposal.
6.3. Choosing Non-Toxic Materials: Protecting Your Health
When selecting materials, opt for non-toxic options whenever possible. This is especially important if children or pets will be around the finished product. Look for water-based adhesives and sealants that are low in VOCs (volatile organic compounds).
7. Advanced Techniques and Embellishments: Taking Your Creations to the Next Level
Ready to take your rock-to-stick creations to the next level? Here are some advanced techniques and embellishments to consider.
7.1. Carving and Shaping: Adding Intricate Details
Use carving tools to add intricate details to the sticks or rocks. This can include carving patterns, shapes, or even personalized messages. Practice on scrap materials first to develop your skills.
7.2. Painting and Decorating: Adding Color and Personality
Paint the rocks and sticks with acrylic paints to add color and personality to your creations. Use stencils, brushes, or sponges to create unique designs. Seal the painted surfaces with a clear coat to protect them from fading or chipping.
7.3. Incorporating Other Natural Elements: Expanding Your Palette
Incorporate other natural elements like shells, leaves, or feathers into your rock-to-stick creations. These additions can add texture, color, and visual interest. Use adhesives or wire to securely attach these elements.
8. Troubleshooting Common Issues: Overcoming Challenges
Even with careful planning, you may encounter some challenges when attaching a rock to a stick. Here are some common issues and how to address them.
8.1. The Rock Won’t Stay Attached: Strengthening the Bond
If the rock keeps falling off, try strengthening the bond by using a stronger adhesive, adding more binding material, or creating a deeper slot in the stick. Ensure the surfaces are clean and dry before applying the adhesive.
8.2. The Stick Breaks: Choosing Stronger Materials
If the stick breaks, choose a stronger, more durable material like hardwood. You can also reinforce the stick by wrapping it with wire or twine.
8.3. The Adhesive Doesn’t Cure Properly: Following Instructions
If the adhesive doesn’t cure properly, ensure you’re following the manufacturer’s instructions for mixing and curing times. Check the expiration date of the adhesive and store it properly to maintain its effectiveness.
9. Finding Inspiration and Resources: Expanding Your Knowledge
Looking for more inspiration and resources for your rock-to-stick projects? Here are some places to explore.
9.1. Online Communities and Forums: Connecting with Fellow Crafters
Join online communities and forums dedicated to crafting and DIY projects. These platforms offer a wealth of information, inspiration, and support. Share your creations, ask questions, and learn from others.
9.2. Books and Magazines: Learning from the Experts
Explore books and magazines on crafting, gardening, and outdoor decor. These resources often feature step-by-step instructions, design ideas, and expert tips.
9.3. Local Craft Stores and Workshops: Hands-On Learning
Visit your local craft stores and workshops to learn new techniques and get hands-on experience. Many stores offer classes on various crafting topics, including rock and stick art.
10. Rockscapes.net: Your Partner in Landscape Design
At rockscapes.net, we are passionate about helping you create beautiful and functional outdoor spaces using natural stone.
10.1. Explore Design Ideas: Inspiration for Your Next Project
Browse our extensive collection of design ideas to find inspiration for your next landscape project. From rock gardens to stone pathways, we offer a wide range of options to suit your style and budget.
10.2. Discover Different Types of Rocks: Choosing the Right Stone
Learn about the different types of rocks available and their unique characteristics. Our detailed descriptions and images will help you choose the right stone for your project.
10.3. Get Expert Advice: Guidance from Our Team
Our team of experts is here to provide guidance and support throughout your landscape design journey. Contact us with your questions and we’ll be happy to help.
Ready to transform your outdoor space with natural stone? Visit rockscapes.net today and discover the beauty and versatility of rock landscapes. For inquiries, visit us at 1151 S Forest Ave, Tempe, AZ 85281, United States. Reach out via phone at +1 (480) 965-9011 or explore our website at rockscapes.net.
FAQ: Frequently Asked Questions
1. What is the best adhesive to use for attaching a rock to a stick?
Epoxy or construction adhesive is the best option for outdoor projects due to its strength and water resistance. Hot glue is suitable for indoor projects.
2. How do I make sure the rock stays securely attached?
Prepare the surfaces by cleaning and sanding them, use a generous amount of strong adhesive, and consider reinforcing the bond with wire or twine.
3. What type of stick is best for outdoor projects?
Hardwood sticks like oak, maple, or hickory are the most durable and resistant to rot for outdoor projects.
4. Can I use hot glue for attaching a rock to a stick?
Yes, hot glue can be used for indoor projects, but it’s not as durable or weather-resistant as epoxy or construction adhesive.
5. How do I protect my rock-to-stick creation from the weather?
Apply a sealant or varnish to protect the wood and adhesive from the elements. Reapply annually or as needed.
6. What are some creative uses for rock-to-stick creations?
Garden markers, decorative garden stakes, sculptures, walking sticks, and indoor decor items are all great uses.
7. How do I clean my rock-to-stick creation?
Use a soft brush and mild soap to gently scrub the surfaces. Avoid harsh chemicals or abrasive cleaners.
8. What safety precautions should I take when working on this project?
Wear safety glasses and gloves, ensure proper ventilation when working with adhesives, and use caution when handling tools.
9. Where can I find inspiration for rock-to-stick projects?
Online communities, books, magazines, and local craft stores are great sources of inspiration. You can also find inspiration at rockscapes.net.
10. How can rockscapes.net help me with my landscape design project?
rockscapes.net offers design ideas, information on different types of rocks, and expert advice to help you create beautiful and functional outdoor spaces using natural stone.