Cleaning debris from landscaping rock is essential for maintaining your outdoor space’s beauty and longevity, and rockscapes.net is here to guide you. This comprehensive guide provides expert tips and tricks for cleaning various types of landscape rocks, ensuring they look as stunning as the day they were installed. Discover effective methods to preserve the aesthetic appeal and structural integrity of your rock features, plus explore rock arrangement ideas, decorative rock projects, and rock garden maintenance.
1. Understanding the Importance of Cleaning Landscaping Rock
Why is it so important to remove dirt and build-up from the stones in your garden? Cleaning debris from landscaping rock not only enhances the aesthetic appeal of your outdoor space but also ensures the longevity and functionality of your rock features. Regular maintenance prevents weed growth, improves drainage, and protects your investment.
1.1 Aesthetic Enhancement
Cleaning your landscape rocks revitalizes their natural beauty, making your outdoor area more inviting and attractive. Over time, rocks can accumulate dirt, algae, and other debris, diminishing their visual appeal. Removing these blemishes reveals the true color and texture of the stones, enhancing the overall look of your landscape. For example, cleaning white marble chips can restore their bright, reflective surface, creating a striking contrast against greenery.
1.2 Preventing Weed Growth
Debris accumulation on and around landscaping rock creates a fertile ground for weed seeds to germinate and thrive. Regular cleaning eliminates this organic matter, reducing the chances of weed infestation. This not only keeps your landscape looking tidy but also saves you time and effort on weeding. Using a combination of cleaning and weed barriers can significantly minimize weed problems in your rock gardens.
1.3 Improving Drainage
Landscape rocks often play a crucial role in managing water runoff and preventing soil erosion. However, when debris and dirt clog the spaces between the rocks, it can impede drainage, leading to water buildup and potential damage to surrounding plants and structures. Cleaning the rocks ensures that water can flow freely, maintaining the effectiveness of your landscape’s drainage system.
1.4 Extending Lifespan
Regular cleaning and maintenance can significantly extend the lifespan of your landscaping rock. By removing corrosive elements like acidic rainwater and organic matter, you prevent the rocks from deteriorating and losing their structural integrity. This is particularly important for softer stone types like limestone, which are more susceptible to weathering. Properly maintained rocks can last for decades, saving you money on replacements.
1.5 Enhancing Property Value
A well-maintained landscape, including clean and attractive rock features, can significantly enhance your property’s curb appeal and overall value. Potential buyers are often impressed by the attention to detail and care evident in a meticulously kept outdoor space. According to real estate experts, a well-manicured landscape can increase a home’s value by as much as 5-12 percent.
2. Essential Tools and Materials for Cleaning Landscaping Rock
What are the must-have tools to effectively clean your landscaping stones? Before you start cleaning, gather the necessary tools and materials to make the job easier and more efficient.
2.1 Essential Tools
-
Garden Hose with Adjustable Nozzle: A garden hose is essential for rinsing off loose dirt and debris from the rocks. An adjustable nozzle allows you to control the water pressure, providing a gentle spray for delicate stones and a more powerful jet for stubborn stains.
-
Stiff-Bristle Brush or Broom: A stiff-bristle brush or broom is ideal for scrubbing the surface of the rocks and dislodging dirt, algae, and moss. Choose a brush with durable bristles that can withstand repeated use and various cleaning solutions.
-
Soft-Bristle Brush: A soft-bristle brush is useful for cleaning more delicate stone surfaces that could be damaged by a stiff brush. This type of brush is gentle enough to remove dirt and grime without scratching or eroding the stone.
-
Bucket: A bucket is necessary for mixing cleaning solutions and carrying water to the cleaning site. Choose a durable bucket with a sturdy handle for easy transport.
-
Protective Gloves: Protective gloves are essential for protecting your hands from harsh chemicals, abrasive surfaces, and potential irritants. Choose gloves made of rubber or neoprene for optimal protection and comfort.
-
Rake or Leaf Blower: A rake or leaf blower is useful for removing loose leaves, twigs, and other debris from around the rocks before cleaning. This step helps to prevent clogs and ensures that the cleaning solution reaches the rock surfaces effectively.
-
Small Brush or Old Toothbrush: A small brush or old toothbrush is perfect for cleaning crevices and hard-to-reach areas of the rocks. These tools allow you to scrub away dirt and grime in tight spaces that are difficult to access with a larger brush.
2.2 Cleaning Solutions
-
Mild Dish Soap and Water: A solution of mild dish soap and water is a versatile and gentle cleaner for general-purpose use. This solution is effective at removing dirt, grime, and light stains without damaging the stone surfaces.
-
White Vinegar and Water (1:1 Ratio): A 1:1 mixture of white vinegar and water is an eco-friendly cleaning solution that is effective at removing algae, moss, and hard water stains. Vinegar is a natural disinfectant and deodorizer, making it a safe and effective choice for outdoor cleaning.
-
Baking Soda Paste: A paste made from baking soda and water is an excellent abrasive cleaner for removing stubborn stains and buildup. Baking soda is a mild alkali that helps to dissolve dirt and grime without scratching the stone surfaces.
-
Hydrogen Peroxide: Hydrogen peroxide is a mild bleaching agent that can be used to lighten and brighten stained or discolored stones. This solution is particularly effective at removing organic stains like mold and mildew.
-
Bleach Solution (Use Cautiously: 1 Part Bleach to 10 Parts Water): A diluted bleach solution can be used to disinfect and remove stubborn stains from rocks, but it should be used with caution. Bleach is a harsh chemical that can damage some stone surfaces and harm surrounding plants if not used properly. Always wear protective gloves and eye protection when working with bleach, and rinse the treated area thoroughly after cleaning.
By gathering these essential tools and materials, you’ll be well-prepared to tackle any cleaning task and keep your landscaping rock looking its best.
 Essential tools for cleaning landscaping rocks, including a garden hose, brushes, and cleaning solutions
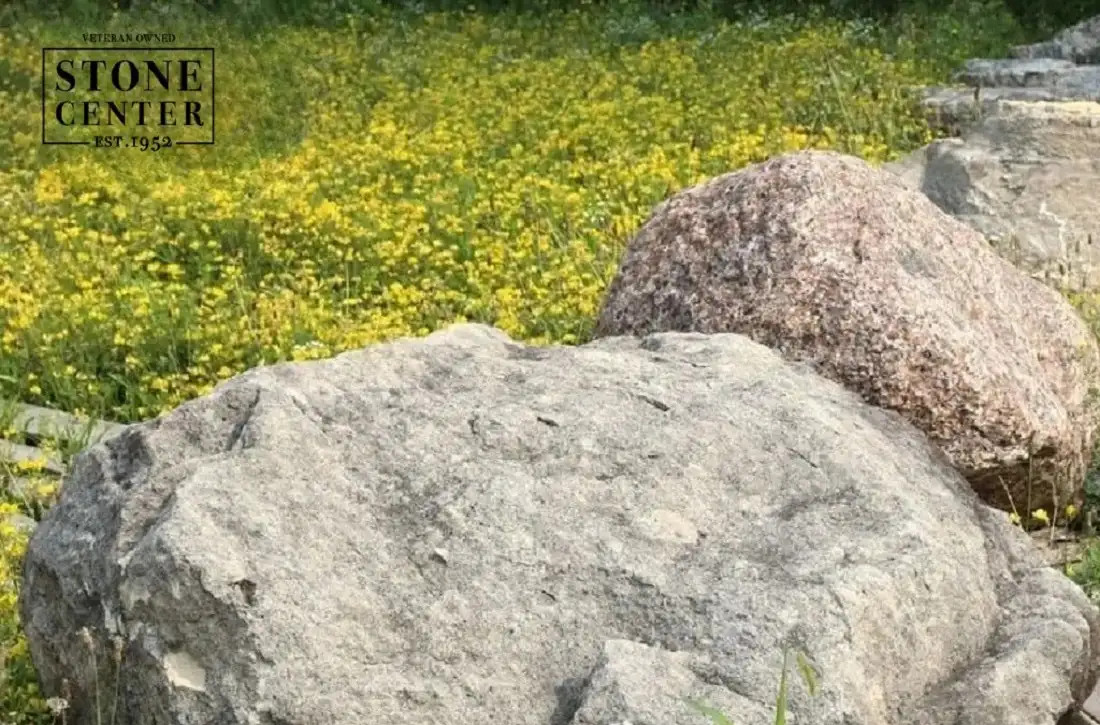
3. Step-by-Step Guide on How to Clean Large Landscape Rocks
How do you effectively clean large rocks to maintain their natural appeal? Large landscape rocks can be a stunning addition to any yard, but they can also become dirty and unsightly over time. Here are the best practices for cleaning these natural stone features.
3.1 Removing Dirt and Debris
Use a brush, rake, or broom to remove any loose dirt or debris from the rock surface. A leaf blower can also be used to blow away leaves and small debris. According to landscape maintenance experts, removing loose debris is the first and most crucial step in cleaning any type of landscaping rock.
3.2 Rinsing the Rocks
Gently rinse off the rocks with a garden hose, starting at the top and working your way down. This ensures that the debris flows away from the clean areas. Using an adjustable nozzle on the hose allows you to control the water pressure and avoid damaging the rocks.
3.3 Scrubbing the Rocks
For tough stains or algae growth, use a stiff-bristle brush or pressure washer to clean the rocks. Be cautious when using a pressure washer to avoid damaging the rocks. Always wear gloves and safety goggles when using a pressure washer for protection.
3.4 Cleaning Crevices and Hard-to-Reach Areas
Use a small bristle brush or a toothbrush to clean the crevices and hard-to-reach areas of the large landscape rocks. A warm water and vinegar solution can be used for a deeper clean in these areas. The vinegar helps to dissolve mineral deposits and kill algae.
3.5 Final Rinse and Drying
After scrubbing, rinse the rocks thoroughly with a hose to remove any remaining dirt or cleaning solution. Allow the rocks to air dry, or use a leaf blower or dry towel to remove any remaining moisture if you need to use the space quickly.
4. Best Practices for Cleaning White Landscape Rocks
How can you keep white stones looking pristine and polished? White landscape stones are popular for their clean and polished look, but they can easily become stained and discolored. Here’s how to clean exterior stones like white landscape stones effectively.
4.1 Preparing the Area
Start by removing any debris or obstacles near the white landscape stones, such as furniture or garden decorations. Use a rake or leaf blower to clear away leaves, twigs, and other loose debris from the stones. Preparing the area ensures that you can access all the stones and clean them thoroughly.
4.2 Rinsing the Stones
Gently rinse the white landscape stones using a garden hose or pressure washer, starting from the top and working your way down. This initial rinse helps to remove loose dirt and debris, making it easier to clean the stones more effectively.
4.3 Applying a Cleaning Solution
Mix a gentle detergent with water in a bucket to create a mild cleaning solution. Dip a stiff-bristle brush into the solution and scrub the white landscape stones. A mild detergent is effective at removing dirt and grime without damaging the stones.
4.4 Addressing Stubborn Stains
For stubborn stains, mix one part bleach with ten parts water in a separate bucket. Carefully apply the bleach solution to the stained areas using the stiff-bristle brush. Let the solution sit for a few minutes before rinsing thoroughly. Always use bleach with caution to avoid damaging surrounding plants or surfaces.
4.5 Final Rinse and Drying
After scrubbing the stones, rinse them again with the garden hose or pressure washer to remove any remaining dirt and cleaning solution. Allow the white landscape stones to air dry completely to prevent water spots and ensure a polished look.
4.6 Pro Tip: Hydrogen Peroxide Solution
To keep white landscape stones looking brilliant year-round without using bleach, mix one part 3 percent hydrogen peroxide with two parts water and apply to stained areas. For preventative maintenance, apply a stone sealer formulated for white stones every 1-2 years.
 Cleaning white landscaping stones with a brush and cleaning solution
5. How to Clean River Rocks for a Pristine Look
What are the best methods for maintaining river rocks in your landscape? Like any other landscaping element, river rocks require occasional cleaning to maintain their pristine appearance. Whether they’re part of a decorative rock wall, used as stone pavers, or simply placed around your garden, here’s how to clean river rock landscaping.
5.1 Preparing the Area
Before you begin cleaning, prepare the area around the river rocks. This may include removing any furniture, decorations, or other items that might obstruct your cleaning process. Use a rake or leaf blower to remove surface dirt and any leaves that have accumulated around the rocks.
5.2 Rinsing the Rocks
Use a garden hose or pressure washer to rinse off the rocks. If using a pressure washer, be sure to wear gloves and safety goggles for protection. Start at the top of the area and work your way down, allowing the water to flow away from the clean sections.
5.3 Scrubbing the Rocks
Create a mild cleaning solution by mixing water and a gentle detergent in a bucket. Dip a stiff-bristle brush or broom into the solution and scrub the rocks, focusing on any areas with visible stains or algae growth. For stubborn stains, use a mixture of equal parts water and white vinegar. Be sure to scrub every surface of the rocks to ensure a comprehensive clean.
5.4 Cleaning Crevices
River rocks often have small crevices and indentations that can trap dirt and debris. To clean these areas, use a small brush or toothbrush dipped in your cleaning solution. Gently scrub the crevices, removing any dirt or buildup that may be present.
5.5 Final Rinse and Drying
Use your garden hose and any power-washing tool to rinse the rocks again. Be sure to rinse thoroughly, as any remaining detergent can cause a slippery surface and harm your plants. Give your rocks time to air dry — the drying process will help prevent water damage to the structure. If you’re in a hurry, you can use a leaf blower or a dry towel to remove excess moisture from the rocks.
5.6 Applying a Stone Sealer
A quality stone sealer can prevent algae growth and make future cleaning easier. Choose a water-based sealer safe for aquatic life if your rocks are near ponds or water features. According to experts, a stone sealer can extend the life of your river rocks and maintain their appearance.
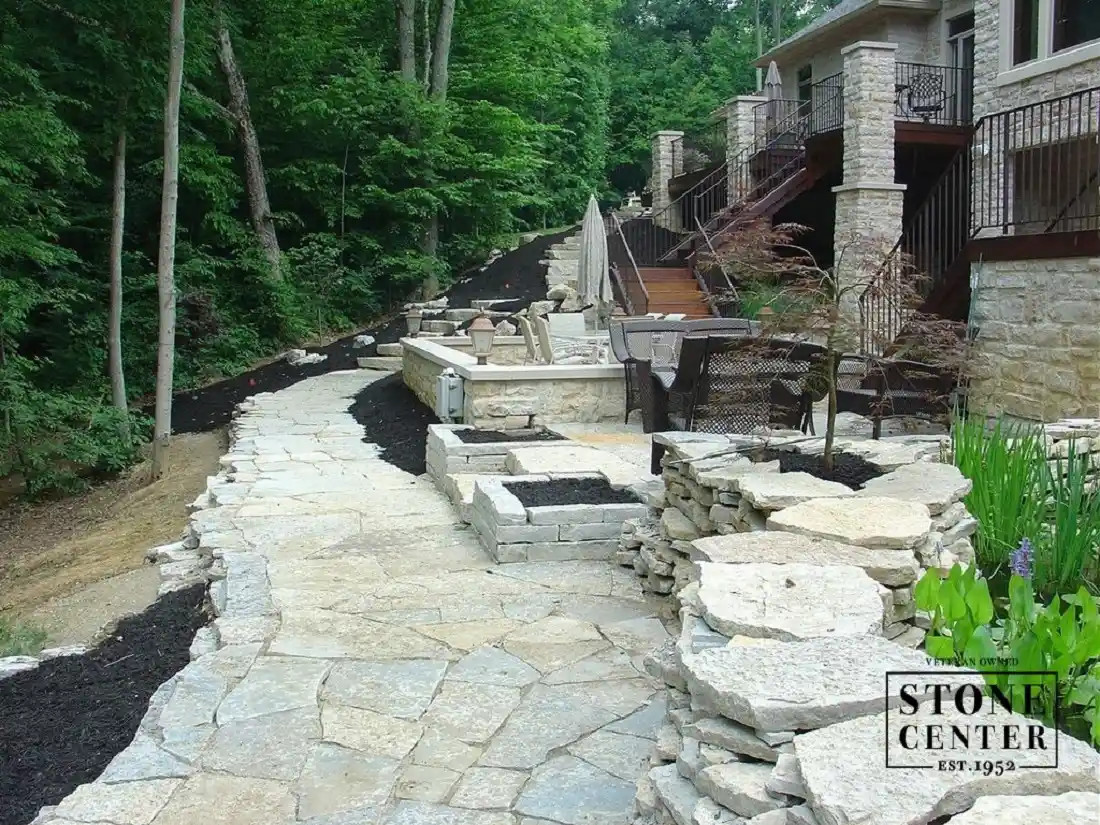
6. Cleaning Rock Walls and Stone Pavers: A Gentle Approach
How do you protect fixed structures while cleaning them thoroughly? Unlike loose stones, rock walls and stone pavers must be cleaned carefully to protect their fixed structures and masonry.
6.1 Removing Loose Debris
For pavers, use a stiff-bristled broom or a leaf blower to clear the area thoroughly. For decorative rock walls, gently use a soft-bristled brush to avoid damaging delicate surfaces or mortar joints.
6.2 Rinsing the Surfaces
Start from the top and work downward on walls, or from one side to the other on pavers. For rock walls, use low pressure to avoid damaging mortar. Pavers can handle more force, but avoid pooling water in joints.
6.3 Applying a Cleaning Solution
Only use a white vinegar solution (equal parts vinegar and water) for stubborn stains on stone pavers or natural stone walls. Avoid vinegar on delicate or manufactured rock walls as it can erode finishes.
6.4 Cleaning Crevices
Use a toothbrush or small brush for tight spaces. Be careful to protect masonry while removing algae, moss, and stubborn dirt buildup.
6.5 Final Rinse and Drying
Use low-pressure water on walls and medium-pressure on pavers if needed. Allow everything to dry completely to prevent mold or mildew and prepare the surface if you plan to apply a sealer afterward for extra protection.
 Cleaning rock walls and stone pavers with a soft brush and gentle cleaning solution
7. Maintaining Rock Landscaping: Keeping Debris Away
What steps can you take to keep your rock features looking their best? Regular maintenance is key to keeping weeds, leaves, and debris away from the garden gravel. Not only can these unwanted items make your garden look unkempt, but they can also attract pests and compromise the health of your plants.
7.1 Regular Maintenance
Regular maintenance is the key to keeping debris at bay. Make it a habit to regularly inspect and clean your garden gravel. It’s also a great way to get leaves out of rocks. Spending time on maintenance can significantly reduce the amount of debris that accumulates in your rock landscaping.
7.2 Investing in Garden Tools
A good pair of gloves, a rake, and a leaf blower can make the task of cleaning debris from garden gravel much easier and faster. These tools are essential for keeping your rock landscaping looking its best.
7.3 Using Weed Barriers
Consider using a weed barrier or landscape fabric underneath the garden gravel to prevent weed growth. Landscape fabric can make a big difference in reducing weed growth and making maintenance easier.
7.4 Applying a Safe Weed Killer
If weeds appear, use a safe weed killer to prevent them from taking over your garden gravel. Choose a weed killer that is safe for your plants and the environment.
7.5 Installing Gutter Guards
Install gutter guards to prevent leaves and other debris from falling into the garden gravel from nearby trees or shrubs. Gutter guards can significantly reduce the amount of debris that ends up in your rock landscaping.
7.6 Using Organic Mulch
Consider using organic mulch around your plants to prevent weed growth and keep the garden gravel clean. Organic mulch can also help to retain moisture in the soil and improve the health of your plants.
7.7 Plant-Safe Cleaning Solutions
When learning how to clean landscape rocks without killing plants, opt for environmentally friendly options. Mix white vinegar and water (1:1) for a natural rock cleaner. Environmentally friendly cleaning solutions are safe for your plants and the environment.
8. The Advantages of Maintaining Decorative Landscape Rocks
Why is investing time in cleaning and maintaining your rocks beneficial? Stone landscape maintenance isn’t just about aesthetics — it’s an investment in your property’s value and functionality. Cleaning and caring for your decorative stones offers numerous benefits that make the effort worthwhile.
8.1 Attractive Outdoor Space
Keeping your decorative stone landscaping clean, free from debris, and well-maintained adds aesthetic value that beautifies your outdoor area, making it more appealing and attractive. A well-maintained landscape creates a welcoming and enjoyable outdoor space.
8.2 Prevents Invasive Weeds
Cleaning landscape rock effectively reduces weed growth in your garden or yard. This will save you time and effort since you won’t have to pull weeds as frequently. Preventing weed growth keeps your landscape looking tidy and reduces maintenance efforts.
8.3 Improves Drainage
Decorative landscape rocks play an essential role in your outdoor drainage, but debris and dirt can clog the rocks and impede drainage. Cleaning landscape rocks will ensure proper drainage and prevent water from building up in unwanted areas. Proper drainage is essential for the health of your plants and the longevity of your landscape.
8.4 Increases Longevity
Cleaning your decorative landscape rock regularly can help extend its lifespan, which will save you money on costly repairs or replacements. Extending the lifespan of your rocks ensures that your landscape remains beautiful for years to come.
8.5 Enhances Property Value
Well-maintained landscape features can increase your home’s curb appeal and market value by up to 5-12 percent. Enhancing property value makes your home more attractive to potential buyers and increases its overall worth.
9. Case Studies: Successful Rock Landscaping Maintenance
What real-world examples highlight the importance of rock maintenance? Here are a few case studies that demonstrate the benefits of maintaining decorative landscape rocks.
9.1 Case Study 1: Residential Garden in Phoenix, Arizona
A homeowner in Phoenix, Arizona, installed a rock garden featuring various types of desert-friendly plants and decorative rocks. Initially, the garden looked stunning, but over time, dust storms and debris accumulation caused the rocks to lose their luster. The homeowner started a regular cleaning routine, using a combination of rinsing, scrubbing, and applying a stone sealer. As a result, the rocks regained their original beauty, and the garden became a vibrant and inviting outdoor space.
9.2 Case Study 2: Commercial Property in Scottsdale, Arizona
A commercial property in Scottsdale, Arizona, used decorative rocks as part of its landscaping design. Due to neglect, the rocks became covered in algae and dirt, detracting from the property’s overall appearance. The property management team implemented a comprehensive maintenance plan, including regular cleaning and weed control. The improved appearance of the rock landscaping enhanced the property’s curb appeal and created a more welcoming environment for visitors.
9.3 Case Study 3: Public Park in Tempe, Arizona
A public park in Tempe, Arizona, featured rock formations and stone pathways as part of its natural landscape. Over time, the rocks became stained and covered in graffiti. The park’s maintenance crew organized a community cleanup event, where volunteers helped to clean the rocks and remove the graffiti. The revitalized rock formations enhanced the park’s natural beauty and provided a more enjoyable experience for visitors.
10. Expert Tips for Long-Term Rock Landscaping Care
What additional strategies can you implement for lasting rock landscape beauty? For long-term care of your rock landscaping, consider these expert tips to maintain its beauty and functionality.
10.1 Regular Inspection
Regularly inspect your rock landscaping for signs of damage, discoloration, or debris accumulation. Early detection of problems allows you to address them before they escalate and cause more significant damage.
10.2 Proper Drainage
Ensure that your rock landscaping has proper drainage to prevent water buildup and potential damage to surrounding plants and structures. Clear any clogs or obstructions that may impede drainage.
10.3 Weed Control
Implement a weed control strategy to prevent weeds from taking over your rock landscaping. Use a combination of weed barriers, safe weed killers, and regular maintenance to keep weeds at bay.
10.4 Stone Sealer
Apply a stone sealer to protect your rocks from stains, discoloration, and weathering. Choose a sealer that is appropriate for the type of stone you have and follow the manufacturer’s instructions for application.
10.5 Professional Maintenance
Consider hiring a professional landscaping company to provide regular maintenance services for your rock landscaping. A professional can provide expert care and ensure that your rock features remain in top condition.
FAQ: Cleaning Debris from Landscaping Rock
1. What is the best way to clean algae off landscaping rocks?
Use a mixture of water and white vinegar (1:1 ratio) or a diluted bleach solution (1 part bleach to 10 parts water). Apply to the affected areas, scrub with a stiff brush, and rinse thoroughly.
2. How often should I clean my landscaping rocks?
Clean your landscaping rocks at least once a year, or more frequently if they are prone to heavy debris accumulation or algae growth.
3. Can I use a pressure washer on all types of landscaping rocks?
Use caution when using a pressure washer, as it can damage some types of rocks, especially softer stones or those with delicate finishes.
4. What is the best way to prevent weed growth around landscaping rocks?
Use a weed barrier fabric underneath the rocks, apply a safe weed killer, and regularly remove any weeds that appear.
5. How do I clean hard-to-reach areas of rock walls or stone pavers?
Use a small brush or old toothbrush dipped in a cleaning solution to scrub the crevices and tight spaces.
6. Is it safe to use bleach on landscaping rocks?
Yes, but use a diluted bleach solution (1 part bleach to 10 parts water) and rinse thoroughly to avoid damaging plants or surfaces.
7. Can I use dish soap to clean landscaping rocks?
Yes, a mild dish soap and water solution is a versatile and gentle cleaner for general-purpose use.
8. How do I remove stubborn stains from white landscaping rocks?
Use a mixture of hydrogen peroxide and water or a bleach solution (with caution) to lighten and brighten stained areas.
9. What is the best way to dry landscaping rocks after cleaning?
Allow the rocks to air dry, or use a leaf blower or dry towel to remove any remaining moisture.
10. Should I seal my landscaping rocks after cleaning?
Applying a stone sealer can protect your rocks from stains, discoloration, and weathering, and make future cleaning easier.
Maintaining your rock landscaping ensures it remains a beautiful and functional part of your outdoor space.
Are you inspired to transform your outdoor space with stunning rock landscaping? Visit rockscapes.net for a wealth of design ideas, detailed information on various rock types, and expert advice on installation and maintenance. Contact us today to explore the possibilities and bring your dream landscape to life. Address: 1151 S Forest Ave, Tempe, AZ 85281, United States. Phone: +1 (480) 965-9011. Website: rockscapes.net.