Cleaning rocks for plants is essential for maintaining their health and beauty. At rockscapes.net, we understand the importance of pristine rock features in your landscape design. This guide will provide you with expert tips and techniques to ensure your rocks and plants thrive together, creating a stunning and healthy outdoor space. Learn How To Clean Rocks For Plants and more about landscape rocks and stone cleaning solutions.
1. Why Clean Rocks For Plants?
Cleaning rocks for plants is important because it enhances the aesthetic appeal of your landscape and promotes the healthy growth of your plants. Dirty rocks can harbor harmful bacteria, algae, and mineral buildup, which can negatively impact plant health. Regularly cleaned rocks allow for better drainage, prevent weed growth, and ensure that your plants receive the necessary nutrients and sunlight.
1.1 Aesthetic Enhancement
Rocks add natural beauty to any landscape. However, when rocks are covered with dirt, algae, or mineral deposits, they can look dull and unattractive.
Here’s How Clean Rocks Improve Aesthetics:
- Restores Natural Color: Cleaning reveals the natural color and texture of the rocks, enhancing their visual appeal.
- Creates a Polished Look: Clean rocks give a polished and well-maintained appearance to your garden or outdoor space.
- Enhances Overall Design: Clean rocks complement the surrounding plants and design elements, creating a cohesive and attractive landscape.
1.2 Plant Health Benefits
Dirty rocks can be detrimental to the health of your plants. Accumulated dirt and algae can block sunlight, impede airflow, and trap moisture, creating an environment conducive to disease.
The Health Benefits of Clean Rocks Include:
- Improved Sunlight Exposure: Removing dirt and algae ensures plants receive adequate sunlight for photosynthesis.
- Better Air Circulation: Clean rocks allow for better airflow around the plants, reducing the risk of fungal diseases.
- Reduced Pest and Disease: Removing debris reduces hiding places for pests and eliminates breeding grounds for harmful bacteria and fungi.
1.3 Preventing Weed Growth
Weeds can quickly take over a garden, competing with plants for nutrients and water. Clean rocks can help suppress weed growth by creating a barrier that prevents weed seeds from germinating.
How Clean Rocks Prevent Weeds:
- Blocks Sunlight: A layer of clean rocks blocks sunlight from reaching weed seeds in the soil.
- Impedes Root Growth: Rocks create a physical barrier that prevents weeds from establishing roots.
- Easier Weed Removal: Weeds that do manage to grow are easier to spot and remove from clean rocks.
1.4 Improved Drainage
Proper drainage is essential for healthy plant growth. Rocks can improve drainage by allowing water to flow freely through the soil, preventing waterlogging and root rot.
The Impact of Clean Rocks on Drainage:
- Prevents Waterlogging: Clean rocks ensure water drains properly, preventing the soil from becoming waterlogged.
- Reduces Root Rot: Improved drainage reduces the risk of root rot, a common problem in waterlogged soils.
- Enhances Nutrient Absorption: Proper drainage allows plants to absorb nutrients more efficiently.
1.5 Minimizing Mineral Buildup
Rocks can accumulate mineral deposits over time, especially in areas with hard water. These deposits can alter the soil pH and affect plant growth.
How Cleaning Minimizes Mineral Buildup:
- Removes Deposits: Regular cleaning removes mineral deposits, preventing them from affecting soil pH.
- Maintains Soil Balance: Cleaning helps maintain the proper soil balance for healthy plant growth.
- Prevents Toxicity: Removing mineral buildup prevents the soil from becoming toxic to plants.
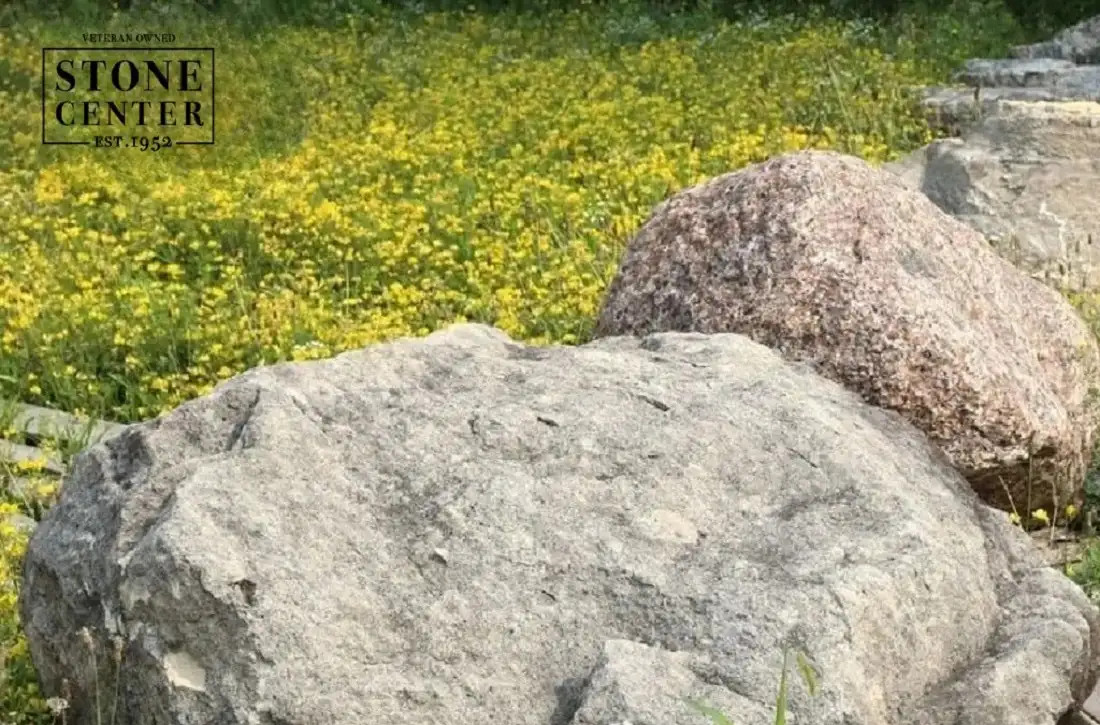 Clean Rocks for Plants Enhance Aesthetics
Clean rocks for plants enhance aesthetics.
2. Identifying Rock Types and Their Specific Cleaning Needs
Different types of rocks require different cleaning methods. Identifying the type of rock you’re working with is crucial for choosing the most effective and safe cleaning approach.
2.1 Common Types of Rocks Used in Landscaping
- River Rocks: Smooth, rounded stones commonly used in water features and garden borders.
- White Landscape Stones: Typically marble or quartz, used for a bright, polished look.
- Large Boulders: Large, natural stones used as focal points in landscapes.
- Rock Walls and Stone Pavers: Used for structural elements like walls, paths, and patios.
- Gravel and Pebbles: Small, loose stones used for ground cover and drainage.
2.2 River Rocks: Cleaning Methods
River rocks are generally easy to clean but can accumulate algae and mineral deposits over time.
Effective Cleaning Methods for River Rocks:
- Pressure Washing: Use a pressure washer to blast away dirt and algae.
- Vinegar Solution: Soak the rocks in a solution of equal parts water and white vinegar.
- Scrubbing: Use a stiff-bristle brush to scrub the rocks with mild soap and water.
2.3 White Landscape Stones: Cleaning Methods
White landscape stones can stain easily and require more gentle cleaning methods to maintain their bright appearance.
Gentle Cleaning Methods for White Landscape Stones:
- Mild Soap and Water: Use a soft-bristle brush and mild soap to gently clean the stones.
- Hydrogen Peroxide: Apply a solution of hydrogen peroxide and water to remove stains.
- Bleach Solution: Use a diluted bleach solution (1 part bleach to 10 parts water) for stubborn stains. Use cautiously to avoid damaging plants.
2.4 Large Boulders: Cleaning Methods
Large boulders can be challenging to clean due to their size and weight.
Cleaning Methods for Large Boulders Include:
- Pressure Washing: Use a pressure washer to remove dirt and algae.
- Scrubbing: Use a stiff-bristle brush and a long-handled broom to scrub the surface.
- Spot Cleaning: Use a small brush and cleaning solution to spot-clean specific areas.
2.5 Rock Walls and Stone Pavers: Cleaning Methods
Rock walls and stone pavers require careful cleaning to avoid damaging the mortar and structural integrity.
Careful Cleaning Methods for Rock Walls and Stone Pavers:
- Gentle Washing: Use a garden hose and a soft-bristle brush to gently wash the surface.
- Vinegar Solution: Apply a solution of equal parts water and white vinegar to remove stains.
- Joint Cleaning: Use a small brush or crevice tool to clean the joints between stones.
2.6 Gravel and Pebbles: Cleaning Methods
Gravel and pebbles can be cleaned in bulk using a variety of methods.
Cleaning Methods for Gravel and Pebbles:
- Rinsing: Use a garden hose to rinse the stones in a mesh bag or container.
- Soaking: Soak the stones in a solution of water and mild soap, then rinse thoroughly.
- Tumbling: Use a rock tumbler to clean and polish the stones.
3. Essential Tools and Materials
Having the right tools and materials makes the cleaning process more efficient and effective.
3.1 List of Essential Tools
- Garden Hose with Adjustable Nozzle: For rinsing and pressure washing.
- Stiff-Bristle Brush: For scrubbing tough stains and algae.
- Soft-Bristle Brush: For delicate surfaces and gentle cleaning.
- Bucket: For mixing cleaning solutions.
- Protective Gloves: To protect your hands from chemicals and dirt.
- Rake or Leaf Blower: For removing debris before cleaning.
- Small Brush or Old Toothbrush: For cleaning crevices and hard-to-reach areas.
- Pressure Washer: For effective and efficient cleaning of large areas and tough stains.
3.2 Safe Cleaning Solutions
- Mild Dish Soap and Water: General-purpose cleaning.
- White Vinegar and Water (1:1 Ratio): Eco-friendly cleaning.
- Baking Soda Paste: For stubborn stains.
- Hydrogen Peroxide: For whitening white stones.
- Bleach Solution (1 Part Bleach to 10 Parts Water): Use cautiously for tough stains.
3.3 Safety Gear
- Gloves: Protect hands from chemicals and abrasions.
- Eye Protection: Safety glasses or goggles to prevent splashes.
- Mask: To avoid inhaling dust or fumes from cleaning solutions.
- Closed-Toe Shoes: For foot protection.
4. Step-by-Step Guides for Cleaning Different Rock Types
Follow these detailed guides to effectively clean different types of rocks for your plants.
4.1 How to Clean Large Landscape Rocks
Cleaning large landscape rocks can be a daunting task, but with the right approach, you can maintain their natural beauty.
Steps to Clean Large Landscape Rocks:
- Remove Debris: Use a brush, rake, or leaf blower to remove loose dirt and debris from the rock surface.
- Rinse the Rocks: Gently rinse the rocks with a garden hose, starting at the top and working your way down.
- Scrub the Rocks: For tough stains or algae, use a stiff-bristle brush or pressure washer.
- Clean Crevices: Use a small brush or toothbrush to clean hard-to-reach areas with a warm water and vinegar solution.
- Rinse Again: Rinse the rocks thoroughly to remove any remaining dirt or cleaning solution.
- Allow to Dry: Let the rocks air dry or use a leaf blower to remove excess moisture.
4.2 How to Clean White Landscape Rocks
White landscape rocks require gentle cleaning to maintain their polished look and prevent discoloration.
Steps to Clean White Landscape Rocks:
- Prepare the Area: Remove any nearby furniture or decorations. Use a rake or leaf blower to clear away loose debris.
- Rinse the Stones: Gently rinse the stones with a garden hose, starting from the top.
- Apply Cleaning Solution: Mix a gentle detergent with water and scrub the stones with a stiff-bristle brush.
- Use Bleach Solution: For stubborn stains, carefully apply a diluted bleach solution (1 part bleach to 10 parts water). Let it sit for a few minutes before rinsing.
- Rinse and Dry: Rinse the stones thoroughly and allow them to air dry completely.
Pro Tip: Mix one part 3 percent hydrogen peroxide with two parts water for a bleach-free alternative.
4.3 How to Clean River Rocks
River rocks can accumulate algae and mineral deposits, requiring regular cleaning to maintain their natural appearance.
Steps to Clean River Rocks:
- Prepare the Area: Remove any items that might obstruct your cleaning process. Use a rake or leaf blower to remove surface dirt.
- Rinse the Rocks: Use a garden hose or pressure washer to rinse off the rocks.
- Scrub the Rocks: Mix water and a gentle detergent in a bucket. Scrub the rocks with a stiff-bristle brush, focusing on stained areas.
- Clean Crevices: Use a small brush or toothbrush to clean crevices and indentations.
- Rinse Again: Rinse the rocks thoroughly to remove any remaining detergent.
- Allow to Dry: Let the rocks air dry or use a leaf blower to remove excess moisture.
- Consider Sealing: Apply a quality stone sealer to prevent algae growth and make future cleaning easier.
4.4 How to Clean Rock Walls and Stone Pavers
Cleaning rock walls and stone pavers requires a careful approach to protect their structural integrity.
Steps to Clean Rock Walls and Stone Pavers:
- Remove Debris: Use a stiff-bristled broom or leaf blower for pavers. Use a soft-bristled brush for rock walls.
- Rinse: Start from the top on walls and from one side on pavers. Use low pressure on walls to avoid damaging mortar.
- Apply Cleaning Solution: Use a white vinegar solution (equal parts vinegar and water) for stubborn stains, but avoid vinegar on delicate or manufactured rock walls.
- Clean Crevices: Use a toothbrush or small brush for tight spaces, being careful to protect masonry.
- Rinse and Dry: Use low-pressure water on walls and medium-pressure on pavers. Allow everything to dry completely.
5. Eco-Friendly Cleaning Solutions
Using eco-friendly cleaning solutions protects your plants and the environment.
5.1 Safe Alternatives to Chemical Cleaners
- White Vinegar and Water: A natural disinfectant and cleaner.
- Baking Soda: A mild abrasive for removing stains.
- Hydrogen Peroxide: A non-toxic alternative to bleach.
- Lemon Juice: For removing mineral deposits.
- Essential Oils: Add a few drops of tea tree or eucalyptus oil to your cleaning solution for added antibacterial properties.
5.2 Preparing Natural Cleaning Solutions
- Vinegar Solution: Mix equal parts white vinegar and water in a spray bottle.
- Baking Soda Paste: Mix baking soda with water to form a thick paste.
- Lemon Juice Solution: Mix lemon juice with water in a spray bottle.
5.3 Application Tips
- Test First: Always test the cleaning solution on a small, inconspicuous area first.
- Apply Evenly: Apply the solution evenly to the surface of the rocks.
- Allow to Sit: Let the solution sit for a few minutes before scrubbing.
- Rinse Thoroughly: Rinse the rocks thoroughly with water after cleaning.
6. Preventing Algae and Moss Growth
Algae and moss can quickly grow on rocks, especially in damp or shady areas. Preventing their growth is essential for maintaining the appearance of your landscape.
6.1 Factors Contributing to Algae and Moss Growth
- Moisture: Damp conditions promote algae and moss growth.
- Shade: Shady areas provide an ideal environment for these organisms.
- Nutrients: Organic matter and debris provide nutrients for algae and moss.
- Poor Air Circulation: Lack of airflow can trap moisture and create favorable conditions for growth.
6.2 Preventative Measures
- Improve Drainage: Ensure proper drainage to prevent water from pooling around the rocks.
- Increase Sunlight: Trim trees and shrubs to allow more sunlight to reach the rocks.
- Regular Cleaning: Clean the rocks regularly to remove organic matter and prevent buildup.
- Apply Sealant: Apply a sealant to the rocks to create a barrier against moisture and algae.
- Use Copper Sulfate: Apply a diluted copper sulfate solution to kill algae and moss. Use cautiously, as copper sulfate can be toxic to plants and animals in high concentrations.
6.3 Long-Term Solutions
- Choose the Right Rocks: Select rock types that are less prone to algae and moss growth.
- Proper Installation: Ensure proper installation with adequate drainage.
- Regular Maintenance: Maintain the surrounding landscape to reduce shade and improve airflow.
7. Addressing Stubborn Stains
Stubborn stains can be challenging to remove, but with the right techniques and solutions, you can restore the rocks to their original beauty.
7.1 Identifying Types of Stains
- Mineral Deposits: White or chalky deposits caused by hard water.
- Algae Stains: Green or black stains caused by algae growth.
- Rust Stains: Orange or brown stains caused by iron oxidation.
- Organic Stains: Dark stains caused by decaying leaves and debris.
7.2 Effective Stain Removal Techniques
- Pressure Washing: Use a pressure washer to blast away surface stains.
- Baking Soda Paste: Apply a thick paste of baking soda and water to the stain, let it sit for several hours, and then scrub and rinse.
- Vinegar Soak: Soak the rocks in a solution of equal parts white vinegar and water.
- Rust Remover: Use a commercial rust remover for rust stains. Follow the manufacturer’s instructions carefully.
- Oxygen Bleach: Apply a solution of oxygen bleach (sodium percarbonate) to the stain and let it sit for several hours before scrubbing and rinsing.
7.3 Precautions
- Test First: Always test the cleaning solution on a small, inconspicuous area first.
- Protect Plants: Cover nearby plants to protect them from cleaning solutions.
- Wear Protective Gear: Wear gloves, eye protection, and a mask when working with cleaning solutions.
- Rinse Thoroughly: Rinse the rocks thoroughly with water after cleaning.
8. Caring for Plants Around Cleaned Rocks
Cleaning the rocks is only part of the process. Caring for the plants around the cleaned rocks is essential for maintaining a healthy and beautiful landscape.
8.1 Watering and Fertilizing
- Water Properly: Water plants deeply and regularly, but avoid overwatering.
- Fertilize Regularly: Use a balanced fertilizer to provide plants with essential nutrients.
- Avoid Over-Fertilizing: Over-fertilizing can lead to nutrient buildup in the soil, which can harm plants.
8.2 Mulching and Weed Control
- Apply Mulch: Use organic mulch to suppress weed growth and retain moisture in the soil.
- Remove Weeds Regularly: Remove weeds as soon as they appear to prevent them from competing with plants for nutrients and water.
- Use Weed Barriers: Consider using weed barriers or landscape fabric to prevent weed growth.
8.3 Pruning and Maintenance
- Prune Regularly: Prune plants regularly to remove dead or damaged branches and promote healthy growth.
- Maintain Proper Spacing: Ensure plants have adequate space to grow and receive sunlight.
- Monitor for Pests and Diseases: Regularly monitor plants for signs of pests and diseases and take action promptly.
9. Seasonal Cleaning Tips
Cleaning rocks for plants should be adapted to the changing seasons.
9.1 Spring Cleaning
- Remove Winter Debris: Remove leaves, twigs, and other debris that have accumulated over the winter.
- Clean Algae and Moss: Clean algae and moss that have grown during the damp winter months.
- Prepare for Growing Season: Prepare the garden for the growing season by fertilizing plants and adding mulch.
9.2 Summer Maintenance
- Regular Watering: Water plants regularly during the hot summer months.
- Weed Control: Remove weeds regularly to prevent them from competing with plants for resources.
- Monitor for Pests and Diseases: Monitor plants for signs of pests and diseases and take action promptly.
9.3 Fall Preparation
- Remove Fallen Leaves: Remove fallen leaves to prevent them from decaying and creating a breeding ground for pests and diseases.
- Clean Debris: Clean debris from around the rocks to prevent algae and moss growth.
- Prepare for Winter: Prepare the garden for winter by mulching plants and protecting them from frost.
9.4 Winter Protection
- Protect Plants from Frost: Protect plants from frost by covering them with blankets or burlap.
- Avoid Overwatering: Avoid overwatering plants during the winter months, as this can lead to root rot.
- Monitor for Snow and Ice: Monitor the garden for snow and ice buildup and take action to prevent damage to plants and rocks.
10. Maintaining Rock Landscapes for Longevity
Maintaining rock landscapes is an ongoing process that requires regular attention and care.
10.1 Regular Inspection
- Inspect Regularly: Inspect the rocks and plants regularly for signs of damage or disease.
- Identify Problems Early: Identify problems early and take action promptly to prevent them from becoming more serious.
10.2 Ongoing Maintenance
- Clean Regularly: Clean the rocks regularly to remove dirt, algae, and mineral deposits.
- Maintain Plants: Maintain the plants by watering, fertilizing, and pruning them as needed.
- Control Weeds: Control weeds to prevent them from competing with plants for resources.
- Improve Drainage: Improve drainage to prevent water from pooling around the rocks.
- Apply Sealant: Apply sealant to the rocks to protect them from the elements and prevent algae and moss growth.
10.3 Long-Term Care
- Replace Rocks as Needed: Replace rocks that are damaged or deteriorated.
- Replant Plants as Needed: Replant plants that have died or outgrown their space.
- Adjust Landscape as Needed: Adjust the landscape as needed to accommodate changing conditions and preferences.
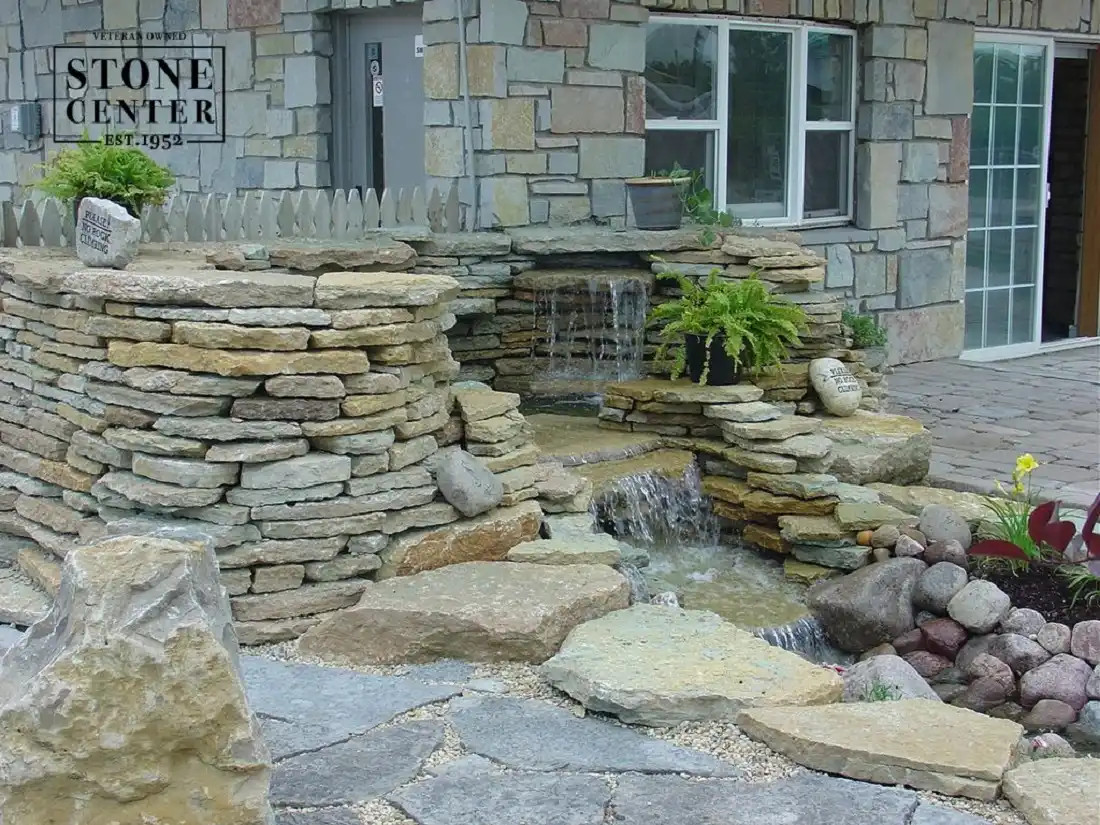 Caring for Plants Around Cleaned Rocks for Longevity
Caring for plants around cleaned rocks for longevity.
FAQ: How to Clean Rocks for Plants
Here are some frequently asked questions about how to clean rocks for plants:
Q1: Why is it important to clean rocks for plants?
Cleaning rocks for plants enhances the aesthetic appeal of your landscape, promotes healthy plant growth, prevents weed growth, improves drainage, and minimizes mineral buildup.
Q2: What are the best tools for cleaning rocks?
Essential tools include a garden hose with an adjustable nozzle, stiff-bristle brush, soft-bristle brush, bucket, protective gloves, rake or leaf blower, and a small brush or old toothbrush.
Q3: What are some safe cleaning solutions for rocks?
Safe cleaning solutions include mild dish soap and water, white vinegar and water (1:1 ratio), baking soda paste, hydrogen peroxide, and a diluted bleach solution (1 part bleach to 10 parts water).
Q4: How do I clean large landscape rocks?
Remove debris, rinse the rocks, scrub the rocks with a stiff-bristle brush or pressure washer, clean crevices with a small brush, rinse again, and allow to dry.
Q5: How do I clean white landscape rocks?
Prepare the area, rinse the stones, apply a gentle detergent solution, use a diluted bleach solution for stubborn stains, rinse thoroughly, and allow to air dry.
Q6: How do I clean river rocks?
Prepare the area, rinse the rocks, scrub the rocks with a gentle detergent solution, clean crevices with a small brush, rinse again, allow to dry, and consider sealing the rocks.
Q7: How can I prevent algae and moss growth on rocks?
Improve drainage, increase sunlight exposure, clean the rocks regularly, apply sealant, and use copper sulfate cautiously.
Q8: What are some eco-friendly cleaning solutions for rocks?
Eco-friendly options include white vinegar and water, baking soda, hydrogen peroxide, lemon juice, and essential oils.
Q9: How often should I clean rocks for plants?
The frequency depends on the environment and rock type, but generally, cleaning should be done at least once a season or as needed.
Q10: How do I care for plants around cleaned rocks?
Water plants properly, fertilize regularly, apply mulch, control weeds, prune plants, and monitor for pests and diseases.
By following this comprehensive guide from rockscapes.net, you can keep your rocks and plants looking their best, creating a beautiful and healthy outdoor space. For more inspiration, detailed information on rock types, and expert advice, visit rockscapes.net today and transform your landscape into a stunning rock garden oasis. Contact us at Address: 1151 S Forest Ave, Tempe, AZ 85281, United States. Phone: +1 (480) 965-9011. Website: rockscapes.net.