Animal Crossing: New Horizons islands each have six rocks, which can be strategically placed to create stunning rock gardens. Rockscapes.net is here to guide you through creating your dream island landscape. Let’s explore the process of optimizing your island’s resources and aesthetics by managing your island rocks with expert tips and inspiring design ideas for rock arrangements.
1. Understanding Rock Mechanics in Animal Crossing
Rocks in Animal Crossing: New Horizons are more than just decorative features; they are essential resources that provide valuable materials. Let’s understand how rocks function and how to manage them effectively.
1.1. The Six-Rock Rule
Every island in Animal Crossing: New Horizons is designed to generate six rocks. These rocks initially spawn randomly across your island. Each day, these rocks can be struck with a shovel or axe to yield resources such as:
- Iron Nuggets
- Stones
- Clay
- Bells (in limited quantities)
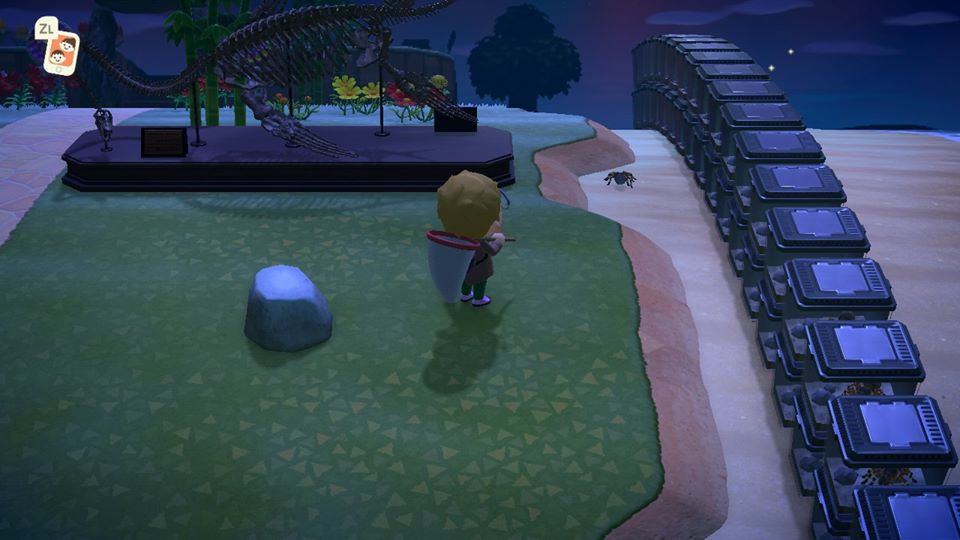 A single rock in Animal Crossing: New Horizons, highlighting its texture and the surrounding environment
1.2. Breaking and Respawning Rocks
You can temporarily remove a rock by consuming fruit and then striking the rock with a shovel. This action causes the rock to break. Broken rocks respawn the following day in a new, random location on the island. This mechanic is crucial for relocating all six rocks to a desired area, such as a rock garden.
1.3. Controlling Rock Spawns
Strategic placement of obstacles is key to controlling where rocks spawn. Rocks cannot appear in spaces that are blocked by:
- Furniture
- Trees
- Cliff sides
- Fences
- Custom designs placed on the ground
By strategically placing these items, you can limit the available spawning locations, making it possible to guide the rocks to your desired rock garden location.
2. Planning Your Rock Garden
Creating a rock garden in Animal Crossing: New Horizons requires careful planning and execution. Here’s how to get started.
2.1. Choosing the Perfect Location
Selecting the right spot for your rock garden is the first step. Consider the following:
- Size: Ensure the area is large enough to accommodate all six rocks with adequate spacing.
- Accessibility: The location should be easily accessible for daily resource collection.
- Aesthetics: Choose a spot that complements your island’s overall design theme.
2.2. Designing the Layout
Once you’ve chosen the location, sketch out a design for your rock garden. Consider these design elements:
- Rock Arrangement: Decide how you want to arrange the rocks. Will they be in a straight line, a circle, or a more organic layout?
- Pathways: Plan pathways that allow you to easily access each rock for hitting.
- Decorative Elements: Incorporate decorative items like sand, stones, plants, and lighting to enhance the garden’s appeal.
2.3. Gathering Resources
Collect the necessary resources to prepare the area. This includes:
- Custom Design Patterns: Create or download custom design patterns to cover the island and block unwanted spawn locations.
- Terraforming Tools: Use the Island Designer App to modify the landscape, such as creating cliffs or waterways around your rock garden.
- Decorative Items: Gather items like sand, stone paths, fences, and plants to decorate your rock garden.
3. Step-by-Step Guide to Building Your Rock Garden
Follow these steps to create your rock garden in Animal Crossing: New Horizons.
3.1. Blocking Unwanted Spawn Locations
The most tedious but crucial step is blocking all potential rock spawn locations except for the desired spots in your rock garden.
- Cover Your Island: Use custom design patterns to cover every square inch of your island. Place patterns on the ground, including beaches, cliffs, and forested areas.
- Check for Gaps: Ensure there are no gaps in your pattern coverage. Rocks can spawn in any uncovered space.
- Utilize Furniture and Decorations: Place furniture, trees, and other decorations in areas where patterns are not feasible.
 The player covering the island with a custom design pattern to block rock spawns
3.2. Breaking the Rocks
After blocking the spawn locations, break all existing rocks on your island.
- Eat Fruit: Consume a piece of fruit to gain the strength needed to break the rocks.
- Hit the Rocks: Use a shovel to hit each rock until it breaks.
- Clear the Area: Ensure the area around each broken rock is clear of any obstructions.
3.3. Waiting for Rocks to Respawn
Rocks respawn one per day in the available locations you’ve designated.
- Check Daily: Each day, check the designated rock garden area for the new rock.
- Adjust as Necessary: If a rock spawns in an undesired location, break it and adjust your blockage strategy.
- Patience is Key: This process can take several days, so be patient and persistent.
3.4. Terraforming and Decorating
Once all six rocks are in place, it’s time to terraform and decorate your rock garden.
- Terraform the Area: Use the Island Designer App to add sand, cliffs, or water features around the rocks.
- Add Decorative Elements: Place decorative items like stone paths, fences, plants, and lighting to enhance the garden’s aesthetic appeal.
- Customize: Add your personal touch with unique items that reflect your island’s theme.
4. Advanced Tips and Tricks
Here are some advanced tips to help you optimize your rock garden project.
4.1. Using Mannequins for Blocking
Mannequins are a versatile tool for blocking rock spawns.
- Create a Custom Design: Design a simple pattern for your mannequin.
- Place Mannequins: Place mannequins in potential spawn locations.
- Move and Adjust: Easily move mannequins to adjust your blockage strategy as needed.
- Remove Mannequins: Once all rocks are in place, remove the mannequins by editing the design.
4.2. Avoiding Common Mistakes
Watch out for these common mistakes that can prolong the rock garden creation process.
- Gaps in Coverage: Ensure every potential spawn location is blocked.
- Forgetting Flowers: Remember that rocks can spawn next to flowers, so cover those areas too.
- Obstructions: Ensure there are no hidden obstructions that might prevent a rock from spawning in the desired location.
4.3. Optimizing Resource Collection
Maximize your daily resource collection from the rocks.
- Dig Holes: Dig two holes behind you to prevent being knocked back when hitting the rocks.
- Fast Tapping: Rapidly tap the “A” button to get the maximum number of resources from each rock.
- Daily Routine: Make hitting the rocks part of your daily routine to gather essential materials.
5. The Aesthetic Value of Rock Gardens
Beyond their functional purpose, rock gardens offer significant aesthetic value to your Animal Crossing island. Let’s explore how to maximize their visual appeal.
5.1. Integrating Natural Elements
Enhance your rock garden by incorporating natural elements that complement the rocks. Consider these additions:
- Mossy Rocks: Place mossy rocks around the garden to create a more natural and aged look.
- Water Features: Add small ponds or streams to create a serene and calming atmosphere.
- Bamboo Accents: Incorporate bamboo plants and fences for an East Asian-inspired design.
5.2. Thematic Designs
Create a rock garden that reflects a specific theme or style. Here are a few ideas:
- Zen Garden: Design a minimalist garden with carefully raked sand, mossy rocks, and a few well-placed plants to evoke a sense of tranquility.
- Fairy Garden: Add whimsical elements like fairy lights, mushroom furniture, and colorful flowers to create an enchanting fairy garden.
- Desert Oasis: Use sand, cacti, and desert-themed decorations to create a unique desert oasis rock garden.
5.3. Seasonal Decorations
Update your rock garden with seasonal decorations to keep it fresh and engaging throughout the year.
- Spring: Add cherry blossom petals, pastel-colored flowers, and butterfly decorations.
- Summer: Incorporate seashells, palm trees, and vibrant summer flowers.
- Autumn: Use maple leaves, pumpkins, and autumn-colored plants.
- Winter: Add snow, ice sculptures, and festive lights.
6. Inspiration from Real-World Rock Gardens
Drawing inspiration from real-world rock gardens can provide unique ideas and design elements for your Animal Crossing rock garden.
6.1. Japanese Rock Gardens (Karesansui)
Japanese rock gardens, also known as Karesansui, are renowned for their minimalist design and symbolic representation of nature. Key elements include:
- Raked Gravel: Represents water, creating a sense of flow and movement.
- Arranged Rocks: Symbolize mountains, islands, or animals, placed in deliberate patterns.
- Moss: Adds a touch of green and represents age and tranquility.
6.2. Alpine Gardens
Alpine gardens showcase plants that thrive in rocky, mountainous environments. Essential features include:
- Variety of Rocks: Incorporate different sizes and types of rocks to mimic a natural alpine landscape.
- Drought-Resistant Plants: Use plants like sedum, succulents, and alpine flowers that can withstand dry conditions.
- Well-Draining Soil: Ensure the soil drains well to prevent root rot in alpine plants.
6.3. Coastal Rock Gardens
Coastal rock gardens blend rocks with maritime elements, creating a serene and beachy atmosphere. Key components include:
- Seaside Plants: Use plants like sea lavender, beach grass, and succulents that thrive in coastal environments.
- Seashells and Driftwood: Add seashells and driftwood to enhance the coastal theme.
- Sand and Gravel: Incorporate sand and gravel to mimic a beach setting.
7. Rock Garden Maintenance and Upkeep
Maintaining your rock garden is essential to keep it looking its best. Here’s how to care for your rock garden in Animal Crossing: New Horizons.
7.1. Daily Checks and Adjustments
Perform daily checks to ensure your rock garden remains pristine.
- Weed Removal: Remove any weeds that may pop up around the rocks.
- Watering Plants: Water any plants in your rock garden to keep them healthy.
- Adjust Decorations: Adjust decorations as needed to maintain the desired aesthetic.
7.2. Seasonal Cleanup
Perform a more thorough cleanup during seasonal transitions.
- Remove Debris: Remove fallen leaves, snow, or other debris from the rock garden.
- Prune Plants: Prune any overgrown plants to keep them in shape.
- Reapply Mulch: Reapply mulch or gravel as needed to maintain the garden’s appearance.
7.3. Pest and Disease Control
Protect your rock garden from pests and diseases.
- Monitor Plants: Regularly monitor plants for signs of pests or diseases.
- Apply Treatments: Apply appropriate treatments to control pests and diseases.
- Replace Plants: Replace any plants that are severely affected by pests or diseases.
8. Community Inspiration and Sharing
Share your rock garden designs and gain inspiration from other Animal Crossing players.
8.1. Online Forums and Communities
Engage with online forums and communities to share your designs and get feedback.
- Animal Crossing Subreddits: Share your rock garden on subreddits like r/AnimalCrossing and r/AC_NewHorizons.
- Discord Servers: Join Animal Crossing Discord servers to chat with other players and share your designs.
- Social Media: Use hashtags like #AnimalCrossing, #ACNH, and #RockGarden to share your rock garden on social media platforms like Twitter and Instagram.
8.2. Dream Address Sharing
Share your Dream Address so others can visit your island and see your rock garden in person.
- Visit the Dream Suite: Go to the Dream Suite and upload your island as a dream.
- Share Your Dream Address: Share your Dream Address with other players online.
- Get Feedback: Encourage visitors to leave feedback on your rock garden design.
8.3. Design Contests and Challenges
Participate in design contests and challenges to showcase your creativity.
- Theme Challenges: Participate in theme challenges focused on rock gardens or natural landscapes.
- Island Tours: Showcase your rock garden during island tours hosted by online communities.
- Awards and Recognition: Earn awards and recognition for your outstanding rock garden designs.
9. Conclusion: Rock Your Island with a Stunning Rock Garden
Creating a rock garden in Animal Crossing: New Horizons is a rewarding project that enhances both the aesthetic and functional aspects of your island. Remember to follow these key steps:
- Understand rock mechanics and spawning rules.
- Plan your rock garden layout carefully.
- Block unwanted spawn locations methodically.
- Terraform and decorate to create your desired aesthetic.
- Maintain your rock garden to keep it looking its best.
With patience, creativity, and attention to detail, you can create a stunning rock garden that will be the envy of all your island visitors.
10. Frequently Asked Questions (FAQs) About Rock Gardens in Animal Crossing
10.1. How many rocks can I have on my Animal Crossing island?
You can have exactly six rocks on your island in Animal Crossing: New Horizons. This limit is set by the game’s mechanics.
10.2. Can I move rocks in Animal Crossing?
Yes, you can move rocks by breaking them with a shovel after eating fruit, causing them to respawn in a new location the next day. You can control where they reappear by blocking other potential spawn locations.
10.3. How do I break a rock in Animal Crossing?
To break a rock, eat a piece of fruit to gain temporary strength, then hit the rock with a shovel. The rock will break, disappearing until it respawns the next day.
10.4. What happens when I hit a rock in Animal Crossing?
When you hit a rock with a shovel, it will yield resources such as iron nuggets, stones, clay, and sometimes bells. You can get up to eight items from each rock per day if you hit it continuously without stopping.
10.5. How do I stop getting knocked back when hitting rocks?
To prevent being knocked back when hitting rocks, dig two holes behind your character before hitting the rock. This will keep you in place and allow you to get all eight resources.
10.6. What materials can I get from rocks in Animal Crossing?
Rocks can yield several valuable materials, including iron nuggets, stones, clay, and bells. These materials are essential for crafting tools, furniture, and other items.
10.7. Can I customize the appearance of rocks in Animal Crossing?
No, you cannot customize the appearance of rocks in Animal Crossing: New Horizons. They have a fixed appearance that cannot be altered.
10.8. How long does it take for a rock to respawn in Animal Crossing?
A broken rock will respawn in a new location on your island the following day. The respawn occurs at 5:00 AM local time.
10.9. What are some common mistakes to avoid when creating a rock garden?
Common mistakes include leaving gaps in your blockage coverage, forgetting to block areas next to flowers, and not accounting for all potential spawn locations. Double-check your island to ensure every unwanted spot is blocked.
10.10. Can rocks spawn on sand or custom designs?
Rocks cannot spawn directly on sand or custom designs placed on the ground. However, they can spawn next to these areas if the adjacent space is available and not blocked.
Ready to transform your island with a stunning rock garden? Visit Rockscapes.net for more inspiration, detailed guides, and expert advice on landscaping with rocks. Discover the perfect stones and designs to bring your vision to life. Contact us today and let our team help you create the island paradise you’ve always dreamed of.
Rockscapes.net
Address: 1151 S Forest Ave, Tempe, AZ 85281, United States
Phone: +1 (480) 965-9011
Website: rockscapes.net