Drawing rocks and minerals can seem daunting, but with the right techniques, anyone can master it. At rockscapes.net, we provide expert guidance and inspiration to help you capture the natural beauty of geological formations in your art. Discover the secrets to rendering realistic textures, shading, and geological accuracy, transforming your sketches into stunning representations of the earth’s artistry. Let’s explore value scales and other important aspects of drawing stones.
1. Why Learn How to Draw Rocks and Minerals?
Learning How To Draw Rocks And Minerals is essential for artists, designers, and anyone passionate about nature’s artistry. Rocks and minerals offer a fascinating subject matter, providing diverse textures, shapes, and colors that enhance artistic skills and understanding of the natural world. For example, landscape designers use drawings to visualize rock arrangements, while geologists sketch mineral structures for documentation.
- Enhances Observational Skills: Drawing forces you to observe details in shapes, textures, and light, sharpening your artistic eye.
- Improves Technical Skills: You’ll learn shading, perspective, and rendering techniques to create realistic depictions.
- Increases Geological Knowledge: Understanding mineral structures and rock formations adds depth to your art.
- Broadens Artistic Expression: Rocks and minerals offer unique textures and colors, expanding your artistic palette.
- Practical Applications: Useful in landscape design, geological illustration, and artistic expression.
2. What Essential Materials Do You Need to Draw Rocks and Minerals?
To draw rocks and minerals effectively, you’ll need a selection of essential materials that enhance your artistic process. These tools help capture the unique textures, shapes, and details of geological subjects, ensuring precision and realism in your artwork. By choosing the right pencils, paper, and erasers, you’ll be well-equipped to create stunning representations of the earth’s natural formations.
2.1. Pencils
Graphite pencils are foundational for drawing, offering various hardness grades to achieve different effects. Harder pencils (H grades) create light, precise lines, ideal for initial sketches and fine details. Softer pencils (B grades) produce darker, richer tones, perfect for shading and adding depth. A range from 2H to 6B provides versatility in creating textures and values.
2.2. Paper
The choice of paper greatly impacts the drawing process and final result. Smooth paper is suitable for detailed work, while textured paper enhances shading and creates a more natural, rugged look. Heavier weight paper (at least 100gsm) prevents tearing and warping, especially when using multiple layers or blending techniques.
2.3. Erasers
Different erasers serve distinct purposes. A kneaded eraser is excellent for lifting graphite to create highlights and soft shadows without damaging the paper. A plastic or gum eraser is useful for cleanly removing lines and correcting mistakes. An eraser pencil allows for precise erasing in tight areas and fine details.
2.4. Blending Tools
Blending stumps and tortillons are essential for creating smooth transitions and soft shading effects. These tools help blend graphite particles on the paper, reducing harsh lines and creating a more realistic appearance. Cotton swabs or paper towels can also be used for larger areas or subtle gradients.
2.5. Other Useful Tools
A sharpener is essential for maintaining the point of your pencils, ensuring precision in your lines and details. A ruler or straight edge helps create accurate lines for geological structures. A magnifying glass aids in observing intricate details of mineral specimens, enhancing realism in your drawings.
3. How to Understand Basic Rock and Mineral Shapes?
Understanding the basic shapes of rocks and minerals is crucial for realistic drawing. Rocks often have irregular, angular shapes, while minerals display more defined geometric forms. Observing and simplifying these forms into basic shapes like cubes, spheres, and pyramids can greatly improve your drawing accuracy.
- Observe Real Specimens: Study rocks and minerals to understand their unique shapes and textures.
- Simplify into Basic Forms: Break down complex shapes into simpler geometric forms.
- Use Light and Shadow: Practice shading to emphasize the three-dimensional nature of the shapes.
- Consider Geological Context: Understand how formation processes influence the shapes of rocks and minerals.
- Refer to Geological Guides: Use guides for accurate depictions of specific mineral structures.
4. What Are The Drawing Techniques For Rocks?
Effective drawing techniques for rocks involve understanding their structure, texture, and how light interacts with their surfaces. By mastering these techniques, you can create realistic and dynamic depictions of rocks in your artwork. Shading techniques, line work, and texture rendering are important to create depth and realism.
4.1. Line Work
Use varied line weights to define edges and create depth. Thicker lines can indicate areas in shadow or closer to the viewer, while thinner lines suggest highlights or distant edges. Cross-hatching can add texture and dimension, especially in rough or uneven surfaces.
4.2. Shading
Shading is crucial for creating a three-dimensional effect. Use hatching, stippling, or blending techniques to create smooth tonal transitions. Pay attention to the direction of light and how it affects the rock’s surface. Darker tones indicate areas in shadow, while lighter tones highlight illuminated areas.
4.3. Texture
Rocks have diverse textures, from smooth and polished to rough and jagged. Replicate these textures using various pencil strokes and techniques. Stippling can create a granular texture, while short, broken lines can simulate cracks and crevices. Experiment with different approaches to find what works best for the specific rock you are drawing.
4.4. Contour Drawing
Contour drawing involves outlining the edges and internal shapes of the rock. Focus on accurately capturing the contours to create a sense of form and volume. Avoid lifting your pencil to maintain a continuous line, which helps develop hand-eye coordination and observational skills.
4.5. Value Studies
Creating value studies helps understand the range of tones present in the rock. Start by identifying the lightest and darkest areas, then fill in the intermediate values. This technique enhances the sense of depth and realism in the drawing. Use a value scale as a reference to ensure accurate tonal representation.
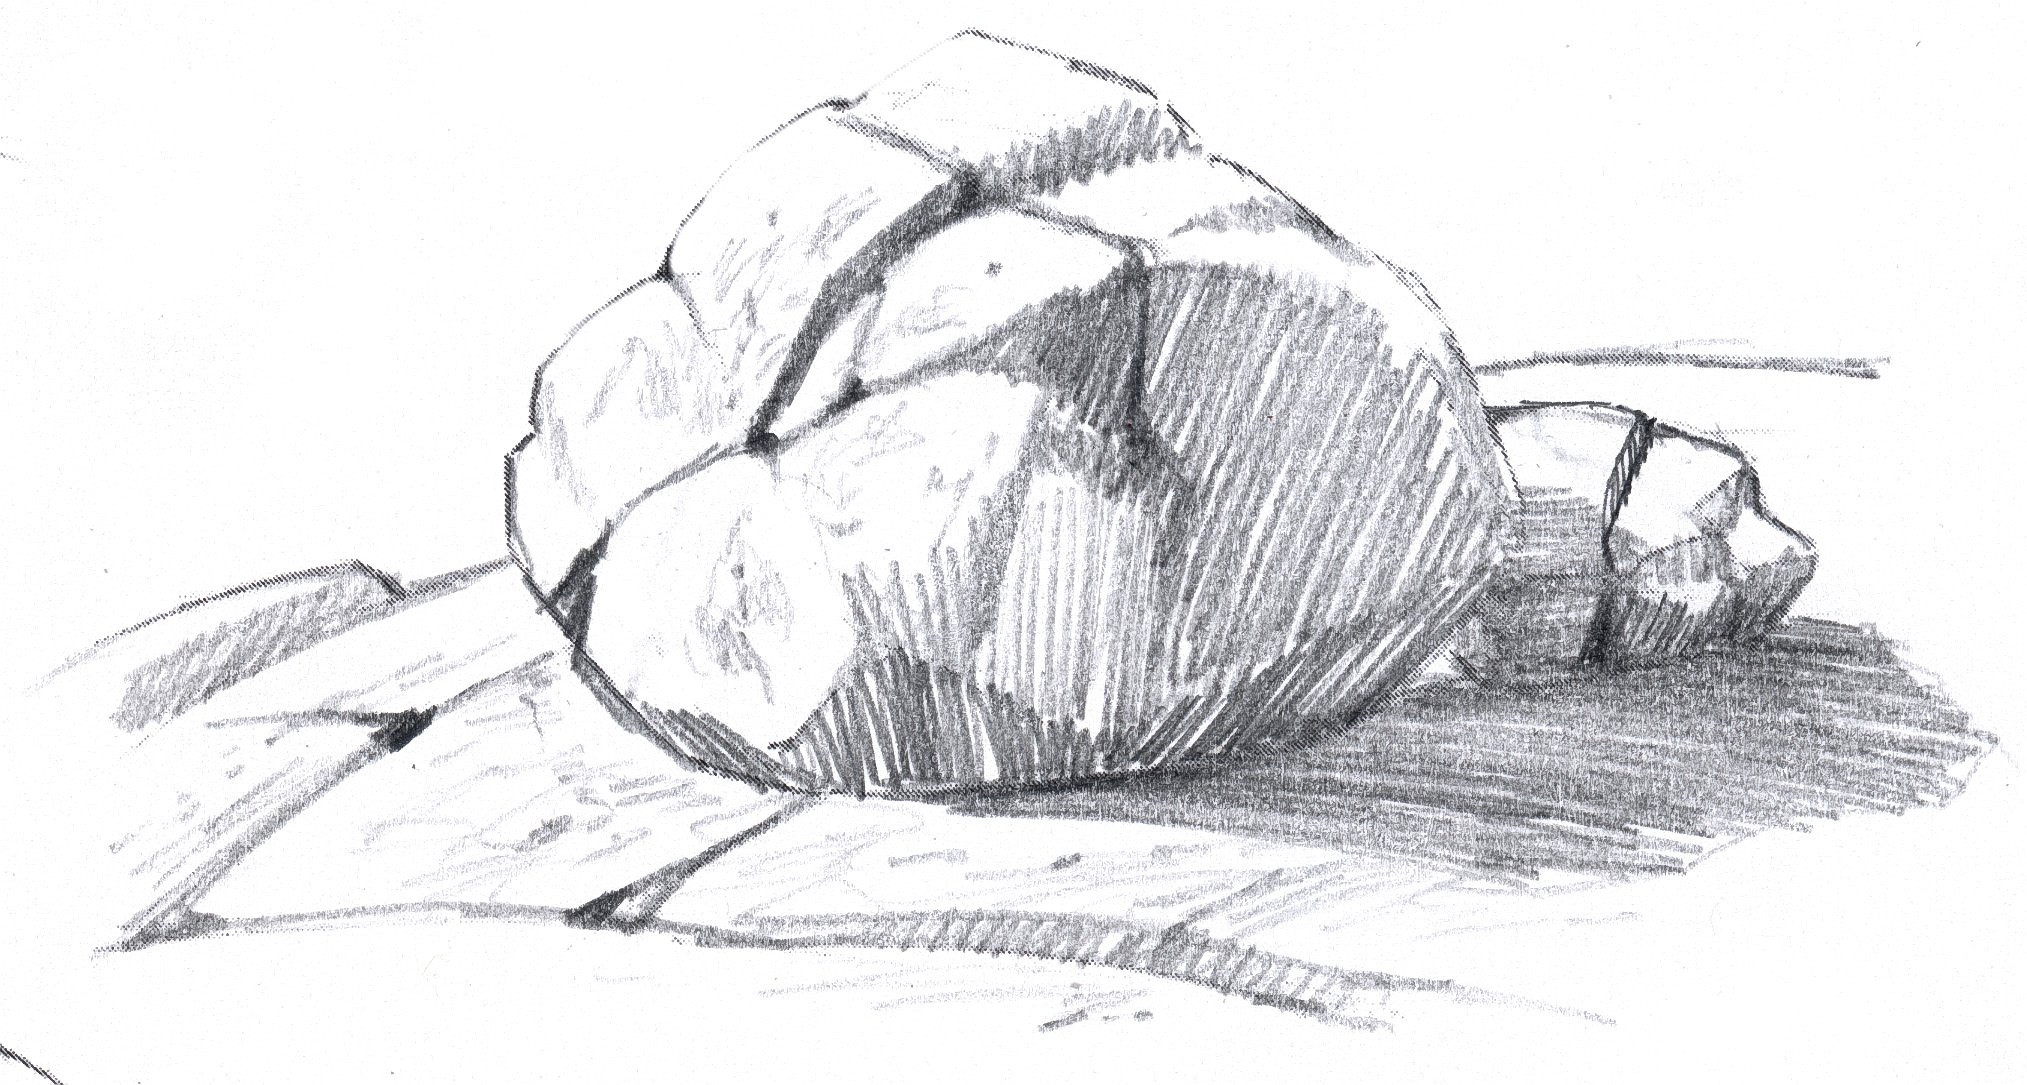
 boulder pencil
5. How Do You Show Planes, Shading Line Angle, Shadows, And Cracks?
Showing planes, shading line angles, shadows, and cracks is essential for adding depth and realism to your rock drawings. These elements help convey the three-dimensional structure and texture of rocks, making them appear more lifelike and dynamic. Focus on value scales and cracks to enhance your drawing.
5.1. Planes
Rocks consist of various angled surfaces or planes. Identify these planes by observing changes in direction and how light interacts with them. Use lines or subtle shading to define the edges between planes, creating a sense of volume. This technique emphasizes the three-dimensional structure of the rock.
5.2. Shading Line Angle
The orientation of shading lines can indicate the direction of a plane. Shading lines should follow the contour of the surface, suggesting how water would flow over it. For example, vertical lines indicate a downward slope, while horizontal lines suggest a flat surface. Adjust the angle of the lines to match the plane’s orientation, enhancing the sense of depth.
5.3. Shadows
Shadows define the shape and volume of the rock. Observe where light falls on the rock and create shadows accordingly. Use darker tones in areas away from the light source and lighter tones in illuminated areas. Cast shadows can add depth and grounding, making the rock appear more firmly planted in its environment.
5.4. Cracks
Cracks add character and realism to rock drawings. They should change direction as they move from one plane to another, following the rock’s structure. Darken the edges of cracks to create depth and emphasize the fracture. Include small divots or accents where cracks meet to enhance the three-dimensional effect.
6. What Value Scale Should You Use, And How Do You See The Shapes In Each Zone?
Using a simple value scale is crucial for accurately representing the range of tones in your rock drawings. A value scale typically consists of several steps from light to dark, helping you identify and replicate the tonal values present in the rock. Seeing the shapes in each zone of value enhances your ability to create depth and realism.
- Create a Value Scale: Develop a scale with at least five distinct values from white to black.
- Identify Value Zones: Observe the rock and identify areas of highlight, mid-tone, and shadow.
- Apply Values Accordingly: Use the value scale to match and apply the correct tones to each zone.
- Observe Shapes within Zones: Notice how shapes are defined by the contrast between different values.
- Practice Regularly: Improve your ability to see and replicate values through consistent practice.
7. How Do You Include The Light And Dark Wedges?
Including light and dark wedges along the edges of shadows adds visual interest and realism to your rock drawings. These wedges create subtle variations in tone, making the rock appear more dynamic and textured. They are often found where light and shadow meet, adding depth and complexity to the overall appearance.
- Observe Shadow Edges: Look for areas where wedges of light intrude into the shadow and vice versa.
- Add Light Wedges: Lighten areas along the shadow edge to create the illusion of light creeping in.
- Incorporate Dark Wedges: Darken areas within the highlight to suggest shadow extending outward.
- Vary Wedge Size: Use different sizes and shapes of wedges to create visual interest.
- Blend Subtly: Blend the edges of the wedges to create smooth tonal transitions.
8. How Do Cracks Change Angles As They Move From One Angle To Another?
Cracks change angles as they move from one plane to another on a rock’s surface, reflecting the underlying structure and fractures. This change in angle is essential for accurately depicting the three-dimensional form of the rock. Observing and replicating these changes in angle enhances the realism of your drawing.
- Identify Planes: Determine the different planes on the rock’s surface.
- Observe Crack Direction: Notice how the direction of the crack changes as it crosses each plane.
- Adjust Angle Accordingly: Adjust the angle of the crack in your drawing to match the changes in plane.
- Emphasize Transitions: Highlight the transitions between angles to emphasize the rock’s structure.
- Use Reference Images: Refer to photographs or real rocks to ensure accurate depiction of crack angles.
9. How To Ground The Rocks With Dark Shadows?
Grounding rocks with dark shadows is essential for creating a sense of weight and stability in your drawings. These shadows suggest that the rocks are firmly planted in the earth, adding depth and realism to the overall composition. Dark shadows at the base of the rocks create a strong visual connection to the ground.
- Identify Contact Points: Determine where the rocks make contact with the ground.
- Add Dark Shadows: Create dark shadows at these contact points, using a soft pencil or shading technique.
- Extend Shadows: Extend the shadows outward from the base of the rocks, following the direction of light.
- Vary Shadow Intensity: Vary the intensity of the shadows to create a sense of depth and volume.
- Soften Edges: Soften the edges of the shadows to blend them into the surrounding environment.
 platonic solids shadow
10. How Can Understanding Planes Help To Draw Rocks With Real Volume?
Understanding planes is critical for drawing rocks with real volume, as it allows you to accurately represent their three-dimensional form. By identifying and depicting the different angled surfaces of a rock, you can create a sense of depth and solidity. Planes define how light interacts with the rock, creating highlights and shadows that enhance its volume.
- Identify Angled Surfaces: Look for changes in direction and how light reflects off the rock.
- Define Planes with Lines: Use lines to delineate the edges between different planes.
- Use Shading to Emphasize Planes: Apply shading to create highlights and shadows on each plane.
- Pay Attention to Light Direction: Observe how light affects each plane and adjust your shading accordingly.
- Practice Regularly: Improve your ability to see and represent planes through consistent practice.
11. How Do You Indicate The Direction Of A Plane By The Orientation Of The Shading Lines?
Indicating the direction of a plane by the orientation of shading lines is a technique that adds depth and realism to your rock drawings. The direction of the shading lines should follow the contour of the plane, suggesting its slope and orientation. This method enhances the three-dimensional effect, making the rock appear more lifelike.
- Observe Plane Direction: Determine the direction of the plane you are shading.
- Align Shading Lines: Align your shading lines with the direction of the plane.
- Use Vertical Lines for Downward Slopes: Shade downward-sloping planes with vertical lines.
- Use Horizontal Lines for Flat Surfaces: Shade flat surfaces with horizontal lines.
- Adjust Angle as Needed: Adjust the angle of the lines to match the plane’s orientation.
12. How Do Cracks And Veins Help Show The Planes?
Cracks and veins play a crucial role in illustrating the planes of a rock, as they naturally follow and emphasize its structure. These features change direction as they move from one plane to another, providing visual cues about the rock’s form. By accurately depicting cracks and veins, you can enhance the realism and depth of your drawings.
- Follow Plane Changes: Notice how cracks and veins alter direction as they cross different planes.
- Emphasize Direction Changes: Highlight these changes in direction to emphasize the rock’s structure.
- Use Dark Lines for Depth: Use dark lines to define the edges of cracks and veins, adding depth.
- Add Texture Around Cracks: Incorporate texture around cracks and veins to enhance their appearance.
- Refer to Real Examples: Study photographs or real rocks to understand how cracks and veins behave.
 edges contour
13. Step-by-Step Guide: How to Draw Angular Rocks?
Drawing angular rocks involves breaking down their complex shapes into simpler planes and using shading techniques to create depth and realism. This step-by-step guide will help you master the process, emphasizing the planes and solidity of the rock. Follow these steps to create stunning depictions of angular rocks.
13.1. Outline the Basic Shape
Begin by lightly sketching the outline of the rock using a pale pencil. Focus on capturing the overall shape and proportions. Indicate the edges of the major shadows and planes with light lines.
13.2. Define Major Shadows
Use lines to define the major shadows, carving out the planes of the rock. For demonstration purposes, make the shading lines fairly bold. Remember to orient the shading lines to show the direction of each plane.
13.3. Add Light and Dark Wedges
Look along the edges of the shadows and add wedges of shadow intruding into the highlight, and wedges of light creeping into the dark. These additions make the shape of the rock more interesting.
13.4. Incorporate Cracks
If your rock has cracks, draw them carefully. The angle of the crack should change each time it moves from one plane to another. Add dark divots where cracks meet to give depth.
13.5. Add Texture and Refine Shadows
Add texture to the rock, especially in areas where the shadow transitions to highlight. Deepen the shadows to suggest stronger sunlight. Add shadows at the base of the rocks to ground them to the earth.
14. Why Are Dark Divots in Some of the Places Where Two Cracks Meet?
Dark divots often appear where two cracks meet due to increased erosion at these points. The intersection of cracks creates a more vulnerable spot, leading to faster weathering and the formation of small recesses. These divots add depth and realism to your drawings, enhancing the three-dimensional effect.
- Increased Erosion: Cracks create weak points where erosion is accelerated.
- Vulnerable Spots: The intersection of cracks is more susceptible to weathering.
- Small Recesses: Erosion leads to the formation of small, dark recesses.
- Enhanced Depth: Divots add depth and realism to drawings.
- Three-Dimensional Effect: They enhance the overall sense of form and volume.
15. What Are Some Common Mistakes When Drawing Rocks and Minerals?
When drawing rocks and minerals, several common mistakes can hinder the realism and accuracy of your artwork. Recognizing and avoiding these errors will significantly improve your drawing skills. Here are some frequent pitfalls to watch out for:
- Ignoring Planes: Failing to recognize and represent the different planes on a rock’s surface.
- Inconsistent Shading: Not using consistent shading techniques to create depth and volume.
- Incorrect Proportions: Drawing rocks with inaccurate proportions, making them appear unnatural.
- Lack of Texture: Omitting texture, resulting in flat and lifeless drawings.
- Overly Symmetrical Shapes: Creating rocks that are too symmetrical, lacking the irregularity of natural formations.
16. What Are Advanced Tips For Drawing Rocks And Minerals?
To elevate your rock and mineral drawings, consider these advanced tips that enhance realism, detail, and artistic expression. Incorporating geological knowledge, experimenting with mixed media, and refining your observational skills can significantly improve your artwork. These tips will help you create stunning and accurate depictions of geological formations.
- Study Geology: Learn about rock and mineral formations to understand their structures and characteristics. According to research from Arizona State University’s School of Earth and Space Exploration, understanding geological processes enhances the accuracy of your drawings.
- Use Mixed Media: Experiment with combining different drawing materials, such as graphite, charcoal, and colored pencils, to create unique textures and effects.
- Incorporate Environmental Context: Draw rocks and minerals in their natural settings to add depth and realism. Consider the surrounding landscape, lighting, and atmosphere.
- Refine Observational Skills: Continuously practice observing real rocks and minerals, paying close attention to details in shape, texture, and color.
- Develop a Personal Style: Experiment with different techniques and approaches to develop a unique artistic style.
17. What Are Some Drawing Exercises To Improve Your Skills?
To sharpen your skills in drawing rocks and minerals, engaging in targeted exercises is essential. These exercises focus on specific techniques and elements, helping you build a solid foundation and refine your abilities. Consistent practice with these exercises will lead to significant improvement in your artwork.
- Contour Drawing Exercises: Practice drawing the outlines of rocks and minerals without lifting your pencil to improve hand-eye coordination and observation skills.
- Value Scale Exercises: Create value scales and practice shading different tones to understand and replicate the range of values present in rocks and minerals.
- Texture Rendering Exercises: Experiment with different pencil strokes and techniques to create various textures, such as smooth, rough, and granular.
- Plane Identification Exercises: Practice identifying and drawing the different planes on a rock’s surface to improve your understanding of three-dimensional form.
- Crack and Vein Drawing Exercises: Focus on drawing cracks and veins accurately, paying attention to their direction and how they change as they move across different planes.
18. Where Can You Find Inspiration For Drawing Rocks And Minerals?
Finding inspiration for drawing rocks and minerals is abundant in both natural and artistic sources. Exploring these resources can spark creativity and provide valuable references for your artwork. Here are some excellent sources of inspiration to fuel your artistic endeavors:
- Geological Sites: Visit geological sites, such as national parks, quarries, and rock formations, to observe rocks and minerals in their natural environment.
- Museums: Explore natural history museums and mineral collections to study a wide variety of specimens up close.
- Photography: Use photographs of rocks and minerals as references for your drawings, paying attention to details in shape, texture, and color.
- Art Books: Study art books and tutorials on drawing rocks and minerals to learn new techniques and approaches.
- Online Resources: Explore online resources, such as geological websites and art communities, to find inspiration and connect with other artists.
19. What Geological Factors Influence The Appearance Of Rocks And Minerals?
Geological factors significantly influence the appearance of rocks and minerals, shaping their color, texture, and structure. Understanding these factors enhances the accuracy and depth of your drawings, allowing you to depict geological formations with greater realism. Here are some key geological influences:
- Formation Processes: Igneous, sedimentary, and metamorphic processes create distinct rock types with unique characteristics.
- Mineral Composition: The types of minerals present in a rock determine its color, hardness, and other properties.
- Weathering and Erosion: These processes alter the surface of rocks and minerals, creating textures and patterns.
- Tectonic Activity: Faulting, folding, and other tectonic events can deform rocks, creating unique structures.
- Environmental Conditions: Climate, water, and other environmental factors influence the weathering and alteration of rocks and minerals.
20. How Can rockscapes.net Help You Learn To Draw Rocks and Minerals?
Rockscapes.net is your ultimate resource for mastering the art of drawing rocks and minerals. We offer a wealth of information, inspiration, and expert guidance to help you create stunning geological artwork. Explore our diverse content and unlock your artistic potential.
- Extensive Resources: Access detailed articles, tutorials, and tips on drawing rocks and minerals.
- Inspirational Designs: Discover diverse design ideas and images to inspire your own creations.
- Expert Advice: Receive guidance from experienced artists and geological experts.
- Community Support: Connect with a community of fellow artists and enthusiasts to share your work and receive feedback.
- Latest Trends: Stay updated on the latest trends and techniques in geological art.
Ready to explore the beauty of rocks and minerals through art? Visit rockscapes.net today and start your artistic journey.
21. What Are The Types Of Rocks And Minerals?
Rocks and minerals are categorized into different types based on their formation and composition. Understanding these classifications is essential for accurately depicting them in your drawings. Here’s a brief overview of the main types:
- Igneous Rocks: Formed from cooled magma or lava, such as granite and basalt.
- Sedimentary Rocks: Formed from accumulated sediments, such as sandstone and limestone.
- Metamorphic Rocks: Formed from existing rocks altered by heat and pressure, such as marble and gneiss.
- Silicate Minerals: The most abundant mineral group, including quartz, feldspar, and mica.
- Carbonate Minerals: Minerals containing carbonate ions, such as calcite and dolomite.
22. How Can I Incorporate Geology Knowledge In Drawings?
Incorporating geological knowledge into your drawings adds depth and realism, making your artwork more accurate and engaging. Understanding how rocks and minerals form, weather, and interact with their environment enhances your ability to depict them authentically. Here’s how to integrate geological insights into your art:
- Research Formation Processes: Learn about the geological processes that formed the rocks and minerals you are drawing.
- Identify Rock Types: Determine the rock type based on its characteristics and formation.
- Understand Weathering Patterns: Observe how weathering affects the surface of rocks and minerals, creating textures and patterns.
- Depict Geological Structures: Accurately represent geological structures, such as faults, folds, and layers.
- Use Accurate Colors: Research the typical colors of different rocks and minerals and use them in your drawings.
23. Where To Seek Assistance About Rocks And Minerals?
Seeking assistance about rocks and minerals can greatly enhance your knowledge and skills in geological art. Expert guidance and resources are available to help you understand the complexities of these natural formations. Here are some reliable sources to seek assistance:
- Universities: Geology departments at universities offer courses, workshops, and resources on rocks and minerals.
- Geological Surveys: State and national geological surveys provide information, maps, and publications on local geology.
- Museums: Natural history museums have experts who can answer your questions and provide insights into their collections.
- Rock and Mineral Clubs: Join local rock and mineral clubs to connect with enthusiasts and learn from experienced collectors.
- Online Forums: Participate in online forums and communities dedicated to geology and mineralogy to ask questions and share knowledge.
 paltonic sections
24. How To Understand Metamorphic, Igneous, And Sedimentary Rocks?
Understanding the three main types of rocks – metamorphic, igneous, and sedimentary – is fundamental for geological art. Each type has unique characteristics and formation processes that influence its appearance. Knowing these differences allows you to depict rocks with greater accuracy and realism.
- Metamorphic Rocks: Formed from existing rocks transformed by heat, pressure, or chemical processes. They often exhibit foliation or banding. Examples include marble, slate, and gneiss.
- Igneous Rocks: Formed from the cooling and solidification of magma (intrusive) or lava (extrusive). They can have a crystalline or glassy texture. Examples include granite, basalt, and obsidian.
- Sedimentary Rocks: Formed from the accumulation and cementation of sediments, such as mineral grains, rock fragments, and organic matter. They often exhibit layering or stratification. Examples include sandstone, limestone, and shale.
25. What is rockscapes.net Address?
For personalized assistance and to explore our extensive collection of rocks and minerals, visit us at:
Address: 1151 S Forest Ave, Tempe, AZ 85281, United States.
Phone: +1 (480) 965-9011.
Website: rockscapes.net.
26. FAQ: Drawing Rocks And Minerals
26.1. What is the best way to start drawing rocks?
Start by observing the basic shapes and planes of the rock. Use light lines to sketch the outline, then add shading to define the form and texture.
26.2. How do you shade rocks to make them look realistic?
Use a value scale to create smooth tonal transitions from light to dark. Pay attention to the direction of light and how it affects the rock’s surface.
26.3. What pencils are best for drawing rocks and minerals?
A range of graphite pencils from 2H to 6B provides versatility for creating different line weights, shading, and textures.
26.4. How do you draw realistic cracks in rocks?
Cracks should change direction as they move from one plane to another. Darken the edges of cracks to create depth and emphasize the fracture.
26.5. What are some common mistakes when drawing rocks?
Common mistakes include ignoring planes, inconsistent shading, incorrect proportions, lack of texture, and overly symmetrical shapes.
26.6. How can I improve my rock drawing skills?
Practice regularly, study geological formations, experiment with different techniques, and seek feedback from other artists.
26.7. Where can I find inspiration for drawing rocks and minerals?
Visit geological sites, museums, and explore photography and art books for inspiration.
26.8. What geological factors influence the appearance of rocks and minerals?
Formation processes, mineral composition, weathering and erosion, tectonic activity, and environmental conditions all influence the appearance.
26.9. How can rockscapes.net help me learn to draw rocks and minerals?
rockscapes.net offers extensive resources, inspirational designs, expert advice, community support, and the latest trends in geological art.
26.10. What are some drawing exercises to improve my skills?
Contour drawing exercises, value scale exercises, texture rendering exercises, plane identification exercises, and crack and vein drawing exercises can help.