What Type Of Paint For Rocks ensures your artistic creations withstand the elements and bring lasting beauty to any landscape? This guide from rockscapes.net explores the best paints for rock painting, offering insights to ensure your designs remain vibrant and durable, transforming ordinary stones into stunning outdoor art. Dive in to discover the perfect painting solutions for your rock art projects, and find endless inspiration for your next rockscapes.net creation with tips on rock painting techniques and long-lasting rock art.
1. Understanding Your Rock Painting Needs
Before diving into the world of paints, it’s essential to consider what you’ll be using your painted rocks for. Are they going to be decorative pieces indoors, or will they be exposed to the elements in a garden or outdoor setting? The location dictates the type of paint you should use.
-
Indoor Rocks: For indoor displays, the choice is broader, as the paint doesn’t need to withstand harsh weather.
-
Outdoor Rocks: Outdoor settings demand durable, weather-resistant paints.
Understanding these basic needs sets the stage for selecting the right type of paint, ensuring that your art remains vibrant and intact over time. Let’s dive into the best paint types for rocks.
1.1. Identifying Key Factors for Paint Selection
Choosing the right paint involves more than just picking your favorite colors; it requires a careful evaluation of several critical factors to ensure longevity and visual appeal. By considering these elements, you can guarantee that your rock art will withstand the test of time and environmental conditions.
-
Weather Resistance: For outdoor displays, the paint must resist fading, cracking, and peeling when exposed to sunlight, rain, and temperature fluctuations. Paints formulated for exterior use are ideal.
-
Adhesion: The paint needs to adhere strongly to the rock surface. Proper surface preparation, such as cleaning the rock, is crucial for ensuring good adhesion.
-
Durability: The paint should be able to withstand physical contact, such as handling or light abrasion. A protective sealant can enhance the durability of the painted surface.
-
Color Retention: Select paints known for their ability to maintain vibrancy over time. Pigments that are UV resistant will help prevent fading.
-
Non-toxicity: Especially important if children or pets are around, ensure the paint is non-toxic and safe for the environment.
Considering these factors will guide you in selecting the appropriate paint for your specific rock painting project, ensuring that your artistic efforts are both beautiful and lasting.
1.2. Types of Rocks and Their Impact on Paint
The type of rock you choose can significantly influence how well the paint adheres and looks. Different rocks have varying textures and porosities, which affect the paint’s absorption and overall finish. Here’s a look at common rock types and how to approach painting them:
| Rock Type | Characteristics | Best Paint Choices | Preparation Tips |
|---|---|---|---|
| Smooth Rocks | Fine-grained, non-porous surfaces, such as river rocks. | Acrylics, paint pens; easy to achieve crisp lines and details. | Clean thoroughly to remove any oils or residues that may prevent paint from adhering. |
| Porous Rocks | Rough, absorbent surfaces like sandstone or lava rock. | Acrylics, especially with a primer, to prevent excessive absorption. | Use a sealant or primer to create a barrier that reduces paint absorption. |
| Dark Rocks | Dark-colored rocks may require more coats for colors to pop. | Opaque acrylics, bright colors, or metallic paints. | Apply a white or light-colored base coat to make brighter colors stand out. |
| Light Rocks | Light-colored rocks provide a great base for most colors. | Any type of acrylic paint works well. | Minimal preparation needed; cleaning is typically sufficient. |
Understanding the type of rock you are working with will help you select the right paint and preparation methods, leading to better results and more durable artwork.
2. Top Paint Choices for Rock Painting
When it comes to rock painting, selecting the right type of paint is crucial for achieving vibrant, long-lasting designs. Each type of paint offers unique benefits, making them suitable for different styles and environments. Let’s explore some of the best paint options for rock painting, including their characteristics, pros, and cons.
2.1. Acrylic Paints: The Versatile Option
Acrylic paints are a favorite among rock painting enthusiasts for their versatility and ease of use. They are water-based, dry quickly, and are available in a wide range of colors. Here’s why acrylics are a top choice:
-
Characteristics: Acrylic paints consist of pigment suspended in an acrylic polymer emulsion. They can be diluted with water, making them easy to blend and work with.
-
Pros:
- Versatile: Suitable for various techniques, from base coating to detailed artwork.
- Fast-Drying: Allows for layering and quicker project completion.
- Wide Range of Colors: Available in numerous shades, including metallics and fluorescents.
- Water-Based: Easy to clean up with soap and water.
-
Cons:
- Not Always Weatherproof: Standard acrylics may require a sealant for outdoor use to prevent fading and peeling.
- Can Be Transparent: Some colors may need multiple coats for full opacity.
-
Best Uses: Base coats, detailed designs, blending, and layering. Ideal for both indoor and outdoor projects when sealed properly.
-
Application Tips:
- Clean the rock thoroughly before painting to ensure good adhesion.
- Apply thin, even coats and allow each layer to dry before adding the next.
- Use a variety of brushes to achieve different effects and details.
-
Durability Enhancements:
- Apply a waterproof sealant to protect the paint from the elements.
- Consider using high-quality acrylics specifically formulated for outdoor use.
Acrylic paints are a reliable and adaptable choice for rock painting, offering endless possibilities for creativity.
 Acrylic Paint
2.2. Acrylic Paint Pens: Precision and Detail
Acrylic paint pens are indispensable tools for adding fine details and intricate designs to your rock art. These pens are filled with acrylic paint and come with various tip sizes, allowing for precise control.
-
Characteristics: Acrylic paint pens contain high-quality acrylic paint in a pen format, making them easy to handle and control.
-
Pros:
- Precision: Perfect for detailed line work, lettering, and small designs.
- Easy to Use: User-friendly for artists of all skill levels.
- Portable: Convenient for painting on the go.
- Consistent Flow: Provides a smooth and even application of paint.
-
Cons:
- Limited Coverage: Not ideal for covering large areas or creating base coats.
- Can Be Pricey: Higher quality pens can be more expensive.
- Tip Maintenance: Tips may need occasional cleaning to prevent clogging.
-
Best Uses: Fine details, outlining, lettering, and adding accents to your rock paintings. Excellent for both indoor and outdoor projects, especially when combined with a sealant.
-
Application Tips:
- Shake the pen well before each use to ensure the paint is properly mixed.
- Prime the tip by gently pressing it down on a piece of scrap paper until the paint flows.
- Use light pressure for fine lines and more pressure for thicker lines.
- Clean the tip after each use to prevent clogging.
-
Durability Enhancements:
- Seal your finished design with a waterproof sealant to protect the paint from the elements.
- Store pens horizontally to prevent the tips from drying out.
Acrylic paint pens are a valuable addition to any rock painter’s toolkit, offering the precision needed to bring intricate designs to life.
2.3. Oil-Based Paints: The Durable Choice
Oil-based paints are renowned for their durability and rich colors, making them a solid option for rock painting, particularly for projects intended to withstand harsh outdoor conditions.
-
Characteristics: Oil-based paints consist of pigments suspended in a drying oil, such as linseed oil. They provide a glossy finish and excellent coverage.
-
Pros:
- Highly Durable: Resistant to fading, cracking, and peeling, making them ideal for outdoor use.
- Rich Colors: Offer deep, vibrant colors that stand out.
- Excellent Adhesion: Bonds well to rock surfaces, providing a long-lasting finish.
- Weather Resistant: Can withstand exposure to sunlight, rain, and temperature fluctuations.
-
Cons:
- Long Drying Time: Requires a significant amount of time to dry completely, often several days.
- Requires Solvents for Cleanup: Cannot be cleaned with water; requires mineral spirits or other solvents.
- Strong Odor: May emit a strong, potentially unpleasant odor during application and drying.
-
Best Uses: Outdoor rock art that requires maximum durability and weather resistance. Suitable for base coats and detailed designs.
-
Application Tips:
- Prepare the rock surface by cleaning it thoroughly and applying a primer.
- Apply thin, even coats and allow ample drying time between coats.
- Use high-quality brushes designed for oil-based paints.
- Work in a well-ventilated area due to the strong odor.
-
Durability Enhancements:
- Apply a sealant specifically designed for oil-based paints to further protect the finish.
- Avoid placing painted rocks in areas with excessive moisture or direct sunlight to prolong their lifespan.
Oil-based paints are an excellent choice for creating durable and vibrant rock art that can withstand the test of time, though they require patience due to their longer drying times and specific cleanup needs.
2.4. Chalk Paints: The Rustic Look
Chalk paints are a unique option for rock painting, offering a matte finish and a rustic, vintage aesthetic. While not as durable as acrylic or oil-based paints, they can be a great choice for specific decorative effects.
-
Characteristics: Chalk paints are highly pigmented paints that adhere well to many surfaces and dry to a chalky matte finish.
-
Pros:
- Excellent Adhesion: Sticks to most surfaces with minimal prep work.
- Matte Finish: Provides a unique, non-glossy look that is ideal for creating a vintage or rustic appearance.
- Easy to Distress: Can be easily sanded or distressed to create an aged effect.
- Water-Based: Easy to clean up with soap and water.
-
Cons:
- Low Durability: Not as durable as acrylic or oil-based paints, and can easily scratch or chip.
- Requires Sealing: Must be sealed to protect the finish and prevent damage.
- Limited Weather Resistance: Not suitable for outdoor use unless properly sealed and protected.
-
Best Uses: Indoor decorative rocks, vintage-style designs, and projects where a matte finish is desired.
-
Application Tips:
- Clean the rock surface before painting to remove any dirt or debris.
- Apply thin, even coats and allow each coat to dry completely.
- Use a soft brush for a smooth finish.
- Distress the paint with sandpaper or a damp cloth to create an aged look.
-
Durability Enhancements:
- Apply multiple coats of a high-quality sealant to protect the paint from damage.
- Avoid placing painted rocks in high-traffic areas or locations where they may be easily scratched.
Chalk paints offer a distinctive look for your rock art, perfect for achieving a rustic or vintage style. However, they require careful sealing and are best suited for indoor display to ensure their longevity.
2.5. Specialty Paints: Glow-in-the-Dark and More
For those looking to add a unique twist to their rock art, specialty paints offer exciting possibilities. These paints can create eye-catching effects and bring a distinctive flair to your creations.
-
Glow-in-the-Dark Paint
- Characteristics: Absorbs light and emits a soft glow in the dark.
- Pros: Adds a magical effect, perfect for nighttime displays.
- Cons: Requires exposure to light to glow, may not be as vibrant during the day.
- Best Uses: Night gardens, decorative accents, and themed projects.
-
Glitter Paint
- Characteristics: Contains fine glitter particles for a sparkling finish.
- Pros: Adds a touch of glamour and visual interest.
- Cons: Can be messy to apply, may require multiple coats for full coverage.
- Best Uses: Decorative rocks, festive designs, and adding sparkle to details.
-
Metallic Paint
- Characteristics: Contains metallic pigments for a shiny, reflective finish.
- Pros: Creates a luxurious and eye-catching effect, ideal for highlighting details.
- Cons: May require multiple coats for full opacity, can be prone to scratching.
- Best Uses: Accents, borders, and creating a high-end look.
-
Application Tips for Specialty Paints:
- Base Coat: Apply a base coat of regular acrylic paint to enhance the specialty paint’s color and adhesion.
- Even Coats: Apply thin, even coats to prevent clumping or uneven distribution of particles.
- Sealing: Seal the finished design with a clear sealant to protect the paint and enhance its effect.
-
Durability Enhancements:
- Use a high-quality sealant specifically designed for the type of specialty paint you are using.
- Avoid placing painted rocks in areas with high traffic or exposure to harsh weather conditions.
Specialty paints can transform your rock art into something truly special, adding unique effects that capture attention and spark imagination. Whether you choose glow-in-the-dark, glitter, or metallic paints, be sure to follow the application tips and seal your designs for long-lasting beauty.
3. Preparing Your Rocks for Painting
Proper preparation is essential for achieving the best results when painting rocks. A clean, smooth surface will ensure that your paint adheres well and your designs look their best. Follow these steps to prepare your rocks for painting:
3.1. Cleaning and Drying
The first step in preparing your rocks is to clean them thoroughly. This removes any dirt, debris, or oils that could prevent the paint from adhering properly.
- Wash the Rocks: Use warm, soapy water to scrub the rocks with a brush. A toothbrush or scrub brush works well for getting into crevices.
- Rinse Thoroughly: Make sure to rinse the rocks completely to remove any soap residue.
- Dry Completely: Allow the rocks to dry completely before painting. This may take several hours or even overnight.
3.2. Priming for Enhanced Adhesion
Priming the rocks can significantly improve the adhesion and durability of your paint, especially if you are working with porous or uneven surfaces.
-
Why Prime? Primer creates a smooth, uniform surface that the paint can grip onto. It also helps to prevent the paint from soaking into the rock, which can result in uneven color and a dull finish.
-
Choosing the Right Primer: Select a primer that is compatible with the type of paint you will be using. Acrylic gesso is a good option for acrylic paints, while oil-based primers work well with oil-based paints.
-
Applying Primer:
- Apply a thin, even coat of primer to the rock using a brush or sponge.
- Allow the primer to dry completely before painting. This usually takes a few hours.
- If necessary, apply a second coat of primer for better coverage.
3.3. Smoothing Rough Surfaces
If your rocks have rough or uneven surfaces, smoothing them can create a better canvas for your artwork.
- Sanding: Use sandpaper to gently smooth any rough spots or sharp edges. Start with a coarse grit sandpaper and gradually move to a finer grit for a smooth finish.
- Filling Cracks and Holes: For larger cracks or holes, use a rock filler or epoxy to fill them in. Allow the filler to dry completely and then sand it smooth.
By taking the time to properly prepare your rocks, you can ensure that your paint adheres well, your designs look their best, and your rock art lasts for years to come.
4. Painting Techniques for Stunning Rock Art
Once your rocks are prepped and your paints are chosen, it’s time to unleash your creativity. Here are some painting techniques to help you create stunning rock art:
4.1. Base Coating: Creating the Perfect Canvas
A base coat provides a smooth, uniform surface for your designs, ensuring that your colors pop and your details stand out.
-
Choosing the Right Color: Select a base coat color that complements your design. White or light colors are ideal for making brighter colors stand out, while darker colors can add depth and contrast.
-
Applying the Base Coat:
- Use a brush or sponge to apply a thin, even coat of paint to the entire rock surface.
- Allow the base coat to dry completely before adding any details.
- Apply a second coat if necessary for full coverage.
Here are some tips from Arizona State University’s School of Earth and Space Exploration: The most popular color for the base coat on natural rocks in Arizona is white, as it helps reflect sunlight and keeps the rocks cooler. According to research from Arizona State University’s School of Earth and Space Exploration, in July 2025, white provides 10-20% more reflection than other colors.
4.2. Layering and Blending: Adding Depth and Dimension
Layering and blending techniques can add depth and dimension to your rock art, creating a more visually interesting and dynamic design.
-
Layering:
- Apply multiple layers of paint, allowing each layer to dry before adding the next.
- Use different colors and shades to create depth and texture.
-
Blending:
- Use a soft brush or sponge to blend different colors together while they are still wet.
- Create smooth transitions between colors for a seamless look.
4.3. Detailing: Bringing Your Vision to Life
Adding fine details can bring your rock art to life, making it truly unique and eye-catching.
- Using Paint Pens: Acrylic paint pens are perfect for adding fine lines, intricate patterns, and small details to your designs.
- Brush Techniques: Use a fine-tipped brush to paint small details, such as dots, lines, and intricate patterns.
- Stenciling: Use stencils to create precise shapes and designs.
4.4. Special Effects: Making Your Rocks Stand Out
Experiment with special effects to make your rock art stand out.
- Marbling: Create a marbled effect by swirling different colors of paint together on the rock surface.
- Dripping: Drip paint onto the rock to create a textured, abstract design.
- Splattering: Splatter paint onto the rock for a fun and whimsical effect.
By mastering these painting techniques, you can create rock art that is both beautiful and unique, transforming ordinary stones into stunning works of art.
5. Sealing for Longevity
Protecting your painted rocks with a sealant is essential, especially if they will be placed outdoors. Sealing helps to prevent fading, chipping, and damage from the elements, ensuring that your artwork lasts for years to come.
5.1. Choosing the Right Sealant
Selecting the right sealant is crucial for protecting your painted rocks. Here are some factors to consider when choosing a sealant:
- Type of Paint: Choose a sealant that is compatible with the type of paint you used. Acrylic sealants work well with acrylic paints, while oil-based sealants are better for oil-based paints.
- Finish: Sealants are available in different finishes, such as glossy, matte, and satin. Choose a finish that complements your design.
- UV Resistance: If your painted rocks will be exposed to sunlight, choose a sealant that offers UV protection to prevent fading.
- Water Resistance: Select a waterproof sealant to protect your painted rocks from rain and moisture.
5.2. Application Techniques
Proper application is key to achieving a durable and protective seal. Follow these steps to seal your painted rocks:
- Clean the Surface: Make sure the painted surface is clean and dry before applying the sealant.
- Apply Thin Coats: Apply thin, even coats of sealant, allowing each coat to dry completely before applying the next. This helps to prevent drips and ensures a smooth finish.
- Use a Brush or Spray: You can apply sealant with a brush or a spray can. Brushes are good for applying sealant to small areas or intricate designs, while spray cans are ideal for covering larger surfaces quickly and evenly.
- Ventilation: Work in a well-ventilated area when applying sealant, as some sealants can emit fumes.
5.3. Maintaining Your Sealed Rocks
Once your painted rocks are sealed, proper maintenance can help to extend their lifespan.
- Regular Cleaning: Clean your sealed rocks regularly with a soft cloth and mild soap and water to remove any dirt or debris.
- Avoid Harsh Chemicals: Avoid using harsh chemicals or abrasive cleaners, as these can damage the sealant.
- Reapplication: Reapply sealant every year or two to maintain protection, especially if the rocks are exposed to harsh weather conditions.
By sealing your painted rocks and following these maintenance tips, you can ensure that your artwork remains vibrant and beautiful for years to come.
6. Creative Ideas and Inspiration
Rock painting is a versatile art form that allows for endless creativity and self-expression. Whether you’re a beginner or an experienced artist, there’s always something new to discover. Here are some creative ideas and inspiration to spark your imagination:
6.1. Themes and Styles
- Nature-Inspired: Paint rocks with images of flowers, leaves, animals, and landscapes.
- Abstract Art: Experiment with different colors, shapes, and patterns to create abstract designs.
- Mandalas: Create intricate mandala patterns using paint pens or fine-tipped brushes.
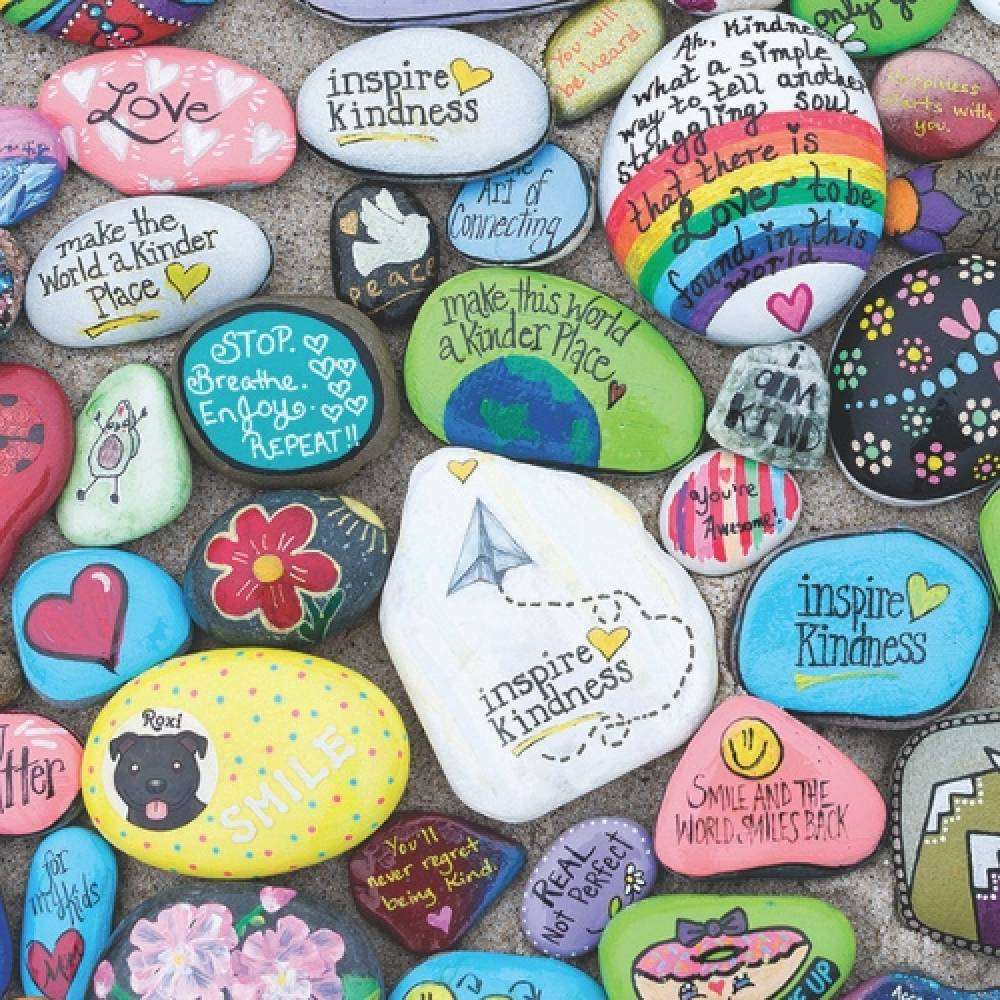
- Inspirational Quotes: Write inspirational quotes or affirmations on your rocks to spread positivity.
- Holiday Themes: Create festive rock art for holidays like Halloween, Christmas, and Easter.
- Cartoon Characters: Paint rocks with images of your favorite cartoon characters or superheroes.
6.2. Project Ideas
- Kindness Rocks: Paint rocks with positive messages and leave them in public places for others to find.
- Rock Gardens: Create a rock garden by painting a collection of rocks with different designs and arranging them in your garden.
- Story Stones: Paint rocks with images that can be used to create stories. Use the rocks as prompts to spark your imagination and storytelling skills.
- Decorative Accents: Use painted rocks as decorative accents in your home or garden.
- Gifts: Give painted rocks as personalized gifts to friends and family.
6.3. Finding Inspiration
- Online Resources: Explore websites and social media platforms like Pinterest and Instagram for rock painting ideas and inspiration.
- Art Books: Browse art books for inspiration and techniques.
- Nature: Look to nature for inspiration in terms of colors, shapes, and patterns.
- Local Art: Visit local art galleries and craft fairs to see what other artists are creating.
Rockscapes.net is your premier online destination for inspiration, supplies, and guidance on all things related to rock art and landscaping. We provide a vast gallery of stunning designs, detailed tutorials, and expert advice to help you transform ordinary stones into captivating works of art. Whether you’re looking to create a serene rock garden or simply add a touch of creativity to your outdoor space, Rockscapes.net offers the resources and inspiration you need to bring your vision to life.
With a little imagination and creativity, you can transform ordinary rocks into stunning works of art that bring joy and inspiration to yourself and others.
7. Addressing Common Challenges
Even with the best preparation and techniques, you may encounter some challenges when painting rocks. Here are some common issues and how to address them:
7.1. Paint Not Adhering
-
Problem: Paint peels or flakes off the rock surface.
-
Solution:
- Clean the Rock Thoroughly: Make sure the rock is free of dirt, oils, and debris.
- Use a Primer: Apply a primer to create a better surface for the paint to adhere to.
- Choose the Right Paint: Use paint that is designed for use on rocks or other porous surfaces.
7.2. Colors Fading
-
Problem: Painted colors fade over time, especially when exposed to sunlight.
-
Solution:
- Use UV-Resistant Paints: Choose paints that are formulated to resist fading from UV exposure.
- Apply a UV-Resistant Sealant: Seal your painted rocks with a sealant that offers UV protection.
- Avoid Direct Sunlight: Place your painted rocks in areas that are not exposed to direct sunlight for extended periods.
7.3. Paint Cracking
-
Problem: Paint cracks, especially in cold or wet weather.
-
Solution:
- Use Flexible Paints: Choose paints that are flexible and can withstand temperature changes.
- Apply Thin Coats: Apply thin, even coats of paint to prevent cracking.
- Seal Properly: Seal your painted rocks with a sealant that provides a waterproof barrier.
7.4. Smudging
-
Problem: Wet paint smudges easily when applying details or additional layers.
-
Solution:
- Let the Paint Dry Completely: Allow each layer of paint to dry completely before adding the next.
- Use a Soft Brush: Use a soft brush to apply details and avoid pressing too hard on the surface.
- Work in a Well-Lit Area: Ensure you have adequate lighting to see what you’re doing and avoid accidental smudges.
By addressing these common challenges with the right techniques and solutions, you can ensure that your rock art remains beautiful and durable for years to come.
8. Safety and Best Practices
When working on rock painting projects, it’s important to prioritize safety and follow best practices to ensure a positive and risk-free experience.
8.1. Safe Handling of Materials
- Paints and Sealants: Always use paints and sealants in a well-ventilated area to avoid inhaling harmful fumes. Wear a mask if necessary.
- Protective Gear: Wear gloves to protect your hands from paint and chemicals.
- Eye Protection: Use safety glasses to protect your eyes from splashes or splatters.
- Storage: Store paints, sealants, and other materials in a safe place, out of reach of children and pets.
8.2. Environmental Considerations
- Non-Toxic Materials: Choose non-toxic paints and sealants that are safe for the environment.
- Proper Disposal: Dispose of paint and sealant containers properly, following local regulations for hazardous waste disposal.
- Avoid Polluting Natural Habitats: Do not paint rocks in natural habitats or leave painted rocks in protected areas.
8.3. Working with Children
- Supervision: Always supervise children when they are working with paints and other art materials.
- Age-Appropriate Materials: Use age-appropriate materials that are non-toxic and safe for children.
- Teach Safety: Teach children about the importance of safe handling of materials and proper disposal.
8.4. Best Practices for Rock Painting
- Preparation: Prepare your rocks properly by cleaning and priming them before painting.
- Technique: Use appropriate painting techniques to achieve the desired effects.
- Sealing: Seal your painted rocks to protect them from the elements and ensure their longevity.
- Clean Up: Clean up your work area after each session to prevent accidents and keep your space organized.
By following these safety guidelines and best practices, you can enjoy rock painting while minimizing risks and ensuring a positive experience for yourself and others.
9. Frequently Asked Questions (FAQs)
9.1. What is the best type of paint to use on rocks for outdoor display?
Acrylic paints are ideal for outdoor display due to their durability and water-resistant properties. Seal with a waterproof sealant for added protection.
9.2. Can I use regular craft paint on rocks?
Yes, you can use regular craft paint, but it may not be as durable as acrylic paint for outdoor use. Sealing is essential to protect the design.
9.3. How do I prevent my painted rocks from fading in the sun?
Use UV-resistant paints and sealants to protect your painted rocks from fading in the sun. Also, avoid placing them in direct sunlight for extended periods.
9.4. Do I need to seal my painted rocks?
Yes, sealing is highly recommended, especially for outdoor use. It protects the paint from the elements and extends the life of your artwork.
9.5. What kind of sealant should I use for painted rocks?
Use a waterproof sealant that is compatible with the type of paint you used. Acrylic sealants work well with acrylic paints.
9.6. How do I clean painted rocks?
Clean painted rocks with a soft cloth and mild soap and water. Avoid using harsh chemicals or abrasive cleaners.
9.7. Can I use oil-based paints on rocks?
Yes, oil-based paints are durable and weather-resistant, making them a good option for outdoor rock art. However, they require longer drying times and solvents for cleanup.
9.8. Are acrylic paint pens good for rock painting?
Yes, acrylic paint pens are excellent for adding fine details and intricate designs to your rock paintings.
9.9. How do I prepare rocks for painting?
Clean the rocks with warm, soapy water, rinse thoroughly, and allow them to dry completely before painting. Priming can also enhance paint adhesion.
9.10. Where can I find inspiration for rock painting ideas?
Explore online resources like Pinterest and Instagram, art books, nature, and local art galleries for rock painting ideas and inspiration.
10. Discover More at Rockscapes.net
Ready to take your rock painting to the next level? Visit rockscapes.net for a wealth of resources, inspiration, and supplies to help you create stunning rock art.
10.1. Explore Design Ideas
Discover a vast gallery of design ideas to spark your creativity, from simple patterns to intricate landscapes.
10.2. Find the Best Materials
Shop for high-quality paints, sealants, brushes, and other materials to ensure your rock art looks its best and lasts for years to come.
10.3. Get Expert Advice
Access expert advice and tutorials on rock painting techniques, tips for sealing, and solutions to common challenges.
10.4. Join Our Community
Connect with other rock painting enthusiasts, share your creations, and get feedback from fellow artists.
10.5. Contact Us
Have questions or need assistance? Contact the friendly team at rockscapes.net for personalized support.
- Address: 1151 S Forest Ave, Tempe, AZ 85281, United States
- Phone: +1 (480) 965-9011
- Website: rockscapes.net
Unlock your creativity and transform ordinary rocks into extraordinary works of art with rockscapes.net, your ultimate resource for all things rock painting. Explore our website today and start your rock painting journey!
Rockscapes.net stands out as a unique online resource, particularly for those in the USA seeking to beautify their landscapes with stone. Unlike general art or landscaping sites, Rockscapes.net offers a specialized focus on rock-centric designs, providing tailored advice on stone selection, project planning, and maintenance specific to the diverse climates and terrains of the United States.
Don’t just dream it, create it. Visit rockscapes.net today to explore design ideas, find the best materials, and get expert advice. Let’s bring your rock art and landscaping visions to life!
