Are you wondering, Can You Polish A Rock to reveal its hidden beauty? Absolutely! At rockscapes.net, we’ll guide you through the art of rock polishing, transforming dull stones into dazzling gems. Discover the best techniques and materials for hand polishing, ensuring your rocks shine like never before.
1. Why Choose Hand Polishing for Your Rocks?
Hand polishing rocks offers numerous advantages. It’s an accessible method for all ages and skill levels, requiring minimal materials and offering a cost-effective way to achieve beautifully polished stones. For softer stones like turquoise and amber, hand polishing is often the preferred method, as these materials may not withstand the rigors of a rock tumbler. According to the Gemological Institute of America (GIA), hand polishing allows for greater control over the final result, which is especially important for delicate or valuable specimens.
Hand polishing can also be a therapeutic activity. The rhythmic motion can be relaxing, providing a Zen-like experience. Additionally, the personal touch allows for a greater appreciation of the stone’s unique characteristics.
Here’s a quick comparison of hand polishing vs. tumbling:
| Feature | Hand Polishing | Rock Tumbling |
|---|---|---|
| Time | Faster for softer rocks | Slower, days to weeks |
| Labor | More labor-intensive | Less labor-intensive |
| Control | Greater control over the result | Less control |
| Best for | Softer, delicate stones | Harder, durable stones |
| Initial Setup | Low Cost | Higher Cost |
2. Essential Materials for Hand Polishing
Before you begin, gather these essential materials:
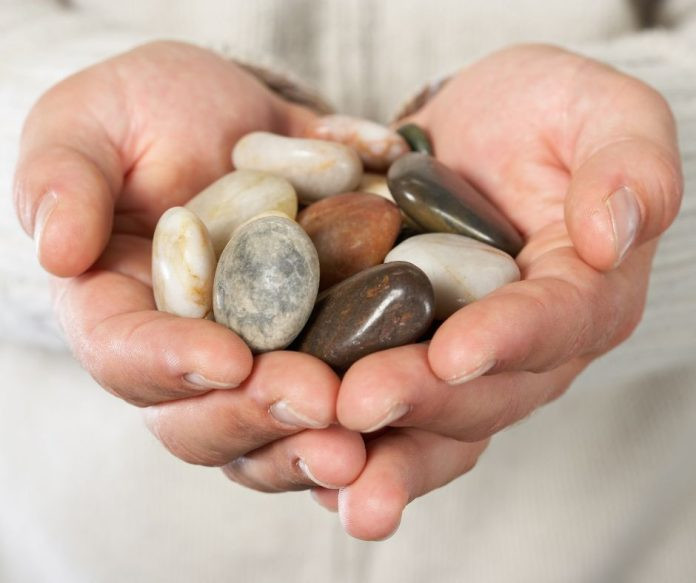
- Rocks: Select rocks that are relatively smooth and free of major imperfections. Softer stones are ideal for beginners.
- Cleaning Supplies: A bucket, hot soapy water, and a toothbrush for removing dirt and debris.
- Sandpaper: A range of grits, including 220, 500, and 1200 grit, to gradually refine the surface of the rock.
- Cutting Board: Or another hard, flat surface to provide a stable base for sanding.
- Thick Cloth: Preferably denim or a similar material, for the final polishing stage.
- Toothpaste: A readily available and effective polishing compound.
- Mineral Oil or Rock Polish: To enhance the luster of the polished stone.
- Protective Gear: Gloves, eyewear, and a mask to protect your skin, eyes, and respiratory system.
- Dremel (Optional): A motorized rotary tool for shaping and polishing harder stones.
According to research from Arizona State University’s School of Earth and Space Exploration, using the correct grit sequence is crucial for achieving a high-quality polish.
3. Step-by-Step Guide to Hand Polishing Rocks
Follow these steps to transform your rocks into gleaming beauties:
3.1. Step 1: Cleaning the Rocks
Start by thoroughly cleaning the rock(s) to remove any dirt, grime, or debris. Fill a small bucket with hot, soapy water. Use an old toothbrush to scrub away stubborn residue from crevices. Rinse the rock(s) thoroughly with clean water and discard the soapy water. Refill the bucket with clean water for use throughout the polishing process.
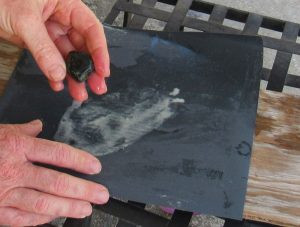
3.2. Step 2: Rough Shaping with 220-Grit Sandpaper
Moisten the 220-grit sandpaper and place it grit-side up on a cutting board or other hard, flat surface. Wet the rock and hold it in your dominant hand. Rub the rock along the sandpaper to remove hard edges and begin shaping it. Continuously wet the rock to remove fine particles and continue sanding until the edges become smooth and rounded or you achieve the desired shape.
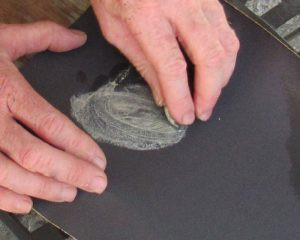
3.3. Step 3: Refining the Shape with 500-Grit Sandpaper
Switch to 500-grit sandpaper to further refine the shape and remove heavy scratches. Keep the rock wet throughout the sanding process for optimal results. This step helps to smooth out the surface and prepare it for the final polishing stages.
3.4. Step 4: Polishing with 1200-Grit Sandpaper
Use 1200-grit sandpaper to remove lighter scratches and begin polishing the rock. This extra-fine sandpaper buffs out tiny imperfections on the stone’s surface, and the shine will start to emerge during this step. Ensure the rock remains wet, rinsing it frequently to expose any missed spots.
3.5. Step 5: Final Polishing with Toothpaste
Dampen a square of thick cloth, preferably denim, and apply a generous dab of toothpaste. Work the stone through the toothpaste and over the fabric to create a beautiful luster. Depending on the stone, add more toothpaste as needed until the desired shine is achieved.
3.6. Step 6: Enhancing the Luster
Rinse off the toothpaste and coat the newly polished stone with mineral oil or a commercial rock polish to bring out its luster. Once the rock is dry, it’s ready to be displayed and admired.
 how-to-polish-rocks-by-hand
3.7. Augmenting with a Dremel
A Dremel is a popular motorized rotary tool that’s useful for grinding, smoothing sharp edges, and shaping hard stones, especially those with lots of crevices.
“You can shape and polish rocks and gems faster with a Dremel if you want,” said Allen McGhee, long-time rockhound and hand polisher. “They make heads for them with all three levels of grit you need.”
When using a Dremel, protective eyewear is a must. Even small chips can damage an eye. Gloves should be used to protect hands. Sharp edges on the rock and the rotating tip of the Dremel can break the skin. Wearing a mask prevents inhaling the tiny particles coming off the rock as it is ground.
4. Choosing the Right Rocks for Polishing
Selecting the right rocks is crucial for successful hand polishing. Softer stones, like those mentioned earlier, are generally easier to polish by hand. However, harder stones can also be polished with patience and the right techniques.
Here are some popular rock types for hand polishing:
- Agate: A microcrystalline variety of quartz known for its colorful bands and patterns.
- Jasper: An opaque variety of chalcedony, often found in vibrant colors and patterns.
- Turquoise: A blue-green mineral prized for its color and used in jewelry and ornamentation.
- Amber: Fossilized tree resin, often containing inclusions of insects or plant matter.
- Obsidian: Volcanic glass with a smooth, glassy texture.
- Malachite: A green copper carbonate mineral with distinctive banding patterns.
- Rhodochrosite: A manganese carbonate mineral, typically rose-red in color.
- Lapis Lazuli: A deep-blue metamorphic rock used for its intense color since antiquity.
When selecting rocks, look for specimens that are relatively smooth and free of major cracks or imperfections. These will be easier to polish and will yield better results.
5. Addressing Common Challenges in Rock Polishing
Even with the best techniques, you may encounter some challenges during the rock polishing process. Here are some common issues and how to address them:
- Uneven Polishing: This can occur if you don’t apply even pressure while sanding. Focus on maintaining consistent pressure and motion.
- Scratches: If scratches persist, go back to a coarser grit of sandpaper and work your way up through the finer grits again.
- Dull Finish: A dull finish can be caused by using too little polishing compound or not polishing for long enough. Ensure you’re using enough toothpaste and polishing for an adequate amount of time.
- Rock Breakage: Delicate rocks can break during polishing. Be gentle and avoid applying too much pressure.
6. Understanding the Mohs Hardness Scale
The Mohs hardness scale is a crucial tool for rockhounds, determining a mineral’s resistance to scratching. Minerals are ranked from 1 (talc, the softest) to 10 (diamond, the hardest). This knowledge aids in selecting appropriate polishing methods and materials.
| Hardness | Mineral | Common Object |
|---|---|---|
| 1 | Talc | Easily scratched by a fingernail |
| 2 | Gypsum | Scratched by a fingernail |
| 3 | Calcite | Scratched by a copper penny |
| 4 | Fluorite | Easily scratched by a knife |
| 5 | Apatite | Scratched by a knife with some effort |
| 6 | Orthoclase | Scratched by a steel file |
| 7 | Quartz | Scratches glass |
| 8 | Topaz | Scratches quartz |
| 9 | Corundum | Scratches topaz |
| 10 | Diamond | Scratches everything |
When hand polishing, it’s essential to choose rocks with a similar hardness to ensure consistent results. Combining rocks with significantly different hardness levels in a tumbler, for example, can lead to uneven polishing and damage to the softer stones.
7. Advanced Techniques for Rock Polishing
For more experienced rock polishers, several advanced techniques can enhance the final result.
- Pre-Polishing: Before the final polishing stage, use a pre-polishing compound, such as cerium oxide, to remove any remaining fine scratches and prepare the surface for the final shine.
- Ultrasonic Cleaning: After polishing, use an ultrasonic cleaner to remove any residual polishing compound from crevices and other hard-to-reach areas.
- Waxing: Applying a thin coat of wax to the polished rock can further enhance its luster and protect it from scratches.
8. The Art of Rock Arrangement and Display
Once you’ve polished your rocks, it’s time to showcase them. Consider these display ideas:
- Shadow Boxes: Arrange your polished rocks in shadow boxes to create stunning wall art.
- Glass Jars: Fill glass jars with polished rocks for a colorful and textured display.
- Garden Accents: Use larger polished rocks as accents in your garden or landscape.
- Jewelry Making: Incorporate smaller polished rocks into jewelry designs.
No matter how you choose to display your polished rocks, be sure to highlight their unique beauty and showcase the time and effort you invested in transforming them.
9. Safety Measures While Polishing Rocks
When polishing rocks, safety should be a top priority. Always wear safety glasses to protect your eyes from flying debris. Use gloves to protect your hands from abrasion and potential cuts. If you’re using a Dremel or other power tools, wear a dust mask to avoid inhaling fine particles. Work in a well-ventilated area to minimize exposure to dust and fumes.
10. Frequently Asked Questions (FAQs) About Polishing Rocks
10.1. Can you polish any type of rock?
Yes, you can polish most types of rocks, but softer stones are generally easier to polish by hand.
10.2. What is the best sandpaper grit for polishing rocks?
A range of grits, including 220, 500, and 1200 grit, is ideal for gradually refining the surface of the rock.
10.3. Is it better to polish rocks by hand or in a tumbler?
Hand polishing is faster for softer rocks and offers greater control, while tumbling is less labor-intensive and suitable for harder stones.
10.4. Can I use toothpaste to polish rocks?
Yes, toothpaste is an effective and readily available polishing compound for achieving a beautiful luster.
10.5. What safety precautions should I take when polishing rocks?
Always wear safety glasses, gloves, and a dust mask, and work in a well-ventilated area.
10.6. How long does it take to polish a rock by hand?
The time it takes to polish a rock by hand depends on the hardness of the stone and the desired level of polish. It can range from a few hours to several days.
10.7. What is the Mohs hardness scale?
The Mohs hardness scale is a measure of a mineral’s resistance to scratching, ranging from 1 (softest) to 10 (hardest).
10.8. Can I use a Dremel to polish rocks?
Yes, a Dremel can be used to shape and polish harder stones, especially those with lots of crevices.
10.9. What are some popular rock types for hand polishing?
Popular rock types for hand polishing include agate, jasper, turquoise, amber, and obsidian.
10.10. How can I display my polished rocks?
Consider displaying your polished rocks in shadow boxes, glass jars, as garden accents, or in jewelry designs.
Conclusion: Unleash the Beauty Within
So, can you polish a rock? Absolutely! With the right techniques, materials, and a bit of patience, you can transform dull, ordinary stones into dazzling gems. Whether you’re a seasoned rockhound or a beginner, hand polishing offers a rewarding and therapeutic way to connect with the natural world. Explore the endless possibilities of rock polishing and create stunning displays of natural beauty.
Ready to start your rock polishing journey? Visit rockscapes.net for more inspiration, detailed guides, and expert advice. Let us help you discover the hidden beauty within every stone. Contact us at Address: 1151 S Forest Ave, Tempe, AZ 85281, United States. Phone: +1 (480) 965-9011. Website: rockscapes.net. Explore the beauty of rock polishing with us today!
 how-to-polish-rocks
 how-to-polish-rocks