How To Do Rock Art? Rock art, also known as painted rocks, is a fun and creative hobby that anyone can enjoy. At rockscapes.net, we provide you with all the information to get started with this art form, from finding the perfect rocks to displaying your finished masterpieces. Discover the beauty of rock painting and add a personal touch to your rock garden or share your art with the community.
1. Understanding Rock Art
Rock art involves painting designs, patterns, or images onto rocks, transforming ordinary stones into decorative and expressive art pieces. Whether you’re aiming to create something for your own enjoyment or to share within your community, understanding the basics can help you get started.
1.1 What is Rock Art?
Rock art, in its simplest form, is the act of painting on rocks. It’s a creative outlet that allows individuals to express themselves through various designs and patterns on a natural canvas. According to research from Arizona State University’s School of Art, this practice fosters creativity and community engagement.
1.2 Why is Rock Art Popular?
Rock art is popular because it’s accessible, affordable, and fun for all ages. It’s also a great way to connect with nature and spread joy by hiding painted rocks for others to find. Sharing kindness is an important reason why individuals choose this hobby.
1.3 What are the Benefits of Rock Art?
Rock art offers several benefits:
- Boosts Creativity: Encourages artistic expression and innovation.
- Reduces Stress: Provides a relaxing and meditative activity.
- Enhances Community: Fosters connection through sharing and hiding rocks.
- Educational: Teaches about different cultures and art techniques.
2. Gathering Your Supplies for Rock Art
To begin your rock art journey, you’ll need to gather a few essential supplies. Having the right materials ensures a smooth and enjoyable experience.
2.1 What Kind of Rocks are Best for Painting?
Smooth, flat rocks are best for painting. These provide an even surface for your designs. River rocks or landscaping rocks are excellent choices. According to the University of Arizona’s Department of Geosciences, sedimentary rocks like sandstone and shale are porous and may require additional preparation.
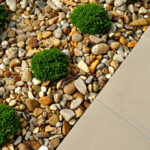
2.2 Where Can You Find Rocks for Painting?
You can find rocks in several places:
- Landscaping Supply Shops: Affordable and natural-looking stones.
- Online Retailers: Convenient for specific sizes and shapes.
- Craft Stores: Offer a variety of rocks suitable for painting.
- Your Own Backyard: A cost-free option, just ensure it’s legal to collect them.
2.3 What Types of Paint Work Best on Rocks?
Acrylic paints are the most popular choice for rock art. They are durable, water-resistant, and come in a wide range of colors. Paint pens, especially Posca pens, are great for detailed work.
2.4 What Other Supplies Do You Need for Rock Art?
Besides rocks and paint, consider these additional supplies:
- Brushes: Various sizes for different details.
- Sealant: To protect your painted rocks from the elements.
- Primer: To create a smooth base for your paint.
- Pencils: For sketching designs before painting.
- Water Container: For cleaning brushes.
- Paper Towels: For blotting excess paint.
3. Preparing Your Rocks for Painting
Properly preparing your rocks ensures that the paint adheres well and your designs look their best. Cleaning and priming are essential steps.
3.1 Why is it Important to Clean Rocks Before Painting?
Cleaning removes dirt, debris, and oils that can prevent paint from sticking. A clean surface ensures better adhesion and a more vibrant finish.
3.2 How Do You Clean Rocks for Painting?
- Rinse: Wash the rocks with warm water to remove loose dirt.
- Scrub: Use a vegetable brush to scrub the rocks thoroughly.
- Dry: Allow the rocks to dry completely before painting.
3.3 Should You Prime Rocks Before Painting?
Priming is optional but recommended. It creates a smooth, even surface that helps paint adhere better and enhances color vibrancy.
3.4 How Do You Prime Rocks for Painting?
- Apply Primer: Use a brush or spray to apply a thin, even coat of primer.
- Dry: Allow the primer to dry completely according to the manufacturer’s instructions.
- Sand (Optional): Lightly sand the primed surface for extra smoothness.
4. Painting Techniques for Rock Art
Now comes the fun part: painting your rocks. There are endless possibilities when it comes to designs and techniques.
4.1 What are Some Basic Painting Techniques for Rock Art?
- Base Coating: Applying a solid color as a foundation for your design.
- Layering: Adding multiple layers of paint to create depth and dimension.
- Dot Painting: Using dots to create intricate patterns and designs.
- Blending: Smoothly merging colors together for a gradient effect.
- Outlining: Defining shapes and details with a fine-tipped brush or paint pen.
4.2 How Do You Create Detailed Designs on Rocks?
For detailed designs:
- Sketch: Lightly sketch your design on the rock with a pencil.
- Outline: Use a fine-tipped paint pen to outline your design.
- Fill In: Carefully fill in the details with your chosen colors.
- Layer: Add layers of paint to create depth and highlights.
4.3 What are Some Popular Themes for Rock Art?
- Animals: Birds, butterflies, cats, and dogs are always popular.
- Nature Scenes: Sunsets, landscapes, and floral patterns.
- Inspirational Quotes: Positive messages and affirmations.
- Mandalas: Intricate geometric patterns.
- Cartoon Characters: Beloved characters from movies and TV shows.
4.4 How Do You Fix Mistakes While Painting Rocks?
- Wipe Away: If the paint is still wet, wipe it away with a damp cloth.
- Paint Over: Once dry, paint over the mistake with a base color and start again.
- Use a Cotton Swab: Dip a cotton swab in water or paint thinner to correct small errors.
5. Sealing Your Painted Rocks
Sealing your painted rocks protects them from the elements and ensures that your designs last longer.
5.1 Why is it Important to Seal Painted Rocks?
Sealing protects your artwork from fading, chipping, and water damage, especially if you plan to display your rocks outdoors.
5.2 What Types of Sealants are Best for Rock Art?
- Spray Sealants: Easy to apply and provide even coverage.
- Brush-On Sealants: Offer more control and are ideal for detailed work.
- Resin: Creates a glossy, glass-like finish.
5.3 How Do You Seal Painted Rocks?
- Clean: Ensure the painted surface is clean and dry.
- Apply Sealant: Apply a thin, even coat of sealant according to the manufacturer’s instructions.
- Dry: Allow the sealant to dry completely before adding additional coats.
- Repeat: Apply multiple coats for added protection.
5.4 What are Some Tips for Sealing Rocks in Different Weather Conditions?
- Dry Weather: Seal outdoors on a dry, sunny day for best results.
- Humid Weather: Seal indoors in a well-ventilated area to prevent clouding.
- Cold Weather: Ensure the sealant is at room temperature for optimal application.
6. Displaying and Sharing Your Rock Art
Once your rocks are painted and sealed, it’s time to display and share your creations. There are many ways to showcase your art.
6.1 Where Can You Display Your Painted Rocks?
- Gardens: Add a pop of color and creativity to your outdoor space.
- Home Decor: Use them as decorative accents on shelves, tables, or windowsills.
- Community Hiding: Hide them in parks, trails, and public spaces for others to find.
- Rock Gardens: Create a dedicated space for your rock art collection.
6.2 How Can You Share Your Rock Art with Others?
- Social Media: Share photos of your creations on platforms like Instagram and Facebook.
- Local Rock Groups: Join local rock painting groups to connect with other artists.
- Gifting: Give your painted rocks as unique and personalized gifts.
- Etsy: Sell your rock art creations online.
6.3 What are Some Ethical Considerations When Hiding Painted Rocks?
- Respect Nature: Avoid placing rocks in sensitive environmental areas.
- Obey Local Laws: Ensure that hiding rocks is permitted in the area.
- Use Non-Toxic Materials: Only use paints and sealants that are safe for the environment.
- Avoid Private Property: Do not hide rocks on private property without permission.
6.4 How Can You Promote Kindness Through Rock Art?
- Inspirational Messages: Paint rocks with uplifting quotes and messages.
- Random Acts of Kindness: Hide rocks in unexpected places to brighten someone’s day.
- Community Projects: Organize rock painting events to spread joy and positivity.
- Donate to Charities: Donate painted rocks to hospitals, nursing homes, or shelters.
7. Advanced Techniques and Ideas for Rock Art
Ready to take your rock art to the next level? Explore these advanced techniques and creative ideas.
7.1 How to Use Alcohol Inks on Rocks
Alcohol inks create vibrant, translucent effects on rocks.
- Prepare the Rock: Prime the rock with a white base coat.
- Apply Ink: Drip or brush alcohol inks onto the rock.
- Blend: Use a blending solution or isopropyl alcohol to blend the inks.
- Seal: Seal the rock with a UV-resistant sealant to prevent fading.
7.2 How to Create Mandala Designs on Rocks
Mandalas are intricate, geometric designs that are both beautiful and meditative.
- Center Point: Start by marking the center of the rock.
- Grid: Create a grid with evenly spaced lines.
- Patterns: Use dotting tools to create symmetrical patterns around the center.
- Color: Add color to the mandala using paint pens or fine-tipped brushes.
7.3 How to Blend Paints on Rocks
Blending creates smooth transitions between colors.
- Base Coat: Apply a base coat of your lightest color.
- Add Colors: Apply small amounts of your other colors next to each other.
- Blend: Use a soft brush or sponge to blend the colors together while they are still wet.
- Layer: Add layers of color to deepen the blend.
7.4 How to Make Glow-in-the-Dark Painted Rocks
Glow-in-the-dark rocks add a magical touch to your garden or home decor.
- Base Coat: Apply a white or light-colored base coat.
- Glow Paint: Apply glow-in-the-dark paint over your design.
- Charge: Expose the rock to light to charge the glow paint.
- Seal: Seal the rock with a clear sealant.
8. Rock Art for Different Seasons and Holidays
Rock art can be adapted to celebrate various seasons and holidays.
8.1 What are Some Rock Art Ideas for Spring?
- Floral Designs: Daisies, tulips, and cherry blossoms.
- Spring Animals: Butterflies, ladybugs, and chicks.
- Pastel Colors: Soft pinks, blues, and greens.
- Easter Themes: Bunnies, eggs, and spring messages.
8.2 What are Some Rock Art Ideas for Summer?
- Beach Themes: Seashells, starfish, and ocean waves.
- Summer Fruits: Watermelons, strawberries, and lemons.
- Bright Colors: Yellows, oranges, and blues.
- Patriotic Designs: Flags, stars, and stripes for the Fourth of July.
8.3 What are Some Rock Art Ideas for Autumn?
- Fall Leaves: Maple leaves, oak leaves, and birch leaves.
- Autumn Animals: Squirrels, owls, and foxes.
- Warm Colors: Reds, oranges, and browns.
- Halloween Themes: Pumpkins, ghosts, and spooky messages.
8.4 What are Some Rock Art Ideas for Winter?
- Snowflakes: Intricate snowflake patterns.
- Winter Animals: Penguins, polar bears, and reindeer.
- Cool Colors: Blues, whites, and silvers.
- Christmas Themes: Santa Claus, snowmen, and festive messages.
9. Troubleshooting Common Rock Art Problems
Even experienced rock artists encounter occasional problems. Here are some solutions to common issues.
9.1 Why is My Paint Chipping Off My Rocks?
- Poor Preparation: Ensure the rocks are clean and primed.
- Incompatible Paint: Use acrylic paints specifically designed for crafts.
- Insufficient Sealing: Apply multiple coats of sealant for adequate protection.
- Weather Exposure: Protect rocks from extreme weather conditions.
9.2 Why is My Sealant Cloudy or Streaky?
- Humidity: Seal rocks in a dry environment.
- Incompatible Sealant: Use a sealant that is compatible with your paint.
- Improper Application: Apply thin, even coats of sealant.
- Old Sealant: Use fresh sealant for best results.
9.3 How Do I Prevent Paint Pens from Clogging?
- Shake Well: Shake the paint pen thoroughly before each use.
- Prime: Prime the pen by pressing the tip down on a scrap piece of paper.
- Clean: Clean the tip of the pen regularly with a damp cloth.
- Store Properly: Store the pen horizontally to prevent clogging.
9.4 How Do I Remove Paint from Rocks if I Make a Mistake?
- Wet Paint: Wipe away with a damp cloth.
- Dry Paint: Use a cotton swab dipped in rubbing alcohol or paint thinner.
- Stubborn Paint: Lightly sand the area with fine-grit sandpaper.
 Assortment of rocks and tools used for painting
10. Rock Art and the Community
Rock art is not just a personal hobby; it’s also a way to connect with and contribute to your community.
10.1 How Can You Get Involved in Local Rock Painting Groups?
- Facebook: Search for local rock painting groups on Facebook.
- Community Centers: Check for rock painting workshops at local community centers.
- Libraries: Attend rock painting events at local libraries.
- Online Forums: Participate in online forums dedicated to rock art.
10.2 What are Some Ways to Use Rock Art for Charitable Causes?
- Fundraisers: Sell painted rocks to raise money for charities.
- Donations: Donate painted rocks to hospitals, nursing homes, or shelters.
- Awareness Campaigns: Create rocks with messages promoting awareness for important causes.
- Community Projects: Organize rock painting events to benefit local organizations.
10.3 How Can Rock Art Promote Environmental Awareness?
- Nature Themes: Paint rocks with images of endangered species or natural landscapes.
- Environmental Messages: Create rocks with messages promoting conservation and sustainability.
- Recycled Materials: Use recycled materials to create rock art.
- Clean-Up Events: Organize rock painting events in conjunction with local clean-up efforts.
10.4 What are Some Tips for Organizing a Rock Painting Event?
- Location: Choose a safe, accessible location with plenty of space.
- Supplies: Provide all necessary supplies, including rocks, paint, brushes, and sealant.
- Instructions: Offer clear instructions and guidance for participants.
- Promotion: Promote the event through social media, local newspapers, and community bulletin boards.
11. Rock Art Inspiration and Ideas from Rockscapes.net
Looking for inspiration? Rockscapes.net offers a wealth of ideas and resources to fuel your creativity.
11.1 Exploring Landscape Design with Rocks
Transform your garden or outdoor space with creative rock arrangements.
- Rock Gardens: Create a serene and natural-looking rock garden.
- Pathways: Use rocks to create winding pathways through your yard.
- Water Features: Incorporate rocks into water features such as ponds and fountains.
- Retaining Walls: Build sturdy and attractive retaining walls with rocks.
11.2 Unique Rock Features for Your Yard
Add personality and charm to your yard with unique rock features.
- Sculptures: Create eye-catching rock sculptures.
- Fire Pits: Build a cozy fire pit surrounded by rocks.
- Benches: Construct a rock bench for relaxing in your garden.
- Edging: Use rocks to create decorative edging around flower beds.
11.3 Integrating Rock Art into Your Landscape Design
Blend your painted rocks seamlessly into your landscape design.
- Hidden Gems: Place painted rocks among plants and flowers for delightful surprises.
- Themed Gardens: Create themed gardens with rocks that match the theme.
- Fairy Gardens: Incorporate painted rocks into whimsical fairy gardens.
- Memorials: Use painted rocks to create personalized memorials for loved ones or pets.
 Selection of sealed and painted rocks
11.4 Choosing the Right Rocks for Your Project at Rockscapes.net
Rockscapes.net offers a wide variety of rocks to suit any project.
- Granite: Durable and versatile for various applications.
- Slate: Elegant and ideal for pathways and patios.
- River Rock: Smooth and perfect for water features.
- Flagstone: Flat and great for paving and walkways.
12. Maintaining Your Rock Art
Proper maintenance ensures that your rock art remains beautiful for years to come.
12.1 How to Clean Painted Rocks
- Gentle Washing: Wash rocks with mild soap and water.
- Soft Brush: Use a soft brush to remove dirt and debris.
- Rinse Thoroughly: Rinse rocks thoroughly with clean water.
- Dry Completely: Allow rocks to dry completely before placing them back in your garden.
12.2 How to Protect Your Rock Art from the Elements
- Sealant: Apply a UV-resistant sealant to protect rocks from fading.
- Shade: Place rocks in shaded areas to reduce exposure to sunlight.
- Cover: Cover rocks during extreme weather conditions, such as heavy rain or snow.
- Reapply Sealant: Reapply sealant every year to maintain protection.
12.3 How to Repair Damaged Rock Art
- Clean: Clean the damaged area with soap and water.
- Touch-Up Paint: Use touch-up paint to repair chipped or faded areas.
- Reseal: Reseal the repaired area with sealant.
- Replace: Replace severely damaged rocks with new ones.
12.4 Best Practices for Long-Lasting Rock Art
- Quality Materials: Use high-quality paints and sealants.
- Proper Preparation: Clean and prime rocks thoroughly.
- Regular Maintenance: Clean and reseal rocks regularly.
- Protection: Protect rocks from extreme weather conditions.
13. Frequently Asked Questions (FAQ) About Rock Art
13.1 What is the best type of paint to use for rock art?
Acrylic paints are the best choice due to their durability and water resistance.
13.2 Do I need to seal my painted rocks?
Yes, sealing is essential to protect your artwork from the elements.
13.3 Can I use regular markers instead of paint pens?
Paint pens are recommended for finer details and better durability compared to regular markers.
13.4 How do I prevent my painted rocks from fading in the sun?
Use a UV-resistant sealant and place your rocks in shaded areas to prevent fading.
13.5 Is it okay to take rocks from parks or natural areas for painting?
Always check local laws and regulations before collecting rocks from public areas.
13.6 How do I clean my paint brushes after rock painting?
Clean your brushes with soap and water immediately after use to prevent paint from drying.
13.7 Can I sell my painted rocks online?
Yes, you can sell your painted rocks on platforms like Etsy.
13.8 What is the best sealant for painted rocks that will be placed outdoors?
A UV-resistant, waterproof sealant is best for protecting painted rocks outdoors.
13.9 How do I remove old sealant from painted rocks?
Use a sealant remover or gently sand the surface to remove old sealant.
13.10 What are some good resources for rock art inspiration?
Websites like Pinterest, Instagram, and Rockscapes.net offer plenty of rock art ideas and inspiration.
14. Conclusion: Unleash Your Creativity with Rock Art
Rock art is a rewarding and enjoyable hobby that allows you to express your creativity and connect with your community. From gathering supplies to mastering advanced techniques, the possibilities are endless. Visit rockscapes.net for more inspiration, tips, and resources to enhance your rock art journey. Transform ordinary stones into extraordinary works of art and share the joy of rock art with the world.
Ready to start your rock art adventure? Explore the stunning array of rocks and get inspired by our unique landscape designs at rockscapes.net. Contact us today at +1 (480) 965-9011 or visit our location at 1151 S Forest Ave, Tempe, AZ 85281, United States, and let our experts help you create breathtaking rock art that will transform your space. Don’t wait, unleash your creativity now with Rockscapes.