Are you looking to bring the raw beauty of nature into your home or outdoor space? Installing rock tile is a fantastic way to achieve a unique and organic aesthetic. At rockscapes.net, we provide you with a step-by-step guide on How To Install Rock Tile, ensuring a successful and visually stunning project. Let’s dive into the world of stone installation, natural stone tiles, and landscaping stones to unlock the full potential of your space with rockscapes.net.
1. Understanding Rock Tile and Its Applications
Rock tile offers a distinctive and elegant way to enhance both interior and exterior spaces. Understanding the types of rock tile available and their best uses is crucial for a successful installation.
1.1 What Exactly Is Rock Tile?
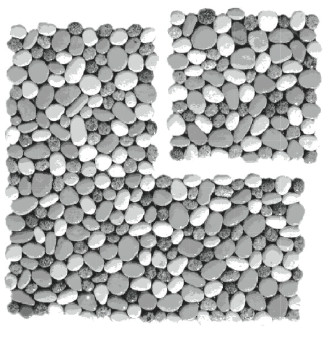
Rock tile refers to tiles made from natural stones like granite, slate, marble, or pebbles. These tiles are often mesh-backed for easy installation and can be used for various applications, including flooring, walls, backsplashes, and outdoor landscaping features. Rock tile’s natural variations in color, texture, and size create a unique, organic look that’s hard to replicate with other materials.
1.2 Where Can You Use Rock Tile?
Rock tile is versatile and can be used in numerous settings. Here are some popular applications:
- Flooring: Ideal for bathrooms, kitchens, and entryways, providing a non-slip surface and natural aesthetic.
- Walls: Great for accent walls, shower walls, and backsplashes, adding texture and visual interest.
- Outdoor Patios and Walkways: Perfect for creating natural-looking pathways and durable patio surfaces.
- Fireplaces: Adds a rustic and elegant touch to fireplace surrounds.
- Water Features: Suitable for ponds, fountains, and other water elements, enhancing their natural appeal.
- Landscaping: Use rock tiles to create retaining walls, garden borders, and other decorative features.
1.3 What are the Benefits of Installing Rock Tile?
Installing rock tile comes with a myriad of benefits, making it a popular choice for homeowners and designers alike.
- Aesthetic Appeal: Natural stone provides a unique, organic look that can enhance any space. The variations in color, texture, and pattern create a visually appealing and one-of-a-kind design.
- Durability: Rock tile is incredibly durable and long-lasting, capable of withstanding heavy foot traffic and harsh weather conditions. This makes it an ideal choice for both indoor and outdoor applications.
- Low Maintenance: Once sealed, rock tile is relatively easy to maintain. Regular cleaning with mild soap and water is usually sufficient to keep it looking its best.
- Increased Home Value: The addition of natural stone can increase the overall value of your home, thanks to its high-end look and long-lasting durability.
- Versatility: Rock tile can be used in a variety of applications, from flooring and walls to outdoor patios and landscaping features. Its versatility makes it a great choice for any design style.
- Eco-Friendly: Natural stone is an environmentally friendly material, especially when sourced locally. It’s a sustainable option that adds a touch of nature to your home.
2. Essential Tools and Materials for Rock Tile Installation
Preparing for your rock tile installation involves gathering the right tools and materials. Having everything on hand will ensure a smooth and efficient process.
2.1 What Tools Do You Need?
- Notched Trowel: Essential for applying adhesive evenly. A 1/4″ notched trowel is generally recommended.
- Tile Saw: Used for cutting tiles to fit specific spaces. A wet saw is best for cutting stone accurately.
- Rubber Mallet: Helps to gently set the tiles into the adhesive.
- Level: Ensures tiles are installed evenly and prevents uneven surfaces.
- Grout Float: Used to apply grout smoothly and evenly between the tiles.
- Sponges: Necessary for cleaning excess grout and adhesive.
- Buckets: For mixing adhesive and cleaning water.
- Measuring Tape: Accurate measurements are crucial for proper tile placement.
- Pencil: For marking cut lines on tiles.
- Safety Glasses and Gloves: Protect your eyes and hands during the installation process.
2.2 What Materials Are Required?
- Rock Tiles: Choose the type and style that best fits your project’s aesthetic. Island Stone offers a variety of mesh-backed pebble and marble tiles.
- Adhesive (Thin-Set Mortar): Select an adhesive suitable for natural stone. Modified cement adhesive is recommended for areas with potential movement.
- Grout: Choose a grout that complements the color of your tiles and is suitable for joints up to 1/2″ wide.
- Sealer: A quality impregnating sealer is essential for protecting the stone from stains and water damage.
- Waterproof Membrane (for Wet Areas): Install a waterproof membrane in wet areas like showers and bathrooms to prevent water leakage.
- Cleaning Solution: Use a mild detergent to clean the tiles before and after installation.
2.3 What Type of Adhesive Should I Use?
Selecting the right adhesive is crucial for ensuring that your rock tiles are securely installed and long-lasting. The type of adhesive you choose will depend on the substrate and the environment in which the tiles will be installed.
- Cement-Based Adhesives (Thin-Set Mortar): These are generally suitable for masonry substrates where no movement is anticipated. They are easy to mix and apply, making them a popular choice for many installations.
- Modified Cement Adhesives: For areas where slight movement could occur due to thermal or pedestrian loads, a modified cement adhesive is recommended. These adhesives offer enhanced flexibility and bond strength, ensuring the tiles remain in place even with minor shifts.
- Epoxy Adhesives: For demanding environments such as those exposed to chemicals or heavy traffic, epoxy adhesives provide superior bond strength and resistance to moisture and chemicals.
- Latex-Modified Thin-Set: These adhesives combine the benefits of cement-based and modified adhesives, offering good flexibility and bond strength. They are a versatile option suitable for a wide range of applications.
According to research from Arizona State University’s School of Earth and Space Exploration, the use of modified cement adhesives in areas with potential movement significantly reduces the risk of tile cracking and detachment, ensuring a longer-lasting and more durable installation.
3. Preparing the Surface for Rock Tile Installation
Proper surface preparation is critical for ensuring the longevity and appearance of your rock tile installation. A clean, stable, and level surface will provide the best foundation for your tiles.
3.1 How to Clean the Substrate?
The first step in surface preparation is cleaning the substrate thoroughly. Remove any dirt, dust, grease, or other contaminants that could interfere with the adhesion of the tile.
- Sweep or Vacuum: Start by sweeping or vacuuming the area to remove loose debris.
- Scrub with Detergent: Use a scrub brush and a solution of mild detergent and water to clean the surface.
- Rinse Thoroughly: Rinse the area with clean water to remove any soap residue.
- Allow to Dry: Allow the surface to dry completely before proceeding to the next step.
3.2 How to Ensure a Flat and Even Surface?
Uneven surfaces can lead to cracked tiles and an unprofessional appearance. Use a level to check for any irregularities and address them accordingly.
- Identify Uneven Areas: Use a long level to identify any high or low spots on the surface.
- Fill Low Spots: Fill low spots with a self-leveling compound or thin-set mortar, following the manufacturer’s instructions.
- Grind High Spots: Grind down high spots with a concrete grinder or sander until the surface is level.
- Recheck with Level: After making corrections, recheck the surface with a level to ensure it is flat and even.
3.3 Do You Need a Waterproof Membrane?
In wet areas such as showers, bathrooms, and around water features, installing a waterproof membrane is essential to prevent water damage.
- Apply Membrane: Apply a waterproof membrane to the substrate, following the manufacturer’s instructions. Ensure that the membrane extends up the walls and around any penetrations, such as pipes or drains.
- Allow to Cure: Allow the membrane to cure completely before proceeding with the tile installation. This usually takes 24-48 hours, depending on the product.
3.4 How to Handle Control Joints?
Control joints are essential for minimizing potential damage from building movement. They allow for expansion and contraction, preventing cracks and other issues.
- Identify Existing Joints: Identify any existing control joints in the substrate.
- Maintain Joints: Ensure that the control joints are maintained through the tile installation. Do not tile over control joints; instead, create matching joints in the tile layer.
- Fill Joints: Fill the control joints with a flexible sealant and bond breaker to allow for movement.
By following these steps, you can ensure that your surface is properly prepared for rock tile installation, setting the stage for a beautiful and long-lasting result.
4. Laying Out Your Rock Tile
Proper layout is crucial for achieving an aesthetically pleasing and structurally sound rock tile installation. Careful planning ensures that the tiles are aligned correctly and that any necessary cuts are made accurately.
4.1 How to Plan Your Tile Arrangement?
Before you start laying tiles, take the time to plan your arrangement. This will help you visualize the final result and make any necessary adjustments.
- Measure the Area: Measure the area where you will be installing the tiles.
- Dry Layout: Lay out the tiles without adhesive to get an idea of how they will fit. Adjust the arrangement as needed to ensure a balanced and visually appealing design.
- Consider Focal Points: Plan your layout around any focal points in the room, such as a fireplace or a window.
- Mark Reference Lines: Use a level and a pencil to mark reference lines on the substrate. These lines will guide you as you lay the tiles.
4.2 How to Handle Cuts and Trims?
Cutting tiles accurately is essential for fitting them around corners, edges, and obstacles.
- Measure and Mark: Measure the space where the tile needs to be cut, and mark the cut line on the tile with a pencil.
- Use a Tile Saw: Use a wet tile saw to make clean, accurate cuts. Be sure to wear safety glasses to protect your eyes.
- Smooth Edges: Smooth any rough edges with a rubbing stone or sandpaper.
- Plan for Borders: If you’re using border tiles, plan their placement carefully to create a finished look.
4.3 What Pattern Options are Available?
Rock tiles offer a range of pattern options, allowing you to customize the look of your installation.
- Stacked Pattern: Tiles are aligned in straight rows and columns, creating a clean and modern look.
- Offset Pattern: Tiles are staggered, creating a more dynamic and visually interesting design.
- Herringbone Pattern: Tiles are arranged in a zigzag pattern, adding a touch of elegance and sophistication.
- Random Pattern: Tiles of different sizes and shapes are arranged randomly, creating a natural and organic look.
According to interior design experts at rockscapes.net, the choice of pattern can significantly impact the overall aesthetic of the space. A stacked pattern is ideal for a minimalist look, while an offset or herringbone pattern can add visual interest to a larger area.
5. Installing Rock Tile: A Step-by-Step Guide
With the surface prepared and the layout planned, you’re ready to begin installing the rock tile. Follow these steps for a successful installation.
5.1 How to Apply the Adhesive?
Applying the adhesive properly is essential for ensuring that the tiles are securely bonded to the substrate.
- Mix the Adhesive: Mix the adhesive according to the manufacturer’s instructions. Add water gradually until you achieve a smooth, creamy consistency.
- Apply with a Notched Trowel: Use a notched trowel to apply a thin, even layer of adhesive to the substrate. Hold the trowel at a 45-degree angle to create ridges in the adhesive.
- Work in Small Sections: Work in small sections, applying only enough adhesive for a few tiles at a time. This will prevent the adhesive from drying out before you can set the tiles.
5.2 How to Set the Tiles?
Setting the tiles correctly ensures that they are level and properly aligned.
- Place the Tiles: Carefully place the tiles onto the adhesive, pressing down firmly to ensure good contact.
- Use Tile Spacers: Use tile spacers to maintain consistent grout lines.
- Tap with a Rubber Mallet: Gently tap the tiles with a rubber mallet to set them into the adhesive and ensure they are level.
- Check Alignment: Use a level to check the alignment of the tiles and make any necessary adjustments.
 Installing rock tile with notched trowel
5.3 How to Handle Mesh-Backed Tiles?
Mesh-backed tiles, like those offered by Island Stone, are designed for easy installation.
- Cut as Needed: Use a utility knife or scissors to cut the mesh backing as needed to fit around corners and edges.
- Ensure Proper Embedding: Make sure each pebble or stone is embedded in the adhesive. Remove and re-adhere any stones that may have been placed incorrectly.
- Butt Tiles Together: For the best visual results, butt the tiles together without leaving a traditional grout gap.
5.4 How Long Should the Adhesive Dry?
Allow the adhesive to dry completely before proceeding to the next step.
- Cure Time: Allow the adhesive to cure for at least 24-48 hours, or according to the manufacturer’s instructions.
- Avoid Foot Traffic: Avoid walking on the tiles during the curing process to prevent them from shifting or becoming misaligned.
Following these steps will ensure that your rock tile installation is done correctly, resulting in a beautiful and durable surface that will last for years to come.
6. Grouting Your Rock Tile
Grouting is an essential step in the rock tile installation process, as it fills the gaps between the tiles, provides structural support, and enhances the overall appearance of the finished surface.
6.1 How to Choose the Right Grout?
Choosing the right grout is crucial for achieving the desired look and ensuring the longevity of your rock tile installation.
- Consider Grout Color: Select a grout color that complements the color of your tiles and enhances the overall design.
- Choose Grout Type: Opt for a grout that is suitable for the width of your grout lines. For joints up to 1/2″ wide, a standard grout is generally suitable.
- Consider Flexibility: If some flexibility is needed, use a latex additive in place of or with water.
6.2 How to Apply Grout?
Applying grout correctly ensures that the gaps between the tiles are completely filled and that the finished surface is smooth and even.
- Mix the Grout: Mix the grout according to the manufacturer’s instructions. Add water gradually until you achieve a smooth, creamy consistency.
- Apply with a Grout Float: Use a grout float to apply the grout to the tile surface, working it into the gaps between the tiles. Hold the float at a 45-degree angle and apply firm, even pressure.
- Remove Excess Grout: Use the edge of the grout float to remove excess grout from the surface of the tiles. Work diagonally across the tiles to avoid pulling grout out of the joints.
 Applying grout to rock tile with a grout float
6.3 How to Clean Excess Grout?
Cleaning excess grout from the tile surface is essential for achieving a clean and professional finish.
- Use a Damp Sponge: Use a damp sponge to clean the surface of the tiles, rinsing the sponge frequently in clean water.
- Avoid Over-Wetting: Avoid over-wetting the grout, as this can weaken it and cause it to crumble.
- Use a Grout Haze Remover: If necessary, use a grout haze remover to remove any stubborn residue from the tile surface.
- Allow to Dry: Allow the grout to dry completely before sealing the tiles.
6.4 What is the Recommended Grout Level?
It is recommended that the grout level not be much higher than the maximum girth of the pebbles. In this way, more pebble is seen with less grout, allowing the pebbles to be as visible as possible.
According to tiling experts, achieving the right grout level enhances the aesthetic appeal of the rock tile installation, allowing the natural beauty of the stones to shine through.
7. Sealing Your Rock Tile
Sealing is a critical step in preserving the beauty and durability of your rock tile. A good sealer protects the stone from stains, water damage, and other environmental factors.
7.1 How to Choose the Right Sealer?
Selecting the right sealer depends on the type of stone and the intended use of the tiled surface.
- Impregnating Sealer: For general use, an impregnating sealer is recommended. This type of sealer penetrates the stone, providing protection from within.
- Water-Repelling Sealer: For use in and around water, a water-repelling sealer is essential to ensure longevity.
- Color Enhancer: A color enhancer may be applied to bring out the true color of the stone at any time after grouting.
- Avoid Oil-Based Sealers: Do not use oil-based sealers, as they can discolor the stone and attract dirt.
7.2 How to Apply Sealer?
Applying the sealer correctly ensures that the stone is fully protected.
- Clean the Surface: Ensure the tile surface is clean and dry before applying the sealer.
- Apply Evenly: Apply the sealer evenly with a brush, roller, or sprayer, following the manufacturer’s instructions.
- Allow to Penetrate: Allow the sealer to penetrate the stone for the recommended time.
- Wipe Off Excess: Wipe off any excess sealer with a clean cloth.
- Apply Multiple Coats: Apply multiple coats of sealer for added protection, allowing each coat to dry before applying the next.
7.3 How Often Should You Reseal?
The frequency of resealing depends on the type of stone, the type of sealer, and the amount of traffic the tiled surface receives.
- Check Regularly: Check the sealer regularly by dropping a few drops of water on the surface. If the water beads up, the sealer is still effective. If the water soaks in, it’s time to reseal.
- Follow Recommendations: Follow the sealer manufacturer’s recommendations for resealing.
- High-Traffic Areas: High-traffic areas may need to be resealed more frequently than low-traffic areas.
By following these steps, you can ensure that your rock tile is properly sealed and protected, maintaining its beauty and durability for years to come.
8. Unique Design Ideas with Rock Tile
Rock tile isn’t just about practical applications; it’s also a fantastic way to express your creativity and elevate your design aesthetic. Here are some unique design ideas to inspire your next project, incorporating elements that you can explore further on rockscapes.net.
8.1 Rock Tile Accent Walls
Create a stunning focal point in any room by using rock tile to construct an accent wall.
- Natural Textures: Combine different textures and colors of rock to add depth and character.
- Vertical Gardens: Incorporate a vertical garden into your rock wall for a touch of living art.
- Lighting: Highlight the texture and color variations of the rock with strategic lighting.
8.2 Rock Tile in Bathrooms
Transform your bathroom into a spa-like retreat with rock tile.
- Shower Walls: Use pebble tile on shower walls to mimic a natural riverbed.
- Flooring: Create a non-slip surface with textured rock tile.
- Vanity Backsplash: Add a touch of nature with a rock tile backsplash behind your vanity.
8.3 Outdoor Living Spaces with Rock Tile
Extend your living space outdoors with rock tile patios, walkways, and fire pits.
- Patios: Construct a durable and beautiful patio with flagstone or slate tile.
- Walkways: Create winding pathways with pebble or gravel tile.
- Fire Pits: Build a cozy fire pit with stacked stone tile for a rustic touch.
8.4 Kitchen Backsplashes
Add a unique touch to your kitchen with a rock tile backsplash.
- Mosaic Patterns: Create intricate mosaic patterns with small rock tiles.
- Contrasting Colors: Combine different colors of rock to add visual interest.
- Under-Cabinet Lighting: Highlight the texture of the rock with under-cabinet lighting.
8.5 Water Features
Enhance your garden or outdoor space with water features incorporating rock tile.
- Ponds: Line ponds with rock tile to create a natural and serene environment.
- Fountains: Construct fountains with stacked stone tile for a rustic and elegant look.
- Waterfalls: Create stunning waterfalls with cascading rock tile.
These ideas provide just a starting point. With rockscapes.net, you can find a wealth of inspiration and resources to bring your unique design visions to life.
9. Maintaining Your Rock Tile
Proper maintenance is crucial for preserving the beauty and extending the lifespan of your rock tile. Regular cleaning and care will keep your tile looking its best for years to come.
9.1 How to Clean Rock Tile?
Cleaning rock tile regularly prevents the buildup of dirt and stains.
- Sweep or Vacuum: Sweep or vacuum the tile regularly to remove loose dirt and debris.
- Use Mild Detergent: Wash the tile with a mild detergent and warm water. Avoid using harsh chemicals or abrasive cleaners, as these can damage the stone.
- Rinse Thoroughly: Rinse the tile thoroughly with clean water to remove any soap residue.
- Dry with a Soft Cloth: Dry the tile with a soft cloth to prevent water spots.
9.2 How to Prevent Stains?
Preventing stains is easier than removing them.
- Seal the Tile: Seal the tile regularly to protect it from stains.
- Wipe Up Spills Immediately: Wipe up spills immediately with a clean cloth to prevent them from soaking into the stone.
- Use Placemats and Coasters: Use placemats and coasters to protect the tile from spills and scratches.
9.3 How to Remove Stains?
If stains do occur, take action to remove them as soon as possible.
- Identify the Stain: Identify the type of stain before attempting to remove it.
- Use Appropriate Cleaner: Use a cleaner that is specifically designed for the type of stain you are trying to remove.
- Test in an Inconspicuous Area: Test the cleaner in an inconspicuous area before applying it to the entire surface.
- Follow Manufacturer’s Instructions: Follow the manufacturer’s instructions for using the cleaner.
- Rinse Thoroughly: Rinse the tile thoroughly with clean water after using the cleaner.
9.4 What to Do About Discolored Pebbles?
Before sealing, if any pebbles are yellowed from contact with glue, a solution of bleach and water applied to the surface will remove any discoloration.
By following these maintenance tips, you can keep your rock tile looking beautiful and well-maintained for years to come.
10. Addressing Common Issues in Rock Tile Installation
Even with careful planning and execution, some issues may arise during rock tile installation. Knowing how to address these common problems can help you achieve a successful and satisfying result.
10.1 Uneven Tile Surfaces
- Problem: Uneven tile surfaces can result from improper substrate preparation or inconsistencies in tile thickness.
- Solution: Ensure the substrate is level and flat before installation. Use a self-leveling compound to correct any imperfections. When setting tiles, use a rubber mallet to gently tap each tile into place, ensuring it is flush with the surrounding tiles.
10.2 Cracking Grout
- Problem: Cracking grout can occur due to movement in the substrate or improper grout mixing and application.
- Solution: Use a flexible grout that is designed to withstand movement. Ensure the grout is mixed according to the manufacturer’s instructions and applied evenly. Consider installing control joints to accommodate expansion and contraction.
10.3 Loose or Detached Tiles
- Problem: Loose or detached tiles can result from inadequate adhesive application or moisture issues.
- Solution: Ensure the adhesive is applied evenly and in sufficient quantity to create a strong bond. Use a waterproof membrane in wet areas to prevent moisture from undermining the adhesive.
10.4 Staining and Discoloration
- Problem: Staining and discoloration can occur from spills, exposure to harsh chemicals, or improper sealing.
- Solution: Seal the tiles regularly with a high-quality sealer to protect them from stains. Clean spills immediately and avoid using abrasive cleaners.
10.5 Difficult Cuts
- Problem: Cutting rock tiles, especially those with irregular shapes or textures, can be challenging.
- Solution: Use a wet tile saw with a diamond blade for precise cuts. Take your time and make multiple passes if necessary. Consider using a tile nipper for small adjustments.
By addressing these common issues proactively, you can minimize potential problems and ensure a beautiful and long-lasting rock tile installation.
Installing rock tile can transform any space with its natural beauty and durability. By following these steps and tips, you can achieve a professional-looking installation that will enhance your home or outdoor area for years to come.
Ready to start your rock tile project? Visit rockscapes.net for a wide selection of rock tiles, expert advice, and inspiration to bring your vision to life. Contact us at Address: 1151 S Forest Ave, Tempe, AZ 85281, United States. Phone: +1 (480) 965-9011. Let rockscapes.net help you create the landscape of your dreams.
FAQ: Installing Rock Tile
1. What is the best adhesive for rock tile installation?
A modified cement adhesive (thin-set mortar) is generally recommended for rock tile installation, especially in areas with potential movement. This type of adhesive provides enhanced flexibility and bond strength, ensuring that the tiles remain securely in place.
2. How do I prepare the surface for rock tile installation?
To prepare the surface, start by cleaning the substrate thoroughly to remove any dirt, dust, or contaminants. Ensure the surface is flat and even by filling low spots with a self-leveling compound and grinding down high spots. In wet areas, install a waterproof membrane to prevent water damage.
3. Do I need to seal rock tile after installation?
Yes, sealing rock tile is essential to protect it from stains, water damage, and other environmental factors. Use a quality impregnating sealer before and after grouting to ensure longevity.
4. How often should I reseal my rock tile?
The frequency of resealing depends on the type of stone, the type of sealer, and the amount of traffic the tiled surface receives. Check the sealer regularly by dropping a few drops of water on the surface; if the water soaks in, it’s time to reseal.
5. What type of grout should I use for rock tile?
Choose a grout that complements the color of your tiles and is suitable for joints up to 1/2″ wide. Generally grouts are water-mix, but where some flexibility may be needed, then a latex additive should be used in place of or with water.
6. How do I clean rock tile without damaging it?
Clean rock tile regularly with a mild detergent and warm water. Avoid using harsh chemicals or abrasive cleaners, as these can damage the stone. Rinse thoroughly with clean water and dry with a soft cloth.
7. Can I use rock tile in a shower or other wet area?
Yes, rock tile can be used in showers and other wet areas, but it is essential to install a waterproof membrane to prevent water damage. Also, use a water-repelling sealer to ensure longevity.
8. How do I cut rock tile to fit around corners and edges?
Use a wet tile saw with a diamond blade for precise cuts. Measure the space where the tile needs to be cut, and mark the cut line on the tile with a pencil. Smooth any rough edges with a rubbing stone or sandpaper.
9. What should I do if some of the pebbles are discolored?
Before sealing, if any pebbles are yellowed from contact with glue, a solution of bleach and water applied to the surface will remove any discoloration.
10. Where can I find more information and resources for installing rock tile?
Visit rockscapes.net for a wide selection of rock tiles, expert advice, and inspiration to bring your vision to life. Contact us at Address: 1151 S Forest Ave, Tempe, AZ 85281, United States. Phone: +1 (480) 965-9011.