How To Paint Sandstone Rocks involves understanding the unique properties of this sedimentary stone and using appropriate techniques to achieve beautiful and lasting results; Rockscapes.net is here to guide you through the process. Sandstone, with its porous nature and earthy tones, can be transformed into captivating works of art with the right approach, enhancing your landscape with unique rock designs. Whether you are aiming to create eye-catching landscape features or preserve the natural beauty of sandstone, this guide provides detailed steps and expert tips. Explore the art of painting sandstone rocks and discover how to bring your creative vision to life with rockscapes.net.
1. Understanding Sandstone Rocks: A Painter’s Primer
Painting sandstone rocks requires understanding their unique composition and properties. Sandstone, a sedimentary rock composed of sand-sized grains of mineral, rock, or organic material, presents both opportunities and challenges for painting.
1.1 What is Sandstone?
Sandstone is a sedimentary rock formed from cemented grains of sand. The most common mineral in sandstone is quartz, but it can also contain feldspar, mica, and various other minerals. Its color varies based on the mineral composition, with shades ranging from light tan and yellow to red, brown, and even gray. The stone’s porous nature makes it highly absorbent, which affects how paint adheres and dries.
According to research from Arizona State University’s School of Earth and Space Exploration, sandstone formations in the southwestern United States, such as those found in Arizona, owe their vibrant colors to the presence of iron oxides.
1.2 Types of Sandstone
Understanding the different types of sandstone is crucial because their textures and porosities vary, influencing the painting process.
| Type of Sandstone | Description | Painting Considerations |
|---|---|---|
| Quartz Arenite | Composed almost entirely of quartz grains; very durable and resistant to weathering. | Requires thorough cleaning and priming to ensure paint adhesion. |
| Arkose Sandstone | Contains a significant amount of feldspar; tends to be less durable than quartz arenite. | May require a sealant to prevent moisture absorption and protect the paint. |
| Lithic Sandstone | Contains a variety of rock fragments; can have a more varied texture and color. | Test paint on a small area first to check for compatibility and adhesion. |
| Graywacke Sandstone | A dark-colored, poorly sorted sandstone with a matrix of clay and rock fragments. | May require more extensive preparation, including cleaning and possibly applying a bonding primer. |
1.3 Why Paint Sandstone Rocks?
Painting sandstone rocks serves multiple purposes, from aesthetic enhancement to preservation.
- Aesthetic Appeal: Painting allows for creative expression, transforming ordinary rocks into decorative elements for gardens, pathways, and water features.
- Preservation: Applying a protective coating can help to seal the sandstone, preventing it from crumbling or deteriorating due to weathering.
- Customization: Painting enables you to match the rocks to specific color schemes or design themes in your landscape.
- Highlighting Natural Features: Using paint to accentuate the natural textures and patterns of the sandstone can enhance its visual impact.
1.4 Common Challenges When Painting Sandstone
Successfully painting sandstone requires addressing several challenges to ensure a lasting and visually appealing result.
- High Porosity: Sandstone’s absorbent nature means it can soak up a lot of paint, requiring multiple coats.
- Uneven Texture: The rough and varied surface can make it difficult to achieve a smooth, uniform finish.
- Weathering: Outdoor sandstone is exposed to the elements, which can cause paint to fade, crack, or peel over time.
- Adhesion Issues: Paint may not adhere well to the sandstone surface without proper preparation.
Addressing these challenges involves careful preparation, selecting the right types of paint, and applying appropriate sealing techniques, all of which will be discussed in detail in the following sections.
2. Essential Tools and Materials for Painting Sandstone
To achieve the best results when painting sandstone rocks, gather the necessary tools and materials. Proper preparation and the right supplies can make the process smoother and ensure a long-lasting finish.
2.1 Cleaning Supplies
- Stiff Bristle Brush: Use a sturdy brush to scrub away dirt, moss, and loose particles from the sandstone surface.
- Pressure Washer: A pressure washer can be effective for removing stubborn debris and grime, especially for larger rocks.
- Mild Detergent: A gentle soap can help to remove oils and stains without damaging the sandstone.
- Water Hose: Use a hose to rinse off the rocks after cleaning.
2.2 Priming and Sealing Agents
- Concrete Primer: A high-quality concrete primer helps to seal the porous surface of the sandstone, improving paint adhesion and reducing the amount of paint needed.
- Acrylic Sealer: An acrylic sealer provides a protective layer that shields the paint from the elements, preventing fading, cracking, and peeling.
- Water-Based Sealer: For a more eco-friendly option, a water-based sealer can offer good protection while being less harmful to the environment.
2.3 Paint Types
Choosing the right type of paint is crucial for achieving a durable and visually appealing finish on sandstone.
- Acrylic Latex Paint: Known for its flexibility and resistance to cracking, acrylic latex paint is a popular choice for outdoor use. It adheres well to primed sandstone and offers good color retention.
- Masonry Paint: Specifically formulated for use on concrete and masonry surfaces, masonry paint is designed to withstand harsh weather conditions and provide long-lasting protection.
- Exterior Latex Paint: Ideal for outdoor projects, exterior latex paint is water-based, easy to apply, and offers good resistance to fading and mildew.
2.4 Painting Tools
- Paint Brushes: Use a variety of brush sizes and shapes to cover both large areas and intricate details.
- Paint Rollers: A roller can be useful for applying primer and paint to larger, smoother surfaces.
- Paint Sprayer: For large projects or highly textured rocks, a paint sprayer can provide even coverage and save time.
- Paint Trays: Keep paint readily accessible and prevent spills with sturdy paint trays.
2.5 Safety Gear
- Gloves: Protect your hands from paint and cleaning solutions by wearing waterproof gloves.
- Safety Glasses: Shield your eyes from splashes and debris with safety glasses.
- Respirator: When using spray paints or sealers, a respirator can protect you from inhaling harmful fumes.
2.6 Additional Supplies
- Drop Cloths: Protect surrounding surfaces from paint splatters with drop cloths.
- Painter’s Tape: Use painter’s tape to create clean lines and protect areas you don’t want to paint.
- Mixing Sticks: Thoroughly mix paint and primer to ensure even consistency.
- Sandpaper: Smooth out any rough spots on the sandstone surface with sandpaper before painting.
By gathering these essential tools and materials, you’ll be well-prepared to tackle your sandstone painting project and achieve stunning, long-lasting results.
3. Preparing Sandstone Rocks for Painting: The Key to Success
Proper preparation is essential for achieving a long-lasting and visually appealing paint job on sandstone rocks. Thorough cleaning and surface preparation ensure that the paint adheres well and the final result looks professional.
3.1 Cleaning the Sandstone Surface
- Remove Loose Debris: Begin by using a stiff bristle brush to remove any loose dirt, moss, and debris from the surface of the sandstone. Pay close attention to crevices and textured areas.
- Wash with Mild Detergent: Mix a mild detergent with water and scrub the sandstone with the brush to remove any oils, stains, or algae. Rinse thoroughly with a water hose to remove all traces of soap.
- Pressure Washing (Optional): For larger rocks or those with stubborn stains, a pressure washer can be highly effective. Use a wide nozzle and keep the pressure at a moderate level to avoid damaging the sandstone. Rinse thoroughly after pressure washing.
- Allow to Dry: After cleaning, allow the sandstone to dry completely. This may take several hours or even a day, depending on the weather conditions. Ensure the surface is dry to the touch before proceeding to the next step.
3.2 Repairing Cracks and Imperfections
- Inspect the Surface: Carefully inspect the sandstone for any cracks, chips, or imperfections. Addressing these issues before painting will result in a smoother and more durable finish.
- Fill Cracks with Masonry Patch: Use a masonry patching compound to fill any cracks or chips. Apply the compound according to the manufacturer’s instructions, using a putty knife to ensure it is evenly distributed and flush with the surrounding surface.
- Smooth Rough Edges: Once the patching compound has dried, use sandpaper to smooth any rough edges and blend the repaired areas with the surrounding sandstone.
- Clean Repaired Areas: After sanding, clean the repaired areas with a damp cloth to remove any dust or debris.
3.3 Priming the Sandstone
- Choose the Right Primer: Select a high-quality concrete or masonry primer designed for porous surfaces. This type of primer will penetrate the sandstone, sealing the surface and providing a strong bond for the paint.
- Apply Primer Evenly: Using a brush, roller, or paint sprayer, apply the primer evenly over the entire surface of the sandstone. Ensure that you cover all areas, including crevices and textured spots.
- Allow Primer to Dry: Allow the primer to dry completely according to the manufacturer’s instructions. This may take several hours. The primed surface should have a uniform appearance.
- Inspect and Re-Prime if Necessary: After the primer has dried, inspect the surface for any areas that may have been missed or that appear to need additional coverage. Re-prime these areas as needed to ensure a consistent and well-sealed surface.
3.4 Masking and Protecting Areas
- Apply Painter’s Tape: Use painter’s tape to mask off any areas you don’t want to paint, such as edges or sections with different colors. Ensure the tape is firmly pressed down to prevent paint from bleeding underneath.
- Use Drop Cloths: Place drop cloths around the work area to protect surrounding surfaces from paint splatters and spills. This is especially important when working outdoors.
By following these steps, you can properly prepare your sandstone rocks for painting, ensuring a smooth, durable, and visually appealing finish.
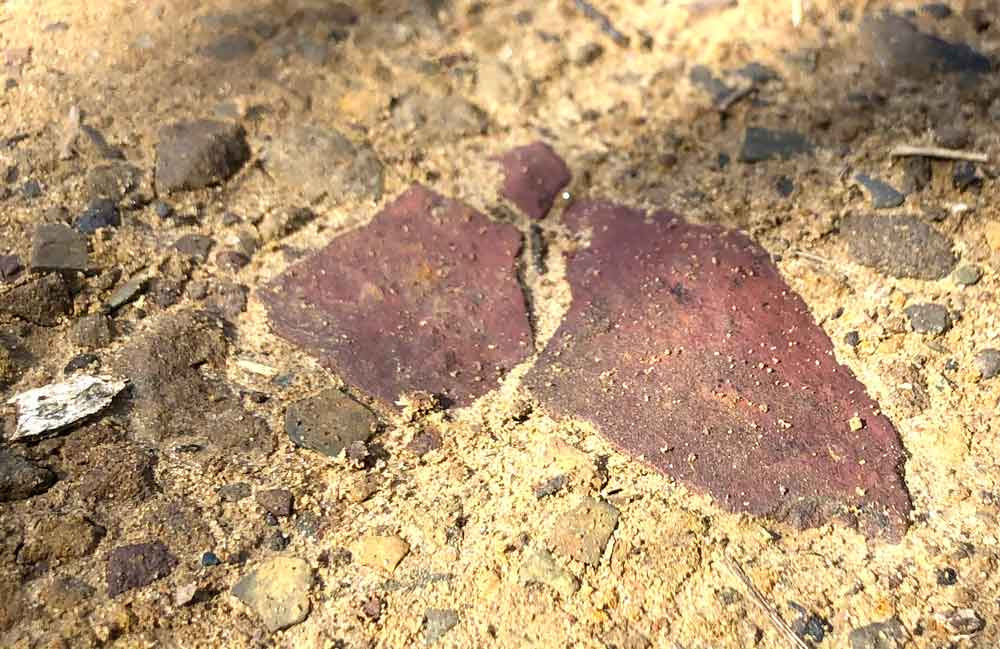 Red sandstone in the driveway. They’re easier to spot when damp or wet.
4. Painting Techniques for Sandstone Rocks: Bringing Your Vision to Life
With your sandstone rocks properly prepared, it’s time to bring your creative vision to life. Selecting the right painting techniques can help you achieve the desired look, whether you’re aiming for a natural appearance or a vibrant, artistic design.
4.1 Choosing the Right Paint
- Acrylic Latex Paint: This is a popular choice due to its flexibility, durability, and resistance to cracking. It adheres well to primed sandstone and is available in a wide range of colors.
- Masonry Paint: Specifically designed for masonry surfaces, this paint offers excellent weather resistance and long-lasting protection.
- Exterior Latex Paint: A good option for outdoor projects, this water-based paint is easy to apply and provides good resistance to fading and mildew.
4.2 Applying the Base Coat
- Select Your Color: Choose a base coat color that complements your overall design or the natural tones of the sandstone.
- Apply Thin, Even Coats: Using a brush, roller, or paint sprayer, apply the base coat in thin, even layers. Avoid applying too much paint at once, as this can lead to drips and uneven coverage.
- Work in Sections: If you’re painting a large rock, work in manageable sections to ensure consistent coverage.
- Allow Each Coat to Dry: Allow each coat of paint to dry completely before applying the next one. This usually takes a few hours, depending on the weather conditions and the type of paint used.
4.3 Adding Details and Designs
- Plan Your Design: Before you start painting, sketch out your design on paper or directly onto the sandstone using a pencil. This will help you visualize the final result and ensure accurate placement of details.
- Use Appropriate Brushes: Use a variety of brush sizes and shapes to create different effects. Small, fine-tipped brushes are ideal for intricate details, while larger brushes are suitable for filling in larger areas.
- Layer Colors: Experiment with layering different colors to create depth and dimension. Allow each layer to dry before applying the next.
- Use Stencils: Stencils can be useful for creating precise shapes and patterns. Secure the stencil to the sandstone with painter’s tape and apply the paint with a brush or sponge.
- Create Textures: Add texture to your painted rocks by using sponges, rags, or other tools to create unique patterns and effects.
- Consider Natural Elements: Incorporate natural elements into your design, such as leaves, flowers, or geometric patterns inspired by the sandstone’s natural formations.
4.4 Special Techniques
- Dry Brushing: Dip the tip of a dry brush into the paint, then wipe off most of the paint onto a paper towel. Lightly brush the surface of the sandstone to create a textured, weathered look.
- Sponging: Dip a sponge into the paint and dab it onto the sandstone to create a mottled, textured effect. Use different colors and sponge types to achieve a variety of looks.
- Washing: Dilute the paint with water and apply it to the sandstone to create a translucent wash. This technique can be used to add subtle color or highlight the natural textures of the stone.
- Antiquing: Apply a dark glaze or stain to the painted sandstone, then wipe it off with a clean cloth to create an aged, antique look.
4.5 Sealing the Painted Rocks
- Choose the Right Sealer: Select an acrylic or water-based sealer designed for outdoor use. This will protect the paint from the elements and prevent fading, cracking, and peeling.
- Apply Sealer Evenly: Apply the sealer in thin, even coats using a brush, roller, or paint sprayer. Ensure that you cover all painted areas, including crevices and details.
- Allow Sealer to Dry: Allow the sealer to dry completely according to the manufacturer’s instructions. This usually takes several hours.
- Apply Additional Coats: For added protection, apply two or three coats of sealer, allowing each coat to dry before applying the next.
By mastering these painting techniques, you can transform ordinary sandstone rocks into stunning works of art that enhance your landscape and reflect your personal style.
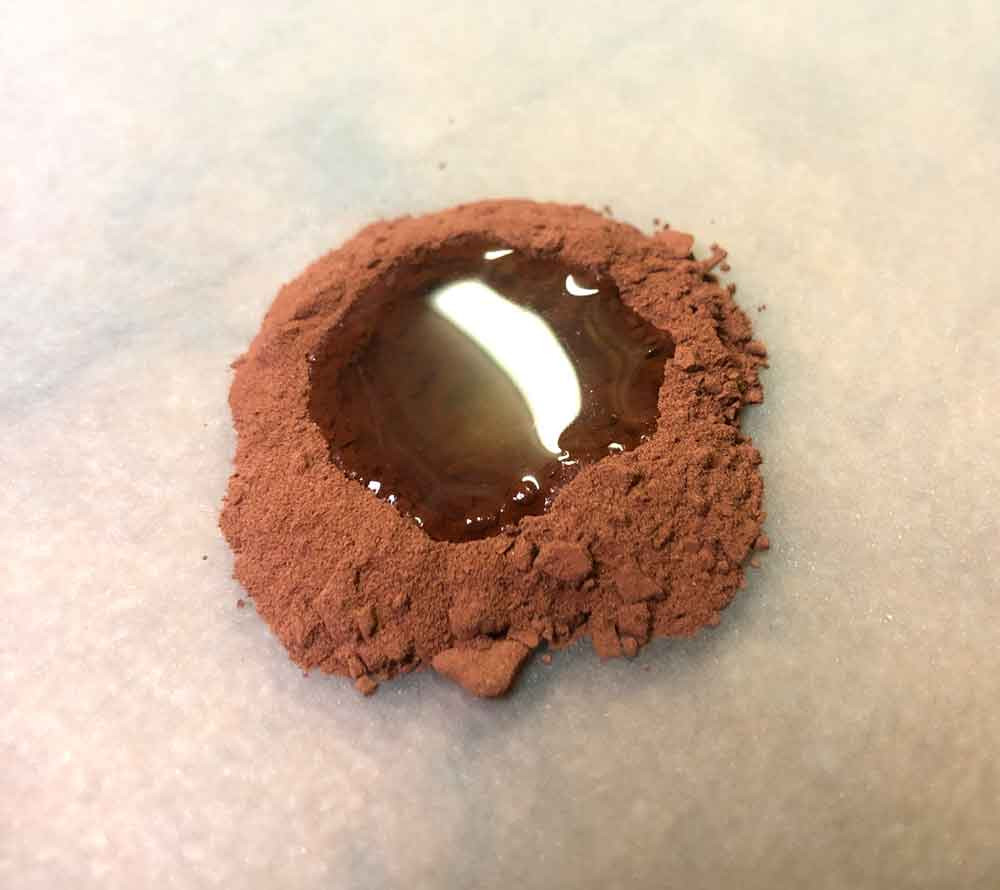 Washed pigment from red sandstone.
5. Creative Ideas for Painting Sandstone Rocks: Inspiration for Your Projects
Painting sandstone rocks offers endless creative possibilities. Whether you’re looking to add a touch of whimsy to your garden or create stunning landscape features, here are some inspiring ideas to get you started:
5.1 Garden Art
- Animal Themes: Paint sandstone rocks to resemble animals like ladybugs, turtles, cats, or birds. These charming additions can add a playful touch to your garden.
- Floral Designs: Create beautiful floral patterns on sandstone rocks, such as roses, daisies, or sunflowers. These can be scattered throughout your garden beds or used as decorative accents.
- Mushroom Rocks: Paint sandstone rocks to look like colorful mushrooms. Arrange them in clusters to create a whimsical fairy garden.
- Cactus Rocks: Paint rocks green and add white dots to mimic the look of cacti. These are perfect for desert-themed gardens or dry landscapes.
5.2 Decorative Accents
- Monogrammed Rocks: Paint sandstone rocks with monograms or initials. These can be used to personalize your garden or as unique housewarming gifts.
- Inspirational Words: Paint rocks with inspirational words or quotes. Place them along pathways or in meditation gardens to create a calming and uplifting atmosphere.
- Mandala Stones: Create intricate mandala designs on sandstone rocks using vibrant colors. These can be used as focal points in your garden or as decorative elements for patios and decks.
- Abstract Art: Experiment with abstract designs using bold colors and geometric shapes. These contemporary creations can add a modern touch to your outdoor spaces.
5.3 Landscape Features
- Pathway Markers: Paint sandstone rocks with reflective paint and use them as pathway markers. This can add a decorative touch while also improving safety at night.
- Water Feature Accents: Use painted sandstone rocks to enhance water features such as ponds, fountains, and waterfalls. Choose colors that complement the surrounding landscape and add visual interest to the water feature.
- Rock Gardens: Create a rock garden using a variety of painted sandstone rocks. Arrange them in visually appealing patterns and add drought-tolerant plants to complete the look.
- Retaining Walls: Use painted sandstone rocks to build small retaining walls or borders. This can add both functionality and aesthetic appeal to your landscape.
5.4 Themed Projects
- Holiday Decorations: Paint sandstone rocks with holiday-themed designs, such as pumpkins for Halloween or snowflakes for Christmas. These can be used to decorate your garden or porch during the holiday season.
- Story Stones: Create story stones by painting different images on each rock. Use these stones to tell stories or create imaginative games with children.
- Educational Rocks: Paint rocks with letters, numbers, or shapes to create educational tools for children. These can be used for learning activities in the garden or classroom.
5.5 Tips for Success
- Consider the Environment: When choosing colors and designs, consider the surrounding environment and how the painted rocks will complement the landscape.
- Use High-Quality Materials: Invest in high-quality paints and sealers to ensure that your painted rocks will withstand the elements and maintain their beauty over time.
- Get Creative: Don’t be afraid to experiment with different colors, techniques, and designs. The possibilities are endless, so have fun and let your creativity shine.
By exploring these creative ideas and tips, you can transform ordinary sandstone rocks into stunning works of art that add beauty, personality, and charm to your outdoor spaces.
 Mulling lites from red sandstone
6. Maintaining Painted Sandstone Rocks: Ensuring Longevity and Beauty
Once you’ve invested time and effort into painting your sandstone rocks, it’s important to maintain them properly to ensure they retain their beauty and durability for years to come. Regular maintenance can prevent damage from weathering, fading, and other environmental factors.
6.1 Regular Cleaning
- Gentle Washing: Periodically wash your painted sandstone rocks with a mild soap and water solution. Use a soft brush or cloth to gently scrub away any dirt, algae, or debris.
- Avoid Harsh Chemicals: Avoid using harsh chemicals or abrasive cleaners, as these can damage the paint and sealer.
- Rinse Thoroughly: After washing, rinse the rocks thoroughly with clean water to remove any soap residue.
6.2 Protecting from the Elements
- UV Protection: Apply a UV-resistant sealer to protect the painted rocks from fading due to sun exposure. Reapply the sealer every year or as needed, following the manufacturer’s instructions.
- Winter Care: In areas with harsh winters, consider bringing your painted sandstone rocks indoors or covering them with a tarp to protect them from freezing temperatures and snow.
- Drainage: Ensure that the painted rocks are placed in an area with good drainage to prevent water from pooling around them. This can help to prevent moisture damage and algae growth.
6.3 Inspecting for Damage
- Regular Inspections: Regularly inspect your painted sandstone rocks for any signs of damage, such as cracks, chips, or peeling paint.
- Address Issues Promptly: Address any issues promptly to prevent them from worsening. Repair cracks with a masonry patching compound and touch up any areas with peeling paint.
6.4 Touch-Up Painting
- Prepare the Surface: Before touch-up painting, clean the area with a mild soap and water solution and allow it to dry completely.
- Match the Color: Use the same type and color of paint as the original paint job to ensure a seamless repair.
- Apply Thin Coats: Apply thin, even coats of paint to the damaged area, allowing each coat to dry before applying the next.
- Seal the Repaired Area: After the touch-up paint has dried, seal the repaired area with a UV-resistant sealer to protect it from the elements.
6.5 Re-Sealing
- Assess the Sealer: Periodically assess the condition of the sealer on your painted sandstone rocks. If the sealer is showing signs of wear, such as dullness or flaking, it’s time to re-seal.
- Clean the Surface: Before re-sealing, clean the surface of the painted rocks with a mild soap and water solution and allow it to dry completely.
- Apply New Sealer: Apply a new coat of UV-resistant sealer, following the manufacturer’s instructions. Ensure that you cover all painted areas, including crevices and details.
- Allow to Dry: Allow the sealer to dry completely before exposing the painted rocks to the elements.
6.6 Tips for Long-Term Care
- Avoid Abrasive Contact: Avoid placing heavy objects on top of your painted sandstone rocks, as this can cause damage to the paint and sealer.
- Store Properly: If you need to store your painted sandstone rocks, store them in a dry, protected area to prevent damage from moisture and temperature changes.
- Rotate Placement: If your painted sandstone rocks are exposed to direct sunlight, consider rotating their placement periodically to prevent uneven fading.
By following these maintenance tips, you can ensure that your painted sandstone rocks remain beautiful and durable for many years to come, adding lasting charm and personality to your outdoor spaces.
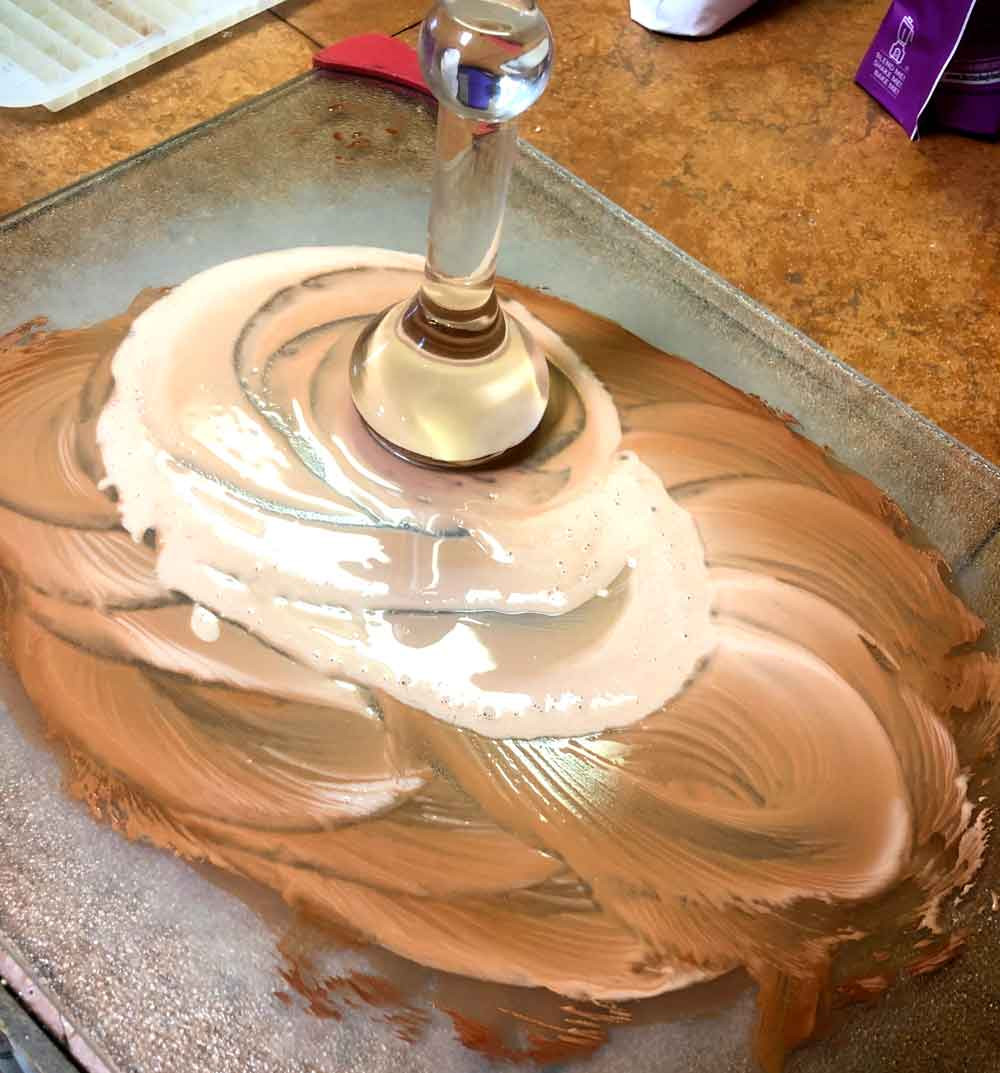 adding some limestone to pick up leftover color on the mulling board
7. Troubleshooting Common Issues When Painting Sandstone Rocks
Painting sandstone rocks can sometimes present challenges. Here are common issues you might encounter and how to troubleshoot them:
7.1 Paint Not Adhering
Issue: Paint peels or flakes off the sandstone surface shortly after application.
Causes:
- Inadequate surface preparation
- Using the wrong type of paint
- Damp or dirty surface
Solutions:
- Thorough Cleaning: Ensure the sandstone surface is thoroughly cleaned with a stiff brush and mild detergent to remove all dirt, moss, and debris. Rinse well and allow to dry completely.
- Proper Priming: Apply a high-quality concrete or masonry primer specifically designed for porous surfaces. This creates a better bonding surface for the paint.
- Appropriate Paint: Use acrylic latex or masonry paint formulated for outdoor use. These paints are designed to adhere well to stone surfaces.
- Dry Surface: Make sure the sandstone is completely dry before applying any primer or paint.
7.2 Uneven Color or Coverage
Issue: The paint appears patchy or uneven across the sandstone surface.
Causes:
- Uneven surface texture
- Inconsistent paint application
- Paint soaking into porous areas
Solutions:
- Surface Smoothing: Sand down any rough or uneven areas on the sandstone with sandpaper before painting.
- Multiple Thin Coats: Apply several thin, even coats of paint rather than one thick coat. This helps to achieve more uniform coverage.
- Consistent Technique: Use consistent brush strokes or spray techniques to ensure even paint distribution.
- Primer Sealing: Apply a primer to seal the porous surface and prevent the paint from soaking in unevenly.
7.3 Fading or Discoloration
Issue: The paint color fades or changes over time, especially in areas exposed to sunlight.
Causes:
- Exposure to UV rays
- Low-quality paint
- Lack of protective sealant
Solutions:
- UV-Resistant Paint: Use high-quality acrylic latex or masonry paint with good UV resistance.
- Protective Sealer: Apply a UV-resistant sealer over the painted surface to protect it from fading. Reapply the sealer annually or as needed.
- Shaded Placement: If possible, place the painted sandstone rocks in a location with partial shade to reduce exposure to direct sunlight.
7.4 Cracking or Peeling
Issue: The paint cracks or peels off the sandstone surface due to weathering or temperature changes.
Causes:
- Expansion and contraction of the stone
- Moisture penetration
- Poor paint adhesion
Solutions:
- Flexible Paint: Use a flexible acrylic latex paint that can expand and contract with the stone without cracking.
- Proper Sealing: Ensure the sandstone is properly sealed to prevent moisture from penetrating the surface.
- Good Drainage: Place the painted rocks in an area with good drainage to avoid water pooling around them.
- Preparation: Ensure the surface is well-prepared with cleaning and priming.
7.5 Algae or Mold Growth
Issue: Algae or mold grows on the painted sandstone surface, especially in damp or shady areas.
Causes:
- Moisture
- Lack of sunlight
- Organic debris
Solutions:
- Regular Cleaning: Clean the painted rocks regularly with a mild bleach solution (1 part bleach to 10 parts water) to kill algae and mold.
- Sunlight Exposure: Place the painted rocks in an area with more sunlight to inhibit algae and mold growth.
- Proper Drainage: Ensure good drainage to prevent water from pooling around the rocks.
- Antimicrobial Paint: Use paint with antimicrobial properties to resist algae and mold growth.
7.6 Difficulty Achieving Fine Details
Issue: It’s challenging to create intricate designs or fine details on the rough sandstone surface.
Causes:
- Rough surface texture
- Inappropriate brushes
- Paint too thick
Solutions:
- Smoothing: Smooth the surface with fine-grit sandpaper before painting.
- Detail Brushes: Use small, fine-tipped brushes specifically designed for detail work.
- Thinned Paint: Thin the paint slightly with water or a paint thinner to improve its flow and make it easier to apply fine details.
- Practice: Practice your designs on a scrap piece of sandstone before painting the final piece.
By addressing these common issues and implementing the troubleshooting tips, you can achieve beautiful and long-lasting results when painting sandstone rocks.
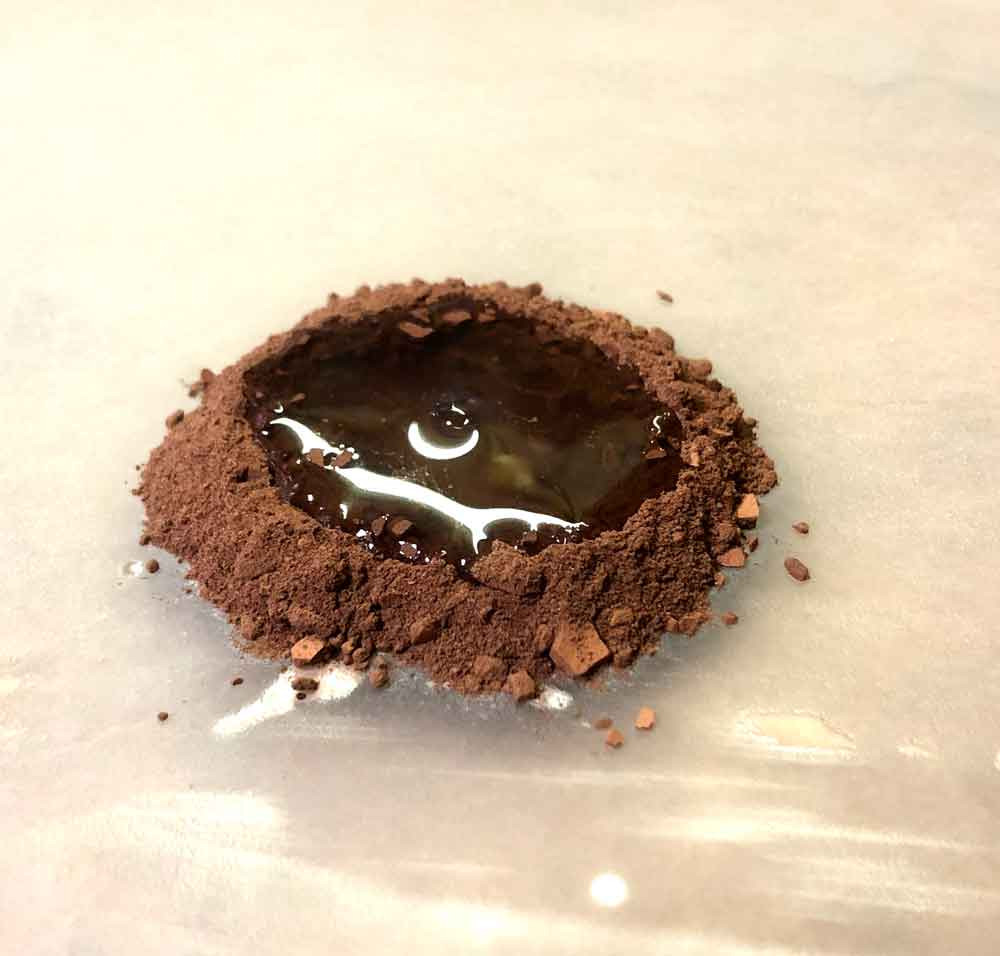 a pile of washed pigment from red sandstone
8. Safety Precautions When Painting Sandstone Rocks
When working on any DIY project, including painting sandstone rocks, safety should be a top priority. Taking the necessary precautions can help prevent accidents and ensure a safe and enjoyable experience.
8.1 Personal Protective Equipment (PPE)
- Gloves: Wear waterproof gloves to protect your hands from paint, cleaning solutions, and other chemicals.
- Safety Glasses: Use safety glasses or goggles to protect your eyes from splashes, dust, and debris.
- Respirator: When using spray paints, sealers, or working in poorly ventilated areas, wear a respirator to avoid inhaling harmful fumes.
8.2 Ventilation
- Outdoor Painting: Whenever possible, paint sandstone rocks outdoors in a well-ventilated area to minimize exposure to fumes.
- Indoor Painting: If you must paint indoors, ensure the area is well-ventilated by opening windows and using fans to circulate air.
8.3 Handling Chemicals
- Read Labels: Carefully read and follow the manufacturer’s instructions and safety precautions on all paint, primer, sealer, and cleaning product labels.
- Store Properly: Store all chemicals in a cool, dry place away from heat, sparks, and open flames. Keep them out of reach of children and pets.
- Avoid Mixing: Never mix different chemicals together, as this can create dangerous fumes or reactions.
- Dispose Properly: Dispose of used paint, solvents, and cleaning materials according to local regulations. Do not pour them down the drain or into the environment.
8.4 Working with Tools
- Power Tools: If using power tools such as pressure washers or paint sprayers, follow the manufacturer’s instructions and safety guidelines. Wear appropriate PPE, such as eye and ear protection.
- Hand Tools: Use caution when working with hand tools such as brushes, sandpaper, and putty knives. Keep your hands away from sharp edges and blades.
8.5 Environmental Considerations
- Protect Surroundings: Use drop cloths to protect surrounding surfaces from paint splatters and spills.
- Avoid Contamination: Avoid painting near water sources or sensitive vegetation to prevent contamination.
- Clean Up: Clean up any spills or messes immediately to prevent accidents and environmental damage.
8.6 General Safety Tips
- Work Area: Keep your work area clean and organized to prevent trips and falls.
- Lighting: Ensure adequate lighting to see what you are doing and avoid accidents.
- Breaks: Take frequent breaks to avoid fatigue and maintain focus.
- First Aid: Keep a first aid kit nearby in case of minor injuries.
- Children and Pets: Keep children and pets away from the work area to prevent accidents and exposure to chemicals.
8.7 Emergency Procedures
- Eye Contact: If paint or chemicals get into your eyes, flush them immediately with clean water for at least 15 minutes and seek medical attention.
- Skin Contact: If paint or chemicals get on your skin, wash the affected area thoroughly with soap and water.
- Inhalation: If you inhale fumes and feel dizzy or nauseous, get fresh air immediately and seek medical attention if symptoms persist.
- Ingestion: If paint or chemicals are ingested, call your local poison control center or seek medical attention immediately.
By following these safety precautions, you can minimize the risk of accidents and injuries while painting sandstone rocks, ensuring a safe and successful project.
 mulling lites from the red sandstone
9. Sandstone Rock Painting Ideas for Different Skill Levels
Whether you’re a beginner or an experienced artist, there are plenty of sandstone rock painting ideas to suit your skill level. Here’s a breakdown of projects ranging from easy to advanced:
9.1 Beginner-Friendly Projects
These projects are perfect for those new to rock painting and require minimal artistic skill.
- Solid Colors: Simply paint the entire rock with a solid color. This is a great way to practice applying even coats of paint and get familiar with the materials.
- Polka Dots: Add polka dots to a solid-colored rock using different sizes and colors. This is a fun and easy way to create a playful design.
- Stripes: Paint stripes on the rock using painter’s tape to create clean lines. Experiment with different colors and stripe widths.
- Simple Shapes: Paint basic shapes like hearts, stars, or circles on the rock. Use stencils to create more precise shapes.
- Ladybugs: Paint the rock red and add black dots to create a simple ladybug design.
- Inspirational Words: Write inspirational words or quotes on the rock using a paint pen.
9.2 Intermediate Projects
These projects require some basic artistic skill and attention to detail.
- Floral Designs: Paint simple floral designs like daisies, sunflowers, or roses on the rock. Use different brush sizes to create varying textures and details.
- Animal Faces: Paint the faces of animals like cats, dogs, or owls on the rock. Focus on capturing the animal’s unique features and expressions.
- Mandalas: Create simple mandala designs using geometric shapes and patterns. Use a compass and ruler to create symmetrical designs.
- Landscape Scenes: Paint simple landscape scenes like mountains, trees, or sunsets on the rock. Use different colors and techniques to create depth and dimension.
- Galaxy Rocks: Paint the rock black and add splatters of different colors to create a galaxy effect. Add stars using a white paint pen.
- Tribal Patterns: Paint tribal-inspired patterns using geometric shapes and bold colors.
9.3 Advanced Projects
These projects are best suited for experienced artists and require advanced painting skills and techniques.
- Realistic Portraits: Paint realistic portraits of people or animals on the rock. Pay close attention to details like shading, highlights, and proportions.
- Intricate Mandalas: Create intricate mandala designs with complex patterns and vibrant colors. Use fine-tipped brushes to create precise details.
- 3D Effects: Use shading and highlighting techniques to create 3D effects on the rock.
- Detailed Landscape Scenes: Paint detailed landscape scenes with realistic trees, mountains, and water features. Use advanced techniques like layering and blending to create depth and dimension.
- Abstract Art: Create abstract art using bold colors, textures, and patterns. Experiment with different techniques like pouring, splattering, and dry brushing.
- Custom Designs: Create your own custom designs inspired by nature, mythology, or your imagination.
9.4 Tips for Choosing a Project
- Assess Your Skill Level: Choose a project that matches your current skill level and artistic abilities.
- Start Simple: If you’re new to rock painting, start with a simple project and gradually work your way up to more complex designs.
- Gather Inspiration: Look for inspiration online, in nature, or in art books.
- Have Fun: Most importantly, have fun and let your creativity shine.
By exploring these sandstone rock painting ideas and choosing a project that suits your skill level, you can create beautiful and unique works of art that enhance your outdoor spaces.
 a pile of pigment from red sandstone
10. Where to Find Sandstone Rocks for Painting
Finding the right sandstone rocks is the first step in your painting project. Here are several places where you can source sandstone rocks:
10.1 Natural Environments
- Beaches: Sandstone rocks can often be found along beaches, especially in areas with rocky coastlines.
- Rivers and Streams: Riverbeds and stream banks are another great place to find sandstone rocks of various sizes and shapes.
- Mountains and Hillsides: Sandstone formations are common in mountainous and hilly areas. Look for loose rocks along trails and hillsides.
- Deserts: In desert regions, sandstone rocks are abundant and come in a variety of colors and textures.
Important: Before collecting rocks from natural environments, check local regulations and obtain any necessary permits. Some areas may have restrictions on rock collecting to protect the environment.
10.2 Landscaping Suppliers
- Rock Yards: Landscaping suppliers often carry a variety of sandstone rocks for use in gardens, pathways, and water features. These rocks are typically sorted by size and type, making it easy to find what you need.
- Garden Centers: Garden centers may also carry a selection of sandstone rocks, especially those that are commonly used in landscaping projects.
- Stone Quarries: Stone quarries are a great source for larger sandstone rocks and slabs. You may be able to purchase directly from the quarry at a lower price than from a landscaping supplier.
10.3 Online Marketplaces
- Online Retailers: Websites like rockscapes.net, Amazon, Etsy, and eBay offer a wide selection of sandstone rocks from various sellers. This is a convenient option if you can’t find what you’re looking for locally.
- Local Classifieds: Check local classifieds websites like Craigslist or Facebook Marketplace for people selling sandstone rocks in your area.
10.4 Construction Sites
- Construction Sites: