Moving rocks in Link’s Awakening is essential for uncovering secrets and progressing through the game. At Rockscapes.net, we understand the challenges players face and offer comprehensive solutions to navigate Koholint Island’s rocky terrain. Let’s explore how to move those pesky rocks and unlock the game’s hidden treasures with our landscaping expertise!
1. Understanding the Basics of Rock Moving in Link’s Awakening
Successfully moving rocks in Link’s Awakening involves acquiring specific items and employing strategic techniques. This foundational knowledge is crucial for any player aiming to explore every nook and cranny of Koholint Island.
1.1. What Items Do You Need to Move Rocks?
The primary item required to move rocks in Link’s Awakening is the Power Bracelet. According to ZeldaDungeon.net, the Power Bracelet allows Link to lift heavy objects, including rocks of various sizes. Without it, you’re stuck admiring the scenery.
1.2. Where to Find the Power Bracelet
You can find the Power Bracelet in the Bottle Grotto, the second dungeon in the game. This dungeon is located in the south-eastern part of Koholint Island. Once you defeat the dungeon boss, you’ll receive the Power Bracelet as a reward.
1.3. Types of Rocks You’ll Encounter
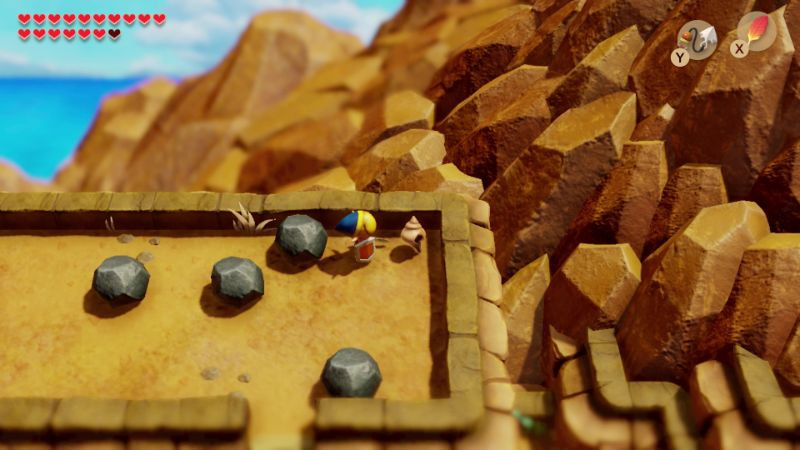
Koholint Island features different rock sizes:
- Small Rocks: These can be lifted without the Power Bracelet.
- Medium Rocks: These require the Power Bracelet to lift.
- Large Rocks: These often cannot be moved but can be destroyed with bombs or the upgraded sword.
2. Step-by-Step Guide to Moving Rocks
Once you have the Power Bracelet, moving rocks becomes a straightforward process. Follow these steps to clear your path and uncover hidden items and passages.
2.1. Equipping the Power Bracelet
First, make sure the Power Bracelet is equipped. Open your inventory and assign the Power Bracelet to either the X or Y button for quick access.
2.2. Approaching the Rock
Walk towards the rock you want to move. Ensure Link is directly facing the rock to interact with it.
2.3. Lifting the Rock
Press the button to which you assigned the Power Bracelet. Link will lift the rock above his head.
2.4. Throwing the Rock
While holding the rock above your head, press the same button again to throw it. Make sure you are not facing an obstacle, or the rock will simply drop at your feet.
2.5. Strategic Rock Placement
Consider where you throw the rock. Sometimes, you can use rocks to weigh down switches or block enemy pathways.
3. Advanced Rock Moving Techniques
Beyond simply lifting and throwing rocks, there are more advanced techniques that can help you solve puzzles and access secret areas.
3.1. Using Bombs on Large Rocks
Large rocks that cannot be lifted can often be destroyed using bombs. Place a bomb near the rock and wait for it to explode. This is particularly useful in caves and dungeons.
3.2. The Hookshot for Distant Rocks
In some instances, rocks might be blocking a path across a gap. Use the Hookshot to pull yourself across the gap instead of trying to move the rock.
3.3. Combining Items for Maximum Efficiency
Sometimes, you’ll need to combine the use of the Power Bracelet with other items like the Roc’s Feather to jump over obstacles after moving a rock.
4. Common Challenges and Solutions
Moving rocks isn’t always easy. Here are some common challenges you might encounter and how to overcome them.
4.1. Running Out of Inventory Space
You might find your inventory full when trying to collect items revealed by moving rocks. Make sure to manage your inventory wisely, discarding unnecessary items or storing them in a convenient location.
4.2. Rocks Blocking Narrow Passages
In tight spaces, precise movements are crucial. Take your time and adjust Link’s position carefully before throwing the rock.
4.3. Enemies Interrupting Your Progress
Enemies can disrupt your rock-moving efforts. Clear the area of enemies before attempting to move rocks, or use items like the shield to protect yourself while lifting.
5. Rock-Related Secrets and Hidden Areas
Moving rocks often leads to discovering secrets and hidden areas. Here are some notable examples in Link’s Awakening.
5.1. Seashell Locations
Many Secret Seashells are hidden beneath rocks throughout Koholint Island. These seashells can be exchanged for valuable items at the Seashell Mansion.
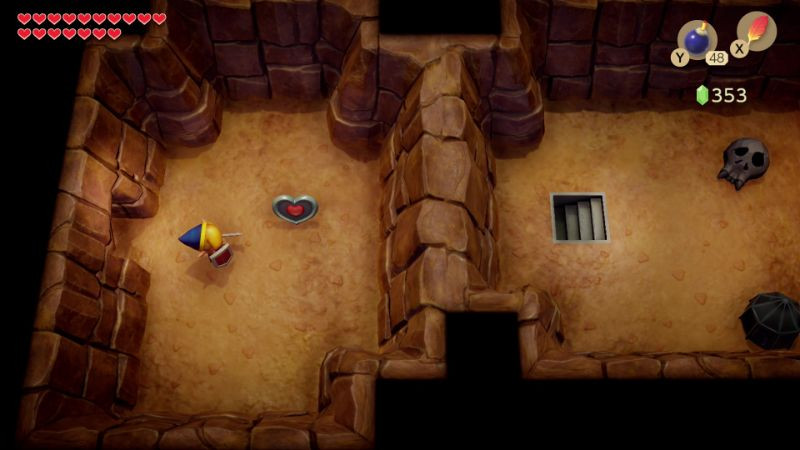
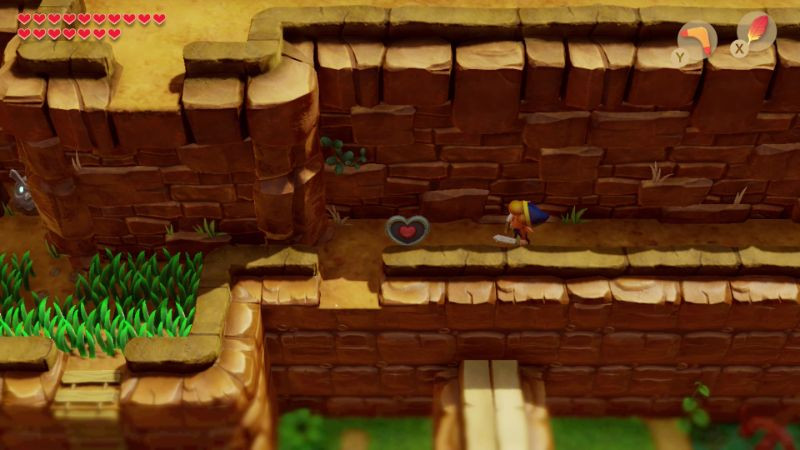
5.2. Heart Pieces
Heart Pieces, which increase Link’s maximum health, are frequently found under rocks. Explore every corner of the map to collect them all.
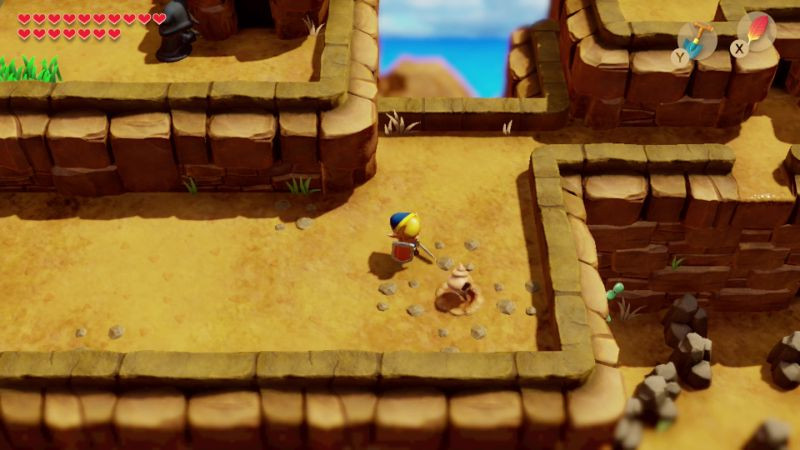
5.3. Cave Entrances
Hidden caves are often concealed by rocks. These caves can contain valuable items, shortcuts, or challenging puzzles.
6. Rockscapes.net: Your Ultimate Landscaping Guide
Just like in Link’s Awakening, strategic placement and removal of rocks can transform a landscape. At Rockscapes.net, we specialize in creating stunning outdoor spaces using natural stone.
6.1. Why Choose Rockscapes.net?
Rockscapes.net offers:
- Expert Advice: Our team of experienced landscapers can help you design the perfect outdoor space.
- High-Quality Materials: We source only the finest natural stones for our projects.
- Custom Designs: We tailor our designs to meet your specific needs and preferences.
6.2. Our Landscaping Services
We offer a wide range of landscaping services, including:
- Rock Gardens: Create a serene and natural-looking garden with carefully selected rocks and plants.
- Stone Pathways: Add elegance and functionality to your outdoor space with custom stone pathways.
- Retaining Walls: Build durable and attractive retaining walls to enhance your landscape.
6.3. Featured Projects
Check out some of our featured projects to see how we can transform your outdoor space:
- Arizona Desert Oasis: A stunning rock garden featuring native plants and natural stone.
- Mountain Retreat: A rustic landscape with stone pathways and retaining walls.
- Coastal Paradise: A beach-themed garden with smooth stones and coastal vegetation.
7. Expert Tips for Real-World Rock Landscaping
Applying the principles of rock moving from Link’s Awakening to real-world landscaping can result in beautiful and functional outdoor spaces.
7.1. Planning Your Landscape
Before moving any rocks, create a detailed plan of your desired landscape. Consider the size, shape, and color of the rocks you want to use.
7.2. Choosing the Right Rocks
Select rocks that complement your home and garden. Consider local stone varieties for a natural and cohesive look. According to Arizona State University’s School of Earth and Space Exploration, in July 2025, the use of native materials provides environmental and aesthetic benefits.
7.3. Proper Rock Placement
Place rocks strategically to create visual interest and functional features. Use larger rocks as focal points and smaller rocks to fill in gaps.
7.4. Safety Considerations
Always prioritize safety when moving heavy rocks. Use proper equipment and techniques to avoid injuries.
8. Customer Success Stories
Hear from our satisfied customers who have transformed their outdoor spaces with Rockscapes.net.
8.1. John from Phoenix, Arizona
“Rockscapes.net helped me create the perfect desert oasis in my backyard. The team was professional, knowledgeable, and dedicated to bringing my vision to life.”
8.2. Sarah from Scottsdale, Arizona
“I couldn’t be happier with the stone pathway Rockscapes.net installed in my garden. It adds so much character and charm to my outdoor space.”
8.3. Michael from Tempe, Arizona
“The retaining wall Rockscapes.net built for me is not only functional but also beautiful. It has completely transformed my landscape.”
9. Frequently Asked Questions (FAQ)
Here are some frequently asked questions about moving rocks in Link’s Awakening and real-world landscaping.
9.1. How do I get the Power Bracelet in Link’s Awakening?
The Power Bracelet is found in the Bottle Grotto dungeon. Defeat the boss to obtain it.
9.2. Can I move all rocks in Link’s Awakening with the Power Bracelet?
No, some larger rocks require bombs to be destroyed.
9.3. What is the best way to plan a rock garden?
Start with a detailed plan, choose the right rocks, and consider the overall design.
9.4. How do I choose the right rocks for my landscape?
Consider the size, shape, color, and local availability of the rocks.
9.5. What safety precautions should I take when moving heavy rocks?
Use proper equipment, techniques, and prioritize safety to avoid injuries.
9.6. How can Rockscapes.net help me with my landscaping project?
Rockscapes.net offers expert advice, high-quality materials, and custom designs to transform your outdoor space.
9.7. Where can I find inspiration for rock landscaping ideas?
Visit Rockscapes.net and browse our featured projects for inspiration.
9.8. What are the benefits of using natural stone in landscaping?
Natural stone adds beauty, durability, and a natural look to your landscape.
9.9. How do I maintain a rock garden?
Regularly remove weeds, trim plants, and ensure proper drainage.
9.10. Can I combine rock landscaping with other garden features?
Yes, rock landscaping can be combined with plants, water features, and other elements to create a unique outdoor space.
10. Contact Rockscapes.net Today
Ready to transform your outdoor space with stunning rock landscaping? Contact Rockscapes.net today for a free consultation.
Address: 1151 S Forest Ave, Tempe, AZ 85281, United States
Phone: +1 (480) 965-9011
Website: Rockscapes.net
11. Link’s Awakening Walkthrough Snippets Incorporating Rockscapes Elements
11.1. Western Tal Tal Mountain Range
As Link journeys through the Western Tal Tal Mountain Range, remember that like landscaping, navigation requires strategic planning. Just as you would plan a rock garden, consider each step carefully.
11.2. Optional: Piece of Heart #30
“Once you enter the cave that is west of the Hen House, place a bomb against the cracked wall at the south end of the room. From there walk to the right a screen and pick up the piece of heart.” Think of this as uncovering a hidden gem in your landscape design.
 Piece of Heart Location
11.3. Optional: Secret Seashell #49
“Once you reach the north end of the map, just west of Mount Tamaranch on your map, lift the rock at the top-right corner to find the seashell.” This illustrates how removing obstacles reveals treasures, just as clearing space allows for creative landscaping.
 Secret Seashell Location
11.4. Optional: Piece of Heart #31
“After leaping off the ledge, you’ll reach an area with a Like Like and a Shrouded Stalfos. Walk to the west and you’ll find a narrow passage that has a piece of heart at the end.” Consider this the equivalent of discovering the perfect nook for a striking rock feature in your garden.
 Piece of Heart Location
11.5. Optional: Secret Seashell #50
“Walk to the left and you’ll find some tiny rocks that are in the sand. The four sets of rocks surround a small soft soil spot. Dig it up to get the 50th Secret Seashell!” Just as this seashell is carefully concealed, the best landscape designs often require careful excavation and attention to detail.
 Secret Seashell Location
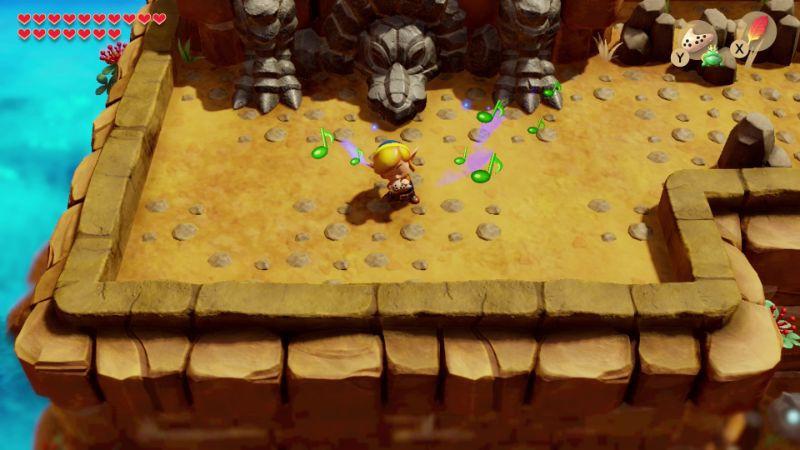
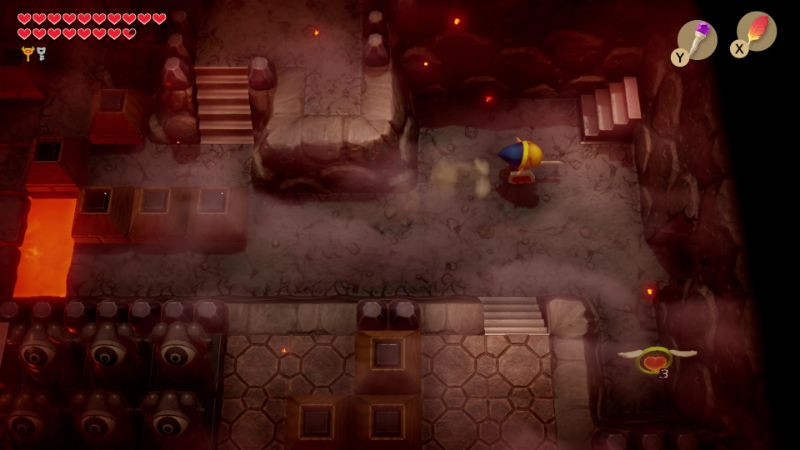
11.6. Giant Turtle Encounter
Like moving heavy stones, awakening the Giant Turtle requires strategy. Pull out the Ocarina and play the Frog’s Song of Soul to bring the turtle to life. The turtle will move its head left and right, occasionally dashing towards you. Wait until it dashes forward and it will slam its head against the rock. While it is stunned, drop a bomb to slowly break its mask. Repeat this process until the mask has come off. With its face now revealed, you can slash away with your sword. When the head moves up into the air, Link can leap up with Roc’s feather and slash it that way. After a number of hits the turtle head will be defeated, revealing the entrance to the next dungeon. Walk inside to take on the 8th and final dungeon, Turtle Rock.
 Giant Turtle Battle
12. Turtle Rock Dungeon: A Landscaping Challenge
Turtle Rock is probably the longest and most non-linear dungeon in the entire game. There are multiple pathways you can go right off the bat, but I will guide you through what I consider the fastest route. Much like designing a complex landscape, navigating Turtle Rock requires foresight and adaptability.
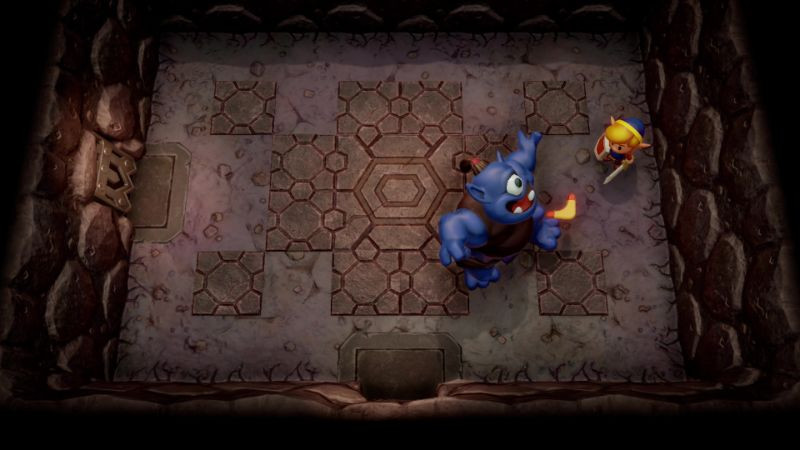
12.1. Early Challenges
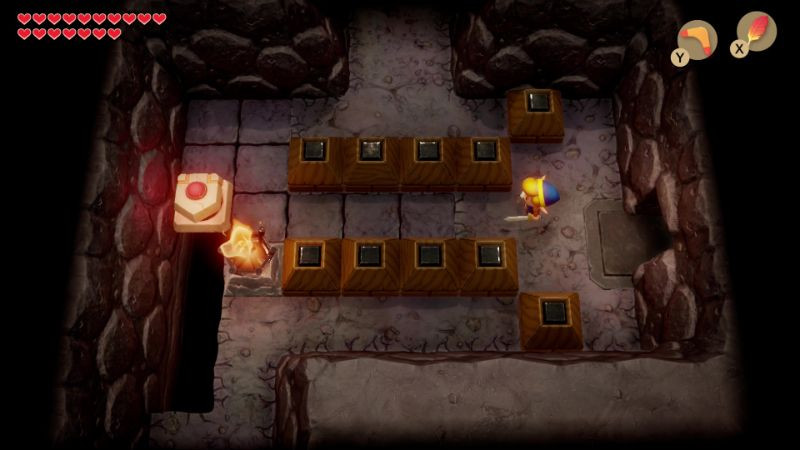
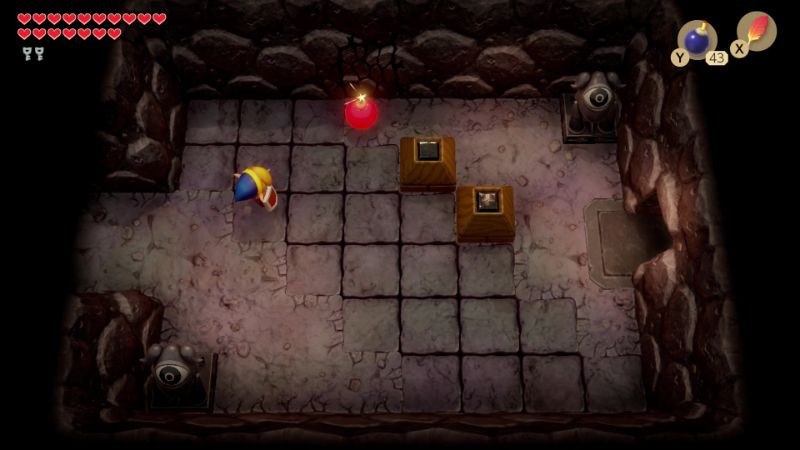
From the start of the dungeon just head up and you’ll immediately find yourself facing a new enemy, a Vire. Defeat the three Ropes that are found in this room and then head up a screen through the door that opens up. You’ll find a blue hinox in this room. Just toss your boomerang and hit him a few times to defeat him. Grab the fairy that he leaves behind and then head through the door that opens on the left. There is a moveable block in this room and once you start moving it, you can control it using the control-pad. Push it to the left four blocks, then up two, left one, and down five so that it covers all the tiles in the room. If done successfully a treasure chest will appear in this room containing 20 rupees! Collect the rupees from the treasure chest then head down a screen.
 Turtle Rock Start
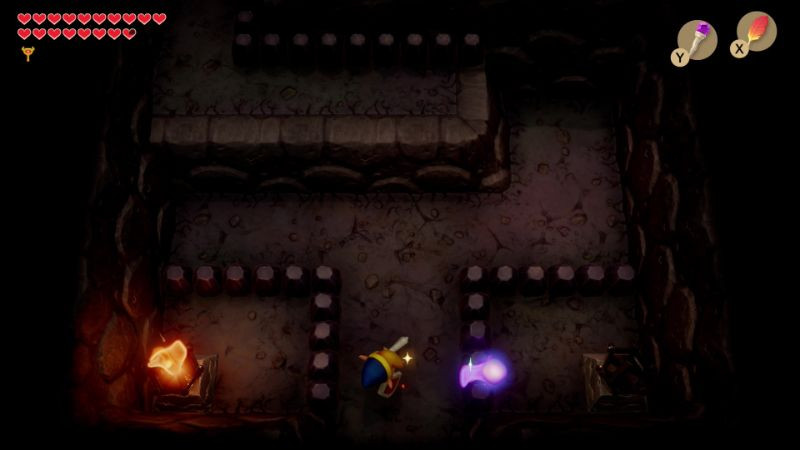
12.2. Compass and Map Acquisition
There are two sparks in this room and you can defeat each of them by using the boomerang. Open the treasure chest in this room to get some more rupees and then head left a screen. Here you will find Rolling Bones, the mini-boss from all the way back in Tail Cave. Just jump over the rolling spiked log and hit him once with the boomerang to defeat him. Once Rolling Bones is defeated, head up a screen. You’ll find another vire in this room, along with a single bubble. Use the boomerang to defeat the vire and then collect the key that is left for you. After getting the small key, head down two screens. There is a green zol in this room along with a vacuum in the bottom-right corner. You can defeat the vacuum and then open the treasure chest in this room to get the Compass. At this point you can play Manbo’s Mambo if you’d like to warp back to the dungeon entrance. Otherwise, you’ll have some backtracking to do. From the room with the compass, head up a screen, right a screen, up a screen, right a screen, down a screen, and right a screen to get back to the room with the first vire.
 Turtle Rock Compass
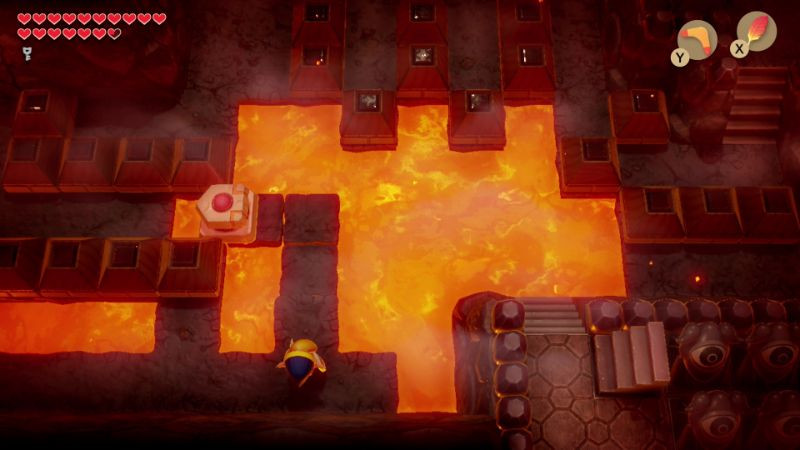
From here, jump over the lava and head up a screen. Continue to the and you’ll see another moving platform that you can push. Push it up two blocks and left two blocks. Follow the path that you created and head left to find a treasure chest. Push the top and bottom block to the left, and then push the middle block down. Walk over and open the treasure chest to get the Dungeon Map.
 Turtle Rock Map
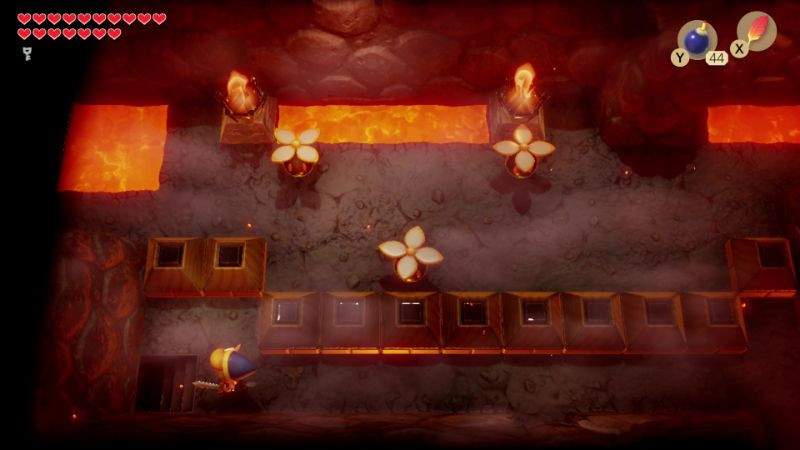
12.3. Side-Scrolling Challenges
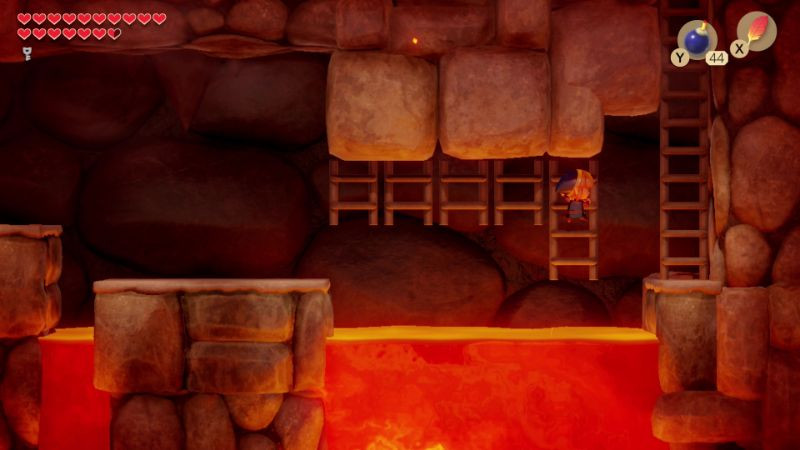
In the same room with the dungeon map, you’ll see a crack on the north wall. Place a bomb and this will blow open an entrance to the room above. Walk through the entrance and then head down the steps on the left side of the screen. You’ll now find yourself in an underground side-scrolling area with fireballs coming up from underground. Carefully use Roc’s Feather and jump over the gaps. Do the same thing on the next screen, using the ladders as well, and then climb the large ladder to resurface.
 Turtle Rock Side-Scrolling
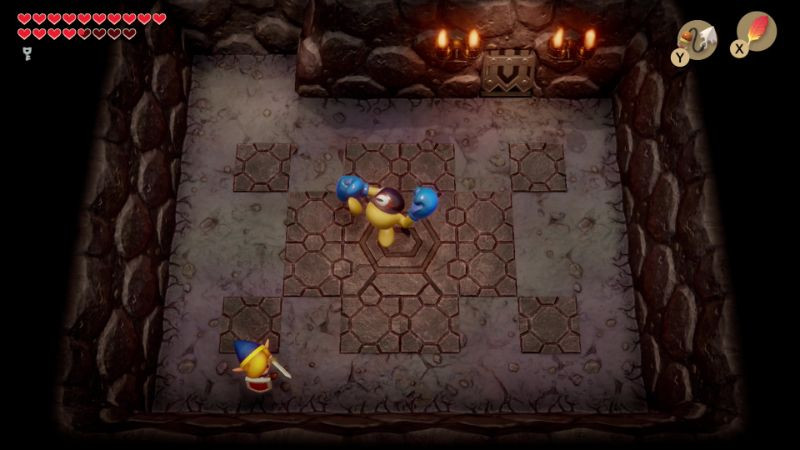
12.4. Stone Beak and Smasher Encounter
Once you resurface you will be in a room with four ropes. Use the power bracelet to lift up the pots and defeat the ropes in this room. Open up the treasure chest to get the Stone Beak and then head up a screen. You’ll find Smasher in this room, yet another mini-boss from a previous dungeon and this time it is from Face Shrine. Use the power bracelet to pick up his large ball and toss it at him. After four hits, smasher will be defeated. You can go up a screen and speak with the owl statue here to get some advice on those moveable platforms. The statue tells you to fill all the holes and you’ll get a special gift. There is a staircase in this room but there is no need to go through it as it leads to an unnecessary part of the dungeon. Step on the switch that is underneath the pot on the left and head back down a screen.
 Turtle Rock Smasher
12.5. Key Acquisition
From the room where you defeated Smasher, head left a screen. There is another moving platform in this room, and this one is a big more tricky than the previous ones. We need to cover all the blocks in this room and you’ll have to push it in a precise pathway in order to do so. You have to push the block left twice, up one, left one, up one, left one, up one, and left two to get to the top-left corner. Then continue down one, right one, down one, right one, down one, right one, down one, right one, down one, right one, up one, right one, down one, and right one to reach the bottom-right corner. Collect the small key that drops.
 Turtle Rock Key
12.6. Dodongo Snakes Encounter
In this room you’ll find two Gibdos walking around. Use your boomerang to defeat them, but note that the ground below you is cracked. You have to continuously be moving, otherwise you’ll fall through holes in the ground. Each gibdo will take three hits with the boomerang to defeat. Once both have been done away with, grab the small key that is left behind and then head left a screen. You will find two dodongo snakes, but don’t bother defeating them. If you do so, a treasure chest will appear, but at the top portion of the room that we cannot reach. By the time we reach the top area, the dodongo snakes will have respawned and the treasure chest will disappear. This is exactly what the owl statue was referring to, in that we have to defeat these enemies from a higher place. Ignore the snakes and head left a screen.
 Turtle Rock Dodongo Snakes
12.7. Obtaining Secret Medicine
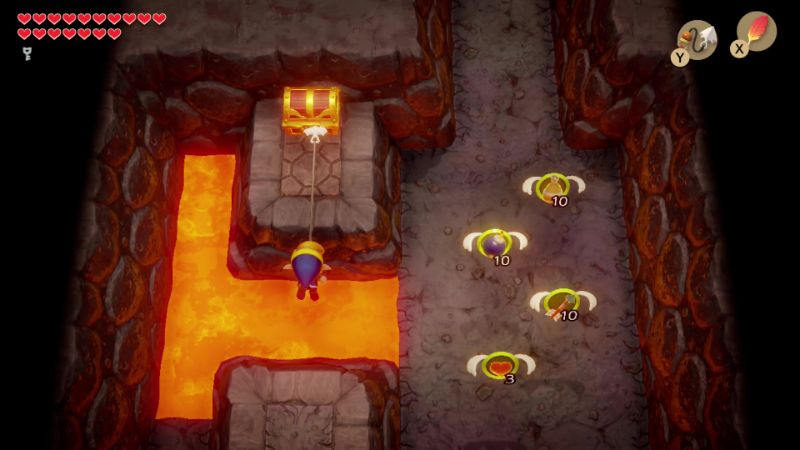
In this next room you’ll find a locked door to the left, but don’t bother using a small key as we can skip that all together. Instead, head up a screen and then use the hookshot to grab onto the treasure chest. Open it up to get the secret medicine. You can only hold one of these at time, so if you have one already, this treasure chest pretty much does nothing. Jump off the ledge to the right, grab any goodies that you’d like, and then head up. Walk up the steps to reach a side scrolling area.
 Turtle Rock Secret Medicine
12.8. Eye Statue Puzzle
You can talk to the owl statue in the room and it gives you a hint to shoot the statue with the bow. Well, pull out the bow and arrow and shoot the eye statue that is in the center of the room. Doing so will cause a small key to drop, so walk on over and collect it. You can go down a screen if you’d like as you will find a number of items to fill up your inventory. Afterwards, travel to the left a screen from the room with the eye statue.
 Turtle Rock Eye Statue
12.9. Piece of Heart Reward
You’ll now find yourself outside and if you look at the map, you are at the furthest northwest part of Koholint Island. There are two enemies around, but they shouldn’t be much of a problem. More importantly, at the top of the steps you’ll find a piece of heart!
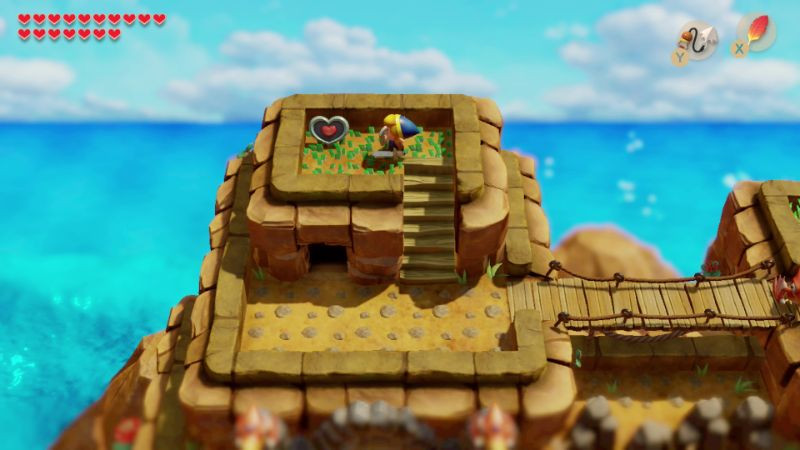 Turtle Rock Heart Piece
12.10. Blaino Encounter
In the underground side-scrolling area, use Roc’s Feather to jump across the moving platform while avoiding the fireballs. Resurface using the large ladder on the right. Once you resurface, jump off the ledge and head down a screen to take on Blaino, the dungeon mini-boss.
 Turtle Rock Blaino
12.11. Acquiring the Magic Rod
Climb the steps and the blocks should be lowered if you hit the crystal switch earlier as stated in the walkthrough. Open the treasure chest to get the dungeon item, the Magic Rod.
 Turtle Rock Magic Rod
12.12. Cue Ball Encounter
Walk down the steps and head left through the locked door. Here you will find Cue Ball, yet another mini-boss from a previous dungeon. Wait until Cue Ball comes towards you, then jump over him with Roc’s Feather, and deliver a sword slash to the back of its head. Repeat this process four times with the Koholint Sword to defeat him. Go up through the door that opens up.
 Turtle Rock Cue Ball
12.13. Nightmare Key Reward
Here you will find the final moving platform puzzle in this dungeon and it is the longest one yet! Push the platform up three, right two, down one, right one, up one, and right two to reach the top-right part of the room. From here go down three, left one, up one, left one, down one, left one, up one, left one, down two, and right five to finish off the puzzle. Open the treasure here to get the Nightmare Key! We are now ready to take on the dungeon boss!
 Turtle Rock Nightmare Key
12.14. Final Ascent
Equip roc’s feather and the magic rod. Jump up and climb the steps on the right side. Use the magic rod to clear the ice to the left, and then the ice block just above. Jump up and use the magic rod to clear the ice blocks to the left. Stand above one of the columns of ice, jump up, and aim the magic rod down to get rid of more ice. Once you have fallen, aim up and get rid of the next column of ice. You need to repeatedly maneuver around this area, fall down from the top and try to use the magic rod to melt the ice block at the left part of the screen. Once you’ve done so, climb up, jump over to that ledge using roc’s feather, and continue left a screen.
 Turtle Rock Final Ascent
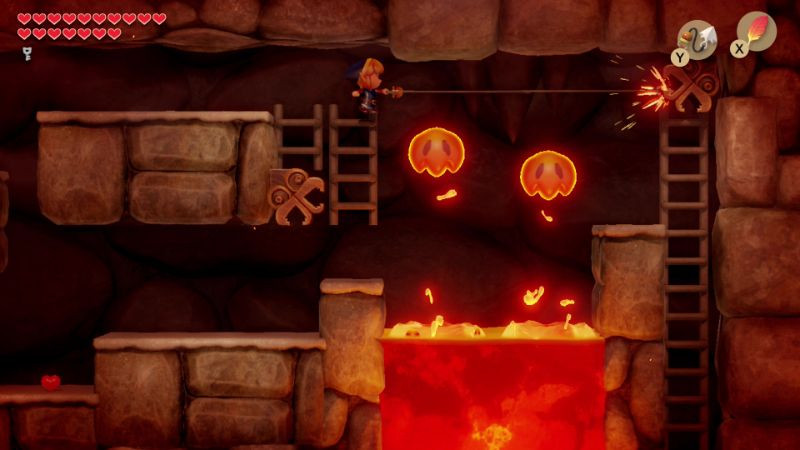
12.15. Hot Head Encounter
You are now ready to take on the dungeon boss, Hot Head. So once you’ve prepared yourself, use the Nightmare’s Key and head up through the door.
 Turtle Rock Hot Head
12.16. Thunder Drum Reward
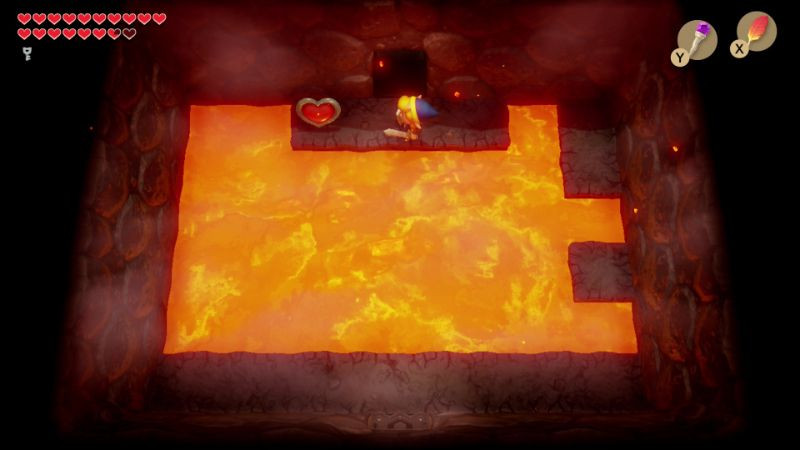
After Hot Head has been defeated, he’ll leave you with the final words that you cannot wake the Wind Fish. Hot Head reminds Link that he too is within the dream. Collect the Heart Container to raise your overall health to 18 full heart containers. Jump over the lava and head up a screen to collect the eighth Instrument of the Sirens, the Thunder Drum!
 Turtle Rock Thunder Drum
Unlock the secrets of rock moving in Link’s Awakening and transform your outdoor space with Rockscapes.net! Visit our website at rockscapes.net for more information and inspiration.