Making a rock screen transforms your outdoor space, adding texture, privacy, and a natural aesthetic. At rockscapes.net, we provide homeowners, landscape designers, and DIY enthusiasts with the knowledge and resources to create stunning rock screens. Discover how to design, build, and maintain your own unique landscape feature using our expert tips and the best materials available. With innovative landscape ideas and the right natural stones, creating your outdoor space with rock features has never been easier!
1. What Is A Rock Screen and Why Build One?
A rock screen is a decorative and functional structure made from rocks, used in landscaping to provide privacy, define spaces, or add aesthetic appeal. According to research from Arizona State University’s School of Earth and Space Exploration, in July 2025, rock screens provide effective erosion control and habitat creation in arid landscapes.
1.1 Defining a Rock Screen
A rock screen, in its simplest form, is a barrier constructed from rocks. These structures can range from simple stacks of stones to elaborately designed walls or panels. They are used in both residential and commercial landscaping projects to enhance visual appeal and functionality.
1.2 Benefits of Incorporating Rock Screens into Your Landscape
Rock screens offer several advantages:
- Privacy: Acts as a natural barrier, shielding your space from unwanted views.
- Aesthetics: Adds a rustic, natural look that complements various architectural styles.
- Windbreak: Reduces wind speed, protecting plants and creating a more comfortable outdoor environment.
- Erosion Control: Helps stabilize soil on slopes and prevent erosion, crucial in areas with varied topography.
- Habitat Creation: Provides shelter and habitat for beneficial insects and small animals, enhancing biodiversity.
1.3 The Growing Popularity of Rock Features in American Landscapes
The use of rock features in landscaping is on the rise across the United States. Homeowners and designers appreciate the durability and low-maintenance nature of rock, as well as its ability to blend seamlessly with the natural environment. This trend is particularly evident in regions like Arizona, where the desert landscape inspires the integration of rocks into outdoor designs.
2. Understanding Different Types of Rock Screens
What are the different types of rock screens to suit your style and needs? Rock screens come in various forms, each with unique aesthetic and functional qualities. From gabion walls to stacked stone designs, understanding these types will help you choose the best option for your landscape.
2.1 Gabion Walls: Modern and Functional
Gabion walls are structures made from wire cages filled with rocks. They are known for their strength, durability, and modern appearance. Gabion walls are often used for erosion control, retaining walls, and decorative screens.
2.1.1 Materials Used in Gabion Walls
- Wire Mesh: Galvanized or PVC-coated wire mesh for the cages.
- Rocks: Various types of rocks, such as river rock, crushed stone, or quarry stone.
2.1.2 Construction Techniques for Gabion Walls
- Assemble the Cages: Construct the wire mesh cages according to the manufacturer’s instructions.
- Place the Cages: Position the cages in the desired location, ensuring they are level and stable.
- Fill with Rocks: Fill the cages with rocks, arranging them tightly to minimize gaps.
- Secure the Lids: Close and secure the lids of the cages.
2.1.3 Design Ideas for Gabion Walls
- Tiered Gabion Walls: Create a multi-level wall for a dynamic look.
- Gabion Benches: Integrate seating into the wall design.
- Planting Pockets: Incorporate pockets for plants to grow within the wall.
2.2 Stacked Stone Screens: Classic and Natural
Stacked stone screens involve carefully arranging rocks to create a wall or panel. This type of rock screen offers a classic, natural aesthetic that blends well with traditional landscape designs.
2.2.1 Types of Stones for Stacked Screens
- Flagstone: Flat, sedimentary rocks ideal for creating smooth, even surfaces.
- Fieldstone: Naturally rounded stones that add a rustic touch.
- Ledgestone: Thin, layered stones that create a textured appearance.
2.2.2 Mortared vs. Dry-Stacked Stone Screens
- Mortared: Stones are held together with mortar, providing stability and longevity.
- Dry-Stacked: Stones are arranged without mortar, relying on their weight and interlocking shapes for stability.
2.2.3 Building a Stable Stacked Stone Screen
- Prepare the Foundation: Ensure a level and stable base for the screen.
- Select Stones: Choose stones of varying sizes and shapes to create a natural look.
- Arrange Stones: Carefully stack the stones, interlocking them to enhance stability.
- Use Mortar (if applicable): Apply mortar between the stones, ensuring a strong bond.
2.3 Rock and Wood Combination Screens: Blending Materials
Combining rocks with wood elements can create a visually appealing and structurally sound screen. This approach allows for a mix of textures and colors, enhancing the overall design.
2.3.1 Incorporating Wood Elements
- Wood Posts: Use wooden posts to support sections of the rock screen.
- Wood Panels: Integrate wood panels between rock sections for a contrasting look.
- Wood Accents: Add wooden accents, such as beams or decorative pieces, to complement the rock.
2.3.2 Design Considerations
- Material Compatibility: Choose wood and rock types that complement each other in color and texture.
- Structural Integrity: Ensure the wood and rock elements are securely connected.
- Weather Resistance: Use treated wood to withstand outdoor conditions and prevent rot.
2.4 Freestanding Rock Panels: Artistic and Versatile
Freestanding rock panels are individual screens that can be placed anywhere in the landscape. They offer flexibility in design and placement, allowing for creative arrangements and focal points.
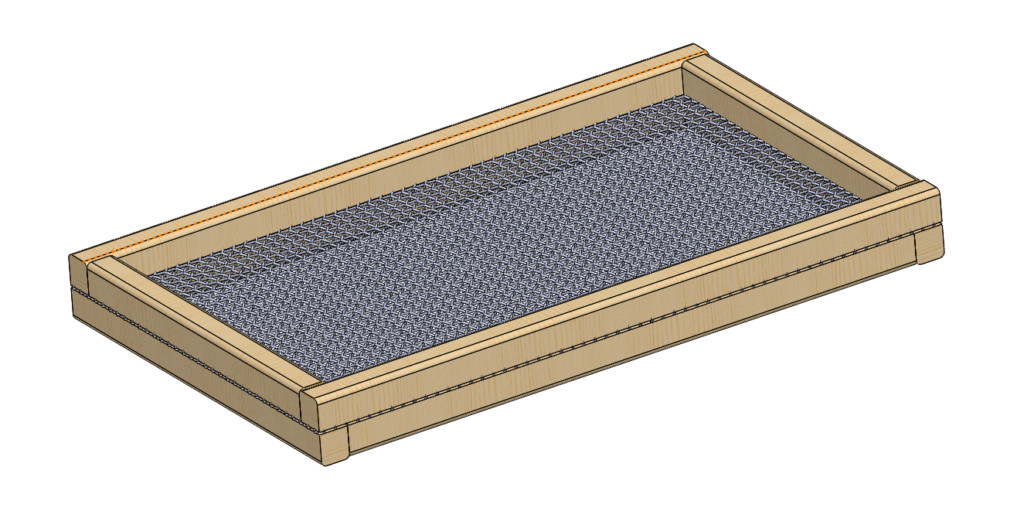
2.4.1 Creating a Rock Panel Structure
- Build a Frame: Construct a sturdy frame from wood or metal.
- Attach Mesh: Secure wire mesh to the frame to hold the rocks.
- Fill with Rocks: Fill the mesh with rocks, arranging them for aesthetic appeal.
- Secure the Rocks: Use mortar or adhesive to secure the rocks in place.
2.4.2 Placement and Design Tips
- Focal Points: Position the panels to draw attention to specific areas of the garden.
- Privacy Screens: Use panels to create secluded seating areas or block unwanted views.
- Artistic Arrangements: Arrange multiple panels in creative patterns for a unique design.
 Stacked stone screen with a variety of earth-toned rocks and lush greenery
3. Planning Your Rock Screen Project
What should you consider when planning your rock screen project? Proper planning is essential for a successful rock screen project. This includes assessing your site, determining the right size and height, and choosing the appropriate materials.
3.1 Assessing Your Site
Before starting your project, evaluate your site for factors such as soil type, slope, and existing vegetation.
3.1.1 Soil Type and Stability
- Sandy Soil: May require additional stabilization measures.
- Clay Soil: Can be prone to expansion and contraction, affecting the screen’s stability.
- Loamy Soil: Generally provides a good foundation for rock screens.
3.1.2 Slope Considerations
- Level Ground: Simplifies construction and ensures stability.
- Sloping Ground: May require terracing or retaining walls to create a stable base.
3.1.3 Existing Vegetation
- Root Systems: Remove any large roots that could interfere with the screen’s foundation.
- Plant Placement: Consider how the screen will affect sunlight and water availability for existing plants.
3.2 Determining the Right Size and Height
The size and height of your rock screen should be proportional to the surrounding landscape and meet your specific needs for privacy or aesthetics.
3.2.1 Privacy Needs
- Measure the Area: Determine the height needed to block unwanted views.
- Consider Viewing Angles: Ensure the screen provides adequate coverage from all angles.
3.2.2 Aesthetic Goals
- Scale: Ensure the screen is proportional to the size of your yard or garden.
- Balance: Create a visually balanced design that complements the surrounding landscape.
3.2.3 Local Regulations
- Height Restrictions: Check local building codes for any height restrictions on fences or walls.
- Permits: Obtain any necessary permits before starting construction.
3.3 Choosing the Right Rocks and Materials
Selecting the right rocks and materials is crucial for the durability and aesthetic appeal of your rock screen.
3.3.1 Types of Rocks
- Granite: Durable and visually appealing, suitable for various designs.
- Slate: Flat, layered stones ideal for creating smooth surfaces.
- River Rock: Smooth, rounded stones that add a natural touch.
- Fieldstone: Irregularly shaped stones for a rustic appearance.
3.3.2 Sourcing Your Materials
- Local Quarries: Often provide a wide selection of rocks at competitive prices.
- Landscape Suppliers: Offer a variety of rocks and other landscaping materials.
- Online Retailers: Provide convenient access to a range of materials, but consider shipping costs.
3.3.3 Estimating Material Quantities
- Calculate Volume: Determine the volume of space the screen will occupy.
- Consider Rock Size: Account for the size and shape of the rocks when estimating quantities.
- Add Extra: Purchase extra materials to account for breakage and variations in size.
4. Step-by-Step Guide to Building a Rock Screen
How do you build a rock screen that lasts? Building a rock screen involves careful preparation, construction, and finishing touches. Follow this step-by-step guide to ensure a sturdy and attractive structure.
4.1 Preparing the Foundation
A solid foundation is essential for the stability of your rock screen.
4.1.1 Clearing the Area
- Remove Debris: Clear the area of rocks, roots, and other obstructions.
- Level the Ground: Ensure the ground is level to provide a stable base.
4.1.2 Digging a Trench (if necessary)
- Depth: Dig a trench to the required depth, typically 6-12 inches.
- Width: Ensure the trench is wide enough to accommodate the base of the screen.
4.1.3 Laying a Base of Gravel
- Gravel Type: Use crushed gravel for good drainage and stability.
- Thickness: Spread a layer of gravel 4-6 inches thick in the trench.
- Compaction: Compact the gravel to create a solid base.
4.2 Constructing the Frame (if applicable)
For certain types of rock screens, such as gabion walls or freestanding panels, a frame is necessary.
4.2.1 Assembling the Frame
- Material: Use wood or metal for the frame.
- Dimensions: Construct the frame to the desired dimensions of the screen.
- Secure Joints: Use screws, bolts, or welding to secure the joints.
4.2.2 Installing Mesh or Wire
- Mesh Type: Use galvanized or PVC-coated wire mesh for durability.
- Attachment: Secure the mesh to the frame with staples or wire.
- Tension: Ensure the mesh is taut to prevent sagging.
 Building a rock screen involves arranging stones for aesthetic appeal and stability
4.3 Arranging the Rocks
The arrangement of rocks is crucial for both the structural integrity and aesthetic appeal of the screen.
4.3.1 Choosing Your Pattern
- Random: Arrange the rocks in a random pattern for a natural look.
- Layered: Create distinct layers with similar-sized rocks.
- Geometric: Arrange the rocks in a geometric pattern for a modern look.
4.3.2 Interlocking the Stones
- Stagger Joints: Stagger the joints between rocks to increase stability.
- Use Shims: Use small stones or shims to fill gaps and level the rocks.
- Check Stability: Regularly check the stability of the screen as you build.
4.3.3 Using Mortar (if applicable)
- Mixing Mortar: Mix the mortar according to the manufacturer’s instructions.
- Applying Mortar: Apply mortar between the rocks, ensuring a strong bond.
- Tooling Joints: Tool the joints to create a neat, professional finish.
4.4 Finishing Touches
Adding the finishing touches can enhance the look and functionality of your rock screen.
4.4.1 Adding Drainage
- Drainage Holes: Add drainage holes to prevent water buildup behind the screen.
- Backfill: Backfill behind the screen with gravel to improve drainage.
4.4.2 Incorporating Plants
- Plant Selection: Choose plants that complement the rock screen and thrive in the local climate.
- Planting Pockets: Create planting pockets within the screen for added greenery.
- Drip Irrigation: Install a drip irrigation system to provide water to the plants.
4.4.3 Lighting
- Uplighting: Install uplighting to highlight the texture and form of the rock screen.
- Path Lighting: Add path lighting to illuminate walkways around the screen.
- Solar Lights: Use solar lights for an energy-efficient lighting solution.
5. Rock Screen Design Ideas and Inspiration
Looking for creative ways to use rock screens in your landscape? Explore these design ideas to inspire your own project, creating unique focal points and functional spaces.
5.1 Rock Screens as Privacy Walls
Use rock screens to create private outdoor spaces, shielding your yard from neighbors and street traffic.
5.1.1 Creating Secluded Patios
- Enclose the Patio: Build a rock screen around the perimeter of the patio.
- Add Seating: Incorporate built-in seating into the screen design.
- Planting: Add plants to soften the look and enhance privacy.
5.1.2 Screening Off Utility Areas
- Hide Unsightly Areas: Use a rock screen to hide trash cans, air conditioning units, or other utility areas.
- Access Points: Include access points for maintenance and service.
- Ventilation: Ensure adequate ventilation for equipment.
5.1.3 Blocking Unwanted Views
- Analyze Sightlines: Determine the best placement and height to block unwanted views.
- Staggered Heights: Use screens of varying heights for a dynamic look.
- Overlapping Screens: Overlap screens to provide additional privacy.
5.2 Rock Screens as Garden Features
Enhance your garden by using rock screens as decorative elements, providing a backdrop for plants and creating visual interest.
5.2.1 Backdrops for Plant Beds
- Complement Plant Colors: Choose rocks that complement the colors of your plants.
- Texture Contrast: Create contrast by pairing smooth rocks with textured plants.
- Height Variations: Use screens of varying heights to create depth.
5.2.2 Water Features
- Integrate Waterfalls: Incorporate a waterfall into the rock screen design.
- Ponds: Create a pond at the base of the screen.
- Fountains: Add a fountain for a focal point.
5.2.3 Rock Gardens
- Alpine Plants: Plant alpine plants that thrive in rocky environments.
- Gravel Mulch: Use gravel mulch to complement the rocks.
- Drainage: Ensure good drainage for the plants.
5.3 Rock Screens as Architectural Accents
Incorporate rock screens into your home’s design to create a cohesive and natural look, blending indoor and outdoor spaces.
5.3.1 Entryway Features
- Welcome Guests: Create an inviting entryway with a rock screen.
- Lighting: Add lighting to highlight the screen at night.
- Planting: Incorporate plants to soften the look.
5.3.2 Outdoor Kitchens
- Enclose the Kitchen: Build a rock screen around the perimeter of the outdoor kitchen.
- Countertops: Use rock countertops to complement the screen.
- Storage: Incorporate storage areas into the screen design.
5.3.3 Fire Pits
- Enclose the Fire Pit: Build a rock screen around the fire pit for safety and aesthetics.
- Seating: Add built-in seating to the screen design.
- Materials: Use fire-resistant materials for the screen.
6. Maintenance and Care of Your Rock Screen
How do you keep your rock screen looking its best? Proper maintenance ensures your rock screen remains attractive and functional for years to come.
6.1 Cleaning Your Rock Screen
Regular cleaning helps maintain the appearance of your rock screen by removing dirt, moss, and algae.
6.1.1 Removing Dirt and Debris
- Hose Down: Use a garden hose to rinse off loose dirt and debris.
- Pressure Washer: Use a pressure washer for stubborn dirt (use caution to avoid damaging the rocks or mortar).
- Soft Brush: Use a soft brush to scrub the rocks.
6.1.2 Controlling Moss and Algae Growth
- Sunlight: Ensure the screen receives adequate sunlight to prevent moss and algae growth.
- Algaecide: Apply an algaecide to kill existing moss and algae.
- Vinegar Solution: Use a vinegar solution to clean the rocks (mix equal parts vinegar and water).
6.1.3 Preventing Stains
- Sealant: Apply a sealant to protect the rocks from stains.
- Prompt Cleanup: Clean up spills and stains promptly.
- Avoid Harsh Chemicals: Avoid using harsh chemicals that could damage the rocks.
6.2 Repairing Damage
Addressing damage promptly can prevent further deterioration of your rock screen.
6.2.1 Replacing Loose Stones
- Remove Loose Stones: Carefully remove any loose stones.
- Clean the Area: Clean the area where the stone was located.
- Apply Mortar: Apply mortar to the back of the stone.
- Replace the Stone: Replace the stone, ensuring it is level and secure.
6.2.2 Repairing Mortar Joints
- Remove Old Mortar: Remove any crumbling or damaged mortar.
- Clean the Joints: Clean the joints with a brush and water.
- Apply New Mortar: Apply new mortar, ensuring it fills the joints completely.
- Tool the Joints: Tool the joints to create a neat finish.
6.2.3 Addressing Structural Issues
- Assess the Damage: Assess the extent of the damage.
- Reinforce the Structure: Reinforce the structure with additional support if necessary.
- Consult a Professional: Consult a professional for major structural issues.
6.3 Protecting Your Rock Screen from the Elements
Protecting your rock screen from harsh weather conditions can extend its lifespan.
6.3.1 Weatherproofing
- Sealant: Apply a sealant to protect the rocks from water damage.
- Drainage: Ensure good drainage to prevent water buildup.
- Wind Protection: Provide wind protection to prevent damage from strong winds.
6.3.2 Winterizing
- Remove Debris: Remove any debris that could trap moisture and cause damage.
- Protect from Ice: Protect the screen from ice buildup, which can cause cracking.
- Cover Plants: Cover any plants incorporated into the screen to protect them from frost.
6.3.3 Sun Protection
- UV-Resistant Sealant: Use a UV-resistant sealant to protect the rocks from fading.
- Shade: Provide shade to protect the screen from direct sunlight.
- Planting: Plant trees or shrubs to provide shade.
7. Finding the Right Professionals for Your Rock Screen Project
Need help with your rock screen project? Knowing when to hire a professional can save you time and ensure the job is done right.
7.1 Landscape Designers
Landscape designers can help you create a cohesive and functional design for your rock screen.
7.1.1 Benefits of Hiring a Landscape Designer
- Expertise: They have the expertise to create a design that meets your needs and aesthetic goals.
- Knowledge of Materials: They have knowledge of different types of rocks and materials.
- Project Management: They can manage the project from start to finish.
7.1.2 What to Look for in a Landscape Designer
- Experience: Look for a designer with experience in rock screen projects.
- Portfolio: Review their portfolio to see examples of their work.
- References: Ask for references from previous clients.
7.1.3 Working with a Landscape Designer
- Communicate Your Vision: Clearly communicate your vision and goals for the project.
- Provide Feedback: Provide feedback on the design and make any necessary changes.
- Stay Involved: Stay involved in the project to ensure it meets your expectations.
7.2 Stone Masons
Stone masons are skilled in the art of building with stone and can ensure the structural integrity of your rock screen.
7.2.1 Benefits of Hiring a Stone Mason
- Expert Craftsmanship: They have the skills and experience to build a sturdy and attractive rock screen.
- Knowledge of Techniques: They have knowledge of different stone masonry techniques.
- Attention to Detail: They pay attention to detail to ensure a high-quality finish.
7.2.2 What to Look for in a Stone Mason
- Experience: Look for a stone mason with experience in building rock screens.
- Certifications: Check for certifications from professional organizations.
- Insurance: Ensure they have adequate insurance coverage.
7.2.3 Collaborating with a Stone Mason
- Provide Clear Instructions: Provide clear instructions on the design and materials.
- Regular Communication: Maintain regular communication throughout the project.
- Inspect the Work: Inspect the work regularly to ensure it meets your standards.
7.3 General Contractors
General contractors can oversee the entire rock screen project, coordinating all aspects from design to construction.
7.3.1 Benefits of Hiring a General Contractor
- Project Management: They can manage the entire project from start to finish.
- Coordination: They can coordinate all the different trades involved in the project.
- Budget Management: They can manage the budget and ensure the project stays on track.
7.3.2 Choosing the Right Contractor
- License: Ensure the contractor is licensed to operate in your state.
- Insurance: Check that they have adequate insurance coverage.
- References: Ask for references from previous clients.
7.3.3 Managing the Project
- Regular Meetings: Schedule regular meetings to discuss progress and address any issues.
- Detailed Contract: Ensure there is a detailed contract that outlines the scope of work, timeline, and payment schedule.
- Change Orders: Document any changes to the project with written change orders.
8. Common Mistakes to Avoid When Building a Rock Screen
What pitfalls should you watch out for? Avoiding these common mistakes can save you time, money, and frustration when building your rock screen.
8.1 Poor Foundation
A weak foundation can lead to instability and failure of your rock screen.
8.1.1 Inadequate Base
- Solution: Ensure the base is level, compacted, and well-drained.
8.1.2 Improper Soil Compaction
- Solution: Use a compactor to compact the soil before building the screen.
8.1.3 Lack of Drainage
- Solution: Install drainage to prevent water buildup behind the screen.
8.2 Incorrect Rock Selection
Choosing the wrong rocks can affect the appearance and stability of your screen.
8.2.1 Using Unsuitable Rock Types
- Solution: Choose rocks that are durable, weather-resistant, and appropriate for your design.
8.2.2 Inconsistent Rock Sizes
- Solution: Use a variety of rock sizes to create a natural look, but ensure they are compatible for stacking.
8.2.3 Poor Color Coordination
- Solution: Choose rocks that complement the surrounding landscape and architecture.
8.3 Improper Construction Techniques
Using incorrect construction techniques can compromise the structural integrity of your rock screen.
8.3.1 Not Interlocking Stones
- Solution: Interlock the stones to create a stable structure.
8.3.2 Insufficient Mortar
- Solution: Use enough mortar to create a strong bond between the stones (if applicable).
8.3.3 Neglecting Stability
- Solution: Regularly check the stability of the screen as you build, and make adjustments as needed.
8.4 Neglecting Maintenance
Failing to maintain your rock screen can lead to damage and deterioration.
8.4.1 Lack of Cleaning
- Solution: Clean the screen regularly to remove dirt, moss, and algae.
8.4.2 Ignoring Repairs
- Solution: Address any damage promptly to prevent further deterioration.
8.4.3 Insufficient Protection from the Elements
- Solution: Protect the screen from harsh weather conditions with sealants and drainage.
9. Frequently Asked Questions (FAQ) About Rock Screens
Have questions about rock screens? These FAQs provide quick answers to common queries.
-
What is a rock screen?
A rock screen is a decorative and functional structure made from rocks, used to provide privacy, define spaces, or add aesthetic appeal to a landscape.
-
What are the benefits of using a rock screen?
Rock screens provide privacy, act as windbreaks, control erosion, create habitats for wildlife, and add a natural aesthetic to your landscape.
-
What types of rocks are best for building a rock screen?
Granite, slate, river rock, and fieldstone are popular choices due to their durability and aesthetic appeal.
-
How do I prepare the foundation for a rock screen?
Clear the area, level the ground, dig a trench if necessary, and lay a base of compacted gravel.
-
How do I maintain my rock screen?
Clean the screen regularly to remove dirt and algae, repair any damage promptly, and protect it from harsh weather conditions.
-
Do I need a permit to build a rock screen?
Check your local building codes for any height restrictions or permit requirements.
-
Can I incorporate plants into my rock screen design?
Yes, incorporating plants can soften the look of the rock screen and add greenery.
-
How do I choose the right size for my rock screen?
Consider your privacy needs, aesthetic goals, and local regulations when determining the size and height of your rock screen.
-
What are gabion walls?
Gabion walls are structures made from wire cages filled with rocks, known for their strength and modern appearance.
-
Should I hire a professional to build my rock screen?
Consider hiring a landscape designer, stone mason, or general contractor for complex projects or if you lack the necessary skills and experience.
10. Conclusion: Enhance Your Landscape with Rockscapes.net
Ready to transform your outdoor space with a stunning rock screen? At rockscapes.net, we offer the inspiration, information, and resources you need to create a beautiful and functional landscape feature. Whether you’re looking for design ideas, detailed guides, or expert advice, our website is your ultimate destination for all things rockscapes. Enhance your landscape today with rockscapes.net and bring the natural beauty of stone to your home. Explore our site for design ideas, detailed information on rock types, and helpful construction tips. Let us help you create the landscape of your dreams!
Visit rockscapes.net today and discover the endless possibilities of rock screens! Contact us at:
Address: 1151 S Forest Ave, Tempe, AZ 85281, United States
Phone: +1 (480) 965-9011
Website: rockscapes.net