Rock candy with powdered sugar can be made easily at home; rockscapes.net is here to guide you through the process of creating this crystalline treat. Rock candy, also known as sea glass candy, becomes a delightful and visually appealing confection when dusted with powdered sugar and rockscapes.net will help you achieve that perfect balance of sweetness and texture. Discover the joys of homemade candy-making, enhance your culinary skills and explore options for flavored candy oils, hard candy recipes, and how to make hard tack candy.
1. What Exactly Is Rock Candy And Why Add Powdered Sugar?
Rock candy is a type of confection made by crystallizing sugar. Powdered sugar is added to prevent sticking, soften edges, and absorb any excess oil.
Rock candy, also known as sea glass candy or hard candy, is essentially large sugar crystals grown from a supersaturated solution of sugar and water. This process, simple in theory, yields a visually stunning and delightfully sweet treat. The addition of powdered sugar plays several crucial roles:
- Preventing Sticking: Rock candy is notorious for its stickiness. Powdered sugar acts as a barrier, preventing the individual pieces from clumping together, especially during storage.
- Softening Edges: The crystallization process can result in sharp, jagged edges. Powdered sugar gently softens these edges, making the candy more pleasant to handle and eat.
- Absorbing Excess Oil: When using flavored candy oils, there’s a slight chance of separation, leaving a thin layer of oil on the surface. Powdered sugar helps absorb this excess oil, preventing a greasy texture.
- Enhancing Visual Appeal: A light dusting of powdered sugar creates a frosted, elegant look that complements the crystalline structure of the rock candy.
Essentially, powdered sugar elevates the rock candy experience, both texturally and visually.
2. The Science Behind Rock Candy Crystallization
The crystallization of rock candy relies on creating a supersaturated sugar solution. As the solution cools, the sugar molecules come out of the solution and attach to seed crystals, forming larger crystals.
To fully understand how to make the best rock candy, it’s helpful to grasp the science behind crystallization. Here’s a breakdown:
- Supersaturation: You start by dissolving a large amount of sugar in water, more than would typically dissolve at room temperature. This is achieved by heating the mixture, which allows the water to hold more dissolved sugar.
- Nucleation: As the solution cools, it becomes supersaturated, meaning it contains more dissolved sugar than it can stably hold at that temperature. This creates an unstable environment where sugar molecules are eager to come out of the solution. The process of these molecules beginning to clump together is called nucleation. In a classic rock candy recipe, this nucleation occurs on a string or stick suspended in the solution, providing a surface for the crystals to grow.
- Crystal Growth: Once the initial nuclei form, more sugar molecules from the solution attach to these “seed” crystals. The sugar molecules arrange themselves in a highly ordered, repeating pattern, building larger and larger crystals over time. The slower the cooling process, the larger and more well-defined the crystals will generally be.
- Purity and Interference: The purity of the sugar solution is crucial for optimal crystal growth. Impurities can disrupt the orderly arrangement of sugar molecules, leading to smaller, less defined crystals. This is why using filtered water and high-quality sugar is recommended. Similarly, excessive stirring can interfere with crystal formation by breaking apart the delicate nuclei.
Understanding these principles allows you to troubleshoot common issues, such as cloudy candy or poorly formed crystals. By carefully controlling the sugar concentration, temperature, and purity of the solution, you can consistently create beautiful, large rock candy crystals.
3. Essential Ingredients For Rock Candy
The basic ingredients for rock candy are sugar, water, and corn syrup. Flavored candy oils and food coloring are optional but add flavor and visual appeal.
Let’s delve into why each ingredient is important:
- Granulated Sugar: This is the foundation of your rock candy. Use a high-quality granulated sugar for best results. Avoid using powdered sugar or brown sugar, as these will not crystallize properly.
- Water: Use filtered water to minimize impurities that can interfere with crystal formation. The water acts as a solvent, allowing the sugar to dissolve and form a supersaturated solution.
- Corn Syrup: This is an invert sugar, meaning it helps prevent the sugar from re-crystallizing too quickly, resulting in a smoother, clearer candy. Light corn syrup is generally preferred. Some recipes suggest using a touch of vinegar or lemon juice instead of corn syrup, achieving a similar effect.
- Flavored Candy Oils (Optional): These concentrated flavorings are designed for high-heat applications like candy making. They provide a potent burst of flavor without adding excess liquid. Popular options include cinnamon, peppermint, cherry, and lemon. Be sure to use candy oils, not extracts, as extracts can evaporate during the cooking process.
- Food Coloring (Optional): A few drops of food coloring can transform your rock candy into vibrant, eye-catching treats. Gel food coloring is often preferred over liquid food coloring, as it is more concentrated and less likely to affect the consistency of the sugar solution.
- Powdered Sugar: As mentioned earlier, powdered sugar is used to dust the finished rock candy, preventing sticking and softening the edges.
By using high-quality ingredients and understanding their roles, you can set yourself up for rock candy success.
4. Can You Use Powdered Sugar Instead Of Granulated Sugar?
No, powdered sugar cannot be substituted for granulated sugar in rock candy. Powdered sugar contains cornstarch, which prevents proper crystallization.
Powdered sugar is essentially granulated sugar that has been ground into a fine powder and mixed with a small amount of cornstarch (typically around 3-5%). This cornstarch is the key reason why it cannot be used as a direct substitute for granulated sugar in rock candy making.
Here’s why:
- Interference with Crystallization: The cornstarch in powdered sugar interferes with the crystallization process. It disrupts the orderly arrangement of sugar molecules, preventing them from forming the large, well-defined crystals that characterize rock candy.
- Altered Texture: Even if you were able to dissolve powdered sugar in water, the resulting candy would have a cloudy, grainy texture due to the presence of cornstarch. It would not achieve the clear, glassy appearance of traditional rock candy.
- Inaccurate Sugar Concentration: Because powdered sugar contains cornstarch, using it would throw off the sugar-to-water ratio in your recipe. This could lead to a solution that is not sufficiently supersaturated, resulting in little to no crystal growth.
For successful rock candy, stick with granulated sugar. Its pure crystalline structure is essential for achieving the desired results.
5. Step-By-Step Guide To Making Rock Candy
To make rock candy, dissolve sugar, water, and corn syrup in a saucepan. Boil the mixture to 300°F (149°C), add flavoring and coloring, and pour onto a parchment-lined sheet. Once cooled, break into pieces and dust with powdered sugar.
Here’s a more detailed breakdown:
Step 1: Prepare Your Pan
- Lightly butter a 15×10 inch rimmed baking sheet.
- Line the pan with parchment paper, ensuring the paper extends slightly beyond the edges for easy removal.
- Butter the parchment paper as well, paying special attention to the edges to prevent the candy from seeping underneath.
Step 2: Combine Ingredients
- In a large, deep saucepan (a heavy-bottomed pan is ideal for even heat distribution), combine 1 cup of water, 3 3/4 cups of granulated sugar, and 1 1/4 cups of light corn syrup.
- If desired, add 1 teaspoon of food coloring at this stage.
Step 3: Dissolve the Sugar
- Place the saucepan over medium-high heat.
- Stir constantly until the sugar begins to dissolve.
Step 4: Boil to Hard Crack Stage
- Attach a candy thermometer to the side of the pan, making sure it doesn’t touch the bottom.
- Bring the mixture to a boil and continue cooking until the thermometer registers 300°F (149°C), also known as the “hard crack” stage. This may take around 20 minutes.
- Monitor the mixture closely. If it starts to boil too vigorously and threatens to spill over, remove the pan from the heat briefly, stir to reduce the bubbling, and then return it to the heat.
Step 5: Add Flavoring
- Once the mixture reaches 300°F (149°C), remove the pan from the heat.
- Working quickly, stir in 1-2 teaspoons of your chosen flavored candy oil. Be cautious, as some flavorings (like cinnamon) can be quite strong. Ensure the area is well-ventilated.
Step 6: Pour and Cool
- Immediately pour the hot candy mixture onto the prepared parchment-lined baking sheet.
- Spread the mixture evenly.
- Let the candy cool completely for at least 4 hours.
Step 7: Break and Dust
- After 4 hours, dust the top of the candy with powdered sugar.
- Flip the candy over onto a large cutting board or cookie sheet and remove the parchment paper.
- Return the candy to the pan, and use the tip of a sharp knife or a heavy mallet to break it into bite-sized pieces. If using a mallet, cover the candy with parchment paper to prevent shattering.
- Dust the broken candy pieces with more powdered sugar.
Step 8: Store
- Store the finished rock candy in an airtight container in a cool, dry place.
Following these steps carefully will increase your chances of making perfect, shimmering rock candy every time.
6. Tips For Achieving Crystal-Clear Rock Candy
Use filtered water, avoid stirring after the sugar dissolves, and maintain a consistent temperature to get crystal-clear rock candy.
Here are some expert tips:
- Start with Purity: Impurities hinder crystal growth. Use filtered water and high-quality granulated sugar.
- Gentle Dissolving: Stir constantly only until the sugar dissolves completely. Once dissolved, avoid stirring, as this can disrupt crystal formation.
- Consistent Temperature: Maintaining a steady temperature is crucial. Use a reliable candy thermometer and monitor the mixture closely.
- Avoid Agitation: Do not bump or shake the pan during the cooling process. Vibrations can disrupt the delicate crystal structure.
- Patience is Key: Allow the candy to cool completely undisturbed. Rushing the process can lead to soft or cloudy candy.
- Humidity Control: High humidity can affect the candy’s texture. If possible, make rock candy on a dry day.
- Cleanliness Matters: Ensure all your equipment (saucepan, utensils, thermometer) is clean and free of any residue.
- Consider an Invert Sugar: Corn syrup (or a touch of vinegar or lemon juice) helps prevent sugar from re-crystallizing too quickly, leading to smoother candy.
- Don’t Scrape the Bottom: When pouring the candy onto the baking sheet, avoid scraping the bottom of the saucepan, as this can introduce undissolved sugar crystals that will cloud the candy.
- Test for Doneness: If you’re unsure if the candy has reached the hard crack stage, drop a small amount into a bowl of ice water. If it hardens immediately and becomes brittle, it’s ready.
By following these tips, you’ll significantly improve your chances of creating stunning, crystal-clear rock candy that will impress your friends and family.
7. Troubleshooting Common Rock Candy Problems
If rock candy doesn’t harden, it may not have reached the hard crack stage, or there may be too much moisture. Cloudy candy can result from impurities or stirring during cooling.
Here’s a detailed look at how to solve them:
-
Soft Candy:
- Problem: The candy didn’t reach the hard crack stage (300°F or 149°C).
- Solution: Return the candy mixture to the saucepan and continue cooking until it reaches the correct temperature. Ensure your candy thermometer is accurate.
- Problem: Too much moisture in the air (high humidity).
- Solution: If humidity is an issue, try making rock candy on a drier day or use a dehumidifier in your kitchen. You can also try cooking the candy to a slightly higher temperature (a degree or two above 300°F).
-
Cloudy Candy:
- Problem: Impurities in the ingredients (sugar, water).
- Solution: Use filtered water and high-quality granulated sugar.
- Problem: Stirring the mixture after the sugar dissolved.
- Solution: Avoid stirring once the sugar is fully dissolved.
- Problem: Undissolved sugar crystals in the mixture.
- Solution: Ensure the sugar is completely dissolved before bringing the mixture to a boil. When pouring the candy, avoid scraping the bottom of the pan.
-
Grainy Candy:
- Problem: Sugar crystals re-forming during cooling.
- Solution: This can happen if the mixture cools too quickly or if there are seed crystals present. Ensure a slow, even cooling process. Adding corn syrup or a touch of vinegar can also help prevent graininess.
-
Candy Sticks to the Pan:
- Problem: Insufficiently greased parchment paper.
- Solution: Make sure to generously butter the parchment paper, especially along the edges.
-
Flavor Oil Separation:
- Problem: Some flavored candy oils can separate from the sugar mixture, creating a slick surface.
- Solution: Remove the pan from the heat, stir in the oil well, and quickly pour into the prepared pan. The powdered sugar dusting will also help absorb any excess oil.
-
Uneven Color:
- Problem: Food coloring not mixed in thoroughly.
- Solution: Add the food coloring along with the sugar and water, and stir until evenly distributed before heating.
By understanding these common problems and their solutions, you can confidently tackle any rock candy challenge.
8. Flavor Variations And Creative Twists
Experiment with different candy oils like cinnamon, peppermint, or fruit flavors. Add edible glitter for a festive touch.
Let’s explore some exciting ways to customize your rock candy:
-
Flavor Infusions:
- Classic Spices: Cinnamon, peppermint, and anise are traditional favorites.
- Fruity Delights: Cherry, raspberry, lemon, and orange offer a burst of freshness.
- Unique Extracts: Explore more unusual options like rose, lavender, or even bubblegum for a whimsical twist.
- Layered Flavors: Combine complementary flavors for a more complex taste profile (e.g., lemon-lime, strawberry-kiwi).
-
Visual Enhancements:
- Edible Glitter: Add a pinch of edible glitter to the mixture for a sparkling, festive look.
- Swirls and Marbling: Divide the candy mixture into separate bowls, color each differently, and then swirl them together before pouring onto the baking sheet.
- Layered Colors: Pour one colored layer of candy onto the baking sheet, let it partially set, and then pour another colored layer on top.
- Embeds: Sprinkle edible decorations (sprinkles, edible flowers, small candies) onto the surface of the candy while it’s still warm and pliable.
-
Texture Transformations:
- Nutty Crunch: Stir in chopped nuts (almonds, pecans, walnuts) after adding the flavoring oil.
- Salty Sweet: Sprinkle a pinch of sea salt on top of the candy after pouring it onto the baking sheet.
- Citrus Zest: Add finely grated citrus zest (lemon, orange, lime) along with the flavoring oil for a bright, aromatic touch.
-
Creative Shapes:
- Silicone Molds: Pour the hot candy mixture into silicone molds to create shaped candies (stars, hearts, animals). Be sure to grease the molds well with butter.
- Suckers: Insert lollipop sticks into the candy while it’s still warm and pliable to make homemade lollipops.
With a little creativity, you can transform basic rock candy into a dazzling array of flavors, colors, and textures.
9. Storing Rock Candy Properly
Store rock candy in an airtight container in a cool, dry place to prevent it from becoming sticky or dissolving.
Here are some essential storage tips:
- Airtight is Key: The most important factor in storing rock candy is preventing moisture absorption. Store the candy in an airtight container, such as a Tupperware container or a zip-lock bag.
- Cool and Dry: Store the container in a cool, dry place away from direct sunlight and heat. High temperatures and humidity can cause the candy to become sticky or even dissolve.
- Layering: If you’re storing multiple layers of rock candy in the same container, place a sheet of parchment paper between the layers to prevent sticking.
- Powdered Sugar Protection: Ensure the rock candy pieces are well-dusted with powdered sugar before storing. The powdered sugar acts as a barrier against moisture.
- Avoid Refrigeration: Refrigerating rock candy is not recommended, as the cold, humid environment can cause it to become sticky.
- Short-Term Storage: For short-term storage (a few days), you can keep the rock candy in a decorative jar or bowl, but make sure it’s covered to protect it from dust and moisture.
- Long-Term Storage: Properly stored, rock candy can last for several weeks or even a month. However, its texture and appearance may degrade over time.
By following these storage guidelines, you can keep your homemade rock candy fresh, crisp, and delicious for as long as possible.
10. The History And Cultural Significance Of Rock Candy
Rock candy has been around for centuries, enjoyed in various cultures as a simple yet delightful treat. It’s often associated with celebrations and holidays.
Here’s a glimpse into its rich history:
-
Ancient Origins: The concept of crystallizing sugar dates back centuries. Some historians believe that forms of crystallized sugar existed in ancient Persia and India.
-
Medieval Europe: Sugar was a rare and expensive commodity in medieval Europe, making crystallized sugar a luxury item enjoyed by the wealthy.
-
Colonial America: Rock candy became popular in Colonial America, where it was often used as a medicinal remedy for sore throats and coughs.
-
Victorian Era: The Victorian era saw a surge in the popularity of rock candy, with elaborate displays and intricate designs becoming fashionable.
-
Cultural Significance:
- Celebrations: Rock candy is often associated with celebrations and holidays, such as Christmas, Easter, and weddings.
- Gifts: It’s a popular homemade gift, often packaged in decorative bags or jars.
- Nostalgia: For many, rock candy evokes feelings of nostalgia and childhood memories.
-
Modern Revival: In recent years, there’s been a resurgence of interest in homemade candies, including rock candy. People are experimenting with new flavors, colors, and designs, keeping this classic treat alive and relevant.
Whether you’re drawn to its historical roots, its cultural significance, or simply its delightful taste, rock candy continues to captivate and delight people of all ages.
11. Health Considerations And Alternatives
Rock candy is primarily sugar, so moderation is key. Consider using sugar substitutes, but results may vary.
Here’s a more balanced perspective:
-
High Sugar Content: Rock candy is primarily composed of sugar and is therefore high in calories. It should be consumed in moderation as part of a balanced diet.
-
Dental Health: The high sugar content can contribute to tooth decay. Practice good oral hygiene, such as brushing your teeth after consuming rock candy.
-
Blood Sugar Levels: Individuals with diabetes or those monitoring their blood sugar levels should be mindful of their rock candy consumption, as it can cause a rapid spike in blood sugar.
-
Artificial Colors and Flavors: Some recipes call for artificial food coloring and flavoring. If you’re concerned about these additives, opt for natural alternatives, such as fruit and vegetable juices for coloring and natural extracts for flavoring.
-
Potential Alternatives:
- Sugar Substitutes: Some people experiment with sugar substitutes like erythritol or stevia to make a lower-calorie version of rock candy. However, it’s important to note that these substitutes may not crystallize in the same way as sugar, and the texture and appearance of the candy may be different.
- Smaller Portions: Enjoy rock candy as an occasional treat in small portions rather than indulging in large quantities.
- Pair with Nutritious Foods: Balance your rock candy consumption with nutritious foods like fruits, vegetables, and protein to minimize its impact on your blood sugar levels.
While rock candy can be a delightful treat, it’s important to be mindful of its health implications and consume it in moderation.
12. Can You Make Rock Candy Without Corn Syrup?
Yes, rock candy can be made without corn syrup, but it may result in a slightly different texture. Adding a small amount of vinegar or lemon juice can help prevent crystallization.
Here’s what you need to know:
- Role of Corn Syrup: Corn syrup acts as an “invert sugar,” which means it helps prevent the sugar from re-crystallizing too quickly. This results in a smoother, clearer candy with a less grainy texture.
- Alternatives: If you prefer not to use corn syrup, you can try adding a small amount of vinegar (white vinegar or apple cider vinegar) or lemon juice to the sugar mixture. These acidic ingredients also act as invert sugars, helping to prevent re-crystallization.
- Adjusting the Recipe: When omitting corn syrup, use only 3 3/4 cups of granulated sugar and 1 cup of water. Add 1 teaspoon of either vinegar or lemon juice.
- Potential Differences: Rock candy made without corn syrup may have a slightly more grainy texture and may be more prone to clouding. However, it will still be a delicious and enjoyable treat.
- Experimentation: Making candy is a science, so don’t be afraid to experiment to find what works best for you.
13. Safety Precautions When Making Rock Candy
Always use a candy thermometer, keep children away from the hot sugar, and have a bowl of ice water nearby in case of burns.
Here are some detailed safety precautions:
- Candy Thermometer: A reliable candy thermometer is essential for monitoring the temperature of the sugar mixture. This ensures that the candy reaches the hard crack stage (300°F or 149°C) without overheating or burning.
- Keep Children Away: Hot sugar is extremely dangerous and can cause severe burns. Keep children and pets away from the kitchen while making rock candy.
- Protective Gear: Wear heat-resistant gloves or oven mitts to protect your hands from splashes of hot sugar.
- Eye Protection: Consider wearing safety glasses to protect your eyes from splattering sugar.
- Cold Water Bowl: Keep a bowl of ice water nearby in case of burns. If hot sugar gets on your skin, immediately immerse the affected area in cold water for at least 15 minutes.
- Ventilation: When adding flavored candy oils, especially strong flavors like cinnamon, ensure the area is well-ventilated to avoid inhaling fumes that can irritate your eyes and respiratory system.
- Non-Slip Surface: Work on a stable, non-slip surface to prevent accidents.
- Careful Pouring: When pouring the hot candy mixture onto the prepared baking sheet, do so slowly and carefully to avoid splashes.
- Supervision: Never leave the saucepan unattended while the sugar mixture is heating.
- Clean Up Spills Immediately: Clean up any sugar spills immediately to prevent slipping hazards.
By following these safety precautions, you can minimize the risk of accidents and enjoy the candy-making process with peace of mind.
14. Rock Candy Recipes For Different Holidays
Customize rock candy with holiday-themed colors and flavors, such as peppermint for Christmas or pastel colors for Easter.
Here are some ideas for incorporating rock candy into your holiday celebrations:
-
Christmas:
- Peppermint Rock Candy: Use peppermint candy oil and red and white food coloring for a festive treat.
- Cinnamon Rock Candy: Infuse the candy with cinnamon candy oil and add a touch of red food coloring for a warm, spicy flavor.
- Christmas Tree Rock Candy: Pour the hot candy mixture into a Christmas tree-shaped silicone mold for a festive touch.
-
Easter:
- Pastel Rock Candy: Use pastel food coloring (pink, blue, green, yellow) to create colorful Easter-themed rock candy.
- Fruit-Flavored Rock Candy: Use fruit-flavored candy oils (lemon, orange, strawberry) for a refreshing springtime treat.
- Easter Egg Rock Candy: Pour the hot candy mixture into egg-shaped silicone molds for a festive touch.
-
Halloween:
- Orange and Black Rock Candy: Use orange and black food coloring for a spooky Halloween treat.
- Candy Corn Rock Candy: Create layers of orange, yellow, and white candy to mimic the look of candy corn.
- Spooky Flavors: Experiment with flavors like licorice or black cherry for a Halloween-themed twist.
-
Valentine’s Day:
- Red and Pink Rock Candy: Use red and pink food coloring for a romantic Valentine’s Day treat.
- Rose-Flavored Rock Candy: Infuse the candy with rose extract for a delicate floral flavor.
- Heart-Shaped Rock Candy: Pour the hot candy mixture into heart-shaped silicone molds for a sweet gesture.
By customizing the colors, flavors, and shapes, you can create rock candy that perfectly complements any holiday celebration.
15. Making Rock Candy With Kids
Kids can help with measuring ingredients, dusting with powdered sugar, and breaking the candy into pieces, but adult supervision is crucial due to the hot sugar.
Here are some tips for making rock candy with kids:
- Safety First: Hot sugar is extremely dangerous, so adult supervision is essential at all times.
- Age-Appropriate Tasks: Assign tasks that are appropriate for your child’s age and abilities.
- Measuring Ingredients: Kids can help with measuring out the sugar, water, and corn syrup. This is a great way to practice math skills.
- Adding Food Coloring: Let kids add the food coloring to the sugar mixture. This is a fun and colorful task.
- Dusting with Powdered Sugar: Kids can help with dusting the finished rock candy with powdered sugar.
- Breaking into Pieces: Once the candy has cooled, kids can help with breaking it into bite-sized pieces. Be sure to supervise this task, as the candy can be sharp.
- Fun and Educational: Making rock candy is a fun and educational activity that can teach kids about science, math, and cooking.
- Keep it Simple: Choose a simple recipe with few ingredients and easy-to-follow instructions.
- Be Patient: Candy making can be time-consuming, so be patient and allow plenty of time for the process.
- Make Memories: Most importantly, have fun and create lasting memories with your kids.
Remember to keep the focus on safety and enjoyment. With proper supervision and age-appropriate tasks, making rock candy can be a fun and rewarding experience for the whole family.
16. Can You Make Rock Candy With Honey?
While it’s possible to make candy with honey, rock candy relies on the specific crystallization of sugar. Honey’s different sugar composition may not produce the same results.
Here’s why honey might not be the best choice for traditional rock candy:
- Sugar Composition: Granulated sugar (sucrose) is the key ingredient for rock candy because it crystallizes readily. Honey, on the other hand, contains a mixture of sugars, including fructose and glucose, which don’t crystallize in the same way.
- Moisture Content: Honey has a higher moisture content than granulated sugar. This can affect the candy-making process and prevent the formation of hard, brittle crystals.
- Flavor Profile: Honey has a distinct flavor that will be prominent in the finished candy. This may not be desirable if you’re looking for the classic, clean taste of rock candy.
- Texture: Candy made with honey may be softer and more chewy than traditional rock candy.
If you’re interested in making candy with honey, you might want to explore recipes for honey candies or caramels, which are specifically designed for honey’s unique properties.
17. Exploring Rockscapes.Net For Rock Candy Inspiration
While rockscapes.net specializes in landscape rocks, it shares the same principles of creating visually appealing displays. Consider the colors and textures of landscape rocks as inspiration for your rock candy creations.
While rockscapes.net may not offer rock candy recipes directly, here are some ways to draw inspiration from the site:
- Color Palettes: Explore the different colors and shades of landscape rocks featured on the site. Use these color palettes as inspiration for your rock candy creations.
- Texture Combinations: Consider the textures of various landscape rocks, such as smooth river rocks or rough, jagged stones. Experiment with different techniques to create similar textures in your rock candy.
- Layering Techniques: Rockscapes often involve layering different types of rocks to create visual interest. Apply this concept to your rock candy by creating layered candies with different colors and flavors.
- Natural Beauty: Appreciate the natural beauty of landscape rocks and try to capture that essence in your rock candy designs.
- Creative Displays: Get inspired by the creative ways that landscape rocks are used to enhance outdoor spaces. Think about how you can display your rock candy in a visually appealing way.
By drawing inspiration from rockscapes.net, you can elevate your rock candy creations and turn them into edible works of art.
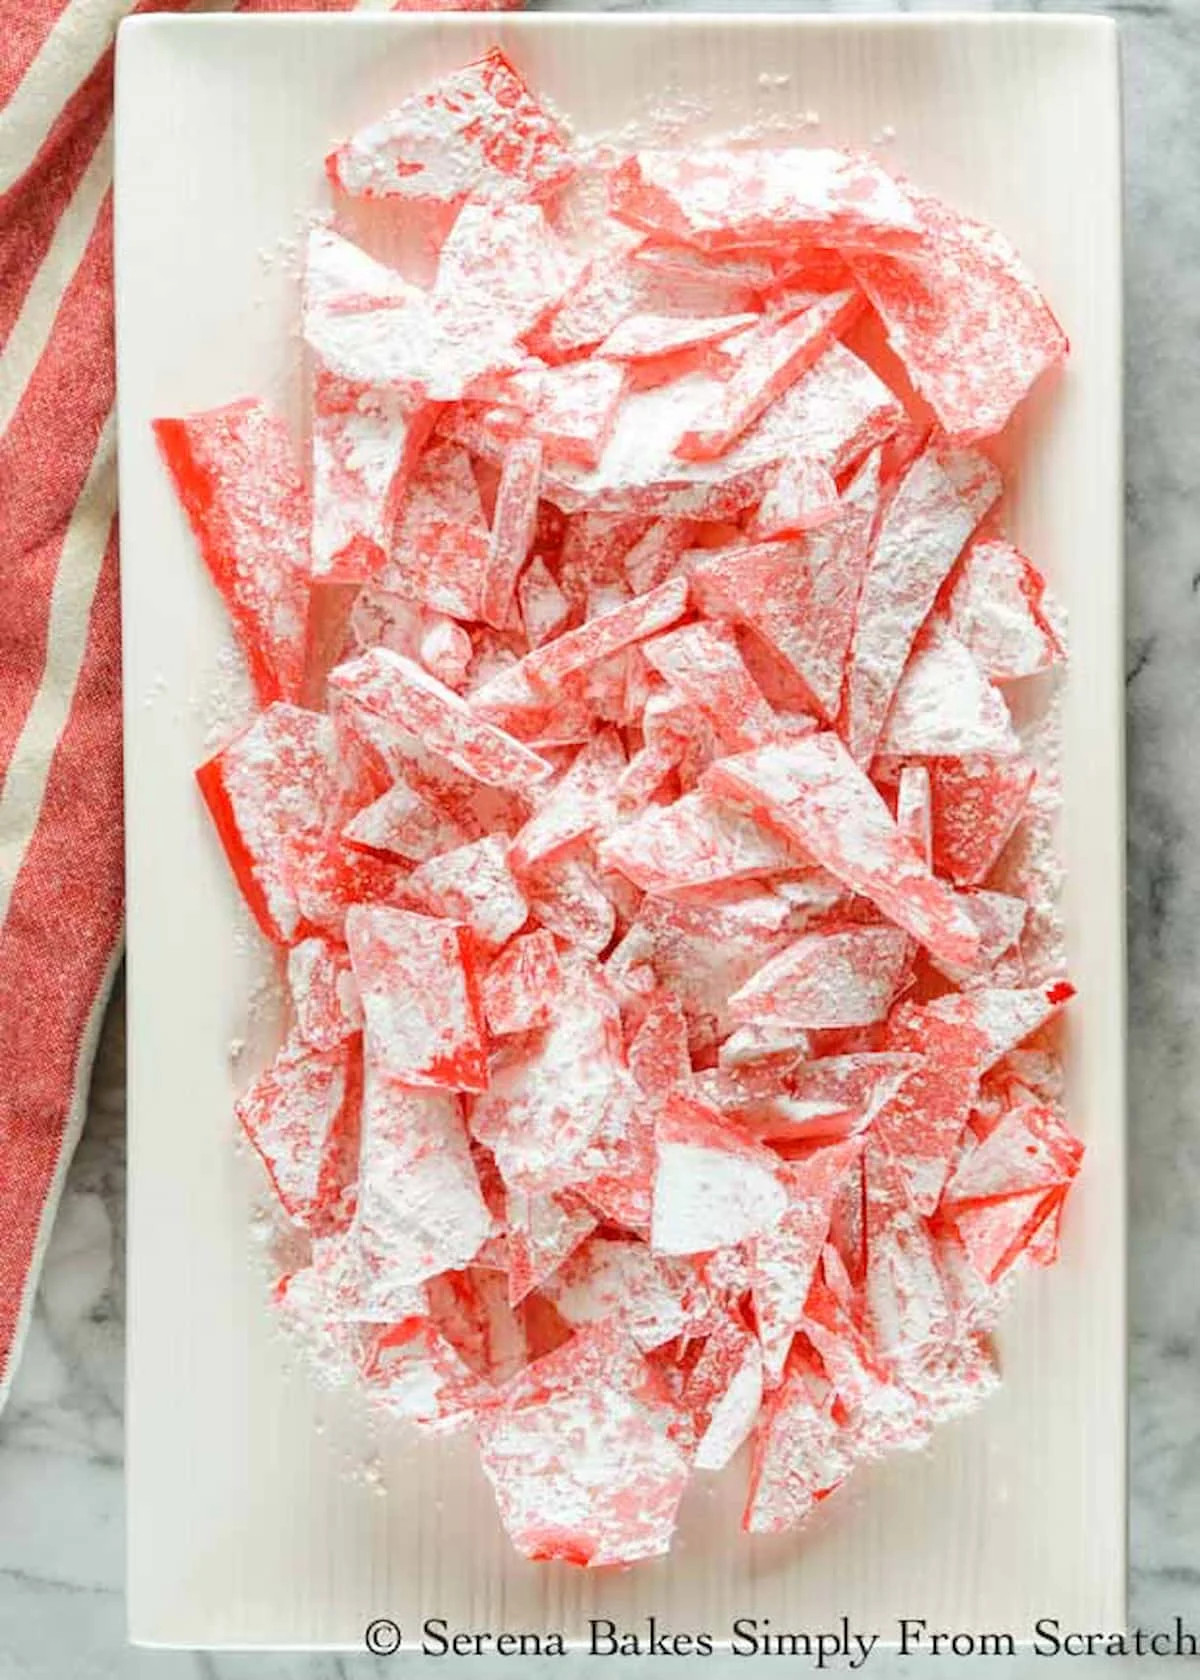 A close up of bright red rock candy crystals dusted with powdered sugar..jpg)
18. Frequently Asked Questions (FAQs) About Rock Candy
Here are some frequently asked questions about rock candy.
18.1. Why is my rock candy sticky?
Your rock candy may be sticky due to high humidity or improper storage. Ensure you store it in an airtight container with powdered sugar.
18.2. How long does rock candy last?
When stored properly in an airtight container, rock candy can last for several weeks to a month.
18.3. Can I use brown sugar to make rock candy?
No, brown sugar is not suitable for rock candy because it contains molasses, which interferes with crystallization.
18.4. What is the hard crack stage?
The hard crack stage is the temperature range (300-310°F or 149-154°C) in candy making where the sugar mixture becomes hard and brittle when cooled.
18.5. Can I add flavors other than candy oils?
While candy oils are recommended, you can experiment with extracts, but be aware they may not be as potent and can evaporate during cooking.
18.6. What if my candy thermometer touches the bottom of the pan?
Ensure your thermometer does not touch the bottom of the pan for an accurate temperature reading, or it may give a false high reading.
18.7. Can I reuse parchment paper?
No, it is not recommended to reuse parchment paper for candy making, as it may not release the candy properly.
18.8. What kind of food coloring is best for rock candy?
Gel food coloring is best as it is more concentrated and less likely to affect the consistency of the sugar solution.
18.9. How do I prevent the sugar from burning?
Use a heavy-bottomed pan and stir constantly until the sugar dissolves to prevent burning.
18.10. Is there a vegan rock candy recipe?
Yes, simply ensure that the corn syrup and food coloring you use are vegan.
19. Finding Inspiration For Your Next Rock Candy Creation
Ready to embark on your rock candy adventure? Remember, the possibilities are endless. Whether you’re seeking inspiration for color palettes, texture combinations, or creative displays, websites like rockscapes.net can provide a wealth of ideas to spark your imagination.
So, gather your ingredients, unleash your creativity, and get ready to create stunning rock candy that will impress your friends and family.
20. Ready To Create Your Own Landscape?
Now that you’re equipped with the knowledge to make stunning rock candy, why not extend that creativity to your outdoor spaces? At rockscapes.net, we offer a wide array of landscape rocks to transform your yard into a breathtaking oasis.
Explore our selection of natural stones, discover inspiring design ideas, and find the perfect materials to bring your vision to life. Whether you’re creating a serene Zen garden, a vibrant desert landscape, or a modern architectural statement, rockscapes.net has the rocks to make it happen.
Visit rockscapes.net today and let us help you turn your landscaping dreams into reality! Visit us at 1151 S Forest Ave, Tempe, AZ 85281, United States or call us at +1 (480) 965-9011!