How Do You Find Crystals In Rocks for landscaping? At rockscapes.net, we understand your desire to incorporate the natural beauty of crystals into your landscape. Finding these hidden gems involves understanding geological formations, recognizing key indicators, and employing effective prospecting techniques; Let’s explore how to uncover the captivating allure of crystals in rocks, transforming your outdoor spaces into breathtaking rockscapes, offering innovative landscaping solutions using natural stone elements.
Table of Contents
- Understanding Crystal Formation
- Geological Indicators for Crystal Hunting
- Essential Tools for Crystal Prospecting
- Prospecting Techniques: Where to Look for Crystals
- Identifying Crystal Types in the Field
- Ethical and Legal Considerations for Crystal Collecting
- Incorporating Crystals into Your Landscape Design
- Maintaining Your Crystal Landscape
- Advanced Prospecting Tips from Experts
- Common Mistakes to Avoid When Hunting Crystals
- Frequently Asked Questions
1. Understanding Crystal Formation
How are crystals formed within rocks? Crystals form through a fascinating process of mineral precipitation from solutions or melts. The specific environment and geological conditions determine the type of crystal that emerges.
The formation of crystals within rocks is a geological marvel, shaped by time, pressure, and the Earth’s inherent chemistry. This process, known as crystallization, is influenced by several key factors. According to research from Arizona State University’s School of Earth and Space Exploration, the primary components involved in crystal formation include:
- Temperature: Higher temperatures allow for greater solubility of minerals in solutions, leading to crystal growth as the solution cools.
- Pressure: Pressure affects the stability of minerals and can influence the type of crystal that forms.
- Solution Composition: The types and concentrations of minerals present in the solution dictate the crystal’s composition and structure.
- Cooling Rate: Slow cooling rates promote the formation of larger, well-defined crystals, while rapid cooling results in smaller, less perfect crystals.
Understanding these factors is crucial for anyone interested in prospecting for crystals, as it helps to identify areas where the conditions are conducive to crystal formation. Here’s a breakdown of the environments where crystal formation is most likely to occur:
- Pegmatites: These are coarse-grained igneous rocks often found on the margins of large granite intrusions. They are rich in rare elements and provide the space and time needed for large crystals to grow.
- Hydrothermal Veins: These form when hot, aqueous solutions circulate through fractures in rocks, depositing minerals as they cool. This process often leads to the formation of stunning crystal clusters and individual specimens.
- Sedimentary Deposits: Crystals can also form in sedimentary environments, such as geodes and concretions. These structures trap mineral-rich fluids that slowly crystallize over time.
- Metamorphic Rocks: During metamorphism, existing rocks are transformed by heat and pressure, leading to the recrystallization of minerals and the formation of new crystal structures.
By understanding the geological processes that drive crystal formation, you can increase your chances of finding these beautiful treasures in your rockscapes.net adventures.
2. Geological Indicators for Crystal Hunting
What are the geological signs that indicate the presence of crystals in rocks? Look for specific rock types, such as pegmatites and hydrothermal veins, and geological features like faults and fractures.
Identifying geological indicators is a critical skill for successful crystal hunting. These indicators provide clues about the types of rocks and formations that are likely to host crystals. Some key geological indicators include:
- Pegmatites: These are coarse-grained igneous rocks that often contain large crystals of quartz, feldspar, mica, and other minerals. Pegmatites form during the late stages of magma crystallization and are known for their exceptional crystal specimens. According to the University of Arizona’s Mineral Museum, pegmatites are often found in the margins of large granite intrusions.
- Hydrothermal Veins: These are fractures in rocks that have been filled with mineral-rich fluids. As the fluids cool, they deposit minerals, forming veins of quartz, calcite, fluorite, and other crystals. Hydrothermal veins are commonly associated with volcanic and tectonic activity.
- Faults and Fractures: These geological features can act as conduits for mineral-rich fluids, creating opportunities for crystal growth. Look for areas where faults and fractures intersect, as these can be particularly promising locations.
- Geodes: These are hollow, spherical or oval-shaped rocks that contain crystals on their inner surfaces. Geodes form when mineral-rich fluids seep into cavities in sedimentary rocks and slowly crystallize over time.
- Specific Rock Types: Certain rock types are more likely to host crystals than others. For example, limestone and shale are often associated with geodes and concretions, while metamorphic rocks like schist and gneiss can contain crystals of garnet, staurolite, and kyanite.
- Color Variations: Keep an eye out for unusual color variations in rocks, as these can indicate the presence of minerals that form crystals. For example, the presence of iron oxides can give rocks a reddish or brownish hue, while copper minerals can create green or blue colors.
- Weathering Patterns: Weathering can expose crystals that are hidden beneath the surface of rocks. Look for areas where rocks have been eroded or fractured, as these can reveal crystal pockets or seams.
By learning to recognize these geological indicators, you can narrow your search and increase your chances of finding crystals in rocks. Remember to consult geological maps and local experts to gain a better understanding of the geology in your area. At rockscapes.net, we provide resources and information to help you identify these indicators and plan your crystal hunting expeditions effectively.
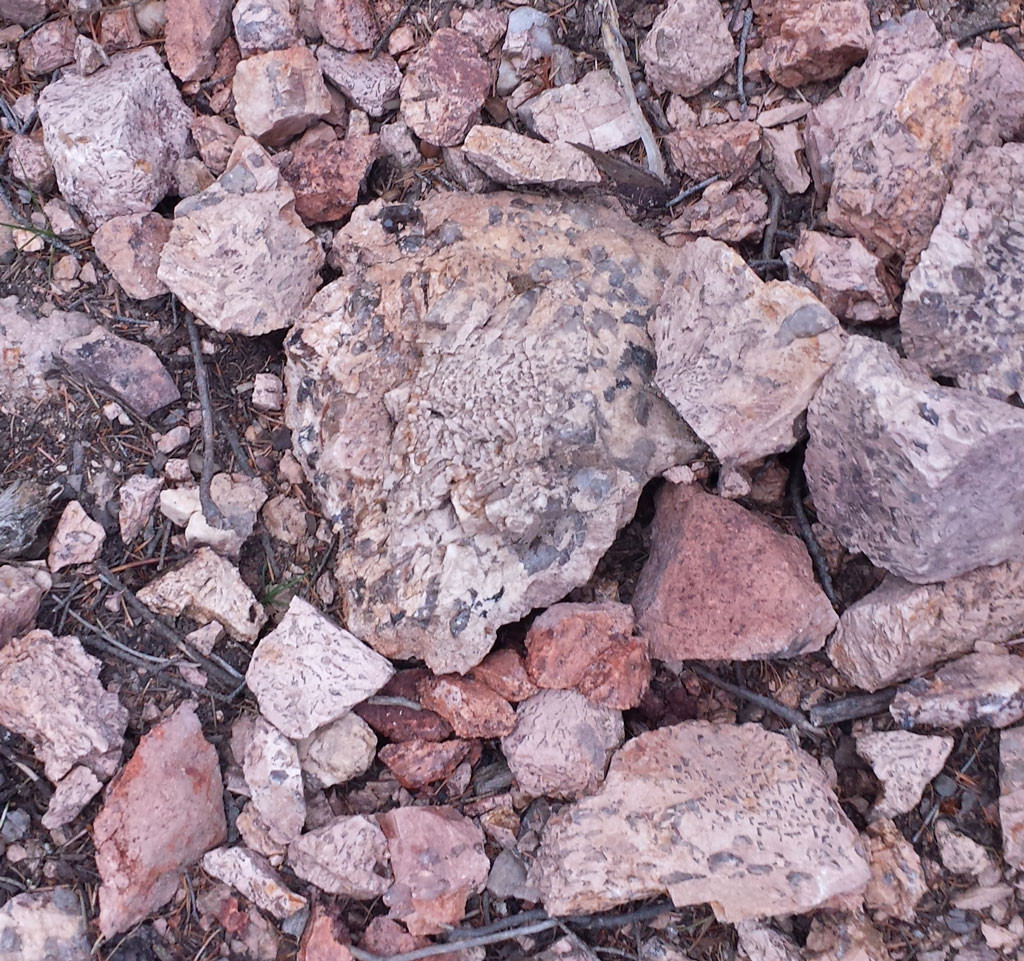 Pegmatite rock formation with visible crystal inclusions
3. Essential Tools for Crystal Prospecting
What tools do I need for crystal prospecting? A sturdy rock hammer, chisel set, safety glasses, gloves, and a backpack are essential. A magnifying glass and a guidebook can also be helpful for identification.
Having the right tools is crucial for successful and safe crystal prospecting. Here’s a list of essential tools and equipment that will help you extract and identify crystals:
- Rock Hammer: A sturdy rock hammer is indispensable for breaking rocks and exposing potential crystal formations. Choose a hammer with a comfortable grip and a head weight that suits your strength and experience.
- Chisel Set: A set of chisels with varying sizes and shapes will help you carefully remove crystals from rocks without damaging them. Look for chisels made from hardened steel for durability and precision.
- Safety Glasses: Protecting your eyes from flying rock fragments is paramount. Always wear safety glasses when using a rock hammer or chisel.
- Gloves: Wear gloves to protect your hands from sharp rocks and potential irritants. Leather gloves provide excellent grip and durability.
- Backpack: A sturdy backpack is essential for carrying your tools, water, snacks, and crystal specimens. Choose a backpack with comfortable straps and plenty of storage space.
- Magnifying Glass: A magnifying glass will help you examine crystals closely and identify their features. Look for a magnifying glass with a high magnification power and a built-in light for better visibility.
- Guidebook: A field guide to minerals and crystals will help you identify the types of crystals you find. Choose a guidebook that is specific to your region and includes detailed descriptions and photographs.
- Shovel and Pickaxe: These tools can be useful for digging in tailings piles or excavating around potential crystal-bearing rocks.
- Sieves and Screens: Sieves and screens can help you sift through loose material and find small crystals that might otherwise be missed.
- First Aid Kit: It’s always a good idea to carry a basic first aid kit with you when prospecting, in case of minor injuries.
- GPS Device or Compass: A GPS device or compass can help you navigate and keep track of your location, especially in remote areas.
With the right tools and equipment, you’ll be well-prepared to explore and uncover the hidden treasures within rocks. Remember to prioritize safety and use your tools responsibly. At rockscapes.net, we offer guidance on selecting the best tools for your prospecting needs and provide tips on how to use them effectively.
4. Prospecting Techniques: Where to Look for Crystals
Where should I look for crystals? Start by researching known crystal-bearing areas, explore old mining sites, and examine stream beds for signs of float material.
Effective prospecting techniques are essential for finding crystals in rocks. Here are some proven strategies for locating crystal-bearing areas:
- Research Known Crystal-Bearing Areas: Start by researching areas that are known for crystal occurrences. Geological surveys, mineralogical databases, and local rock and mineral clubs can provide valuable information about potential prospecting locations. Websites like Mindat.org offer extensive data on mineral localities worldwide.
- Explore Old Mining Sites: Old mining sites can be a treasure trove of crystals, as miners often discard lower-quality specimens or miss pockets of crystals altogether. Tailings piles, dumps, and abandoned mine workings can yield impressive finds. Always obtain permission before entering private property or mining claims.
- Examine Stream Beds: Stream beds can be excellent places to find “float” material, which consists of crystals and mineral fragments that have been eroded from their original source. Look for areas where streams cut through rock formations or near known crystal-bearing areas.
- Follow Float Material Upstream: If you find float material in a stream bed, follow it upstream to locate the source. The concentration of float material will typically increase as you approach the origin of the crystals.
- Dig Test Holes: In areas where you suspect the presence of crystals, dig test holes to explore the subsurface. Pay attention to the types of rocks and minerals you encounter, and look for signs of crystal growth.
- Check Road Cuts and Construction Sites: Road cuts and construction sites can expose fresh rock faces that may contain crystals. Always obtain permission before entering these areas, and be aware of potential hazards.
- Join a Rock and Mineral Club: Joining a local rock and mineral club is a great way to learn about prospecting techniques, share information with other enthusiasts, and participate in organized field trips.
- Use Remote Sensing Techniques: In some cases, remote sensing techniques such as aerial photography and satellite imagery can be used to identify potential crystal-bearing areas. These techniques can reveal geological features and mineral alterations that are not visible from the ground.
By combining research, exploration, and careful observation, you can increase your chances of finding crystals in rocks. At rockscapes.net, we provide detailed guides and resources to help you master these prospecting techniques and discover the hidden treasures of the earth.
 Crystal hunter examining rocks in a stream bed
5. Identifying Crystal Types in the Field
How can I identify different types of crystals in the field? Learn to recognize common crystal habits, colors, and associated minerals. Use a field guide or mineral identification app to aid in your identification.
Identifying crystal types in the field is a crucial skill for any crystal enthusiast. Here are some tips to help you recognize common crystals:
- Quartz: Quartz is one of the most abundant minerals on Earth and comes in a variety of forms, including clear quartz, smoky quartz, amethyst, citrine, and rose quartz. Quartz crystals typically have a hexagonal prism shape and can be found in a wide range of geological settings.
- Feldspar: Feldspar is another common mineral that occurs in igneous and metamorphic rocks. It is typically white, pink, or gray and has a blocky or tabular shape. Common types of feldspar include orthoclase, plagioclase, and microcline.
- Calcite: Calcite is a carbonate mineral that is often found in sedimentary rocks like limestone and marble. It is typically white or clear and can have a variety of crystal shapes, including rhombohedral and scalenohedral.
- Fluorite: Fluorite is a colorful mineral that is often found in hydrothermal veins and sedimentary rocks. It can be purple, green, yellow, blue, or colorless and typically has a cubic crystal shape.
- Garnet: Garnet is a group of silicate minerals that are commonly found in metamorphic rocks. Garnets can be red, brown, green, or black and typically have a dodecahedral or trapezohedral crystal shape.
- Tourmaline: Tourmaline is a complex borosilicate mineral that is often found in pegmatites and metamorphic rocks. It can be black, brown, green, pink, or multicolored and typically has a prismatic crystal shape.
- Beryl: Beryl is a beryllium aluminum silicate mineral that includes varieties such as emerald (green), aquamarine (blue), and morganite (pink). Beryl crystals typically have a hexagonal prism shape and are found in pegmatites and metamorphic rocks.
To aid in your identification, consider using a field guide or mineral identification app. These resources provide detailed descriptions and photographs of common crystals, as well as information on their properties and occurrences.
When identifying crystals in the field, pay attention to the following characteristics:
- Crystal Habit: The typical shape or form of a crystal.
- Color: The color of the crystal, which can be influenced by trace elements.
- Luster: The way a crystal reflects light, such as metallic, glassy, or dull.
- Hardness: The resistance of a crystal to scratching, measured on the Mohs hardness scale.
- Cleavage: The tendency of a crystal to break along specific planes.
- Streak: The color of a crystal when it is powdered, which can be different from its surface color.
By learning to recognize these characteristics and using reliable resources, you can confidently identify crystal types in the field and enhance your understanding of the mineral world. At rockscapes.net, we offer educational materials and expert advice to help you master the art of crystal identification.
6. Ethical and Legal Considerations for Crystal Collecting
What are the ethical and legal guidelines for crystal collecting? Always obtain permission before collecting on private land, respectLeave No Trace principles, and be aware of local regulations regarding mineral collecting.
Ethical and legal considerations are paramount when collecting crystals in the United States. Responsible collecting ensures the preservation of natural resources and protects the rights of property owners. Here are some guidelines to follow:
- Obtain Permission: Always obtain permission from the landowner before collecting crystals on private property. Trespassing is illegal and can result in fines or legal action.
- Respect Mining Claims: Be aware of existing mining claims in your area and avoid collecting on active claims without permission. Mining claims give the holder the right to extract minerals from the land.
- Follow Leave No Trace Principles: Practice Leave No Trace principles to minimize your impact on the environment. Pack out everything you pack in, avoid disturbing vegetation and wildlife, and fill in any holes you dig.
- Be Aware of Local Regulations: Check with local authorities, such as the Bureau of Land Management (BLM) or the U.S. Forest Service, to learn about regulations regarding mineral collecting in your area. Some areas may be closed to collecting, or may have restrictions on the types and quantities of minerals that can be collected.
- Collect Responsibly: Avoid collecting more crystals than you need, and focus on collecting specimens that are representative of the area. Leave some crystals for others to enjoy and for future generations to study.
- Avoid Damaging the Environment: Be careful not to damage the environment when collecting crystals. Avoid digging in sensitive areas, such as stream banks or wetlands, and be mindful of the impact of your activities on wildlife habitat.
- Report Significant Finds: If you discover a significant mineral deposit or find a rare or unusual crystal, consider reporting your find to a local museum or geological survey. This information can help scientists better understand the mineral resources of your area.
- Respect Cultural Resources: Be aware of the potential for encountering cultural resources, such as archaeological sites or Native American artifacts, when collecting crystals. If you find any cultural resources, leave them in place and report your find to the appropriate authorities.
By following these ethical and legal guidelines, you can ensure that your crystal collecting activities are sustainable and respectful of the environment and the rights of others. At rockscapes.net, we promote responsible collecting practices and provide information on local regulations to help you collect crystals ethically and legally.
7. Incorporating Crystals into Your Landscape Design
How can I use crystals in my landscape design? Use larger crystals as focal points, incorporate smaller crystals into rock gardens, or create crystal pathways for a unique touch.
Incorporating crystals into your landscape design can add a touch of natural beauty, elegance, and positive energy to your outdoor spaces. Here are some creative ways to use crystals in your landscape:
- Focal Points: Use larger crystals as focal points in your garden or landscape. A large quartz crystal, amethyst geode, or cluster of selenite can create a stunning visual impact and draw attention to a specific area.
- Rock Gardens: Incorporate smaller crystals into rock gardens to add color, texture, and visual interest. Choose crystals that complement the surrounding rocks and plants, and arrange them in a natural-looking manner.
- Crystal Pathways: Create crystal pathways by embedding crystals into stepping stones or arranging them along the edges of paths. This can add a unique and magical touch to your garden.
- Water Features: Add crystals to water features, such as ponds, fountains, or waterfalls, to enhance their beauty and create a sense of tranquility. Clear quartz crystals are especially effective for purifying and energizing water.
- Planters: Place crystals in planters to promote plant growth and create a positive energy field around your plants. Choose crystals that are known for their beneficial properties, such as clear quartz, rose quartz, or amethyst.
- Zen Gardens: Incorporate crystals into Zen gardens to enhance their meditative and calming atmosphere. Use crystals to create patterns, define spaces, and add a touch of natural beauty.
- Crystal Grids: Create crystal grids in your garden to amplify specific intentions, such as abundance, love, or healing. Arrange crystals in geometric patterns and activate the grid with your intention.
- Outdoor Altars: Create outdoor altars using crystals, rocks, and other natural elements. Use the altar as a space for meditation, reflection, and connecting with nature.
When incorporating crystals into your landscape design, consider the following factors:
- Color: Choose crystals that complement the colors of your plants, rocks, and other landscape elements.
- Texture: Select crystals with varying textures to add visual interest and create a tactile experience.
- Size: Use crystals of different sizes to create depth and perspective in your landscape.
- Placement: Arrange crystals in a way that is both aesthetically pleasing and energetically balanced.
- Durability: Choose crystals that are durable and resistant to weathering, especially if they will be exposed to the elements.
By incorporating crystals into your landscape design, you can create a unique and enchanting outdoor space that reflects your personal style and enhances your connection with nature. At rockscapes.net, we offer a wide selection of crystals and expert advice to help you create the landscape of your dreams.
 Crystals arranged in a rock garden with various plants
8. Maintaining Your Crystal Landscape
How do I maintain a crystal landscape? Clean crystals regularly with water and a soft brush. Protect them from harsh weather and consider sealing them to prevent damage.
Maintaining your crystal landscape is essential for preserving its beauty and longevity. Here are some tips for keeping your crystals looking their best:
- Cleaning: Clean your crystals regularly with water and a soft brush to remove dirt, dust, and debris. For stubborn stains, you can use a mild soap or detergent. Avoid using harsh chemicals or abrasive cleaners, as these can damage the surface of the crystals.
- Protection from Weather: Protect your crystals from harsh weather conditions, such as extreme temperatures, heavy rain, and direct sunlight. Prolonged exposure to the elements can cause crystals to fade, crack, or dissolve. Consider covering your crystals during severe weather events or moving them to a sheltered location.
- Sealing: Sealing your crystals can help protect them from damage and prolong their lifespan. Use a clear, non-toxic sealant that is specifically designed for use on minerals and stones. Apply the sealant according to the manufacturer’s instructions, and allow it to dry completely before exposing the crystals to the elements.
- Stabilization: Stabilizing your crystals can help prevent them from crumbling or disintegrating. Use a mineral stabilizer, such as a consolidant or hardener, to strengthen the crystal structure. Apply the stabilizer according to the manufacturer’s instructions, and allow it to dry completely before handling the crystals.
- Regular Inspection: Inspect your crystals regularly for signs of damage, such as cracks, chips, or discoloration. Address any issues promptly to prevent further deterioration.
- Proper Storage: When not in use, store your crystals in a cool, dry place away from direct sunlight and extreme temperatures. Wrap delicate crystals in soft cloth or bubble wrap to protect them from scratches and impacts.
- Energy Cleansing: Cleanse the energy of your crystals regularly to remove any negative vibrations they may have absorbed. There are several methods for cleansing crystals, including:
- Smudging: Burning sage or other herbs and passing the crystals through the smoke.
- Sunlight or Moonlight: Placing the crystals in direct sunlight or moonlight for several hours.
- Salt Water: Soaking the crystals in salt water for a few hours (avoid this method for delicate or porous crystals).
- Visualization: Visualizing a white light surrounding and purifying the crystals.
- Recharging: Recharge the energy of your crystals regularly to enhance their beneficial properties. There are several methods for recharging crystals, including:
- Placing them on a crystal charger: such as a selenite plate or cluster.
- Burying them in the earth: for a day or two.
- Exposing them to positive affirmations: or intentions.
By following these maintenance tips, you can ensure that your crystal landscape remains a beautiful and vibrant addition to your outdoor space for years to come. At rockscapes.net, we offer a range of products and services to help you care for your crystals and maintain their natural beauty.
9. Advanced Prospecting Tips from Experts
What advanced techniques can improve my crystal prospecting? Learn to identify subtle geological features, use specialized tools like ground-penetrating radar, and network with experienced prospectors for insights.
Advanced prospecting techniques can significantly enhance your ability to find crystals. Here are some expert tips to take your crystal hunting to the next level:
- Subtle Geological Features: Develop a keen eye for subtle geological features that may indicate the presence of crystals. This includes:
- Changes in rock texture: Look for areas where the rock texture changes abruptly, as this may indicate a fault or fracture zone.
- Mineral staining: Pay attention to mineral staining on rocks, as this can indicate the presence of valuable minerals.
- Vegetation patterns: Observe vegetation patterns, as certain plants may grow preferentially in areas with specific mineral deposits.
- Ground-Penetrating Radar (GPR): Consider using GPR to locate subsurface anomalies that may indicate crystal-bearing pockets or veins. GPR sends radio waves into the ground and analyzes the reflected signals to create an image of the subsurface.
- Geochemical Analysis: Collect rock and soil samples and have them analyzed for trace elements that are associated with crystal formation. This can help you identify areas that are likely to contain crystals.
- Remote Sensing: Use remote sensing techniques, such as satellite imagery and aerial photography, to identify geological features that may be indicative of crystal deposits.
- Networking: Network with experienced prospectors, geologists, and mineral collectors to gain insights and learn about promising locations. Attend rock and mineral shows, join local clubs, and participate in online forums to connect with other enthusiasts.
- Studying Geological Maps: Study geological maps to understand the rock formations and geological history of your area. This can help you identify areas that are likely to contain crystals.
- Using Dowsing Rods: Some prospectors use dowsing rods to locate underground water or mineral deposits. While the scientific basis for dowsing is debated, some practitioners swear by its effectiveness.
- Developing Intuition: Trust your intuition and follow your instincts when prospecting. Sometimes, the best finds are made when you least expect them.
- Persistence: Be persistent and don’t give up easily. Crystal prospecting can be challenging, but the rewards can be well worth the effort.
- Documentation: Keep detailed records of your prospecting activities, including the locations you visited, the types of rocks and minerals you found, and any geological features you observed. This information can be valuable for future prospecting trips.
By incorporating these advanced techniques into your crystal prospecting strategy, you can increase your chances of finding rare and valuable specimens. At rockscapes.net, we provide resources and expertise to help you master these techniques and become a successful crystal hunter.
10. Common Mistakes to Avoid When Hunting Crystals
What are common mistakes to avoid when prospecting for crystals? Neglecting safety precautions, trespassing on private property, and failing to properly identify minerals are common pitfalls.
Avoiding common mistakes is crucial for a safe and successful crystal hunting experience. Here are some pitfalls to watch out for:
- Neglecting Safety Precautions: Always prioritize safety when prospecting for crystals. Wear safety glasses, gloves, and appropriate footwear. Be aware of potential hazards, such as unstable rocks, steep slopes, and wildlife.
- Trespassing on Private Property: Always obtain permission before collecting crystals on private property. Trespassing is illegal and can damage your reputation as a responsible collector.
- Failing to Properly Identify Minerals: Take the time to learn how to identify common minerals and crystals. Misidentifying minerals can lead to wasted effort and disappointment. Use a field guide, mineral identification app, or consult with an expert to confirm your identifications.
- Collecting Without a Plan: Before heading out into the field, develop a prospecting plan. Research potential locations, gather necessary tools and equipment, and inform someone of your itinerary.
- Overlooking Small Details: Pay attention to small details, such as changes in rock texture, mineral staining, and vegetation patterns. These subtle clues can lead you to valuable crystal deposits.
- Damaging the Environment: Avoid damaging the environment when collecting crystals. Fill in any holes you dig, pack out everything you pack in, and avoid disturbing vegetation and wildlife.
- Collecting Too Much: Avoid collecting more crystals than you need. Focus on collecting representative specimens and leave some for others to enjoy.
- Ignoring Local Regulations: Be aware of local regulations regarding mineral collecting. Some areas may be closed to collecting, or may have restrictions on the types and quantities of minerals that can be collected.
- Giving Up Too Easily: Crystal prospecting can be challenging, and it may take time and effort to find valuable specimens. Don’t give up too easily. Persistence and patience are key to success.
- Not Documenting Your Finds: Keep detailed records of your prospecting activities, including the locations you visited, the types of rocks and minerals you found, and any geological features you observed. This information can be valuable for future prospecting trips.
By avoiding these common mistakes, you can enhance your crystal hunting experience and increase your chances of finding valuable specimens. At rockscapes.net, we provide resources and guidance to help you become a knowledgeable and responsible crystal collector.
11. Frequently Asked Questions
Have questions about finding crystals? Here are some frequently asked questions to help you on your crystal-hunting journey.
Q1: What is the best time of year to go crystal hunting?
A: The best time to go crystal hunting is typically in the spring or fall, when the weather is mild and the vegetation is less dense. This allows for better visibility and easier access to potential crystal-bearing areas.
Q2: How can I tell if a rock is likely to contain crystals?
A: Look for geological indicators such as pegmatites, hydrothermal veins, and fault zones. Also, examine the rock for unusual colors, textures, or mineral staining.
Q3: What is the best way to clean crystals after I find them?
A: Clean crystals with water and a soft brush. For stubborn stains, use a mild soap or detergent. Avoid using harsh chemicals or abrasive cleaners.
Q4: Can I collect crystals on public land?
A: Collecting crystals on public land is generally allowed, but there may be restrictions on the types and quantities of minerals that can be collected. Check with local authorities, such as the BLM or the U.S. Forest Service, for specific regulations.
Q5: How do I identify a crystal I found in the field?
A: Use a field guide, mineral identification app, or consult with an expert to identify the crystal. Pay attention to its crystal habit, color, luster, hardness, cleavage, and streak.
Q6: What are some common types of crystals found in the United States?
A: Common crystals found in the United States include quartz, feldspar, calcite, fluorite, garnet, tourmaline, and beryl.
Q7: How can I protect my crystals from damage?
A: Protect your crystals from harsh weather conditions, such as extreme temperatures, heavy rain, and direct sunlight. Consider sealing them to prevent damage.
Q8: What is the best way to store crystals when not in use?
A: Store crystals in a cool, dry place away from direct sunlight and extreme temperatures. Wrap delicate crystals in soft cloth or bubble wrap to protect them from scratches and impacts.
Q9: How can I find out about local rock and mineral clubs?
A: Search online for “rock and mineral clubs near me” or contact your local geological survey for a list of clubs in your area.
Q10: Is it ethical to collect crystals from the environment?
A: Collecting crystals ethically involves obtaining permission before collecting on private land, following Leave No Trace principles, and being aware of local regulations. Collect responsibly and avoid damaging the environment.
At rockscapes.net, we’re here to support your crystal-hunting journey every step of the way.
Ready to unearth the geological treasures hidden beneath your feet? Finding crystals in rocks for landscaping can transform your outdoor space into a mesmerizing sanctuary. Visit rockscapes.net today for expert advice, premium crystal selections, and innovative design ideas. Let us help you create a landscape that not only captivates the eye but also resonates with the earth’s natural beauty. Contact us at Address: 1151 S Forest Ave, Tempe, AZ 85281, United States or Phone: +1 (480) 965-9011. Your crystal-infused landscape awaits at rockscapes.net.