Is your home’s exterior stuck in the past with outdated Rock Siding? Like many homeowners with houses built in previous decades, I faced the challenge of unappealing, brown 1970s rock siding that diminished my home’s curb appeal. While some online suggested leaving the original rock as is, I knew a change was necessary to bring my house into the 21st century. I’m thrilled to share the transformation and guide you through updating your own exterior rock siding for a modern, fresh look.
 Outdated brown rock siding before the DIY update.
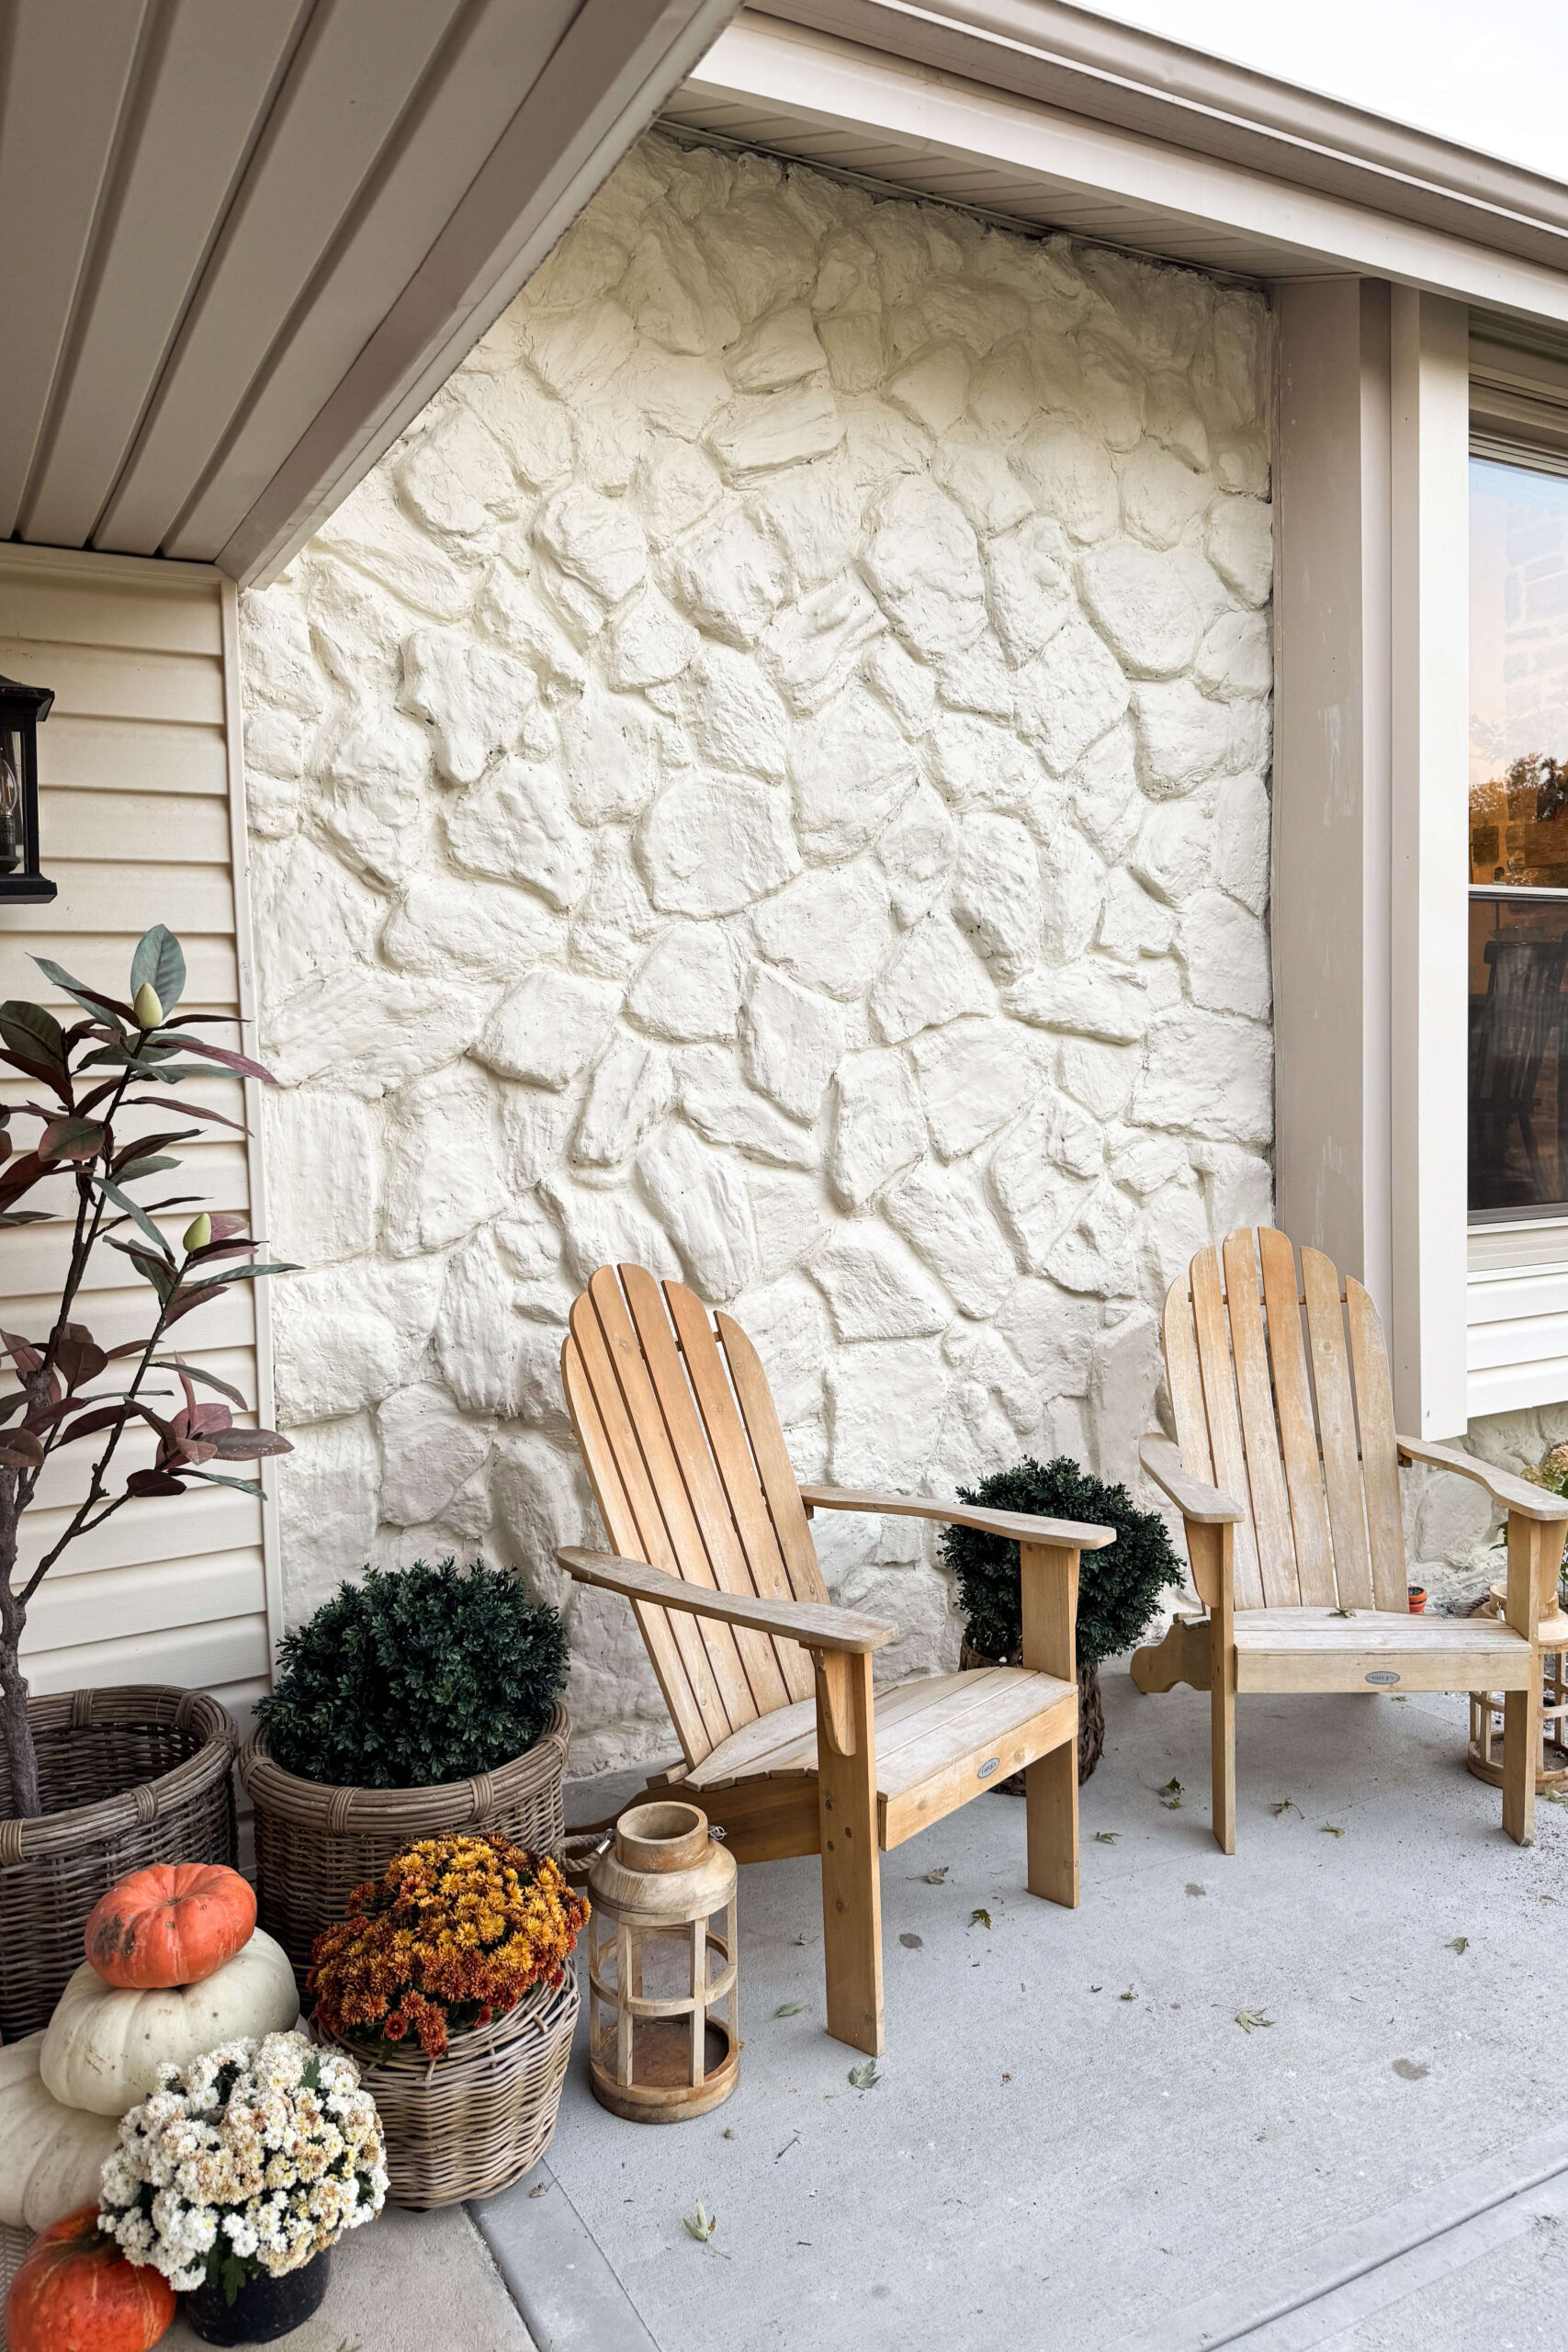
 Freshly updated exterior rock siding with a smooth, modern finish.
This past spring and summer, my focus has been on enhancing our home’s exterior. From installing new sod and refreshing the landscaping to building stylish cement curbing, I’ve been tackling projects to boost our curb appeal. However, the dated exterior rock siding remained a significant eyesore. It was the typical heavy-textured, deep-grooved 1970s rock siding that many homes of that era unfortunately sport. Simply painting the rock siding seemed like a superficial fix. I envisioned a complete makeover to truly modernize the exterior. Let’s dive into how I achieved a dramatic transformation of my rock siding, moving beyond just a basic paint job.
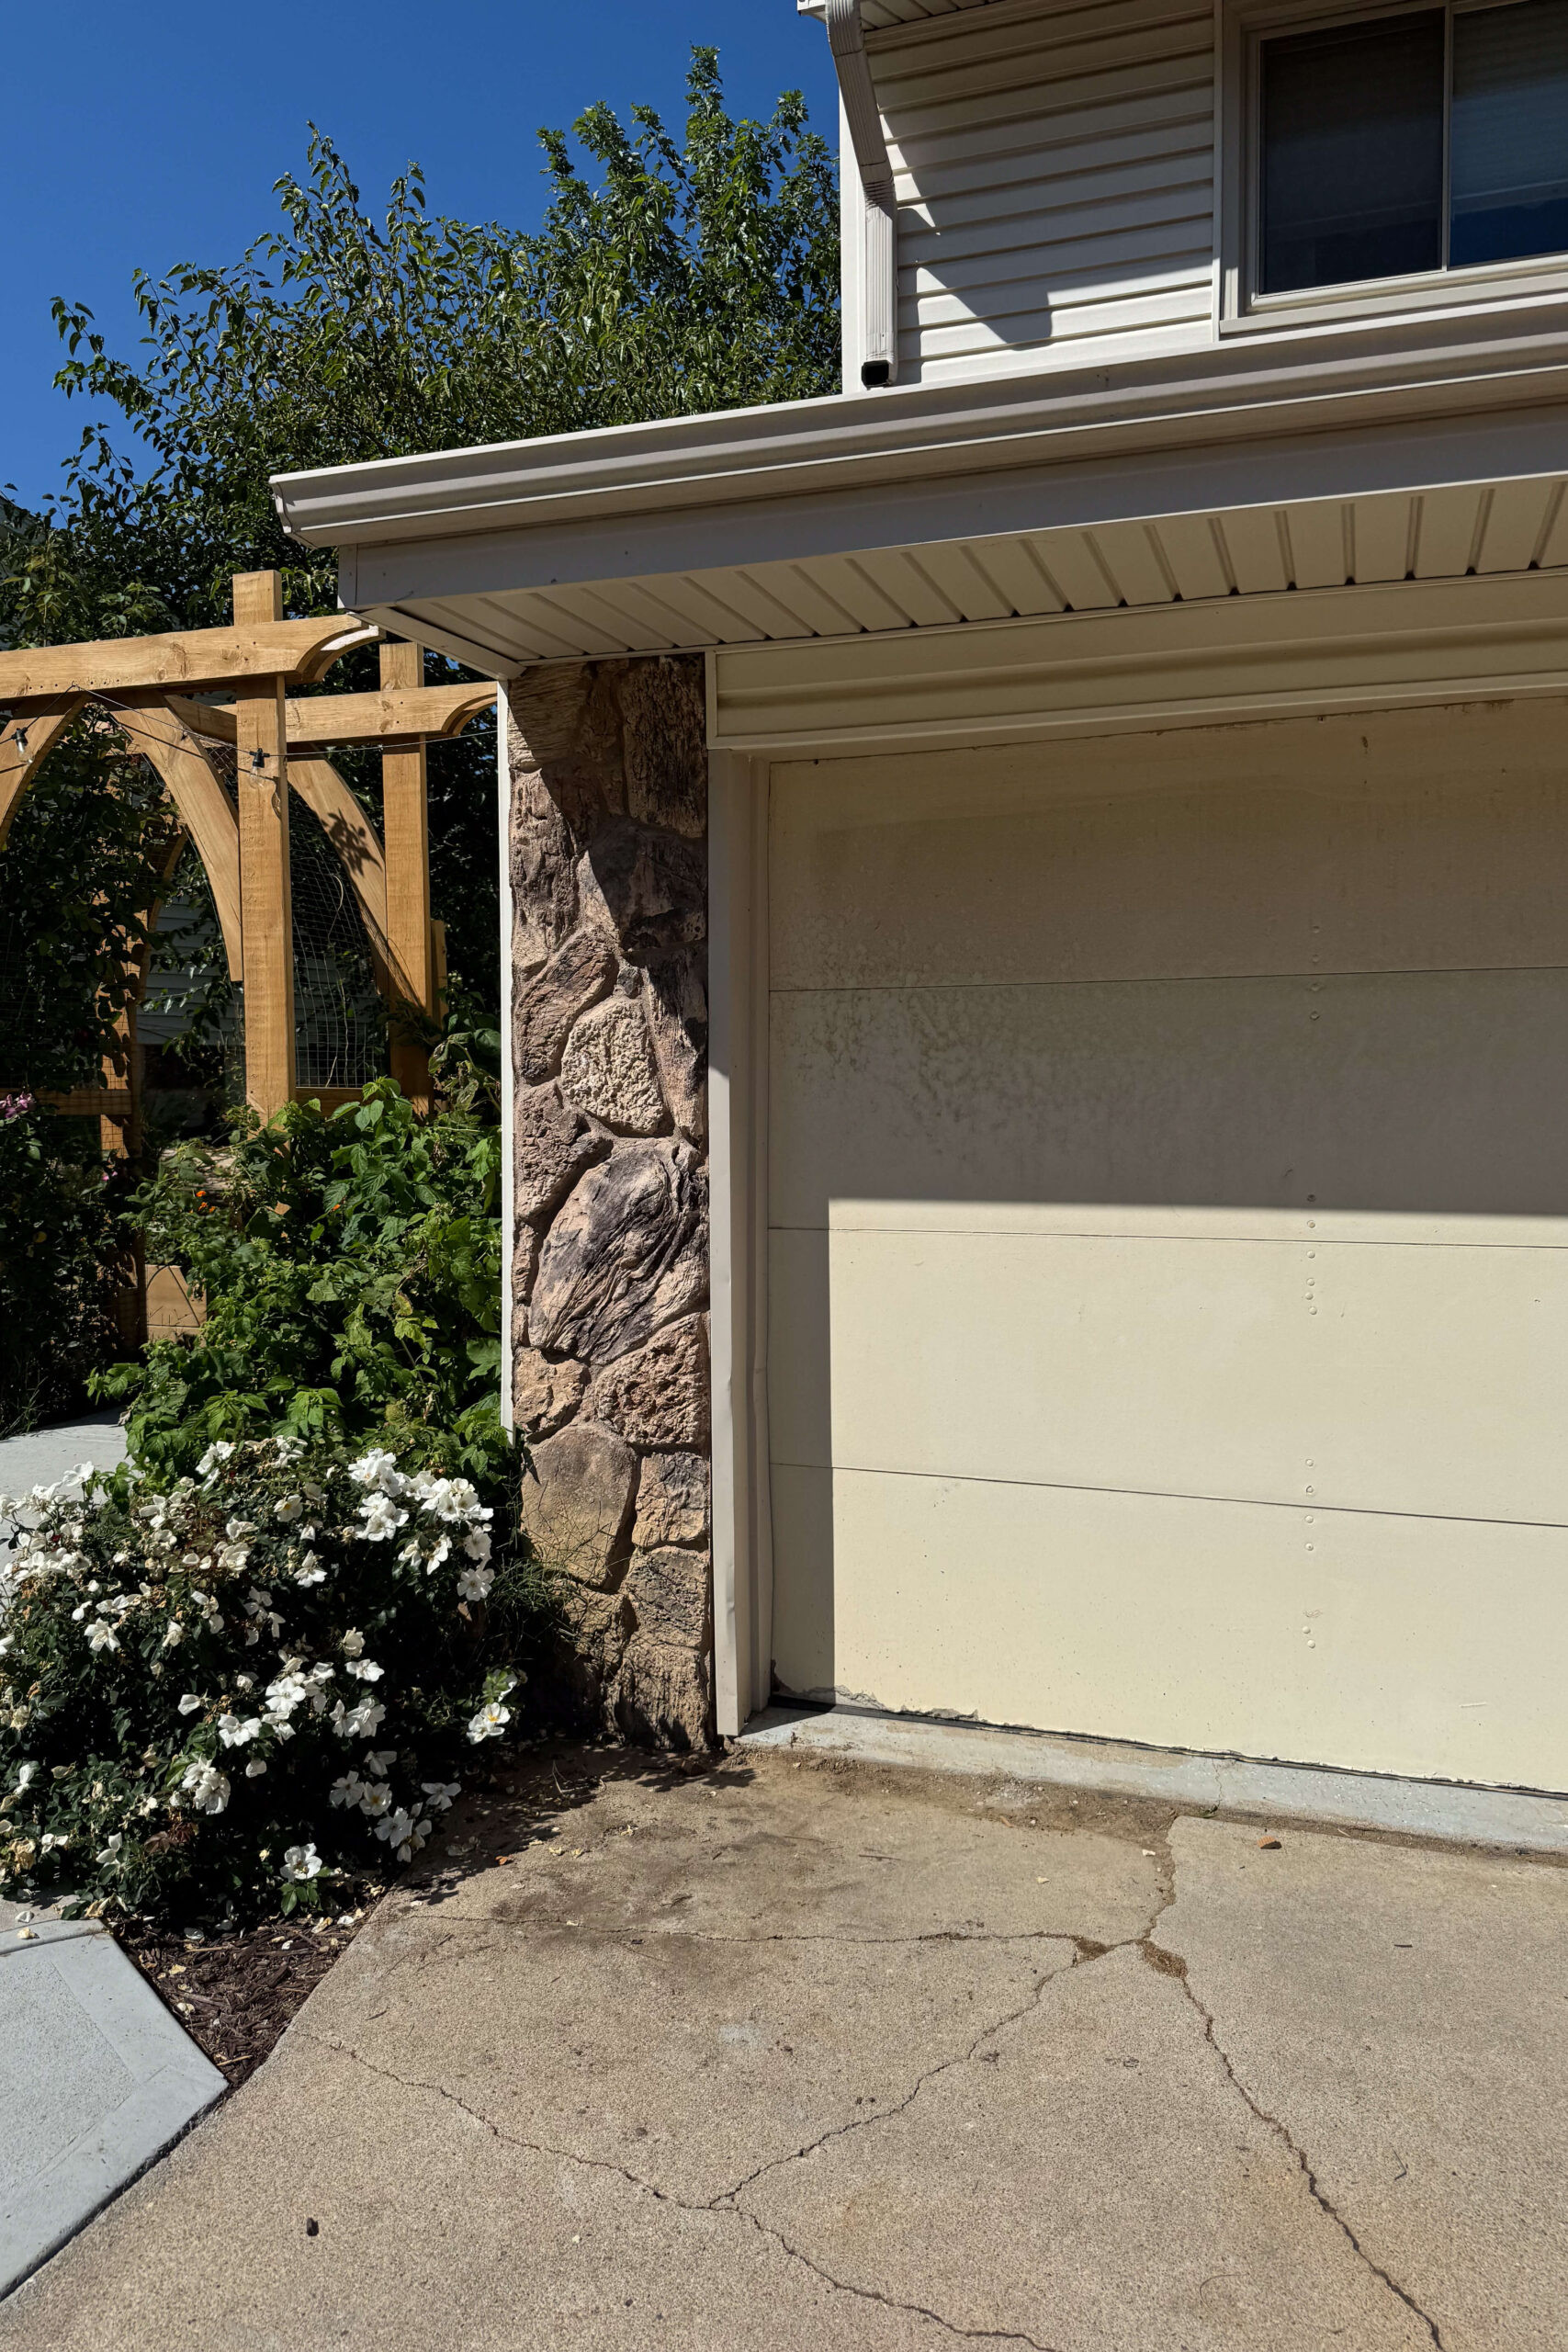
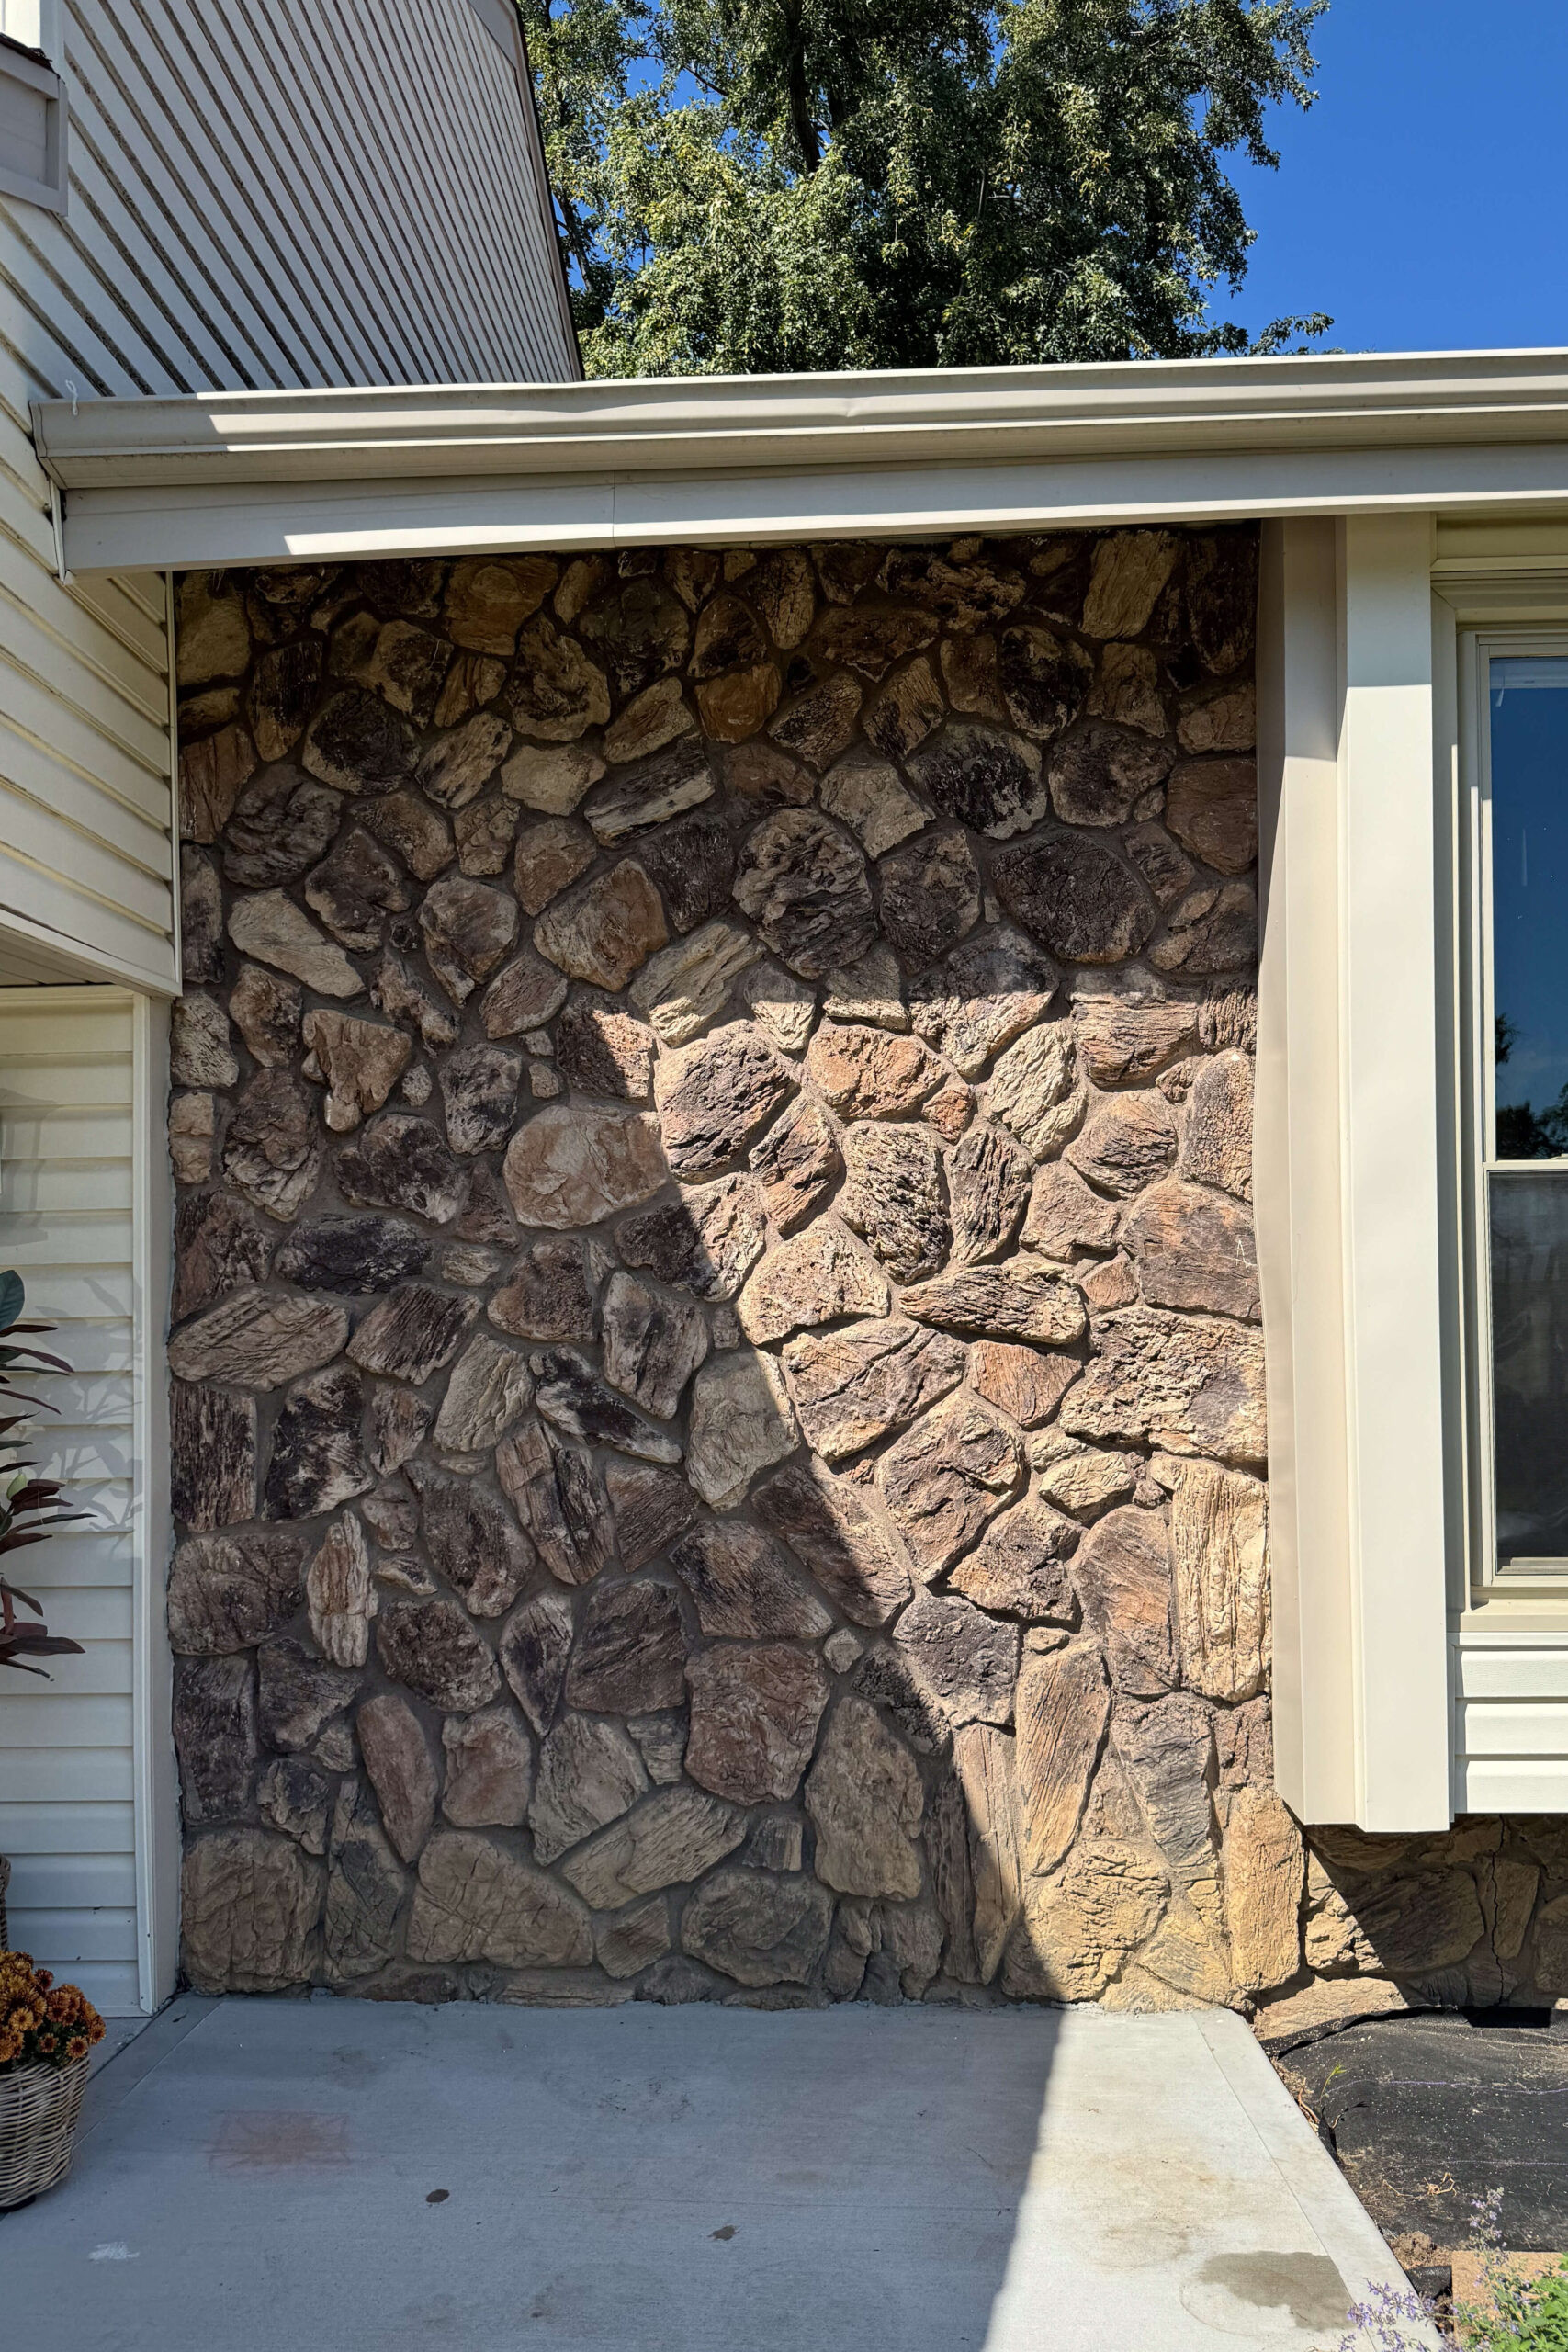
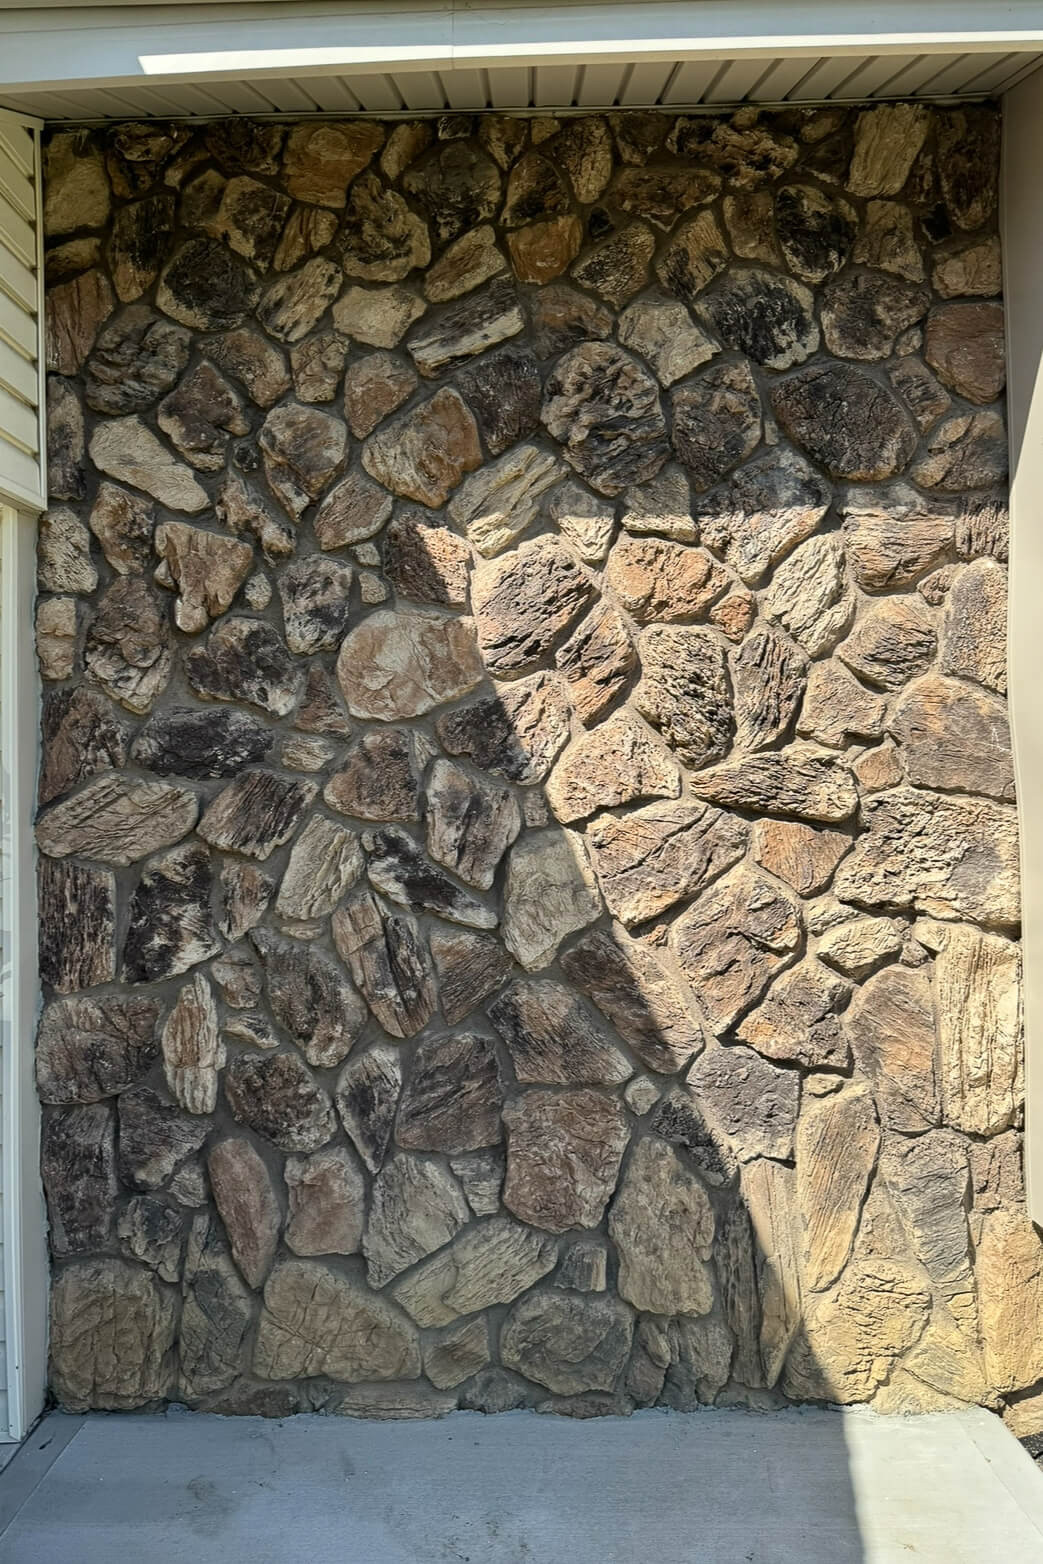
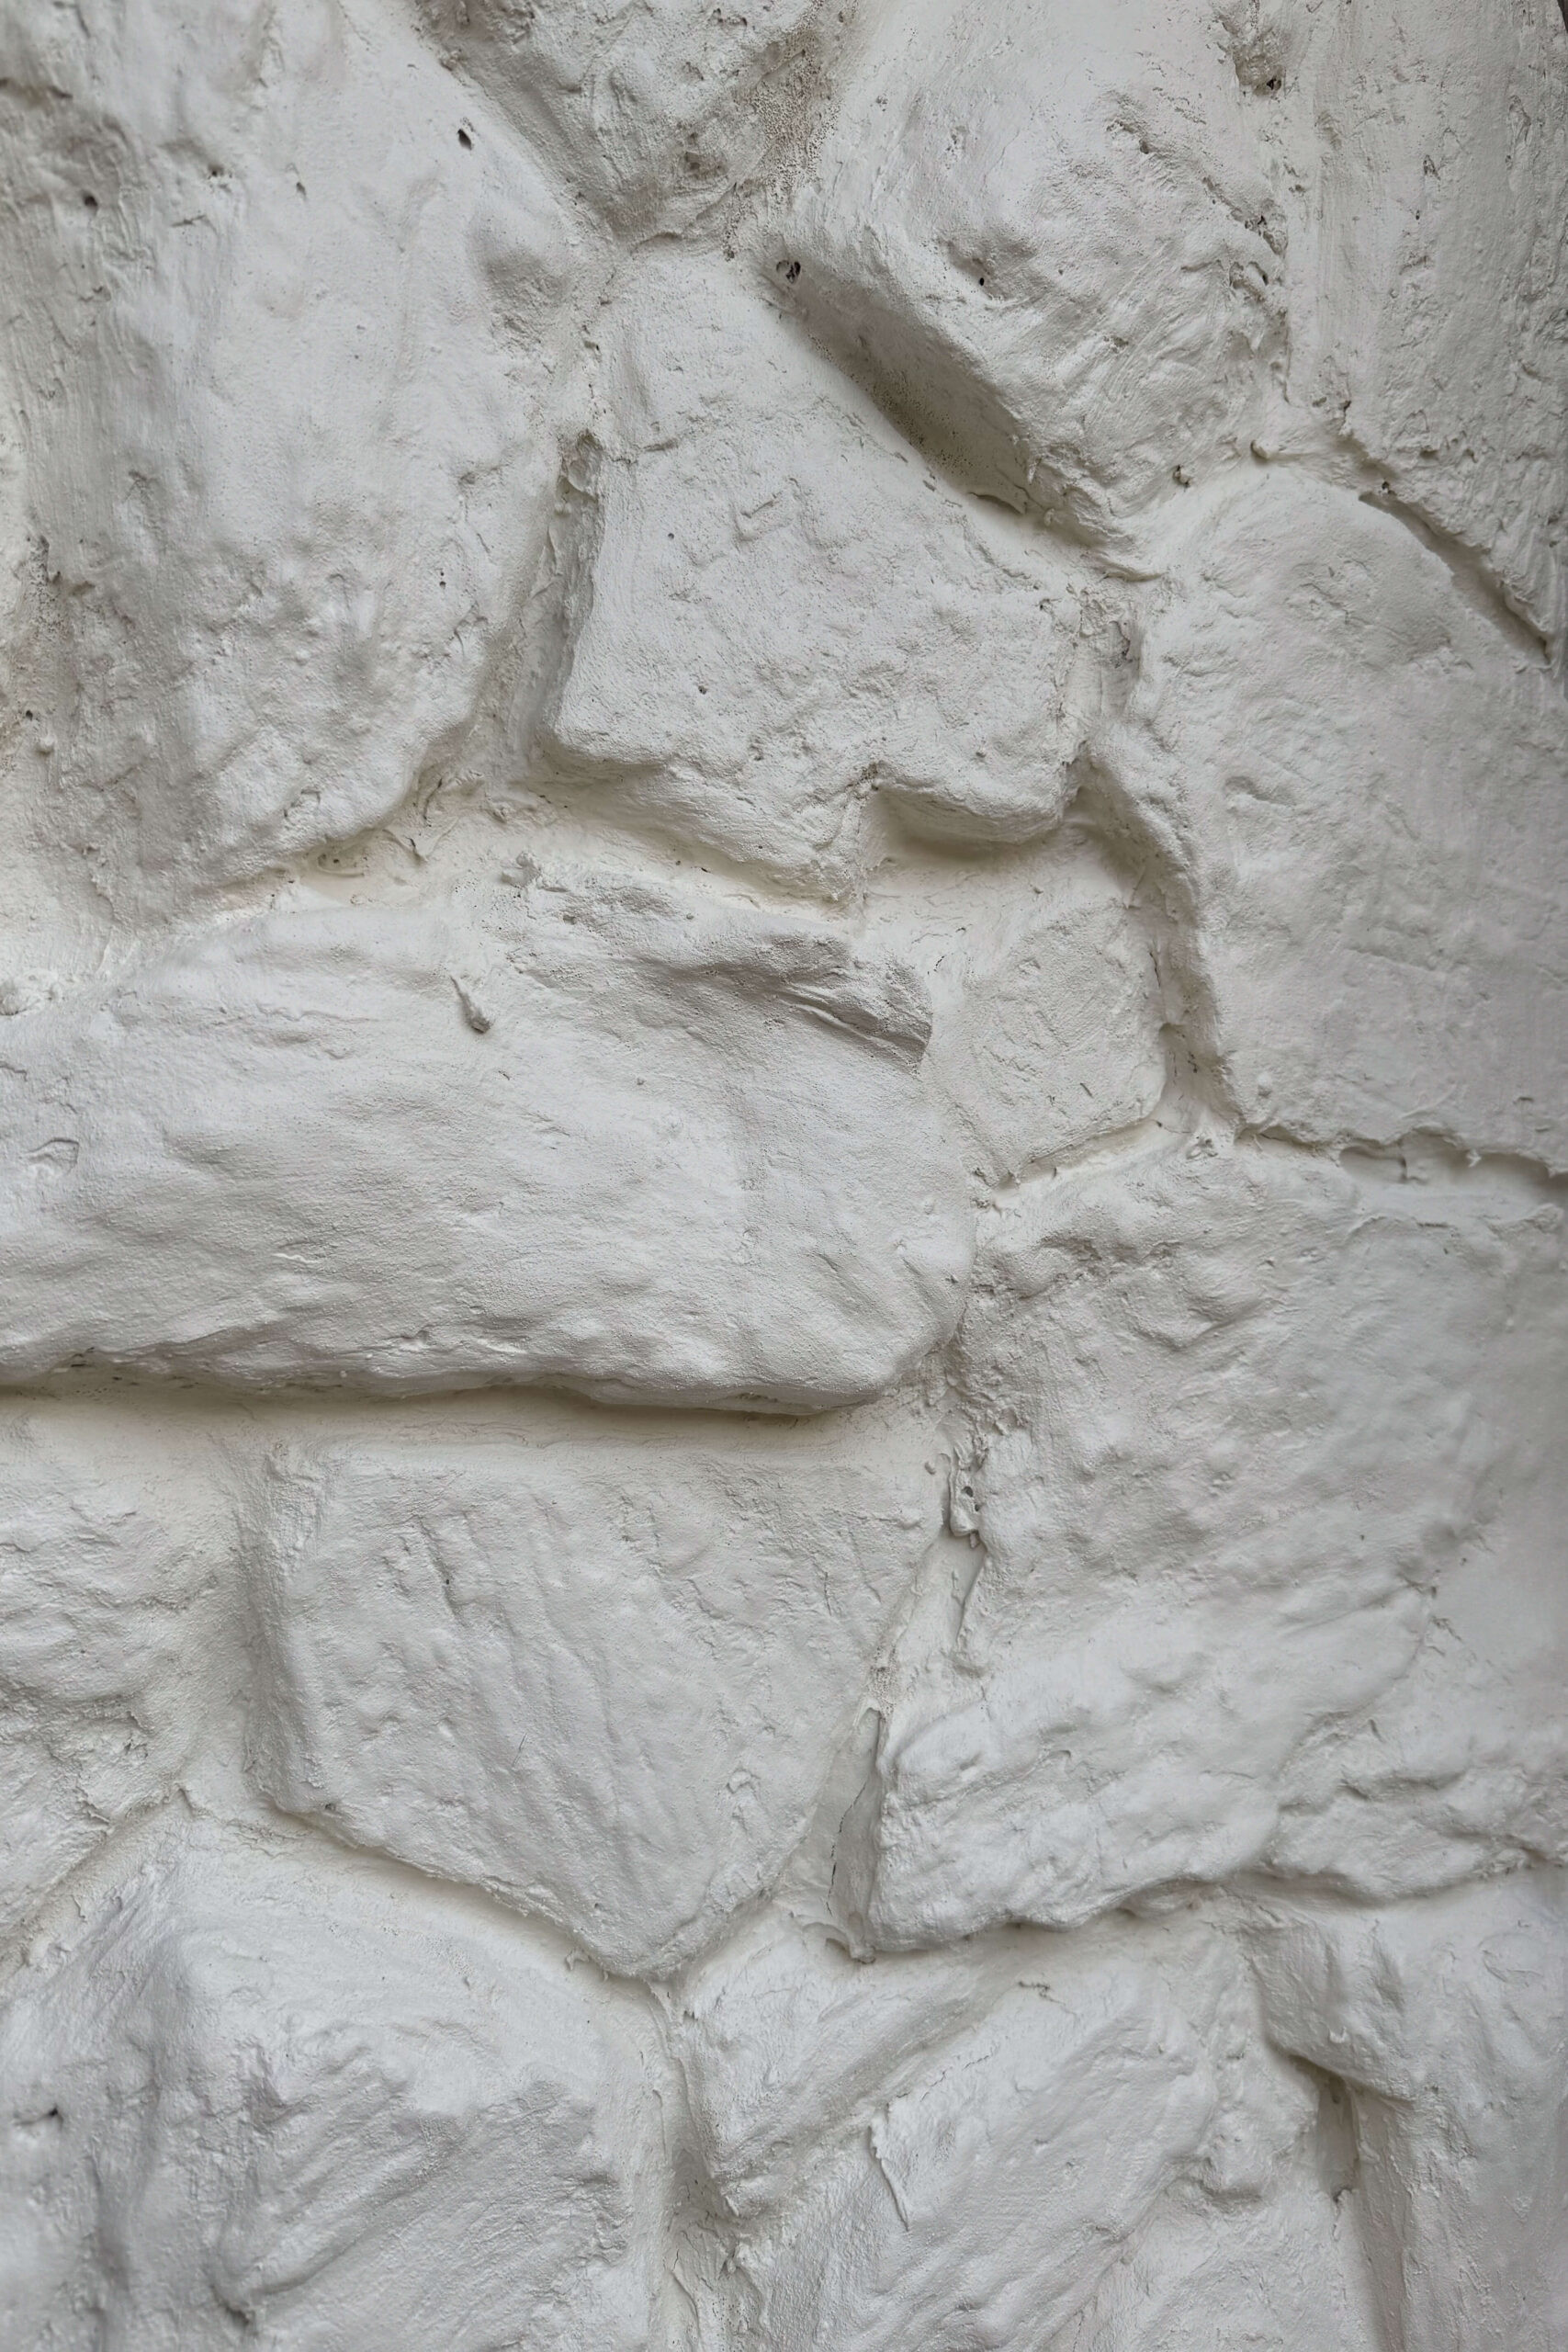
To truly understand the starting point, here are some ‘before’ photos showcasing the original 1970s rock siding. You’ll recognize this style if you’ve encountered it on houses or fireplace surrounds – it was a dominant design trend back then!
 Close-up before picture of 1970s rock siding with heavy texture and deep grooves.
 Wide before picture showing the extent of dated rock siding on the home exterior.
Many people suggested painting the existing rock siding to update it. However, for me, the issue wasn’t just the color. The prominent texture and deep recesses of the rock made it look undeniably dated. I aimed for a significant change, a genuine makeover for the exterior rock siding, not just a superficial color change. Continue reading to discover the steps I took to achieve a complete transformation!
 Side view before picture highlighting the rough texture of the 1970s rock siding.
Essential Tools and Materials for Rock Siding Transformation
Before starting your rock siding makeover, gather these tools and materials to ensure a smooth and efficient process:
- Mortar Mix: Choose a high-quality mortar mix suitable for exterior applications. White mortar can provide a lighter base for painting.
- Mixing Bucket: A sturdy bucket for mixing the mortar.
- Utility Knife: For opening mortar bags.
- Water: Clean water for mixing the mortar to the correct consistency.
- Drill with Paddle Attachment: A drill with a paddle attachment is crucial for efficiently mixing mortar to a smooth, even texture.
- Gloves: Protect your hands with durable work gloves during mortar application.
- Hose or Spray Bottle: For dampening the rock siding before mortar application.
- Mortar Sponge: A large mortar sponge for smoothing the applied mortar.
- Paint (Exterior Masonry): Select a high-quality exterior masonry paint in your desired color.
- Masonry Primer/Sealer: Use a masonry primer/sealer to prepare the mortared surface for painting and ensure longevity.
- Paint Sprayer (Optional): A paint sprayer can speed up the painting process, especially for large areas of rock siding.
- Paint Brushes and Rollers (Alternative to Sprayer): If not using a sprayer, have brushes and rollers suitable for masonry surfaces.
- Painter’s Tape: For masking off areas you want to protect from paint.
- Pressure Washer (Optional but Recommended): A pressure washer is incredibly helpful for cleaning up any mortar or paint splatters.
- Safety Glasses and Mask: Protect yourself from dust and debris, especially when mixing mortar and using power tools.
Step-by-Step Guide: Mixing Mortar for Rock Siding
Mixing mortar is a fundamental step in updating your rock siding and is similar to mixing concrete. For manageable batches and to prevent the mortar from setting too quickly, it’s best to mix in smaller quantities.
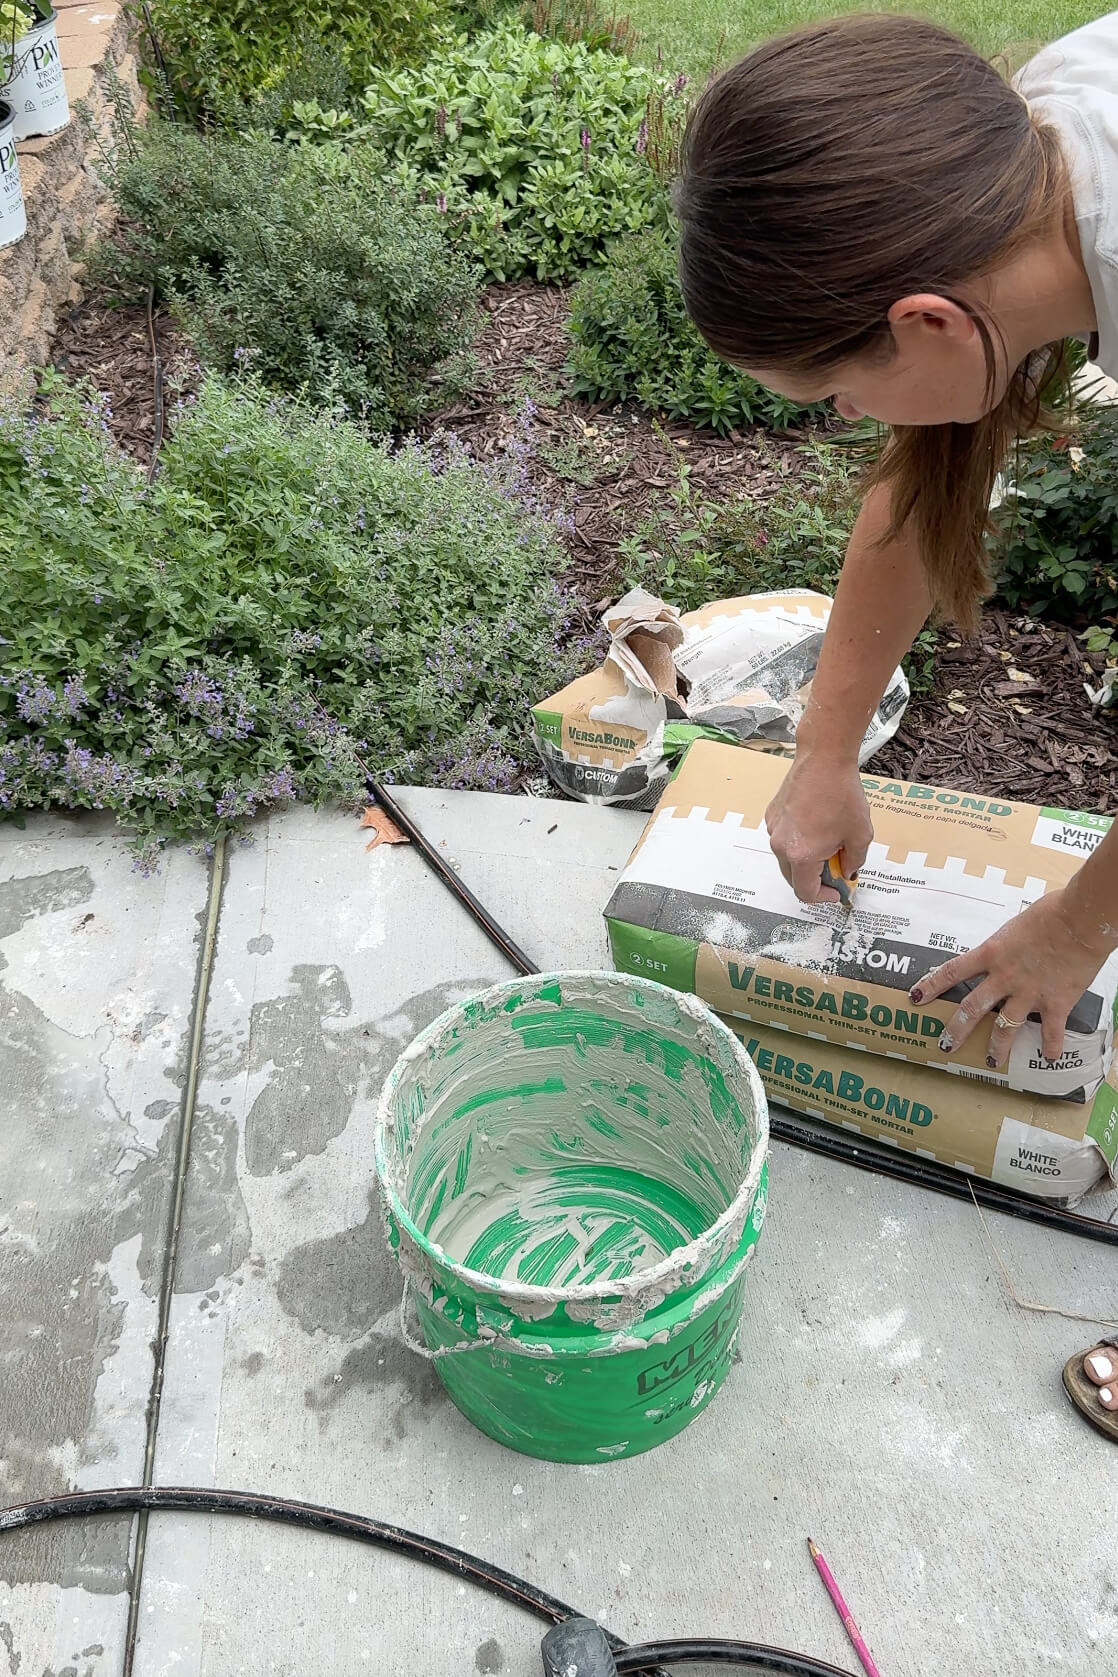 Preparing to mix mortar in a bucket for the rock siding project.
 Close-up of dry mortar mix being poured into a mixing bucket.
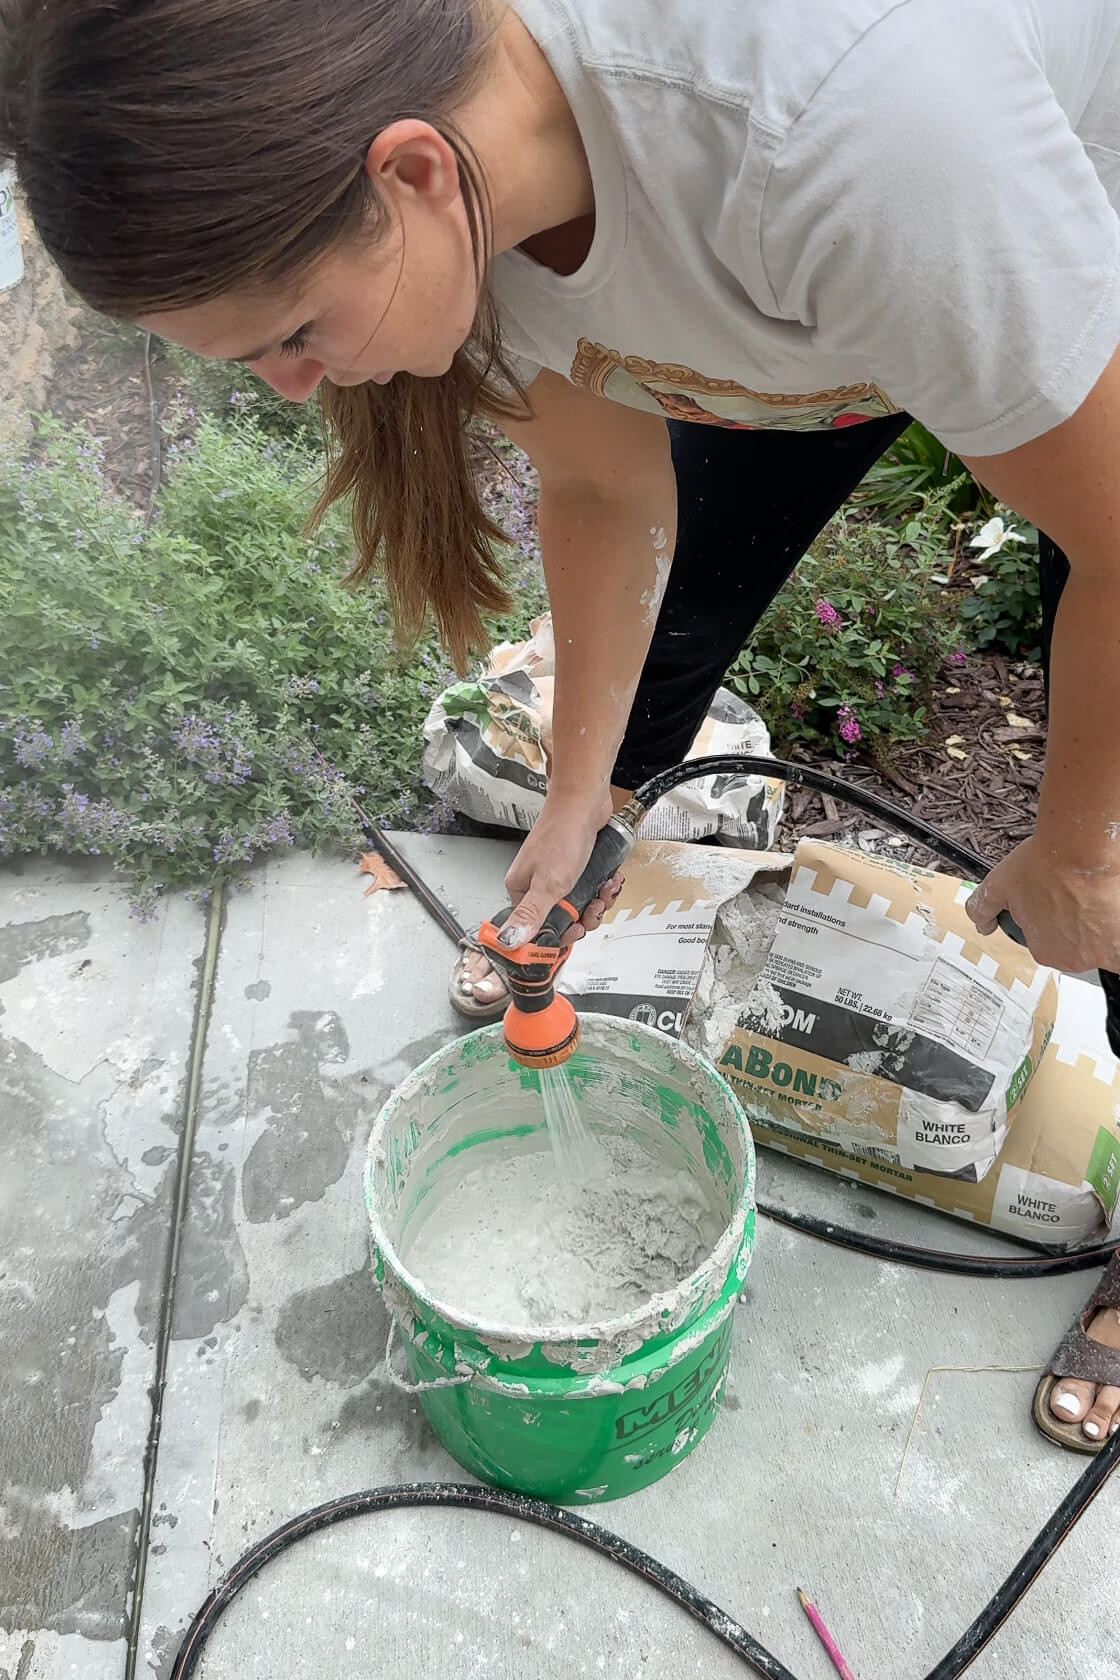
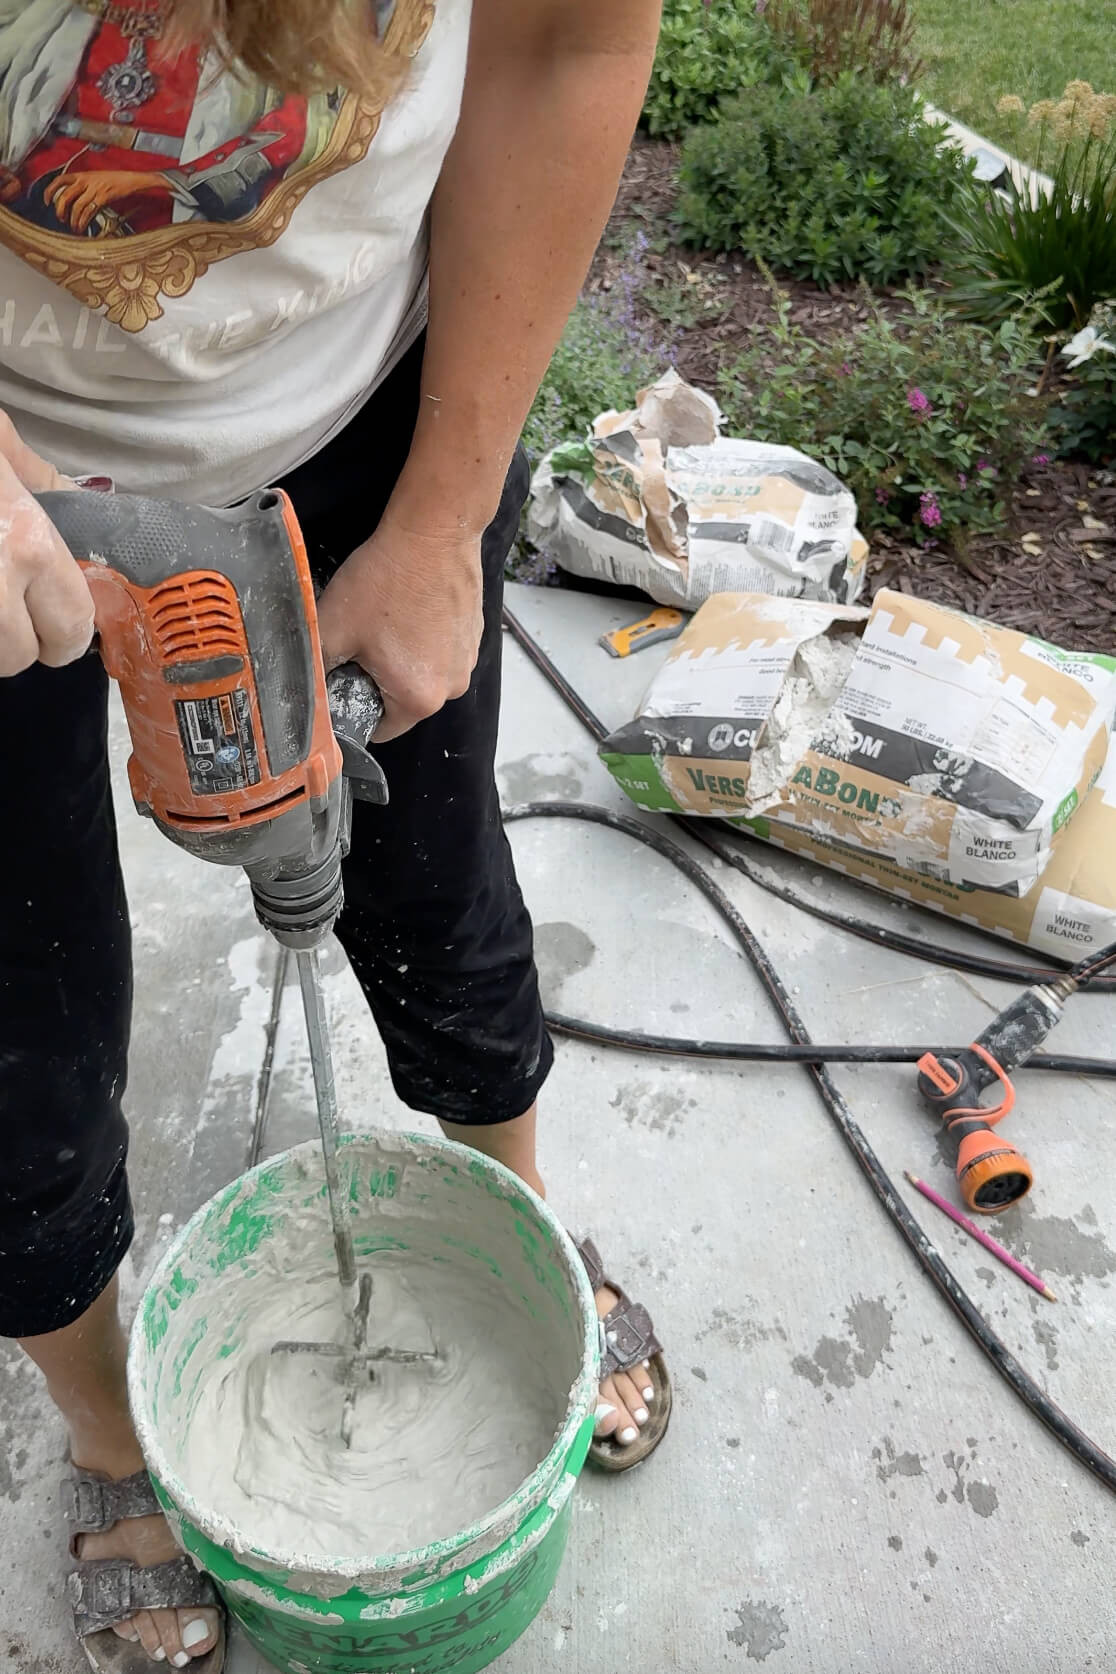
Begin by using a utility knife to carefully slit across the mortar bag. Flip the bag and pour a portion of the dry mix into your mixing bucket. Gradually add water to the dry mortar. Remember, you can always add more water, but removing excess water is impossible! Utilize a drill equipped with a paddle attachment to thoroughly mix the mortar and water.
 Using a drill with a paddle attachment to mix mortar in a bucket.
 Checking the mortar consistency during the mixing process.
Continue adding water in small increments and mixing until you achieve a consistency similar to toothpaste. The ideal mortar consistency should be thick enough to hold its shape when lifted with the paddle, yet still spreadable with ease. This ensures it adheres well to the rock siding and is easy to work with.
Applying Mortar to Transform Your Exterior Rock Siding
Before applying mortar, prepare the rock siding surface by spraying it down with water to dampen the stones. For exterior projects, a garden hose works perfectly. If you are working indoors on a rock fireplace or interior wall, a simple spray bottle will suffice. Dampening the rock helps the mortar adhere properly.
 Spraying water onto the rock siding to prepare it for mortar application.
Put on your gloves and take a handful of the mixed mortar. Begin spreading it onto the rock siding. My goal was to retain some of the original stone texture while filling in the deep gaps and smoothing out the overall rough, 1970s lava rock appearance.
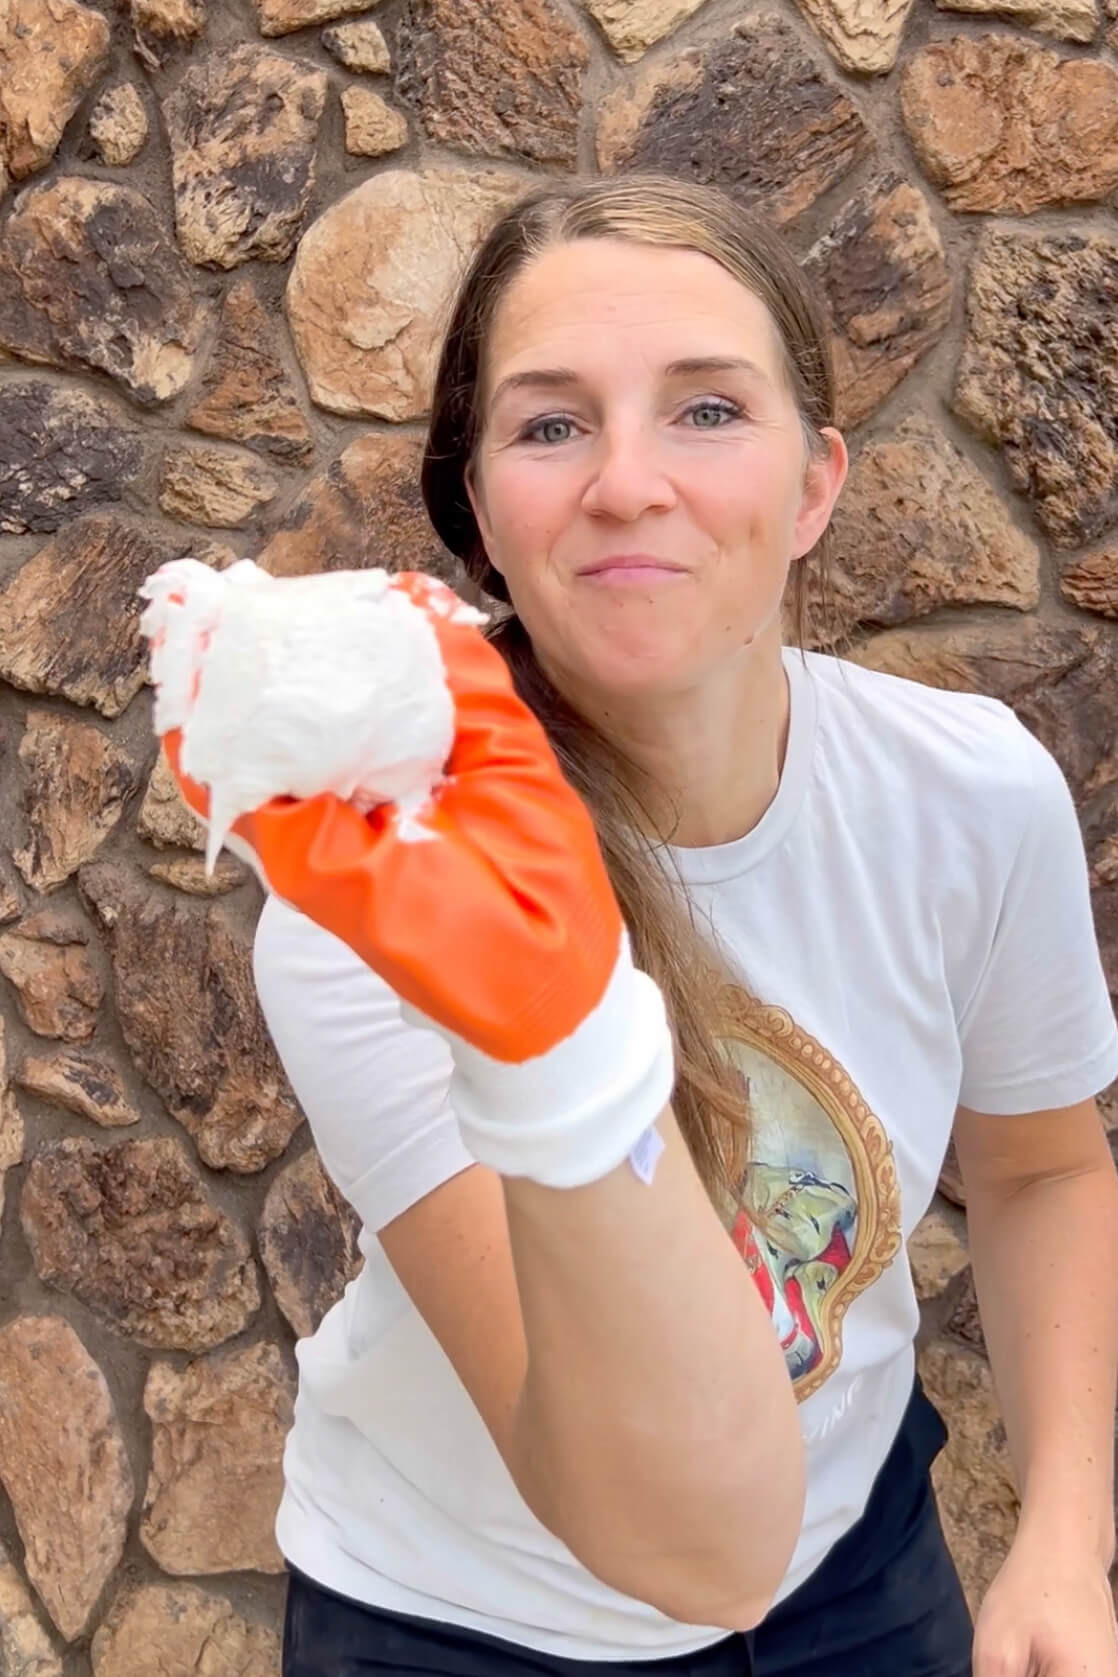 Applying mortar by hand to the rock siding to create a smoother surface.
 Close-up of mortar being applied and spread onto the rock siding.
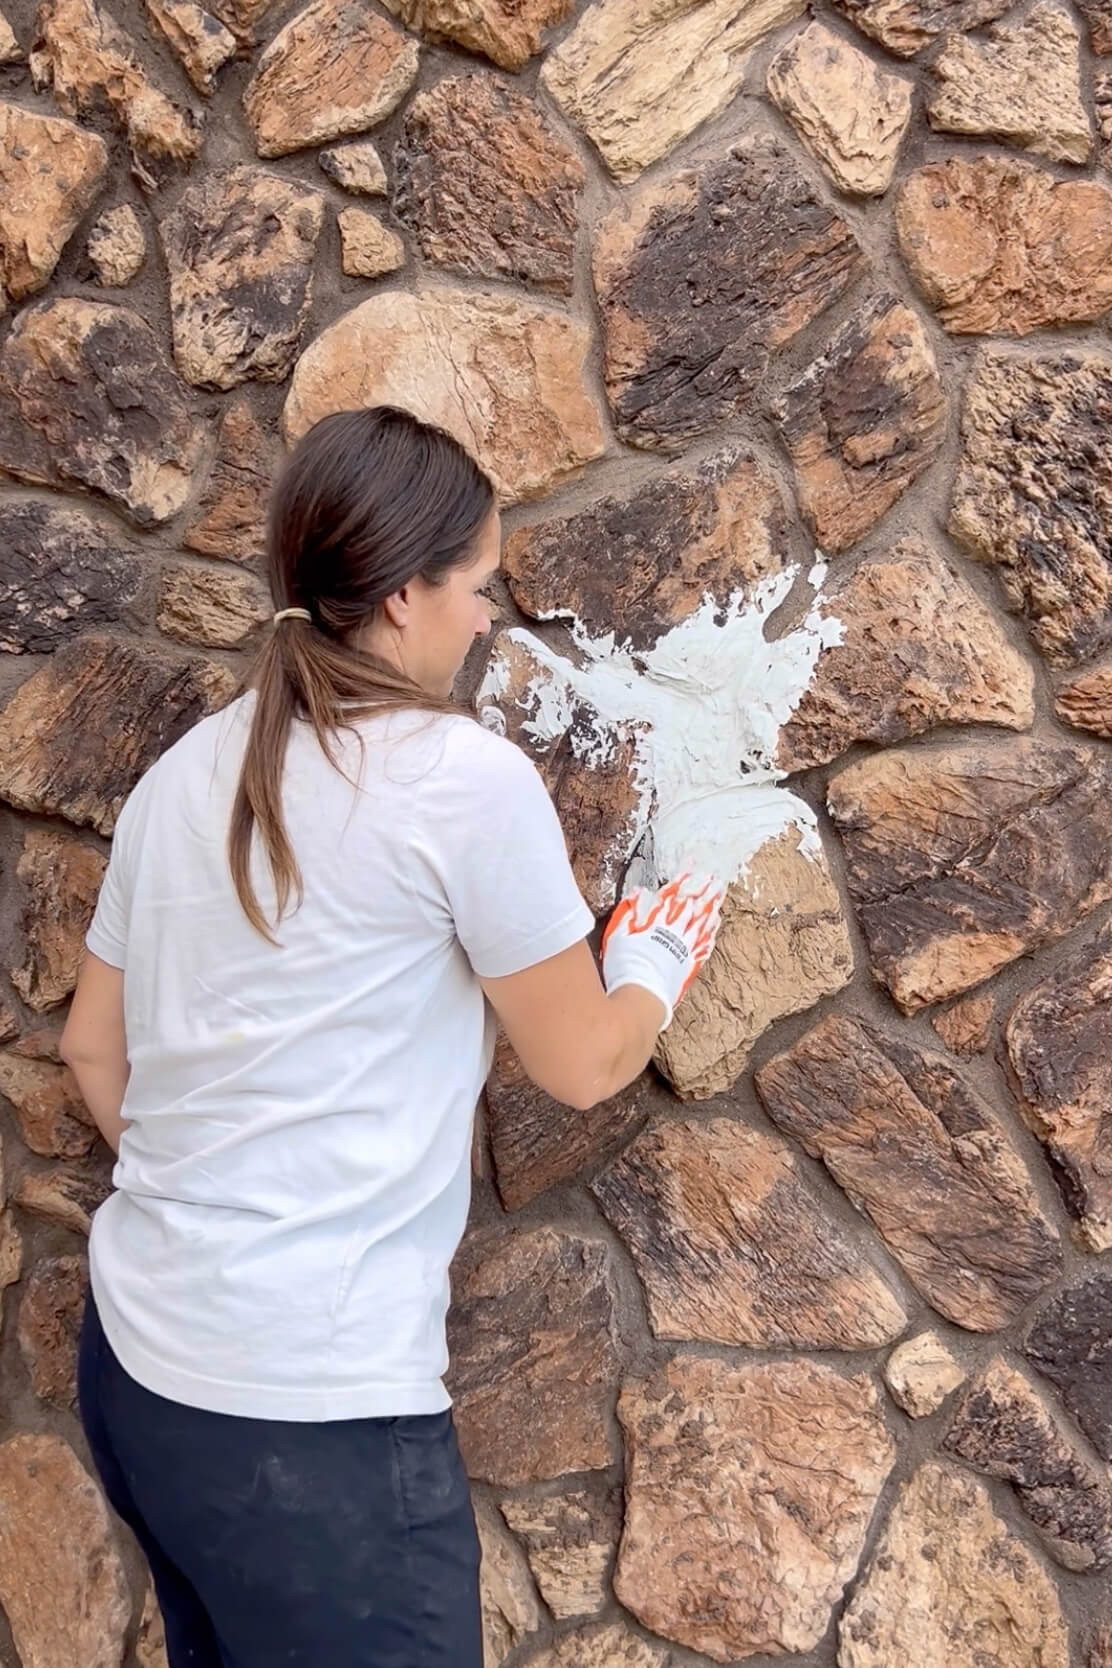
Work across the exterior rock siding section by section, applying, spreading, and shaping the mortar as needed. If you notice any areas you missed or want to adjust, simply add more mortar and smooth it until you are satisfied with the result. This hands-on approach allows for customization and ensures complete coverage.
 Applying mortar to a section of dated rock siding on a home exterior.
The rock siding on my patio, around the dining room windows, and on both sides of the garage constituted a large project. Recognizing the scale of the task, I enlisted help from friends. I’m incredibly grateful a group came over for the day to assist. Many hands truly make light work, and this is a fantastic DIY project to tackle with a group of friends!
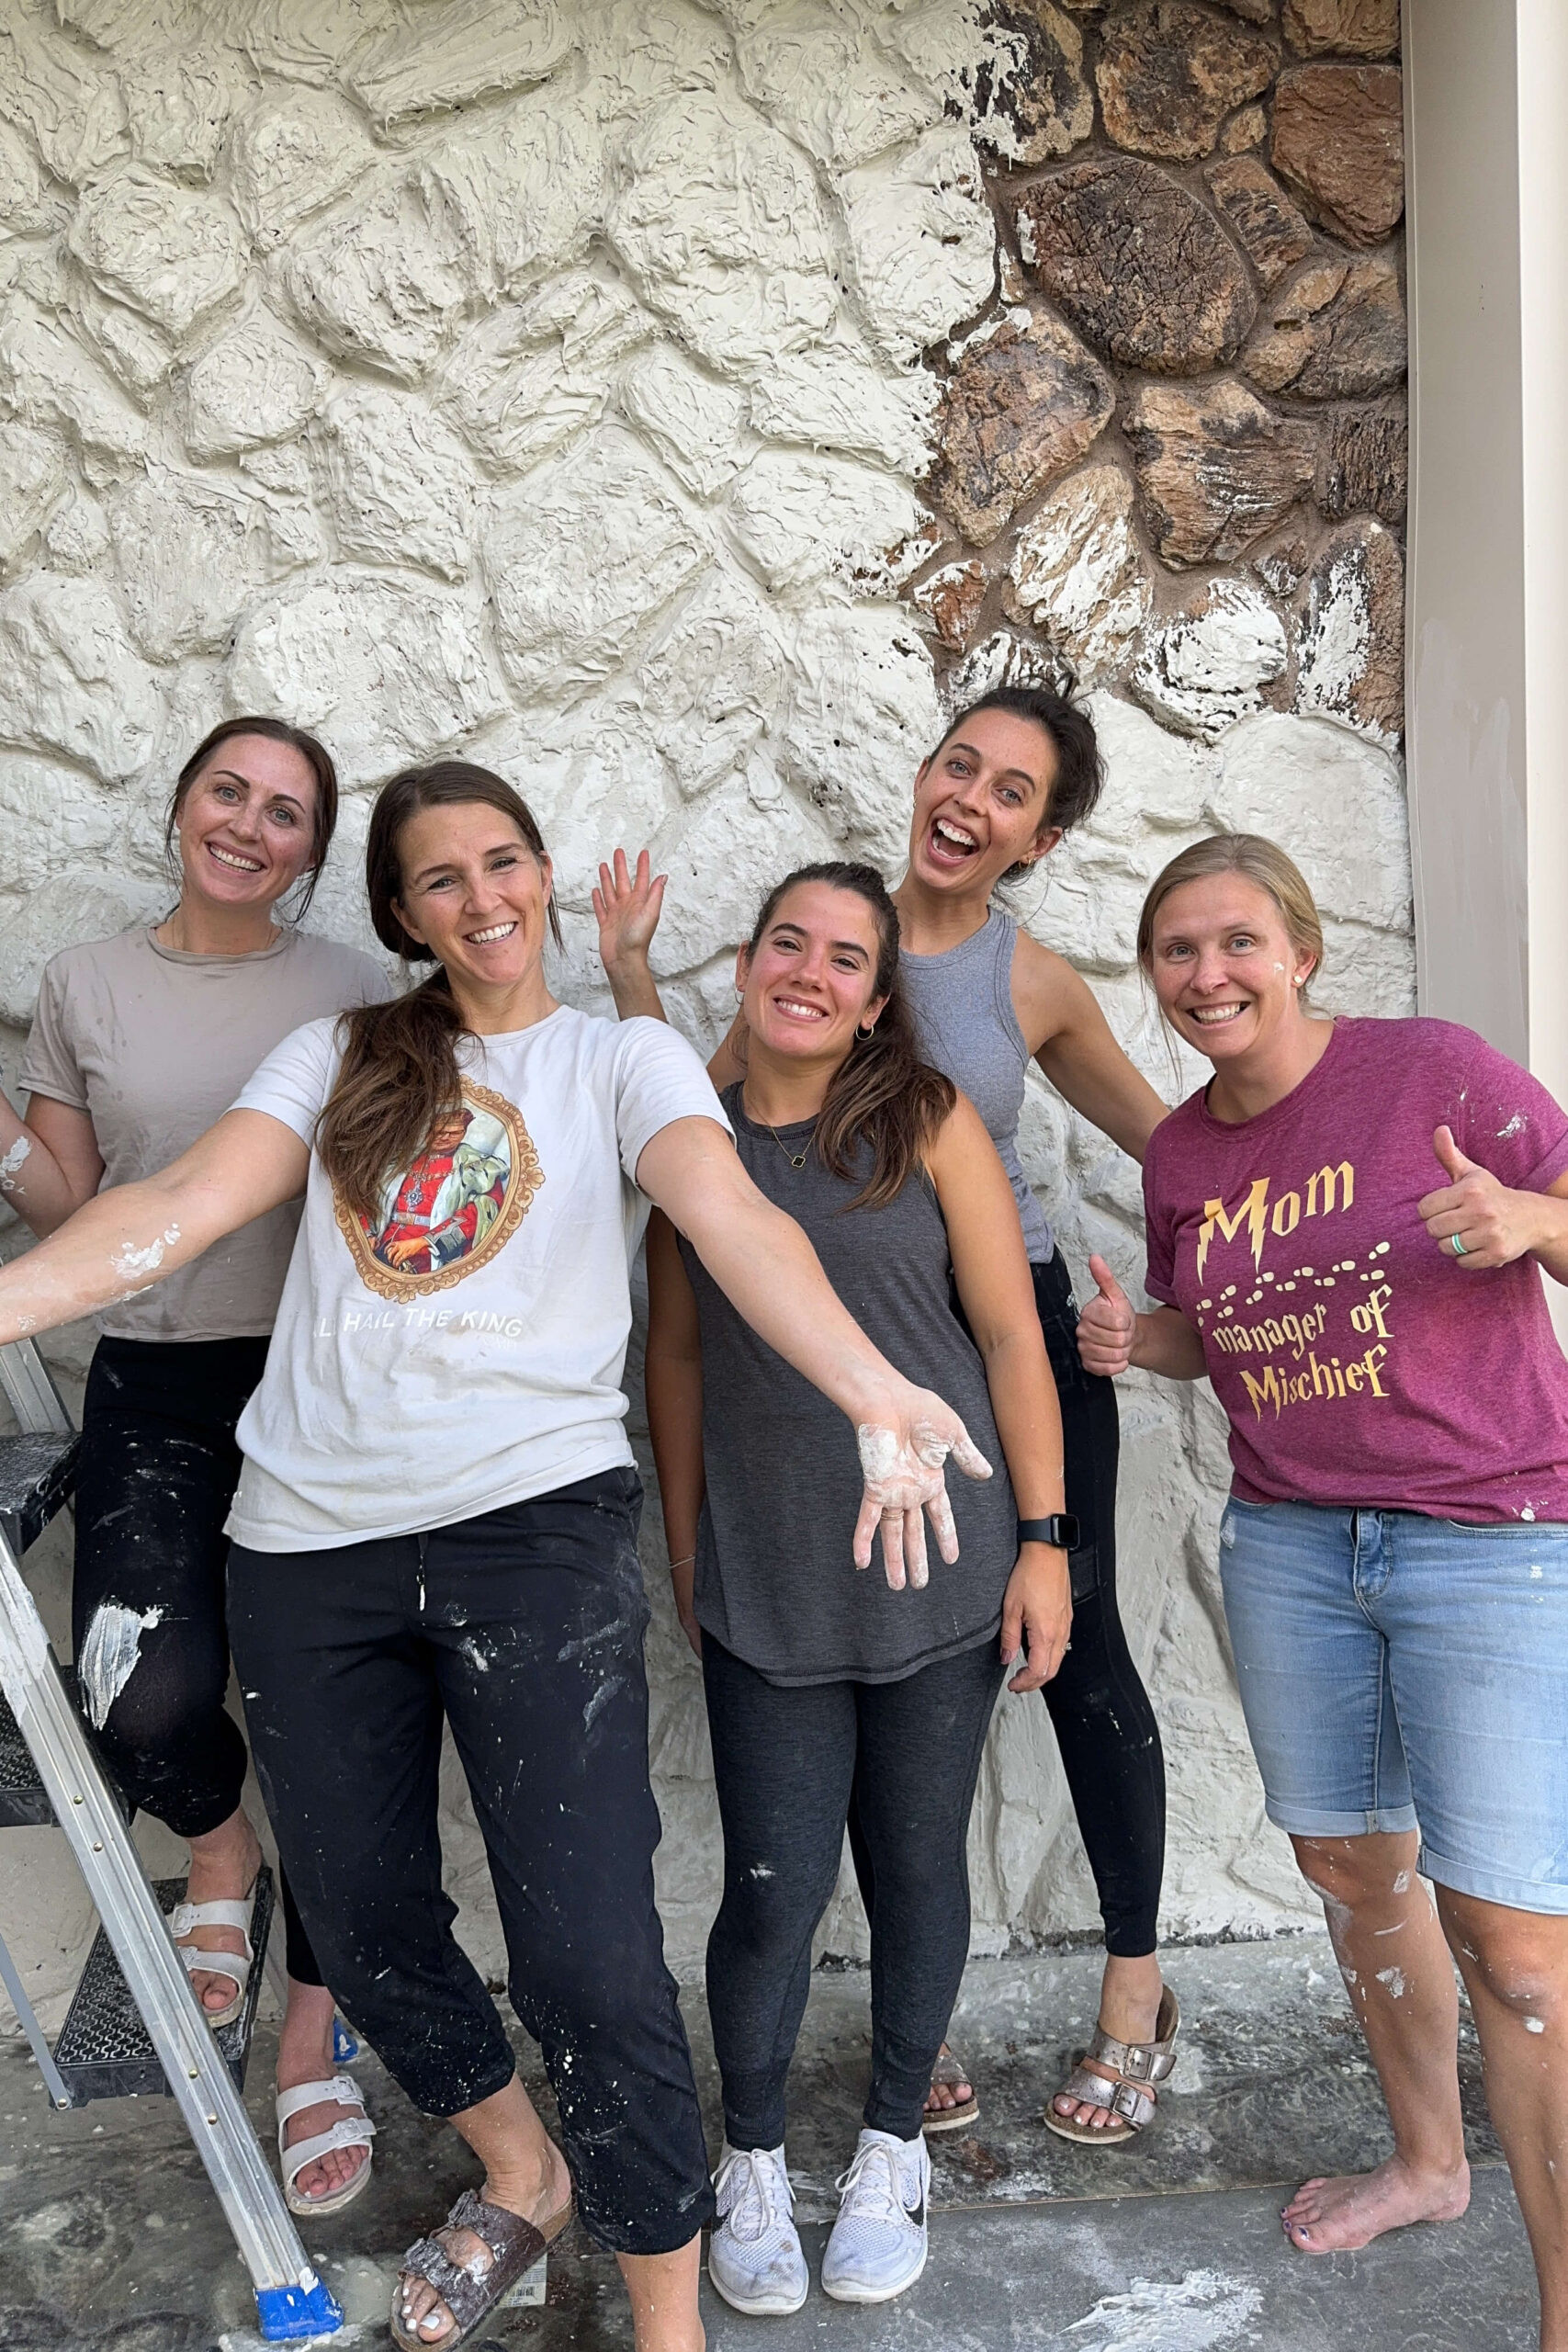 A group of friends helping to apply mortar to the exterior rock siding.
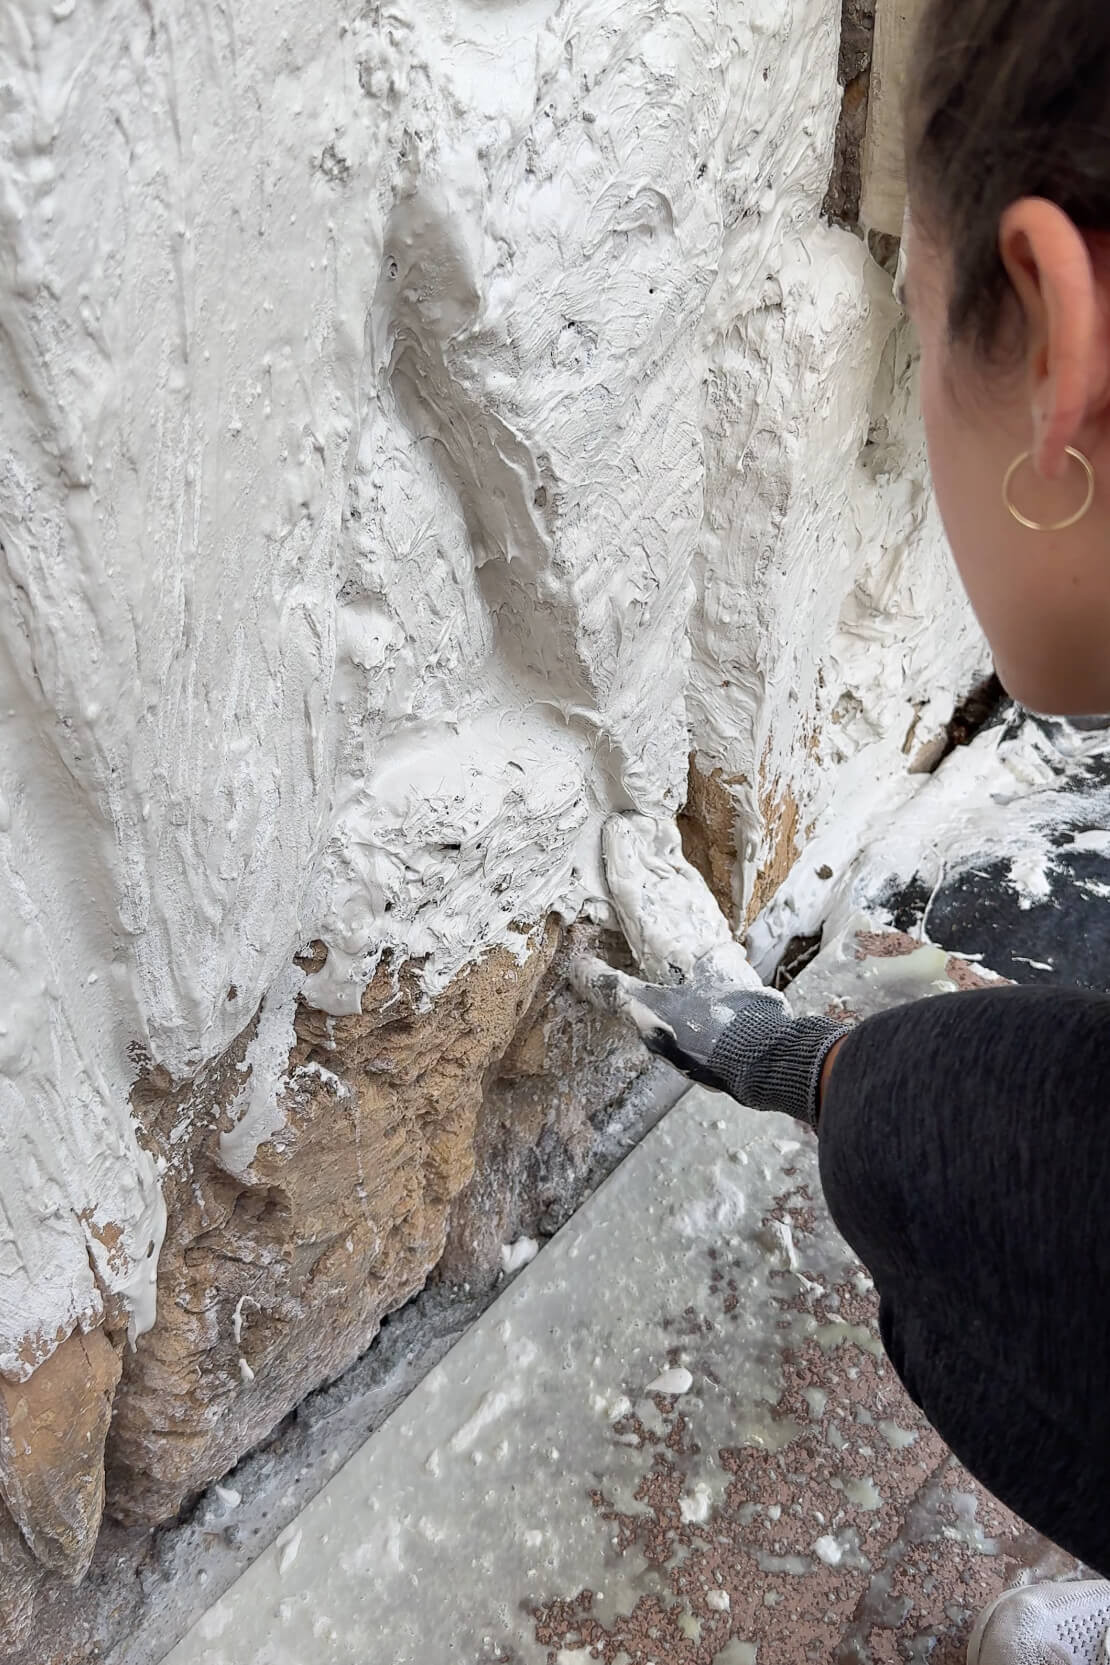
Smoothing the Mortared Rock Siding with a Sponge
Immediately after applying the mortar, the surface might appear somewhat uneven or show finger marks. This is perfectly normal. Allow approximately 15 minutes for the mortar to begin setting slightly. Then, take a wet mortar sponge and start smoothing the surface.
 Using a wet sponge to smooth the freshly applied mortar on the rock siding.
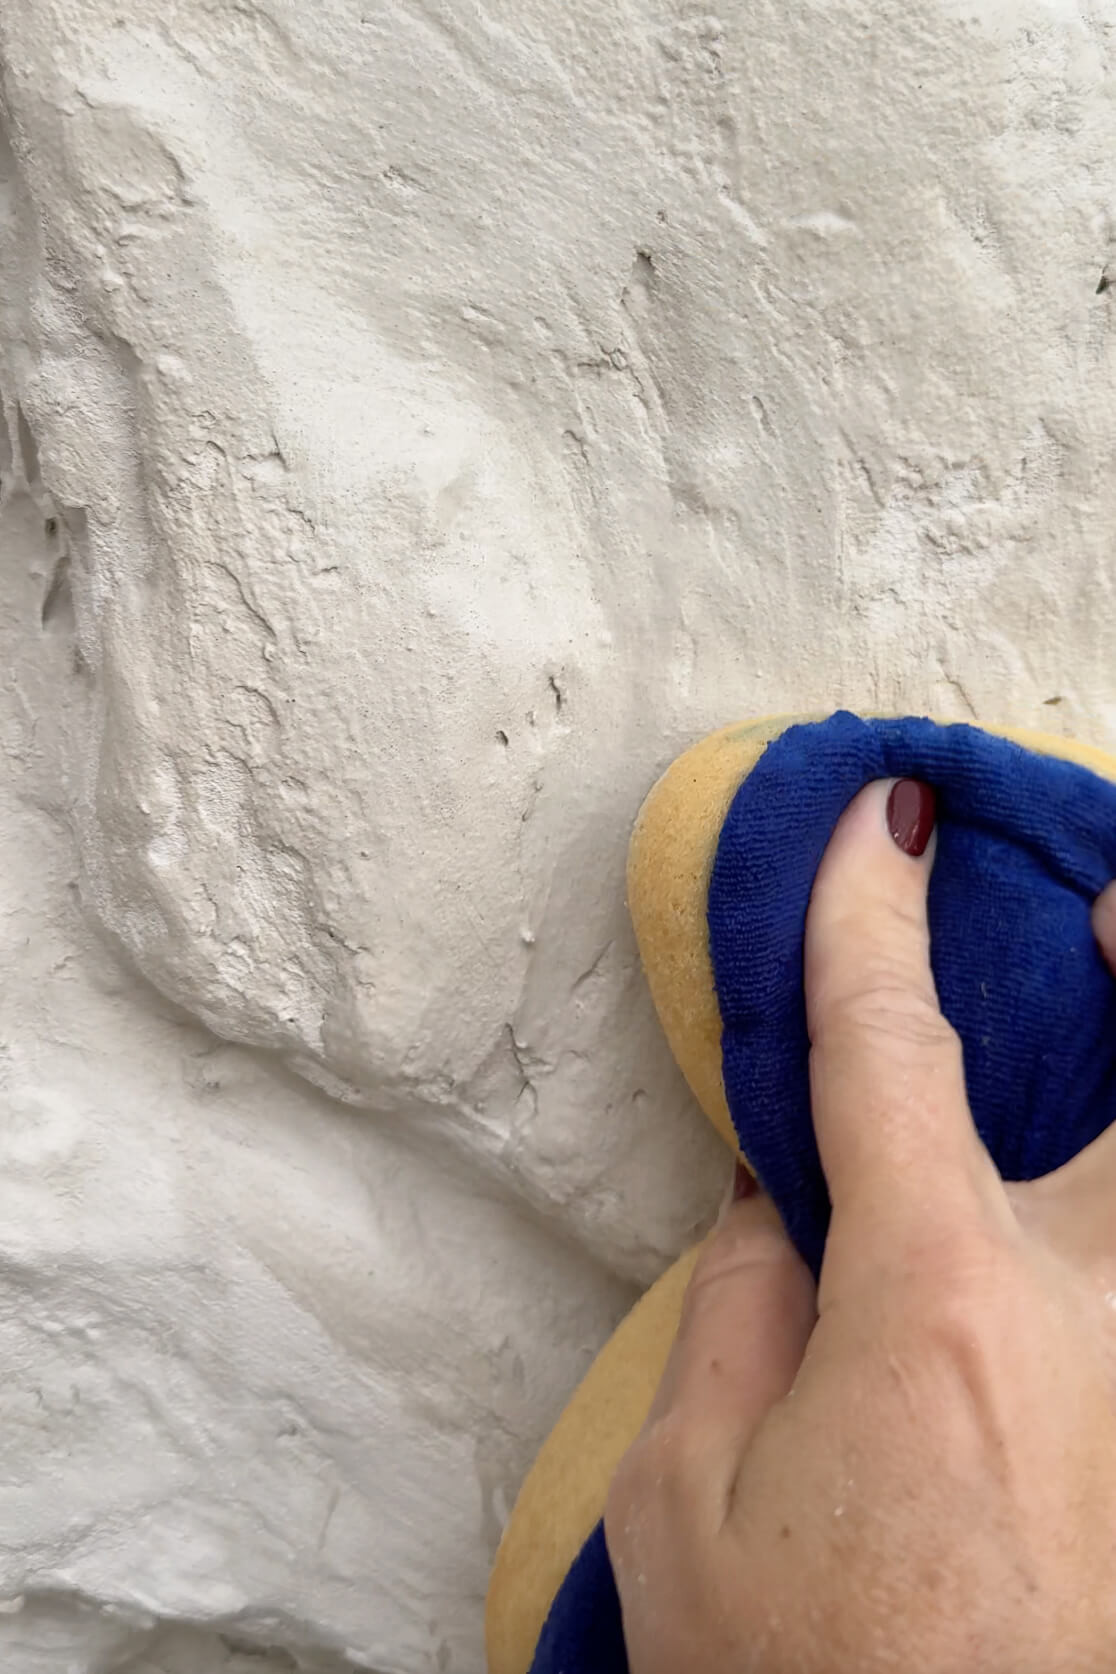 Close-up of the sponging technique to create a smooth mortar finish on rock siding.
With the sponge, you can refine and manipulate the mortar on the exterior rock siding to achieve your desired level of smoothness. You have control over how much or how little texture remains. My helpers especially enjoyed this stage of the process!
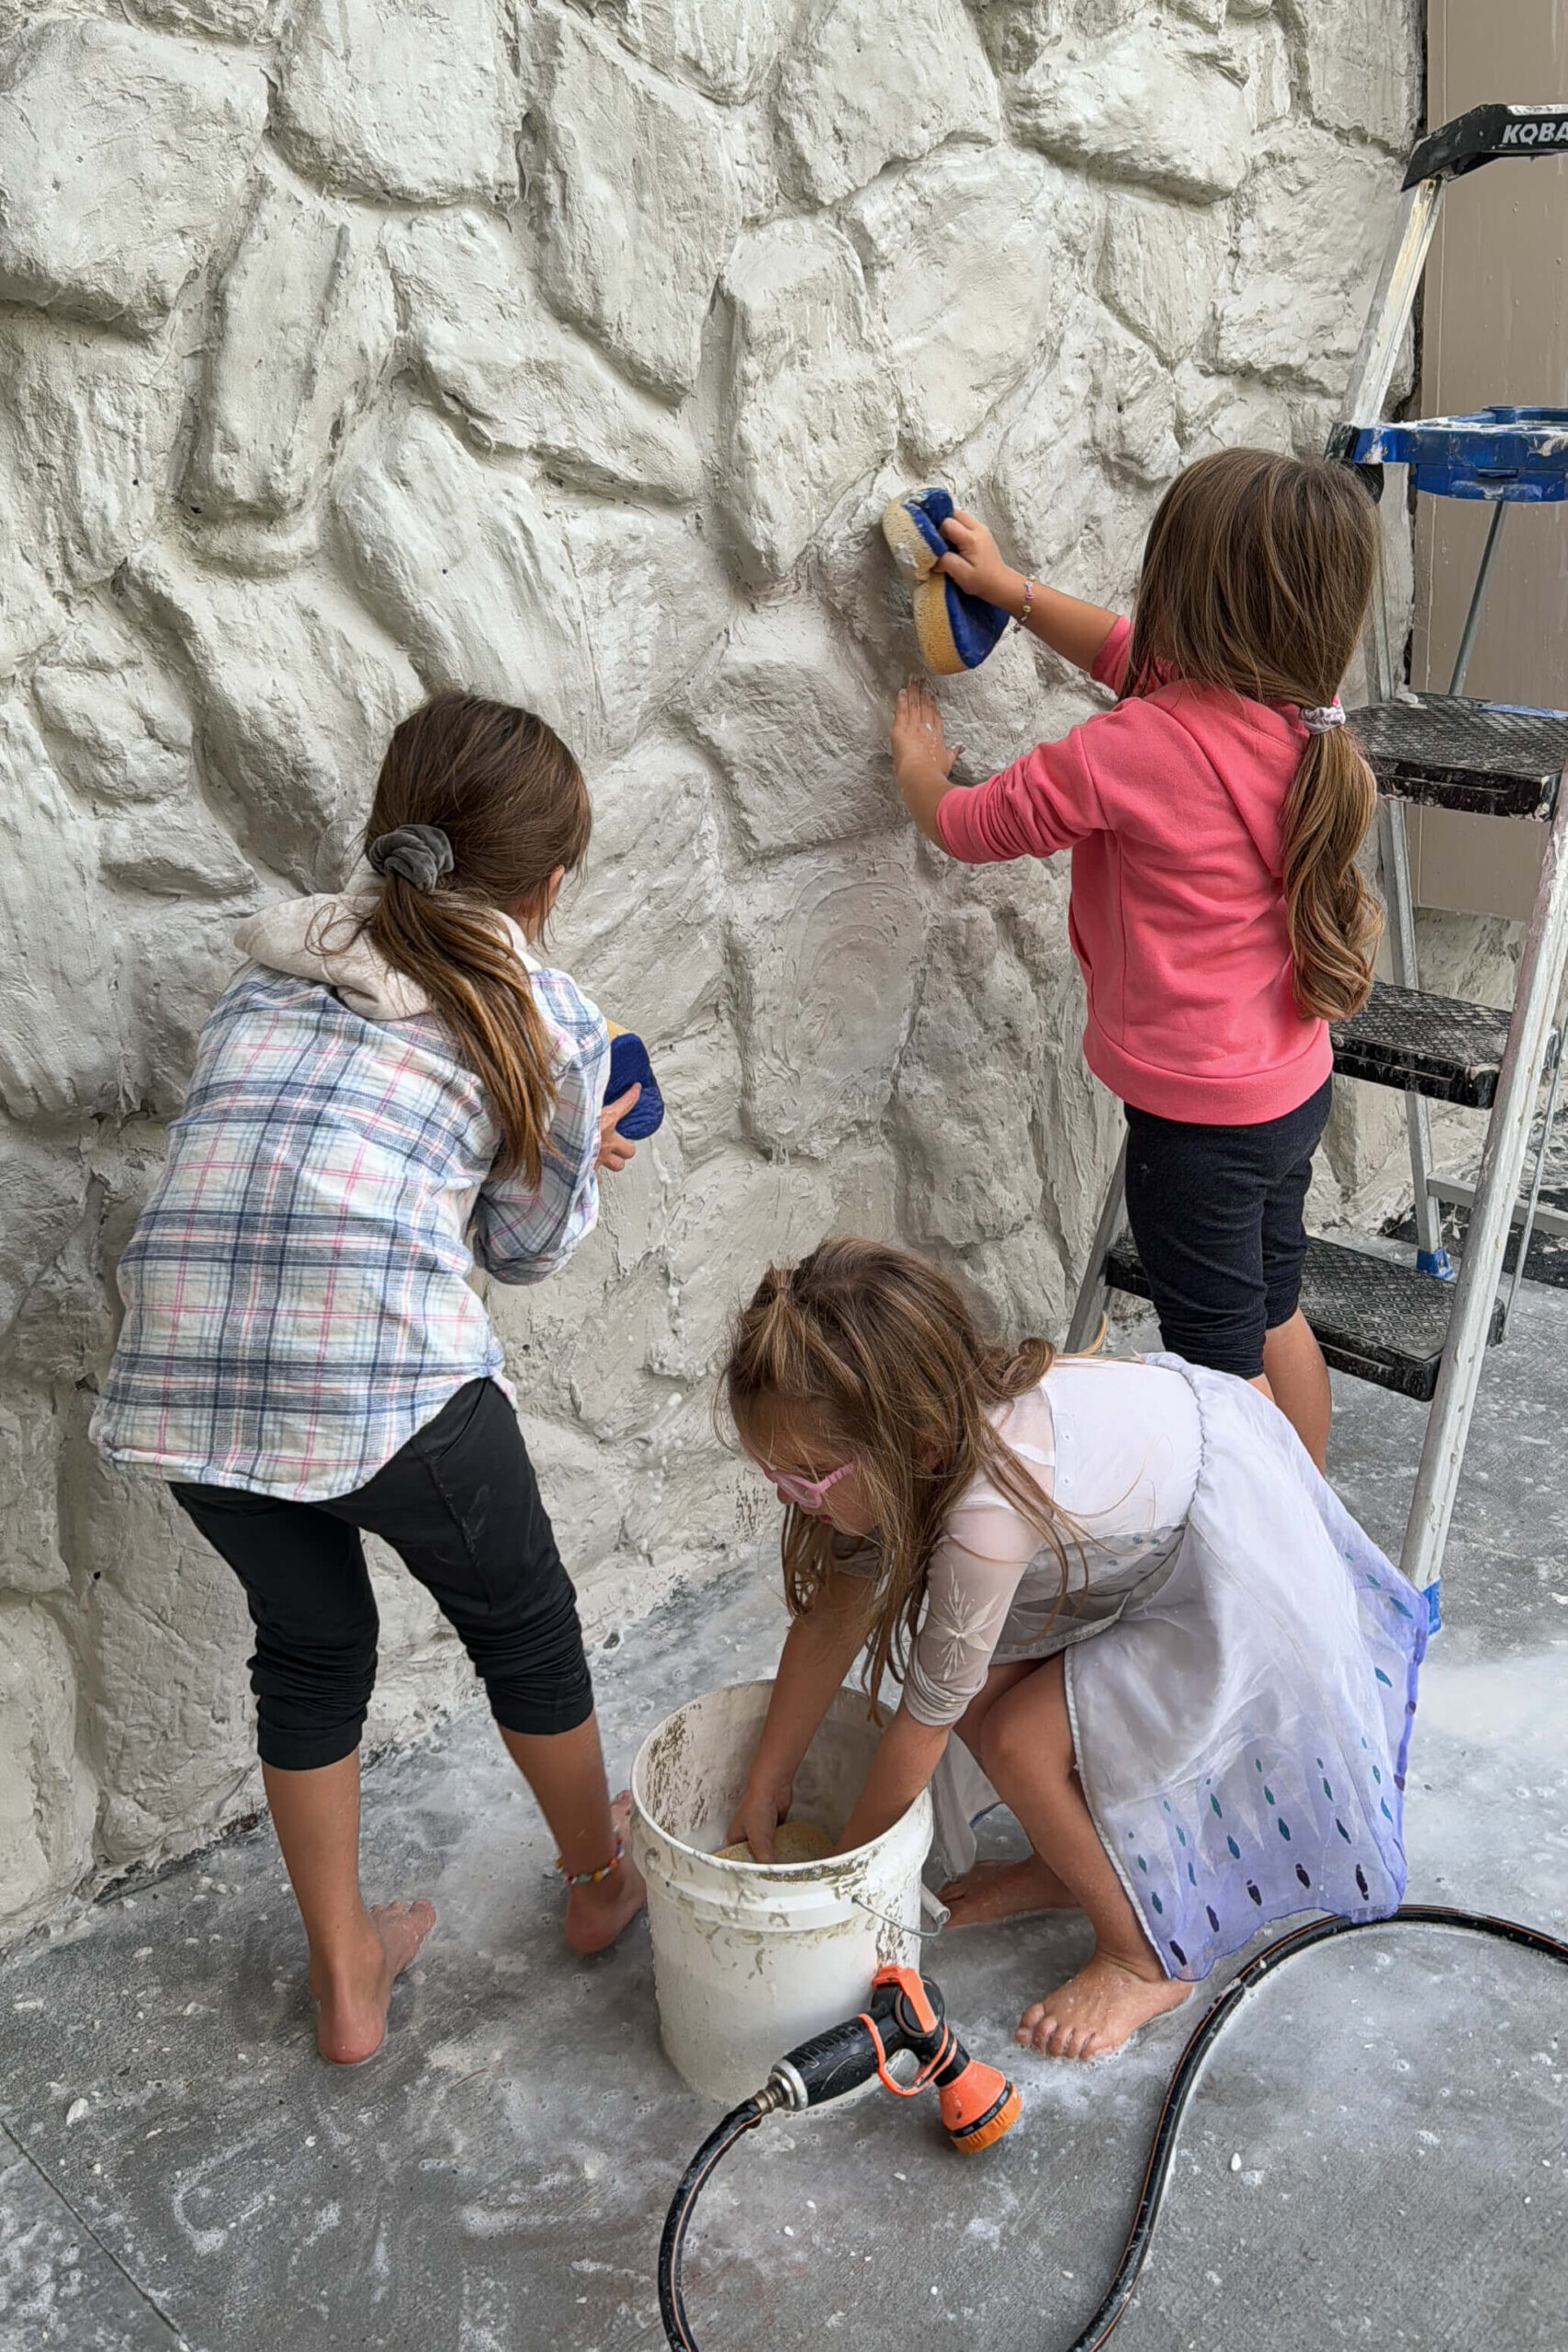 Friends using sponges to smooth the mortar on the exterior rock siding, making it a fun group activity.
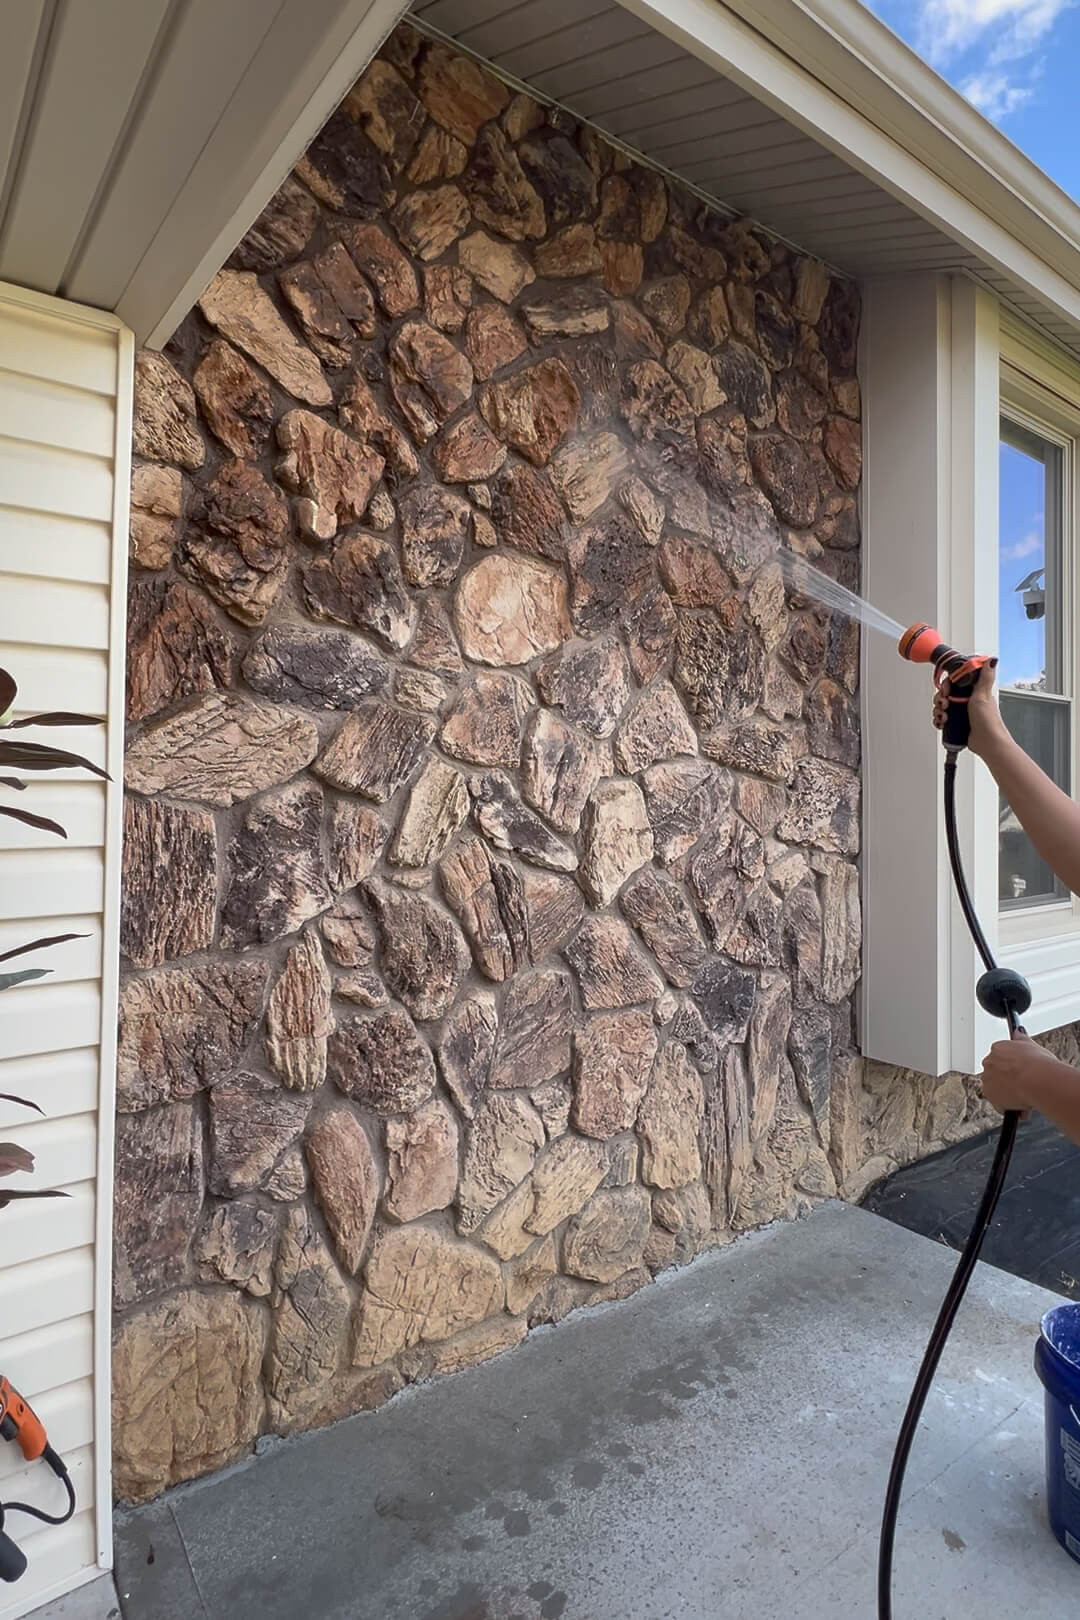
Be aware that this project can get messy. If any mortar happens to drip, clean it up promptly before it hardens. A pressure washer is exceptionally useful for efficient cleanup of larger splatters or after the mortar has fully dried.
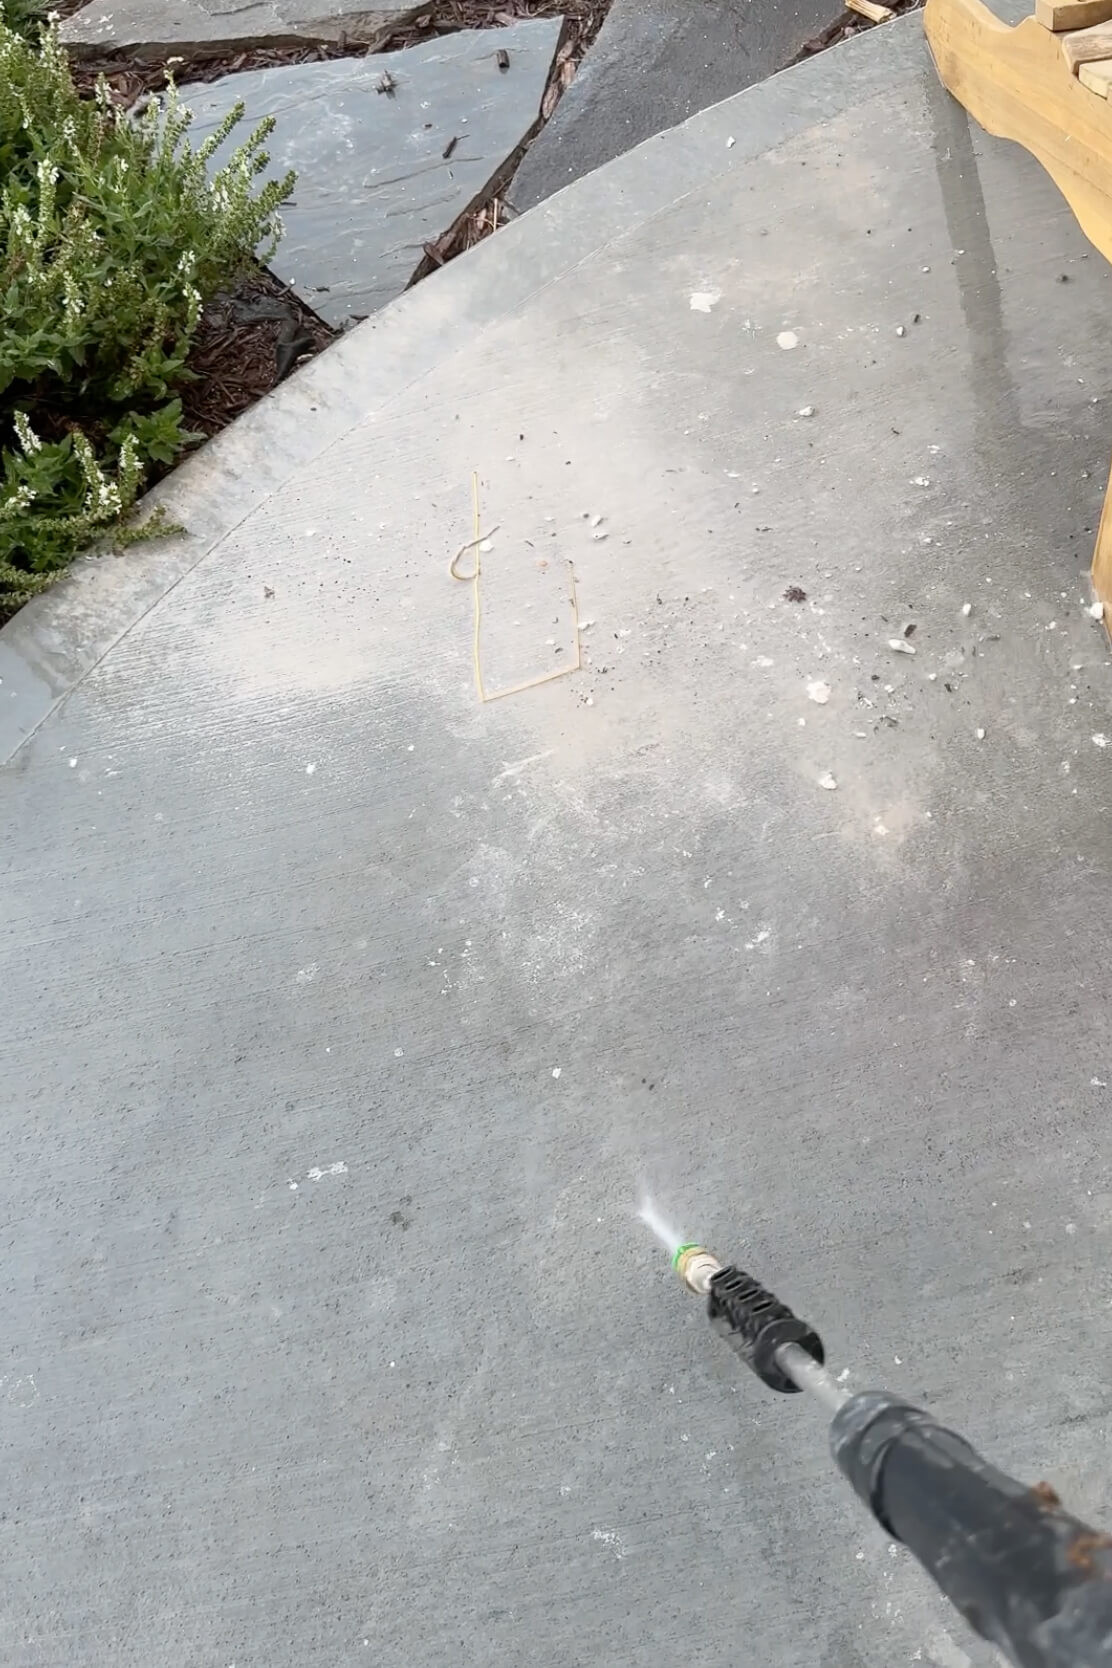 Using a pressure washer to clean up excess mortar and keep the work area tidy.
Painting the Updated Rock Siding for a Modern Finish
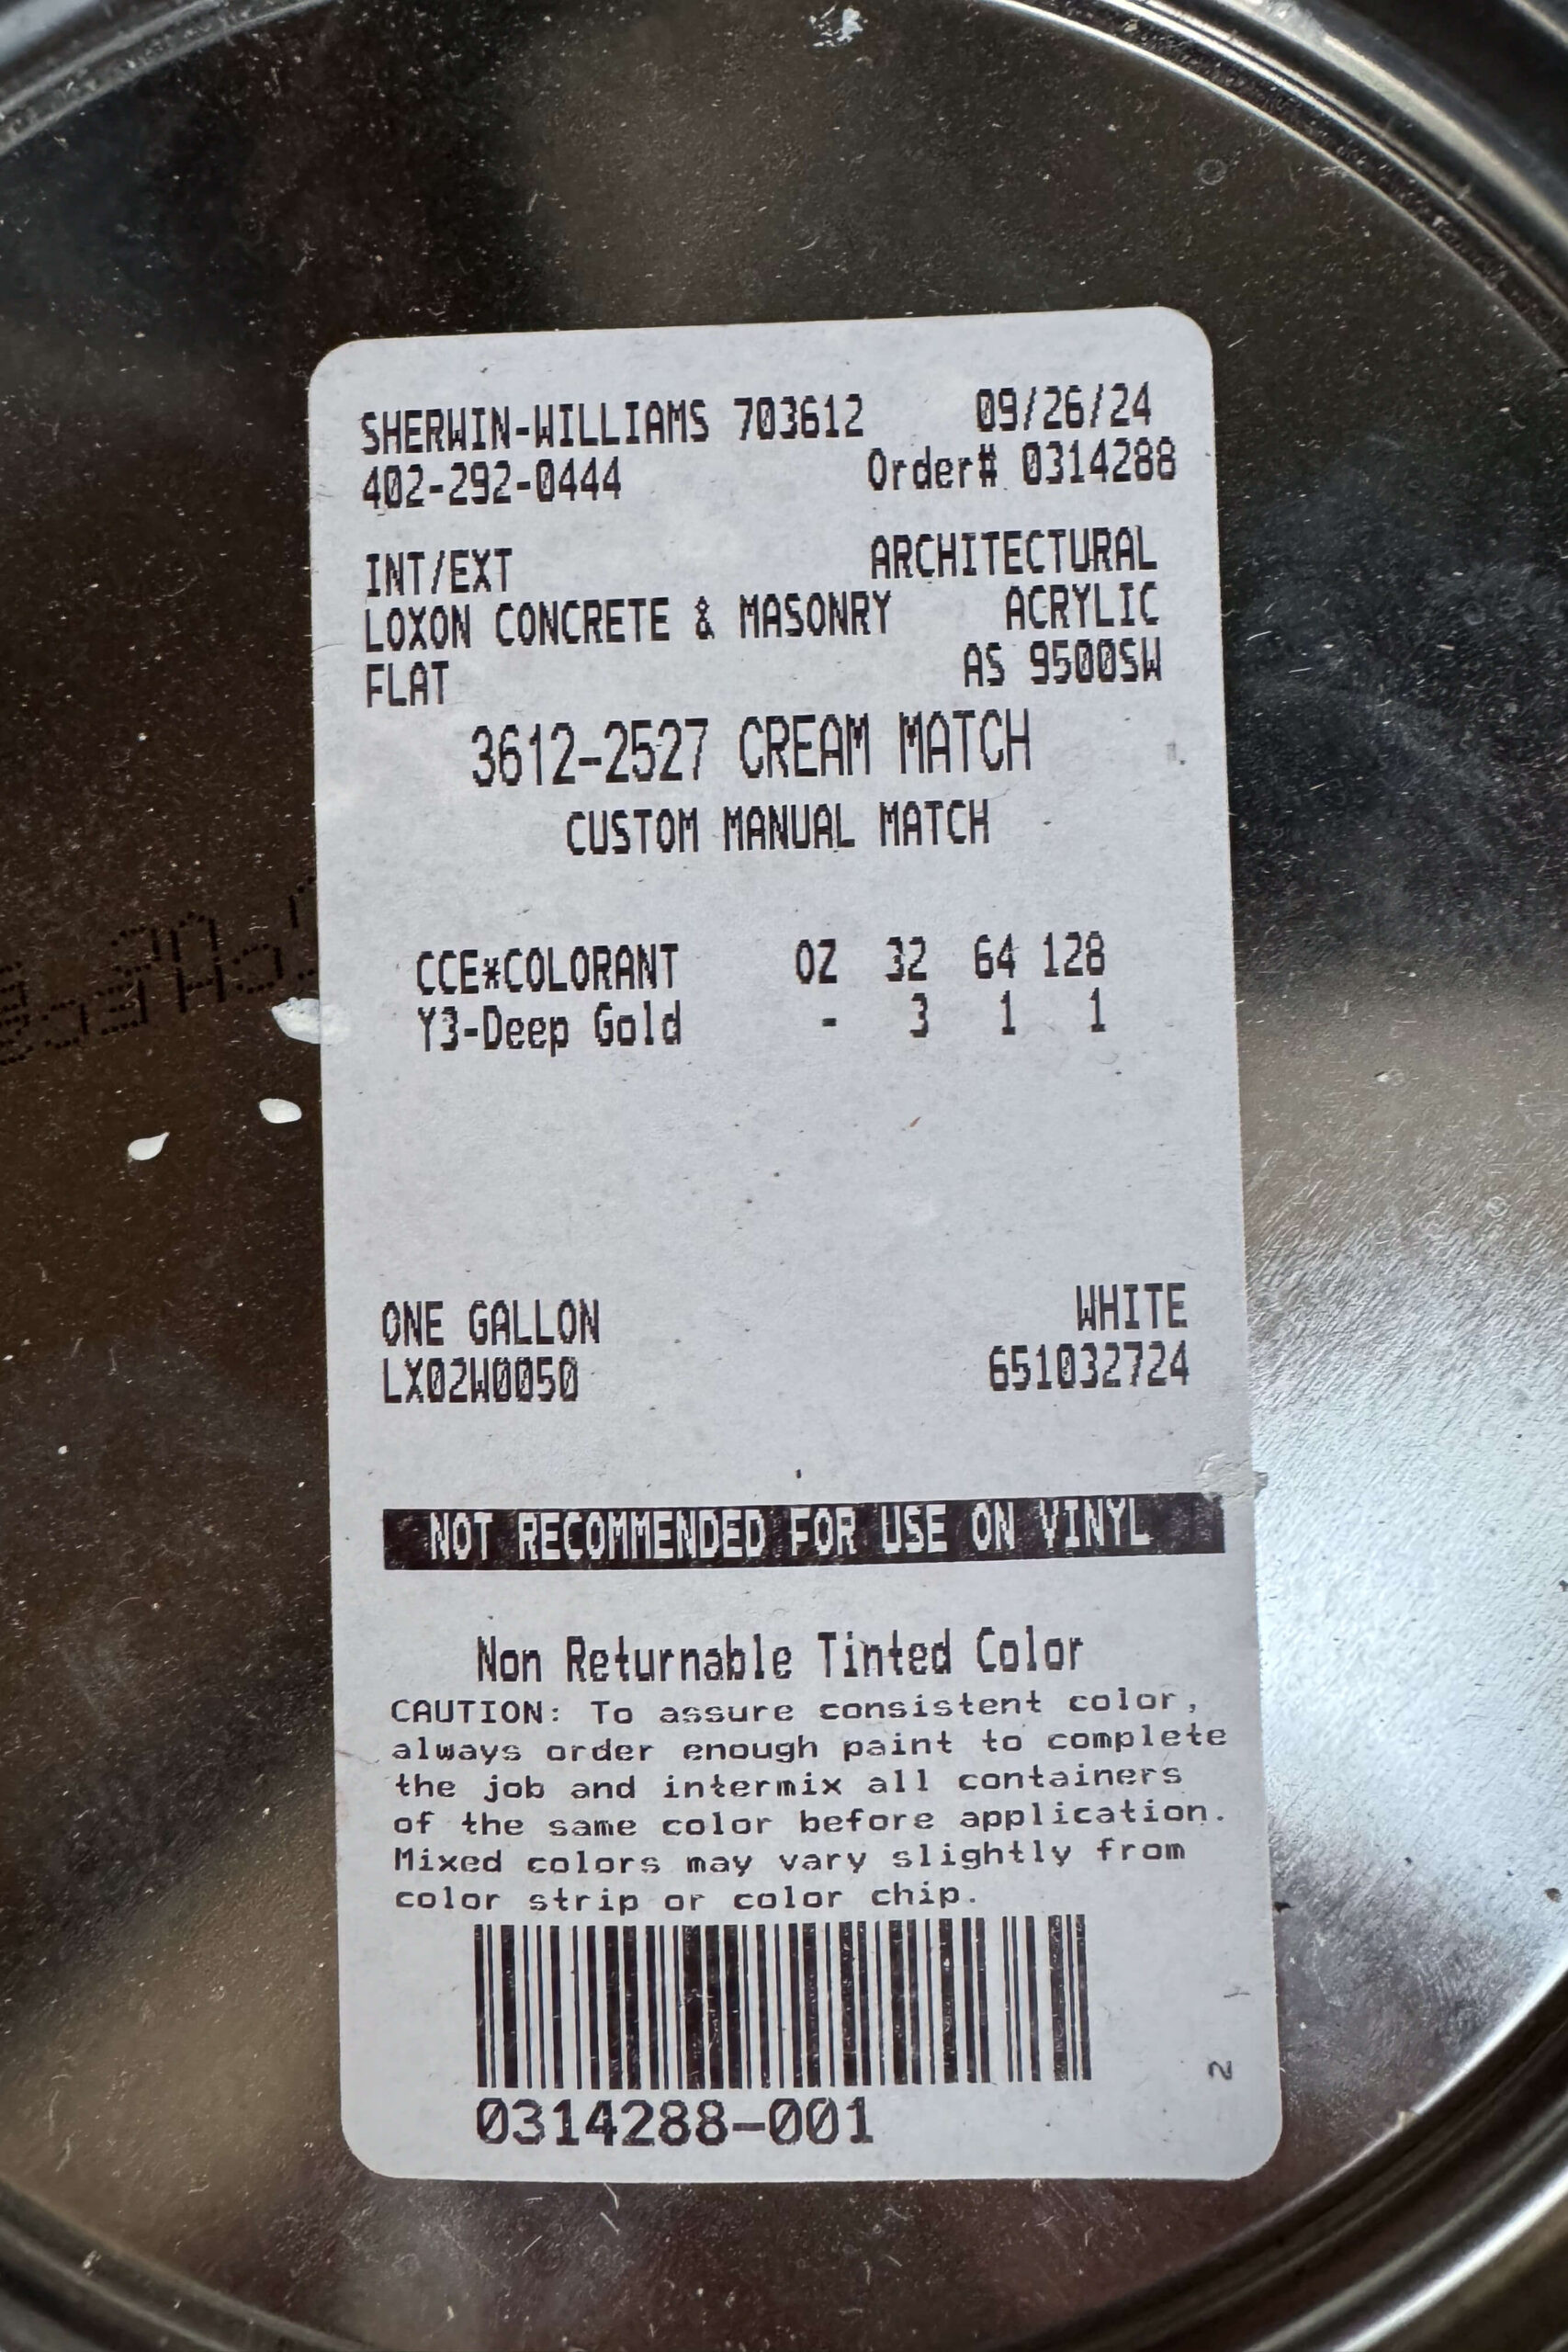
For this project, I opted for white mortar, which closely matched the existing house color. However, it still wasn’t the precise shade I wanted. To achieve a perfect color match, I took a small piece of the updated rock siding to my local Sherwin-Williams store. They expertly color-matched it and mixed it into their LOXON concrete and masonry primer/sealer. This primer/sealer combination is ideal for ensuring long-lasting paint adhesion and durability on masonry surfaces.
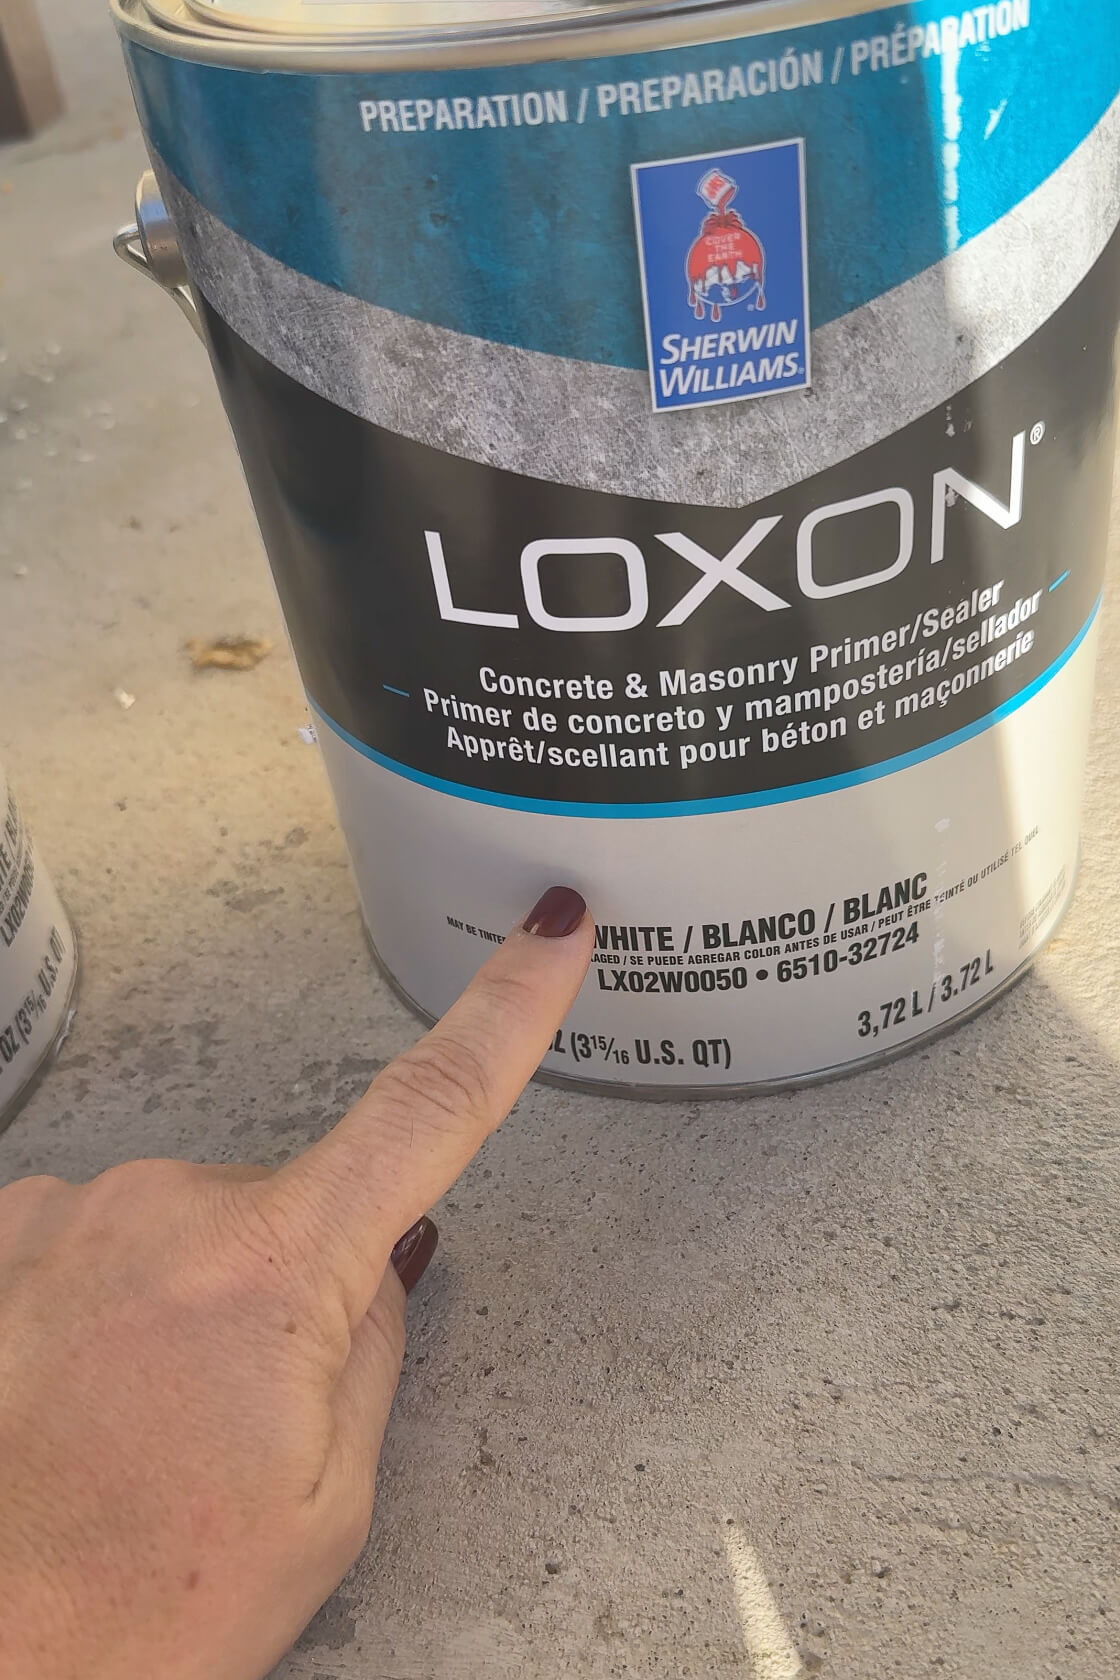 Showing the color-matched paint and primer from Sherwin-Williams for the rock siding project.
 Applying masonry primer/sealer to the updated rock siding before painting.
After carefully masking off all areas I wanted to protect from paint, I used my paint sprayer to apply the color-matched paint. The creamy off-white shade looked fantastic and was a significant improvement over the stark white of the mortar alone.
 Using a paint sprayer to apply the color-matched paint to the primed rock siding.
 Close-up of the painted rock siding showing the smooth, updated finish.
See the Entire Rock Siding Transformation in this Video!
And just like that, my exterior rock siding project was complete! The transformation is truly remarkable.
Outdated brown rock siding before the DIY update.
The before and after comparison of this project is incredibly satisfying. It’s amazing to see the significant difference that mortar, paint, and a collaborative afternoon with friends can achieve.
 Side-by-side before and after pictures of the updated rock siding.
 Another set of before and after pictures highlighting the transformation of the rock siding.
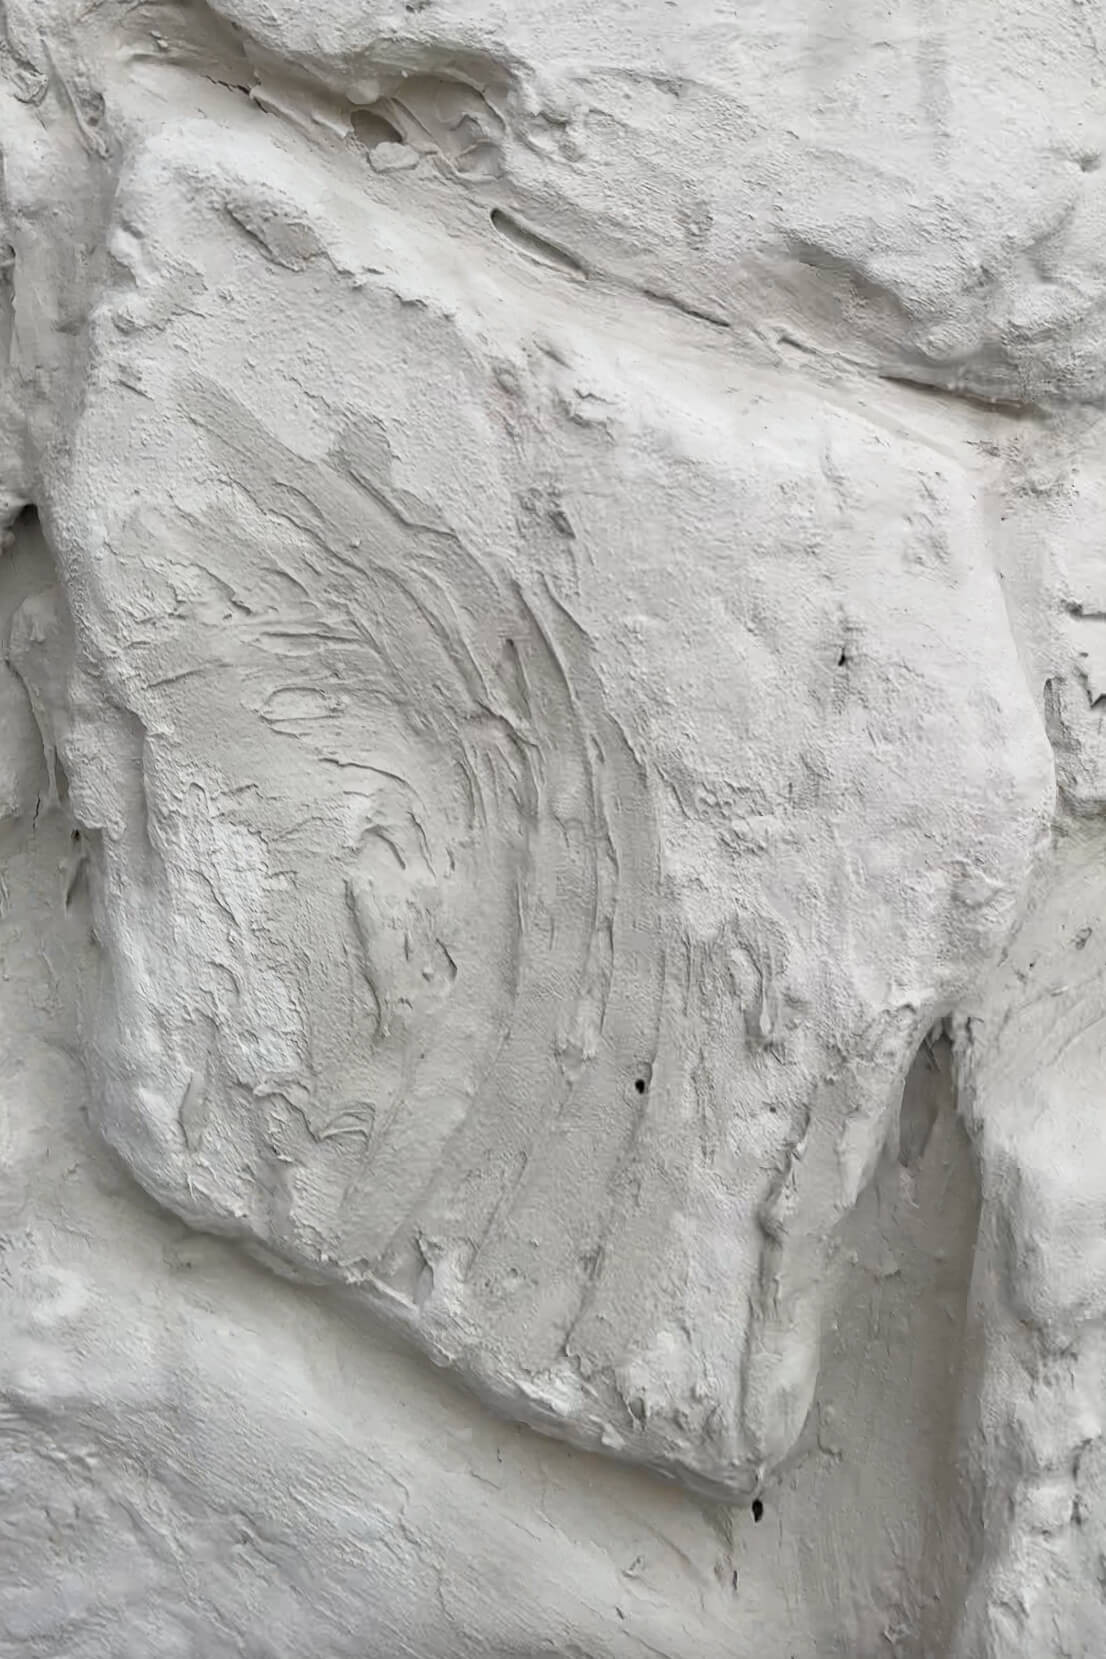
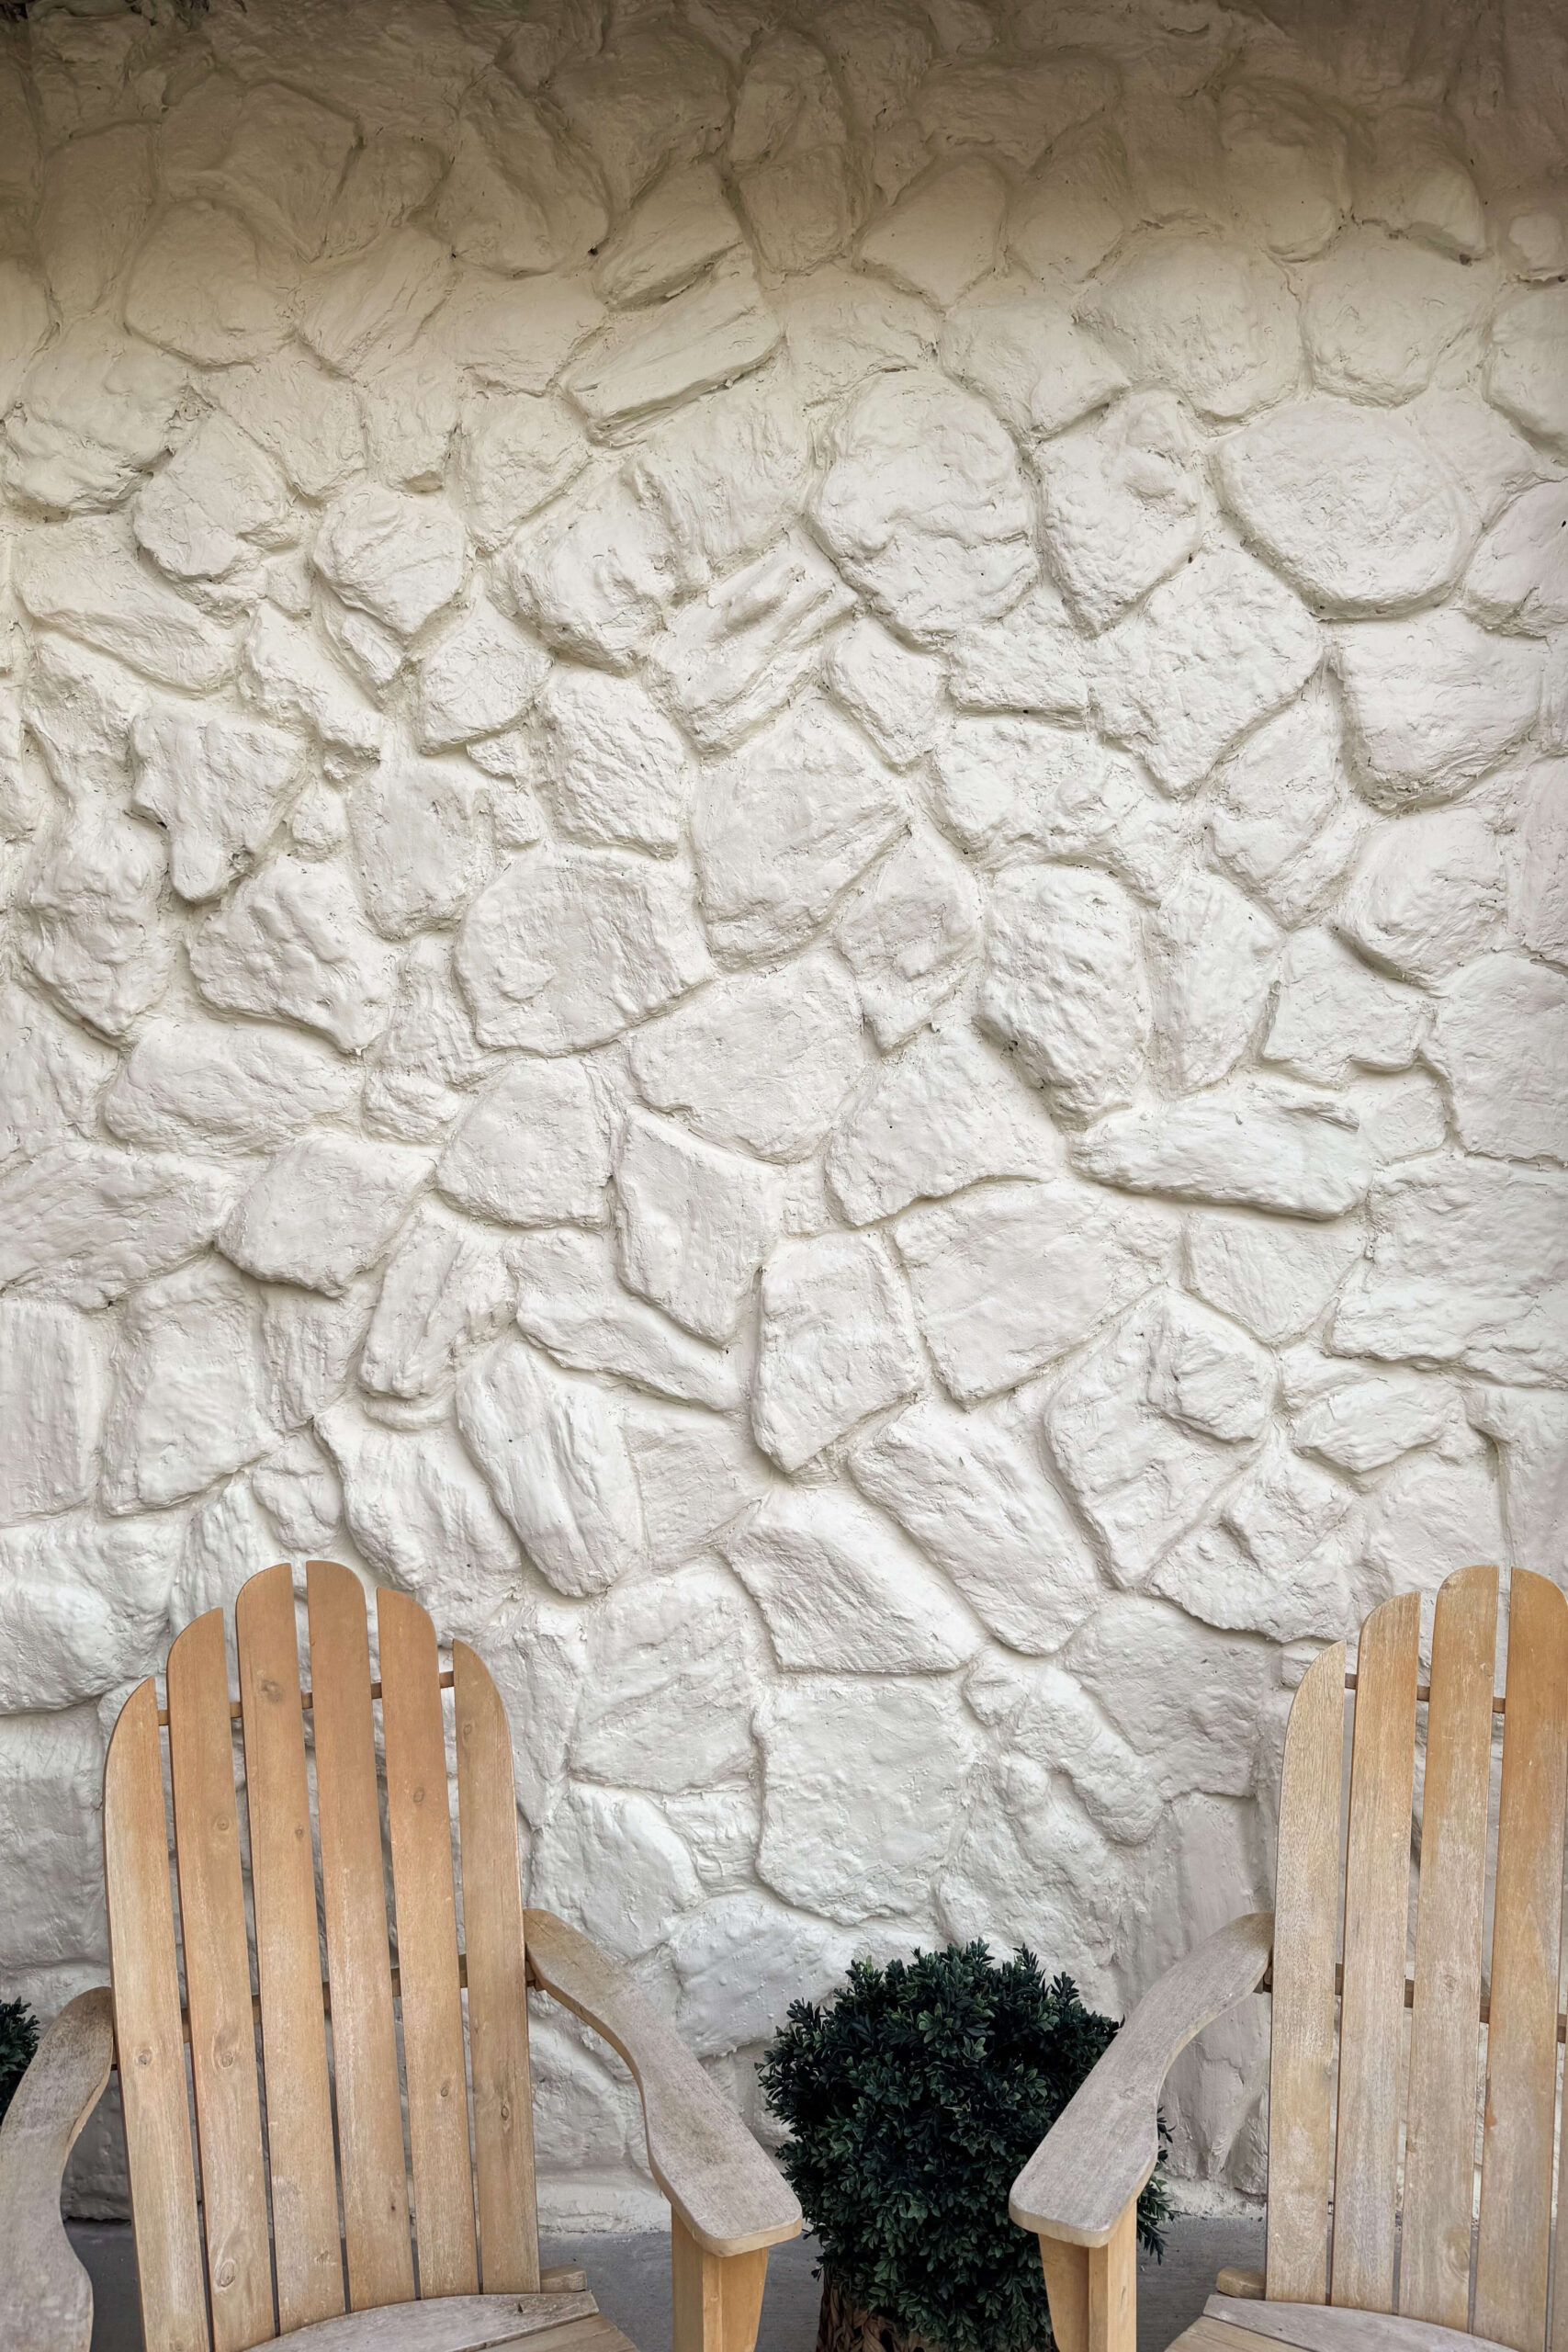
Here’s a closer look at the updated rock siding. You can still appreciate some of the original texture, but the overall finish is significantly smoother and more modern. This clean, updated aesthetic is precisely what I was aiming for.
Side view before picture highlighting the rough texture of the 1970s rock siding.
 Another close-up before and after showcasing the smoother, painted rock siding.
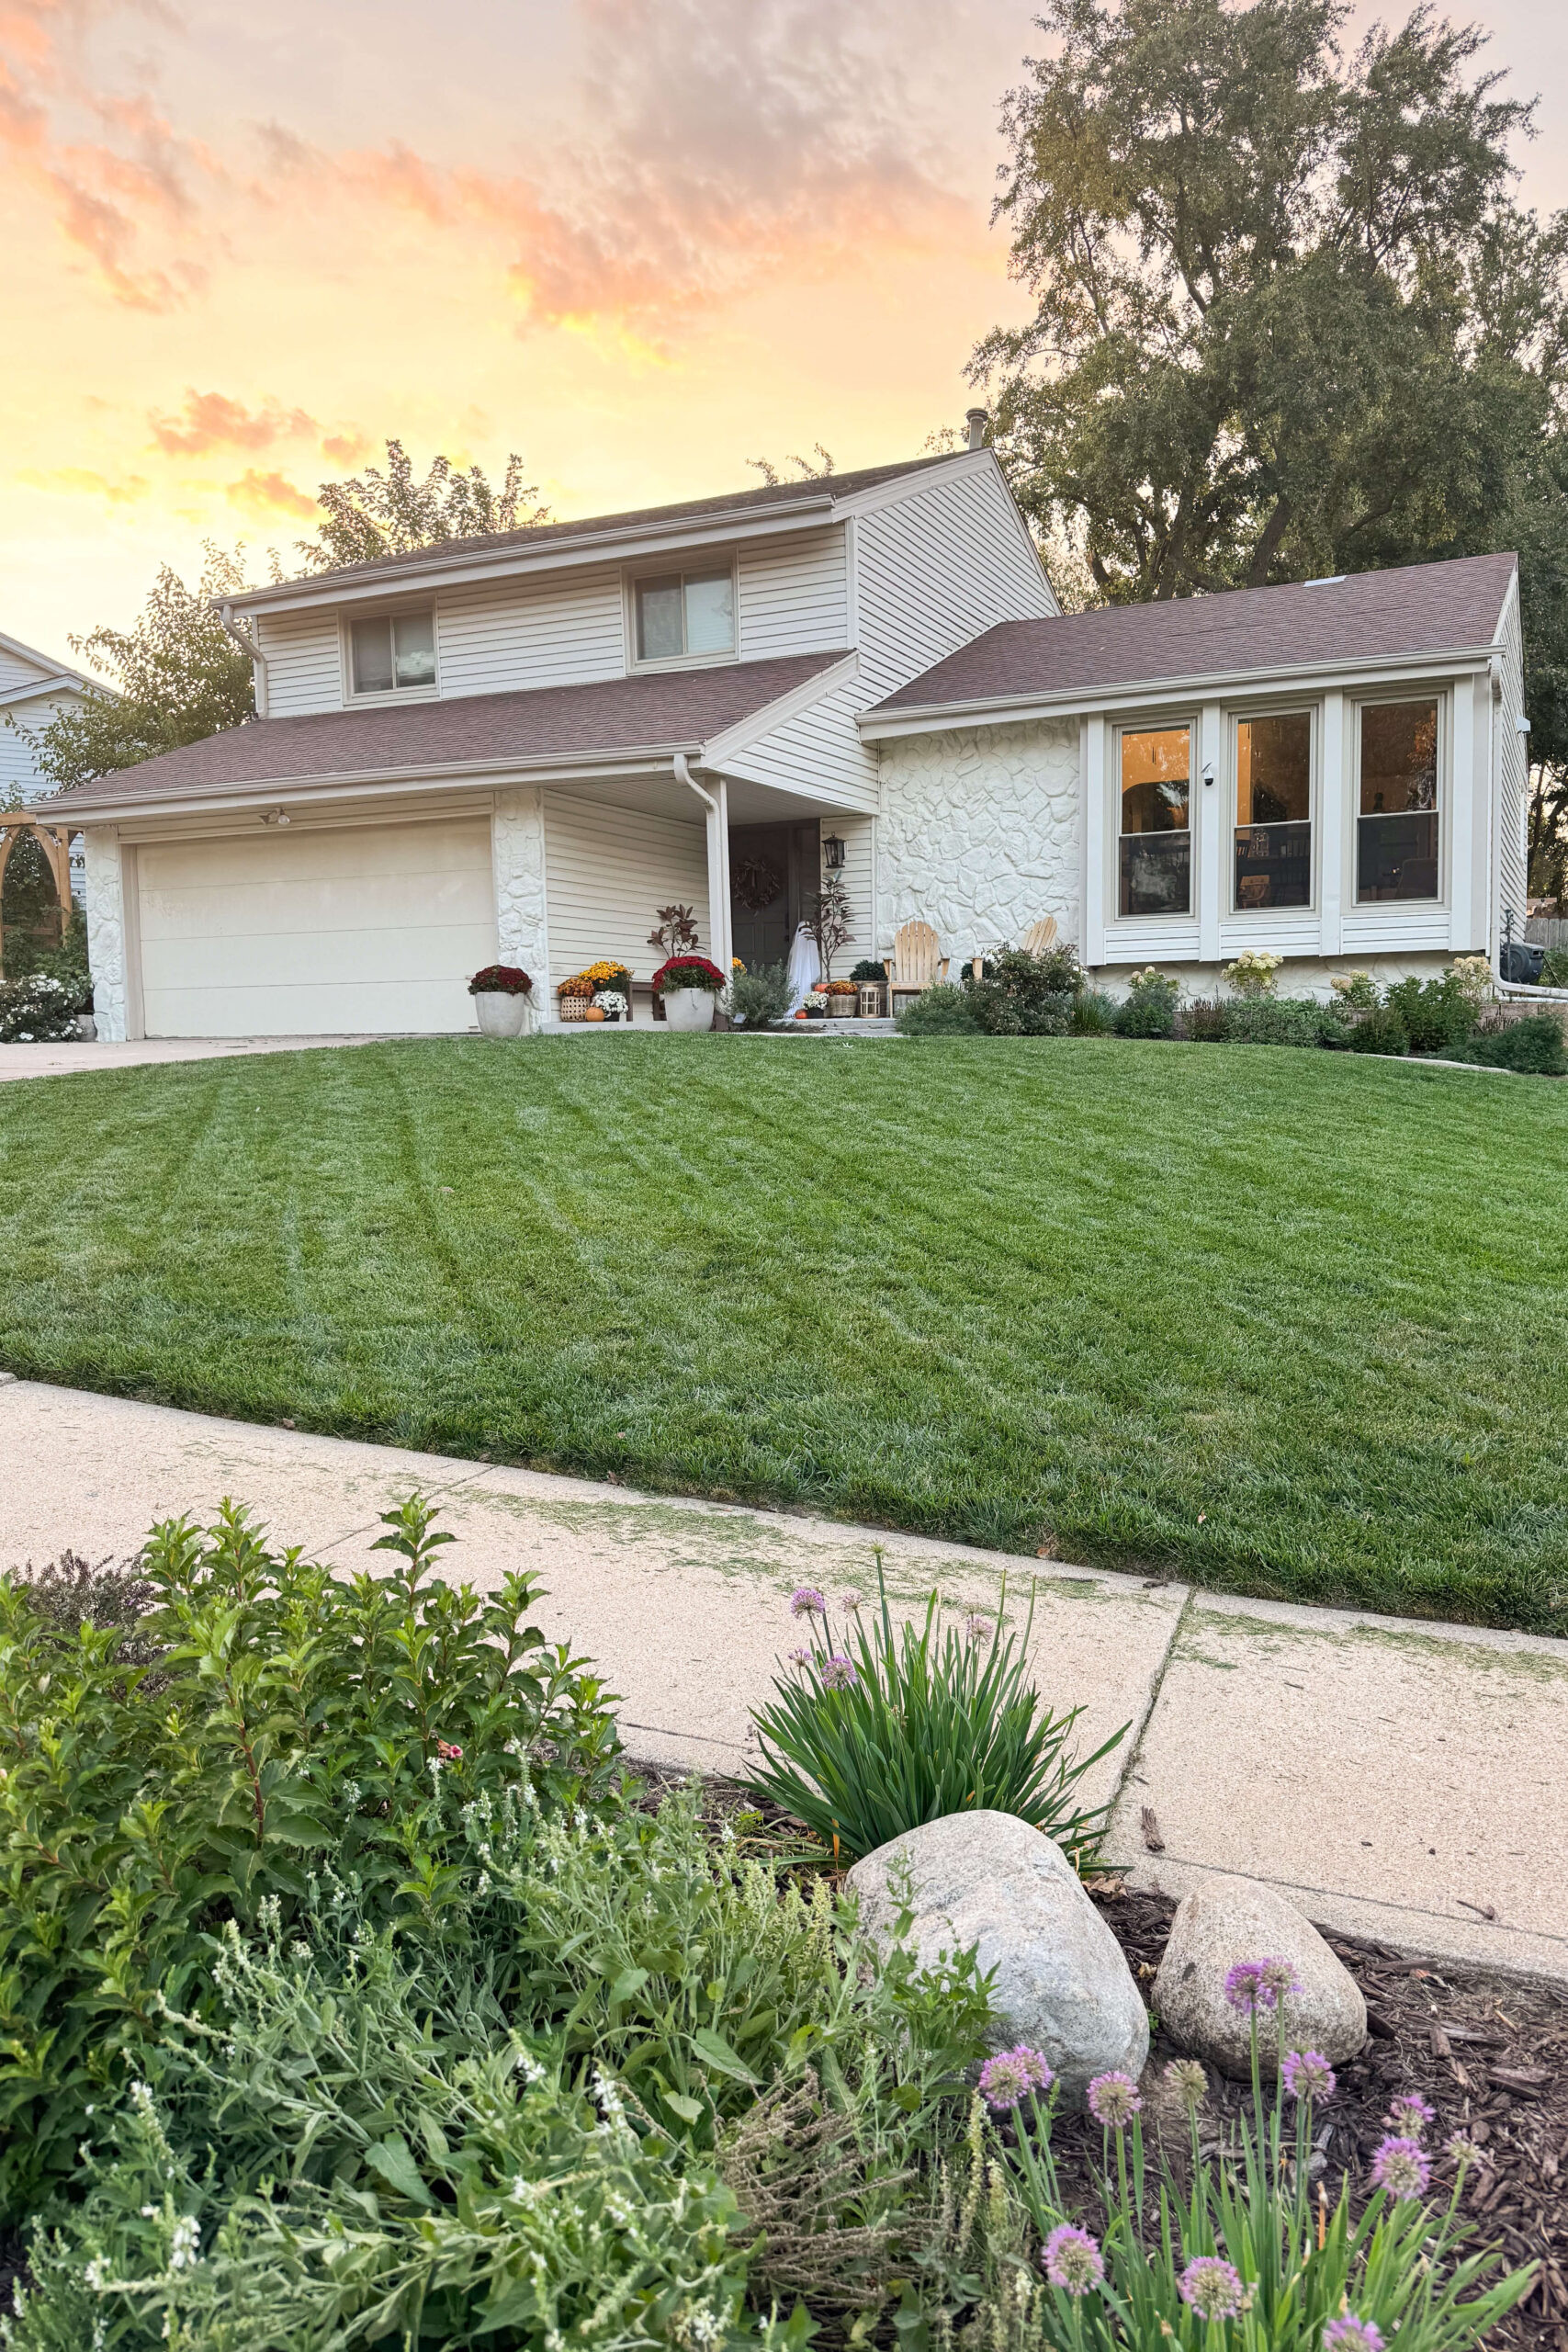
My house now has a fresh and updated look! The exterior rock siding, once an eyesore, is now a beautiful feature that adds character and modern appeal to my home. It no longer screams ‘dated 1970s’ but instead complements the overall aesthetic. I am so pleased I finally undertook this project!
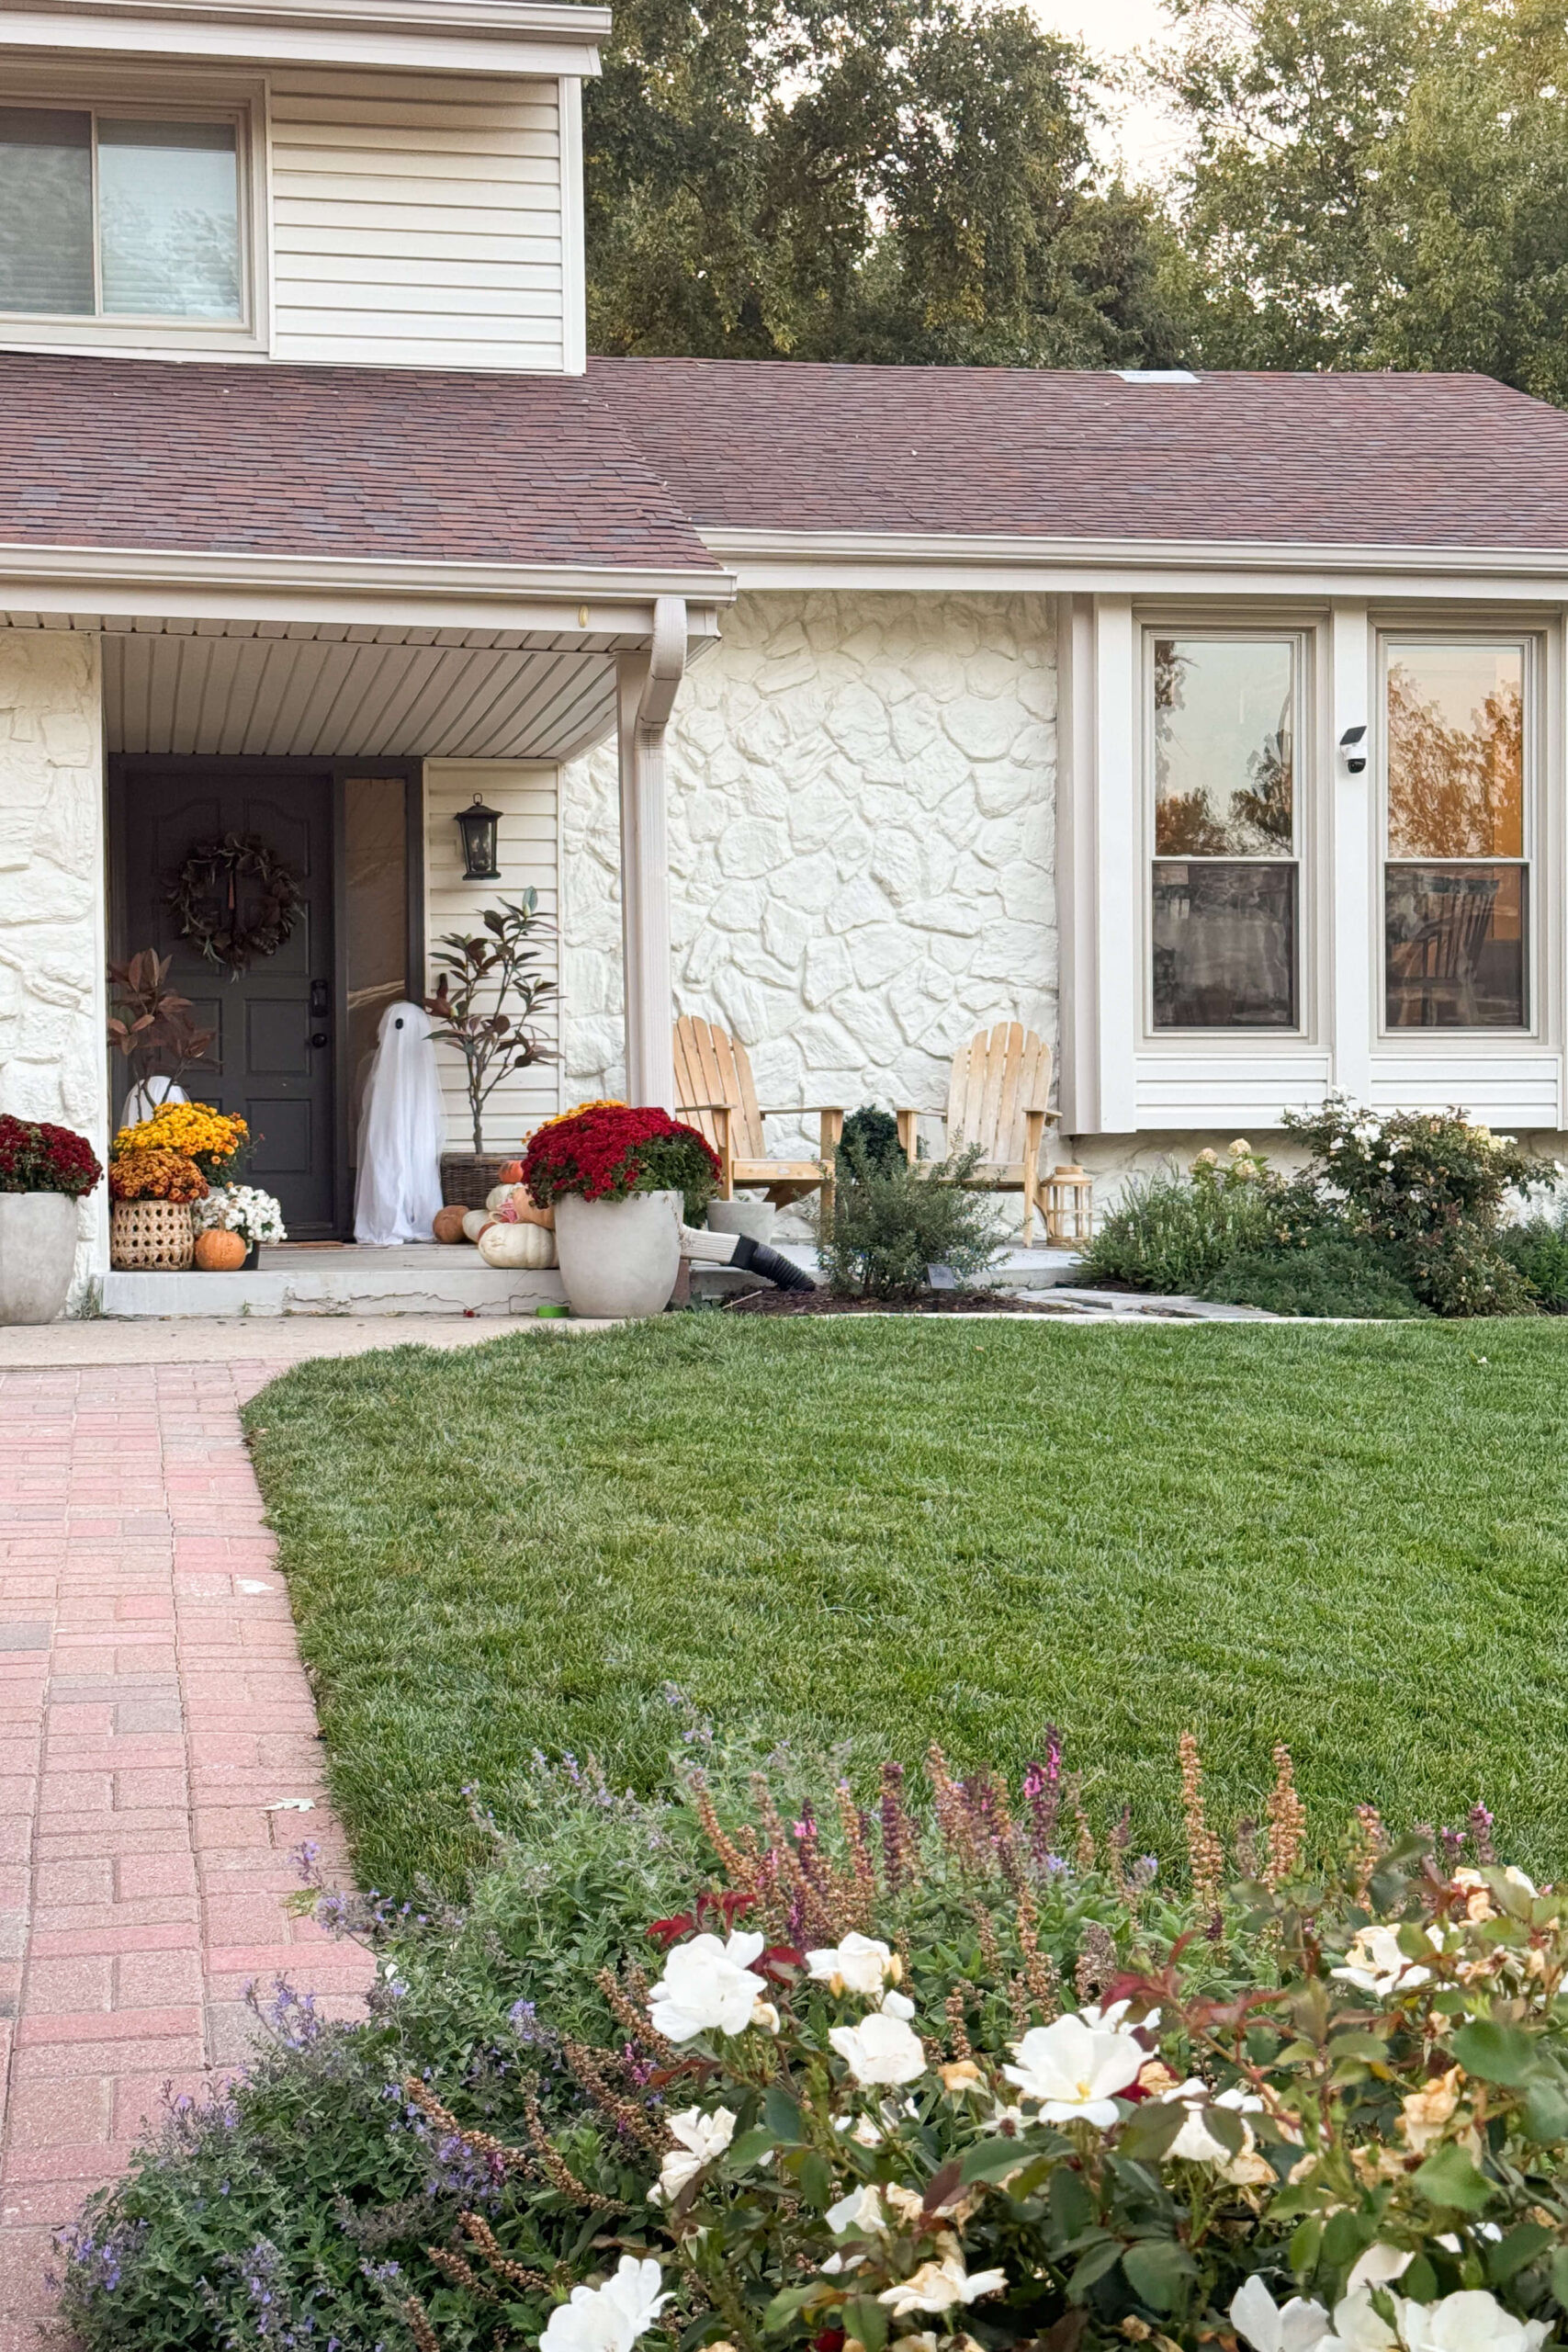 Full view of the gorgeous home exterior after the rock siding makeover.
Freshly updated exterior rock siding with a smooth, modern finish.
I have even more exciting plans for the front of my house! A new roof is scheduled, I’m building custom shutters, and the garage door is getting a facelift. I can’t wait to see it all come together! Follow my home exterior makeover journey on Instagram for more updates and DIY inspiration!
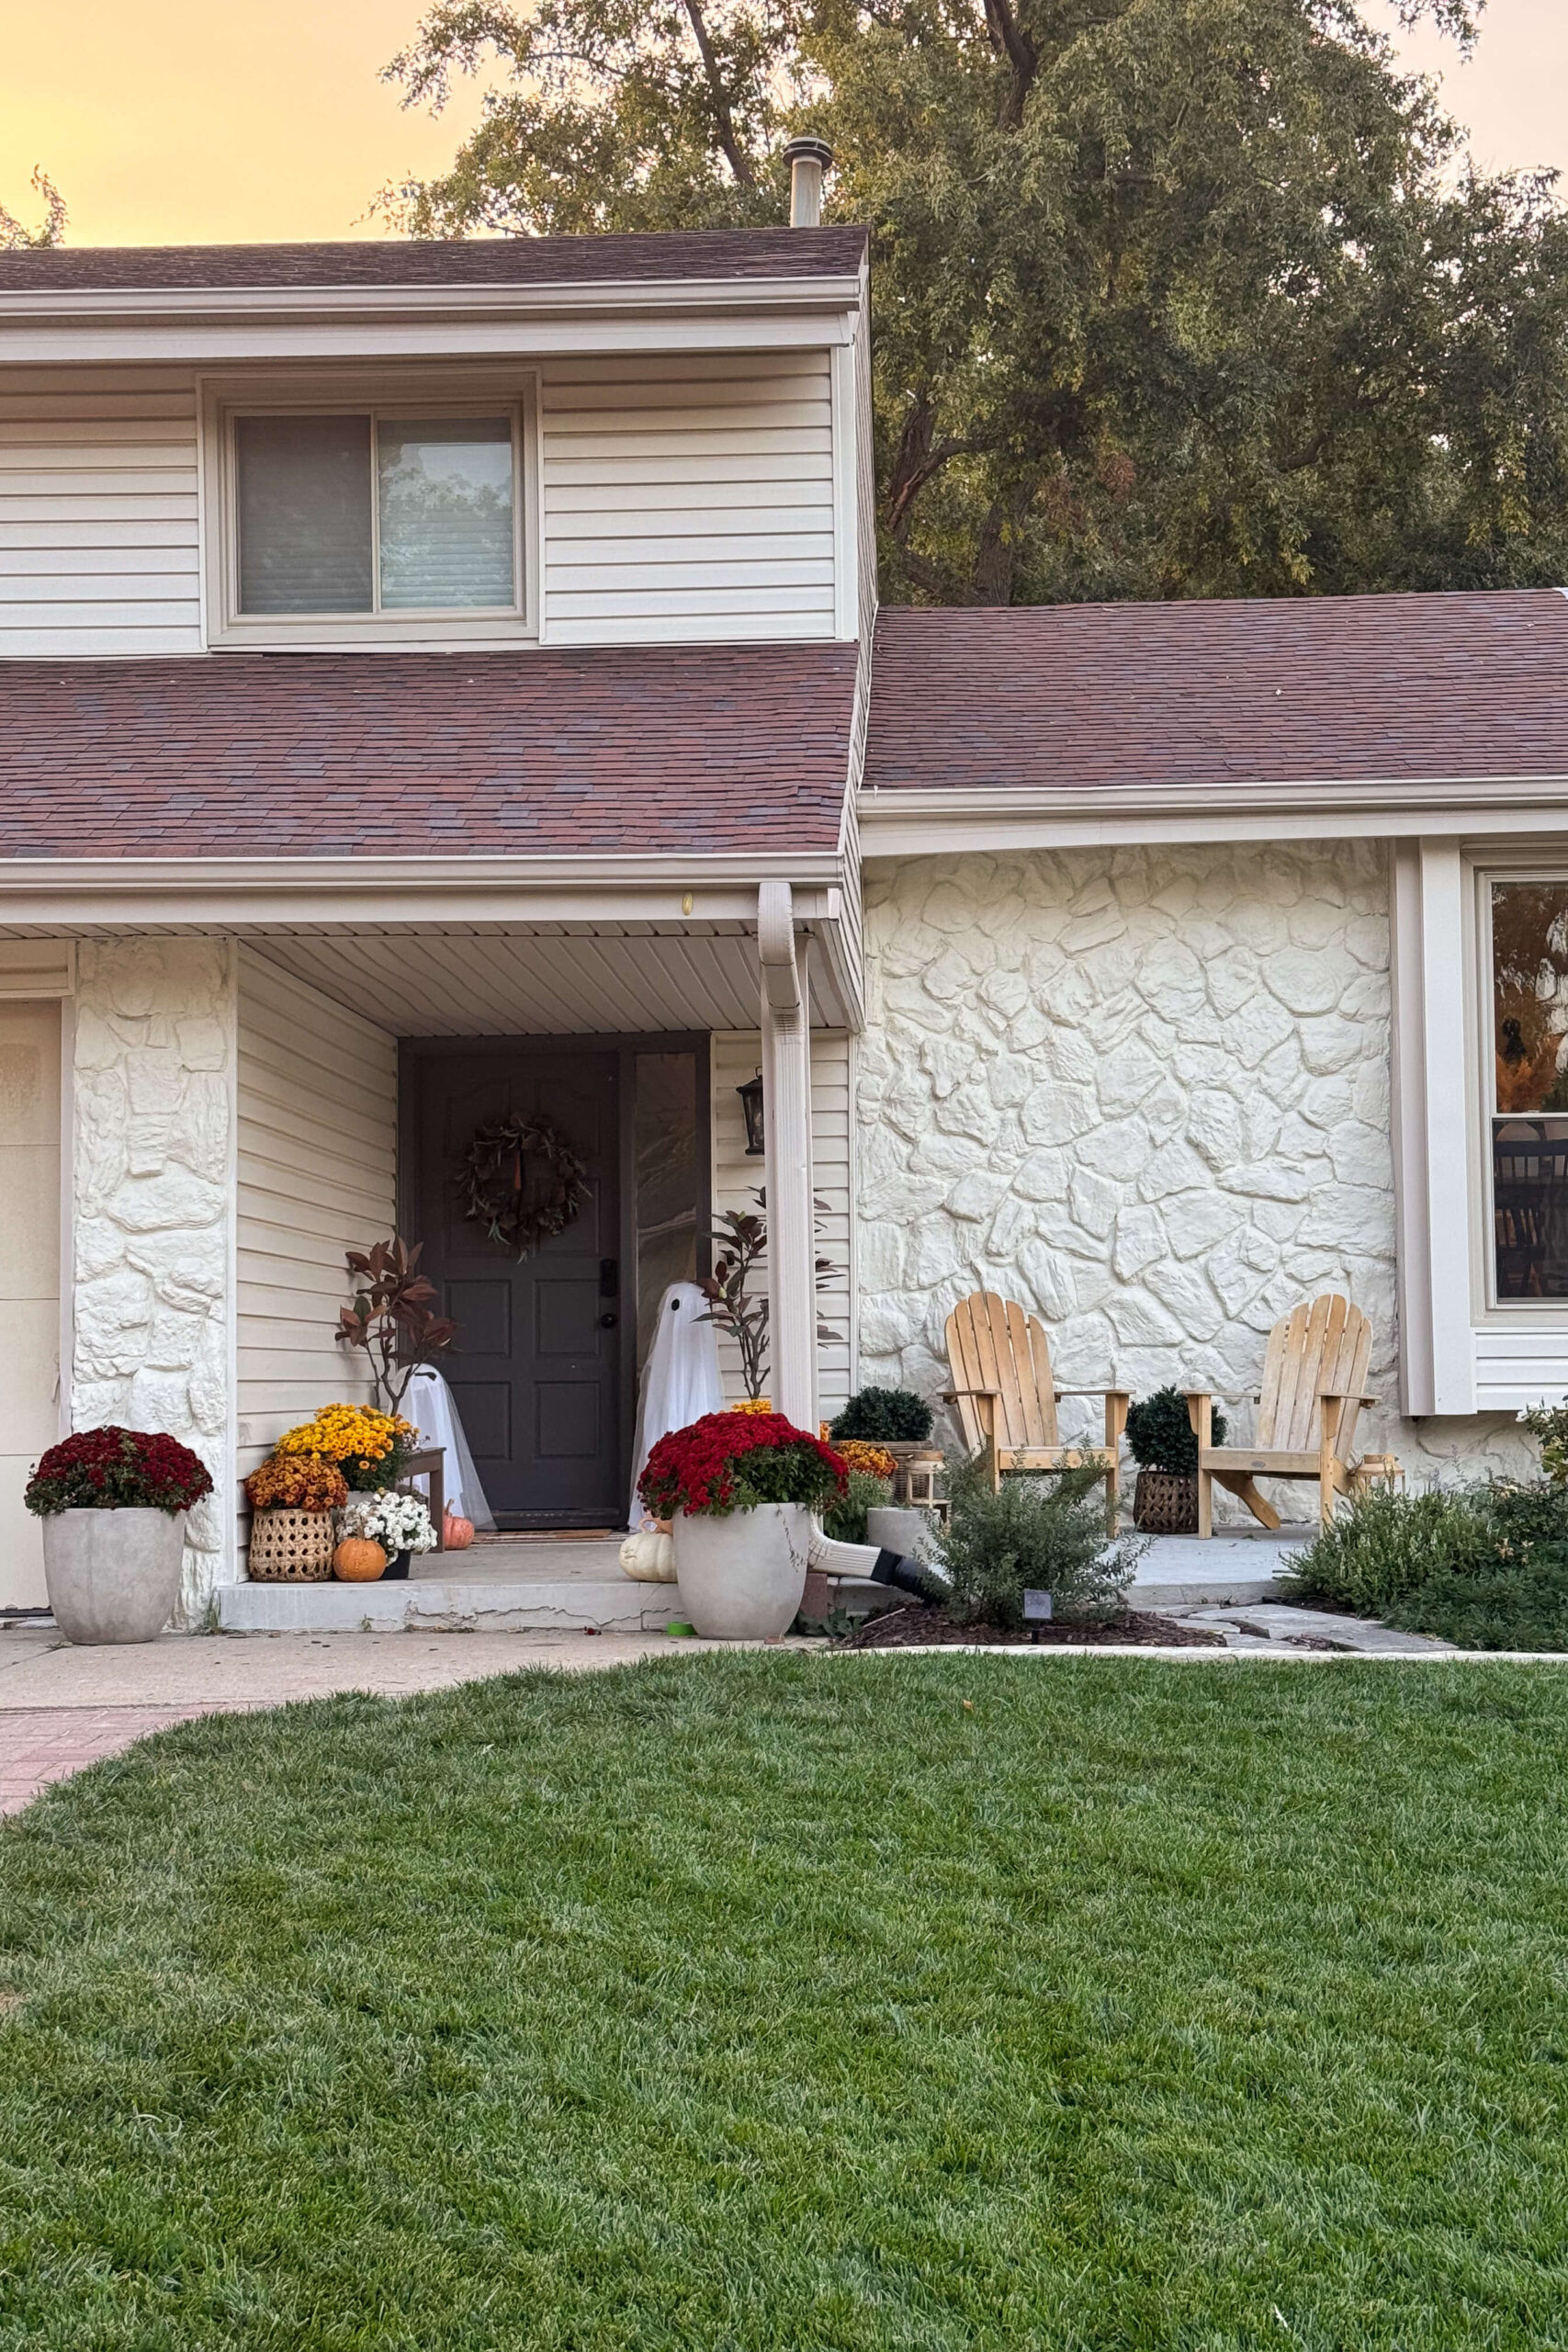 Final shot of the updated stone exterior showcasing the completed rock siding project.
Frequently Asked Questions about Updating Rock Siding
What supplies are needed to update old rock siding?
You’ll need exterior masonry paint, primer, rollers, brushes, and painter’s tape. A paint sprayer is also recommended for larger projects to ensure even coverage and save time.
How should I prepare rock siding before painting?
Thoroughly clean the rock siding to remove any dirt, debris, or loose particles. After cleaning, apply a masonry primer. Primer is essential as it helps the paint adhere properly to the rock surface and ensures long-lasting results.
Is paint durable on rock siding?
Yes, with the correct preparation, including a quality masonry primer and high-grade masonry paint, the paint can last for many years, even in outdoor conditions. Proper application and quality products are key to durability.
Can I easily change the color of rock siding?
Absolutely! Painting is a straightforward and cost-effective method to completely transform the appearance of rock siding without the need for removal or replacement. It’s a simple way to modernize your home’s exterior.