Rocking chairs bring a sense of timeless charm and relaxation to any home, especially in nurseries or cozy corners. However, the comfort of a rocking chair is significantly enhanced with a well-made cushion. If you’re looking to personalize your rocking chair and add a touch of comfort and style, creating your own Rocking Chair Cushions is a rewarding DIY project. This guide will walk you through the process of making upholstered rocking chair cushions, ensuring you avoid common pitfalls and achieve a professional-looking result.
We understand the desire to customize furniture to perfectly match your home decor. Like many DIY enthusiasts, we’ve learned valuable lessons through trial and error. In fact, our own rocking chair project has been updated multiple times! We’re excited to share our experience to help you create beautiful and comfortable rocking chair cushions while avoiding the mistakes we made along the way.
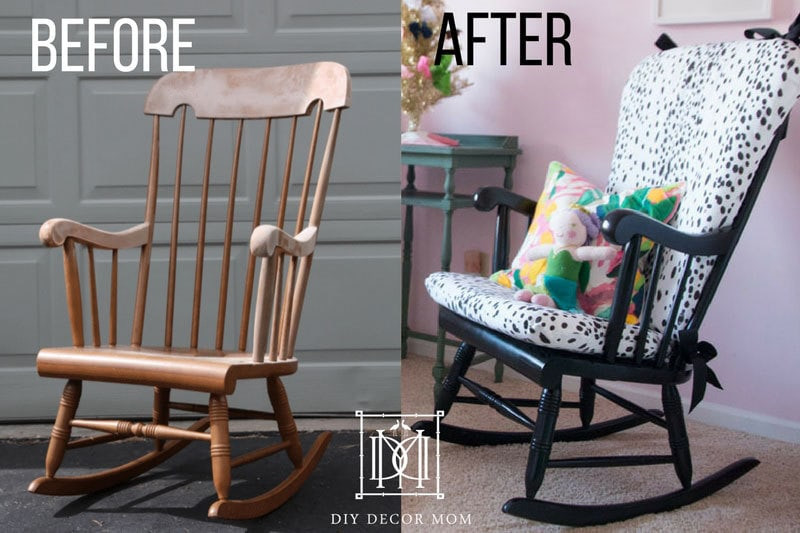 Before and after transformation of a rocking chair with a DIY upholstered cushion, highlighting the impact of new cushions
Why DIY Your Rocking Chair Cushions?
Creating your own rocking chair cushions offers numerous benefits:
- Customization: Choose fabrics that perfectly match your nursery decor, living room style, or personal taste. You have complete control over patterns, colors, and textures.
- Cost Savings: Professionally made custom cushions can be expensive. DIY cushions are a budget-friendly way to upgrade your rocking chair.
- Personal Satisfaction: There’s immense satisfaction in crafting something yourself and adding a personal touch to your home.
- Perfect Fit: Rocking chairs come in various shapes and sizes. DIY cushions ensure a perfect fit, maximizing comfort and aesthetics.
- Durability: By selecting the right materials, you can create cushions that are more durable and longer-lasting than store-bought options.
Materials You’ll Need for Your DIY Rocking Chair Cushions
To get started, gather these essential materials:
- Fabric: 3 yards of upholstery-weight fabric. This is crucial for durability. Avoid lightweight fabrics that can tear or stretch easily.
- Batting: Provides cushioning and a soft layer between the foam and fabric.
- 2-inch Foam: High-density foam is recommended for comfortable and supportive cushions.
- Grosgrain Ribbon (Optional): 1.5″ and narrower ribbons for decorative ties to secure the cushions to the chair.
- Spray Paint (Optional): If you want to refresh or change the color of your rocking chair frame.
- Sewing Supplies: Sewing machine, thread, upholstery shears, pins, needles.
- Measuring & Marking Tools: Yardstick, permanent marker, extra-large paper for templates.
- Cutting Tools: Chef’s knife or electric knife for foam cutting.
- Iron: For pressing fabric.
- Fabric sealant (Optional): To prevent ribbon ends from fraying.
 Close-up of an upholstered rocking chair cushion in a nursery setting, emphasizing the cozy and inviting look
Step-by-Step Guide to Creating Your Rocking Chair Cushion
Follow these detailed instructions to create your custom rocking chair cushions:
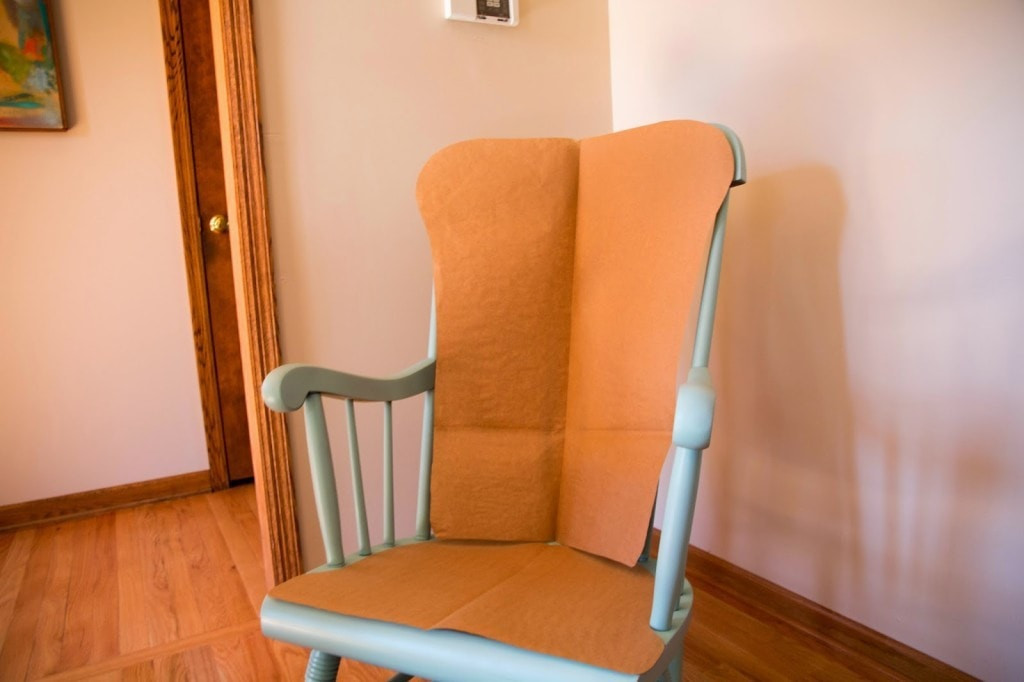
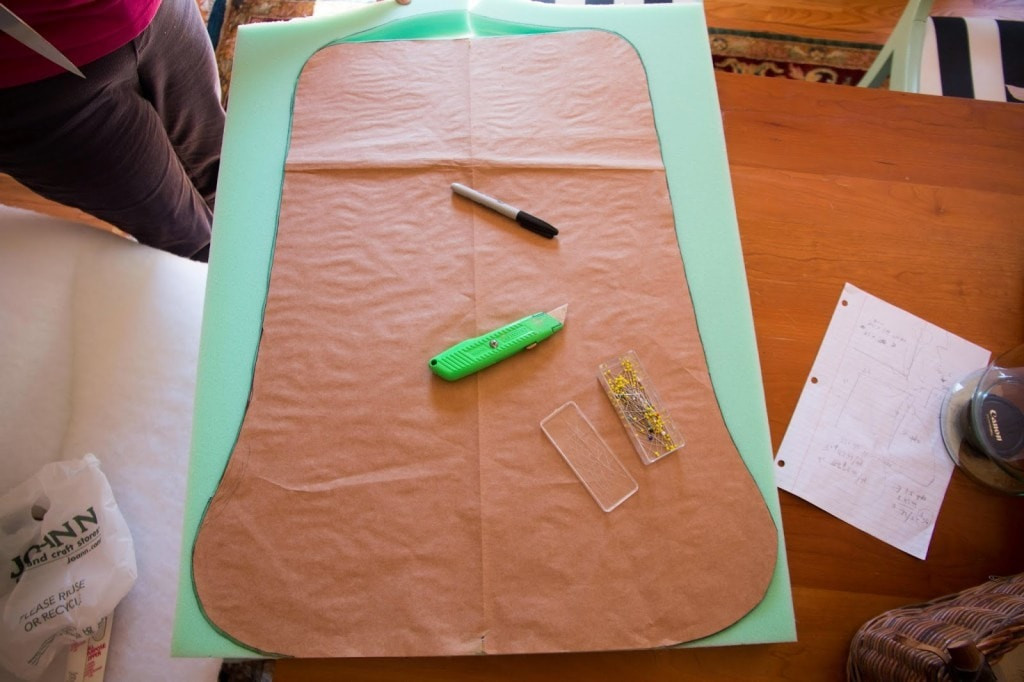
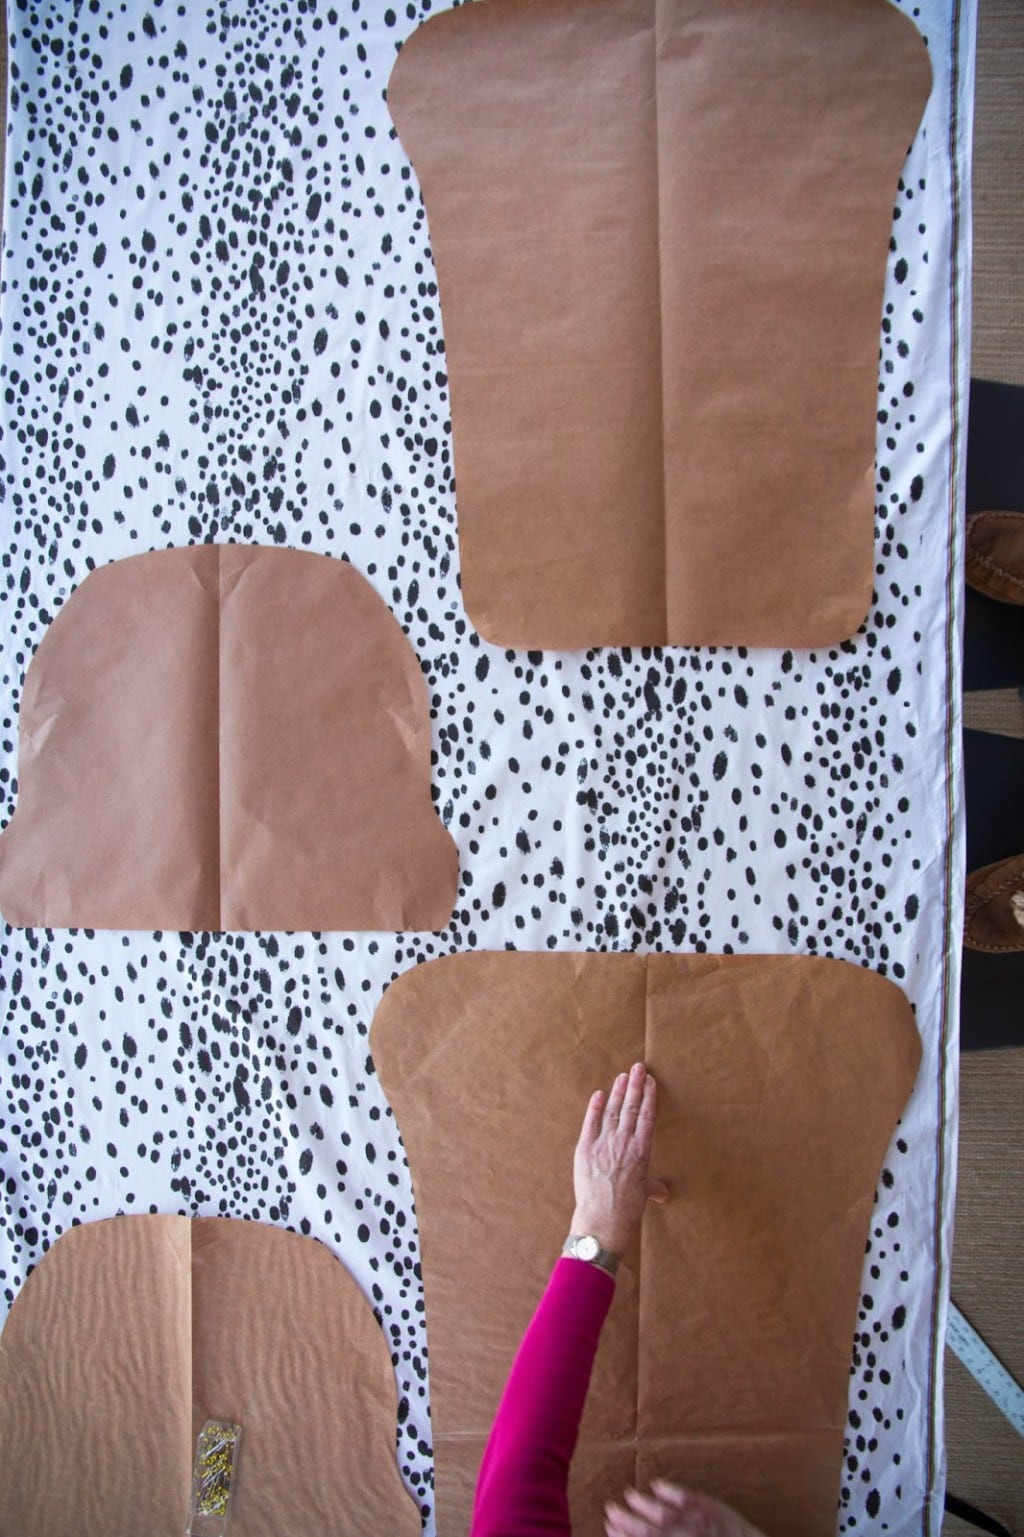
1. Creating Your Cushion Template:
- Lay out your extra-large paper.
- Position it on your rocking chair seat and back to determine the desired cushion size and shape.
- Trace the outline of the seat and back onto the paper, adding any curves or contours you want for your cushions.
- Cut out the paper templates. These will be your guides for cutting foam, batting, and fabric.
 DIY process of creating a template for an upholstered rocking chair cushion, showing paper and marker
 Close-up of a paper template being used to outline the shape for a rocking chair cushion, demonstrating template creation
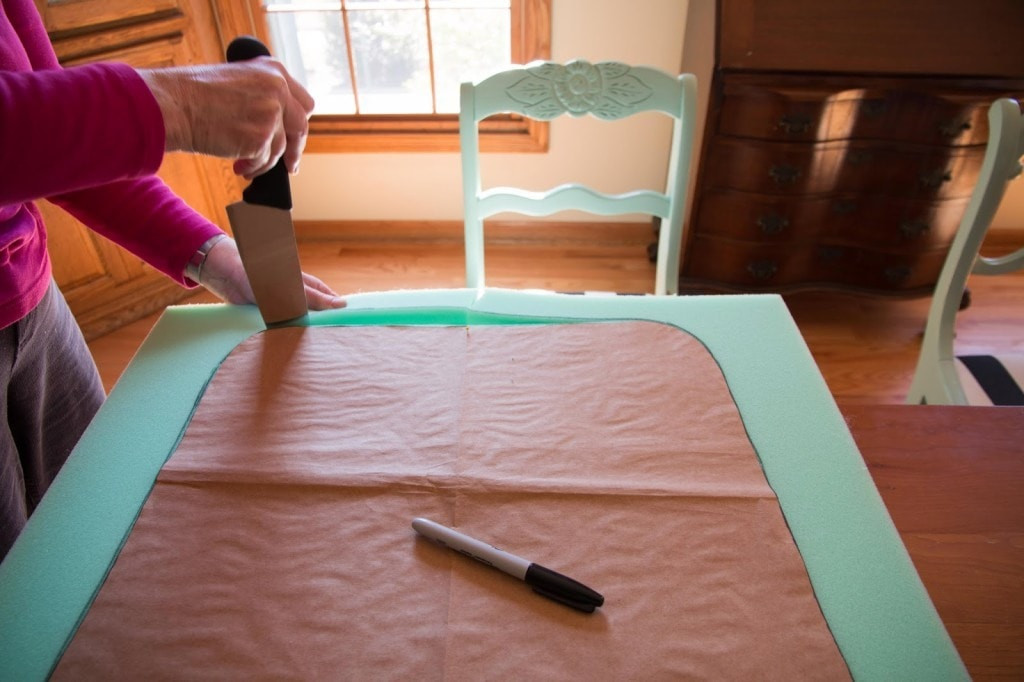
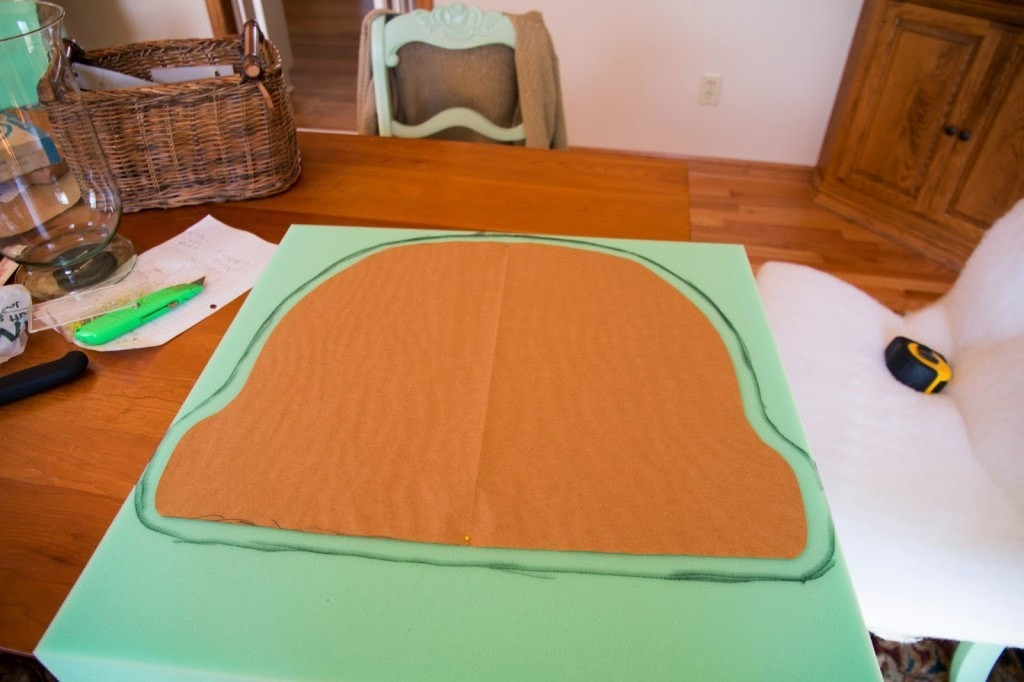
2. Cutting the Foam:
- Place your paper templates onto the 2-inch foam.
- Trace the template outlines onto the foam using a permanent marker.
- Carefully cut the foam along the traced lines using a chef’s knife or an electric knife. A slow, steady sawing motion works best.
 Cutting foam for DIY upholstered rocking chair cushions with a knife, illustrating the foam cutting process
 Close-up view of cutting foam for rocking chair cushions, showcasing the use of a knife for shaping the foam
 Hands shaping cut foam for a rocking chair cushion, emphasizing the shaping and preparation of foam inserts
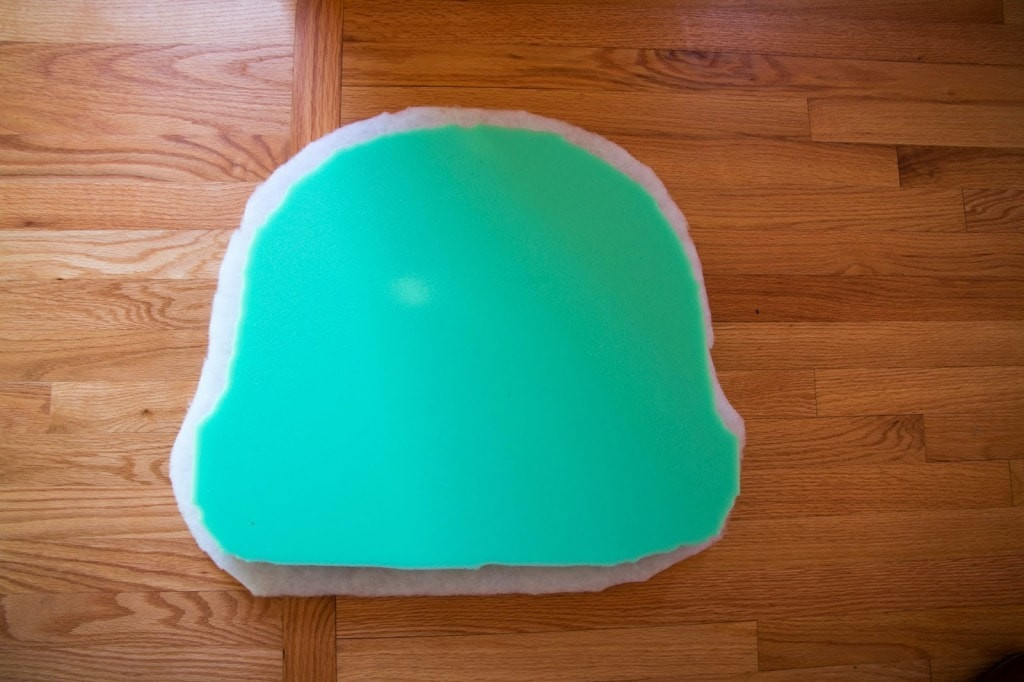
3. Covering Foam with Batting:
- Lay out the batting and place a foam cushion piece on top.
- Cut the batting, leaving an extra inch or two around the foam’s edge. This allows for full encasement of the foam.
- Wrap the batting tightly around the foam and hand-sew or use spray adhesive to secure the batting in place. This creates a smooth surface for the fabric cover.
 Wrapping foam inserts with batting for DIY rocking chair cushions, showing the batting layer being applied
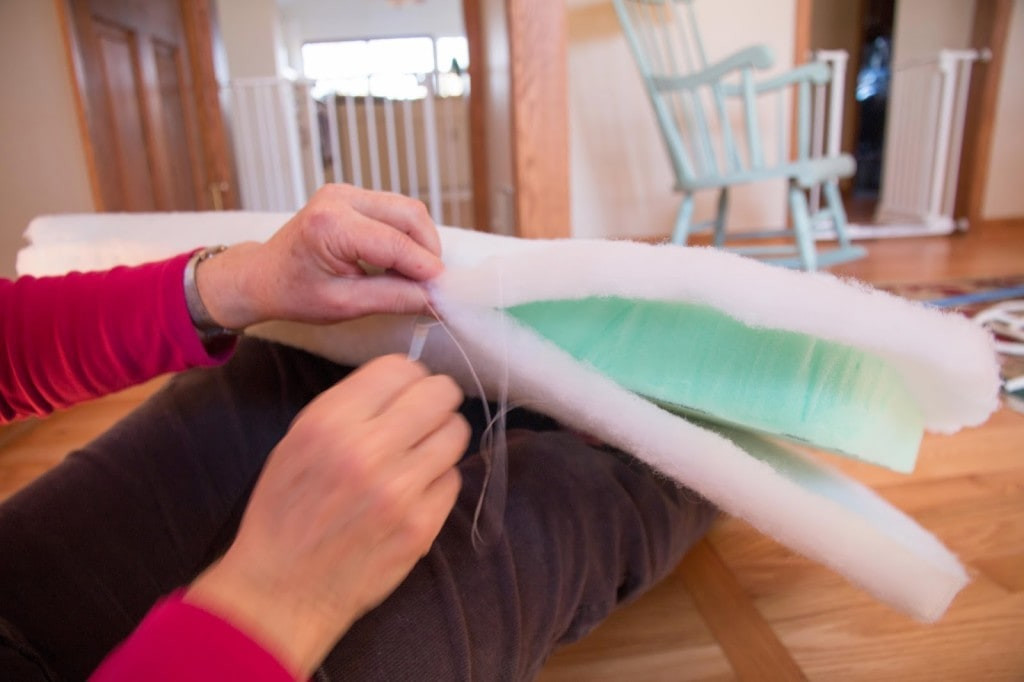 Securing batting around foam cushions for a rocking chair, demonstrating how to encase the foam with batting
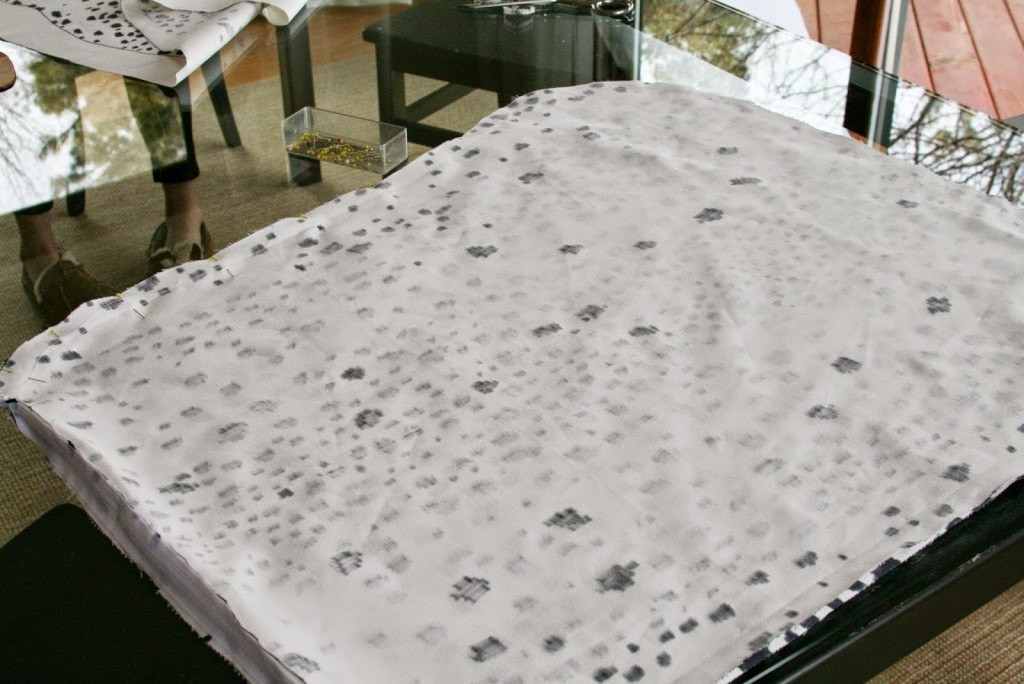
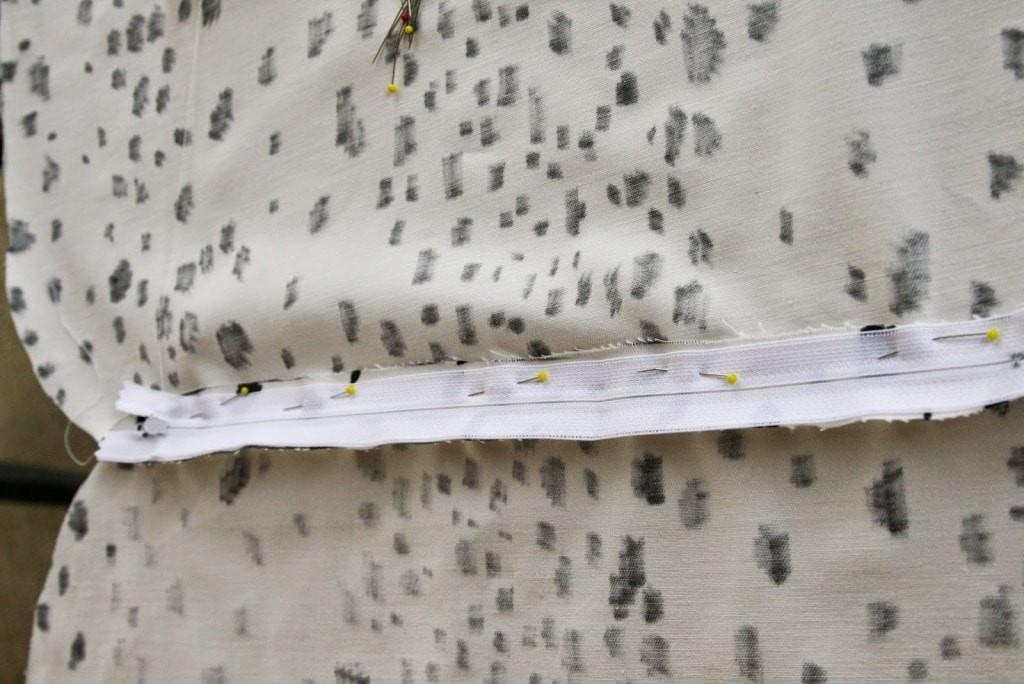
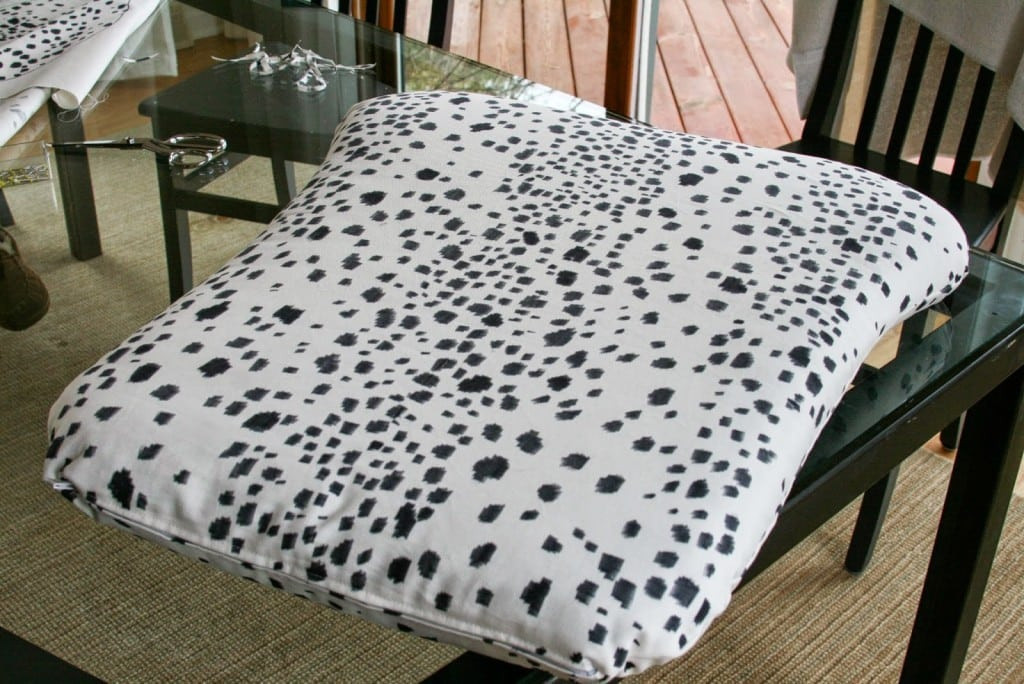
4. Constructing the Fabric Cover:
- Lay your chosen upholstery fabric flat, right side down.
- Place your paper templates onto the fabric. If using patterned fabric, consider pattern placement for a centered design.
- Trace around the templates, adding 1.5 inches extra around the entire outline for seam allowance.
- Cut out the fabric pieces. You’ll need two fabric pieces for each cushion (top and bottom).
- With right sides together, pin and sew the fabric pieces together, leaving one side open to insert the cushion.
- Consider adding a zipper to the back seam for easy removal and washing of the cushion cover.
- Turn the fabric cover right side out and press the seams.
 Fabric pieces being cut for DIY rocking chair cushions, showing fabric being prepared for sewing
 Sewing fabric pieces together for DIY rocking chair cushions, illustrating the sewing process for the cushion cover
 Close-up of sewing machine stitching fabric for rocking chair cushions, highlighting the sewing detail
 Inside-out fabric cover for a rocking chair cushion being sewn, demonstrating the construction of the cover
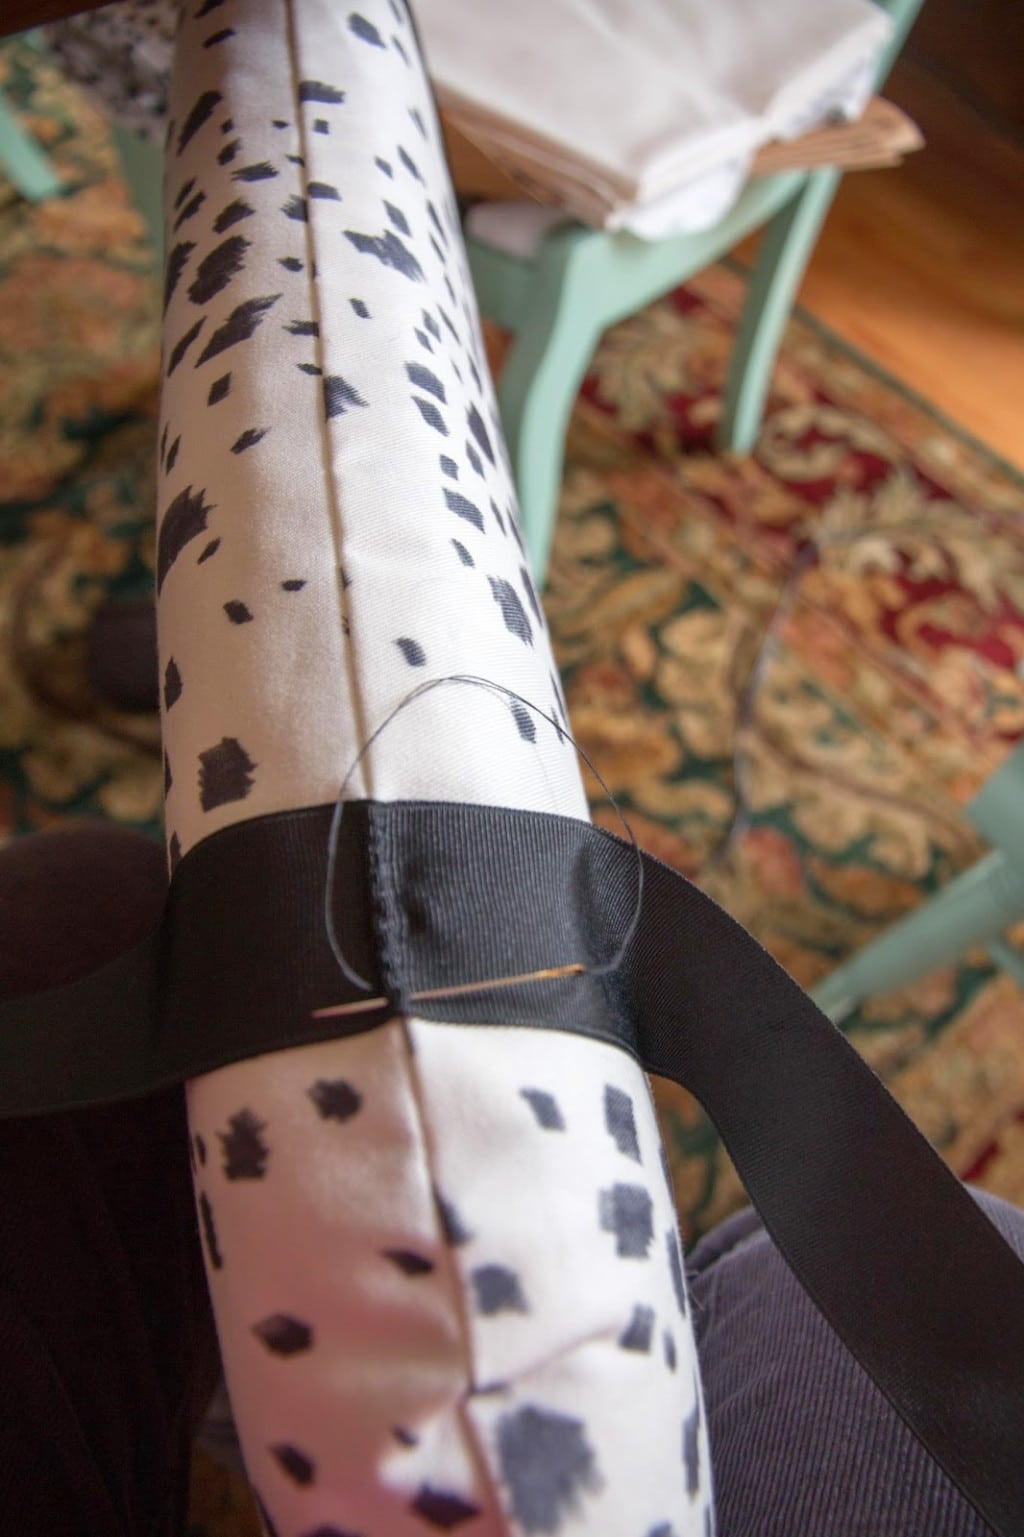
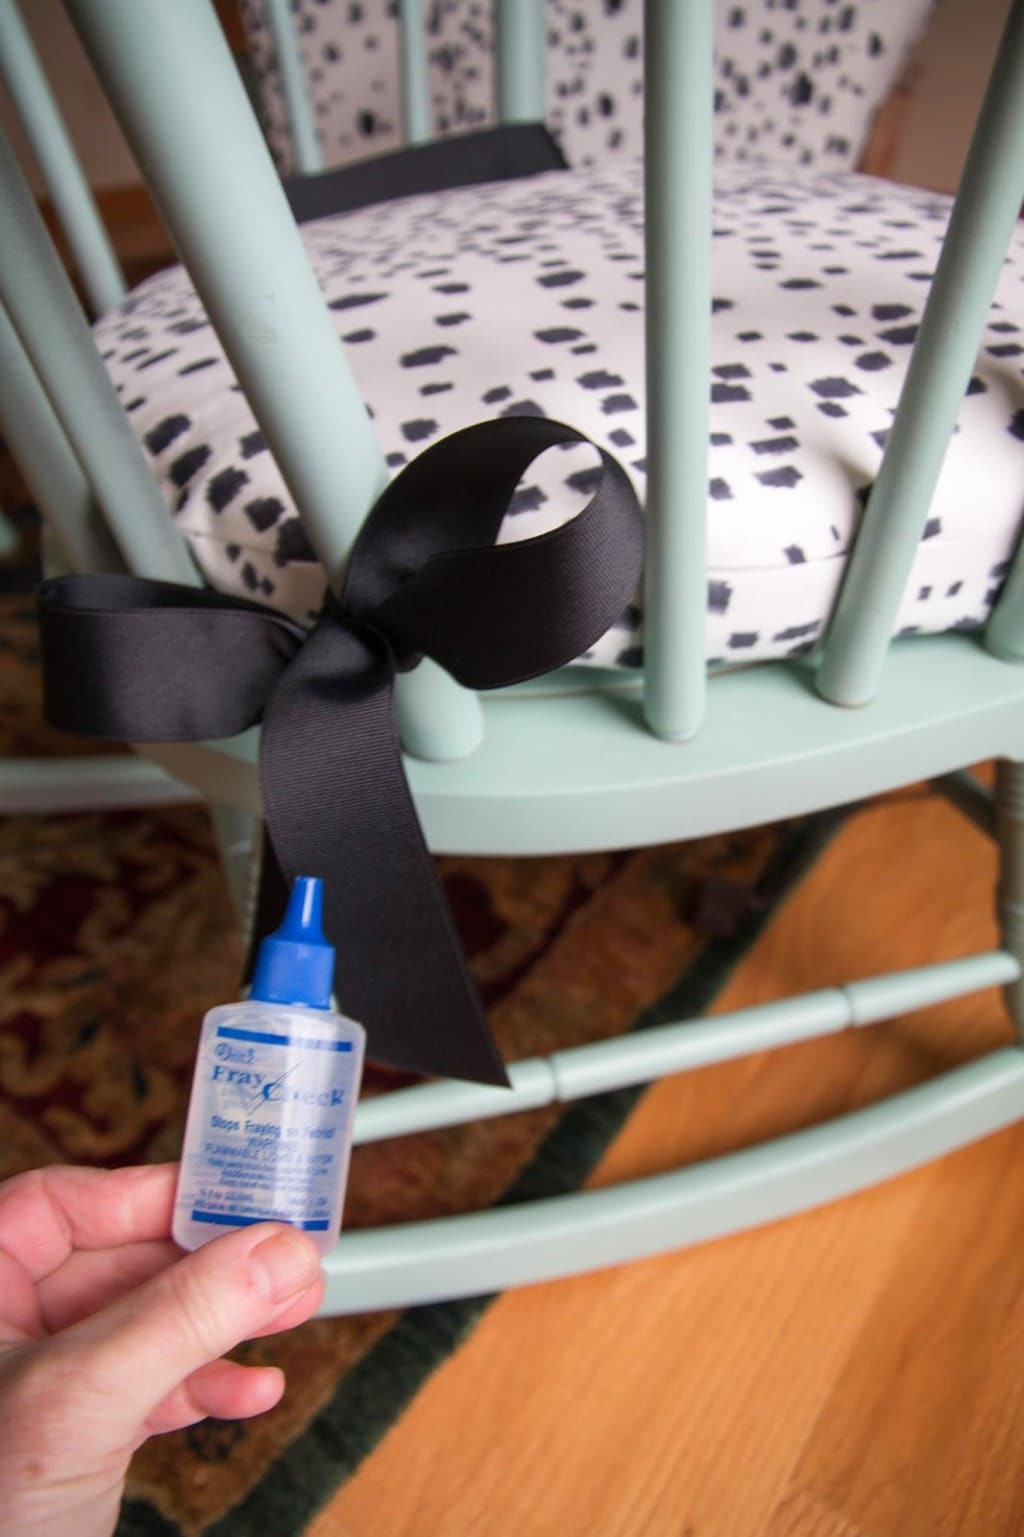
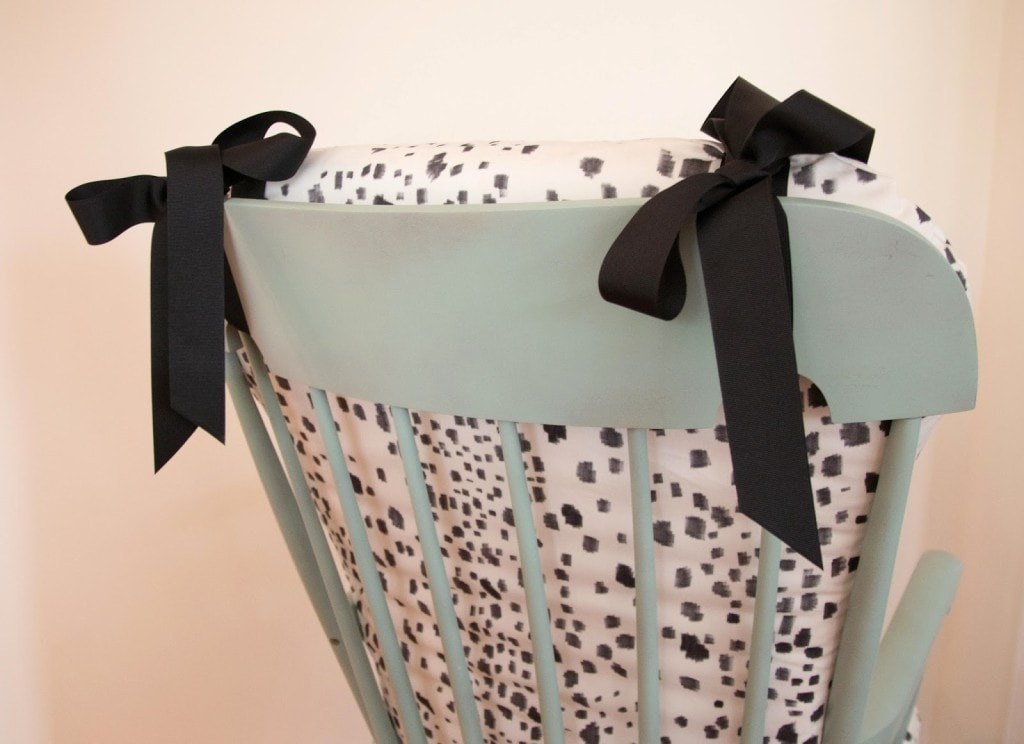
5. Finishing and Adding Ties (Optional):
- Insert the batting-covered foam cushion into the fabric cover.
- Hand-stitch or machine-stitch the opening closed.
- If desired, cut grosgrain ribbon into appropriate lengths for ties.
- Fold the raw ends of the ribbons and apply fabric sealant to prevent fraying.
- Sew the ribbons to the cushion corners or sides to secure the cushions to your rocking chair.
 Rocking chair cushion with ribbon ties being attached, showing the addition of ribbon for securing the cushion
 Rocking chair cushions with ribbon ties in place, demonstrating the finished look with ribbon ties
 Rocking chair cushions with decorative ribbon detail, showcasing the aesthetic detail of ribbon accents
 Completed DIY upholstered rocking chair with new cushions, presenting the final result of the DIY project
Frequently Asked Questions About Rocking Chair Cushions
What kind of fabric is best for rocking chair cushions?
Upholstery-weight fabric is essential. We initially made the mistake of using a lighter fabric, which wasn’t strong enough to withstand regular use and tore. Invest in durable upholstery or drapery fabric for long-lasting cushions.
Where can I buy fabric for recovering rocking chair cushions?
Online fabric stores like Fabric.com and Spoonflower offer a vast selection. Spoonflower is great for unique, custom-printed fabrics. You can also repurpose heavy-weight curtains like Ikea’s Merete curtains for a budget-friendly option.
Is making DIY rocking chair cushions actually cheaper?
Yes, significantly! This DIY project cost approximately $150 for materials, which is considerably less than purchasing a new upholstered rocking chair or having custom cushions professionally made. Custom cushion covers alone can easily cost $200-$300.
Are rocking chairs or gliders more comfortable?
Gliders are generally considered more comfortable due to their smoother, more consistent motion. However, rocking chairs offer a classic charm. To enhance the comfort of your rocking chair, consider adding a rocking chair stool or ottoman for leg support.
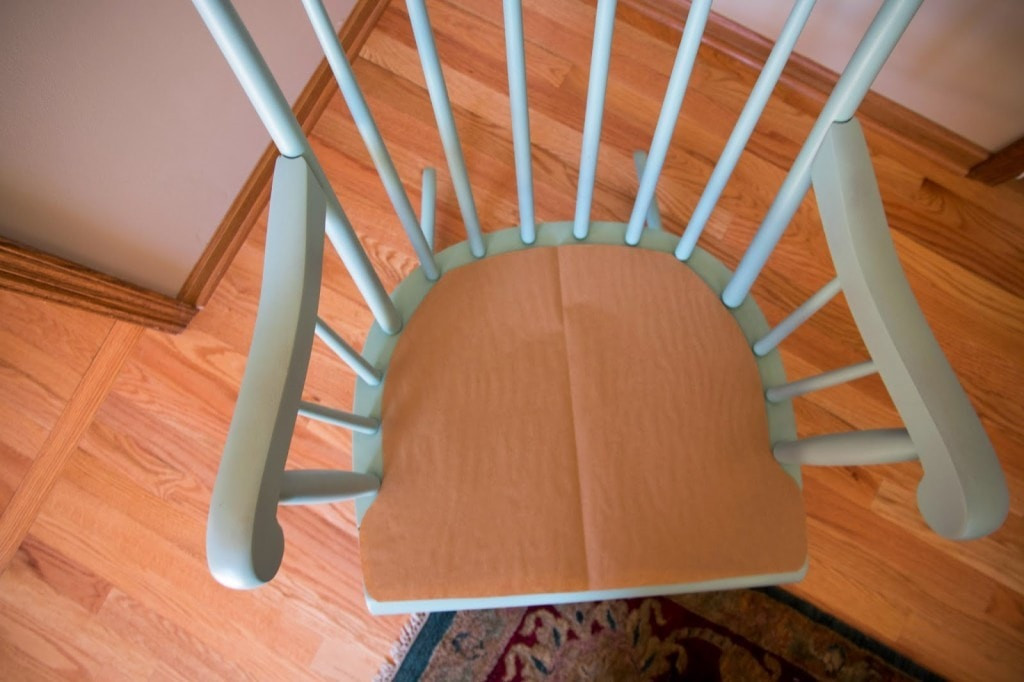
Why did the rocking chair in the photos change colors?
The rocking chair’s frame was originally brown wood. It was then spray-painted mint green, and later, black to match changing decor preferences. Spray paint is an easy way to update the look of a wooden rocking chair frame.
Can I wash my DIY rocking chair cushion covers?
Yes, if you’ve added zippers to your cushion covers, they can be easily removed and washed. Always check the fabric care instructions for your chosen material. Pre-washing and ironing your fabric before sewing is also recommended, especially with fabrics like those from Spoonflower, to prevent shrinkage and ensure colorfastness.
 Decorator cheat sheet graphic, potentially linking to related home decor resources
