Are you wondering if spider plants can thrive in a rock-based environment? Yes, spider plants can grow in rocks, offering a unique and aesthetically pleasing alternative to traditional soil-based planting, and at rockscapes.net, we will explore the possibilities and considerations for successfully growing spider plants in rocks.
Discover how to create a stunning rockscape for your spider plants and unlock a new dimension of botanical artistry with the expert advice from rockscapes.net. We will guide you through the types of rocks, suitable containers, and essential care tips to ensure your spider plants flourish in their new rocky home.
1. What Are The Benefits Of Growing Spider Plants In Rocks?
Growing spider plants in rocks presents several advantages. Firstly, it offers excellent drainage, preventing root rot, a common issue with spider plants. Secondly, it enhances aeration, promoting healthier root development. Finally, it adds a unique aesthetic appeal, transforming your plant display into a miniature rock garden.
- Improved Drainage: Rocks provide superior drainage compared to soil, preventing water from logging around the roots. This is crucial for spider plants, which are susceptible to root rot if overwatered. The spaces between the rocks allow excess water to escape quickly, maintaining a healthy moisture balance.
- Enhanced Aeration: The gaps between rocks also ensure better air circulation around the roots. This increased aeration promotes stronger root growth and prevents the roots from suffocating, leading to a healthier and more vibrant plant.
- Unique Aesthetic Appeal: Growing spider plants in rocks offers a visually stunning alternative to traditional potting methods. The combination of the plant’s lush foliage and the natural texture of the rocks creates a unique and eye-catching display, perfect for adding a touch of elegance to any space.
2. What Types Of Rocks Are Best For Spider Plants?
Selecting the right type of rocks is essential for the health and growth of your spider plant. Porous rocks like lava rocks, river rocks, and shale are excellent choices due to their ability to retain moisture without becoming waterlogged. Avoid using rocks that may contain harmful chemicals or alter the pH of the water.
| Rock Type | Benefits | Considerations |
|---|---|---|
| Lava Rocks | Highly porous, excellent drainage, lightweight | Can be dusty, rinse thoroughly before use |
| River Rocks | Smooth, aesthetically pleasing, readily available | Ensure they are clean and free from contaminants |
| Shale | Good water retention, provides essential minerals | Can break down over time, may need occasional replacement |
| Quartz | Inert, doesn’t affect pH, visually appealing | Doesn’t retain much moisture, may require more frequent watering |
| Granite | Durable, adds weight and stability | Can be expensive, may not be suitable for smaller containers |
| Decorative Pebbles | Adds color and texture, easy to find | Choose inert varieties, avoid painted or coated pebbles |
| AVOID | ||
| Limestone | May increase pH, potentially harming spider plants |
3. How To Prepare Rocks For Planting Spider Plants?
Before planting your spider plant in rocks, proper preparation is necessary to ensure a healthy environment. Thoroughly clean the rocks to remove any dirt, debris, or contaminants. Sterilize them by boiling or soaking in a diluted bleach solution to eliminate harmful bacteria or fungi.
-
Cleaning: Rinse the rocks under running water to remove loose dirt and debris. Use a scrub brush to dislodge any stubborn particles.
-
Sterilization:
- Boiling: Boil the rocks in water for 10-15 minutes to kill any bacteria or fungi.
- Bleach Solution: Soak the rocks in a diluted bleach solution (1 part bleach to 9 parts water) for 30 minutes, then rinse thoroughly.
-
Rinsing: Rinse the rocks multiple times with clean water until all traces of bleach or residue are removed.
-
Drying: Allow the rocks to air dry completely before using them for planting. This prevents excess moisture and potential fungal growth.
-
Inspection: Check the rocks for any signs of damage or contamination. Discard any rocks that appear to be crumbling or have unusual odors.
-
pH Testing: Test the pH of the rocks, especially if you’re using limestone or other alkaline rocks. Spider plants prefer a slightly acidic to neutral pH (6.0-7.0). Adjust the pH if necessary using appropriate soil amendments.
4. What Type Of Container Is Suitable For Spider Plants In Rocks?
Choosing the right container is crucial for the success of your rock-based spider plant setup. Select a container with adequate drainage holes to prevent water accumulation. Clear glass containers are popular for showcasing the layered rock and root structure, while ceramic or plastic pots can also be used.
- Terracotta Pots: These pots are porous, allowing for excellent air circulation and drainage. They are ideal for preventing overwatering, which is a common issue for spider plants. Terracotta pots also add a rustic aesthetic to your plant display.
- Glass Containers: Clear glass containers, such as bowls, vases, or terrariums, provide a visually appealing way to showcase the rock and root structure of your spider plant. They allow you to monitor the moisture level and root health easily. Ensure the container has adequate drainage or use a layered rock and charcoal base to prevent waterlogging.
- Plastic Pots: Lightweight and durable, plastic pots are a practical option for growing spider plants in rocks. Choose pots with multiple drainage holes to ensure proper water runoff. Plastic pots are also available in various colors and styles to match your decor.
- Ceramic Pots: Ceramic pots come in a wide range of designs and finishes, adding a touch of elegance to your plant display. They are less porous than terracotta but still provide adequate drainage if properly designed. Ensure the pot has drainage holes to prevent water accumulation.
- Self-Watering Containers: These containers feature a water reservoir at the bottom, allowing the plant to absorb moisture as needed. They are convenient for busy individuals and help prevent underwatering or overwatering. Make sure the rocks are arranged to allow the roots to access the water reservoir without being constantly submerged.
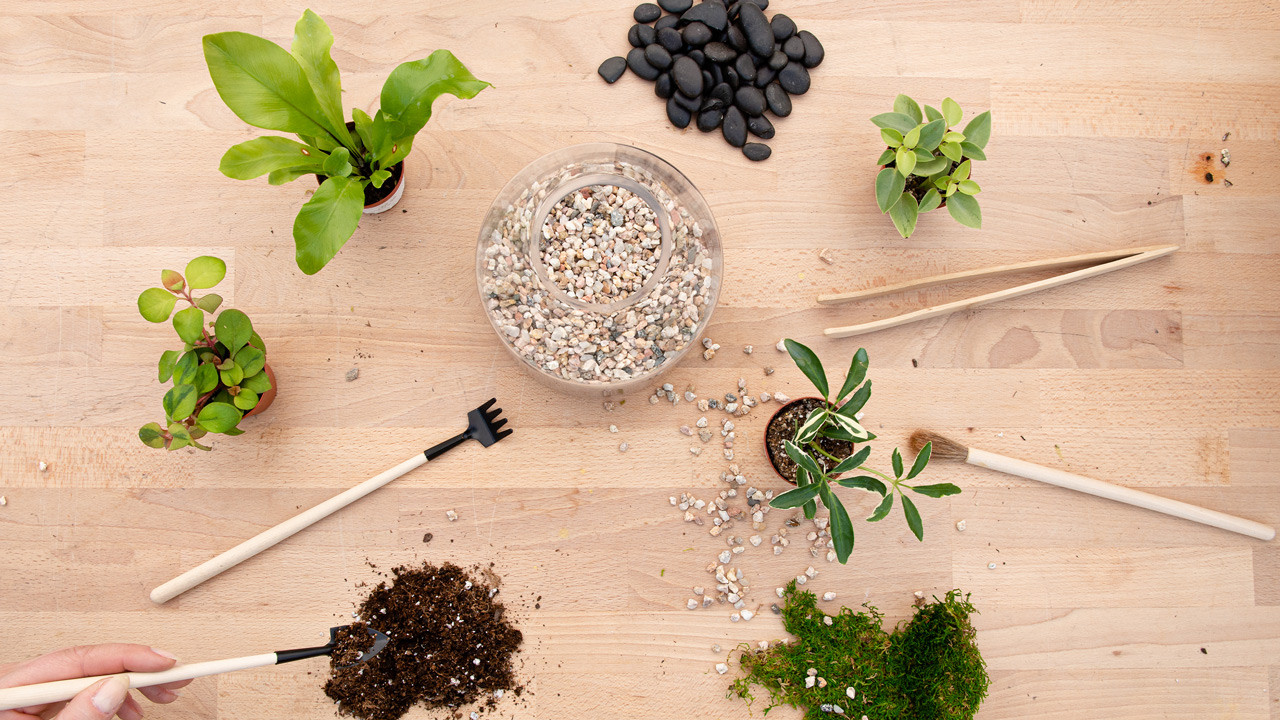
5. How To Plant Spider Plants In Rocks: A Step-By-Step Guide?
Planting a spider plant in rocks requires careful attention to detail to ensure the plant’s health and stability. Here’s a step-by-step guide:
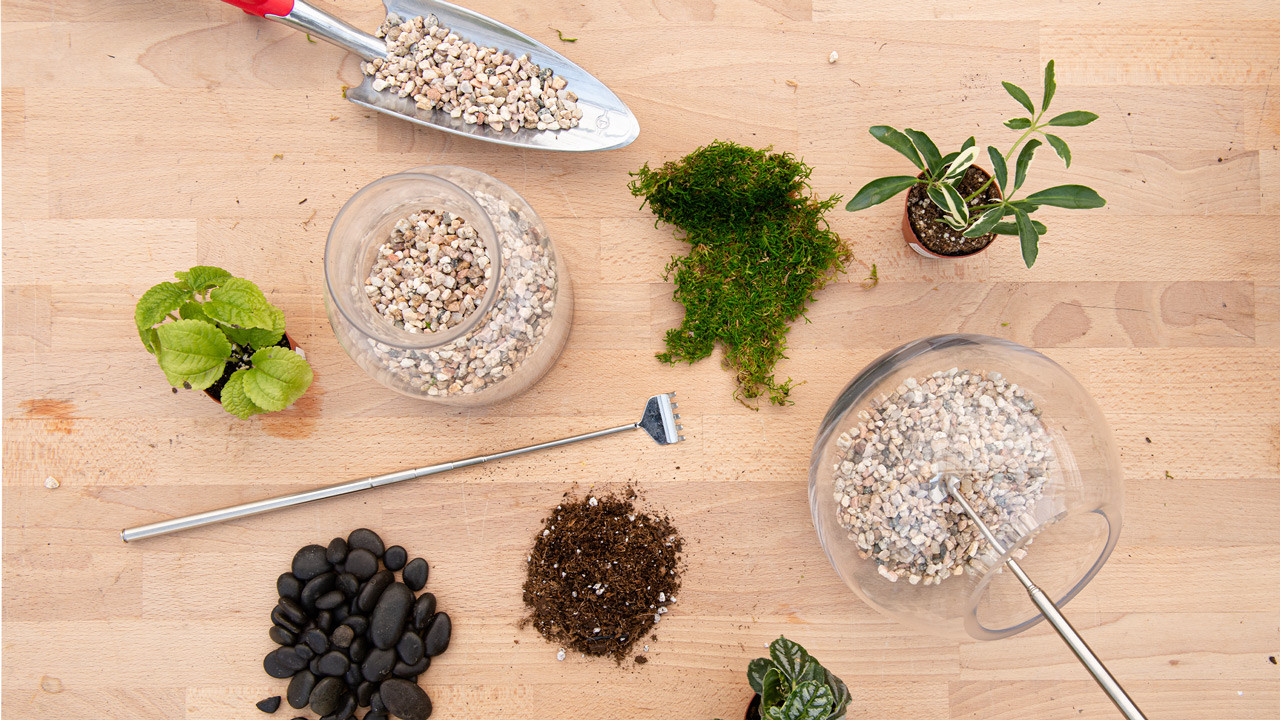
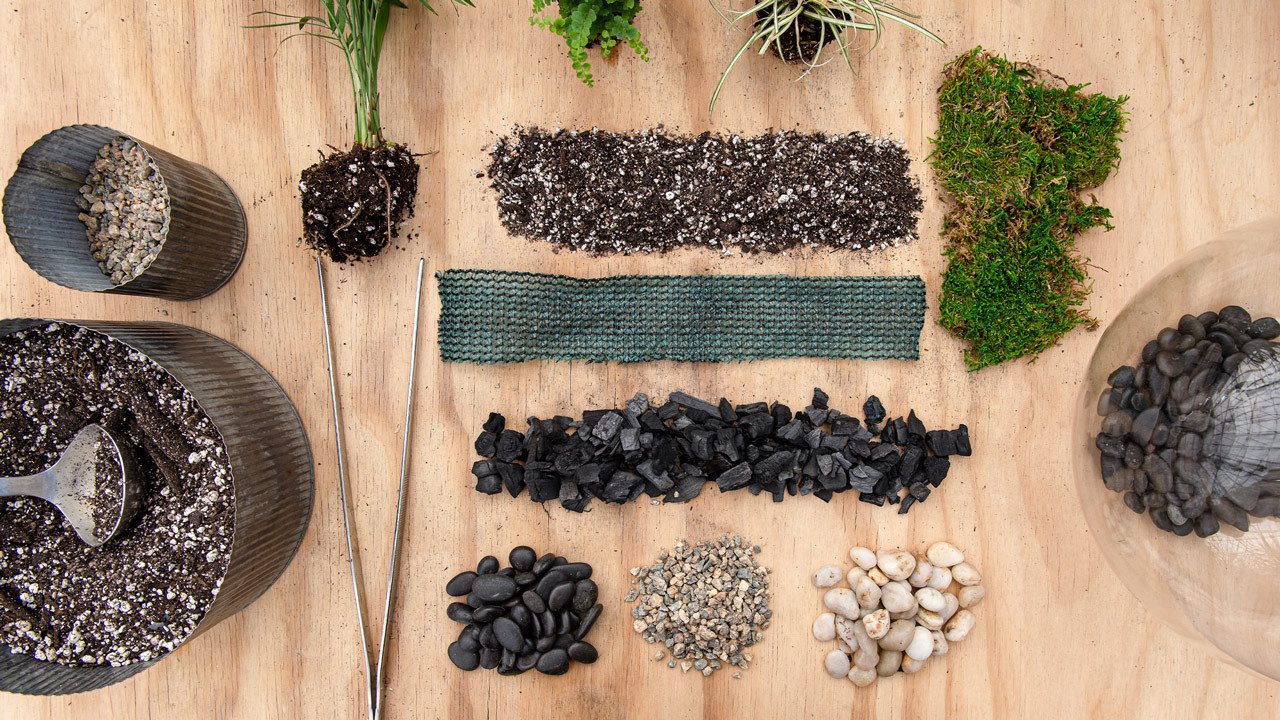
- Prepare the Container: Place a layer of larger rocks at the bottom of the container to facilitate drainage.
- Add a Layer of Charcoal: Sprinkle a layer of activated charcoal over the rocks to help filter the water and prevent odor.
- Introduce the Spider Plant: Gently remove the spider plant from its original pot and loosen the roots.
- Position the Plant: Place the spider plant in the container, spreading the roots over the rock layer.
- Fill with Rocks: Carefully fill the remaining space with smaller rocks, ensuring the roots are covered and the plant is stable.
- Water Thoroughly: Water the plant thoroughly until the water drains out of the bottom of the container.
- Add Decorative Elements: Add decorative elements such as moss, pebbles, or figurines to enhance the aesthetic appeal of your rockscape.
 Spider plant terrarium with rocks
6. What Is The Ideal Watering Schedule For Spider Plants In Rocks?
Watering spider plants in rocks requires a different approach compared to soil-based planting. Water thoroughly when the top layer of rocks feels dry to the touch. Ensure excess water drains out of the container to prevent root rot. Frequency depends on environmental factors, such as temperature and humidity, but generally, watering every 1-2 weeks is sufficient.
- Check the Moisture Level: Use your finger or a moisture meter to check the moisture level of the rocks. Water only when the top inch of the rocks feels dry to the touch.
- Water Thoroughly: When watering, saturate the rocks thoroughly until water drains out of the bottom of the container. This ensures that the roots receive adequate moisture.
- Allow for Drainage: Always allow excess water to drain completely. Do not let the plant sit in standing water, as this can lead to root rot.
- Adjust Watering Schedule: Adjust the watering schedule based on environmental factors such as temperature, humidity, and light exposure. Spider plants in rocks may require more frequent watering during hot, dry periods and less frequent watering during cooler, humid periods.
- Use Filtered Water: Use filtered or distilled water to avoid mineral buildup on the rocks. Tap water can contain chemicals and minerals that can harm the plant over time.
- Observe the Plant: Pay attention to the plant’s leaves and overall appearance. Wilting or yellowing leaves can indicate underwatering or overwatering. Adjust the watering schedule accordingly.
7. How To Provide Proper Lighting For Spider Plants In Rocks?
Spider plants thrive in bright, indirect light. Avoid direct sunlight, which can scorch the leaves. Place your rock-based spider plant near a window with filtered sunlight or under a grow light. Rotate the plant regularly to ensure even light exposure on all sides.
- Bright, Indirect Light: Spider plants prefer bright, indirect light. Place your rock-based spider plant near a window with filtered sunlight. Avoid direct sunlight, as it can scorch the leaves.
- East-Facing Windows: East-facing windows are ideal, as they provide gentle morning sunlight. If you have a south- or west-facing window, use sheer curtains to filter the light.
- Grow Lights: If you don’t have access to natural light, use a grow light to supplement the plant’s lighting needs. LED grow lights are energy-efficient and provide the right spectrum of light for spider plants.
- Rotate the Plant: Rotate the plant regularly to ensure even light exposure on all sides. This prevents the plant from leaning towards the light source and promotes balanced growth.
- Monitor Leaf Color: Monitor the color of the leaves. Pale or yellowing leaves can indicate insufficient light, while scorched or brown leaves can indicate too much direct sunlight. Adjust the plant’s location accordingly.
- Seasonal Adjustments: Adjust the plant’s lighting based on the season. During winter, when daylight hours are shorter, you may need to supplement with grow lights.
8. What Are The Fertilization Requirements For Spider Plants In Rocks?
Spider plants grown in rocks require regular fertilization to provide essential nutrients. Use a balanced liquid fertilizer diluted to half strength. Apply the fertilizer every 4-6 weeks during the growing season (spring and summer). Avoid over-fertilizing, which can lead to salt buildup and damage the roots.
- Balanced Liquid Fertilizer: Use a balanced liquid fertilizer with an N-P-K ratio of 10-10-10 or 20-20-20. Dilute the fertilizer to half strength to prevent over-fertilizing.
- Frequency: Fertilize every 4-6 weeks during the growing season (spring and summer). Reduce or stop fertilizing during the dormant season (fall and winter).
- Application: Apply the diluted fertilizer evenly over the rocks, ensuring it reaches the roots. Avoid pouring fertilizer directly onto the leaves.
- Flushing: Occasionally flush the rocks with plain water to remove any salt buildup from the fertilizer.
- Organic Options: Consider using organic fertilizers such as compost tea or seaweed extract. These provide essential nutrients and promote beneficial microbial activity in the rock environment.
- Monitor Plant Health: Monitor the plant’s health and growth. Pale or yellowing leaves can indicate nutrient deficiencies, while brown or burnt leaf tips can indicate over-fertilizing. Adjust the fertilization schedule accordingly.
9. How To Maintain The Rock Environment For Spider Plants?
Maintaining the rock environment is crucial for the long-term health of your spider plant. Regularly rinse the rocks to remove mineral buildup and debris. Replace the rocks every 1-2 years to prevent the accumulation of harmful substances. Monitor the pH level of the water and adjust as needed to maintain a slightly acidic to neutral environment.
- Rinse the Rocks: Regularly rinse the rocks with plain water to remove mineral buildup, algae, and debris. This helps maintain a clean and healthy environment for the plant.
- Replace the Rocks: Replace the rocks every 1-2 years to prevent the accumulation of harmful substances and maintain proper drainage.
- Monitor pH Level: Monitor the pH level of the water and rocks. Spider plants prefer a slightly acidic to neutral pH (6.0-7.0). Use a pH testing kit to check the pH level and adjust as needed using appropriate soil amendments.
- Remove Debris: Regularly remove any fallen leaves, dead roots, or other debris from the rock environment. This prevents the buildup of organic matter that can lead to fungal growth and other issues.
- Aerate the Rocks: Occasionally aerate the rocks by gently stirring them with a stick or fork. This helps improve air circulation and prevent compaction.
- Inspect for Pests: Regularly inspect the plant and rocks for signs of pests such as spider mites, aphids, or mealybugs. Treat any infestations promptly with appropriate insecticides or natural remedies.
 Spider plant in glass container with rocks
10. What Are Common Problems And Solutions For Spider Plants In Rocks?
Growing spider plants in rocks can present unique challenges. Root rot is a common issue caused by overwatering and poor drainage. Salt buildup from fertilizers can also harm the roots. Pest infestations such as spider mites and mealybugs can occur. Regularly inspect your plant and address any issues promptly to maintain its health.
- Root Rot: Overwatering and poor drainage can lead to root rot. Ensure the container has adequate drainage holes and allow the rocks to dry out slightly between waterings. Remove any affected roots and repot the plant in fresh rocks.
- Salt Buildup: Salt buildup from fertilizers can harm the roots. Regularly flush the rocks with plain water to remove excess salts. Reduce the frequency and concentration of fertilizer applications.
- Pest Infestations: Spider mites, aphids, and mealybugs can infest spider plants in rocks. Treat infestations promptly with appropriate insecticides or natural remedies such as neem oil or insecticidal soap.
- Nutrient Deficiencies: Pale or yellowing leaves can indicate nutrient deficiencies. Fertilize the plant regularly with a balanced liquid fertilizer diluted to half strength.
- Leaf Tip Burn: Brown or burnt leaf tips can be caused by dry air, fluoride in tap water, or over-fertilizing. Increase humidity around the plant, use filtered water, and reduce fertilizer applications.
- Algae Growth: Algae can grow on the rocks in humid environments. Rinse the rocks regularly and ensure adequate air circulation to prevent algae growth.
11. Can Spider Plant Babies (Spiderettes) Grow In Rocks?
Yes, spider plant babies, also known as spiderettes, can absolutely thrive in rocks. Spiderettes, or plantlets, are miniature versions of the parent plant that develop on the ends of long stems. Propagating spiderettes in rocks is a great way to expand your collection and create unique displays. Simply snip off a spiderette and plant it directly into a container filled with rocks, providing adequate moisture and care.
- Detaching the Spiderette: Once the spiderette has developed small roots, carefully detach it from the parent plant using clean scissors or pruning shears.
- Preparing the Rock Container: Fill a small container with thoroughly cleaned and sterilized rocks, ensuring there is good drainage at the bottom.
- Planting the Spiderette: Gently place the spiderette on top of the rocks, spreading its roots around the stones. Add more rocks around the roots to secure the plantlet in place.
- Watering: Water the spiderette thoroughly, allowing the water to drain through the rocks. Keep the rocks consistently moist but not waterlogged.
- Lighting: Place the container in a location with bright, indirect light. Avoid direct sunlight, which can scorch the delicate leaves of the spiderette.
- Humidity: Spiderettes thrive in high humidity. Increase humidity by misting the plant regularly or placing the container on a tray filled with water and pebbles.
- Fertilizing: Once the spiderette has established itself and started to grow, fertilize it every 4-6 weeks with a diluted, balanced liquid fertilizer.
- Monitoring: Monitor the spiderette regularly for signs of growth and any potential problems such as root rot or pest infestations. Adjust care as needed to ensure the plantlet thrives.
 Spider plant babies
12. How Do Rocks Affect The pH Level?
The type of rocks you use can significantly impact the pH level of the water and soil surrounding your spider plant’s roots. Limestone and marble, for example, are alkaline and can raise the pH, potentially harming spider plants, which prefer a slightly acidic to neutral pH (6.0-7.0). Quartz and granite, on the other hand, are inert and have little to no effect on pH.
-
Alkaline Rocks (Increase pH):
- Limestone: Composed primarily of calcium carbonate, limestone can significantly increase the pH of the surrounding environment.
- Marble: Similar to limestone, marble is also alkaline and can raise the pH.
- Dolomite: A type of sedimentary rock that contains calcium magnesium carbonate, dolomite can also increase the pH.
-
Inert Rocks (No Effect on pH):
- Quartz: An inert mineral composed of silicon dioxide, quartz does not affect the pH of the surrounding environment.
- Granite: A hard, igneous rock composed of quartz, feldspar, and mica, granite is also inert and does not alter the pH.
- Slate: A fine-grained, metamorphic rock derived from shale, slate is generally inert and has little to no effect on pH.
-
Acidic Rocks (Decrease pH):
- Shale: A fine-grained, sedimentary rock composed of clay minerals, shale can sometimes be slightly acidic and may lower the pH.
- Peat Moss: Although not a rock, peat moss is often used in rock gardens and can significantly lower the pH due to its acidic nature.
-
Testing and Adjusting pH:
- pH Testing Kit: Use a pH testing kit to measure the pH of the water and soil in your rock garden.
- Adjusting pH: If the pH is too high, use a soil acidifier such as sulfur or iron sulfate to lower it. If the pH is too low, use lime or wood ashes to raise it.
- Regular Monitoring: Regularly monitor the pH level and adjust as needed to maintain the ideal range for your spider plants.
13. Are There Any Specific Spider Plant Varieties That Thrive In Rocks?
While all spider plant varieties can technically grow in rocks, some may be more adaptable and thrive better than others. Chlorophytum comosum ‘Vittatum’ and ‘Variegatum’ are two popular varieties known for their resilience and adaptability. These varieties tend to be more tolerant of varying moisture levels and nutrient conditions, making them well-suited for rock-based environments.
-
Chlorophytum comosum ‘Vittatum’: This classic spider plant variety features green leaves with a central white stripe. It is known for its adaptability and ability to tolerate a wide range of growing conditions.
-
Chlorophytum comosum ‘Variegatum’: Similar to ‘Vittatum,’ this variety has green leaves with white margins. It is equally resilient and adaptable, making it a great choice for rock-based environments.
-
Chlorophytum comosum ‘Bonnie’: This curly spider plant variety features twisted leaves, adding a unique texture to your rock garden. It is slightly more sensitive to overwatering than other varieties but can still thrive in rocks with proper drainage.
-
Chlorophytum comosum ‘Fire Flash’: Also known as the Mandarin Spider Plant, this variety features bright orange petioles that add a pop of color to your rock display. It is relatively easy to grow and can adapt well to rock-based environments.
-
General Tips for Success:
- Good Drainage: Ensure excellent drainage in your rock container to prevent root rot.
- Proper Watering: Water thoroughly when the top layer of rocks feels dry to the touch, and allow excess water to drain completely.
- Adequate Lighting: Provide bright, indirect light to promote healthy growth and vibrant foliage.
- Regular Fertilizing: Fertilize every 4-6 weeks during the growing season with a diluted, balanced liquid fertilizer.
- Monitor pH: Monitor the pH level of the water and soil, and adjust as needed to maintain a slightly acidic to neutral range.
14. What Are Some Creative Rockscape Ideas For Spider Plants?
Creating a visually stunning rockscape for your spider plants can be a fun and rewarding project. Consider incorporating various rock sizes, shapes, and colors to add depth and interest to your display. Add driftwood, moss, and other natural elements to create a miniature ecosystem. Experiment with different container styles to find the perfect complement to your rockscape.
- Zen Garden: Create a minimalist rock garden with smooth river rocks, carefully raked gravel, and a single spider plant as the focal point. Add a small Buddha statue or other Zen-inspired elements to complete the look.
- Mountain Landscape: Arrange jagged lava rocks to mimic a mountain range, with the spider plant cascading down the slopes. Add small alpine plants or succulents to enhance the mountain theme.
- Desert Oasis: Use a mix of sand, gravel, and desert rocks to create a dry, arid landscape. Plant the spider plant in a terracotta pot and surround it with cacti, succulents, and other drought-tolerant plants.
- Waterfall Feature: Incorporate a small water pump and tubing to create a miniature waterfall cascading over the rocks. Plant the spider plant near the waterfall to take advantage of the increased humidity.
- Fairy Garden: Create a whimsical fairy garden with small pebbles, moss, and miniature figurines. Plant the spider plant as a canopy for the fairies and add tiny houses, bridges, and other fairy-themed elements.
- Terrarium: Build a closed or semi-open terrarium with layers of rocks, charcoal, and potting mix. Plant the spider plant in the terrarium and add moss, ferns, and other moisture-loving plants.
 Spider plant growing in rocks in a home interior
15. How Does Rockscapes.net Help With Growing Spider Plants In Rocks?
Rockscapes.net is your ultimate resource for creating stunning rock-based environments for your spider plants. We provide expert advice, high-quality rocks, and innovative design ideas to help you create a unique and thriving display. Whether you’re a beginner or an experienced plant enthusiast, Rockscapes.net has everything you need to elevate your spider plant game.
At Rockscapes.net, we understand the unique challenges and opportunities that come with growing spider plants in rocks. Our team of experts is dedicated to providing you with the knowledge, resources, and inspiration you need to create a thriving and visually stunning display.
- Expert Advice: Our website features a wealth of articles, guides, and tutorials on growing spider plants in rocks. From selecting the right types of rocks to troubleshooting common problems, we cover everything you need to know to succeed.
- High-Quality Rocks: We offer a wide selection of high-quality rocks in various sizes, shapes, and colors. Whether you’re looking for smooth river rocks, jagged lava rocks, or colorful pebbles, we have the perfect rocks to complement your spider plant and create a unique rockscape.
- Innovative Design Ideas: Our website showcases a gallery of innovative rockscape designs to inspire your creativity. From minimalist Zen gardens to elaborate mountain landscapes, we provide endless ideas for creating a visually stunning display.
- Product Recommendations: We recommend a range of products that are essential for growing spider plants in rocks, including containers, fertilizers, pH testing kits, and pest control solutions.
- Community Forum: Our community forum provides a platform for plant enthusiasts to connect, share their experiences, and ask questions. Join our community to learn from others and get personalized advice from our experts.
- Customer Support: Our customer support team is available to answer any questions you may have and provide assistance with your rock-based spider plant project. Contact us today to get started.
FAQ: Can Spider Plants Grow in Rocks?
1. Can spider plants grow in just rocks, without soil?
Yes, spider plants can grow in rocks without soil, utilizing a hydroponic-like setup where the rocks provide support and aeration while nutrients are supplied through liquid fertilizer.
2. What are the best rocks to use for spider plants?
Porous rocks like lava rock, river rock, and shale are best as they retain moisture and provide good aeration, crucial for healthy root development.
3. How often should I water a spider plant growing in rocks?
Water thoroughly when the top layer of rocks feels dry, ensuring excess water drains to prevent root rot; typically, watering every 1-2 weeks is sufficient, adjusting based on environmental conditions.
4. Do spider plants in rocks need fertilizer?
Yes, spider plants in rocks require regular fertilization; use a balanced liquid fertilizer diluted to half strength every 4-6 weeks during the growing season to provide essential nutrients.
5. How do I prevent root rot when growing spider plants in rocks?
Ensure the container has excellent drainage, avoid overwatering, and use porous rocks to promote aeration around the roots, which helps prevent root rot.
6. Can spider plant babies (spiderettes) grow in rocks?
Yes, spider plant babies can be directly planted in rocks; snip them off and place them in a container with rocks, providing adequate moisture and bright, indirect light.
7. How does growing spider plants in rocks affect the pH level?
Rocks like limestone can increase pH, which is harmful; use pH-neutral rocks like quartz and monitor the water’s pH, aiming for a slightly acidic to neutral range (6.0-7.0).
8. What kind of light is best for spider plants growing in rocks?
Spider plants in rocks thrive in bright, indirect light; avoid direct sunlight, which can scorch the leaves, and rotate the plant regularly for even light exposure.
9. How often should I replace the rocks in my spider plant container?
Replace the rocks every 1-2 years to prevent mineral buildup and maintain proper drainage, ensuring a healthy environment for the spider plant.
10. Can I use tap water for spider plants growing in rocks?
It’s better to use filtered or distilled water to avoid mineral buildup on the rocks; tap water often contains chemicals and minerals that can harm the plant over time.
Ready to transform your spider plants into stunning rockscape masterpieces? Visit rockscapes.net today for expert advice, high-quality rocks, and innovative design ideas. Let us help you unlock the beauty of rock-based gardening and create a unique and thriving display that will impress everyone!
Address: 1151 S Forest Ave, Tempe, AZ 85281, United States.
Phone: +1 (480) 965-9011.
Website: rockscapes.net.