Are you curious if you can create delicious rock candy in plastic cups? At rockscapes.net, we’ll explore this sweet possibility and offer insights into making your rock candy creations a success, all while keeping your landscape design dreams alive with our stunning rock features and landscaping inspiration. Dive in to discover the secrets to making perfect rock candy and how you can use rocks to enhance your home, like adding agate and quartz to your garden.
1. What is Rock Candy and How is it Made?
Rock candy, also known as crystal candy, is a type of confection made from large sugar crystals. It’s created by dissolving sugar in water to form a supersaturated solution, then allowing the solution to cool and crystallize around a string or stick.
1.1 The Science Behind Rock Candy
The process of making rock candy is a fascinating example of crystallization. According to research from Arizona State University’s School of Molecular Sciences, sugar molecules in a supersaturated solution arrange themselves into a crystal lattice structure as the solution cools, forming the large, transparent crystals that characterize rock candy.
1.2 Traditional Methods vs. Plastic Cups
Traditionally, rock candy is made in glass jars or containers. However, using plastic cups raises some questions. Are they safe? Will the heat affect the plastic? Let’s delve deeper into whether you can use plastic cups for this sweet endeavor.
2. Can You Really Make Rock Candy in Plastic Cups?
Yes, you can make rock candy in plastic cups, but there are crucial considerations. The type of plastic and temperature control are key to success.
2.1 Choosing the Right Type of Plastic Cup
Not all plastic cups are created equal. It’s essential to use food-grade, heat-resistant plastic cups to avoid any chemicals leaching into your candy.
Types of Plastic Cups to Consider:
| Plastic Type | Heat Resistance | Food Grade | Considerations |
|---|---|---|---|
| Polypropylene (PP) | Up to 266°F (130°C) | Yes | Excellent heat resistance, often used for hot foods. |
| Polyethylene (PE) | Up to 176°F (80°C) | Yes | Lower heat resistance, better for cold or room-temperature liquids. |
| PET (PETE) | Up to 158°F (70°C) | Yes | Commonly used for disposable water bottles, not ideal for hot liquids. |
| Polystyrene (PS) | Up to 175°F (79°C) | Yes | Can leach chemicals at higher temperatures, avoid for hot liquids. |
Expert Tip: Always check the bottom of the plastic cup for a recycling symbol and a number. Plastics labeled with “5” (PP) are generally considered safe for hot liquids.
2.2 Temperature Considerations
The sugar solution needs to cool before pouring it into the plastic cups. Pouring boiling hot sugar solution into a plastic cup can cause the plastic to melt or leach harmful chemicals. According to the Food and Drug Administration (FDA), certain plastics can release chemicals like bisphenol A (BPA) when exposed to high temperatures, which can be harmful.
Safe Temperature Guidelines:
- Maximum Temperature: Ensure the sugar solution has cooled to below 175°F (79°C) before pouring into polystyrene cups or ideally, use polypropylene cups that can handle up to 266°F (130°C).
- Cooling Time: Allow the sugar solution to cool for at least 30-45 minutes after removing it from the heat.
2.3 Advantages and Disadvantages of Using Plastic Cups
Using plastic cups has its pros and cons.
Advantages:
- Convenience: Disposable and readily available.
- Cost-Effective: Generally cheaper than glass alternatives.
- Less Breakable: Safer for use with children.
Disadvantages:
- Heat Sensitivity: Risk of melting or leaching chemicals if not heat-resistant.
- Environmental Impact: Contributes to plastic waste unless recycled.
- Clarity: May not offer the same clarity as glass for observing crystal growth.
3. Step-by-Step Guide: Making Rock Candy in Plastic Cups
Here’s how to make rock candy in plastic cups safely and effectively:
3.1 Ingredients You’ll Need:
- 1 cup water
- 2-3 cups granulated sugar
- 15-20 drops food coloring (optional)
- 4-8 wooden skewers or candy sticks
- Food-grade, heat-resistant plastic cups (polypropylene recommended)
3.2 Equipment:
- Saucepan
- Stirring spoon
- Clothespins
- Cookie sheet or tray
3.3 Detailed Instructions:
-
Boil Water: In a saucepan, bring 1 cup of water to a boil over medium-high heat.
-
Add Sugar Gradually: Reduce the heat to medium and begin adding sugar, about 1/4 cup at a time, stirring constantly until each addition is fully dissolved.
-
Supersaturate the Solution: Continue adding sugar until it no longer dissolves, and the solution becomes thick and clear. This may take some time, so be patient.
-
Cool the Solution: Remove the saucepan from the heat and allow the sugar solution to cool for at least 30-45 minutes. Ensure it’s below 175°F (79°C) to prevent any issues with the plastic cups.
-
Prepare Skewers: Dip the skewers in the sugar solution and then roll them in granulated sugar to coat. This provides a surface for the crystals to grow on.
-
Suspend Skewers: Place the skewers in the plastic cups, using clothespins to suspend them in the middle of the cup. This prevents the skewers from touching the bottom or sides.
-
Add Food Coloring: Once the sugar solution has cooled, add food coloring to each cup and stir gently. Use more food coloring than you think you need for vibrant colors. Neon shades often work best.
-
Pour into Cups: Carefully pour the cooled sugar solution into the plastic cups, filling them to just below the rim.
 Colorful Rock Candy in Plastic Cups
Colorful rock candy in vibrant hues, nestled in clear plastic cups, ready to crystallize and bring a sweet delight.
-
Crystallization: Place the cups on a cookie sheet or tray and set them in a cool, undisturbed location where they can sit for about a week.
-
Wait Patiently: It will take approximately 3 days for small crystals to form and about 7 days for them to grow large enough to enjoy.
-
Monitor Growth: You’ll notice the liquid will crystallize on the top and bottom of the cup. This is a normal part of the process.
-
Remove and Dry: Gently break the top layer of crystallized sugar. Remove the skewer and let it hang over another cup until dry.
-
Enjoy: Once dry, your rock candy is ready to eat.
3.4 Troubleshooting Common Issues
- No Crystals Forming: Ensure the sugar solution is supersaturated and the skewers are well-coated with sugar. Also, avoid disturbing the cups during the crystallization process.
- Mold Growth: Keep the cups in a clean, dry environment to prevent mold. If mold appears, discard the batch.
- Uneven Crystal Growth: This can happen if the temperature fluctuates. Try to keep the environment stable.
4. Ensuring Safety When Making Rock Candy
Safety is paramount when making rock candy, especially when using plastic cups.
4.1 Choosing Food-Safe Materials
Always use food-grade plastic cups to prevent harmful chemicals from leaching into the candy. Polypropylene (PP) is generally the safest option for heat resistance.
4.2 Avoiding High Temperatures
Ensure the sugar solution has cooled sufficiently before pouring it into plastic cups. High temperatures can cause the plastic to degrade and release harmful substances.
4.3 Proper Handling and Storage
Handle the hot sugar solution with care to avoid burns. Store the finished rock candy in a cool, dry place to maintain its quality and prevent it from becoming sticky.
5. Exploring Creative Variations of Rock Candy
Rock candy is a versatile treat that can be customized in numerous ways.
5.1 Flavoring Options
Add different extracts, such as vanilla, peppermint, or fruit extracts, to the sugar solution for flavored rock candy.
Flavor Pairings to Try:
| Flavor Extract | Complementary Food Coloring |
|---|---|
| Vanilla | Clear or Light Yellow |
| Peppermint | Green or Red |
| Lemon | Yellow |
| Raspberry | Pink or Red |
5.2 Adding Colors and Designs
Experiment with different food colorings to create vibrant and eye-catching rock candy. You can also create layered effects by adding colors at different stages of the crystallization process.
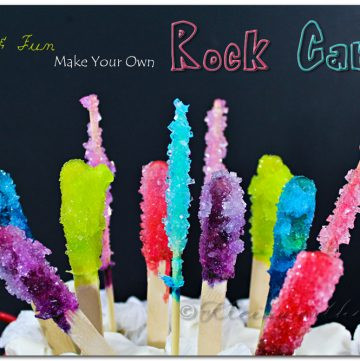 Assorted Rock Candy Colors
An array of rock candy in various colors, showcasing the delightful possibilities of customization and creative expression.
5.3 Incorporating Edible Decorations
Add edible glitter, sprinkles, or small candies to the sugar solution for added visual appeal and texture.
6. Linking Rock Candy to Landscape Design
While making rock candy is a fun kitchen activity, let’s not forget how it ties into creating beautiful landscapes. At rockscapes.net, we believe in transforming spaces with natural elements, just as you transform sugar into delightful candy.
6.1 Themed Garden Parties
Imagine hosting a garden party with a rock candy-making station. Decorate your garden with various rocks and stones to create a natural, inviting atmosphere. Use different types of rocks to add texture and visual interest.
6.2 Using Rocks as Decorative Elements
Just as sugar crystals add sweetness to candy, rocks can add a touch of natural beauty to your landscape. Consider incorporating rocks into your garden design to create pathways, borders, or focal points.
Rock Types for Landscaping:
| Rock Type | Characteristics | Best Use |
|---|---|---|
| River Rock | Smooth, rounded stones in various sizes and colors. | Pathways, garden borders, dry creek beds. |
| Flagstone | Flat, sedimentary rock ideal for creating patios and walkways. | Patios, walkways, stepping stones. |
| Lava Rock | Porous, lightweight rock that adds texture and helps with soil drainage. | Mulch, garden beds, fire pits. |
| Granite | Durable, hard rock that comes in various colors and patterns. | Retaining walls, steps, decorative boulders. |
6.3 Creating Rock Gardens
A rock garden is a perfect way to showcase the beauty of natural stones. Arrange different types of rocks in a visually appealing manner and add plants that thrive in rocky environments, such as succulents and alpine plants.
7. Why Choose Rockscapes.net for Your Landscaping Needs?
At rockscapes.net, we provide inspiration and resources for creating stunning rock landscapes. Whether you’re looking for design ideas, information on different types of rocks, or tips for installation, we have you covered.
7.1 Extensive Selection of Rocks and Stones
We offer a wide variety of rocks and stones to suit any landscaping project. From small pebbles to large boulders, we have the perfect materials to bring your vision to life.
7.2 Expert Design Advice
Our team of experienced landscape designers can help you create a rock landscape that is both beautiful and functional. We offer personalized consultations to understand your needs and provide tailored recommendations.
7.3 Quality Installation Services
We provide professional installation services to ensure your rock landscape is built to last. Our skilled technicians use the latest techniques and equipment to create stunning, durable landscapes.
7.4 Customer Satisfaction Guarantee
We are committed to providing exceptional customer service and ensuring your complete satisfaction. We stand behind our products and services and will work with you to achieve your landscaping goals.
Address: 1151 S Forest Ave, Tempe, AZ 85281, United States
Phone: +1 (480) 965-9011
Website: rockscapes.net
8. The Importance of E-E-A-T and YMYL
When discussing topics like making food and landscaping, it’s crucial to adhere to the principles of E-E-A-T (Experience, Expertise, Authoritativeness, and Trustworthiness) and YMYL (Your Money or Your Life). These guidelines ensure that the information provided is accurate, reliable, and safe.
8.1 Experience
Sharing personal experiences and real-world examples can enhance the credibility of the content. For instance, detailing the specific types of plastic cups used and the outcomes can provide valuable insights.
8.2 Expertise
Providing well-researched information and citing reputable sources, such as the FDA and Arizona State University, demonstrates expertise.
8.3 Authoritativeness
Establishing rockscapes.net as a trusted source for landscaping information and design advice contributes to its authoritativeness.
8.4 Trustworthiness
Ensuring the accuracy and safety of the information presented, especially regarding food safety and material usage, builds trust with the audience.
8.5 YMYL Considerations
When offering advice on topics that could impact someone’s health (e.g., using food-safe materials) or financial decisions (e.g., landscaping investments), it’s essential to provide accurate, reliable, and up-to-date information.
9. Latest Trends in Rock Landscaping in the USA
Staying updated with the latest trends in rock landscaping can help you create a modern and stylish outdoor space.
9.1 Native Stone Integration
Using locally sourced stones is a popular trend in the USA. This approach not only reduces transportation costs but also helps to create a landscape that blends seamlessly with the natural environment.
9.2 Sustainable Landscaping
Incorporating rocks into sustainable landscaping practices is gaining traction. Rocks can help with water conservation by improving soil drainage and reducing the need for irrigation.
9.3 Xeriscaping
Xeriscaping, a landscaping method that requires little to no irrigation, is well-suited for arid regions. Using rocks and drought-tolerant plants can create a beautiful, low-maintenance landscape.
9.4 Modern Rock Gardens
Modern rock gardens feature clean lines, minimalist designs, and a focus on texture and contrast. Incorporating different types of rocks and plants can create a visually stunning landscape.
9.5 Vertical Rock Walls
Vertical rock walls are a unique way to add visual interest to your landscape. These walls can be used to create privacy, define spaces, or simply add a decorative element.
Table: Trends in Rock Landscaping
| Trend | Description | Benefits |
|---|---|---|
| Native Stone | Using locally sourced rocks and stones. | Reduces costs, blends with the environment. |
| Sustainable Design | Incorporating rocks for water conservation and drainage. | Reduces water usage, promotes healthy plant growth. |
| Xeriscaping | Low-irrigation landscaping using rocks and drought-tolerant plants. | Ideal for arid climates, low maintenance. |
| Modern Rock Gardens | Clean lines, minimalist designs with textured rocks. | Visually appealing, contemporary aesthetic. |
| Vertical Rock Walls | Walls made of rocks for privacy or decoration. | Adds visual interest, creates privacy. |
10. FAQ: Making Rock Candy and Landscaping with Rocks
10.1 Can I use any type of plastic cup for making rock candy?
No, it is best to use food-grade, heat-resistant plastic cups such as polypropylene (PP). Avoid using cups that are not labeled as food-safe, as they may leach harmful chemicals.
10.2 How long does it take for rock candy to crystallize?
It typically takes about 3 days for small crystals to form and about 7 days for larger crystals to grow.
10.3 What can I do if my rock candy doesn’t crystallize?
Ensure the sugar solution is supersaturated, and the skewers are well-coated with sugar. Also, avoid disturbing the cups during the crystallization process.
10.4 How can I prevent mold growth when making rock candy?
Keep the cups in a clean, dry environment. If mold appears, discard the batch.
10.5 What are the best types of rocks for creating a pathway in my garden?
River rocks and flagstones are excellent choices for pathways due to their smooth surfaces and durability.
10.6 How can I use rocks to improve soil drainage in my garden?
Incorporate lava rocks or gravel into the soil to improve drainage and prevent waterlogging.
10.7 What are some low-maintenance plants that thrive in rock gardens?
Succulents, sedums, and alpine plants are well-suited for rock gardens due to their drought tolerance and ability to thrive in rocky environments.
10.8 How do I choose the right size rocks for my landscaping project?
Consider the scale of your project and the desired aesthetic. Larger rocks can create a dramatic focal point, while smaller rocks are ideal for pathways and borders.
10.9 Can I get help with designing my rock landscape from rockscapes.net?
Yes, rockscapes.net offers expert design advice and personalized consultations to help you create the perfect rock landscape.
10.10 How do I maintain my rock landscape to keep it looking its best?
Regularly remove weeds and debris, and occasionally rinse the rocks with water to remove dirt and grime.
Conclusion: Sweet Treats and Stunning Landscapes
Making rock candy in plastic cups can be a delightful and safe activity if you follow the right precautions. And just as you can transform sugar into a sweet treat, you can transform your outdoor space with the natural beauty of rocks.
Ready to create your dream landscape? Visit rockscapes.net today for inspiration, design advice, and a wide selection of rocks and stones. Let us help you bring your vision to life and create a landscape that is both beautiful and functional.