Can You Make Sea Glass In A Rock Tumbler? Absolutely, you can transform ordinary glass into stunning sea glass using a rock tumbler, creating unique pieces for your rockscapes.net projects. This process allows you to mimic the natural weathering process, giving glass a frosted, smooth finish perfect for landscaping, jewelry, and other decorative applications, opening new avenues for creative expression in your garden and home decor with these tumbled treasures.
1. What Is Sea Glass And Why Make It In A Rock Tumbler?
Yes, you can certainly make sea glass in a rock tumbler. Sea glass, also known as beach glass or mermaid’s tears, is naturally created when discarded glass ends up in bodies of water, where it’s tumbled and smoothed by waves, sand, and rocks over many years. Using a rock tumbler allows you to replicate this process in a controlled environment, speeding up the transformation of ordinary glass into beautifully frosted and smoothed sea glass, ready for various creative projects.
1.1 The Allure of Sea Glass
Sea glass possesses a unique charm, with its frosted surface and smoothed edges telling a silent story of time and the elements. Each piece is one-of-a-kind, making it highly sought after for jewelry, mosaics, and decorative accents. The colors, ranging from the common greens and whites to the rarer blues and reds, add to its appeal, offering a spectrum of possibilities for artistic expression.
1.2 Why Use a Rock Tumbler?
Using a rock tumbler is an efficient way to mimic the natural process of sea glass formation. Here’s why it’s a great option:
- Speed: The tumbling process in a machine takes weeks rather than years, which is how long it would take in the ocean.
- Control: You have control over the shape, size, and smoothness of the finished product.
- Accessibility: You can create sea glass even if you don’t live near a beach.
- Sustainability: Recycling glass into sea glass is an environmentally friendly way to repurpose discarded materials.
1.3 The Science Behind the Transformation
The transformation of glass in a rock tumbler involves abrasion. The tumbler rotates the glass pieces along with grit and water, causing them to grind against each other. This action gradually smooths the sharp edges and creates the frosted texture characteristic of sea glass. The process requires patience and a series of progressively finer grits to achieve the desired finish.
2. What Materials Do You Need To Make Sea Glass?
To make sea glass in a rock tumbler, you need a few essential materials to ensure the process is effective and safe. The right materials will help you achieve the desired frosted and smooth finish, mimicking the natural beauty of sea glass.
- Rock Tumbler: A sturdy rock tumbler is the core of this process. Dual drum tumblers are great for processing multiple batches simultaneously.
- Glass: You can use various types of glass, such as wine bottles, mason jars, or window panes.
- Grit: You’ll need different grades of grit: coarse, medium, fine, and polishing compound.
- Ceramic Media: These pellets help cushion the glass and distribute the grit evenly.
- Water: Clean water is essential to keep the tumbler lubricated and to carry away debris.
- Safety Gear: Safety glasses, gloves, and a dust mask are crucial for handling broken glass and grit.
2.1 Selecting The Right Rock Tumbler
Choosing the right rock tumbler is crucial for creating quality sea glass. Here are some factors to consider:
- Size: A 3 lb tumbler is suitable for small projects, while larger tumblers can handle bigger batches.
- Type: Rotary tumblers are most common, but vibratory tumblers work faster.
- Durability: Look for a tumbler with a robust motor and a leak-proof barrel.
- Noise Level: Some tumblers can be quite loud, so consider a model with noise reduction features.
- User Reviews: Check online reviews to get insights from other users about performance and reliability.
2.2 Choosing The Right Glass
The type of glass you choose will affect the final appearance of your sea glass. Here are some popular options:
- Wine Bottles: Available in various colors, wine bottles are an excellent choice for creating sea glass with a story.
- Mason Jars: These provide clear or blue glass, ideal for specific projects.
- Window Panes: Clear window glass can be transformed into frosted white sea glass.
- Colored Glass: Craft stores often sell colored glass specifically for tumbling.
- Thickness: Thicker glass takes longer to tumble but is less likely to break into small pieces.
2.3 Essential Grit And Polishing Compounds
The different grades of grit are essential for achieving the perfect sea glass finish. Here’s a breakdown:
- Coarse Grit (60/90 Silicon Carbide): Used for the initial shaping and smoothing of the glass.
- Medium Grit (120/220 Silicon Carbide): Refines the shape and removes larger imperfections.
- Fine Grit (500/600 Silicon Carbide): Further smooths the surface and prepares it for polishing.
- Polishing Compound (Cerium Oxide): Creates the final frosted finish and enhances the glass’s translucence.
Ceramic media acts as a cushion for the glass, preventing it from chipping or breaking during the tumbling process.
 Broken wine bottles ready to be transformed into sea glass using a rock tumbler
3. How To Prepare The Glass Before Tumbling?
Before you start tumbling glass, proper preparation is key to achieving the best results. This involves cleaning, breaking, and sorting the glass to ensure it’s ready for the tumbling process. Proper preparation not only enhances the final product but also ensures safety throughout the process.
- Cleaning the Glass: Remove any labels, glue, or residue from the glass using warm, soapy water.
- Breaking the Glass: Wrap the glass in a towel and use a hammer to break it into smaller, manageable pieces.
- Sorting the Glass: Sort the pieces by size and color to ensure even tumbling.
- Safety First: Always wear safety glasses and gloves when handling broken glass.
- Edge Inspection: Check for any extremely sharp edges and knock them off with pliers or a hammer.
3.1 Cleaning And Removing Labels
Start by thoroughly cleaning the glass to remove any labels or adhesive residue.
- Soaking: Soak the glass in warm, soapy water for at least 30 minutes to loosen labels and glue.
- Scrubbing: Use a scrub brush or sponge to remove the labels. For stubborn residue, try using a razor blade or adhesive remover.
- Rinsing: Rinse the glass thoroughly to remove any soap or cleaning agents.
- Drying: Allow the glass to dry completely before moving on to the next step.
3.2 Safely Breaking The Glass Into Smaller Pieces
Breaking the glass safely is crucial. Follow these steps to minimize the risk of injury:
- Protective Gear: Wear safety glasses, gloves, and a dust mask to protect yourself from flying shards and glass dust.
- Wrapping: Wrap the glass in a thick towel or place it inside a sturdy paper bag to contain the pieces.
- Hammering: Use a hammer to gently break the glass into smaller pieces. Aim for pieces that are roughly 1-2 inches in size.
- Controlling: Avoid using excessive force to prevent the glass from shattering into tiny fragments.
- Inspection: Check the broken pieces for any overly sharp or dangerous edges.
3.3 Sorting Glass By Size And Color
Sorting the glass by size and color helps ensure a more uniform tumbling process:
- Size Separation: Separate the glass pieces into small, medium, and large sizes. This prevents smaller pieces from being over-tumbled while larger pieces remain rough.
- Color Grouping: Group the glass by color to create batches of sea glass with consistent hues. This is particularly useful if you’re planning to use the sea glass for specific projects.
- Batch Planning: Consider the final use of the sea glass when sorting. For example, if you want a mix of colors, you can combine different colors in one batch.
4. Step-By-Step Guide: Making Sea Glass In A Rock Tumbler
Making sea glass in a rock tumbler is a straightforward process that requires patience and attention to detail. By following these steps, you can transform ordinary glass into beautiful sea glass, perfect for a variety of decorative and artistic projects.
- First Stage (Coarse Grit): Tumble the glass with coarse grit for 7-10 days to shape and smooth the edges.
- Second Stage (Medium Grit): Tumble with medium grit for another 7 days to further refine the shape.
- Third Stage (Fine Grit): Tumble with fine grit for 7 days to smooth the surface and prepare for polishing.
- Fourth Stage (Polishing Compound): Tumble with polishing compound for 7 days to create the frosted finish.
- Final Rinse: Rinse the sea glass thoroughly with clean water and inspect the results.
4.1 The First Stage: Coarse Grit Tumbling
The first stage is the most critical for shaping the glass and removing sharp edges.
- Loading the Tumbler: Fill the tumbler barrel about 2/3 full with the prepared glass pieces.
- Adding Coarse Grit: Add the appropriate amount of coarse grit (60/90 silicon carbide) as per the tumbler’s instructions. Typically, this is about 2 tablespoons per pound of glass.
- Adding Ceramic Media: Add ceramic media to fill any remaining space in the barrel.
- Adding Water: Add water until it just covers the glass and ceramic media.
- Tumbling: Seal the barrel and place it on the rock tumbler. Tumble for 7-10 days.
- Checking Progress: After the first 24 hours, check the slurry. If it’s too thick, add more water.
4.2 The Second Stage: Medium Grit Tumbling
The second stage refines the shape and removes larger imperfections.
- Cleaning: Thoroughly clean the glass and the tumbler barrel to remove all traces of the coarse grit.
- Loading: Load the glass back into the tumbler, again filling it about 2/3 full.
- Adding Medium Grit: Add the appropriate amount of medium grit (120/220 silicon carbide).
- Adding Ceramic Media: Add ceramic media as needed.
- Adding Water: Add water until it just covers the glass and ceramic media.
- Tumbling: Tumble for another 7 days.
4.3 The Third Stage: Fine Grit Tumbling
The third stage smooths the surface and prepares the glass for polishing.
- Cleaning: Clean the glass and the tumbler barrel thoroughly.
- Loading: Load the glass into the tumbler, filling it about 2/3 full.
- Adding Fine Grit: Add the appropriate amount of fine grit (500/600 silicon carbide).
- Adding Ceramic Media: Add ceramic media as needed.
- Adding Water: Add water until it just covers the glass and ceramic media.
- Tumbling: Tumble for 7 days.
4.4 The Fourth Stage: Polishing
The final stage creates the frosted finish that gives sea glass its unique appearance.
- Cleaning: Clean the glass and the tumbler barrel thoroughly. Use a new barrel if possible to avoid contamination from previous grits.
- Loading: Load the glass into the tumbler, filling it about 2/3 full.
- Adding Polishing Compound: Add the appropriate amount of polishing compound (cerium oxide).
- Adding Ceramic Media: Add ceramic media as needed.
- Adding Water: Add water until it just covers the glass and ceramic media.
- Tumbling: Tumble for 7 days.
4.5 Final Rinse And Inspection
After the polishing stage, it’s time to rinse and inspect your sea glass.
- Rinsing: Rinse the sea glass thoroughly under running water to remove any remaining polishing compound.
- Inspection: Examine each piece of sea glass for smoothness and frosting. If needed, return pieces to the tumbler for additional polishing.
- Drying: Allow the sea glass to dry completely before using it in your projects.
 A collection of sea glass pieces tumbled to perfection, showcasing their smooth and frosted surfaces
5. Troubleshooting Common Issues
Even with careful preparation and execution, you may encounter some common issues when making sea glass in a rock tumbler. Here are some troubleshooting tips to help you achieve the best results.
- Glass Breaks Too Easily: Use thicker glass or add more ceramic media to cushion the pieces.
- Not Frosted Enough: Extend the polishing stage or use a higher-quality polishing compound.
- Uneven Smoothing: Ensure the tumbler is properly loaded and that the grit is evenly distributed.
- Tumbler Is Too Loud: Place the tumbler on a rubber mat or inside a soundproof box.
- Slurry Is Too Thick: Add more water to the tumbler.
5.1 Why Is My Glass Breaking Too Easily?
If your glass is breaking too easily, consider these factors:
- Glass Thickness: Thinner glass is more prone to breaking. Opt for thicker glass, such as wine bottle bottoms or mason jars.
- Tumbler Load: Overloading the tumbler can cause excessive pressure on the glass. Reduce the amount of glass in each batch.
- Ceramic Media: Insufficient ceramic media can result in glass pieces hitting each other directly. Add more ceramic media to cushion the glass.
- Tumbling Speed: High-speed tumblers can be too aggressive for glass. If possible, adjust the speed or switch to a slower tumbler.
5.2 What If The Glass Is Not Frosted Enough?
If your glass isn’t achieving the desired frosted appearance, try these solutions:
- Polishing Time: Extend the polishing stage. Sometimes, the glass needs more time to develop the frosted finish.
- Polishing Compound Quality: Use a higher-quality polishing compound, such as cerium oxide.
- Grit Contamination: Ensure that the fine grit stage is free of any coarse grit particles.
- Cleaning: Thoroughly clean the glass and tumbler barrel between each stage to prevent contamination.
5.3 Uneven Smoothing: What Can I Do?
Uneven smoothing can be frustrating, but there are ways to address it:
- Even Distribution: Ensure that the glass, grit, and ceramic media are evenly distributed in the tumbler.
- Size Sorting: Sort the glass pieces by size to prevent smaller pieces from being over-tumbled while larger pieces remain rough.
- Tumbler Level: Make sure the tumbler is placed on a level surface to ensure consistent tumbling.
- Regular Inspection: Check the glass regularly and rotate the pieces to promote even smoothing.
6. Safety Tips For Tumbling Glass
Safety should always be a priority when working with glass and rock tumblers. Here are some essential safety tips to follow.
- Wear Safety Gear: Always wear safety glasses, gloves, and a dust mask when handling broken glass and grit.
- Work in a Well-Ventilated Area: Tumbling can produce dust, so work in a well-ventilated area or wear a respirator.
- Handle Glass Carefully: Be cautious when breaking glass to avoid cuts and injuries.
- Keep Away from Children and Pets: Store tumblers and materials out of reach of children and pets.
- Dispose of Waste Properly: Dispose of used grit and slurry properly to avoid environmental contamination.
6.1 Essential Protective Gear
Wearing the right protective gear is crucial for preventing injuries:
- Safety Glasses: Protect your eyes from flying glass shards and dust particles.
- Gloves: Protect your hands from cuts and skin irritation.
- Dust Mask: Prevent inhalation of glass dust and grit particles.
- Apron: Protect your clothing from stains and debris.
6.2 Safe Glass Handling Practices
Follow these practices to handle glass safely:
- Controlled Breaking: Break glass in a controlled environment, such as inside a towel-lined box or paper bag.
- Careful Lifting: Lift glass pieces carefully to avoid dropping and breaking them.
- Proper Tools: Use pliers or tongs to handle small or sharp pieces of glass.
- Immediate Cleanup: Clean up any broken glass immediately to prevent accidents.
6.3 Storing Materials Safely
Proper storage of materials is essential for preventing accidents:
- Secure Containers: Store grit, polishing compounds, and other materials in tightly sealed containers.
- Labeled Containers: Label all containers clearly to avoid confusion and accidental misuse.
- Designated Area: Store materials in a designated area away from children and pets.
- Dry Environment: Keep materials in a dry environment to prevent clumping and spoilage.
7. Creative Ideas For Using Your Homemade Sea Glass
Once you’ve created your sea glass, the possibilities are endless. Here are some creative ideas for using your homemade sea glass.
- Jewelry Making: Create unique pendants, earrings, and bracelets.
- Mosaic Art: Use sea glass to create beautiful mosaics on walls, tables, or picture frames.
- Home Decor: Add sea glass to vases, candle holders, or decorative bowls.
- Garden Accents: Incorporate sea glass into garden pathways, borders, or planters.
- Gifts: Make personalized sea glass gifts for friends and family.
7.1 Jewelry Making With Sea Glass
Sea glass jewelry is a beautiful and unique way to showcase your creations:
- Pendants: Drill a small hole in the sea glass and attach it to a chain or cord.
- Earrings: Wire-wrap the sea glass or attach it to earring hooks.
- Bracelets: String sea glass pieces together with beads or wire.
- Rings: Set the sea glass in a ring bezel or create a wire-wrapped ring.
7.2 Mosaic Art Projects
Sea glass mosaics add a touch of coastal charm to any project:
- Wall Art: Create a sea glass mosaic on a canvas or wooden board.
- Tabletops: Decorate a tabletop with a sea glass mosaic and cover it with resin for a smooth finish.
- Picture Frames: Add sea glass to picture frames for a personalized touch.
- Mirrors: Embellish mirrors with sea glass mosaics for a unique look.
7.3 Enhancing Home Decor
Incorporate sea glass into your home decor for a coastal vibe:
- Vases: Fill clear vases with sea glass for a decorative accent.
- Candle Holders: Glue sea glass to candle holders for a unique glow.
- Decorative Bowls: Display sea glass in decorative bowls on shelves or coffee tables.
- Coasters: Create sea glass coasters by gluing pieces to cork or tile.
7.4 Garden And Landscaping Ideas
Add sea glass to your garden for a touch of whimsy:
- Pathways: Incorporate sea glass into garden pathways for a sparkling effect.
- Borders: Use sea glass to create decorative borders around flower beds.
- Planters: Add sea glass to planters for a unique and colorful touch.
- Fairy Gardens: Create miniature fairy gardens with sea glass accents.
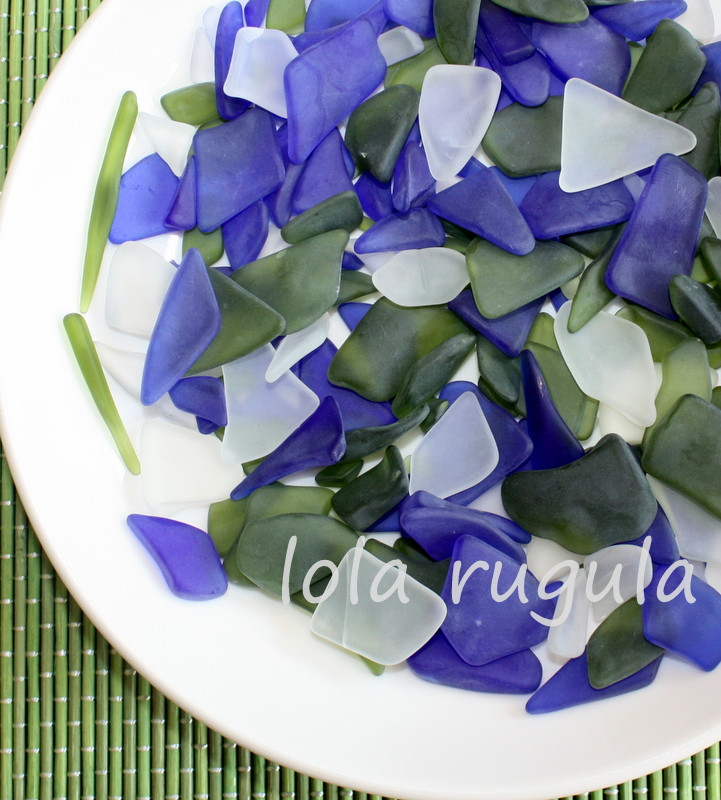 Assorted sea glass pieces perfect for jewelry making and decorative projects
8. How Does This Relate to Rockscapes?
At rockscapes.net, we understand the beauty and versatility of natural elements in landscaping and design. While we specialize in rocks and stones, we recognize the unique appeal of sea glass and how it can complement rock features. Sea glass can add a touch of color, texture, and whimsy to rock gardens, pathways, and water features.
8.1 Complementing Rock Features With Sea Glass
Sea glass can be used to enhance rock features in various ways:
- Color Contrast: The vibrant colors of sea glass can create a striking contrast against the natural tones of rocks.
- Texture Variety: The smooth, frosted texture of sea glass adds a unique tactile element to rock gardens.
- Whimsical Accents: Sea glass can be used to create whimsical accents in rock landscapes, such as fairy gardens or miniature beach scenes.
- Water Features: Sea glass can be incorporated into water features, such as ponds or fountains, for a sparkling effect.
8.2 Integrating Sea Glass Into Your Landscape
Here are some practical tips for integrating sea glass into your landscape:
- Pathways: Scatter sea glass along garden pathways for a subtle sparkle.
- Borders: Use sea glass to define the edges of flower beds or rock gardens.
- Focal Points: Create focal points by arranging sea glass around larger rocks or plants.
- Water Features: Add sea glass to the bottom of ponds or fountains for a shimmering effect.
- Vertical Elements: Incorporate sea glass into vertical elements, such as walls or trellises, for added visual interest.
8.3 Rockscapes.net: Your Source for Landscaping Inspiration
Visit rockscapes.net for more ideas and inspiration on how to incorporate natural elements, including sea glass, into your landscaping projects. Our website offers a wealth of information on different types of rocks, design tips, and installation techniques. Whether you’re a homeowner, landscape designer, or contractor, rockscapes.net is your go-to resource for creating stunning outdoor spaces.
9. Sea Glass Vs. Real Glass
Sea glass, with its frosted surface and smoothed edges, is distinct from regular glass. This transformation occurs through a natural tumbling process in the ocean, or it can be replicated using a rock tumbler. Understanding the differences between sea glass and regular glass can enhance your appreciation for this unique material.
- Texture: Sea glass has a frosted, matte finish, while regular glass is smooth and glossy.
- Edges: Sea glass has rounded, smoothed edges, while regular glass has sharp, defined edges.
- Clarity: Sea glass is translucent, with a slightly obscured appearance, while regular glass is transparent.
- Color: Sea glass colors are often muted and softened by the tumbling process, while regular glass colors are vibrant and clear.
- Durability: Sea glass is more resistant to breaking due to the smoothing and rounding of its edges, while regular glass is more prone to chipping and shattering.
9.1 What Makes Sea Glass Unique?
Several factors contribute to the uniqueness of sea glass:
- Natural Process: The natural tumbling process gives each piece of sea glass a unique shape and texture.
- Rarity: Certain colors of sea glass, such as red, orange, and turquoise, are rare and highly sought after.
- History: Each piece of sea glass has a story to tell, reflecting its origin and journey through the ocean.
- Collectibility: Sea glass is a popular collectible item, with enthusiasts searching beaches around the world for rare and unique pieces.
9.2 Real Sea Glass (Beach Glass) Vs. Artificial (Craft Glass)?
True sea glass, also known as beach glass, is found on beaches and has been naturally tumbled by the ocean. Artificial sea glass, also known as craft glass, is made using a rock tumbler or other methods to mimic the natural process. Here are the key differences:
| Feature | Real Sea Glass (Beach Glass) | Artificial Sea Glass (Craft Glass) |
|---|---|---|
| Origin | Naturally tumbled in the ocean | Artificially tumbled using a rock tumbler |
| Texture | Naturally frosted with a matte finish | Can vary depending on the tumbling process |
| Edges | Rounded and smoothed by wave action | Smoothed, but may have some sharp areas |
| Time to Create | Years or decades | A few weeks |
| Rarity | Rare, especially certain colors | Abundant, as it can be made in any quantity |
9.3 The Environmental Impact of Sea Glass Collection
Collecting sea glass can have both positive and negative environmental impacts. On one hand, it helps remove litter from beaches and repurposes discarded glass. On the other hand, excessive collection can deplete sea glass resources and disrupt coastal ecosystems.
Here are some tips for responsible sea glass collection:
- Collect Sparingly: Take only what you need and leave some for others to enjoy.
- Avoid Protected Areas: Do not collect sea glass from protected beaches or nature reserves.
- Respect Wildlife: Be mindful of wildlife and avoid disturbing their habitats.
- Participate in Beach Cleanups: Help remove other forms of litter from beaches to protect the environment.
10. FAQ: Making Sea Glass In A Rock Tumbler
Here are some frequently asked questions about making sea glass in a rock tumbler.
10.1 Can I use any type of glass in a rock tumbler?
Yes, you can use various types of glass, such as wine bottles, mason jars, or window panes. However, thicker glass tends to work better as it is less likely to break into small pieces.
10.2 How long does it take to make sea glass in a rock tumbler?
The process typically takes 3-4 weeks, depending on the type of glass and the desired level of frosting.
10.3 What grit should I use for making sea glass?
You’ll need different grades of grit: coarse (60/90), medium (120/220), fine (500/600), and polishing compound (cerium oxide).
10.4 Do I need to use ceramic media when tumbling glass?
Yes, ceramic media helps cushion the glass and distribute the grit evenly, preventing it from chipping or breaking.
10.5 How often should I check the progress of my sea glass?
Check the progress every 7 days, especially during the initial coarse grit stage.
10.6 Can I reuse the grit for multiple batches of sea glass?
No, it’s best to use fresh grit for each stage to avoid contamination and ensure optimal results.
10.7 How do I clean the tumbler between stages?
Thoroughly clean the tumbler barrel and the glass with water and a scrub brush to remove any traces of the previous grit.
10.8 What if my sea glass is not smooth enough after tumbling?
Extend the tumbling time or use a finer grade of grit to achieve the desired smoothness.
10.9 Can I add other materials to the tumbler along with the glass?
Avoid adding other materials, as they may contaminate the grit and affect the final result.
10.10 Is it safe to drink from glass that has been tumbled in a rock tumbler?
No, it is not recommended to drink from glass that has been tumbled, as the surface may contain microscopic particles of grit or polishing compound.
Making sea glass in a rock tumbler is a rewarding and creative process. By following these tips and guidelines, you can transform ordinary glass into beautiful, frosted treasures that can be used in a variety of decorative and artistic projects. For more inspiration and resources on landscaping and design, visit rockscapes.net. Transform your garden and home with the timeless beauty of stone and sea glass, creating spaces that inspire and delight.
Address: 1151 S Forest Ave, Tempe, AZ 85281, United States.
Phone: +1 (480) 965-9011.
Website: rockscapes.net.