Can You Stain A Rock Fireplace to refresh its look or match your décor? Yes, you can stain a rock fireplace to transform its appearance. Rockscapes.net provides comprehensive information on how to stain a rock fireplace effectively and safely. From preparation to the final finish, learn how to enhance your fireplace with the perfect stain, creating a stunning focal point for your living space. Discover expert tips on choosing the right stain, preparing the surface, and applying the stain for a beautiful, long-lasting result.
1. Understanding the Possibility of Staining a Rock Fireplace
Staining a rock fireplace is possible and can dramatically alter its appearance, but it’s essential to approach the project with the right knowledge. According to experts at Arizona State University’s School of Earth and Space Exploration, the composition and porosity of the rock significantly affect the stain’s absorption and final look.
1.1. What Types of Rock Can Be Stained?
Various types of rock can be stained, but some are more suitable than others. Here’s a quick look:
| Rock Type | Stainability | Notes |
|---|---|---|
| Granite | Low | Granite is dense and less porous, making it harder to stain effectively. |
| Limestone | High | Limestone is very porous and absorbs stain easily. |
| Sandstone | High | Sandstone’s high porosity allows for excellent stain absorption. |
| Slate | Medium | Slate can be stained, but it requires careful preparation and application. |
| River Rock | Varies | River rocks vary in porosity and composition, so testing is essential. |
1.2. Why Consider Staining Your Rock Fireplace?
Staining a rock fireplace offers several benefits:
- Aesthetic Upgrade: Instantly refresh the look of your fireplace to match your current décor.
- Cost-Effective: More affordable than a complete fireplace renovation.
- DIY Project: A manageable DIY project with the right guidance.
- Customization: Allows you to choose a color that complements your interior design.
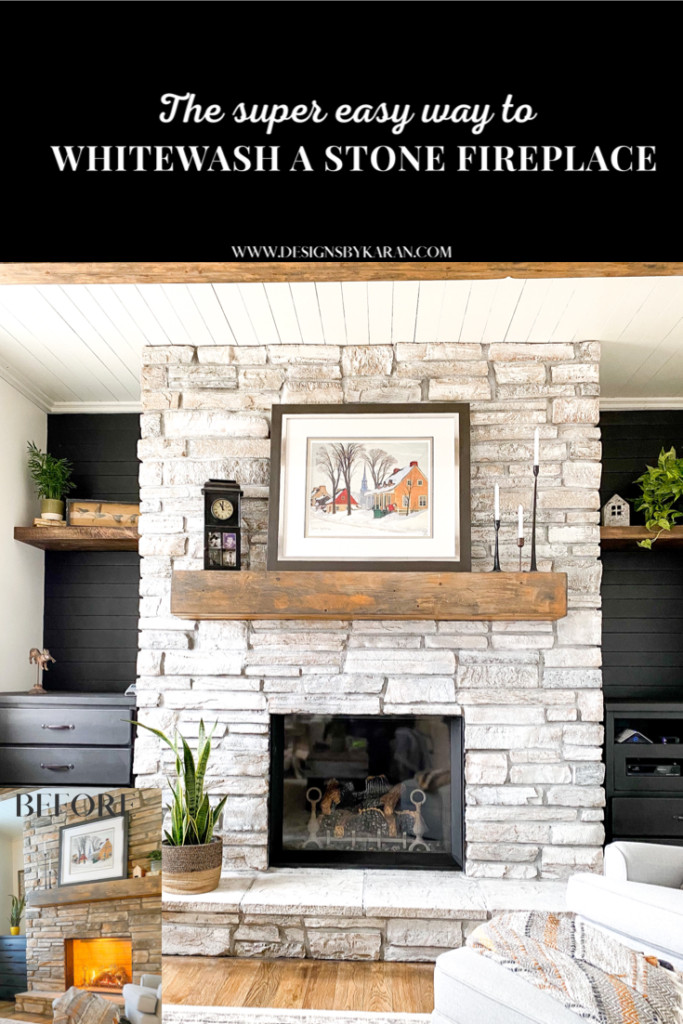 Rock Fireplace Design Idea
2. Preparing Your Rock Fireplace for Staining
Proper preparation is key to achieving a professional-looking stained rock fireplace. This involves cleaning, repairing, and protecting the surrounding areas.
2.1. Cleaning the Rock Surface
Start by thoroughly cleaning the rock surface. Remove any dirt, soot, or debris using these steps:
- Dry Brushing: Use a stiff brush to remove loose particles.
- Washing: Wash the rock with a mixture of mild detergent and water.
- Rinsing: Rinse thoroughly with clean water to remove any soap residue.
- Drying: Allow the rock to dry completely, which may take 24-48 hours.
2.2. Repairing Cracks and Damage
Address any cracks or damage before staining:
- Inspect: Check for cracks, chips, or loose stones.
- Clean: Remove any debris from the damaged areas.
- Repair: Use a stone repair mortar or epoxy to fill in cracks and secure loose stones.
- Cure: Allow the repair material to fully cure according to the manufacturer’s instructions.
2.3. Protecting Surrounding Areas
Protect the areas around your fireplace to avoid accidental staining:
- Cover: Use painter’s tape and plastic sheeting to cover walls, floors, and mantels.
- Ventilate: Ensure the room is well-ventilated by opening windows and using fans.
- Protect Yourself: Wear gloves, eye protection, and a mask to protect yourself from stains and fumes.
 Rock Fireplace Before Staining
3. Selecting the Right Stain for Your Rock Fireplace
Choosing the correct stain is critical for achieving the desired look and ensuring the longevity of the finish.
3.1. Types of Stains Available
There are several types of stains available, each with its own characteristics:
- Acrylic Stains: Water-based, low VOC, and easy to clean up. Ideal for achieving a natural look.
- Oil-Based Stains: Provide deep color and durability but have higher VOCs and require mineral spirits for cleanup.
- Concrete Stains: Specifically designed for porous materials like concrete and some types of rock, offering excellent penetration and color retention.
- Gel Stains: Thick consistency makes them ideal for vertical surfaces, providing even coverage and minimal drips.
3.2. Considering the Rock’s Porosity and Color
The rock’s porosity and existing color will influence the stain’s final appearance. Rocks with high porosity, like sandstone and limestone, will absorb more stain, resulting in a darker, more intense color. Denser rocks like granite will absorb less stain, leading to a lighter finish. The existing color of the rock will also affect the final stain color, so it’s essential to test the stain in an inconspicuous area first.
3.3. Testing the Stain
Always test the stain in an inconspicuous area before applying it to the entire fireplace. This allows you to see how the stain looks on your specific type of rock and adjust the application technique as needed. Apply the stain to a small area, let it sit for the recommended time, and then wipe off any excess. Allow the test area to dry completely to see the final color.
4. Applying the Stain to Your Rock Fireplace
With the proper preparation and stain selection, you can now apply the stain to your rock fireplace.
4.1. Tools You’ll Need
Gather these tools before you begin:
- Stain: Choose the appropriate type and color for your rock.
- Brushes: Use a variety of brushes, including small detail brushes and larger brushes for broader areas.
- Rollers: Foam rollers can be useful for applying stain to flat surfaces.
- Rags: Have plenty of clean, lint-free rags for wiping off excess stain.
- Gloves: Protect your hands from the stain.
- Eye Protection: Wear safety glasses to protect your eyes.
- Drop Cloths: Cover the surrounding area to protect from spills.
4.2. Step-by-Step Staining Process
Follow these steps for a successful staining project:
- Apply the Stain: Apply the stain evenly using a brush, roller, or sponge. Work in small sections to ensure consistent coverage.
- Allow Penetration: Let the stain penetrate the rock for the time recommended by the manufacturer. The longer the stain sits, the deeper the color will be.
- Wipe Off Excess: Use a clean rag to wipe off any excess stain. This will help to reveal the rock’s texture and prevent the stain from becoming too dark.
- Dry Time: Allow the stain to dry completely. Drying times vary depending on the type of stain and environmental conditions.
- Apply a Second Coat (Optional): If you want a darker, more intense color, apply a second coat of stain following the same process.
- Seal (Optional): Apply a sealer to protect the stained rock from moisture and wear. Choose a sealer that is compatible with the type of stain you used.
4.3. Techniques for Achieving Different Looks
Experiment with different techniques to achieve unique looks:
- Dry Brushing: Apply a small amount of stain to a dry brush and lightly brush it over the rock surface for a subtle, textured look.
- Rag Rolling: Dip a rag into the stain and roll it over the rock surface to create a mottled effect.
- Sponging: Use a sponge to dab stain onto the rock surface for a varied, natural look.
Dip your brush lightly into mixture and take off any excess.
5. Sealing and Protecting Your Stained Rock Fireplace
Sealing your stained rock fireplace is an important step to protect the finish and ensure its longevity.
5.1. Why Sealing Is Important
Sealing provides several benefits:
- Protection: Protects the stain from moisture, dirt, and wear.
- Durability: Enhances the durability of the stained finish.
- Easy Cleaning: Makes the surface easier to clean and maintain.
- Color Retention: Helps to prevent the stain from fading over time.
5.2. Types of Sealers
Choose a sealer that is compatible with the type of stain you used:
- Acrylic Sealers: Water-based, low VOC, and provide a clear, matte finish.
- Silicone Sealers: Offer excellent water resistance and are ideal for areas exposed to moisture.
- Penetrating Sealers: Absorb into the rock to provide protection from within, without changing the appearance of the surface.
5.3. Applying the Sealer
Follow these steps to apply the sealer:
- Clean the Surface: Ensure the stained surface is clean and dry.
- Apply the Sealer: Apply the sealer evenly using a brush, roller, or sprayer.
- Allow Penetration: Let the sealer penetrate the rock for the time recommended by the manufacturer.
- Wipe Off Excess: Use a clean rag to wipe off any excess sealer.
- Dry Time: Allow the sealer to dry completely. Drying times vary depending on the type of sealer and environmental conditions.
- Apply a Second Coat (Optional): For added protection, apply a second coat of sealer following the same process.
6. Maintaining Your Stained Rock Fireplace
Proper maintenance will keep your stained rock fireplace looking its best for years to come.
6.1. Regular Cleaning
Clean your stained rock fireplace regularly to remove dust and dirt. Use a soft brush or vacuum with a brush attachment to remove loose particles. Wash the surface with a mild detergent and water, and rinse thoroughly with clean water.
6.2. Avoiding Harsh Chemicals
Avoid using harsh chemicals or abrasive cleaners, as they can damage the stained finish. Stick to mild detergents and gentle cleaning methods.
6.3. Addressing Stains and Spills
Address stains and spills promptly to prevent them from setting into the rock. Blot the spill with a clean rag, and then clean the area with a mild detergent and water.
6.4. Re-Sealing as Needed
Re-seal your stained rock fireplace every few years to maintain its protection. The frequency of re-sealing will depend on the type of sealer used and the amount of wear the surface receives.
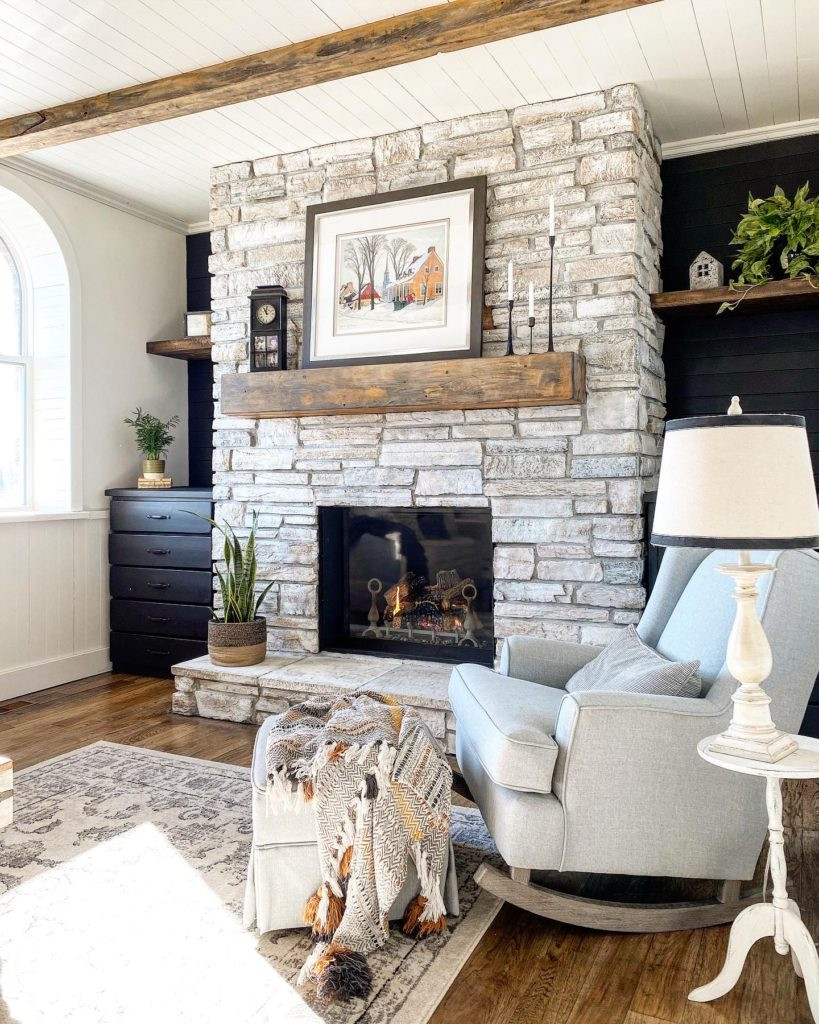 Rock Fireplace After Staining
7. Common Mistakes to Avoid When Staining a Rock Fireplace
Avoiding common mistakes can save you time and ensure a successful staining project.
7.1. Skipping Surface Preparation
Failing to properly clean and prepare the rock surface can result in poor stain adhesion and an uneven finish.
7.2. Choosing the Wrong Stain
Selecting the wrong type of stain for your rock’s porosity and color can lead to unsatisfactory results.
7.3. Not Testing the Stain
Skipping the test phase can result in unexpected color variations and an undesirable final look.
7.4. Applying Too Much Stain
Applying too much stain can obscure the rock’s texture and create a dark, unnatural appearance.
7.5. Neglecting Safety Precautions
Failing to wear protective gear and ventilate the area can expose you to harmful chemicals and fumes.
8. Creative Ideas for Staining Your Rock Fireplace
Explore these creative ideas to inspire your staining project.
8.1. Two-Tone Staining
Apply different shades of stain to create a unique, multi-dimensional look. Use a darker stain for the recessed areas and a lighter stain for the raised areas.
8.2. Faux Painting Techniques
Use faux painting techniques to mimic the appearance of natural stone. Apply different colors and textures to create a realistic, organic look.
8.3. Antiquing
Create an aged, antique look by applying a dark stain and then lightly sanding it off to reveal the underlying rock.
8.4. Highlighting
Highlight specific stones or areas of the fireplace with a contrasting stain color to create visual interest.
9. Addressing Common Concerns About Staining Rock Fireplaces
Addressing common concerns can help you feel confident in your staining project.
9.1. Will Staining Damage the Rock?
When done properly, staining will not damage the rock. However, it’s essential to use the right type of stain and follow the manufacturer’s instructions.
9.2. How Long Will the Stain Last?
The lifespan of the stain will depend on the type of stain used, the amount of wear the surface receives, and the quality of the sealer. With proper maintenance, a stained rock fireplace can last for many years.
9.3. Can the Stain Be Removed?
Removing stain from rock can be challenging but is possible. Use a combination of chemical strippers and scrubbing to remove the stain. In some cases, sandblasting may be necessary.
9.4. Is Staining Environmentally Friendly?
Choose low-VOC or water-based stains to minimize your environmental impact. Dispose of used stain and cleaning materials properly.
10. Finding Inspiration and Resources for Your Rock Fireplace Project at Rockscapes.net
Looking for more ideas and resources for your rock fireplace project? Rockscapes.net is your go-to destination for inspiration, information, and expert advice.
10.1. Explore Design Ideas
Browse our extensive gallery of rock fireplace designs to find inspiration for your project. From rustic to contemporary, we have ideas to suit every style.
10.2. Learn About Different Types of Rock
Discover the unique characteristics of different types of rock, including granite, limestone, sandstone, and slate. Learn about their porosity, color variations, and suitability for staining.
10.3. Get Expert Advice
Read our expert articles and guides to learn everything you need to know about staining a rock fireplace. Get step-by-step instructions, tips, and troubleshooting advice from experienced professionals.
10.4. Find Local Suppliers
Use our directory to find local suppliers of rock, stain, and sealing products. Connect with trusted vendors who can help you find the right materials for your project.
Ready to transform your rock fireplace? Visit Rockscapes.net today and start your journey to a more beautiful and inviting home. For personalized assistance, contact us at:
- Address: 1151 S Forest Ave, Tempe, AZ 85281, United States
- Phone: +1 (480) 965-9011
- Website: Rockscapes.net
FAQ: Staining a Rock Fireplace
- Can all types of rock be stained?
Not all rocks are equally stainable; porous rocks like sandstone and limestone are more receptive, while dense rocks such as granite are less so. Testing a small area is always recommended.
- What is the best type of stain to use on a rock fireplace?
The best stain depends on the rock type and desired look; acrylic stains are water-based and easy to clean, oil-based stains offer deep color and durability, and concrete stains are ideal for porous materials.
- How do I prepare a rock fireplace for staining?
Prepare the fireplace by thoroughly cleaning the surface, repairing any cracks or damage, and protecting surrounding areas with painter’s tape and plastic sheeting.
- Do I need to seal a rock fireplace after staining?
Yes, sealing is crucial to protect the stain from moisture, dirt, and wear, enhancing its durability and making it easier to clean.
- How often should I re-seal my stained rock fireplace?
Re-seal your fireplace every few years, depending on the type of sealer used and the amount of wear the surface receives, to maintain its protection and appearance.
- What are some common mistakes to avoid when staining a rock fireplace?
Avoid skipping surface preparation, choosing the wrong stain, not testing the stain, applying too much stain, and neglecting safety precautions.
- Can I achieve different looks with staining techniques?
Yes, experiment with dry brushing, rag rolling, and sponging to create unique, textured effects and multi-dimensional looks.
- Will staining damage the rock?
When done correctly with the appropriate stain and following instructions, staining should not damage the rock.
- How long does the stain last on a rock fireplace?
With proper maintenance and sealing, the stain can last for many years, depending on the type of stain, wear, and environmental conditions.
- Where can I find inspiration and resources for my rock fireplace project?
Visit rockscapes.net for design ideas, information on rock types, expert advice, and a directory of local suppliers to help you with your project.
Applying the shiplap