Getting rid of rocks in Animal Crossing can be a landscaping challenge, but rockscapes.net is here to guide you through it. You can strategically break and reposition rocks to achieve your ideal island aesthetic. Learn how to manage your island’s geology while maximizing resource collection, making your Animal Crossing experience even more enjoyable and tailored to your unique vision. Explore rock removal strategies to make informed decisions.
1. Understanding Rocks in Animal Crossing
In Animal Crossing: New Horizons, rocks serve as vital sources of resources and can significantly impact your island’s layout. Knowing how to manage these geological features is key to designing your dream island.
1.1. Role of Rocks
Rocks provide essential materials like stone, clay, iron nuggets, and occasionally, even Bells. These resources are crucial for crafting tools, furniture, and other items needed throughout the game. Therefore, managing your rocks effectively is vital for your island’s economy and development.
1.2. Natural Rock Spawn
When you first start your Animal Crossing: New Horizons island, rocks spawn in random locations. This can sometimes lead to inconvenient placements that disrupt your landscaping plans. Understanding the mechanics of rock spawning helps you to strategically manage their placement.
1.3. Rock Limit
Each island is limited to having a maximum of six rocks. This limit encourages players to think carefully about rock placement and management. Knowing this limit ensures that you can plan your island’s layout without the surprise of additional, unwanted rocks appearing.
2. Preparing to Remove Rocks
Before you start smashing rocks, proper preparation is essential to ensure you can move them strategically and efficiently.
2.1. Eating Fruit for Strength
To break a rock, you need to consume fruit. Each piece of fruit gives you the strength to destroy one rock. Common fruits like apples, oranges, cherries, peaches, and pears all work, as well as coconuts. Consider planting a variety of fruit trees to ensure you always have the necessary fuel for your rock-breaking activities.
2.2. Equipping a Shovel
You’ll need a shovel to break the rocks after eating fruit. Any type of shovel will do, from the flimsy shovel you craft at the beginning of the game to the golden shovel.
2.3. Choosing a Location
Before you break any rocks, plan where you want them to respawn. Rocks reappear in random locations, but you can control this randomness by covering your island with unwanted placements.
3. The Rock-Breaking Process
Breaking rocks is a straightforward process, but executing it strategically ensures you move rocks where you want them with minimal hassle.
3.1. Consuming Fruit
Eat a piece of fruit from your inventory. Your character will display a temporary power-up effect, indicating they now have the strength to break a rock.
3.2. Smashing the Rock
Equip your shovel and approach the rock you wish to remove. Press the A button to hit the rock with your shovel. The rock will break apart and disappear.
3.3. Managing Rock Respawn
After breaking a rock, it will respawn in a random location on your island the next day. To control where rocks reappear, cover most of your island with designs, mannequins, or other items to prevent rocks from spawning in those areas. This forces the game to place the new rock in one of the few remaining open spots.
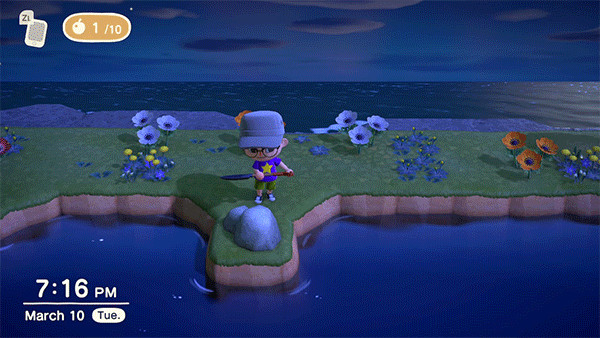 Animal Crossing character eating a peach to gain strength, alt text: Animal Crossing villager consumes a peach for rock-breaking power
4. Controlling Rock Placement
The key to effective rock management in Animal Crossing is controlling where the rocks respawn.
4.1. Preparing the Island
Before breaking rocks, prepare your island by covering unwanted spawn locations. You can use custom designs placed on the ground, mannequins, flowers, or furniture items. The goal is to leave only the desired locations open for rock respawn.
4.2. Using Mannequins
Mannequins are particularly effective because they take up an entire tile and are easy to place and remove. Create a simple custom design and display it as a mannequin. Place these mannequins across your island, leaving only the spots where you want the rocks to appear open.
4.3. Limiting Spawn Locations
By limiting the available spawn locations, you can manipulate the game into placing the rocks exactly where you want them. This method might take several days, as only one rock respawns per day, but it guarantees precise control over your island’s geology.
4.4. Example Layouts
Consider creating a rock garden or a decorative rock cluster by guiding the rocks to specific locations. Use designs to block off all areas except the chosen spot for each rock. Once all six rocks are in place, remove the designs to complete your desired rock arrangement.
5. Maximizing Resource Collection
While moving rocks, it’s essential to maximize your resource collection efficiency.
5.1. The 8-Hit Method
To get the most resources from each rock, use the 8-hit method. This technique involves digging two holes behind you before hitting the rock. These holes prevent you from being knocked back, allowing you to hit the rock repeatedly in quick succession.
5.2. Clearing Obstructions
Clear any flowers, weeds, or other items around the rock to ensure nothing interferes with your ability to hit it eight times. The fewer obstructions, the better your chances of maximizing your resource yield.
5.3. Maximizing Bell Collection
Sometimes, rocks will produce Bells instead of materials. To maximize your Bell collection, use the same 8-hit method. Hitting the Money Rock multiple times in quick succession can yield a substantial amount of Bells, which is invaluable for upgrading your island.
6. Common Mistakes to Avoid
Avoiding common mistakes can save you time and frustration when managing rocks.
6.1. Breaking All Rocks at Once
Breaking all your rocks at once can halt your progress. Rocks provide essential resources needed daily. Breaking them all at once means you’ll have to wait several days for them to respawn, one rock per day, leaving you short on necessary materials.
6.2. Not Preparing Spawn Locations
Failing to prepare spawn locations before breaking rocks results in random rock placements that might not fit your island design. This leads to extra work and wasted time as you repeatedly break and move rocks.
6.3. Forgetting to Eat Fruit
Attempting to break a rock without eating fruit is a common mistake. Remember, you need the temporary strength boost from fruit to destroy rocks.
6.4. Inconsistent Blocking
Inconsistent blocking of spawn locations can lead to rocks appearing in unexpected places. Ensure every unwanted location is thoroughly covered to prevent unwanted rock spawns.
7. Creative Rock Landscaping Ideas
Once you’ve mastered rock management, you can explore creative ways to incorporate rocks into your island’s landscape.
7.1. Rock Gardens
Rock gardens are a popular choice for adding a touch of zen to your island. Arrange rocks in a visually pleasing manner, surrounded by sand, moss, or decorative items like stone lanterns and bonsai trees.
7.2. Natural Rock Formations
Create natural-looking rock formations by clustering rocks together and adding foliage around them. This can mimic real-world geological features and add depth to your island’s scenery.
7.3. Rock Pathways
Use rocks to line pathways, creating a rustic and natural aesthetic. Combine rocks with dirt paths and strategically placed plants to enhance the overall look.
7.4. Elevated Rock Displays
Create elevated rock displays by using cliffs and inclines. This adds verticality to your landscape and offers unique vantage points for viewing your island.
8. Tools and Resources for Rock Management
Several tools and resources can aid you in managing rocks effectively.
8.1. Custom Design Slots
Utilize custom design slots to create simple patterns for blocking unwanted spawn locations. These designs are easy to place and remove, making them ideal for controlling rock placement.
8.2. Island Designer App
The Island Designer app, unlocked after achieving a certain level of island development, allows you to create and modify terrain, including cliffs and waterways. This tool is invaluable for shaping your island’s landscape and planning rock placements.
8.3. Online Communities
Join online Animal Crossing communities and forums to exchange tips and ideas with other players. These communities often share custom designs, layout plans, and strategies for effective rock management.
9. Troubleshooting Rock Placement
Sometimes, despite your best efforts, rocks might spawn in unexpected locations. Here’s how to troubleshoot common issues.
9.1. Identifying Open Spaces
Carefully inspect your island to identify any small, overlooked spaces where rocks could spawn. These might be gaps between furniture items, behind buildings, or along the edges of cliffs.
9.2. Adjusting Blocking Strategies
If rocks continue to spawn in unwanted locations, adjust your blocking strategies. Add more designs or mannequins to cover these areas thoroughly.
9.3. Resetting Rock Locations
If you’re unhappy with the current rock placements, you can reset them by breaking all the rocks again and starting the placement process from scratch. This is time-consuming, but it allows you to completely redesign your rock layout.
10. Advanced Rock Management Techniques
For players looking to take their rock management skills to the next level, here are some advanced techniques.
10.1. Using Fences for Blocking
Fences can be used to block off large areas quickly. While they might not be as precise as custom designs, they are effective for preventing rocks from spawning in broad regions.
10.2. Combining Blocking Methods
Combine different blocking methods for maximum control. Use mannequins for precise placement and fences for broader coverage.
10.3. Planning for Future Development
When planning your rock placements, consider your future island development plans. Think about where you might want to build structures, create pathways, or expand your landscaping.
11. The Aesthetics of Rockscapes
Understanding the aesthetic appeal of rockscapes enhances your island’s visual charm.
11.1. Color Coordination
Coordinate the colors of your rocks with the surrounding landscape. Use different types of ground coverings, flowers, and furniture items to complement the rocks’ natural hues.
11.2. Creating Contrast
Create contrast by juxtaposing rocks with softer elements like flowers, moss, and flowing water. This adds visual interest and makes your rockscapes stand out.
11.3. Incorporating Lighting
Incorporate lighting elements like stone lanterns, tiki torches, and string lights to highlight your rockscapes at night. This adds ambiance and showcases the rocks’ textures and forms.
11.4. Seasonal Themes
Adapt your rockscapes to seasonal themes. Add autumn leaves in the fall, snow in the winter, and blooming flowers in the spring to create dynamic and ever-changing landscapes.
12. Utilizing Rockscapes.net for Inspiration
For more ideas and inspiration on creating stunning rockscapes, visit rockscapes.net. Our website offers a wealth of resources, including design ideas, step-by-step guides, and expert advice.
12.1. Design Galleries
Browse our design galleries to see examples of beautifully crafted rockscapes. These galleries showcase a variety of styles and techniques, providing inspiration for your own island designs.
12.2. Step-by-Step Guides
Follow our step-by-step guides to learn how to create specific rock formations and landscaping features. These guides provide detailed instructions and helpful tips for achieving professional-looking results.
12.3. Expert Advice
Get expert advice from our team of landscaping professionals. Our experts can answer your questions, offer personalized recommendations, and help you troubleshoot any issues you encounter.
13. Community Showcase
Share your own rockscape creations with the rockscapes.net community.
13.1. Submitting Your Designs
Submit your designs to our community showcase and inspire other players with your creativity. We feature outstanding rockscapes on our website and social media channels.
13.2. Participating in Contests
Participate in our rockscape design contests for a chance to win prizes and recognition. These contests encourage creativity and innovation, and they provide a platform for showcasing your talents.
13.3. Networking with Other Players
Connect with other Animal Crossing players on our forums and social media channels. Share tips, exchange ideas, and collaborate on joint projects.
14. Integrating Rockscapes with Other Island Features
Seamlessly integrate rockscapes with other island features to create a cohesive and harmonious environment.
14.1. Water Features
Combine rockscapes with water features like ponds, streams, and waterfalls. The interplay of rocks and water creates a tranquil and visually appealing landscape.
14.2. Cliffside Designs
Incorporate rockscapes into cliffside designs to add depth and texture to your island’s terrain. Use rocks to create natural-looking cliffs and enhance the overall verticality of your landscape.
14.3. Forest Integration
Integrate rockscapes into forested areas to create a wild and natural aesthetic. Use rocks to line pathways, create seating areas, and add visual interest to the forest floor.
14.4. Urban Rockscapes
Even in urban areas, rockscapes can add a touch of nature and tranquility. Use rocks to create small gardens, line sidewalks, and add visual interest to otherwise sterile environments.
15. The Role of Rocks in Island Themes
Rocks can play a significant role in defining your island’s theme.
15.1. Rustic Themes
For rustic themes, use rocks to create natural-looking formations, line pathways, and add texture to the landscape. Combine rocks with wooden furniture, dirt paths, and overgrown foliage to enhance the rustic aesthetic.
15.2. Zen Themes
In zen-themed islands, use rocks to create minimalist rock gardens, line meditation areas, and add a sense of tranquility to the environment. Combine rocks with sand, moss, and carefully placed plants to enhance the zen aesthetic.
15.3. Fantasy Themes
For fantasy themes, use rocks to create otherworldly landscapes, build castles and ruins, and add a sense of mystery and adventure to the environment. Combine rocks with glowing mushrooms, fantasy-themed furniture, and dramatic lighting to enhance the fantasy aesthetic.
15.4. Modern Themes
Even in modern-themed islands, rocks can add a touch of nature and sophistication. Use rocks to create sleek and minimalist rock gardens, line paved pathways, and add visual interest to urban environments. Combine rocks with metal furniture, concrete paths, and modern lighting to enhance the modern aesthetic.
16. Maintaining Your Rockscapes
Proper maintenance ensures your rockscapes remain beautiful and functional.
16.1. Weed Control
Regularly remove weeds from around your rocks to keep your rockscapes looking tidy and well-maintained. Weeds can detract from the aesthetic appeal of your rockscapes and can even damage the rocks over time.
16.2. Cleaning Rocks
Clean your rocks periodically to remove dirt, moss, and other debris. Use a soft brush and water to gently scrub the rocks, revealing their natural colors and textures.
16.3. Repairing Damage
Repair any damage to your rockscapes promptly. Replace cracked or broken rocks, and reinforce any areas that are prone to erosion or collapse.
16.4. Seasonal Adjustments
Make seasonal adjustments to your rockscapes to keep them looking fresh and relevant. Add autumn leaves in the fall, snow in the winter, and blooming flowers in the spring to create dynamic and ever-changing landscapes.
17. Legal and Ethical Considerations
Be aware of legal and ethical considerations when sourcing and using rocks in your rockscapes.
17.1. Sourcing Rocks Responsibly
Source rocks from reputable suppliers who adhere to sustainable and ethical practices. Avoid collecting rocks from protected areas or private property without permission.
17.2. Avoiding Invasive Species
Be careful not to introduce invasive species when using rocks in your rockscapes. Inspect rocks thoroughly for any signs of pests or diseases, and take steps to prevent their spread.
17.3. Respecting Local Regulations
Respect local regulations regarding the use of rocks in landscaping. Some areas may have restrictions on the types of rocks you can use, the amount of rocks you can collect, or the way you can arrange them.
18. Future Trends in Rockscape Design
Stay informed about future trends in rockscape design to keep your island looking fresh and innovative.
18.1. Sustainable Rockscapes
Sustainable rockscapes are becoming increasingly popular as players seek to minimize their environmental impact. These rockscapes use locally sourced rocks, drought-tolerant plants, and water-efficient irrigation systems to create beautiful and sustainable landscapes.
18.2. Interactive Rockscapes
Interactive rockscapes are designed to engage players and encourage exploration. These rockscapes may include hidden pathways, secret gardens, and interactive elements like water features and lighting effects.
18.3. Vertical Rockscapes
Vertical rockscapes are a great way to add depth and texture to your island’s landscape. These rockscapes use climbing plants, hanging baskets, and vertical structures to create stunning displays of rock and foliage.
18.4. Technological Integration
Technological integration is becoming increasingly common in rockscape design. Players are using lighting effects, sound systems, and other technological elements to create immersive and dynamic rockscapes.
19. Conclusion: The Art of Rock Management in Animal Crossing
Mastering rock management in Animal Crossing: New Horizons is an art that combines strategy, creativity, and a bit of patience. By understanding the mechanics of rock spawning, preparing your island effectively, and using creative landscaping ideas, you can transform your island into a geological masterpiece. Remember to visit rockscapes.net for inspiration, expert advice, and a wealth of resources to help you on your rock management journey.
20. FAQ: Your Questions About Rock Management Answered
Here are some frequently asked questions about managing rocks in Animal Crossing: New Horizons.
20.1. How many rocks can I have on my island?
You can have a maximum of six rocks on your island. This limit encourages strategic planning and careful rock placement.
20.2. How do I break a rock?
To break a rock, eat a piece of fruit to gain strength, then hit the rock with a shovel.
20.3. Where do rocks respawn after I break them?
Rocks respawn in a random location on your island the next day. You can control this by covering unwanted spawn locations.
20.4. Can I move rocks to a specific location?
Yes, by preparing your island and limiting spawn locations, you can manipulate where rocks reappear.
20.5. What should I do if a rock spawns in an unwanted location?
If a rock spawns in an unwanted location, break it and continue to refine your blocking strategy.
20.6. How do I maximize resource collection from rocks?
Use the 8-hit method by digging two holes behind you before hitting the rock, preventing knockback.
20.7. What are some creative rock landscaping ideas?
Consider creating rock gardens, natural rock formations, rock pathways, or elevated rock displays.
20.8. Can I use rocks to define my island’s theme?
Yes, rocks can play a significant role in defining your island’s theme, whether it’s rustic, zen, fantasy, or modern.
20.9. How do I maintain my rockscapes?
Regularly remove weeds, clean the rocks, repair any damage, and make seasonal adjustments to keep your rockscapes looking their best.
20.10. Where can I find inspiration for rockscape designs?
Visit rockscapes.net for design ideas, step-by-step guides, and expert advice on creating stunning rockscapes.
Ready to transform your island with breathtaking rockscapes? Explore the endless possibilities at rockscapes.net. Discover a diverse range of design ideas, detailed information on various rock types, and helpful construction tips. Let our experts at Address: 1151 S Forest Ave, Tempe, AZ 85281, United States, Phone: +1 (480) 965-9011, Website: rockscapes.net guide you in creating the landscape of your dreams. Don’t wait—begin your journey to a more beautiful and functional outdoor space today!