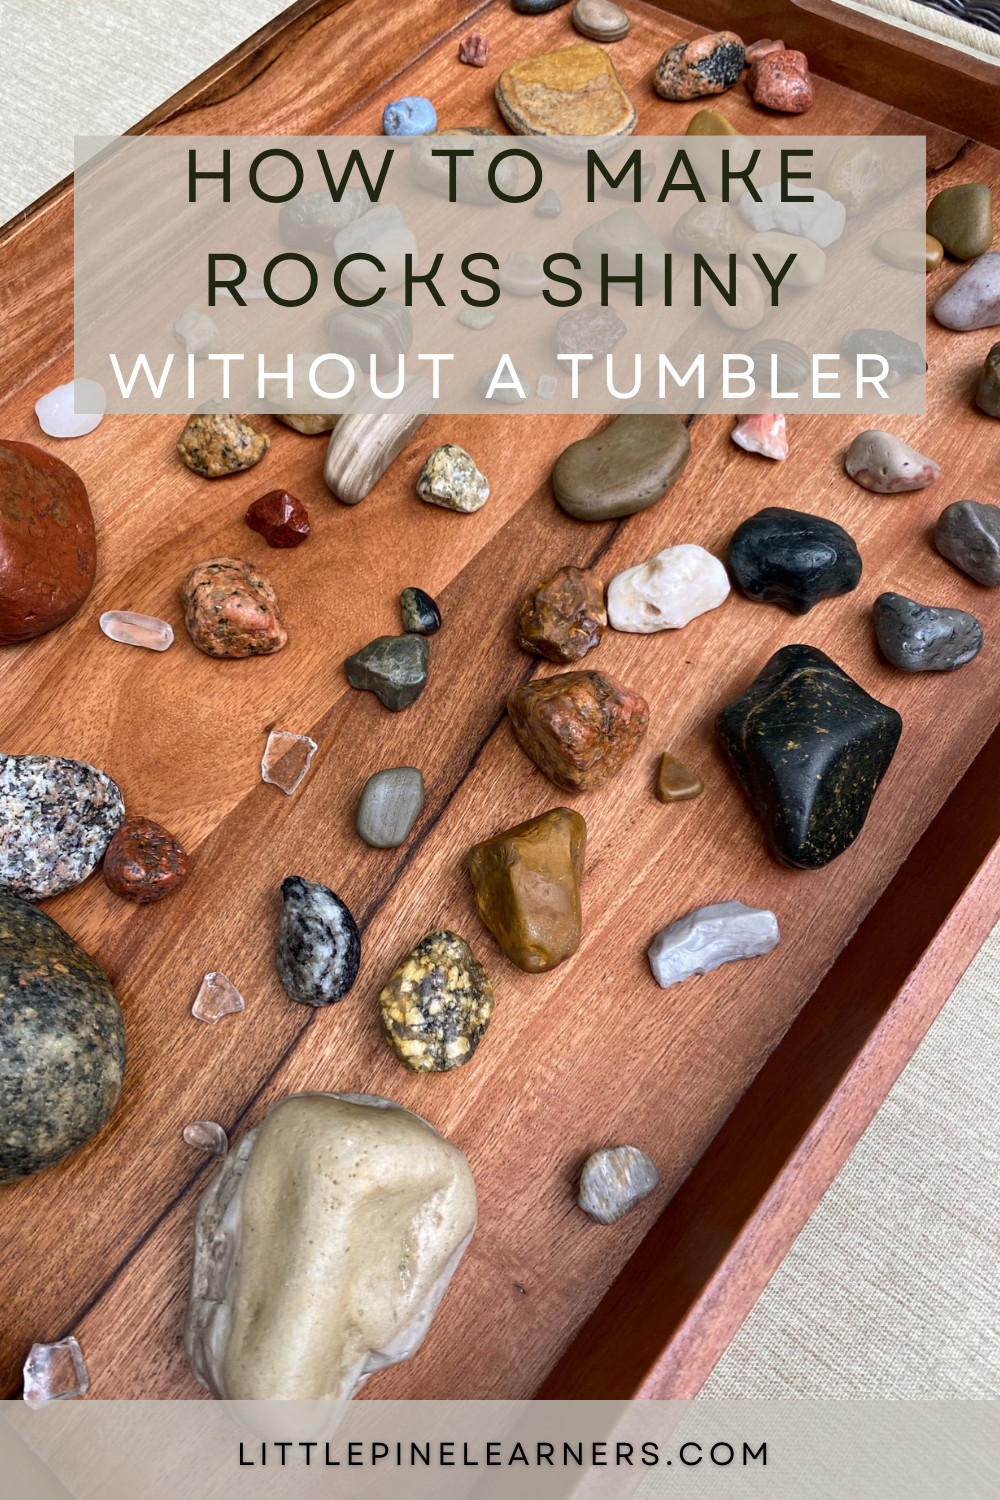
Making polished rocks shiny is easier than you think, and this guide from rockscapes.net will show you how to achieve that stunning, wet-look shine without the need for a rock tumbler! Discover the simple techniques and materials to transform dull stones into dazzling gems, adding beauty and value to your rock collections and landscape designs. Explore the secrets of rock polishing, enhancing their natural luster, and learn about various types of oil, their benefits, and safety precautions.
1. Why Polish Rocks to Make Them Shiny?
Polishing rocks isn’t just about aesthetics; it’s about revealing the hidden beauty within. But why go through the process?
- Enhances Natural Beauty: Polishing brings out the vibrant colors and unique patterns that are often hidden beneath a dull, rough surface. It’s like unveiling a masterpiece that was always there.
- Increases Value: Polished rocks are more desirable for collectors and can be used in jewelry making, home decor, and landscaping, increasing their market value.
- Provides a Sense of Accomplishment: There’s a deep satisfaction in transforming an ordinary rock into something beautiful. It’s a rewarding hobby that connects you with nature.
- Educational Opportunity: Polishing rocks can be an educational activity for kids and adults alike, teaching about geology, mineralogy, and the natural processes that create these stones.
- Therapeutic Activity: The repetitive nature of polishing can be relaxing and meditative, providing a break from the stresses of daily life.
2. What Are the Different Methods to Polish Rocks?
There are several methods for polishing rocks, each with its own advantages and drawbacks. Let’s explore the most common techniques:
- Rock Tumbling: This is the most common method, involving a machine that tumbles rocks with abrasive grits and polishes over several weeks. It’s effective for large batches and harder stones.
- Hand Polishing: This method involves using sandpaper, polishing cloths, and polishing compounds to manually polish rocks. It’s great for single pieces or delicate stones that might be damaged in a tumbler.
- Vibratory Tumbling: Similar to rock tumbling, but uses a vibrating motion instead of rotation. It’s faster than traditional tumbling and gentler on fragile stones.
- Lapidary Machines: These machines use rotating laps with abrasive compounds to grind and polish rocks. They’re ideal for creating cabochons and other precise shapes.
- Oil Polishing: This simple method involves applying oil to the rocks to enhance their natural shine. It’s a quick and easy way to make rocks look wet and vibrant.
Each method caters to different needs and resources. Rock tumbling is excellent for bulk processing, while hand polishing offers precision and control. Oil polishing, a focus of this article, provides an immediate, beautiful shine with minimal effort.
3. How Does Oil Polishing Compare to Other Rock Polishing Methods?
Oil polishing stands out from other methods due to its simplicity and speed. Here’s a comparison:
| Method | Time Required | Equipment | Skill Level | Durability of Shine | Best For |
|---|---|---|---|---|---|
| Oil Polishing | Hours | Jar, oil, towel | Beginner | Weeks | Quick results, enhancing color |
| Rock Tumbling | Weeks | Rock tumbler, grits | Intermediate | Months | Large batches, hard stones |
| Hand Polishing | Hours | Sandpaper, cloths | Intermediate | Months | Single pieces, delicate stones |
| Vibratory Tumbling | Days | Vibratory tumbler | Intermediate | Months | Faster tumbling, fragile stones |
| Lapidary Machines | Hours | Lapidary machine | Advanced | Months | Precise shapes, cabochons |
Oil polishing is perfect for those who want instant gratification and don’t want to invest in expensive equipment. However, the shine is temporary, requiring reapplication every few weeks.
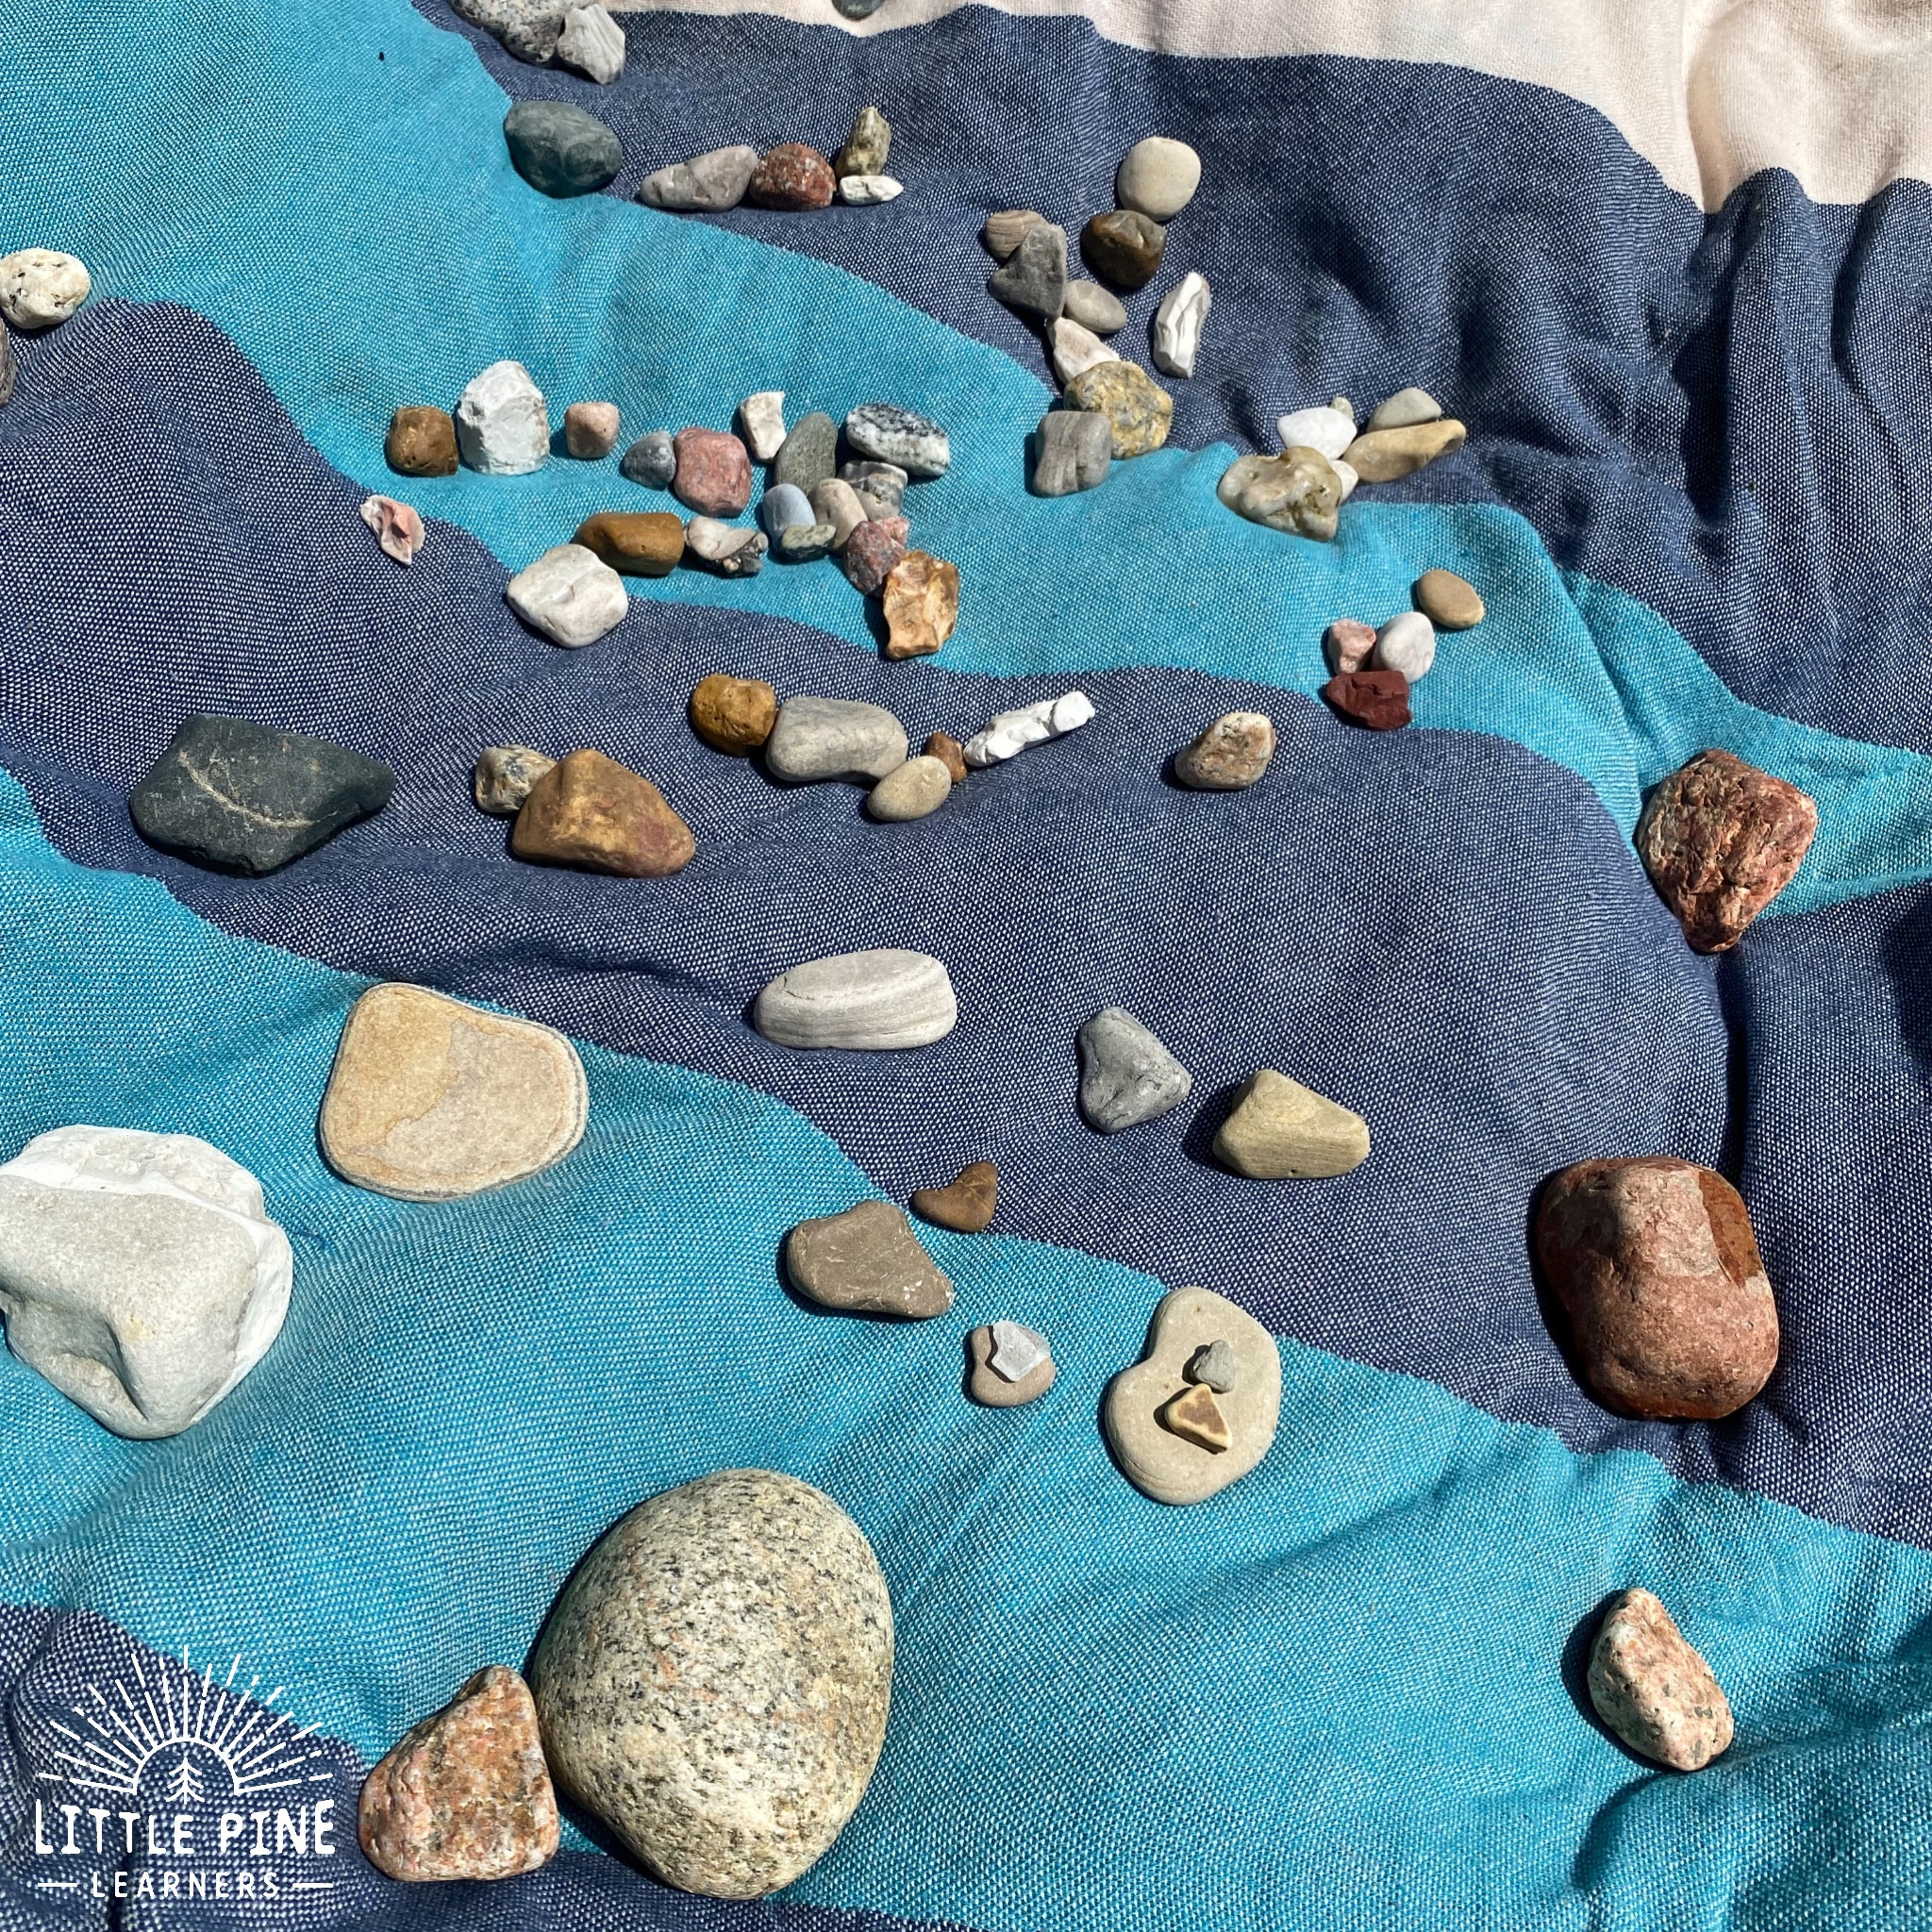
4. What Types of Rocks Benefit Most From Oil Polishing?
While oil polishing can enhance the appearance of many rocks, certain types benefit the most:
- Agates: Their intricate banding and vibrant colors are intensified by oil, making the patterns pop.
- Jaspers: With their earthy tones and unique patterns, jaspers become richer and more visually appealing with oil.
- Petrified Wood: The wood grain and mineral inclusions are highlighted, giving the petrified wood a more lifelike appearance.
- Fossils: Oil can accentuate the details of fossils, making them more visible and enhancing their preservation.
- Quartz: While clear quartz may not show a dramatic difference, colored varieties like rose quartz or amethyst will have their hues deepened.
 Agate stone polished with oil for enhanced patterns
These rocks tend to have porous surfaces that absorb the oil, resulting in a more dramatic and long-lasting shine. Experimenting with different types of rocks can reveal surprising results and enhance your collection’s overall appeal.
5. What Types of Oils Are Best for Polishing Rocks?
Choosing the right oil is crucial for achieving the best results. Here are some top choices:
- Mineral Oil: This is a popular choice due to its clarity, non-toxicity, and ability to penetrate the rock’s surface. Food-grade mineral oil is safe and readily available.
- Jojoba Oil: An environmentally friendly option, jojoba oil is a natural wax ester that mimics the skin’s natural oils. It’s non-greasy and has a long shelf life.
- Linseed Oil: This oil dries to a hard, glossy finish, providing a more durable shine. However, it can yellow over time and requires proper ventilation due to its flammability.
- Tung Oil: Similar to linseed oil, tung oil provides a hard, water-resistant finish. It’s a good option for rocks that will be exposed to the elements.
- Baby Oil: A readily available and affordable option, baby oil is essentially mineral oil with added fragrance.
Each oil has its pros and cons. Mineral oil and jojoba oil are great for beginners, while linseed and tung oil are better for more experienced rock enthusiasts who want a longer-lasting shine.
6. Step-by-Step Guide: How to Polish Rocks With Oil
Ready to make your rocks shine? Follow these simple steps:
Step 1: Gather Your Supplies
You’ll need:
- Rocks to polish
- Mild soap
- Water
- A jar or container
- Your choice of oil (mineral oil or jojoba oil recommended)
- A strainer
- Paper towels
- An old towel or polishing cloth
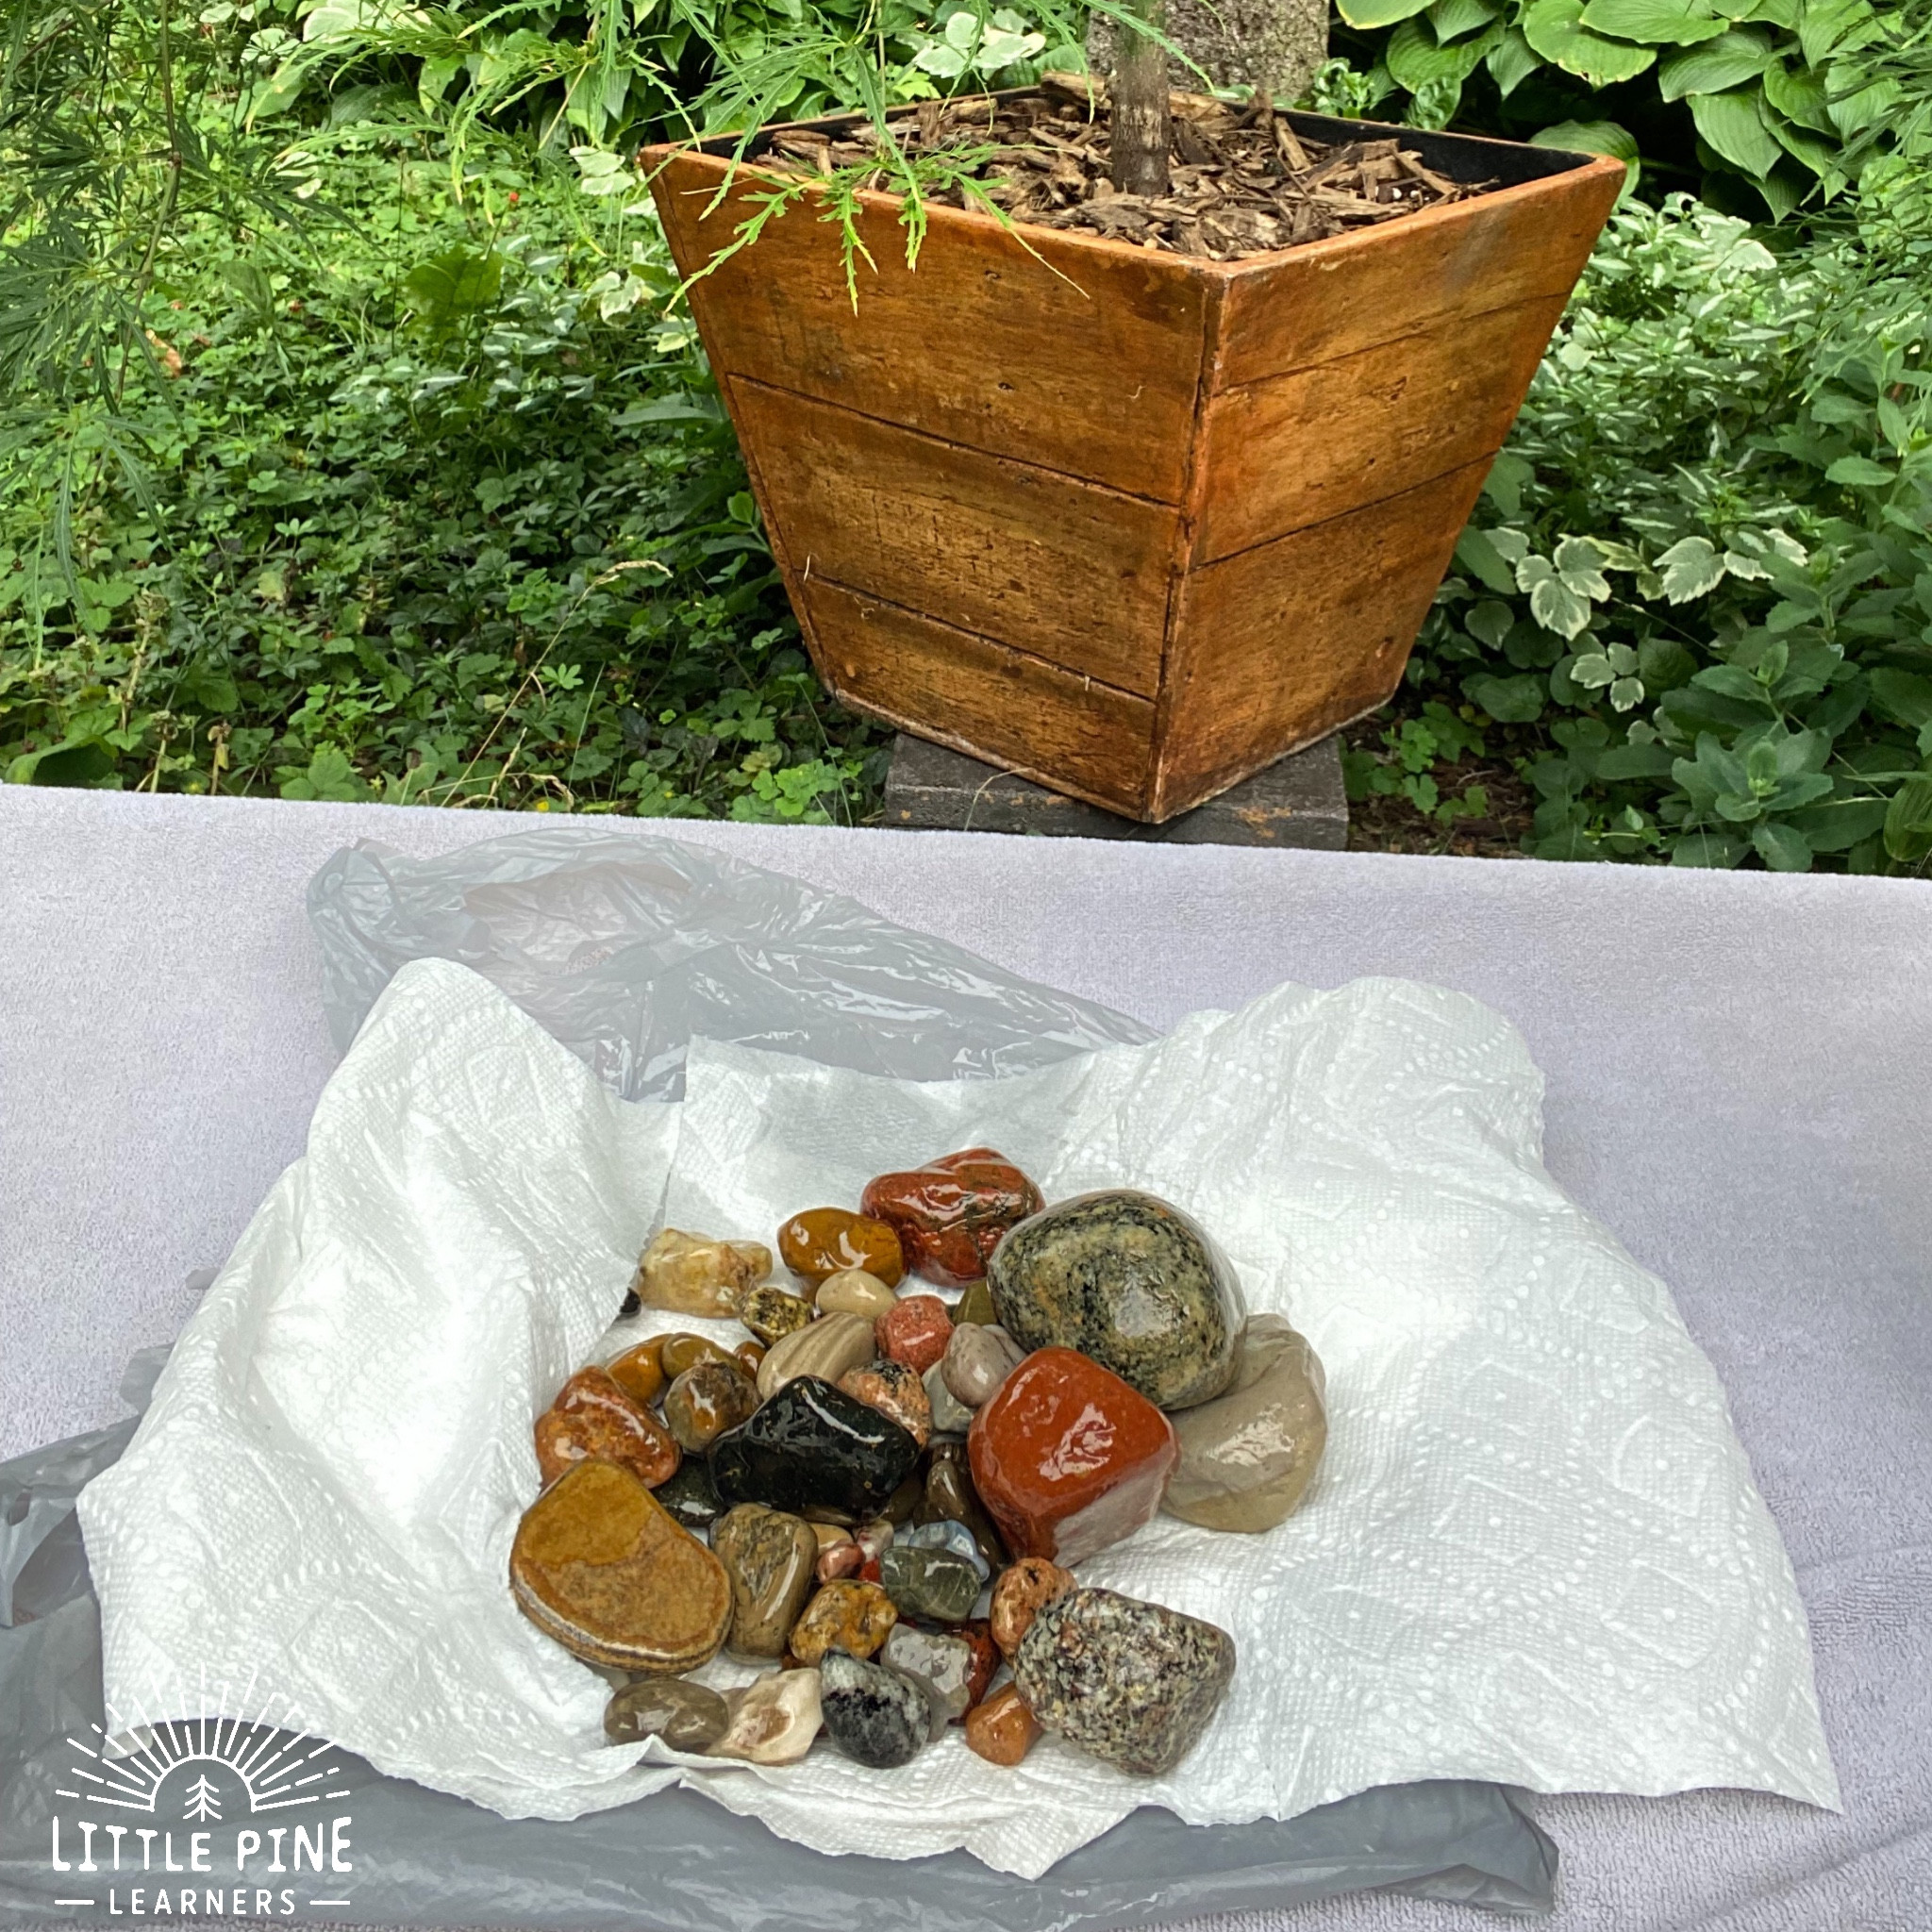
Step 2: Clean the Rocks
Wash the rocks thoroughly with soap and water to remove any dirt, debris, or residue. Rinse them well and allow them to dry completely.
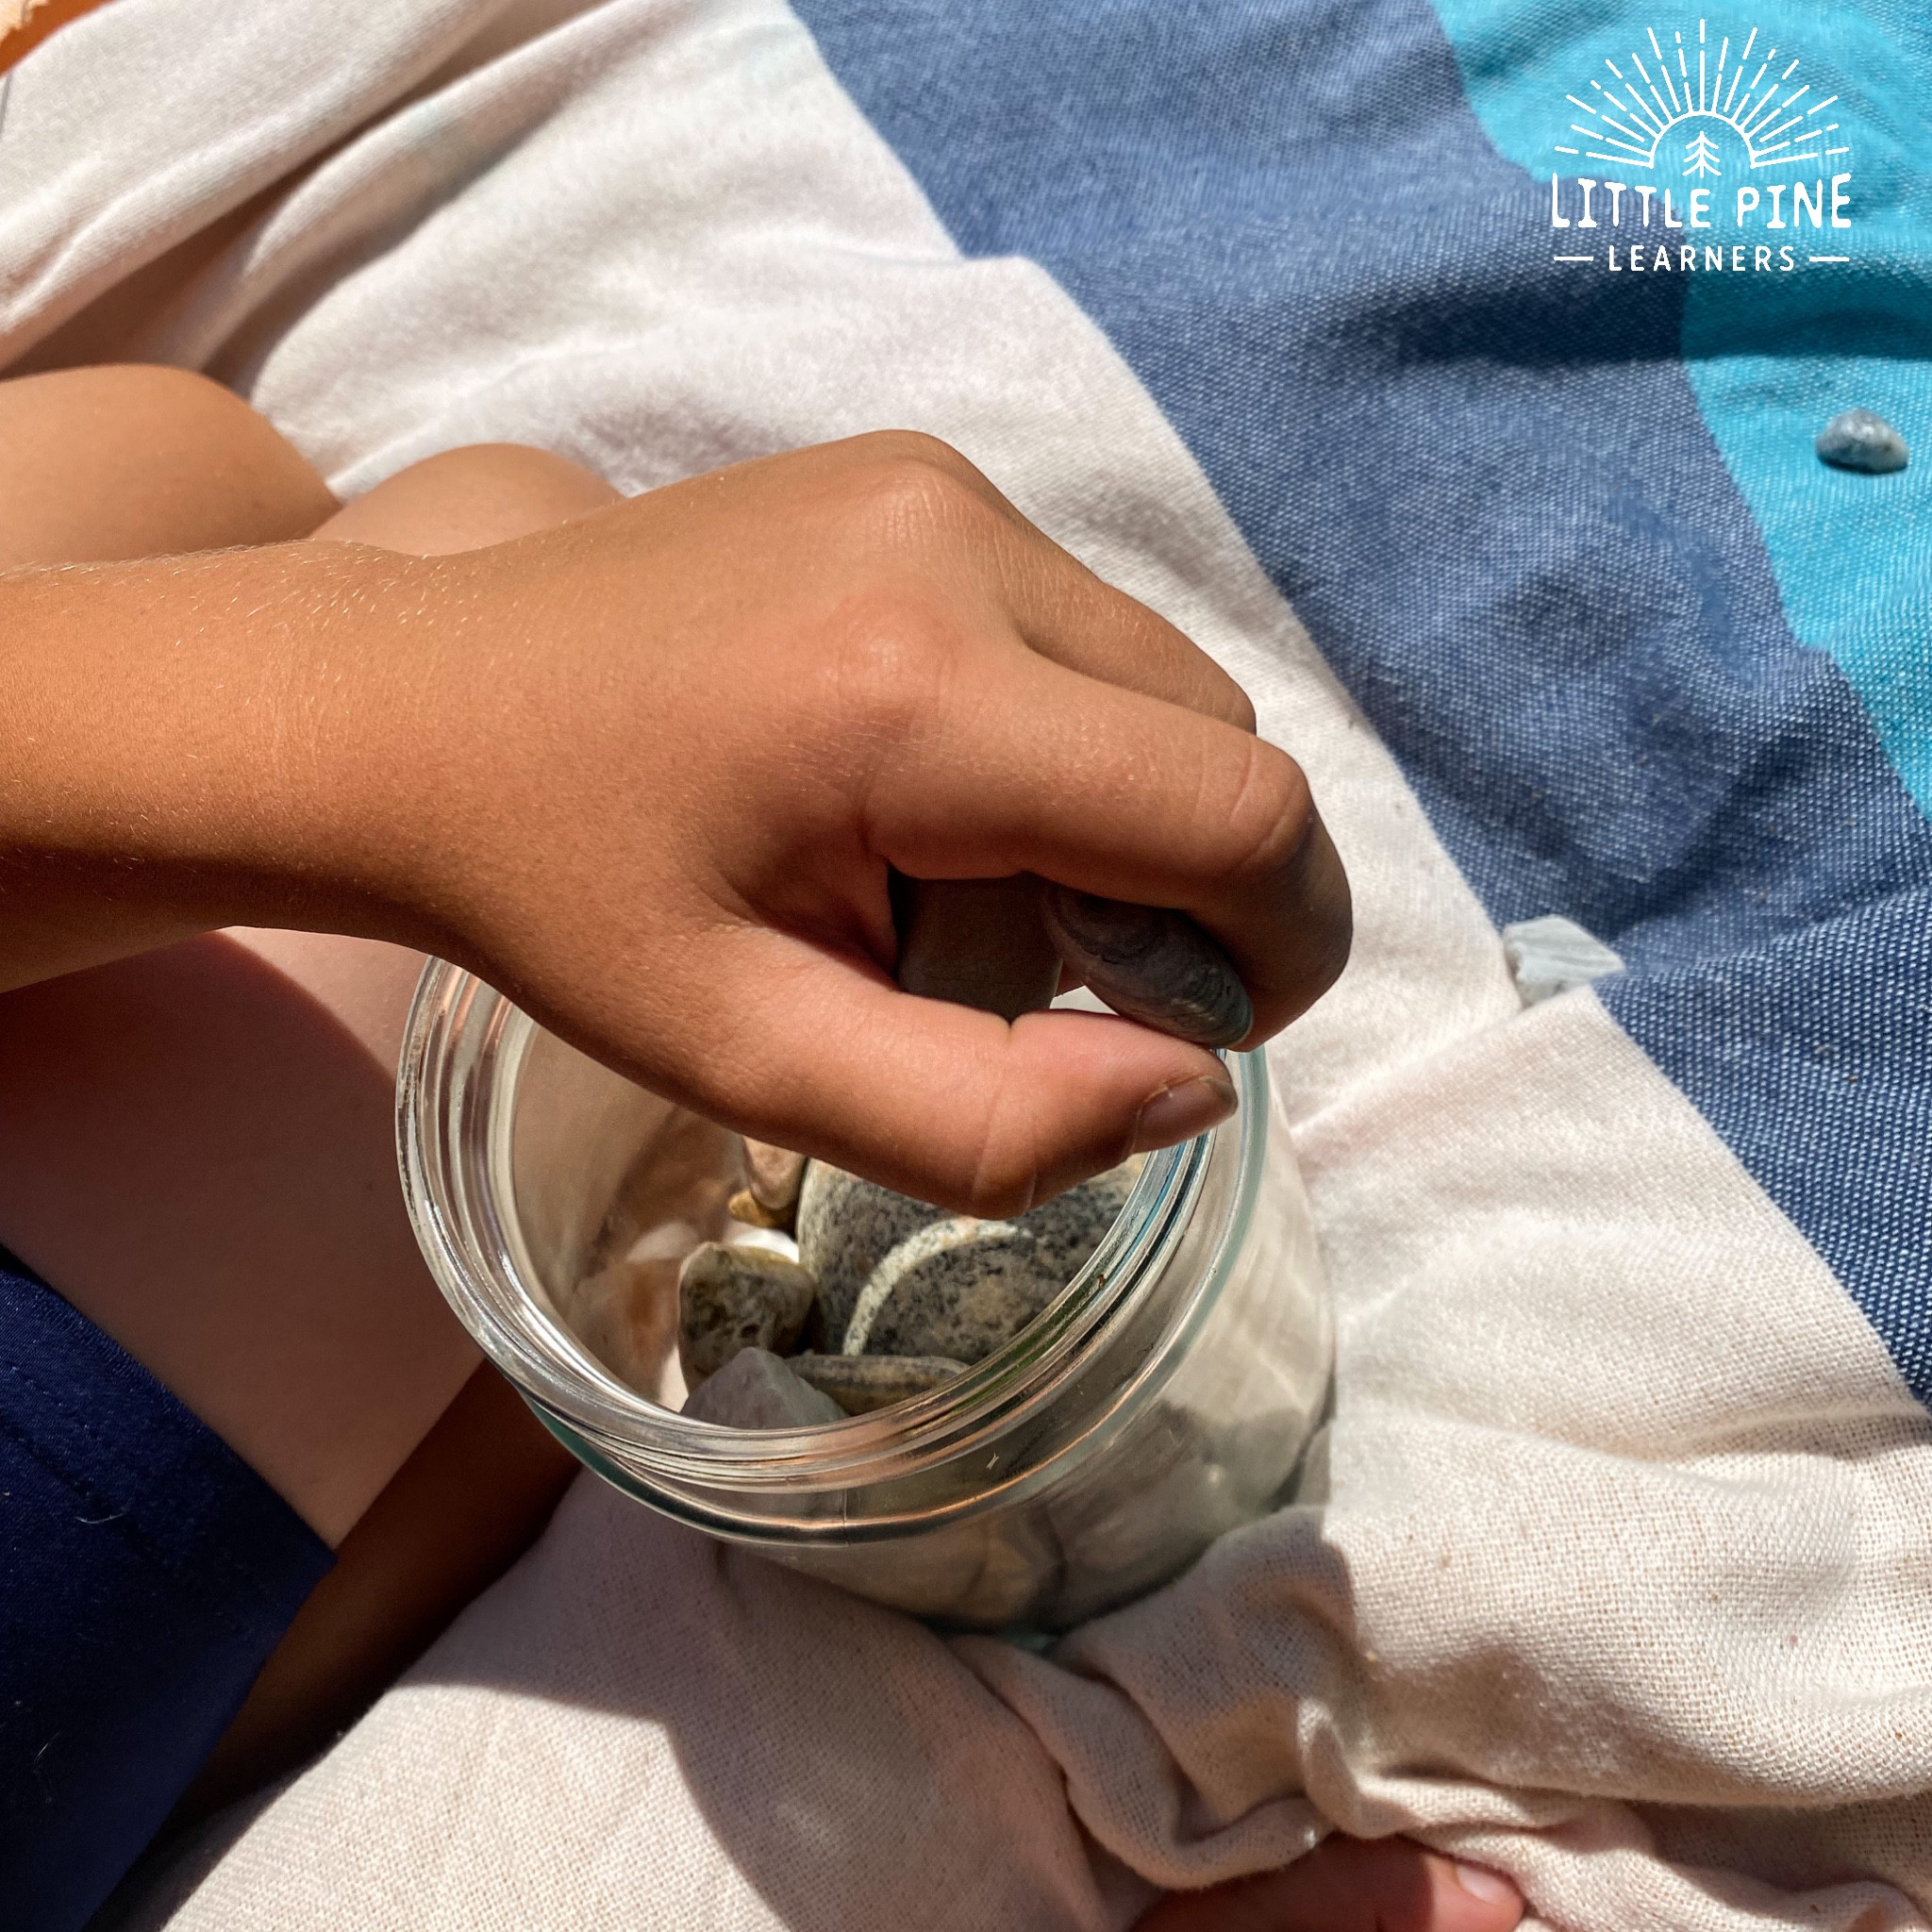 Washing stones for oil polishing
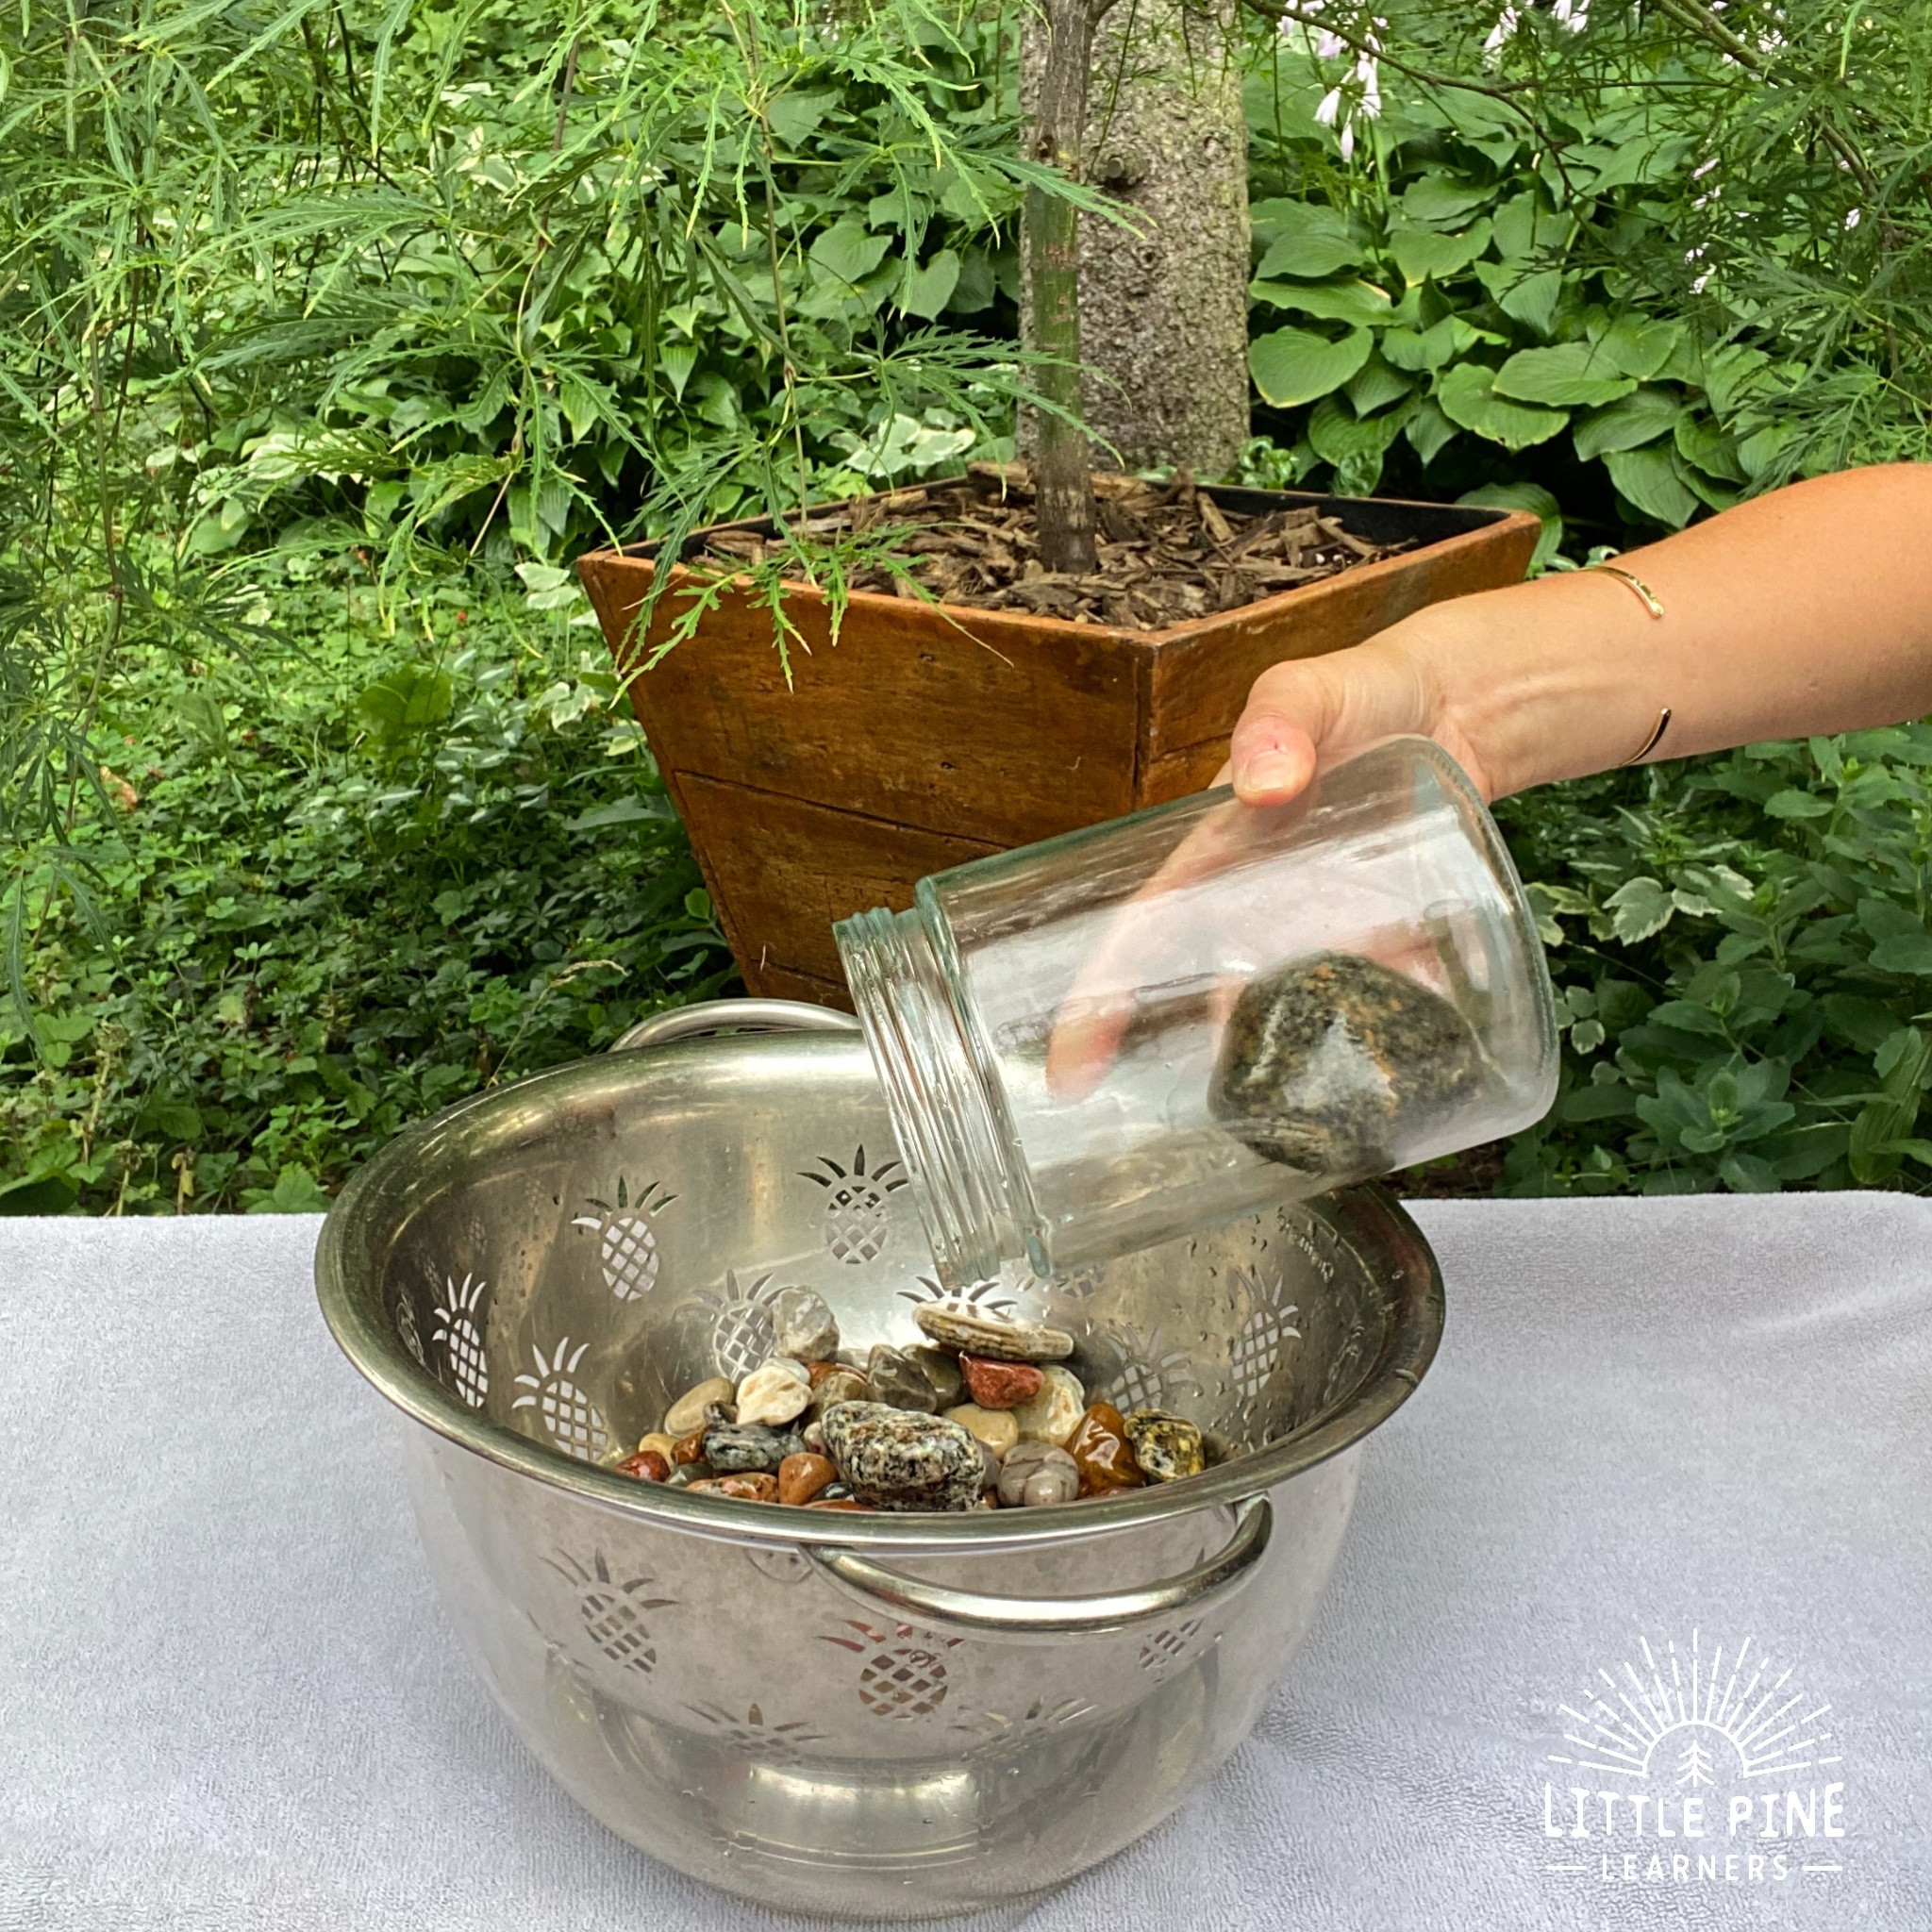
Step 3: Soak the Rocks in Oil
Place the clean, dry rocks in a jar or container. Pour oil over the rocks until they are completely submerged.
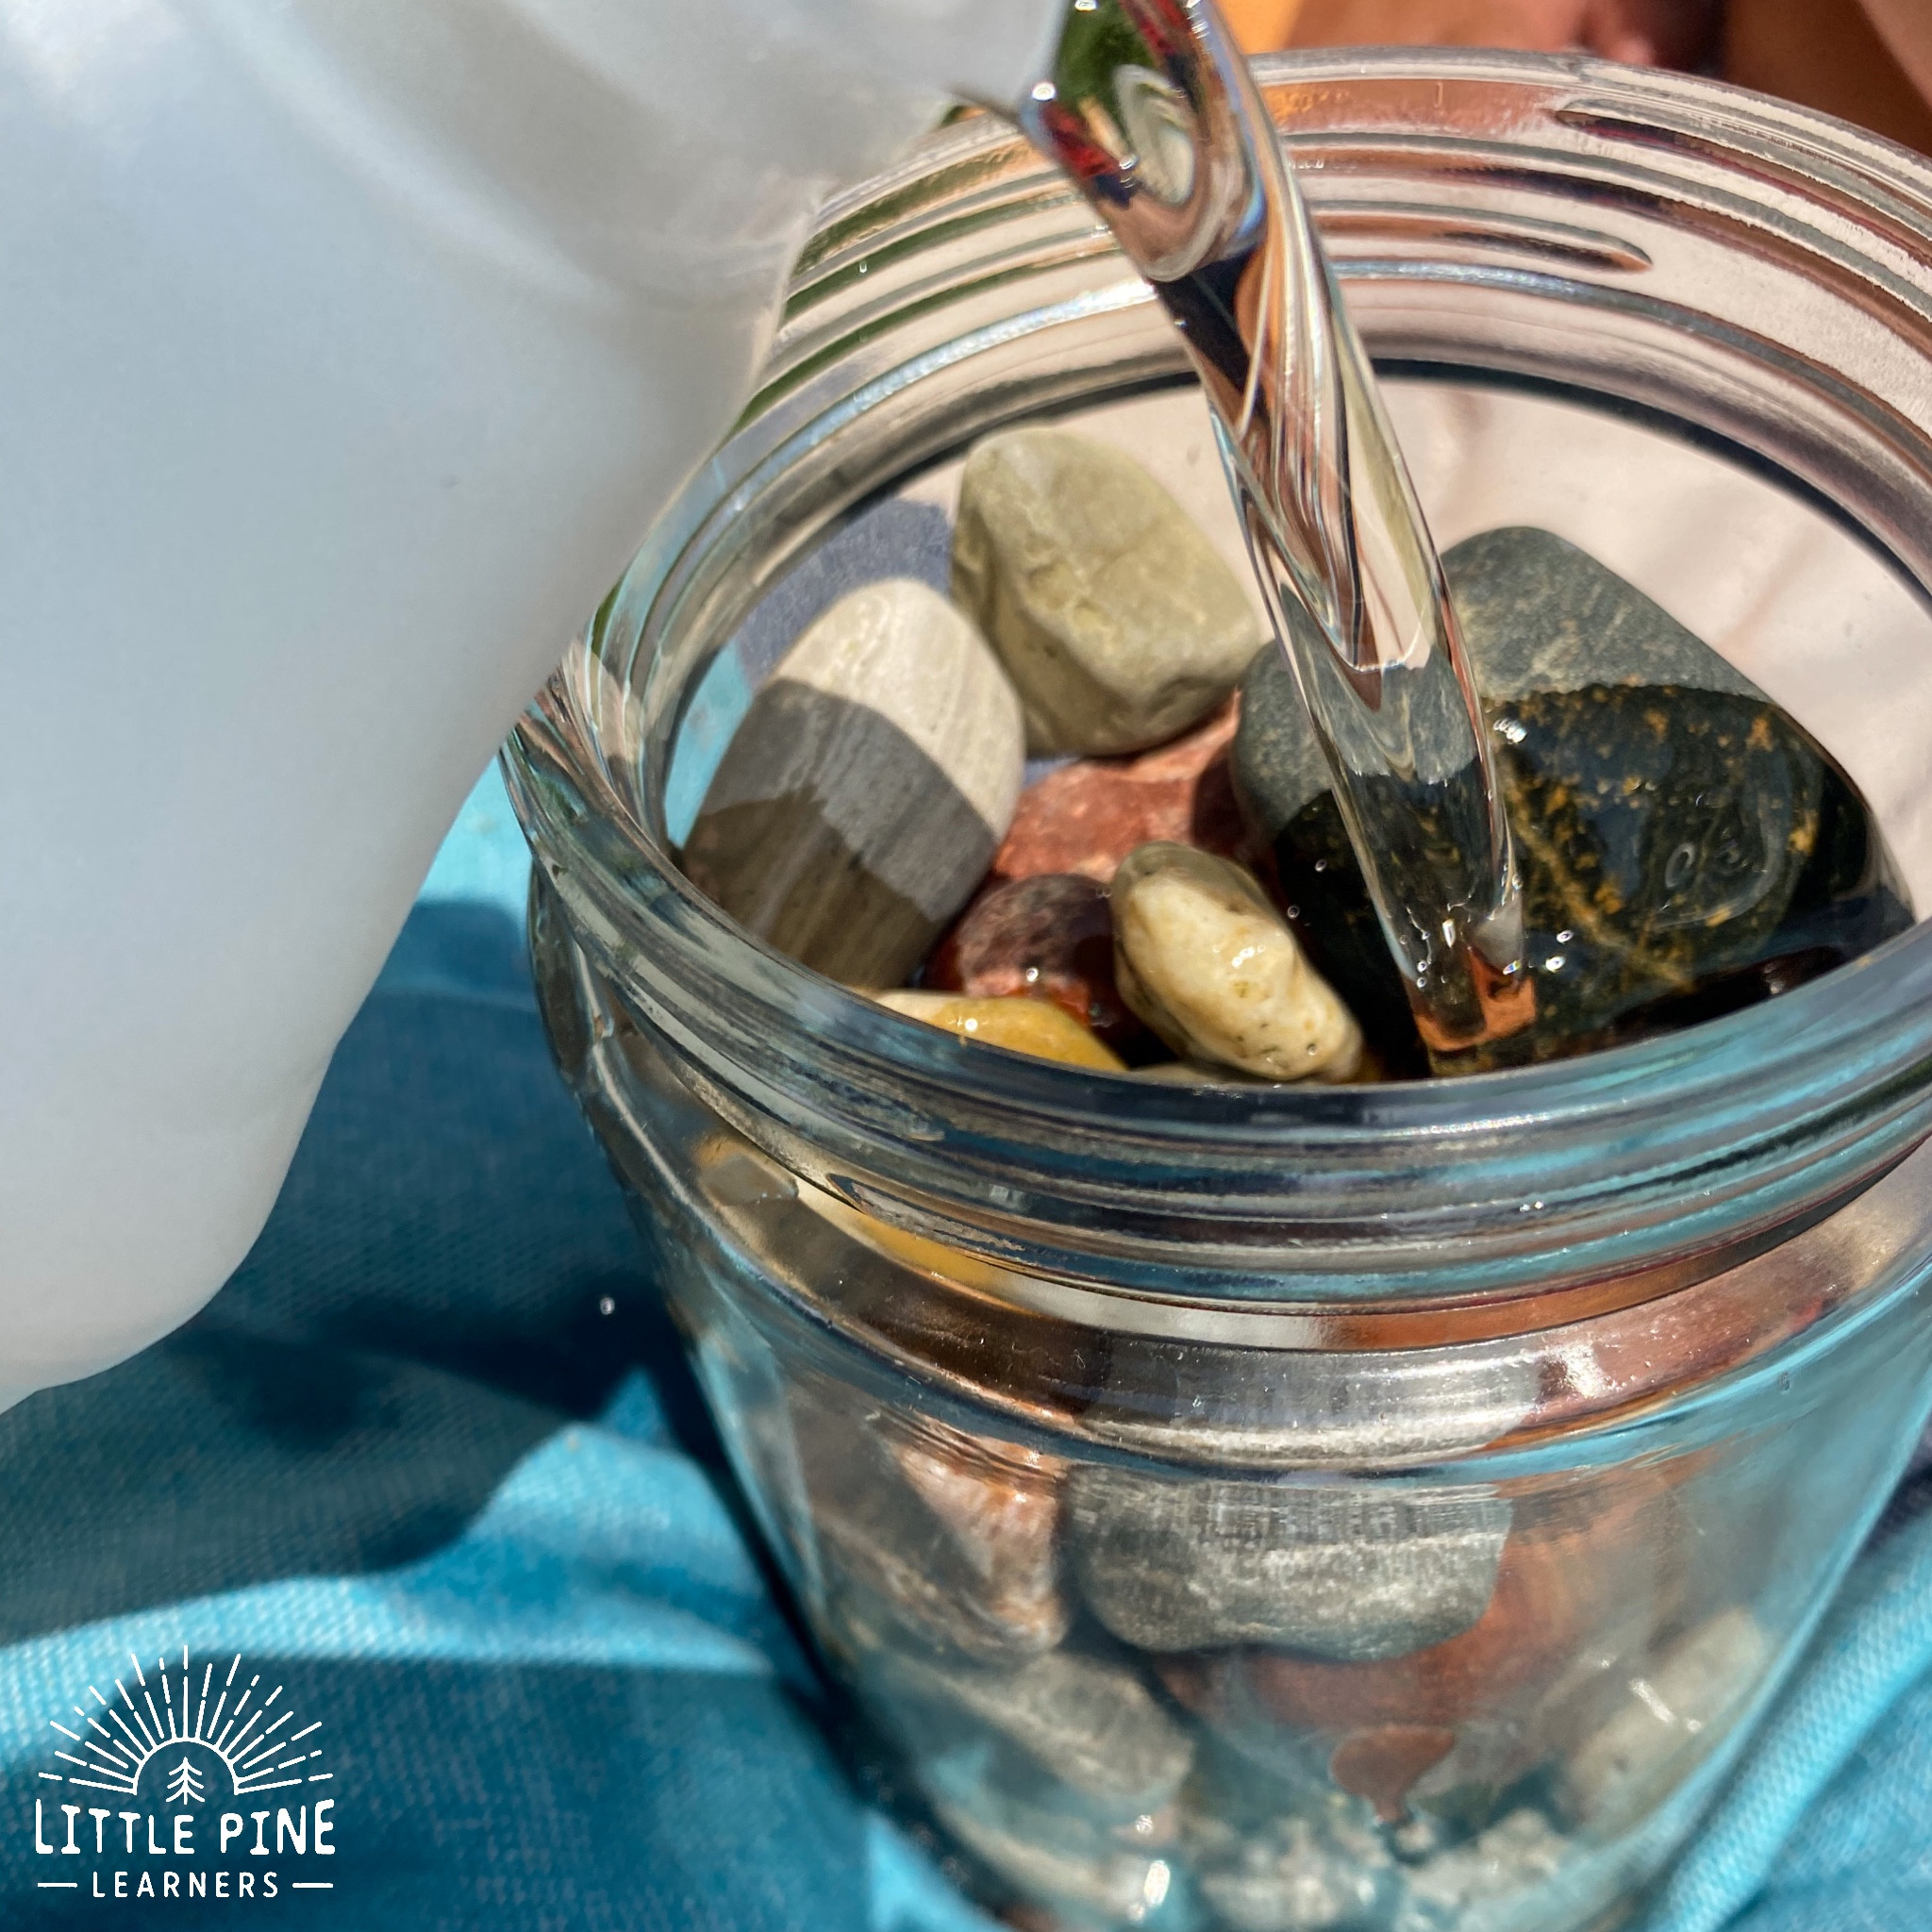 Submerging stones in mineral oil
Step 4: Let the Rocks Sit
Cover the jar and let the rocks soak in the oil for at least two hours, or even overnight for best results. The longer they soak, the more the oil will penetrate the rocks, enhancing their shine.
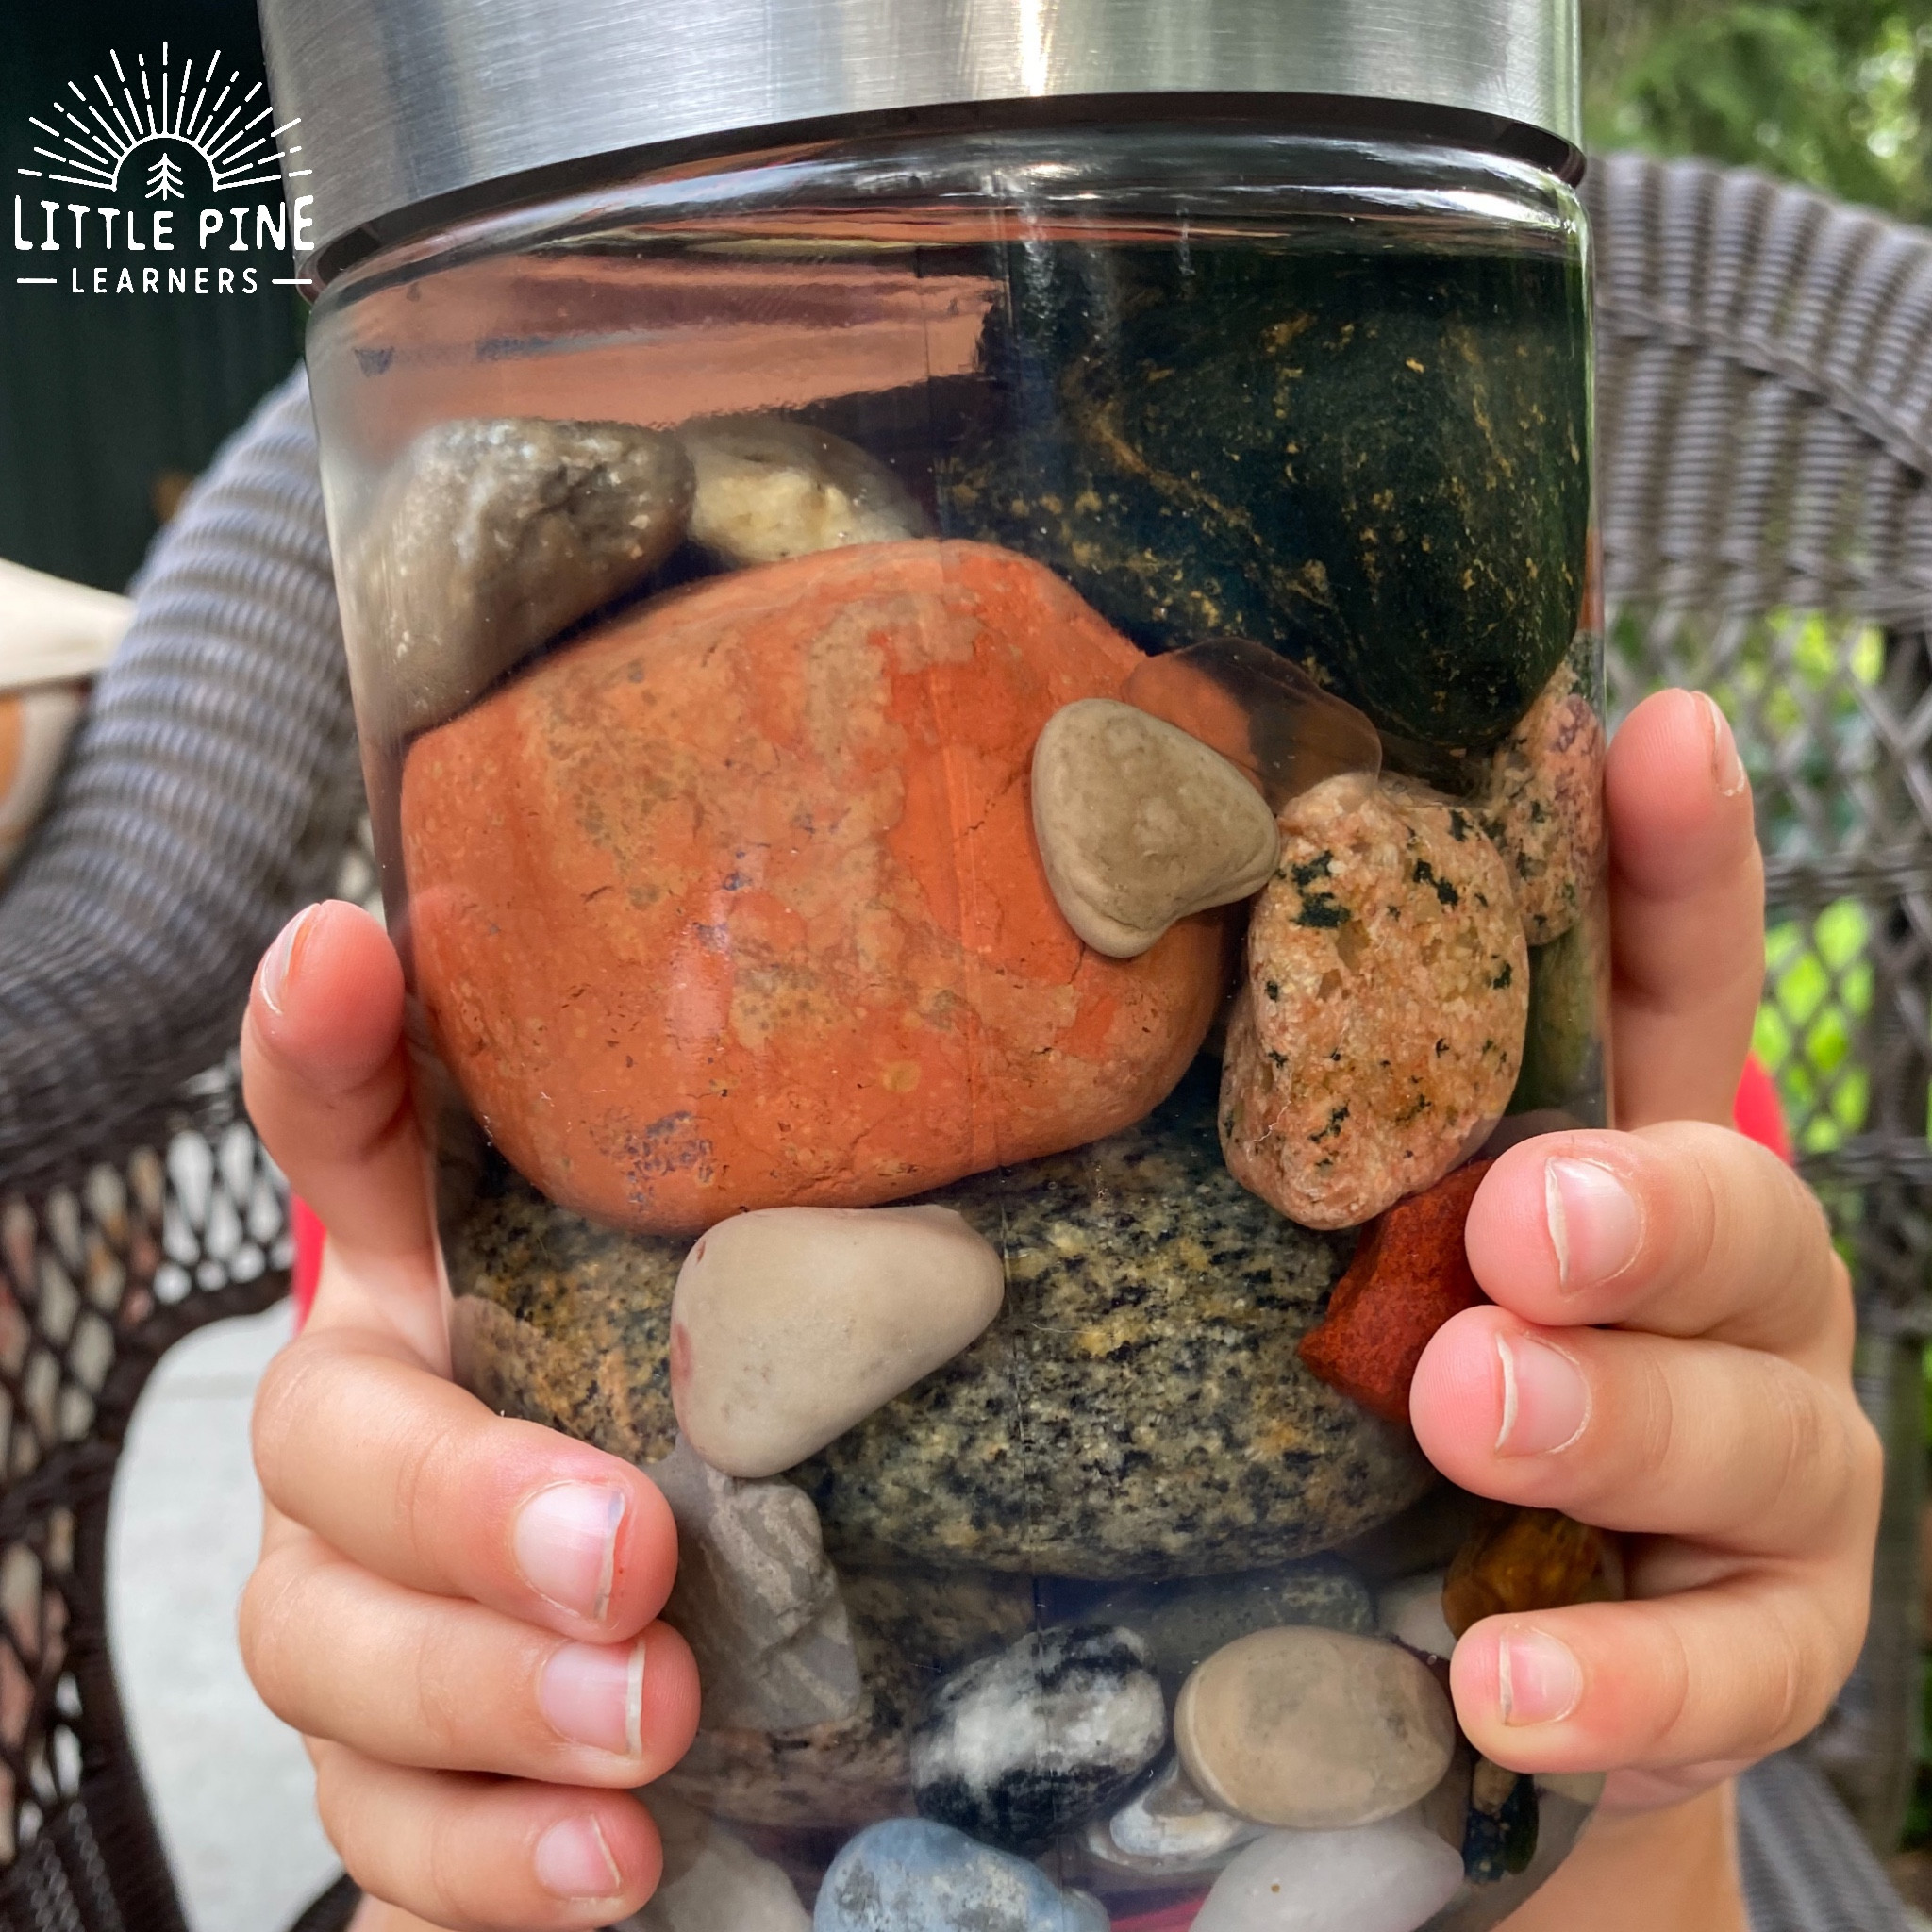 Soaking stones in oil for optimal shine
Step 5: Strain the Oil
Place a bowl under the strainer and carefully pour the contents of the jar into the strainer. This will separate the rocks from the oil. Set aside the strained oil for future use.
 Straining excess mineral oil from polished stones
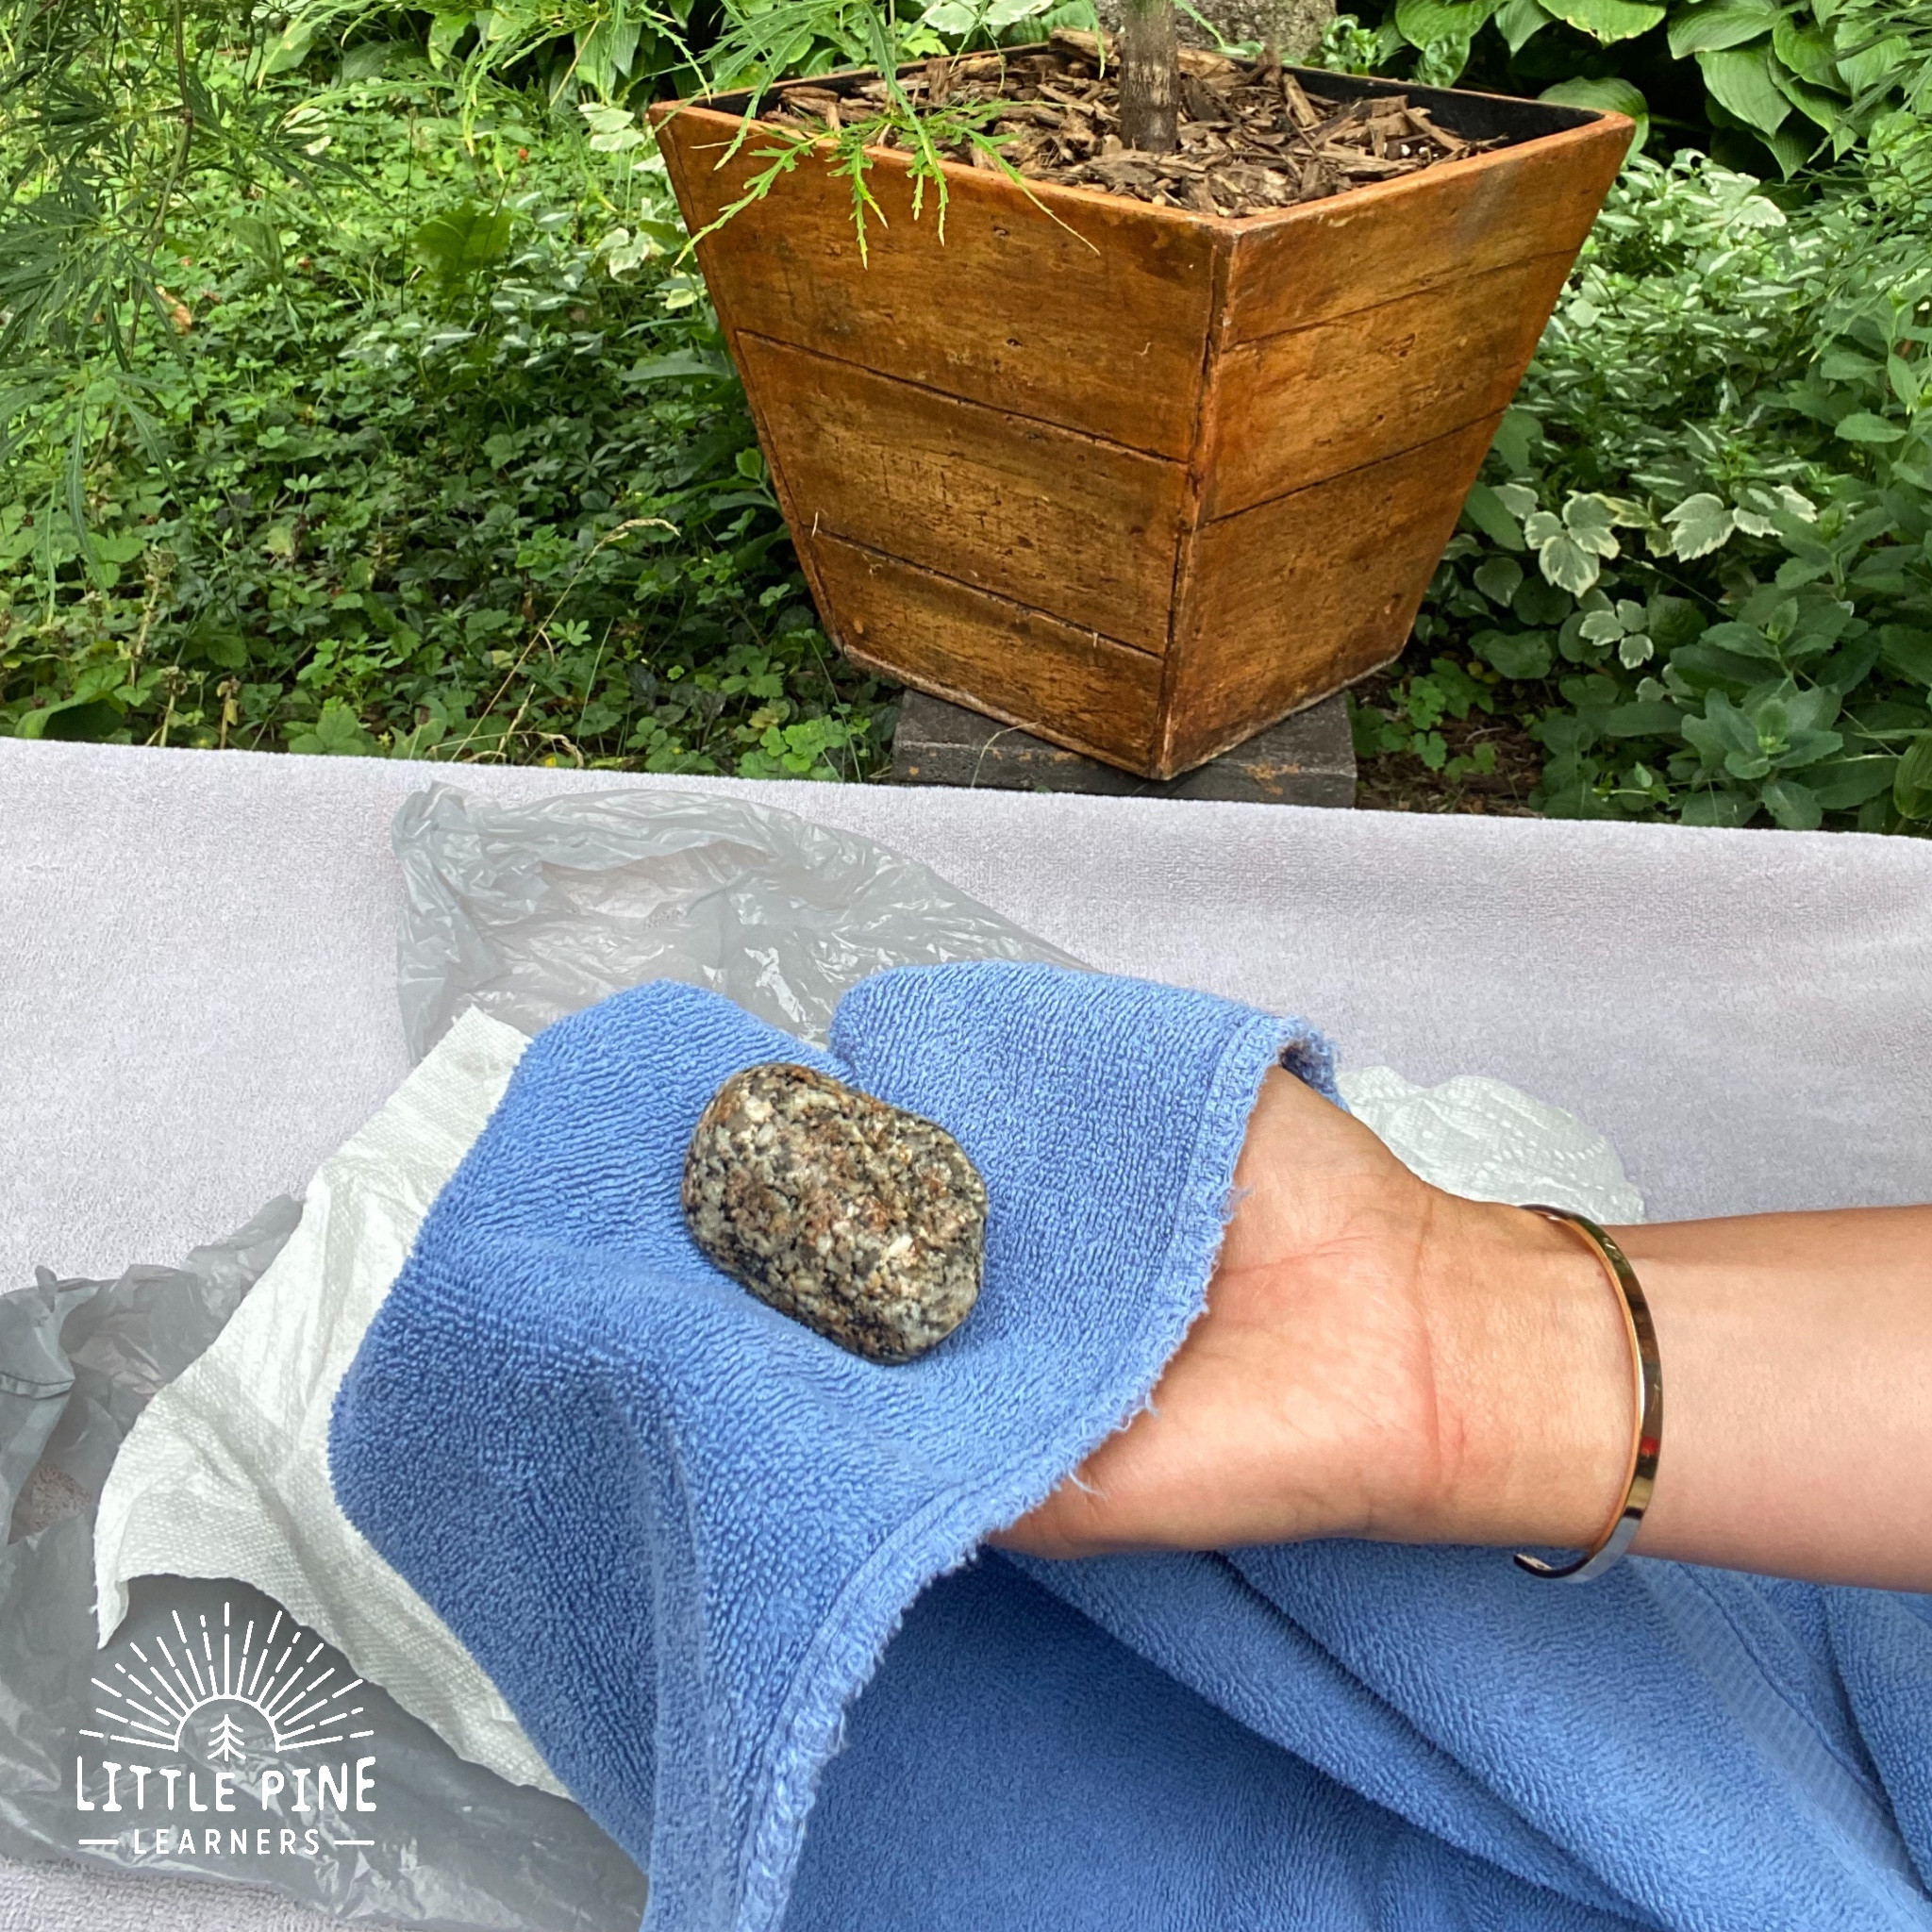
Step 6: Polish the Rocks
Use a paper towel to wipe off any excess oil from the rocks. Then, use an old towel or polishing cloth to buff the rocks, bringing out their shine.
 Polishing stones with paper towel
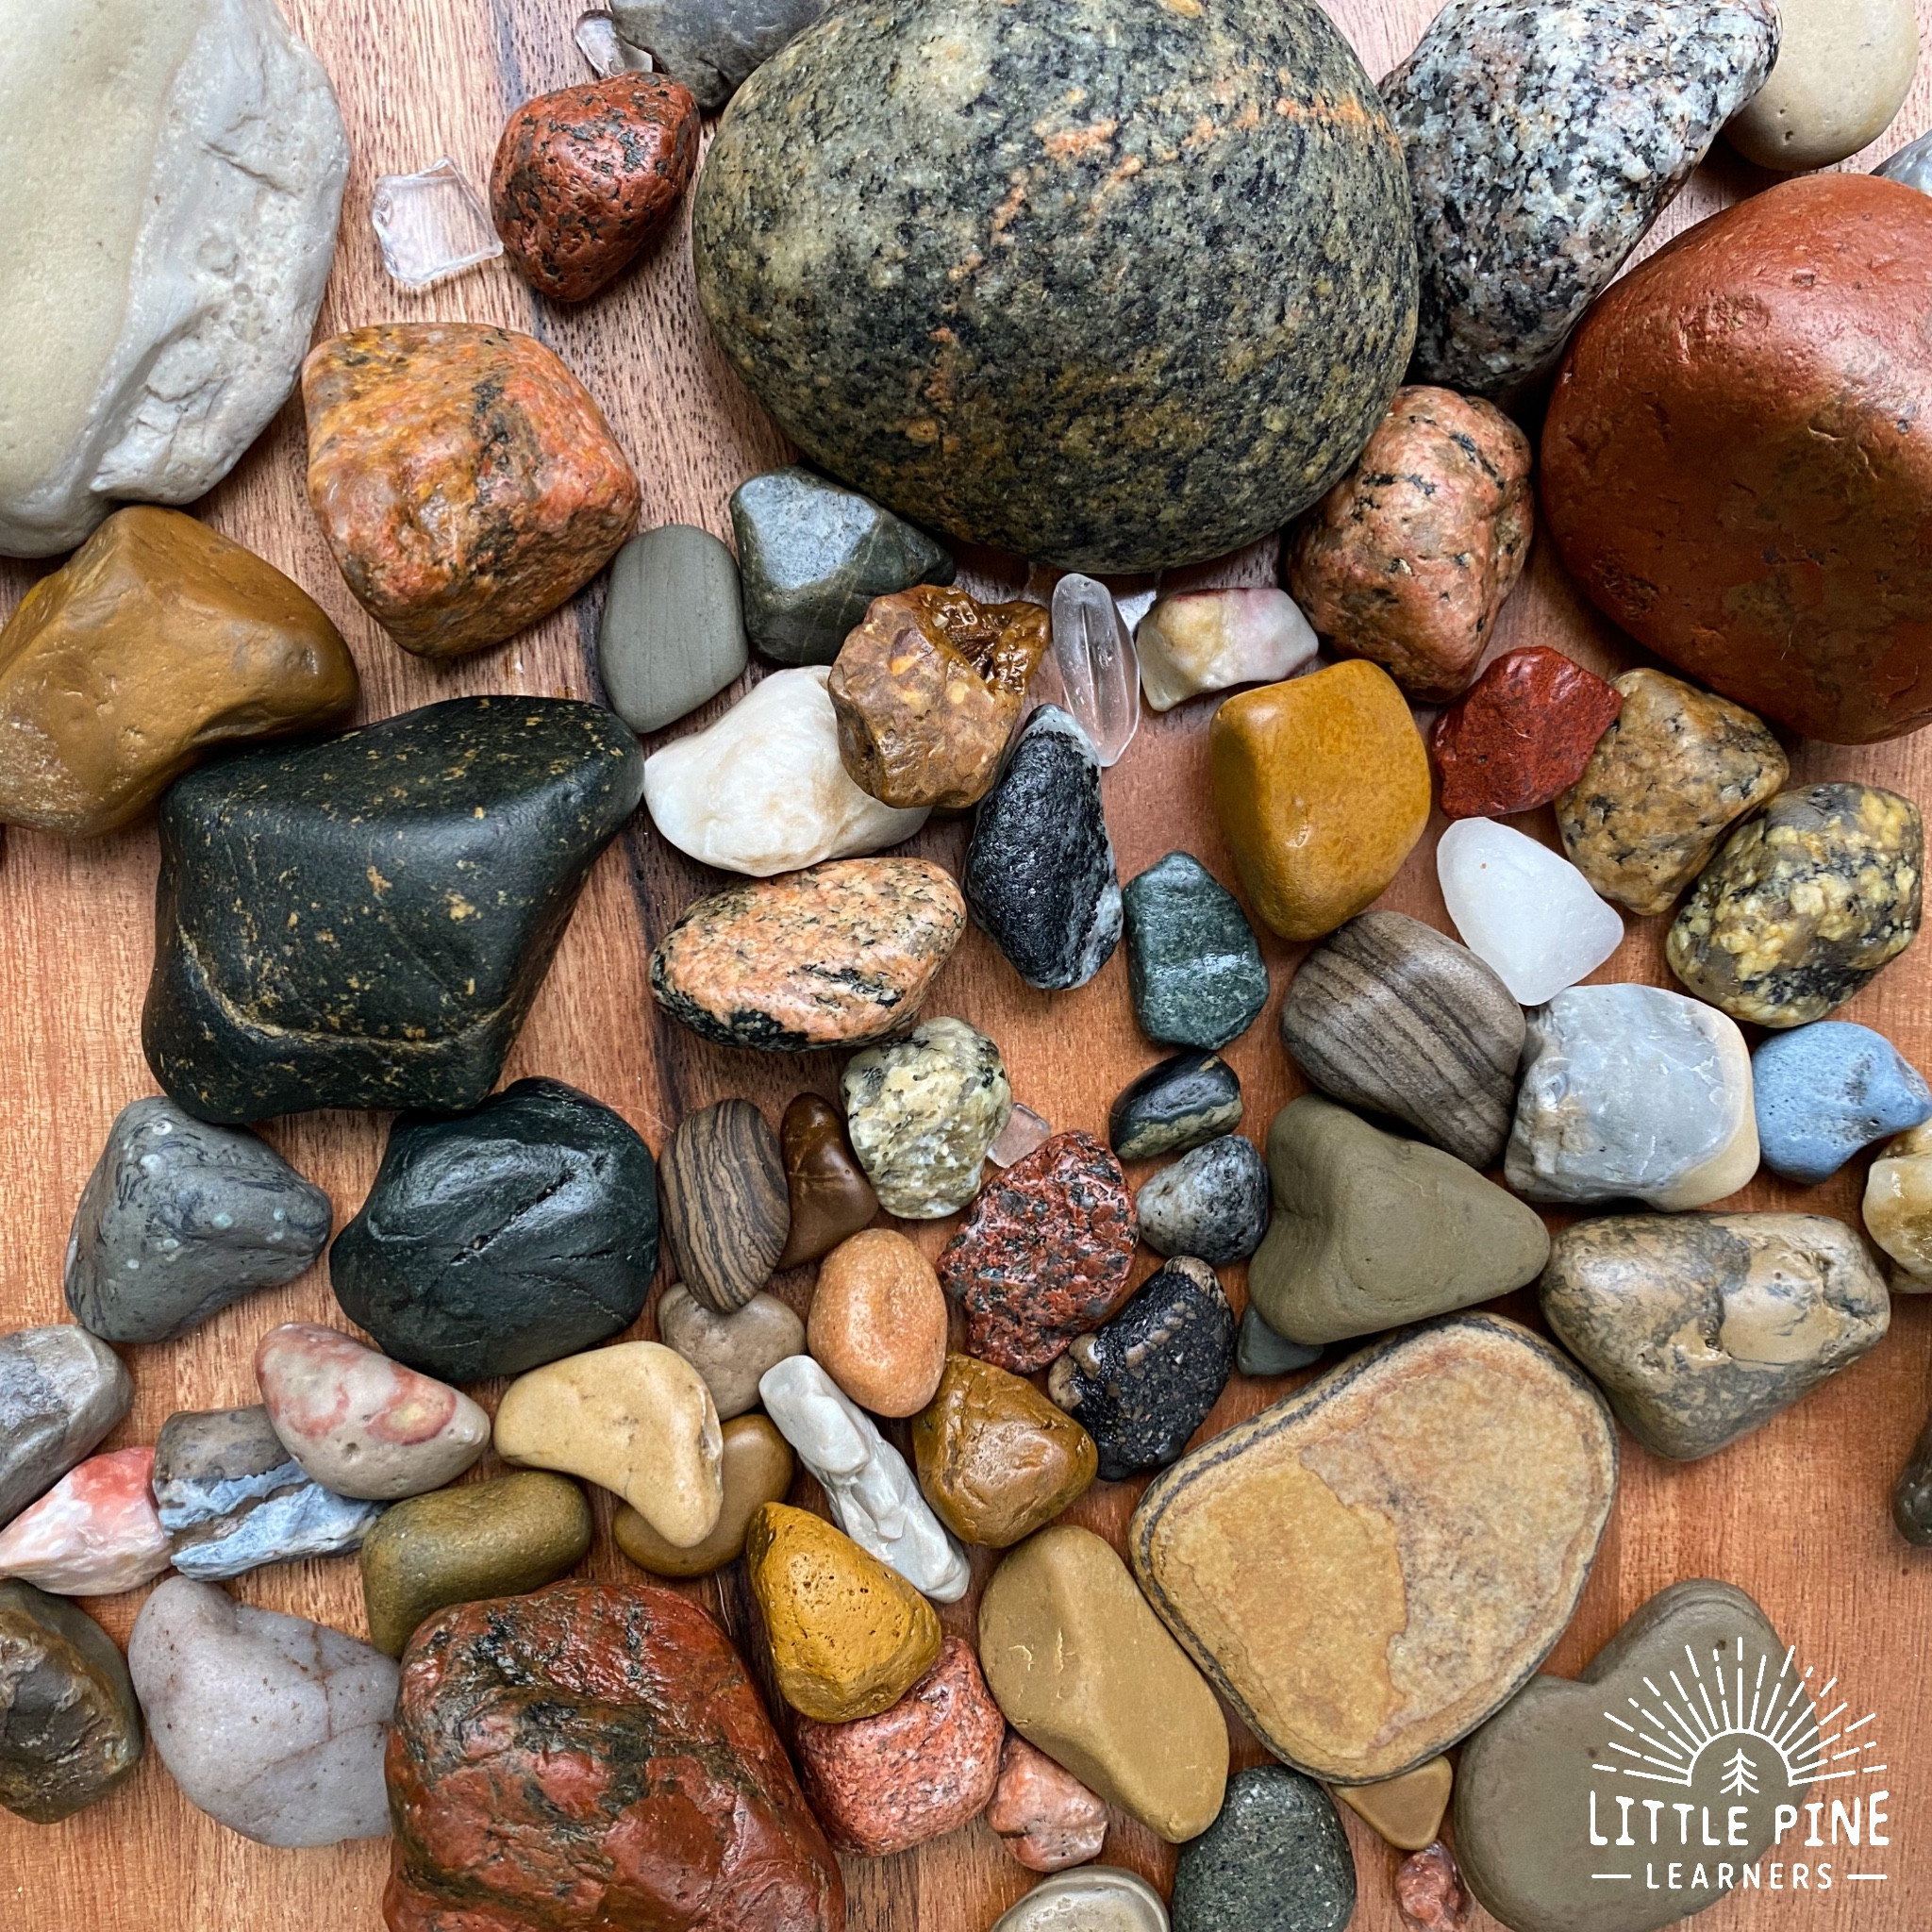
Step 7: Admire Your Shiny Rocks
The rocks should now have a beautiful, wet-look shine. The shine will last for a few weeks, depending on the type of rock and oil used. Reapply oil as needed to maintain the shine.
 Admiring mineral oil polished stones
7. What Safety Precautions Should I Take When Oil Polishing Rocks?
While oil polishing is a relatively safe activity, it’s important to take certain precautions:
- Ventilation: Work in a well-ventilated area, especially when using linseed or tung oil, as they can release fumes.
- Gloves: Wear gloves to protect your hands from the oil and any potential irritants.
- Eye Protection: Although unlikely, wear safety glasses to protect your eyes from splashes.
- Proper Disposal: Dispose of oil-soaked rags properly, as they can be a fire hazard. Spread them out to dry before discarding them.
- Child Safety: Keep oils and small rocks out of reach of children to prevent accidental ingestion.
By following these safety guidelines, you can enjoy oil polishing rocks without any worries.
8. How Can I Enhance the Shine of My Polished Rocks Further?
To maximize the shine of your polished rocks, consider these tips:
- Use a Rock Tumbler First: For an even smoother surface, tumble your rocks through the first few stages of grit before oil polishing. This will remove any rough edges and imperfections.
- Apply Heat: Gently warming the rocks before applying oil can help the oil penetrate deeper, resulting in a more intense shine. Use a hairdryer or place the rocks in a warm (not hot) oven for a few minutes.
- Use Multiple Coats: Apply several thin coats of oil, allowing each coat to dry before applying the next. This will build up the shine and provide a more durable finish.
- Try Different Polishing Cloths: Experiment with different types of polishing cloths, such as microfiber or chamois, to see which gives the best results.
- Store Polished Rocks Properly: Keep your polished rocks in a clean, dry place, away from direct sunlight and extreme temperatures, to maintain their shine.
9. What Are Some Creative Ways to Use Polished Rocks in Landscaping?
Polished rocks can add a touch of elegance and sophistication to any landscape. Here are some creative ideas:
- Pathways and Walkways: Use polished rocks to create stunning pathways and walkways. The smooth, shiny surfaces will reflect light and add visual interest.
- Garden Borders: Line your garden beds with polished rocks to create a clean, defined border. Choose rocks that complement the colors of your plants and flowers.
- Water Features: Add polished rocks to fountains, ponds, and other water features to create a shimmering, reflective effect.
- Rock Gardens: Create a rock garden featuring a variety of polished rocks, succulents, and other drought-tolerant plants.
- Zen Gardens: Use polished rocks to create a tranquil Zen garden, perfect for meditation and relaxation.
 Shiny rocks polished with mineral oil
According to research from Arizona State University’s School of Earth and Space Exploration, in July 2025, integrating polished rocks into landscape designs not only enhances aesthetic appeal but also promotes sustainable landscaping practices by reducing soil erosion and conserving water.
10. What Mistakes Should I Avoid When Polishing Rocks With Oil?
To ensure a successful rock polishing experience, avoid these common mistakes:
- Using Dirty Rocks: Always clean your rocks thoroughly before polishing, as dirt and debris can scratch the surface and prevent the oil from penetrating properly.
- Using Too Much Oil: Applying too much oil can leave a sticky residue on the rocks. Use just enough to coat the surface, and wipe off any excess.
- Not Allowing Enough Soaking Time: Give the rocks ample time to soak in the oil. The longer they soak, the better the oil will penetrate, resulting in a more intense shine.
- Using the Wrong Type of Oil: Choose an oil that is appropriate for the type of rock you are polishing. Some oils may react negatively with certain minerals.
- Skipping the Polishing Step: Polishing is essential for bringing out the shine. Don’t skip this step, and use a clean, soft cloth for best results.
11. How Does Climate Affect the Shine of Oil-Polished Rocks?
Climate plays a significant role in how long the shine lasts on your oil-polished rocks:
- Humidity: High humidity can cause the oil to dissipate more quickly, reducing the shine. In humid climates, you may need to reapply oil more frequently.
- Sunlight: Direct sunlight can cause the oil to break down and fade, especially if you’re using natural oils like jojoba or linseed.
- Temperature: Extreme temperatures can also affect the oil. High temperatures can cause the oil to become runny, while low temperatures can cause it to solidify.
- Rainfall: Frequent rainfall can wash away the oil, requiring more frequent reapplication.
In areas with harsh climates, consider using a more durable oil, like tung oil, and protecting your polished rocks from the elements as much as possible.
12. What Are the Best Practices for Maintaining the Shine of Polished Rocks in Landscaping?
Maintaining the shine of polished rocks in landscaping requires regular care and attention:
- Regular Cleaning: Clean the rocks regularly to remove dirt, dust, and debris. Use a soft brush and mild soap and water.
- Reapplication of Oil: Reapply oil as needed to maintain the shine. The frequency will depend on the climate and the type of oil used.
- Protection from the Elements: Protect the rocks from direct sunlight, extreme temperatures, and excessive moisture.
- Avoid Abrasive Cleaners: Do not use abrasive cleaners or harsh chemicals, as they can damage the surface of the rocks and dull the shine.
- Proper Placement: Choose a location that is not subject to heavy foot traffic or other sources of wear and tear.
13. How Can I Incorporate Polished Rocks Into DIY Home Decor Projects?
Polished rocks can be used in a variety of DIY home decor projects:
- Decorative Bowls: Fill a decorative bowl with polished rocks to create a stunning centerpiece.
- Candle Holders: Glue polished rocks to candle holders to add a touch of natural elegance.
- Picture Frames: Decorate picture frames with polished rocks to create a unique and personalized look.
- Jewelry Dishes: Use a small dish filled with polished rocks as a jewelry holder.
- Coasters: Glue polished rocks to cork or felt to create unique coasters.
 Polished stones used for decoration
14. Where Can I Find High-Quality Rocks for Polishing in the USA?
Finding the right rocks for polishing is essential. Here are some places to look in the USA:
- Rock and Mineral Shows: These shows are a great place to find a wide variety of rocks and minerals from around the world.
- Local Rock Shops: Many cities have rock shops that sell rocks, minerals, and lapidary equipment.
- Online Retailers: Websites like Etsy, eBay, and specialized rock retailers offer a vast selection of rocks for polishing.
- Gem and Mineral Clubs: Joining a local gem and mineral club can provide access to field trips, workshops, and other resources.
- Your Own Backyard: Depending on where you live, you may be able to find interesting rocks and minerals right in your own backyard.
15. What Are the Latest Trends in Using Polished Rocks in Landscape Design in the USA?
Stay ahead of the curve with these latest trends in landscape design using polished rocks:
| Trend | Description | Benefits |
|---|---|---|
| Xeriscaping with Rocks | Using polished rocks in xeriscaping designs to conserve water and create drought-tolerant landscapes. | Reduces water consumption, low maintenance, aesthetically pleasing. |
| Biophilic Design | Incorporating polished rocks to connect indoor and outdoor spaces, promoting well-being and a sense of nature. | Enhances mental health, reduces stress, improves air quality. |
| Sustainable Landscaping | Using locally sourced, polished rocks to reduce environmental impact and support local economies. | Minimizes carbon footprint, supports local businesses, promotes biodiversity. |
| Minimalist Gardens | Creating simple, elegant gardens with polished rocks as focal points, emphasizing clean lines and natural textures. | Creates a sense of calm and serenity, easy to maintain, visually appealing. |
| Sculptural Rock Features | Designing custom rock sculptures and installations with polished rocks, adding artistic flair to outdoor spaces. | Adds unique character, creates focal points, enhances property value. |
16. How Can Rockscapes.Net Help Me With My Rock Polishing and Landscaping Needs?
At rockscapes.net, we’re passionate about helping you create beautiful and sustainable landscapes with rocks. Here’s how we can assist you:
- Extensive Selection of Rocks: We offer a wide variety of rocks and minerals for polishing, landscaping, and home decor.
- Expert Advice: Our team of experts can provide guidance on choosing the right rocks, polishing techniques, and landscape design ideas.
- DIY Guides and Tutorials: We have a comprehensive collection of DIY guides and tutorials to help you with your rock polishing and landscaping projects.
- Supplier Recommendations: We can recommend trusted suppliers of rocks, minerals, and lapidary equipment in your area.
- Inspiration and Ideas: Browse our gallery of stunning rock landscapes and home decor projects for inspiration and ideas.
Ready to transform your rocks into dazzling gems and create a landscape that reflects your unique style? Visit rockscapes.net today and discover the endless possibilities of polished rocks!
FAQ: Making Polished Rocks Shiny
1. What is the best oil to use for polishing rocks?
Mineral oil is a popular choice due to its clarity and non-toxicity, but jojoba oil is an environmentally friendly alternative.
2. How long should I soak rocks in oil?
Soak rocks for at least two hours, or overnight for best results, to allow the oil to penetrate and enhance the shine.
3. How often do I need to reapply oil to polished rocks?
Reapply oil every few weeks, depending on the type of rock, oil used, and climate conditions, to maintain the shine.
4. Can I use cooking oil to polish rocks?
While you can use cooking oil, it may become sticky and attract dirt. Mineral oil or jojoba oil are better options.
5. Is it safe to use linseed oil for polishing rocks?
Linseed oil is safe if used with proper ventilation and precautions due to its flammability. It provides a durable shine.
6. Can I polish rocks without a rock tumbler?
Yes, you can polish rocks by hand with sandpaper, polishing cloths, or by using the oil polishing method.
7. How do I clean polished rocks?
Clean polished rocks with a soft brush, mild soap, and water, avoiding abrasive cleaners.
8. What types of rocks benefit most from oil polishing?
Agates, jaspers, petrified wood, fossils, and quartz varieties benefit most from oil polishing.
9. How can I make my polished rocks last longer?
Protect your polished rocks from direct sunlight, extreme temperatures, and excessive moisture.
10. Can I use polished rocks in water features?
Yes, polished rocks can add a shimmering effect to fountains and ponds, but monitor the oil’s impact on water quality.
For more inspiration, project ideas, and expert advice, visit rockscapes.net and discover the transformative power of rocks in your landscape! Contact us at Address: 1151 S Forest Ave, Tempe, AZ 85281, United States. Phone: +1 (480) 965-9011.