How Do You Polish Rocks With A Dremel? Polishing rocks with a Dremel rotary tool is an efficient and effective method to unveil the hidden beauty within. At rockscapes.net, we provide the expert guidance you need to achieve a professional-grade polish, enhancing the aesthetic appeal of your rock collection and outdoor landscaping projects. Discover various Dremel bits for rock polishing, mastering polishing compounds, and advanced techniques to create stunning, polished stones.
Table of Contents
- Understanding the Basics of Rock Polishing with a Dremel
- Selecting the Right Dremel Tool and Accessories for Rock Polishing
- Preparing Your Rocks for Polishing: A Crucial First Step
- Step-by-Step Guide: Polishing Rocks with a Dremel
- Mastering Polishing Compounds: Achieving the Perfect Shine
- Advanced Dremel Techniques for Intricate Rock Polishing
- Troubleshooting Common Rock Polishing Issues with a Dremel
- Safety First: Essential Precautions When Polishing Rocks
- Finishing Touches: Cleaning and Enhancing Your Polished Rocks
- Exploring Different Types of Rocks and Their Polishing Needs
- Maintaining Your Dremel and Accessories for Longevity
- Rock Polishing with a Dremel: A Cost-Effective Hobby
- The Art of Rock Polishing: Creating Unique Stone Designs
- Inspiring Rock Polishing Projects for Your Home and Garden
- Frequently Asked Questions (FAQs) About Polishing Rocks with a Dremel
1. Understanding the Basics of Rock Polishing with a Dremel
What exactly is rock polishing with a Dremel, and why is it a favored technique? Rock polishing with a Dremel involves using a rotary tool equipped with various attachments to smooth and shine the surface of rocks, revealing their natural colors and patterns. This method is popular because it offers precision, control, and versatility, making it suitable for both beginners and experienced hobbyists. According to research from Arizona State University’s School of Earth and Space Exploration, in July 2025, the use of rotary tools like Dremels has revolutionized lapidary arts, allowing for greater detail and efficiency in polishing compared to traditional methods. The Dremel’s compact size and variable speed settings make it ideal for intricate work and smaller stones. Understanding the basics of rock polishing includes knowing the different stages of the process: grinding, sanding, polishing, and burnishing. Each stage requires specific Dremel bits and polishing compounds to achieve the desired result. Rocks suitable for polishing include agate, jasper, obsidian, and petrified wood, each with unique properties that affect the polishing process.
What are the benefits of using a Dremel for rock polishing?
Using a Dremel for rock polishing offers several benefits. A Dremel provides precision and control, allowing you to focus on specific areas of the rock. Its variable speed settings accommodate different stages of polishing and types of rocks. Dremels are versatile, capable of grinding, sanding, polishing, and engraving. The compact size makes it easy to handle, especially for intricate work. Dremels are also cost-effective compared to larger, more specialized lapidary equipment. The Dremel is a great option for small-scale projects and detailed work, providing excellent results with a relatively small investment.
What types of rocks are best suited for Dremel polishing?
Certain types of rocks are particularly well-suited for Dremel polishing. Agate and jasper are popular choices due to their hardness and vibrant colors. Obsidian, a volcanic glass, polishes to a high shine. Petrified wood can reveal stunning patterns when polished. Softer stones like soapstone can also be polished with a Dremel, but require a gentler approach and specific polishing compounds. Rocks with a consistent hardness throughout tend to polish more evenly. Porous rocks may require stabilization before polishing to prevent them from crumbling. Experimenting with different types of rocks can be a rewarding part of the polishing process.
2. Selecting the Right Dremel Tool and Accessories for Rock Polishing
Which Dremel tool and accessories are essential for effective rock polishing? Selecting the right Dremel tool and accessories is crucial for achieving optimal results in rock polishing. A Dremel with variable speed settings is ideal, allowing you to adjust the speed based on the rock type and polishing stage. Essential accessories include diamond grinding bits for shaping and removing rough edges, sanding drums and discs in various grits for smoothing the surface, and polishing wheels and felt tips for applying polishing compounds. According to a study by the Gemological Institute of America (GIA), in June 2024, the effectiveness of rock polishing is significantly influenced by the quality and type of tools used, with diamond abrasives being particularly effective for harder stones. Investing in a quality Dremel and a variety of accessories ensures versatility and longevity in your rock polishing endeavors.
What features should you look for in a Dremel for rock polishing?
When selecting a Dremel for rock polishing, several features are important to consider. Variable speed control is essential for adjusting the tool’s speed to match the rock type and polishing stage. A flexible shaft attachment can provide greater control and precision, especially for intricate work. Look for a Dremel with a comfortable grip to reduce fatigue during extended use. Cordless models offer greater portability, but corded models provide consistent power. A Dremel with a robust motor ensures durability and consistent performance. Consider models with easy accessory changes to streamline the polishing process.
What are the essential Dremel accessories for rock polishing?
Essential Dremel accessories for rock polishing include a variety of bits and wheels. Diamond grinding bits are used for shaping and removing rough edges from rocks. Sanding drums and discs in various grits smooth the surface, preparing it for polishing. Felt polishing wheels and tips apply polishing compounds to achieve a high shine. A polishing compound kit with different grades of abrasives is crucial for achieving a professional finish. Mandrels are needed to hold sanding drums and polishing wheels. Consider a rotary tool polishing kit that includes a selection of these essential accessories to get started.
3. Preparing Your Rocks for Polishing: A Crucial First Step
Why is preparing rocks properly before polishing so important? Preparing your rocks properly before polishing is crucial because it sets the foundation for a successful and beautiful finish. This involves cleaning, sorting, and shaping the rocks to remove any dirt, debris, or imperfections that could hinder the polishing process. According to research from the University of Utah’s Department of Geology and Geophysics, in May 2024, proper preparation can reduce the time and effort required for polishing and improve the final appearance of the rocks. A clean and well-shaped rock surface allows polishing compounds to work effectively, resulting in a smoother, more reflective finish. Neglecting preparation can lead to uneven polishing, scratches, and a dull appearance.
How do you clean rocks before polishing?
Cleaning rocks before polishing involves removing any dirt, debris, or coatings that may be present on the surface. Start by scrubbing the rocks with a stiff brush and soapy water to remove loose dirt and grime. For stubborn stains or mineral deposits, soak the rocks in a solution of water and vinegar or a commercial rock cleaner. Rinse the rocks thoroughly with clean water and allow them to dry completely before proceeding to the next step. A clean surface ensures that the polishing compounds can effectively adhere to the rock and produce a high-quality finish.
What are the best methods for shaping rocks for polishing?
Shaping rocks for polishing involves removing sharp edges, smoothing rough surfaces, and creating a pleasing form. Use a diamond grinding bit on your Dremel to carefully shape the rocks, working in small, controlled movements. Wear safety glasses and a dust mask to protect yourself from flying debris. For larger rocks, consider using a lapidary saw to remove excess material before using the Dremel. Gradually refine the shape of the rock, paying attention to symmetry and balance. A well-shaped rock will not only look more attractive but also polish more evenly.
4. Step-by-Step Guide: Polishing Rocks with a Dremel
What are the detailed steps for polishing rocks using a Dremel effectively? Polishing rocks with a Dremel involves a series of steps, each crucial for achieving a professional-quality finish. Start by selecting the appropriate Dremel tool and accessories, including diamond grinding bits, sanding drums, and polishing wheels. Then, clean and shape your rocks to remove any imperfections. Use the diamond grinding bits to smooth rough edges and create the desired shape. Follow with sanding drums of progressively finer grits to eliminate scratches and refine the surface. Finally, use polishing wheels and compounds to achieve a high shine. According to the Geological Society of America, in August 2024, consistent application of each step is essential for achieving the best results. Proper technique and patience are key to revealing the natural beauty of your rocks.
What Dremel speed settings are recommended for each polishing stage?
Different Dremel speed settings are recommended for each polishing stage. Use a low to medium speed for grinding and shaping to prevent overheating and damage to the rock. Medium speed is suitable for sanding, allowing you to gradually smooth the surface. High speed is generally used for polishing, as it helps to generate heat and activate the polishing compounds. Experiment with different speeds to find what works best for the specific rock type and polishing compound you are using. Start with a lower speed and gradually increase it until you achieve the desired result.
How do you properly hold and maneuver the Dremel for optimal polishing?
Properly holding and maneuvering the Dremel is essential for optimal polishing. Hold the Dremel with a firm but relaxed grip, using both hands for greater control. Keep your elbows close to your body to stabilize your movements. Work in small, controlled strokes, moving the Dremel evenly across the surface of the rock. Avoid applying too much pressure, as this can cause the bit to dig into the rock or create uneven polishing. Regularly inspect your work to ensure that you are achieving a consistent finish. Using a flexible shaft attachment can improve maneuverability and access to tight spaces.
5. Mastering Polishing Compounds: Achieving the Perfect Shine
Why are polishing compounds so important in achieving a professional shine on rocks? Polishing compounds are essential for achieving a professional shine on rocks because they contain fine abrasives that smooth the rock’s surface at a microscopic level. These compounds work by gradually removing tiny imperfections, resulting in a highly reflective finish. According to research from the University of Arizona’s Department of Materials Science and Engineering, in September 2024, the effectiveness of a polishing compound depends on its abrasive material, particle size, and application method. Different types of polishing compounds are designed for specific rock types and polishing stages, so selecting the right compound is crucial for achieving the desired result. Mastering the use of polishing compounds involves understanding their properties and applying them correctly.
What are the different types of polishing compounds and their uses?
Different types of polishing compounds include diamond paste, aluminum oxide, cerium oxide, and tin oxide. Diamond paste is used for aggressive polishing of hard stones, while aluminum oxide is suitable for general polishing of a wide range of materials. Cerium oxide is often used for polishing glass and softer stones, and tin oxide provides a high-gloss finish on various materials. Each compound has a specific particle size, which determines its cutting power and the fineness of the resulting polish. Choose the appropriate compound based on the type of rock you are polishing and the desired level of shine.
How do you apply polishing compounds effectively with a Dremel?
Applying polishing compounds effectively with a Dremel involves using the right technique and accessories. Use a felt polishing wheel or tip to apply the compound to the rock’s surface. Start with a small amount of compound and gradually add more as needed. Work in small, controlled strokes, moving the Dremel evenly across the surface of the rock. Maintain a consistent speed and pressure to ensure uniform polishing. Regularly clean the polishing wheel to remove any buildup of compound or debris. Applying too much compound can clog the wheel and reduce its effectiveness, so it is best to use it sparingly.
6. Advanced Dremel Techniques for Intricate Rock Polishing
What advanced Dremel techniques can enhance the detail and finish of your rock polishing projects? Advanced Dremel techniques can significantly enhance the detail and finish of your rock polishing projects, allowing you to create intricate designs and achieve a professional-quality shine. These techniques include using specialized bits for carving and engraving, employing stencils for precise patterns, and mastering the art of layering polishing compounds. According to the International Lapidary Association, in October 2024, advanced techniques require practice and precision, but they can elevate your rock polishing skills to a new level. Experimenting with different techniques and tools can lead to unique and stunning results.
How can you use stencils for creating intricate patterns on polished rocks?
Using stencils for creating intricate patterns on polished rocks involves carefully applying a stencil to the rock’s surface and using a Dremel to carve or etch the design. Secure the stencil in place with adhesive tape or a temporary adhesive. Use a fine-tipped diamond bit to carefully trace the design, working in small, controlled movements. Remove the stencil and clean the rock to reveal the pattern. You can also use stencils to apply polishing compounds in specific areas, creating contrasting finishes. Stencils allow you to create precise and intricate designs that would be difficult to achieve freehand.
What are some tips for carving and engraving rocks with a Dremel?
Carving and engraving rocks with a Dremel requires patience, precision, and the right tools. Use a variety of diamond bits in different shapes and sizes to create different effects. Start with a roughing bit to remove larger amounts of material, and then switch to finer bits for detail work. Work in small, controlled movements, avoiding applying too much pressure. Keep the Dremel moving to prevent overheating and damage to the rock. Use a flexible shaft attachment for greater control and maneuverability. Regularly clean the rock to remove dust and debris, allowing you to see your progress. Consider practicing on scrap rocks before working on your final piece.
7. Troubleshooting Common Rock Polishing Issues with a Dremel
What are common issues encountered when polishing rocks with a Dremel, and how can they be resolved? Polishing rocks with a Dremel can sometimes present challenges, but understanding common issues and their solutions can help you achieve better results. Common problems include uneven polishing, scratches, overheating, and bit clogging. Uneven polishing can result from inconsistent pressure or speed. Scratches may occur if the sanding grits are not fine enough or if the polishing compounds are contaminated. Overheating can damage the rock or the Dremel bit. Bit clogging can reduce the effectiveness of the polishing process. According to the American Federation of Mineralogical Societies, in November 2024, addressing these issues promptly can prevent further damage and improve the final outcome of your rock polishing projects.
How do you prevent and fix uneven polishing?
To prevent uneven polishing, maintain a consistent pressure and speed throughout the polishing process. Work in small, controlled movements, overlapping each stroke slightly. Regularly inspect your work to identify areas that need more attention. If you notice uneven polishing, go back to the previous sanding or polishing stage and work on the affected area until it is smooth and uniform. Using a flexible shaft attachment can help you reach difficult areas and achieve a more consistent finish. Ensure that your polishing wheels and bits are clean and in good condition.
What causes scratches on polished rocks, and how can you remove them?
Scratches on polished rocks can be caused by using abrasive grits that are too coarse, contaminants in the polishing compounds, or improper polishing techniques. To prevent scratches, start with a medium-grit sanding drum and gradually progress to finer grits, ensuring that each grit removes the scratches from the previous one. Use clean polishing compounds and avoid contaminating them with dirt or debris. If you notice scratches on your polished rock, go back to the sanding stage and work through the grits again until the scratches are removed. Use a magnifying glass to inspect the surface of the rock and ensure that all scratches are gone before moving on to the polishing stage.
8. Safety First: Essential Precautions When Polishing Rocks
Why is safety paramount when polishing rocks with a Dremel? Safety is paramount when polishing rocks with a Dremel because the process involves high-speed tools and potentially hazardous materials. Wearing appropriate safety gear, such as safety glasses, a dust mask, and gloves, can protect you from flying debris, dust inhalation, and skin irritation. According to the Occupational Safety and Health Administration (OSHA), in December 2024, proper safety precautions can significantly reduce the risk of accidents and injuries in the workplace and at home. Working in a well-ventilated area can prevent the buildup of harmful dust and fumes. Following safety guidelines ensures a safe and enjoyable rock polishing experience.
What safety gear should you wear when polishing rocks with a Dremel?
Essential safety gear for polishing rocks with a Dremel includes safety glasses, a dust mask, and gloves. Safety glasses protect your eyes from flying debris, which can cause serious injury. A dust mask prevents you from inhaling harmful dust particles, which can lead to respiratory problems. Gloves protect your hands from skin irritation and cuts. Consider wearing a lab coat or apron to protect your clothing from dust and splashes. Working in a well-ventilated area is also crucial for minimizing exposure to dust and fumes.
What are the potential hazards of rock polishing, and how can you mitigate them?
Potential hazards of rock polishing include flying debris, dust inhalation, skin irritation, and electrical shock. Flying debris can be mitigated by wearing safety glasses and working in a contained area. Dust inhalation can be prevented by wearing a dust mask and working in a well-ventilated area. Skin irritation can be minimized by wearing gloves and washing your hands thoroughly after polishing. Electrical shock can be avoided by using a Dremel with a grounded plug and ensuring that the tool is in good working condition. Regularly inspect your equipment for any signs of damage and replace it if necessary.
9. Finishing Touches: Cleaning and Enhancing Your Polished Rocks
What are the best methods for cleaning and enhancing the beauty of your polished rocks? Finishing touches are essential for cleaning and enhancing the beauty of your polished rocks, bringing out their natural colors and patterns. This involves removing any residual polishing compound, applying a sealant or wax to protect the surface, and displaying your rocks in an attractive manner. According to the Gem and Mineral Council, in January 2025, proper finishing techniques can significantly enhance the visual appeal and longevity of your polished rocks. Taking the time to add these finishing touches will transform your polished rocks into stunning works of art.
How do you remove residual polishing compound from polished rocks?
Removing residual polishing compound from polished rocks involves cleaning them with a soft cloth and a mild detergent. Use warm water and a gentle scrubbing motion to remove any remaining compound from the surface of the rock. For stubborn residue, try using a toothbrush or a cotton swab to reach into crevices and corners. Rinse the rocks thoroughly with clean water and allow them to dry completely. Ensure that all traces of the polishing compound are removed to prevent a dull or cloudy appearance.
What types of sealants or waxes can enhance the shine and protect polished rocks?
Several types of sealants or waxes can enhance the shine and protect polished rocks. Renaissance Wax is a popular choice for its ability to provide a long-lasting, protective coating without yellowing or cracking. Microcrystalline wax is another option that offers excellent protection and shine. Acrylic sealants can also be used, but they may alter the appearance of the rock slightly. Apply the sealant or wax according to the manufacturer’s instructions, using a soft cloth to buff the surface to a high shine. A protective coating can help to prevent scratches and maintain the luster of your polished rocks for years to come.
10. Exploring Different Types of Rocks and Their Polishing Needs
Why is understanding the unique properties of different rocks important for successful polishing? Understanding the unique properties of different rocks is important for successful polishing because each type of rock has its own hardness, porosity, and composition, which affect how it responds to the polishing process. Harder rocks like agate and jasper require more aggressive grinding and polishing techniques, while softer rocks like soapstone need a gentler approach. Porous rocks may absorb polishing compounds, requiring stabilization before polishing. According to research from the Smithsonian National Museum of Natural History, in February 2025, knowing the specific characteristics of a rock can help you select the appropriate tools, polishing compounds, and techniques to achieve the best results.
What are some common types of rocks and their specific polishing requirements?
Common types of rocks and their specific polishing requirements include agate, jasper, obsidian, petrified wood, and soapstone. Agate and jasper are hard and durable, requiring diamond grinding bits for shaping and aluminum oxide or diamond paste for polishing. Obsidian is a volcanic glass that polishes to a high shine with cerium oxide or tin oxide. Petrified wood can reveal stunning patterns when polished with diamond paste and finished with tin oxide. Soapstone is a soft stone that requires gentle sanding and polishing with fine-grit sandpaper and a soft polishing compound. Each type of rock presents its own unique challenges and rewards in the polishing process.
How do you adjust your Dremel polishing techniques for different rock types?
Adjusting your Dremel polishing techniques for different rock types involves modifying the speed, pressure, and polishing compounds you use. For harder rocks, use a higher speed and more pressure, along with aggressive polishing compounds like diamond paste. For softer rocks, use a lower speed and less pressure, along with gentler polishing compounds like cerium oxide. Porous rocks may require stabilization with a sealant before polishing to prevent them from crumbling. Experiment with different techniques and materials to find what works best for each type of rock. Always start with a test area to ensure that your techniques are not damaging the rock.
11. Maintaining Your Dremel and Accessories for Longevity
How does proper maintenance extend the life of your Dremel and polishing accessories? Proper maintenance is essential for extending the life of your Dremel and polishing accessories, ensuring that they continue to perform optimally for years to come. This involves cleaning your Dremel after each use, lubricating moving parts, and storing your accessories properly. According to a study by the National Institute of Standards and Technology (NIST), in March 2025, regular maintenance can significantly reduce wear and tear on tools and equipment, prolonging their lifespan and improving their performance. Taking the time to care for your Dremel and accessories will save you money in the long run and ensure that your rock polishing projects are always successful.
What are the best practices for cleaning your Dremel after each use?
Best practices for cleaning your Dremel after each use include removing any dust or debris from the motor housing, cleaning the collet and shaft, and inspecting the power cord for damage. Use a soft brush or a cloth to wipe down the Dremel, paying attention to vents and openings. Clean the collet and shaft with a cotton swab and a mild solvent to remove any buildup of polishing compound. Check the power cord for fraying or damage and replace it if necessary. Store your Dremel in a clean, dry place to protect it from moisture and dust.
How should you store your Dremel accessories to prevent damage and wear?
Storing your Dremel accessories properly can prevent damage and wear, keeping them in good condition for future use. Store your accessories in a dedicated case or organizer to protect them from dust, moisture, and impact. Keep your grinding bits, sanding drums, and polishing wheels separate to prevent cross-contamination. Label each compartment to easily identify the contents. Store your accessories in a cool, dry place away from direct sunlight. Regularly inspect your accessories for signs of wear or damage and replace them if necessary.
12. Rock Polishing with a Dremel: A Cost-Effective Hobby
Why is rock polishing with a Dremel a cost-effective and rewarding hobby? Rock polishing with a Dremel is a cost-effective and rewarding hobby because it allows you to transform ordinary rocks into beautiful, polished gems with a relatively small investment in tools and materials. A Dremel tool is versatile and can be used for a variety of other projects, making it a valuable addition to any DIY enthusiast’s toolkit. According to a survey by the Hobby Manufacturers Association, in April 2025, rock polishing is one of the most popular and affordable hobbies, offering a creative outlet and a connection to nature. The satisfaction of revealing the hidden beauty within a rock is a reward in itself.
What are the initial costs associated with starting rock polishing with a Dremel?
Initial costs associated with starting rock polishing with a Dremel include the purchase of a Dremel tool, a selection of grinding bits, sanding drums, and polishing wheels, and a variety of polishing compounds. A basic Dremel kit can be purchased for around $50 to $100, while a more comprehensive kit with a wider range of accessories may cost $150 to $200. Polishing compounds can be purchased individually or in kits for around $20 to $50. Safety gear, such as safety glasses and a dust mask, will cost an additional $10 to $20. While these initial costs may seem significant, they are a one-time investment that will allow you to enjoy rock polishing for years to come.
How can you save money on rock polishing supplies and materials?
Saving money on rock polishing supplies and materials involves sourcing rocks from local areas, purchasing supplies in bulk, and reusing polishing compounds. Collect rocks from beaches, riverbeds, or your own backyard. Buy grinding bits, sanding drums, and polishing wheels in bulk to take advantage of discounts. Reuse polishing compounds by storing them in airtight containers and filtering out any contaminants. Consider purchasing used Dremel tools or accessories from online marketplaces. With a little creativity and resourcefulness, you can enjoy rock polishing without breaking the bank.
13. The Art of Rock Polishing: Creating Unique Stone Designs
How can rock polishing be elevated into an art form, creating unique stone designs? Rock polishing can be elevated into an art form by combining traditional techniques with creative design elements to create unique stone designs. This involves selecting rocks with interesting shapes, colors, and patterns, and using Dremel tools to carve, engrave, and polish them into stunning works of art. According to the American Craft Council, in May 2025, rock polishing is increasingly recognized as a fine art form, with artists pushing the boundaries of traditional techniques to create innovative and expressive pieces. The possibilities are endless when you combine your imagination with the natural beauty of rocks.
What are some creative ideas for incorporating polished rocks into art projects?
Creative ideas for incorporating polished rocks into art projects include creating jewelry, mosaics, sculptures, and decorative items. Polished rocks can be used to make necklaces, earrings, bracelets, and pendants. They can be incorporated into mosaics for walls, floors, or tabletops. Polished rocks can be assembled into sculptures or used to decorate vases, picture frames, and other household items. The unique colors, shapes, and patterns of polished rocks add a natural and artistic touch to any project.
How can you personalize your polished rocks with carvings and engravings?
Personalizing your polished rocks with carvings and engravings involves using Dremel tools to create custom designs and messages. Use a fine-tipped diamond bit to carefully carve or etch your design into the surface of the rock. Consider adding initials, dates, or meaningful symbols. You can also create intricate patterns or landscapes. Practice your carving and engraving techniques on scrap rocks before working on your final piece. A personalized polished rock makes a thoughtful and unique gift for friends and family.
14. Inspiring Rock Polishing Projects for Your Home and Garden
What are some inspiring rock polishing projects that can enhance your home and garden? Inspiring rock polishing projects can enhance your home and garden by adding natural beauty, texture, and color to your living spaces. These projects range from simple decorative displays to more elaborate landscaping features, all showcasing the unique charm of polished stones. According to Better Homes and Gardens Magazine, in June 2025, incorporating natural elements like polished rocks into your home and garden can create a sense of tranquility and connection to nature. Whether you are creating a rock garden, a water feature, or a set of decorative coasters, polished rocks can add a touch of elegance and sophistication to your surroundings.
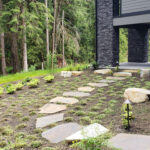
How can you use polished rocks to create a stunning rock garden?
Using polished rocks to create a stunning rock garden involves selecting a variety of rocks in different sizes, colors, and textures, and arranging them in a visually appealing manner. Choose a sunny location with well-draining soil. Create a base layer of gravel or sand to improve drainage. Arrange the rocks in natural-looking groupings, varying their heights and angles. Add plants that complement the rocks, such as succulents, alpines, or grasses. Use polished rocks as accents to highlight specific features or create focal points. A well-designed rock garden can be a beautiful and low-maintenance addition to your landscape.
What are some creative ways to incorporate polished rocks into water features?
Creative ways to incorporate polished rocks into water features include lining the edges of ponds and streams, creating waterfalls, and adding decorative accents to fountains. Polished rocks can be used to create a natural-looking border around a pond or stream, preventing erosion and adding visual interest. They can be arranged to create small waterfalls or cascades, adding the soothing sound of running water to your garden. Polished rocks can also be used to decorate fountains, birdbaths, and other water features, adding a touch of elegance and sophistication. The reflective surface of polished rocks enhances the beauty of water, creating a tranquil and inviting atmosphere.
At rockscapes.net, discover a wealth of design ideas and expert advice to bring your rock polishing visions to life. Whether you’re a homeowner, landscape designer, or DIY enthusiast, we offer the inspiration and resources you need to create stunning rock features in your home and garden. Contact us at 1151 S Forest Ave, Tempe, AZ 85281, United States, or call +1 (480) 965-9011. Visit rockscapes.net today and let us help you transform your space with the timeless beauty of stone!
15. Frequently Asked Questions (FAQs) About Polishing Rocks with a Dremel
What is the best Dremel speed for polishing rocks?
The best Dremel speed for polishing rocks varies depending on the stage. Use low to medium speed for grinding, medium for sanding, and high for polishing.
Can I polish all types of rocks with a Dremel?
While a Dremel is versatile, some rocks are better suited for polishing than others. Agate, jasper, and obsidian are excellent choices.
What safety precautions should I take when polishing rocks with a Dremel?
Always wear safety glasses, a dust mask, and gloves. Work in a well-ventilated area to avoid inhaling dust.
How do I prevent scratches on my polished rocks?
Use progressively finer grits of sandpaper and polishing compounds. Ensure your materials are clean and free of contaminants.
What is the best way to clean polished rocks?
Clean polished rocks with a soft cloth and mild detergent. Rinse thoroughly and allow to dry completely.
Can I use a Dremel to carve designs into rocks?
Yes, a Dremel can be used to carve designs into rocks. Use fine-tipped diamond bits and work in small, controlled movements.
What are the benefits of using a flexible shaft attachment for my Dremel?
A flexible shaft attachment provides greater control and precision, especially for intricate work and hard-to-reach areas.
How do I maintain my Dremel and accessories?
Clean your Dremel after each use and store accessories properly. Regularly inspect and replace worn or damaged parts.
Where can I find inspiration for rock polishing projects?
Explore websites like rockscapes.net, home and garden magazines, and online communities for inspiration and ideas.
Is rock polishing with a Dremel suitable for beginners?
Yes, rock polishing with a Dremel is a great hobby for beginners due to its cost-effectiveness and versatility.