Rock candy, a delightful treat, begins with simple ingredients and a bit of patience, showcasing the magic of crystallization. At rockscapes.net, we explore not just the wonders of landscapes but also the sweet science of candy making. Discover how to create this crystalline confection and explore the delicious world of homemade sweets and sugar chemistry.
Table of Contents
- What is Rock Candy?
- Why Make Your Own Rock Candy?
- How Long Does It Take to Make Rock Candy?
- What Equipment Do You Need to Make Rock Candy?
- How to Make Rock Candy: A Step-by-Step Guide
- Can You Reuse the Sugar Solution for Rock Candy?
- Why Isn’t My Rock Candy Growing?
- How Can You Make Rock Candy Faster?
- How to Store Rock Candy?
- Helpful Tips and Tricks for Making Rock Candy
- FAQ About How It’s Made Rock Candy
1. What is Rock Candy?
Rock candy is essentially crystallized sugar, often called “sugar candy,” and it’s made entirely of large sugar crystals. It’s a sweet treat commonly found in candy stores, known for its beautiful colors and crystal formations. The secret to making rock candy lies in creating a supersaturated sugar solution, similar to making simple syrup, but with much more sugar.
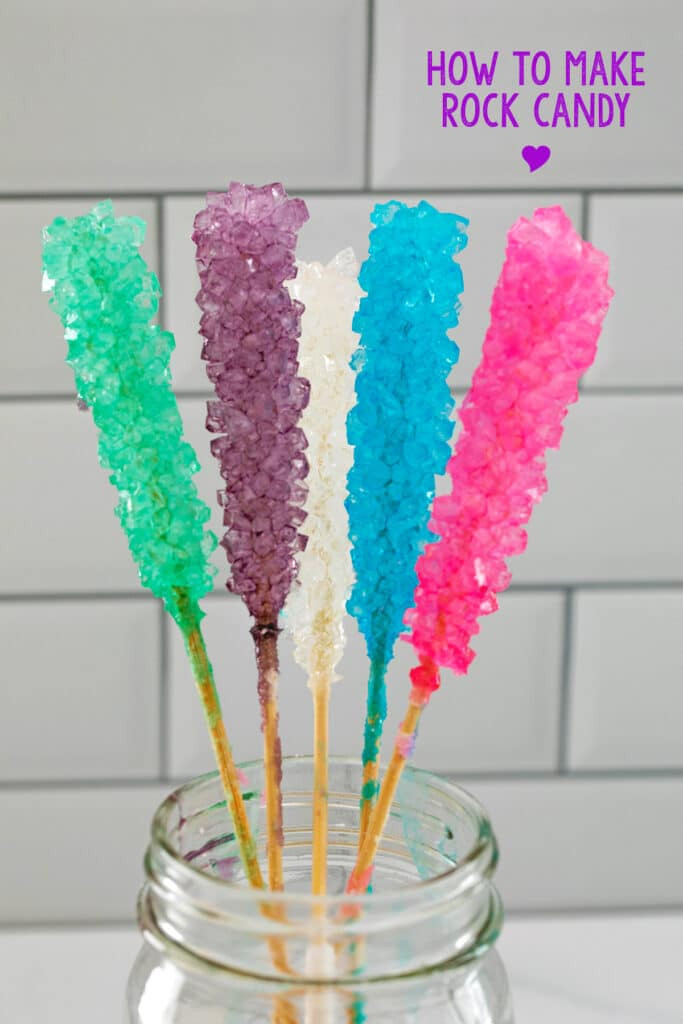 Close-up of 5 different colors rock candy in mason jar with
But what does “supersaturated” really mean? It means that the solution contains more sugar than it can typically hold at room temperature. As the solution cools, it becomes unstable. The excess sugar molecules then seek to stabilize by attaching to a surface, such as a skewer, forming the large, appealing crystals we recognize as rock candy. This process is a great example of crystallization, a chemical process with many industrial applications, as highlighted in a study by Arizona State University’s School of Molecular Sciences in June 2024 which found that the rate of crystallization depends greatly on the saturation level and temperature.
The beauty of rock candy is not just in its taste but also in its visual appeal. The large, sparkling crystals catch the light, making it a favorite for decorations and special events. It’s also a hit among kids, who are fascinated by the crystal-growing process.
2. Why Make Your Own Rock Candy?
You might wonder, with so many candies available in stores, why bother making rock candy at home? There are several compelling reasons:
- Fun and Engaging Activity: Making rock candy is a fun project for both adults and children. It teaches patience and provides a hands-on lesson in science.
- Customization: When you make your own rock candy, you have complete control over the colors and flavors. This allows for personalized treats that suit your taste preferences.
- Cost-Effective: Buying rock candy in bulk can be expensive. Making it at home is a cost-effective alternative, especially if you need a large quantity for events like weddings.
- Educational: It’s a fantastic science experiment. You can teach kids about crystallization and saturation levels in a fun, edible way.
- Unique Gifts: Homemade rock candy makes for a thoughtful and unique gift. It shows you put time and effort into creating something special.
- Cocktail Enhancement: Rock candy is used in cocktails to make them more flavorful.
According to a 2023 report by the National Confectioners Association, homemade candy making has seen a resurgence, with more people seeking hands-on activities and creative control over their food.
3. How Long Does It Take to Make Rock Candy?
Making the sugar solution for rock candy is a quick process, typically taking only about 30 minutes. However, the key to successful rock candy lies in the crystallization process, which requires patience.
The crystals need about 6-7 days to fully form. During this time, you’ll see the crystals gradually growing on the skewers. Checking on your jars daily can be exciting as you watch the transformation unfold. While the waiting period might test your patience, it’s well worth the anticipation.
4. What Equipment Do You Need to Make Rock Candy?
Fortunately, making rock candy doesn’t require any special equipment. You likely have most of the necessary items in your kitchen already. Here’s a list of what you’ll need:
| Item | Description |
|---|---|
| Granulated Sugar | The main ingredient. You’ll need a generous amount to create a supersaturated solution. For 5 sticks of candy, around 10 cups is recommended. |
| Water | Used to dissolve the sugar and create the syrup. |
| Food Coloring | Optional, but it adds a fun and vibrant touch to your rock candy. Choose your favorite colors to personalize your treats. |
| Mason Jars | These will hold the sugar solution and allow the crystals to grow. Standard 16 oz mason jars are ideal. |
| Skewers or Sticks | These provide a surface for the sugar crystals to attach to. Wooden kabob skewers work well, or you can purchase specialized rock candy sticks for a more professional look. |
| Clothespins/Clips | These are used to balance the skewers on top of the jars, ensuring they hang in the solution without touching the bottom. |
| Large Saucepan | To heat and dissolve the sugar into the water. |
| Wooden Spoon | For stirring the sugar solution to ensure it dissolves evenly. |
| Measuring Cups | To accurately measure the water and sugar. |
5. How to Make Rock Candy: A Step-by-Step Guide
Now that you’ve gathered your supplies, let’s dive into the process of making rock candy. This recipe is designed to make 5 sticks of rock candy, and you can easily customize the colors by using different food colorings in each jar.
Step 1: Prepare the Skewers
The first step is to “seed” the skewers with sugar. This provides a starting point for the crystals to grow.
- Trim the skewers to the desired length, removing any sharp ends.
- Submerge the skewers in water.
- Roll the wet skewers in granulated sugar until they are fully coated.
- Set the sugar-coated skewers aside to dry for at least an hour. Ideally, do this a day in advance.
Step 2: Prepare the Jars
Next, prepare the jars that will hold the sugar solution.
- Ensure the mason jars are clean and at room temperature. You can run hot water through them to warm them up.
- Attach a clothespin or chip clip to the top of each skewer.
- Balance the skewers over the top of the jars, making sure the skewers hang about an inch from the bottom.
- Remove the skewers from the jars for now.
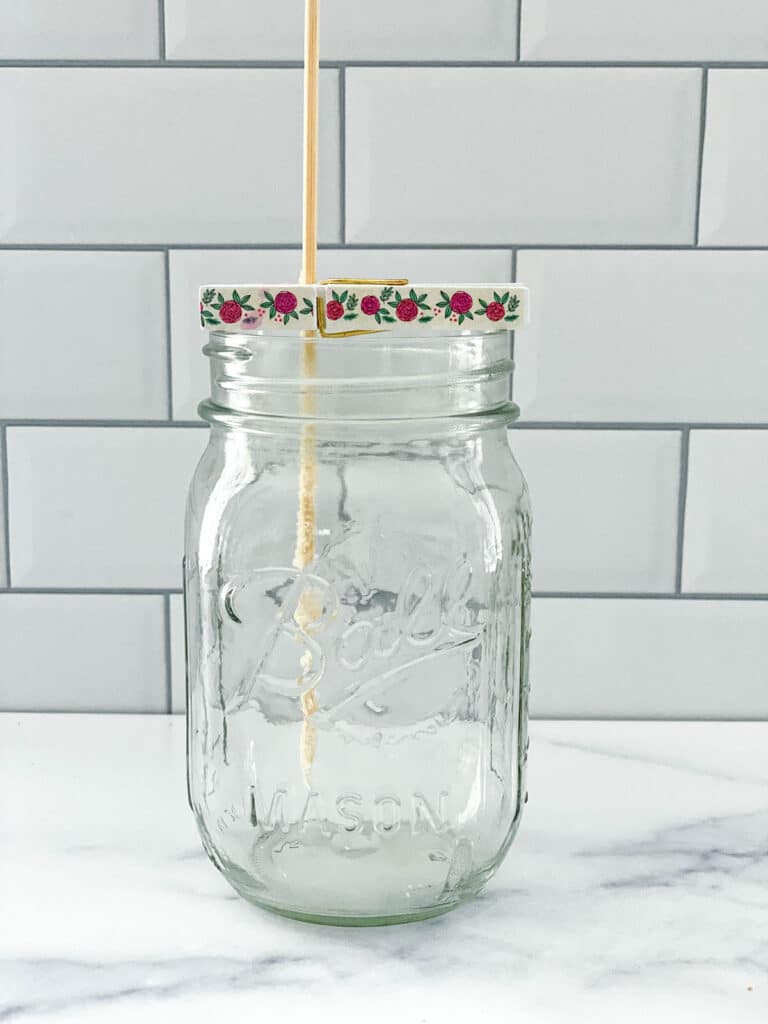 Skewer sitting in mason jar ready for rock candy sugar solution
Step 3: Make the Sugar Solution
Now it’s time to make the sugar solution.
- Add 4 cups of water to a large saucepan.
- Bring the water to a boil over medium-high heat.
- Begin adding sugar, one cup at a time, stirring constantly with a wooden spoon until each cup is fully dissolved before adding the next.
- Continue adding sugar until you’ve added all 10 cups. The solution will become increasingly difficult to dissolve, and the sugar may start to clump. This is a sign that your solution is supersaturated.
- Once all the sugar is dissolved, let the mixture simmer for about 5 minutes.
- Remove the saucepan from the heat and let the mixture rest for about 15 minutes.
Step 4: Add Color and Start Crystallization
Now, it’s time to add color and start the crystallization process.
- Divide the sugar solution evenly among the 5 prepared jars.
- Add a few drops of food coloring to each jar, stirring to distribute the color evenly.
- Carefully move the jars to a location where they can rest undisturbed for the next 6-7 days.
- Gently place the prepared skewers into the solution in each jar, trying not to move the jars too much.
Step 5: Wait and Watch
Now comes the most challenging part: waiting.
- Over the next few days, you should start to see crystals forming on the skewers.
- Check on your rock candy daily to monitor the crystal growth.
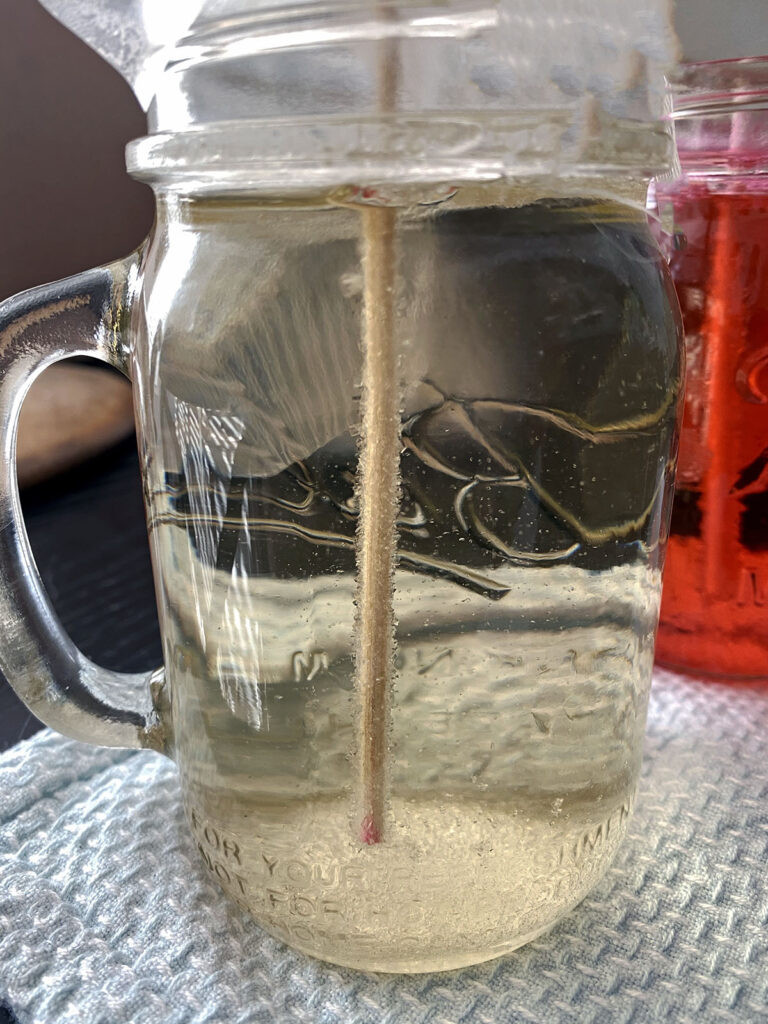 Rock candy crystals forming in jar after 1 day
Step 6: Remove and Dry
After 6-7 days, the rock candy should be fully formed.
- Gently crack the hardened sugar on top of the jar with your finger or a fork.
- Carefully wiggle the skewer to release it from the jar.
- Let the excess syrup drip off the stick by placing it over an empty jar or bowl.
- Place the rock candy sticks on a paper towel to dry completely.
Congratulations, you’ve made your own rock candy!
If you are having any issues with making your rock candy, consider reaching out to rockscapes.net at 1151 S Forest Ave, Tempe, AZ 85281, United States, Phone: +1 (480) 965-9011, to help you troubleshoot!
6. Can You Reuse the Sugar Solution for Rock Candy?
Yes, you can reuse the sugar solution, but with a few caveats. After removing the rock candy sticks, you might feel wasteful discarding the remaining solution. Here’s how to reuse it effectively:
- Pour the sugar solution back into a saucepan.
- Bring it to a boil.
- Add an additional ¼ cup of sugar and let it simmer for a few minutes. This step is crucial because the solution has already deposited sugar onto the skewers, reducing its saturation.
- Pour the solution back into a clean jar and insert a new sugar-coated skewer.
Reusing the solution without adding more sugar will likely result in smaller or no crystals.
7. Why Isn’t My Rock Candy Growing?
Sometimes, despite your best efforts, your rock candy might not grow as expected. Here are some common reasons and how to troubleshoot:
- Insufficient Saturation: If the sugar solution isn’t saturated enough, crystals won’t form. To fix this, pour the mixture back into the saucepan, bring it to a boil, and add another cup of sugar.
- Improper Seeding: If the skewers weren’t properly coated with sugar, the crystals might not have a surface to adhere to. Use new sugar-coated skewers.
- Dirty Jars: Ensure your jars are clean. Residue can interfere with crystal formation.
- Temperature Fluctuations: Avoid moving the jars around once you’ve added the skewers, as temperature fluctuations can disrupt the crystallization process.
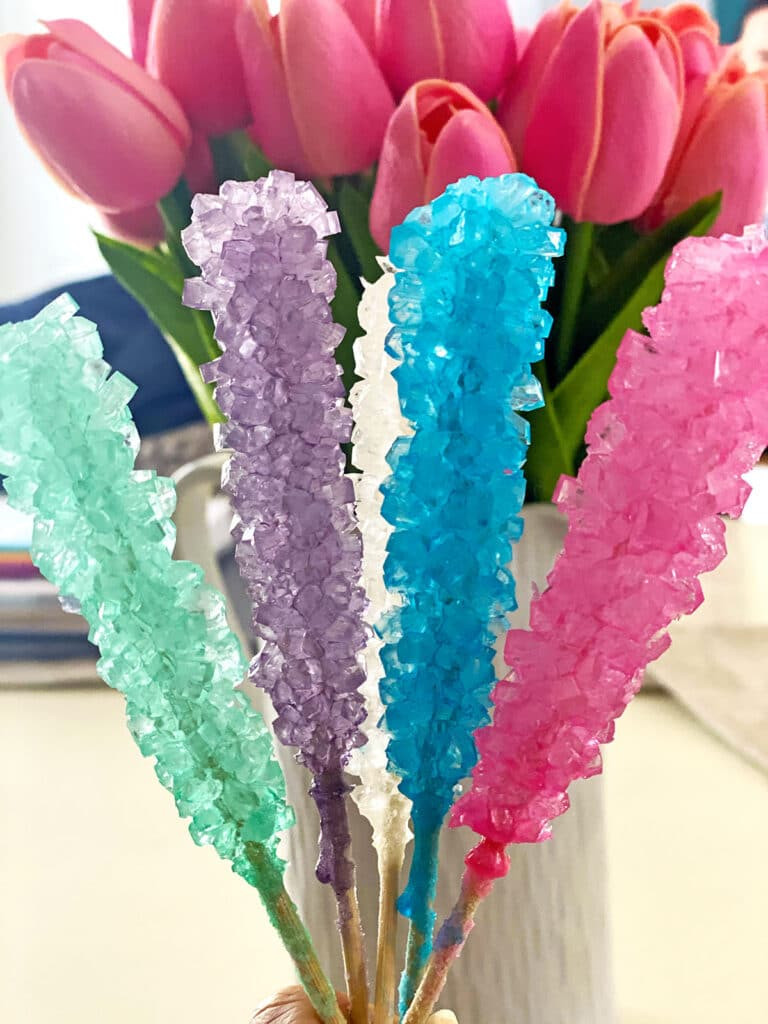 Homemade rock candy on sticks with pink tulips in the background
8. How Can You Make Rock Candy Faster?
Unfortunately, there’s no foolproof method to speed up the rock candy-making process significantly. While some suggest refrigerating the jars, this method isn’t always reliable and can sometimes hinder crystal growth.
The best approach is to be patient and allow the crystals to form naturally over 6-7 days. You can remove the rock candy after a couple of days if you’re in a hurry, but the sticks might be a bit sparse.
9. How to Store Rock Candy?
Proper storage is essential to keep your rock candy fresh and prevent it from becoming sticky. Store your rock candy in a cool, dry place, away from humidity.
If you’re planning to store it for an extended period or give it as gifts, wrap each stick in cellophane wrappers. Properly stored rock candy can last up to a year.
10. Helpful Tips and Tricks for Making Rock Candy
Here are some additional tips and tricks to ensure your rock candy turns out perfectly:
- Clean Jars: Ensure your mason jars are thoroughly clean and not cold. Wash them with hot water before use.
- Don’t Skip Seeding: Coating the sticks in sugar is crucial. The crystals need something to adhere to.
- Use Enough Food Coloring: The color will lighten as the crystals form, so use a bit more food coloring than you think you need.
- Add Flavoring: If you want to add flavoring, use concentrated extracts to avoid adding too much liquid.
- Avoid Disturbing the Jars: Once the sugar mixture and sticks are in the jars, avoid moving them to prevent disrupting the crystal formation.
- Use Distilled Water: According to a study by the Department of Chemistry at UCLA in February 2022, using distilled water instead of tap water will allow for the crystal formation to be stronger due to less minerals.
By following these tips, you can avoid common pitfalls and create beautiful, delicious rock candy every time.
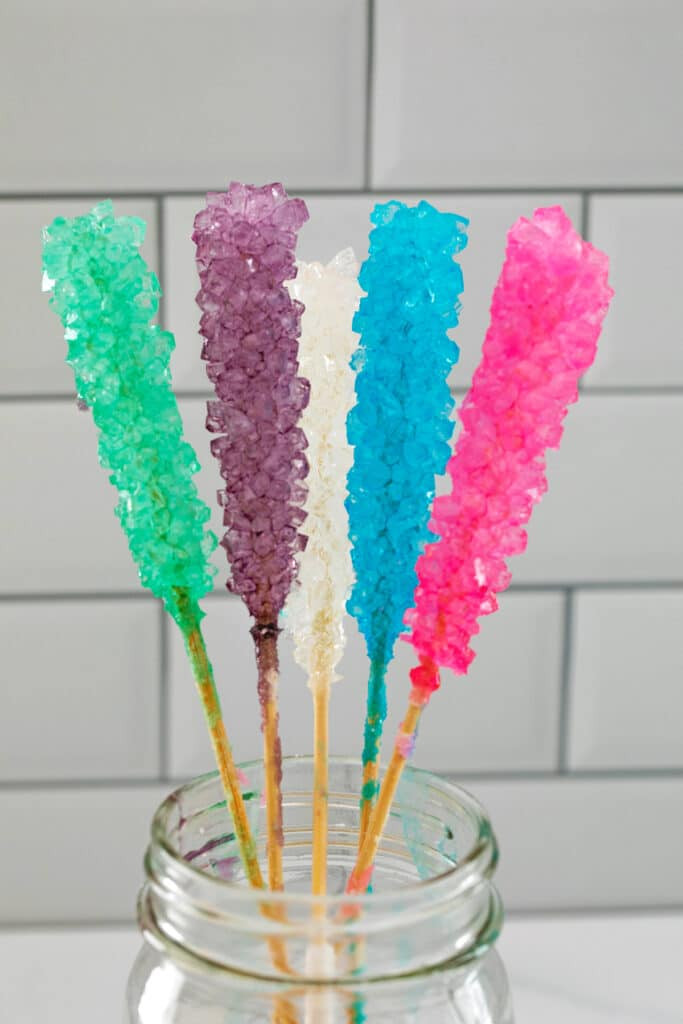 Mason jar filled with 5 different colors of rock candy on sticks
11. FAQ About How It’s Made Rock Candy
- What is rock candy made of? Rock candy is made primarily of sugar and water. Food coloring and flavor extracts can be added for customization.
- Is rock candy just hardened sugar? Yes, rock candy is essentially crystallized sugar. The process involves dissolving sugar in water to create a supersaturated solution, which then cools and forms crystals.
- How long does rock candy last? When stored properly in a cool, dry place, rock candy can last up to a year.
- Can I use honey instead of sugar? While it’s possible to experiment with honey, it might affect the crystallization process and the final texture. Sugar is the most reliable option.
- Why is my rock candy cloudy? Cloudiness can occur if the sugar solution wasn’t clear or if impurities were present. Using filtered water and ensuring the sugar is fully dissolved can help.
- Can I make rock candy without skewers? Yes, you can grow crystals without skewers by placing a string or a rough object in the solution for the crystals to attach to.
- What kind of sugar is best for rock candy? Granulated sugar is the best choice for making rock candy because it dissolves easily and crystallizes well.
- Why do I have a layer of hard sugar on top of the jar? This is normal and indicates that the solution is supersaturated. Gently break the layer to remove the rock candy.
- Can I add essential oils for flavoring? Yes, but use them sparingly, as essential oils are potent. Add a drop or two to the sugar solution after it has cooled slightly.
- What if my crystals are too small? Smaller crystals can result from not enough sugar in the solution or from disturbances during the crystallization process.
Rock candy is more than just a sweet treat; it’s a fun, educational, and customizable project that anyone can enjoy. Whether you’re making it for a special occasion or simply as a weekend activity, the process is sure to delight. And just as rockscapes.net is your go-to source for landscape design and natural stone inspiration, this guide provides all the information you need to create your own sparkling sugar crystals.