How Long Does Rock Candy Take To Grow? It typically takes six to seven days for rock candy to grow, and at Rockscapes.net, we’ll explore the patience and sugar involved in creating this delightful treat, whether for a sweet dessert or a fun science project. Rock candy growth time is a crucial factor for achieving the perfect crystalline structure, influencing its appeal in various applications, and we are here to guide you through the rock candy process!
1. Understanding Rock Candy and Its Appeal
Rock candy is a crystallized form of sugar, often admired for its aesthetic appeal and sweet taste. It’s essentially pure sugar that has formed into large crystals. The process of making rock candy involves creating a supersaturated sugar solution that, when cooled, allows sugar molecules to attach to a seed (like a string or stick), gradually forming crystals. Understanding the science behind rock candy growth helps appreciate its applications in landscaping and design.
1.1 What Is Rock Candy?
Rock candy, also known as sugar candy, is made entirely of large sugar crystals, often colored and sold in candy stores. The process is similar to making simple syrup but involves oversaturating the solution with sugar. As the solution cools, the sugar can’t stay in the liquid and attaches to a skewer, forming the candy.
1.2 The Allure of Homemade Rock Candy
While you can purchase rock candy in stores or online, making your own is a fun activity with various benefits:
- Enjoyment: Whether for personal enjoyment or as gifts, homemade rock candy is a delightful treat.
- Science Experiment: It’s an excellent way to learn about crystallization and solution saturation.
- Cocktails: Rock candy can be used to create fun and unique cocktails or mocktails.
Rock candy is a blend of sugar, water, and patience. The sugar crystals form as the supersaturated solution cools, creating a visually appealing and tasty treat.
2. Factors Influencing Rock Candy Growth Time
Several factors affect how long it takes for rock candy to grow, including temperature, sugar concentration, and the presence of impurities. Maintaining optimal conditions ensures the formation of large, well-defined crystals.
2.1 Optimal Conditions for Crystal Growth
- Supersaturation: A higher sugar concentration leads to faster crystal growth.
- Temperature Stability: Consistent temperature prevents the crystals from dissolving back into the solution.
- Purity: Clean equipment and ingredients reduce the risk of unwanted crystallization or contamination.
According to research from Arizona State University’s School of Earth and Space Exploration, maintaining a stable environment is crucial for crystal formation, minimizing disturbances that can disrupt the growth process.
2.2 How Temperature Affects Growth Rate
Warmer temperatures allow more sugar to dissolve in the water, creating a supersaturated solution. As the solution cools, the sugar molecules come together and crystallize. Temperature fluctuations can affect the uniformity of the crystals, so keeping the solution at a consistent temperature is essential.
2.3 The Role of Sugar Concentration
The amount of sugar dissolved in the water is critical. Too little sugar, and the crystals won’t form properly; too much, and the sugar may not dissolve completely, leading to inconsistent crystal growth.
- Use the correct ratio of sugar to water for optimal results.
- Ensure the sugar is fully dissolved before starting the cooling process.
3. Step-by-Step Guide to Growing Rock Candy
Growing rock candy involves several steps, from preparing the sugar solution to allowing the crystals to form. Each step is crucial for achieving the desired result.
3.1 Preparing the Sugar Solution
- Ingredients: You’ll need granulated sugar, water, food coloring (optional), and flavoring (optional). For five sticks of candy, use 10 cups of sugar.
- Equipment: Gather mason jars, skewers, clothespins, and a saucepan.
- Sugar Coating: Coat skewers in sugar by submerging them in water, coating them in sugar, and letting them dry. This “seeds” the candy and gives the crystals something to adhere to.
- Jar Preparation: Clean the mason jars and attach clothespins to the skewers to balance them over the jars, ensuring the skewer hangs about an inch from the bottom.
- Making the Solution: Add 4 cups of water to a large saucepan and bring to a boil. Add sugar one cup at a time, stirring until each cup is fully dissolved before adding the next.
- Simmering: Once all the sugar is dissolved, let the mixture simmer for about 5 minutes before removing from heat.
- Resting: Remove the saucepan from the heat and let the mixture rest for about 15 minutes.
- Dividing and Coloring: Divide the mixture among the prepared jars and stir in food coloring if desired.
- Resting Spots: Carefully move the jars to their resting spots before placing the skewers in the solution.
- Crystal Formation: Place the prepared skewers into the solution and avoid moving the jars. Crystals should start forming on the sticks within a day.
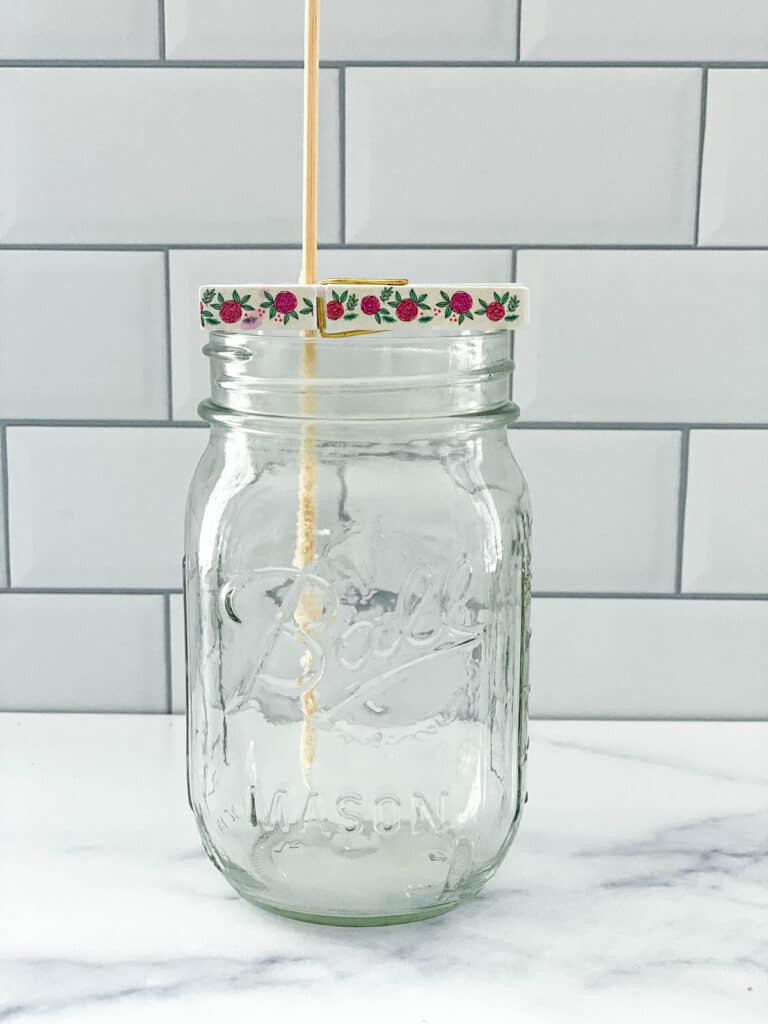 Skewer sitting in mason jar ready for rock candy sugar solution
3.2 Monitoring Crystal Growth
Check the jars daily to monitor crystal growth. You should see crystals forming on the sticks within a day. Here’s how the crystal growth may progress:
- Day 1: Small crystals start forming.
- Day 2: Crystals become more visible.
- Day 3: Larger crystals develop.
- Day 6-7: Crystals are fully formed and ready to be removed.
3.3 Harvesting and Storing Rock Candy
- Removing the Candy: After at least six days, gently crack the hardened sugar on top of the jar and wiggle the stick to release it.
- Drying: Let the syrup drizzle from the stick by setting the candy over an empty jar or bowl or placing it on a paper towel.
- Storing: Store your rock candy in a cool, dry place. Wrap them in cellophane wrappers if you plan to keep them for a while or give them as gifts. When stored properly, rock candy should stay good for a year.
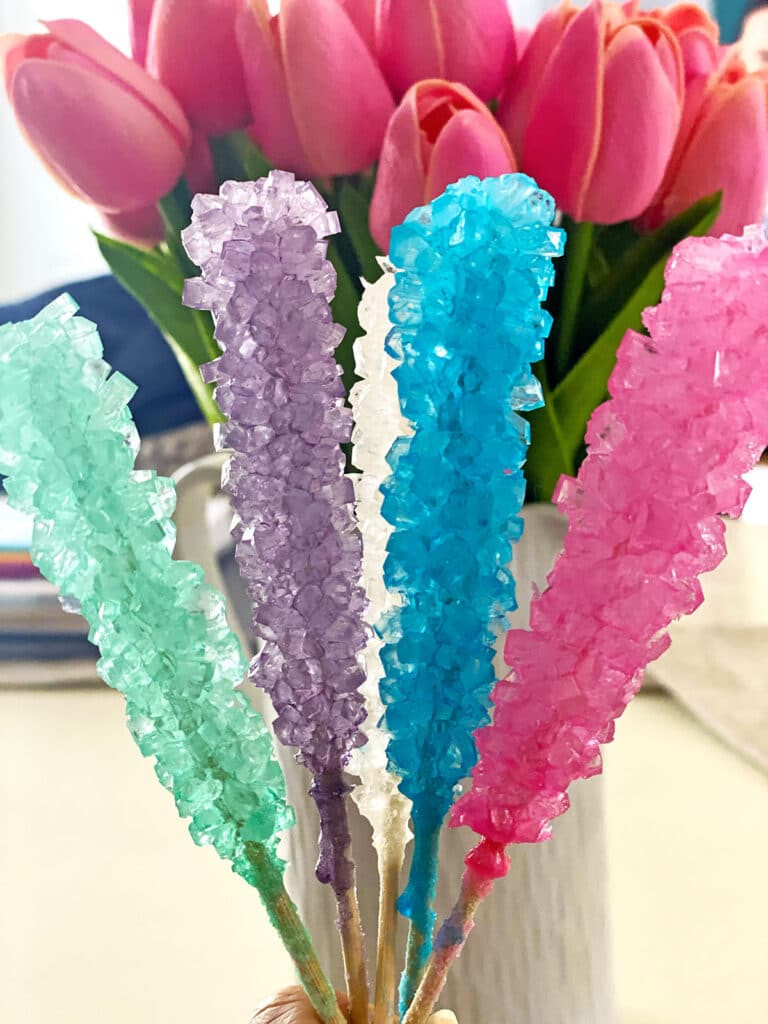 Homemade rock candy on sticks with pink tulips in the background
4. Common Issues and Troubleshooting
Making rock candy can be tricky, and you may encounter issues. Here are some common problems and how to troubleshoot them.
4.1 Why Isn’t My Rock Candy Growing?
If crystals aren’t growing, it may be due to an oversaturated sugar solution. Try these steps:
- Reheat the Mixture: Put the mixture back into the saucepan, bring it to a boil, and add another cup of sugar. Stir to dissolve. Add more sugar if the first cup dissolves easily.
- New Skewers: Use new sugar-coated skewers.
- Clean Jars: Ensure your jars are clean and not cold.
- Avoid Movement: Do not move your jars around once you add the stick in.
4.2 Can I Make Rock Candy Fast?
Unfortunately, there isn’t a way to make rock candy grow quickly. Some suggest putting the jars in the fridge to speed up the process, but this may not work. You can remove the rock candy after a couple of days, but the sticks may be sparse.
4.3 Reusing Sugar Solution
You can reuse the sugar solution. Pour it back into a saucepan, bring it back to a boil, and add another ¼ cup of sugar. Let it simmer for a few minutes, then pour it back into the jar. Reheating and adding more sugar ensures better crystal growth.
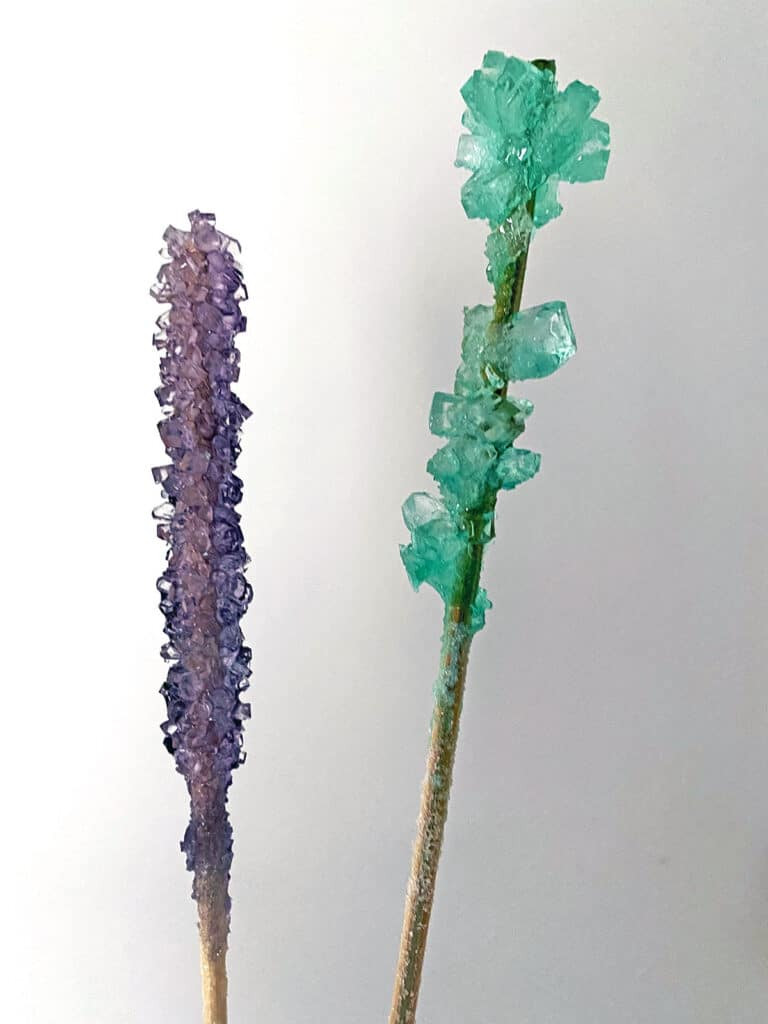 Purple and green rock candy made from reused sugar solution without re-heating and adding more sugar
5. Creative Uses for Rock Candy in Landscaping
While traditionally a sweet treat, rock candy’s unique crystalline structure and vibrant colors can inspire creative landscaping ideas.
5.1 Incorporating Crystal-Like Structures
Use clear or colored resin to create crystal-like structures that mimic the appearance of rock candy. These can be integrated into garden beds, water features, or as standalone art pieces.
5.2 Using Crushed Rock Candy for Decorative Purposes
Crushed rock candy can be used as a decorative element in potted plants or small garden displays, adding a touch of whimsy and color.
5.3 Rock Candy-Inspired Color Schemes
Design your garden with color schemes that mimic the vibrant hues of rock candy. Use flowers, foliage, and hardscape materials in shades of blue, pink, green, and yellow to create a playful, eye-catching landscape.
6. Rockscapes.net: Your Partner in Landscape Design
At Rockscapes.net, we understand the importance of unique and creative elements in landscape design. While we may not offer edible rock candy, we provide a wide range of natural stones and design ideas to enhance your outdoor spaces.
6.1 Exploring Natural Stone Options
Discover various natural stones perfect for creating stunning landscapes. From granite to slate, we offer materials that add texture, color, and durability to any project.
6.2 Design Ideas and Inspiration
Find inspiration for your next landscape project with our extensive gallery of design ideas. Whether you’re looking to create a serene garden or a vibrant outdoor living space, Rockscapes.net has the resources you need.
6.3 Expert Advice and Consultation
Our team of experts is here to help you choose the right materials and design elements for your landscape. We offer personalized consultations to ensure your project is a success.
6.4 Why Choose Rockscapes.net?
Choosing Rockscapes.net means partnering with a company that values quality, creativity, and customer satisfaction. We are committed to providing the best materials and services to bring your landscape dreams to life.
- Extensive Selection: We offer a wide range of natural stones and landscape materials.
- Expertise: Our team has years of experience in landscape design and construction.
- Customer Focus: We prioritize your satisfaction and work closely with you to achieve your vision.
- Quality Materials: We source only the highest quality materials to ensure durability and beauty.
7. Incorporating Natural Stone into Your Landscape Design
Integrating natural stone into your landscape design can create a timeless, elegant look. Here are some ideas for using stone in your outdoor spaces.
7.1 Stone Pathways and Walkways
Create inviting pathways and walkways using flagstone, pavers, or gravel. Stone pathways add texture and visual interest to your garden while providing a functional and durable surface.
7.2 Rock Gardens and Alpine Landscapes
Design a rock garden with various sizes and types of stones to showcase alpine plants and succulents. Rock gardens are low-maintenance and add a unique, natural element to your landscape.
7.3 Water Features with Natural Stone
Enhance water features like ponds, waterfalls, and fountains with natural stone. Use stones to line the edges of ponds, create cascading waterfalls, or add a decorative touch to fountains.
7.4 Retaining Walls and Terraces
Build retaining walls and terraces with natural stone to create level areas and prevent soil erosion. Stone retaining walls are both functional and aesthetically pleasing, adding character to your landscape.
7.5 Fire Pits and Outdoor Fireplaces
Construct fire pits and outdoor fireplaces with natural stone to create a cozy, inviting outdoor living space. Stone fire features provide warmth and ambiance, making your backyard a perfect spot for entertaining.
8. Maintaining Your Stone Landscape
Proper maintenance is essential to keep your stone landscape looking its best. Here are some tips for caring for your natural stone features.
8.1 Cleaning Stone Surfaces
Regularly clean stone surfaces to remove dirt, debris, and stains. Use a mild soap and water solution and a soft brush to scrub the stone gently. Avoid using harsh chemicals or abrasive cleaners that can damage the stone.
8.2 Preventing Weed Growth
Prevent weed growth in stone pathways and rock gardens by applying a pre-emergent herbicide or using a weed barrier fabric. Regularly pull any weeds that do emerge to keep your landscape looking tidy.
8.3 Repairing Stone Features
Repair any cracks, chips, or loose stones promptly to prevent further damage. Use a stone adhesive or mortar to reattach loose stones and fill in cracks. Consult a professional for more extensive repairs.
8.4 Protecting Stone from the Elements
Protect your stone landscape from harsh weather conditions by applying a sealant or water repellent. This helps prevent water damage, staining, and fading. Reapply the sealant every few years to maintain its effectiveness.
9. Discover the Beauty of Rockscapes.net
Visit Rockscapes.net to explore our extensive selection of natural stones, design ideas, and expert advice. Let us help you create a landscape that reflects your unique style and enhances your outdoor living experience.
9.1 Contact Us
Ready to start your landscape project? Contact us today for a personalized consultation.
Address: 1151 S Forest Ave, Tempe, AZ 85281, United States
Phone: +1 (480) 965-9011
Website: Rockscapes.net
9.2 Visit Our Showroom
Visit our showroom to see our natural stones and landscape materials in person. Our knowledgeable staff can help you choose the perfect elements for your project.
9.3 Get Inspired
Browse our gallery of landscape designs to find inspiration for your outdoor spaces. From serene gardens to vibrant living areas, we have ideas to suit every style and budget.
9.4 Stay Connected
Follow us on social media to stay up-to-date on the latest landscape trends, design ideas, and product updates. Join our community of landscape enthusiasts and share your own projects and inspirations.
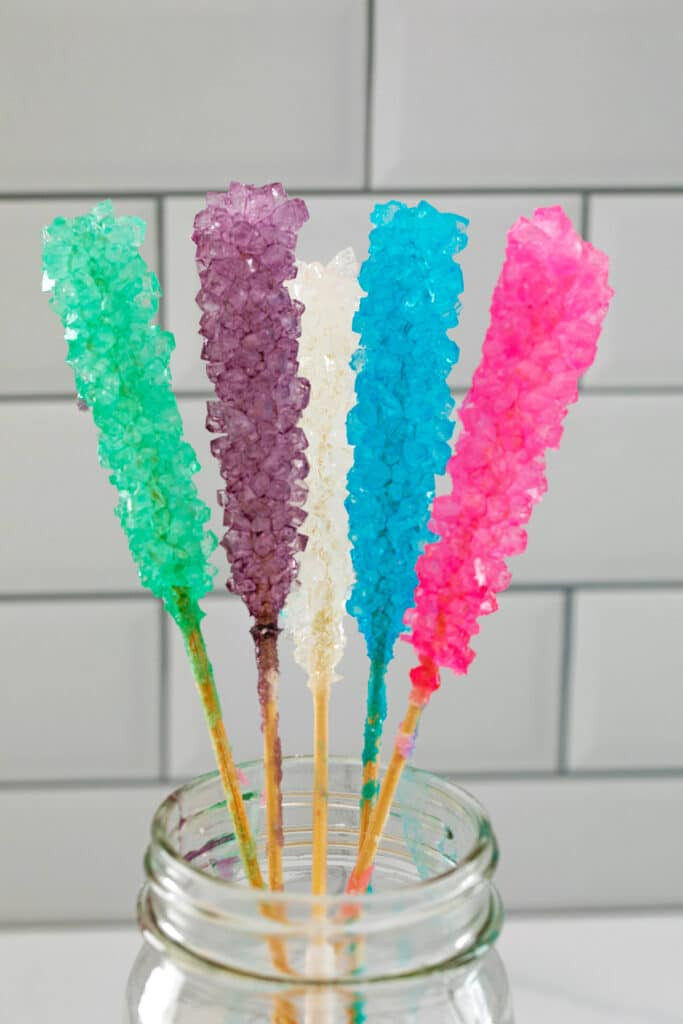 Mason jar filled with 5 different colors of rock candy on sticks
10. Frequently Asked Questions (FAQ) about Rock Candy and Landscaping
10.1 How long does it take for rock candy to grow?
It typically takes six to seven days for rock candy to grow fully, allowing the crystals to form properly in the sugar solution.
10.2 What are the best conditions for growing rock candy?
The best conditions include a supersaturated sugar solution, a stable temperature, and clean equipment to prevent impurities.
10.3 Can I reuse the sugar solution for making more rock candy?
Yes, you can reuse the sugar solution by reheating it, adding more sugar, and letting it simmer before pouring it back into a clean jar.
10.4 What should I do if my rock candy isn’t growing?
If your rock candy isn’t growing, reheat the mixture, add more sugar, ensure your jars are clean, and avoid moving the jars once the sticks are in place.
10.5 How can I store rock candy to keep it fresh?
Store rock candy in a cool, dry place, preferably wrapped in cellophane wrappers to maintain its quality for up to a year.
10.6 How can I incorporate crystal-like structures in landscaping?
You can use clear or colored resin to create crystal-like structures that mimic the appearance of rock candy in garden beds or water features.
10.7 What types of natural stones are best for landscaping in Arizona?
Granite, slate, and other durable stones are excellent choices for landscaping in Arizona, providing both aesthetic appeal and resilience to the climate.
10.8 How do I maintain stone pathways in my garden?
Regularly clean stone pathways with mild soap and water, prevent weed growth with herbicides or barriers, and repair any cracks or loose stones promptly.
10.9 What are the benefits of using natural stone in retaining walls?
Natural stone retaining walls are both functional and aesthetically pleasing, providing soil stabilization and adding character to your landscape design.
10.10 Where can I find high-quality natural stones and expert landscaping advice?
Visit Rockscapes.net or our showroom at 1151 S Forest Ave, Tempe, AZ 85281, United States, to explore our selection and get personalized assistance.
Conclusion: Embrace the Beauty of Natural Stone with Rockscapes.net
While rock candy may offer a sweet treat and a fun science experiment, rockscapes.net provides the natural stones and expertise you need to create stunning, lasting landscapes. Explore our website, visit our showroom, and let us help you bring your outdoor vision to life.