Are you planning a landscape transformation with river rock and wondering, “How Much River Rock Calculator do I need?” Rockscapes.net is here to guide you through every step, ensuring your project is both beautiful and cost-effective. This comprehensive guide will show you how to accurately calculate your river rock needs, explore design ideas, and choose the perfect stones for your outdoor space.
1. What is a River Rock Calculator and Why Use One?
A river rock calculator is a tool that helps you estimate the amount of river rock needed for your landscaping project. Using a river rock calculator prevents over or under-purchasing, saving you time, money, and potential headaches. Instead of guessing, you can plan your project with precision.
1.1. Benefits of Using a River Rock Calculator
- Accuracy: Provides a more accurate estimate than manual calculations.
- Cost-Effective: Prevents overbuying and reduces waste.
- Time-Saving: Simplifies the estimation process.
- Project Planning: Helps you plan your project efficiently.
- Convenience: Available online for easy access anytime, anywhere.
1.2. When to Use a River Rock Calculator
- Landscaping Projects: Use it when creating pathways, garden beds, or decorative features.
- Erosion Control: Ideal for calculating rock needed to stabilize slopes and prevent soil erosion.
- Drainage Systems: Helps estimate the amount of rock for French drains or other drainage solutions.
- Decorative Purposes: Perfect for planning decorative rock gardens or water features.
- Home Improvement: Essential for DIY projects and professional landscaping alike.
2. Key Factors to Consider Before Using a River Rock Calculator
Before diving into calculations, several factors influence the accuracy of your estimate. Consider these to ensure your project goes smoothly.
2.1. Project Area Dimensions
- Length and Width: Measure the length and width of the area you plan to cover with river rock.
- Shape Complexity: For irregular shapes, divide the area into smaller, manageable sections like rectangles or circles.
- Slope: Account for any slopes, as they may require more rock to maintain the desired depth.
2.2. Desired Depth of River Rock
- Purpose: Determine the purpose of the river rock, whether for decoration, drainage, or erosion control.
- Aesthetics: Consider the desired look. A thicker layer provides a more substantial appearance.
- Functionality: Ensure the depth is adequate for the intended function, such as weed suppression or water drainage.
2.3. Type of River Rock
- Size: River rock comes in various sizes, from small pebbles to large boulders.
- Density: The density of the rock affects the weight per cubic foot, influencing the amount needed.
- Shape: Rounded rocks pack differently than angular ones, affecting the volume required.
2.4. Waste Factor
- Cutting and Fitting: Account for waste that occurs during cutting or fitting rocks into tight spaces.
- Settling: Rocks may settle over time, requiring additional material to maintain the desired level.
- Handling Losses: Some material may be lost during transportation and handling.
3. Step-by-Step Guide: Using a River Rock Calculator
Now, let’s break down how to use a river rock calculator effectively. Follow these steps for an accurate estimate.
3.1. Measure the Area
- Gather Tools: You’ll need a measuring tape, stakes, and string for defining the area.
- Define Boundaries: Mark the area’s boundaries with stakes and string.
- Measure Length and Width: Measure the length and width of the area in feet or meters.
- Irregular Shapes: Divide irregular shapes into simpler geometric forms and measure each section separately.
3.2. Determine the Desired Depth
- Purpose: Decide on the purpose of the river rock layer.
- Depth Range: Typical depths range from 2 to 4 inches for decorative purposes and 4 to 6 inches for drainage or erosion control.
- Measure Depth: Use a ruler or measuring tape to visualize the desired depth.
3.3. Input Measurements into the Calculator
- Find a Calculator: Search online for a “river rock calculator” or use the one available on Rockscapes.net.
- Enter Dimensions: Input the length, width, and depth measurements into the appropriate fields.
- Specify Units: Ensure you select the correct units (feet, inches, meters, etc.).
3.4. Calculate the Total Amount of River Rock Needed
- Review Results: The calculator will provide the total amount of river rock needed in cubic yards or tons.
- Adjust for Waste: Add a waste factor of 5-10% to account for settling and handling losses.
- Record Estimate: Note the final estimate for purchasing purposes.
3.5. Example Calculations
Let’s walk through a few examples to illustrate the process:
-
Example 1: Rectangular Garden Bed
- Length: 10 feet
- Width: 5 feet
- Depth: 3 inches (0.25 feet)
- Calculation: (10 ft x 5 ft x 0.25 ft) / 27 = 0.46 cubic yards
-
Example 2: Circular Patio
- Diameter: 8 feet
- Radius: 4 feet
- Depth: 4 inches (0.33 feet)
- Area: π x (4 ft)^2 = 50.27 square feet
- Calculation: (50.27 sq ft x 0.33 ft) / 27 = 0.61 cubic yards
-
Example 3: Triangular Drainage Ditch
- Base: 12 feet
- Height: 6 feet
- Depth: 6 inches (0.5 feet)
- Area: (12 ft x 6 ft) / 2 = 36 square feet
- Calculation: (36 sq ft x 0.5 ft) / 27 = 0.67 cubic yards
4. Understanding the Formula Behind the River Rock Calculator
To fully grasp how the calculator works, let’s look at the formula used:
4.1. Basic Formula for Calculating Volume
- Volume = Length x Width x Depth
- This formula calculates the volume in cubic feet.
4.2. Converting Cubic Feet to Cubic Yards
- Since river rock is often sold by the cubic yard, you’ll need to convert cubic feet to cubic yards.
- 1 Cubic Yard = 27 Cubic Feet
- Formula: Cubic Yards = (Length x Width x Depth) / 27
4.3. Accounting for Waste Factor
- To account for waste, multiply the result by 1.05 (for 5% waste) or 1.10 (for 10% waste).
- Formula: Total Cubic Yards = ((Length x Width x Depth) / 27) x Waste Factor
5. Types of River Rock and Their Uses
River rock isn’t just one type of stone. Understanding the different varieties will help you make the best choice for your project.
5.1. Pea Gravel
- Description: Small, rounded stones, typically ¼ to ⅝ inches in diameter.
- Uses: Pathways, playgrounds, and as a base for pavers.
5.2. Small River Rock
- Description: Ranging from 1 to 2 inches in diameter, these are smooth and come in various colors.
- Uses: Garden beds, decorative ground cover, and erosion control.
5.3. Medium River Rock
- Description: Sizes range from 2 to 5 inches, providing a more substantial look.
- Uses: Dry creek beds, water features, and landscaping accents.
5.4. Large River Rock
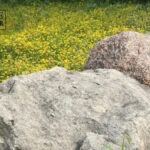
- Description: These rocks can be 5 inches or larger, often used as focal points in landscapes.
- Uses: Retaining walls, large water features, and as standalone decorative elements.
5.5. Delaware River Rock
- Description: A mix of colors, including tan, brown, and gray, offering a natural look.
- Uses: Pathways, driveways, and decorative landscaping.
6. Design Ideas and Inspiration with River Rock
River rock offers endless design possibilities. Here are some ideas to spark your creativity.
6.1. River Rock Pathways
- Natural Look: Create winding pathways that blend seamlessly with the surrounding landscape.
- Material Combinations: Combine river rock with pavers or flagstone for added texture and visual interest.
- Edging: Use larger stones or plants to define the pathway’s edges.
6.2. Decorative Garden Beds
- Mulch Alternative: Use river rock as a mulch alternative to suppress weeds and retain moisture.
- Color Coordination: Choose rocks that complement the colors of your plants and flowers.
- Texture Contrast: Mix different sizes and types of rocks for added texture and visual appeal.
6.3. Water Features
- Dry Creek Beds: Create a dry creek bed that mimics a natural stream, adding visual interest to your yard.
- Ponds and Waterfalls: Use river rock to line ponds and create natural-looking waterfalls.
- Fountains: Incorporate river rock around fountains to enhance their aesthetic appeal.
6.4. Erosion Control
- Sloped Areas: Use river rock to stabilize sloped areas and prevent soil erosion.
- Drainage Ditches: Line drainage ditches with river rock to improve water flow and prevent clogging.
- Retaining Walls: Incorporate river rock into retaining walls for added stability and visual appeal.
7. Tips for Purchasing and Installing River Rock
Once you’ve calculated how much river rock you need, here are some tips for purchasing and installing it.
7.1. Finding a Reliable Supplier
- Local Nurseries: Check local nurseries and garden centers for a variety of river rock options.
- Stone Yards: Stone yards often offer a wider selection and bulk pricing.
- Online Retailers: Online retailers can be convenient, but be sure to check shipping costs.
- Rockscapes.net: Explore Rockscapes.net for a curated selection of high-quality river rock and expert advice.
7.2. Inspecting the Quality of River Rock
- Cleanliness: Ensure the rocks are clean and free of debris.
- Color Consistency: Check for consistent color and texture.
- Size Variation: Look for a mix of sizes to create a more natural look.
7.3. Preparing the Area for Installation
- Clear Debris: Remove any grass, weeds, or debris from the area.
- Level the Ground: Level the ground to ensure a uniform depth of river rock.
- Weed Barrier: Install a weed barrier fabric to prevent weeds from growing through the rocks.
7.4. Installing the River Rock
- Spread Evenly: Spread the river rock evenly over the prepared area.
- Rake Smooth: Use a rake to smooth the surface and distribute the rocks uniformly.
- Compact the Rocks: Compact the rocks with a hand tamper or roller to prevent settling.
- Add Edging: Install edging to contain the rocks and define the area’s boundaries.
7.5. Safety Precautions
- Wear Gloves: Wear gloves to protect your hands from sharp edges and debris.
- Use Proper Lifting Techniques: Lift heavy rocks with your legs, not your back.
- Eye Protection: Wear safety glasses to protect your eyes from flying debris.
8. Maintaining Your River Rock Landscape
Proper maintenance will keep your river rock landscape looking its best.
8.1. Regular Cleaning
- Rake Debris: Rake the rocks regularly to remove leaves, twigs, and other debris.
- Hose Down: Hose down the rocks to remove dirt and grime.
8.2. Weed Control
- Hand Pulling: Hand pull any weeds that manage to grow through the rocks.
- Herbicide: Use a targeted herbicide to kill weeds without harming surrounding plants.
8.3. Replenishing Rocks
- Settling: Add additional rocks as needed to maintain the desired depth and appearance.
- Erosion: Repair any areas where erosion has occurred by adding more rocks.
8.4. Preventing Discoloration
- Algae Growth: Prevent algae growth by ensuring good drainage and sunlight exposure.
- Cleaning Solutions: Use a mild cleaning solution to remove stubborn stains or algae.
9. Common Mistakes to Avoid When Calculating River Rock Needs
Avoid these common pitfalls to ensure accurate calculations and a successful project.
9.1. Not Measuring Accurately
- Inaccurate Dimensions: Double-check your measurements to avoid errors.
- Estimating: Always measure, don’t estimate, to ensure precision.
9.2. Ignoring the Depth
- Too Shallow: A shallow layer of rocks may not provide adequate coverage or functionality.
- Too Deep: An overly deep layer can be wasteful and may not look aesthetically pleasing.
9.3. Forgetting the Waste Factor
- Underestimating: Not accounting for waste can lead to running short on materials.
- Overestimating: A high waste factor can result in overbuying.
9.4. Choosing the Wrong Type of River Rock
- Size Inconsistency: Mixing different sizes of rocks haphazardly can look disorganized.
- Color Clashes: Choosing rocks that clash with your landscape’s color scheme can detract from its overall appeal.
9.5. Not Considering Drainage
- Poor Drainage: River rock can impede drainage if not installed properly, leading to water buildup.
- Slope Considerations: Ignoring the slope of your landscape can cause erosion and uneven distribution of rocks.
10. Advanced Tips for River Rock Landscaping
Elevate your river rock landscaping with these advanced techniques.
10.1. Creating Textural Contrast
- Mix Sizes: Combine different sizes of river rock to create a more dynamic and natural look.
- Use Different Types of Stone: Incorporate other types of stone, such as flagstone or granite, for added texture.
- Layering: Create layers of different materials, such as river rock, mulch, and plants, for visual interest.
10.2. Incorporating Native Plants
- Drought-Tolerant Species: Choose native plants that thrive in dry conditions and complement the river rock landscape.
- Low-Maintenance Options: Opt for low-maintenance plants to reduce upkeep and watering needs.
- Pollinator-Friendly Plants: Attract pollinators by incorporating flowering plants that provide nectar and pollen.
10.3. Using Lighting to Enhance the Landscape
- Spotlights: Use spotlights to highlight focal points, such as large boulders or water features.
- Path Lighting: Install path lighting to illuminate walkways and enhance safety.
- Uplighting: Uplight trees and shrubs to create dramatic silhouettes and add depth to the landscape.
10.4. Building Dry Stack Walls
- Stability: Construct dry stack walls using large, flat river rocks for added stability and visual appeal.
- Drainage: Ensure proper drainage behind the walls to prevent water buildup and erosion.
- Design: Create a natural, rustic look by carefully selecting and arranging the rocks.
10.5. Creating Zen Gardens
- Minimalist Design: Design a Zen garden using river rock, sand, and carefully placed plants for a peaceful and meditative space.
- Raking Patterns: Create raking patterns in the sand to represent water or other natural elements.
- Focal Points: Use a few carefully chosen stones as focal points to draw the eye and create a sense of balance.
11. Frequently Asked Questions (FAQs) About River Rock Calculators
Here are some common questions people ask about using river rock calculators.
11.1. What units of measurement do I need for the river rock calculator?
Typically, you’ll need to provide measurements in feet or inches for length, width, and depth. Some calculators also accept metric units like meters and centimeters.
11.2. How accurate are river rock calculators?
River rock calculators are generally accurate, but the accuracy depends on the precision of your measurements and the correct input of data. Always double-check your numbers.
11.3. Can I use a river rock calculator for irregular shapes?
Yes, but you’ll need to divide the irregular shape into smaller, regular shapes (like rectangles, circles, or triangles), calculate the area of each, and then add them together.
11.4. How much extra river rock should I buy for waste?
It’s generally recommended to add a waste factor of 5-10% to account for settling, spillage, and potential miscalculations.
11.5. What is the difference between cubic feet and cubic yards?
One cubic yard is equal to 27 cubic feet. River rock is often sold by the cubic yard, so understanding this conversion is essential.
11.6. Can I use a river rock calculator for other types of landscaping rocks?
Yes, the same principles apply to other types of landscaping rocks like gravel, crushed stone, and lava rock. However, consider variations in density.
11.7. How does the depth of the river rock affect the calculation?
The depth is a critical factor in determining the total volume of river rock needed. A greater depth requires more material.
11.8. Where can I find a reliable river rock calculator?
You can find reliable river rock calculators online, including on landscaping supply websites and home improvement sites. Rockscapes.net also offers a calculator.
11.9. What if my river rock settles over time?
River rock can settle over time, so it’s a good idea to have some extra material on hand to replenish the area as needed.
11.10. How do I choose the right size of river rock for my project?
Consider the scale of your project and the desired aesthetic. Smaller rocks are suitable for pathways and ground cover, while larger rocks work well for focal points and water features.
12. Conclusion: Plan Your River Rock Project with Confidence
Calculating how much river rock you need doesn’t have to be a daunting task. With the right tools and knowledge, you can plan your project with confidence, ensuring a beautiful and functional landscape.
Ready to transform your outdoor space? Visit Rockscapes.net for a wide selection of high-quality river rock, expert advice, and innovative design ideas. Let us help you bring your vision to life.
Address: 1151 S Forest Ave, Tempe, AZ 85281, United States. Phone: +1 (480) 965-9011. Website: rockscapes.net.