Beating Rock Talus requires strategic approaches and understanding its attack patterns. Rock Talus, formidable mini-bosses found in various landscapes, demand specific tactics to defeat and rockscapes.net provides you with a guide to overcome them. This guide will delve into effective strategies, weapon choices, and location insights to help you conquer these rocky giants, while also touching upon the broader applications of rocks in landscaping and design, including ideas for unique rock formations and materials.
1. Understanding Rock Talus
Rock Talus are formidable mini-bosses found in various open-world environments. To effectively defeat them, understanding their behavior and attack patterns is crucial. Here’s a breakdown:
- Appearance and Camouflage: Rock Talus often blend seamlessly with their surroundings, appearing as simple piles of rocks. Be alert for changes in music or on-screen introductions indicating their presence.
- Attack Patterns: Their primary attack involves throwing rocks, which can inflict significant damage. Maintaining distance and utilizing obstacles like boulders or trees for cover is essential.
- Weak Points: Each Rock Talus has a darker rock formation on its body that serves as a weak point. Targeting this area with arrows or melee weapons is key to defeating them.
2. Strategies for Defeating Rock Talus
Defeating a Rock Talus requires a combination of strategic maneuvering and well-timed attacks. Here are detailed tactics to ensure your victory:
- Initial Approach:
- When a Rock Talus emerges, immediately create distance. This prevents you from being caught in its initial ground-shaking emergence, which can cause significant damage.
- Keep moving to avoid the Talus’s powerful rock throws.
- Utilizing Cover:
- Always keep a solid object like a boulder or tree between you and the Rock Talus. This will act as a shield against the rocks it throws.
- Be aware of the debris and the trajectory of the rocks to avoid being hit by shrapnel or indirect hits.
- Attacking the Weak Point:
- Identify the darker rock on the Talus’s body. This is its weak point, and it is usually located on its back or shoulders.
- Use a bow and arrow to target the weak point. A well-aimed shot will cause the Talus to briefly collapse.
- Melee Attacks:
- After hitting the weak point with an arrow, quickly approach the collapsed Talus.
- Climb onto its body and repeatedly strike the weak point with a melee weapon. Swords, clubs, or axes work well, but be prepared to be thrown off after a short period.
- Repeating the Process:
- Once you are thrown off, retreat to a safe distance and repeat the process. Continue to target the weak point with arrows, climb onto the Talus, and attack with melee weapons until it is defeated.
3. Weapon and Gear Recommendations
Choosing the right weapons and gear can significantly impact your success against Rock Talus. Here are some recommendations:
- Bows and Arrows:
- Strong Bows: Use bows with high attack power to maximize the damage dealt to the weak point. The stronger the bow, the quicker the Talus will collapse.
- Arrow Types: Regular arrows are effective, but consider using Bomb Arrows for increased damage. However, exercise caution to avoid self-inflicted damage.
- Melee Weapons:
- Swords: Swords offer a balance of speed and damage, making them a reliable choice for melee attacks.
- Clubs: Clubs typically deal high damage per hit, which can quickly deplete the Talus’s health.
- Axes: Axes combine good damage with the ability to break through tougher defenses.
- Armor:
- Defense Armor: Armor with high defense stats will reduce the damage taken from the Talus’s attacks.
- Climbing Gear: The Climbing Set can be useful for quickly scaling the Talus after it collapses, allowing for more time to attack the weak point.
4. Advanced Combat Techniques
Mastering advanced combat techniques can provide an edge when facing Rock Talus:
- Perfect Dodges and Flurry Rushes: Executing a perfect dodge (dodging an attack at the last moment) allows you to trigger a Flurry Rush, enabling a series of quick attacks that can deal significant damage.
- Shield Parries: Parrying the rocks thrown by the Talus can stun it, creating an opening for attack. This requires precise timing but is highly effective.
- Elemental Attacks: Using elemental weapons or arrows can exploit the Talus’s weaknesses. For example, Fire Arrows can be effective against Ice Talus, while Ice Arrows can be used against Lava Talus.
- Stasis Rune: The Stasis Rune can freeze the Talus in place, giving you ample time to target its weak point or climb onto its body.
5. Location Insights: Where to Find Rock Talus
Rock Talus can be found in various regions. Here are a few notable locations where you can encounter them:
- Great Plateau: This starting area features a Rock Talus west of Hopper Pond, providing an early challenge for new players.
- Duelling Peaks: A Senior Talus can be found atop the Duelling Peaks. Fast travel to the region’s tower, glide off east, and climb the nearest incline.
- Tabantha Tower: Glide east from Tabantha Tower towards the road leading to Rito Village. A powerful Rock Talus awaits just before the cliffs.
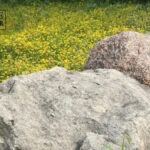
 Rock Talus emerging from the ground
6. Rock Talus Variants: Adapting to Different Challenges
As you progress, you’ll encounter different variants of Rock Talus, each with unique attributes and challenges:
- Igneo Talus (Fire-Type): Found in volcanic regions, these Talus are resistant to fire but vulnerable to ice. Using Ice Arrows or weapons is highly effective against them.
- Frost Talus (Ice-Type): Located in cold, snowy areas, Frost Talus are weak to fire. Fire Arrows or weapons will quickly melt their icy exterior, exposing their weak point.
- Luminous Talus: These Talus glow in the dark and are typically found in caves or at night. They are not elementally aligned but can be more resistant to physical attacks, requiring stronger weapons and strategic attacks.
7. Rewards for Defeating Rock Talus
Defeating a Rock Talus yields valuable resources, including gemstones and other materials. These rewards can be used for crafting, upgrading equipment, or selling for rupees:
- Gemstones: Rock Talus often drop valuable gemstones such as Ruby, Flint, Amber, Opal, Sapphire, and Diamond.
- Other Materials: You may also find other useful materials like Flint, which is essential for starting fires and cooking.
8. Rockscapes.net: Your Ultimate Resource for Rock Information and Design
Interested in learning more about the types and applications of rocks? Visit rockscapes.net for comprehensive information and inspiration. Whether you’re a homeowner, landscape designer, or stone enthusiast, Rockscapes.net offers a wealth of knowledge to enhance your understanding and appreciation of rocks.
9. Integrating Rock Talus Strategies into Landscaping
While Rock Talus are creatures from a video game, their characteristics and environments can inspire unique landscaping designs. Here are some ideas:
- Rock Gardens: Create a rock garden inspired by the mountainous regions where Rock Talus are found. Use various sizes and types of rocks to mimic the natural terrain.
- Defensive Landscaping: Incorporate large boulders and rock formations to create a sense of protection and privacy, similar to how Link uses natural obstacles to fend off a Rock Talus.
- Elemental Themes: Design gardens that reflect the elemental variants of Rock Talus. Use fire-resistant plants around lava rock for an Igneo Talus-themed garden, or create a frost garden with ice-mimicking elements for a Frost Talus theme.
10. Types of Rocks for Landscaping
Selecting the right type of rock is essential for achieving the desired aesthetic and functionality in your landscape design. Here are some popular options:
| Rock Type | Description | Applications |
|---|---|---|
| Granite | Durable, versatile, and available in various colors. | Retaining walls, pathways, decorative accents. |
| Slate | Flat, layered rock with a natural, rustic appearance. | Patios, walkways, stepping stones. |
| Limestone | Sedimentary rock with a light color and porous texture. | Garden borders, pathways, water features. |
| River Rock | Smooth, rounded stones typically found near rivers and streams. | Ground cover, drainage solutions, decorative elements in water features. |
| Lava Rock | Porous, lightweight rock with a distinctive volcanic appearance. | Mulch, fire pits, decorative accents in arid landscapes. |
| Fieldstone | Naturally occurring stones collected from fields, offering a rustic, natural look. | Walls, borders, pathways, and as accents in garden beds. |
| Flagstone | Flat, irregularly shaped stones ideal for creating natural-looking paved surfaces. | Patios, walkways, stepping stones, and decorative wall cladding. |
| Boulders | Large, imposing rocks used as focal points in landscape design. | Creating dramatic visual interest, defining spaces, and providing natural seating. |
| Cobblestone | Small, rounded stones traditionally used for paving roads and pathways. | Driveways, walkways, garden paths, and creating a historic or rustic aesthetic. |
| Crushed Stone | Angular fragments of rock used for drainage, pathways, and ground cover. | Driveways, walkways, erosion control, and as a base material for patios and other paved surfaces. |
| Decomposed Granite | Fine gravel-like material that compacts to form a firm, permeable surface. | Pathways, driveways, patios, and as a low-maintenance ground cover option. |
| Riprap | Large, irregularly shaped rocks used for erosion control and stabilization. | Shoreline protection, retaining walls, stream bank stabilization, and preventing soil erosion. |
| Quartzite | Hard, metamorphic rock with a crystalline structure and sparkling appearance. | Retaining walls, pathways, decorative accents, and adding a touch of elegance to landscape designs. |
| Sandstone | Sedimentary rock with a warm color and porous texture. | Retaining walls, pathways, decorative accents, and creating a natural-looking and inviting landscape. |
| Shale | Fine-grained sedimentary rock that is easily split into thin layers. | Pathways, garden mulch, and as a natural-looking ground cover option. |
| Tufa | Porous limestone rock formed by mineral-rich springs, often used in water features. | Creating waterfalls, rock gardens, and adding a unique and natural element to water features. |
| Volcanic Rock | Lightweight, porous rock formed from volcanic eruptions, often used in arid landscapes. | Mulch, drainage, and as a decorative element in desert-themed gardens. |
11. Rock Formation Ideas for Your Garden
Incorporating rock formations into your garden can add visual interest and create a natural, serene atmosphere. Here are several creative ideas to consider:
- Rock Gardens: Design a traditional rock garden featuring a variety of rock sizes and types, complemented by drought-resistant plants.
- Stacked Stone Columns: Create eye-catching vertical accents by stacking flat stones to form columns, adding height and architectural interest.
- Dry Creek Beds: Simulate a natural creek bed using river rocks and pebbles, enhancing drainage and adding a visual element of flowing water.
- Terraced Rock Walls: Build terraced garden beds supported by rock walls, creating a multi-level landscape with distinct planting zones.
- Boulder Outcrops: Arrange large boulders strategically to mimic natural rock outcrops, providing focal points and creating a sense of rugged beauty.
- Stepping Stone Pathways: Construct pathways using flagstones or stepping stones, guiding visitors through the garden and adding a touch of rustic charm.
- Water Features: Incorporate rocks into water features such as ponds or waterfalls, enhancing the natural aesthetic and creating a soothing soundscape.
- Rock Mulch: Use gravel or crushed stone as mulch around plants, conserving moisture, suppressing weeds, and adding a decorative touch.
- Alpine Gardens: Create an alpine garden featuring small, compact plants nestled among rocks, mimicking the conditions found in mountainous regions.
- Zen Gardens: Design a Zen garden with carefully placed rocks, sand, and minimalist plantings, promoting tranquility and contemplation.
By integrating these rock formation ideas into your garden, you can create a landscape that is both visually stunning and ecologically sound, transforming your outdoor space into a personal sanctuary.
12. How to Choose the Right Rocks for Your Project
Selecting the appropriate rocks for your landscaping project involves considering several factors to ensure the rocks meet your aesthetic preferences, functional requirements, and budget. Here’s a detailed guide to help you make the right choices:
1. Define Your Project Goals:
- Purpose: Determine the primary purpose of the rocks in your landscape. Are they for structural support (retaining walls), decorative elements (rock gardens), pathways, or erosion control?
- Style: Identify the overall style you want to achieve. Do you prefer a natural, rustic look, a formal, modern design, or something in between?
2. Assess Your Site:
- Size: Measure the area where the rocks will be placed to determine the quantity and size of rocks needed.
- Soil Type: Consider your soil type. Some rocks may leach minerals that affect soil pH, which can impact plant growth.
- Drainage: Evaluate the drainage conditions of your site. Rocks can help improve drainage but may also impede it if not properly installed.
- Climate: Choose rocks that are durable and weather-resistant in your local climate. Some rocks may crack or crumble in freezing temperatures.
3. Choose the Right Type of Rock:
- Granite: Ideal for structural elements due to its durability and resistance to weathering.
- Limestone: Suitable for garden borders and pathways, but avoid using it near acid-loving plants.
- Slate: Great for creating natural-looking patios and walkways.
- River Rock: Perfect for drainage solutions and decorative accents in water features.
- Lava Rock: Lightweight and porous, ideal for mulch and arid landscapes.
- Fieldstone: Offers a rustic, natural look for walls and borders.
- Flagstone: Versatile for patios, walkways, and stepping stones.
- Boulders: Use as focal points to add visual interest and create natural seating.
- Cobblestone: Adds a historic or rustic aesthetic to driveways and garden paths.
- Crushed Stone: Provides excellent drainage for driveways and pathways.
4. Consider Size and Shape:
- Size: Select rocks that are proportional to the scale of your landscape. Large boulders can overwhelm a small garden, while small pebbles may get lost in a large space.
- Shape: Choose shapes that complement your design style. Angular rocks provide a more structured look, while rounded rocks offer a softer, more natural feel.
5. Evaluate Color and Texture:
- Color: Select colors that harmonize with your home, plants, and other landscape elements. Consider how the colors will look in different lighting conditions.
- Texture: Combine different textures to add visual interest. Smooth rocks contrast well with rough, jagged rocks.
6. Check Availability and Cost:
- Local Sources: Source rocks from local quarries or suppliers to reduce transportation costs and support local businesses.
- Budget: Set a budget for your rock project and compare prices from different suppliers. Consider the cost of delivery and installation.
7. Inspect the Rocks:
- Quality: Examine the rocks for cracks, chips, or other defects. Ensure they are structurally sound and free from contaminants.
- Consistency: Check for consistency in color and texture, especially if you need multiple rocks that match each other.
8. Sustainability:
- Ethical Sourcing: Choose rocks from suppliers who follow ethical and sustainable mining practices.
- Recycled Materials: Consider using recycled or reclaimed rocks to reduce environmental impact.
By following these guidelines, you can select the right rocks to create a beautiful, functional, and sustainable landscape that meets your needs and preferences.
13. Tips for Maintaining Your Rock Landscape
Maintaining a rock landscape is essential to preserve its aesthetic appeal and ensure its longevity. Here are some practical tips to keep your rock landscape in top condition:
Regular Cleaning:
- Hose Down: Periodically rinse the rocks with a garden hose to remove surface dirt, dust, and debris.
- Pressure Wash: For more stubborn stains or algae growth, use a pressure washer on a low setting to avoid damaging the rocks.
- Gentle Scrubbing: Use a brush with mild soap and water to gently scrub rocks with textured surfaces.
Weed Control:
- Hand Removal: Regularly pull weeds by hand to prevent them from spreading and becoming established.
- Pre-Emergent Herbicides: Apply pre-emergent herbicides in early spring to prevent weed seeds from germinating.
- Fabric Barriers: Install landscape fabric beneath the rocks to suppress weed growth.
- Boiling Water: Pour boiling water on weeds to kill them naturally without using chemicals.
Pest Management:
- Inspect Regularly: Check for signs of pests such as ants, spiders, or rodents that may harbor in or around the rocks.
- Natural Repellents: Use natural pest repellents such as diatomaceous earth or essential oils to deter pests.
- Professional Services: Consider hiring a pest control service for severe infestations.
Structural Maintenance:
- Inspect for Shifts: Periodically inspect rock walls, pathways, and other structural elements for signs of shifting or settling.
- Re-Level: Re-level or reposition rocks as needed to maintain stability and prevent tripping hazards.
- Repair Damage: Repair any cracks, chips, or other damage to rocks promptly to prevent further deterioration.
Erosion Control:
- Monitor Drainage: Ensure proper drainage to prevent soil erosion and water accumulation around rocks.
- Add Soil Amendments: Amend the soil around rocks with organic matter to improve water retention and prevent erosion.
- Install Edging: Install edging around rock beds to contain soil and prevent rocks from migrating into adjacent areas.
Seasonal Care:
- Fall Cleanup: Remove fallen leaves and debris from rock beds to prevent decomposition and nutrient imbalances.
- Winter Protection: Protect delicate rocks from freezing temperatures by covering them with mulch or burlap.
- Spring Refresh: Refresh the appearance of your rock landscape by adding new rocks, plants, or decorative elements.
Enhancing Appearance:
- Sealants: Apply a sealant to protect rocks from staining and weathering while enhancing their natural color.
- Lighting: Install landscape lighting to highlight the beauty of your rock landscape at night.
- Decorative Accents: Add decorative accents such as sculptures, fountains, or bird baths to complement the rocks and create visual interest.
By following these maintenance tips, you can keep your rock landscape looking beautiful and thriving for years to come.
14. Creative Rock Placement Ideas
Creative rock placement can transform an ordinary landscape into a stunning visual masterpiece. Here are several innovative ideas to inspire your next outdoor project:
Focal Points:
- Monolith: Position a single, striking rock as a focal point in your garden, drawing the eye and creating a sense of drama.
- Rock Grouping: Arrange a cluster of rocks in varying sizes and shapes to create a natural-looking outcrop.
- Sculptural Arrangement: Create an artistic arrangement of rocks, using their forms to evoke a specific mood or theme.
Pathways and Walkways:
- Stepping Stone Path: Construct a pathway using large, flat stones spaced evenly apart, guiding visitors through the landscape.
- Cobblestone Mosaic: Create an intricate mosaic pattern with cobblestones, adding a touch of elegance and sophistication.
- Gravel Path: Design a winding path with gravel or crushed stone, providing a natural and permeable surface.
Water Features:
- Waterfall Cascade: Build a waterfall cascading over a series of rocks, creating a soothing sound and visual spectacle.
- Pond Edging: Use rocks to edge a pond, blending the water feature seamlessly into the surrounding landscape.
- Rock Fountain: Create a rock fountain with water bubbling up from a central stone, adding a tranquil and artistic element.
Walls and Borders:
- Dry Stacked Wall: Construct a wall without mortar, relying on the weight and interlocking shapes of the stones for stability.
- Rock Border: Define garden beds and pathways with a border of rocks, creating a clean and polished look.
- Gabion Wall: Build a wall using wire cages filled with rocks, providing both structural support and visual interest.
Garden Accents:
- Rock Bench: Fashion a bench from a large, flat rock, providing a natural and inviting seating option.
- Rock Planter: Hollow out a rock to create a unique planter for succulents or alpine plants.
- Cairn: Stack rocks to create a cairn, a traditional marker or memorial that adds a sense of history and mystery.
Themed Gardens:
- Zen Garden: Arrange rocks in a minimalist Zen garden to promote tranquility and contemplation.
- Alpine Garden: Create an alpine garden with small, compact plants nestled among rocks, mimicking a mountainous landscape.
- Desert Garden: Use rocks to create a desert-themed garden with cacti, succulents, and arid-climate plants.
Creative Combinations:
- Mix Materials: Combine rocks with other materials such as wood, metal, or glass to create unique and dynamic designs.
- Play with Texture: Juxtapose smooth and rough rocks to add tactile and visual interest.
- Use Color: Select rocks in a variety of colors to create a vibrant and eye-catching landscape.
By incorporating these creative rock placement ideas, you can transform your outdoor space into a captivating and personalized environment that reflects your unique style and vision.
15. Cost-Effective Rock Landscaping Ideas
Creating a beautiful rock landscape doesn’t have to break the bank. Here are some cost-effective ideas to help you achieve a stunning outdoor space on a budget:
1. Source Local Rocks:
- Local Quarries: Purchase rocks directly from local quarries to save on transportation costs.
- Natural Sites: Collect rocks from your own property or with permission from local landowners (be sure to check local regulations).
2. Utilize Recycled Materials:
- Reclaimed Rocks: Use reclaimed rocks from old construction sites or demolition projects.
- Broken Concrete: Repurpose broken concrete pieces as stepping stones or garden accents.
3. Opt for Smaller Rocks:
- Gravel and Pebbles: Use gravel or pebbles instead of larger rocks for pathways and ground cover.
- Crushed Stone: Opt for crushed stone for driveways and drainage solutions, as it is typically less expensive than larger rocks.
4. DIY Installation:
- Self-Installation: Install the rocks yourself to save on labor costs.
- Friends and Family: Enlist the help of friends and family for larger projects to reduce the workload.
5. Strategic Placement:
- Focal Points: Use a few large rocks as focal points instead of covering the entire landscape.
- Layering: Layer smaller rocks around larger rocks to create depth and visual interest.
6. Incorporate Native Plants:
- Drought-Tolerant Plants: Plant native, drought-tolerant plants that require minimal watering and maintenance.
- Wildflower Mixes: Sow wildflower mixes among the rocks for a natural and colorful display.
7. Use Mulch Wisely:
- Organic Mulch: Use organic mulch such as wood chips or bark to conserve moisture and suppress weeds.
- Rock Mulch: Use gravel or crushed stone as mulch around plants to reduce watering and maintenance needs.
8. Minimize Hardscaping:
- Natural Pathways: Create natural pathways with mulch or gravel instead of concrete or pavers.
- Simple Borders: Use a simple border of rocks instead of elaborate walls or edging.
9. Shop Around for Deals:
- Sales and Discounts: Look for sales and discounts on rocks and landscaping materials at local garden centers and home improvement stores.
- Online Marketplaces: Check online marketplaces for used or discounted rocks and landscaping supplies.
10. Focus on Low-Maintenance Solutions:
- Xeriscaping: Design a xeriscape garden with minimal irrigation needs.
- Rock Gardens: Create a rock garden with drought-tolerant plants that require little maintenance.
By implementing these cost-effective rock landscaping ideas, you can create a beautiful and sustainable outdoor space without overspending.
16. The Environmental Benefits of Rock Landscaping
Rock landscaping offers numerous environmental benefits, making it a sustainable and eco-friendly choice for homeowners and communities. Here are some key advantages:
1. Water Conservation:
- Reduced Irrigation: Rock landscapes require minimal irrigation compared to traditional lawns and gardens, conserving water resources.
- Drought Tolerance: Rock landscapes often feature drought-tolerant plants that thrive with little or no supplemental watering.
2. Soil Erosion Control:
- Stabilization: Rocks help stabilize soil, preventing erosion caused by wind and water.
- Slope Management: Rock walls and terraces can effectively manage slopes, reducing runoff and soil loss.
3. Weed Suppression:
- Natural Barrier: Rocks act as a natural barrier against weeds, reducing the need for herbicides.
- Mulching Effect: Gravel and crushed stone mulches suppress weed growth and retain soil moisture.
4. Reduced Chemical Use:
- Herbicide Reduction: Rock landscapes minimize the need for herbicides by naturally suppressing weed growth.
- Pesticide Reduction: Native plants in rock landscapes often attract beneficial insects that control pests naturally.
5. Habitat Creation:
- Wildlife Habitat: Rock piles and formations provide habitat for birds, lizards, insects, and other wildlife.
- Pollinator Gardens: Rock landscapes can incorporate pollinator-friendly plants that attract bees, butterflies, and other beneficial insects.
6. Improved Drainage:
- Permeable Surfaces: Gravel and crushed stone surfaces allow rainwater to infiltrate the soil, reducing runoff and improving groundwater recharge.
- Drainage Solutions: Rock landscapes can be designed to effectively manage drainage issues, preventing waterlogging and soil erosion.
7. Reduced Carbon Footprint:
- Low Maintenance: Rock landscapes require minimal maintenance, reducing the use of lawnmowers and other gas-powered equipment.
- Sustainable Materials: Sourcing rocks locally reduces transportation emissions, minimizing the carbon footprint of the project.
8. Enhanced Biodiversity:
- Native Plants: Rock landscapes often feature native plants that support local biodiversity and ecosystem health.
- Habitat Diversity: Rock landscapes provide a variety of habitats, supporting a wider range of plant and animal species.
9. Heat Island Reduction:
- Reflective Surfaces: Light-colored rocks reflect sunlight, reducing heat absorption and mitigating the urban heat island effect.
- Natural Cooling: Rock landscapes can provide natural cooling by promoting air circulation and reducing surface temperatures.
10. Long-Term Sustainability:
- Durability: Rock landscapes are durable and long-lasting, reducing the need for frequent replacements.
- Low Maintenance: The low-maintenance nature of rock landscapes reduces the long-term environmental impact of the project.
By embracing rock landscaping, you can create a beautiful, sustainable outdoor space that benefits both the environment and your community.
17. Inspiring Rock Landscaping Designs
Rock landscaping can transform any outdoor space into a stunning visual masterpiece. Here are several inspiring design ideas to ignite your creativity:
1. Zen Garden:
- Minimalist Design: Create a serene Zen garden with carefully placed rocks, raked gravel, and minimalist plantings.
- Symbolic Elements: Use rocks to represent mountains, islands, or other natural features, creating a symbolic landscape.
2. Alpine Garden:
- Mountainous Theme: Mimic a mountainous landscape with rocks, gravel, and alpine plants such as sedums, saxifrages, and dwarf conifers.
- Well-Drained Soil: Ensure well-drained soil to support the growth of alpine plants.
3. Desert Garden:
- Arid Climate: Recreate a desert environment with rocks, sand, cacti, succulents, and other drought-tolerant plants.
- Xeriscaping: Use xeriscaping techniques to minimize water usage.
4. Rock Wall Garden:
- Vertical Greenery: Transform a rock wall into a vertical garden by planting succulents, herbs, or trailing plants in the crevices.
- Tiered Design: Create a tiered design with different levels of planting, adding depth and visual interest.
5. Water Feature Garden:
- Natural Waterfall: Build a natural-looking waterfall cascading over rocks into a pond or stream.
- Aquatic Plants: Incorporate aquatic plants such as water lilies, cattails, and irises into the water feature.
6. Rock Pathway Garden:
- Stone Path: Create a winding pathway through a garden with large, flat stones or gravel.
- Border Plants: Plant low-growing plants along the edges of the pathway to soften the look and add color.
7. Rock Sculpture Garden:
- Artistic Display: Showcase a collection of rock sculptures or artistic rock arrangements.
- Lighting: Use landscape lighting to highlight the sculptures at night.
8. Coastal Garden:
- Seaside Theme: Create a coastal garden with rocks, sand, shells, and plants that thrive in salty air.
- Driftwood Accents: Incorporate driftwood accents to enhance the seaside theme.
9. Cottage Garden:
- Informal Design: Mix rocks with flowering plants, herbs, and vegetables in an informal cottage garden.
- Rustic Elements: Add rustic elements such as wooden fences, arbors, and birdhouses.
10. Woodland Garden:
- Shady Retreat: Create a shady woodland garden with rocks, ferns, mosses, and shade-loving plants.
- Natural Mulch: Use natural mulch such as fallen leaves and pine needles.
These design ideas can serve as a starting point for creating your own unique rock landscape. By combining creativity, planning, and attention to detail, you can transform your outdoor space into a stunning and inviting retreat.
18. Common Mistakes to Avoid in Rock Landscaping
While rock landscaping offers numerous benefits, it’s essential to avoid common mistakes that can compromise the aesthetics, functionality, and sustainability of your project. Here are some pitfalls to steer clear of:
1. Poor Planning:
- Lack of Design: Failing to create a detailed plan before starting the project can lead to a disorganized and unappealing landscape.
- Ignoring Site Conditions: Neglecting to assess soil type, drainage, and sun exposure can result in plant failures and erosion issues.
2. Improper Rock Selection:
- Mismatched Rocks: Choosing rocks that don’t complement each other in terms of color, texture, and size can create a disjointed look.
- Inappropriate Rocks: Selecting rocks that are not suitable for the climate or purpose can lead to cracking, crumbling, or other problems.
3. Incorrect Installation:
- Poor Foundation: Failing to provide a solid foundation for rock walls, pathways, or other structures can lead to instability and collapse.
- Improper Drainage: Neglecting to install proper drainage can result in waterlogging, erosion, and plant diseases.
4. Overcrowding:
- Too Many Rocks: Using too many rocks can make the landscape look cluttered and unnatural.
- Insufficient Plantings: Overemphasizing rocks while neglecting plants can create a sterile and lifeless environment.
5. Neglecting Maintenance:
- Weed Neglect: Failing to remove weeds regularly can lead to an overgrown and unkempt landscape.
- Lack of Cleaning: Neglecting to clean rocks can result in dirt, algae, and other unsightly buildup.
6. Ignoring Sustainability:
- Non-Native Plants: Using non-native plants that require excessive water and maintenance can deplete local resources and harm the environment.
- Poor Water Management: Failing to implement water-efficient irrigation practices can waste water and increase utility bills.
7. Lack of Creativity:
- Monotonous Design: Creating a landscape that is too uniform and lacks visual interest can be uninspiring.
- Ignoring Personal Style: Failing to incorporate personal preferences and unique elements can result in a generic and unfulfilling landscape.
8. Overspending:
- Unnecessary Expenses: Overspending on unnecessary materials or labor can strain the budget and lead to financial stress.
- Lack of Budgeting: Failing to create a realistic budget can result in cost overruns and compromises in quality.
9. Ignoring Safety:
- Unstable Structures: Creating unstable rock walls or pathways can pose safety hazards.
- Sharp Edges: Leaving sharp edges on rocks can cause injuries.
10. Rushing the Process:
- Lack of Patience: Rushing through the planning and installation phases can lead to mistakes and subpar results.
- Poor Quality: Failing to take the time to do the job properly can compromise the quality and longevity of the landscape.
By being aware of these common mistakes and taking steps to avoid them, you can create a beautiful, functional, and sustainable rock landscape that enhances your property and provides years of enjoyment.
19. Finding Inspiration for Your Rockscape
Embarking on a rock landscaping project can be both exciting and daunting. The key to a successful and satisfying outcome lies in gathering inspiration and ideas that align with your vision, style, and site conditions. Here’s a guide to finding inspiration for your rockscape:
1. Nature:
- Local Landscapes: Explore local parks, gardens, and natural areas to observe how rocks are naturally integrated into the environment.
- Mountain Ranges: Study mountain ranges and rock formations to gain ideas for creating natural-looking rock arrangements.
- Coastal Areas: Visit coastal areas to see how rocks, sand, and plants interact in a seaside environment.
2. Online Resources:
- Rockscapes.net: Explore the rockscapes.net website for a wealth of information, design ideas, and inspiration for rock landscaping.
- Pinterest: Browse Pinterest for rock landscaping ideas, DIY projects, and design inspiration.
- Houzz: Explore Houzz for photos of rock landscaping projects, design tips, and professional advice.
- Instagram: Follow rock landscaping accounts on Instagram for daily inspiration and design ideas.
3. Books and Magazines:
- Landscaping Books: Read books on landscaping, garden design, and rock gardening for inspiration and practical advice.
- Gardening Magazines: Subscribe to gardening magazines for project ideas, plant recommendations, and design trends.
4. Professional Designers:
- Landscape Architects: Consult with landscape architects for professional design services and innovative solutions.
- Garden Designers: Hire garden designers for personalized design advice and installation services.
5. Local Nurseries:
- Plant Combinations: Visit local nurseries to see plant combinations and rock arrangements.
- Expert Advice: Seek advice from nursery staff on plant selection and landscaping techniques.
6. Garden Tours:
- Local Gardens: Attend local garden tours to see inspiring rock landscapes and design ideas.
- Public Gardens: Visit public gardens and botanical gardens to explore diverse rock garden designs.
7. Home and Garden Shows:
- Exhibits and Displays: Attend home and garden shows to see exhibits and displays featuring rock landscaping ideas and materials.
- Demonstrations: Watch demonstrations and seminars on rock landscaping techniques.
8. Travel:
- Inspiring Destinations: Travel to destinations known for their stunning rock landscapes, such as national parks, botanical gardens, and historic sites.
- Cultural Influences: Explore gardens and landscapes in different cultures to gain unique design perspectives.
9. Personal Preferences:
- Style and Taste: Consider your personal style and taste when gathering inspiration.
- Functionality: Think about how you plan to use the landscape and design