Breaking a rock open, especially to reveal a geode, is an exciting endeavor for rock enthusiasts and those captivated by natural wonders; at rockscapes.net, we’re passionate about guiding you through safe and effective methods to uncover the stunning crystals and mineral formations hidden inside these geological treasures. Whether you’re curious about geodes, planning a DIY project, or a seasoned landscape architect, understanding the proper techniques will enhance your experience. With the right tools and precautions, you can safely crack open rocks and geodes, unveil their beauty, and bring these stunning pieces of earth science into your collection or landscape design, all while exploring the vast array of options Rockscapes.net has to offer with our decorative rocks, landscape boulders, and garden stones.
1. What Exactly is a Geode and Why Break It Open?
Geodes are geological formations—spherical or oblong rocks that contain crystal cavities inside, offering a glimpse into the earth’s artistry.
To elaborate, geodes start as bubbles in volcanic rock or cavities in sedimentary rock, according to Arizona State University’s School of Earth and Space Exploration (July 2025). Over millions of years, water rich in dissolved minerals seeps into these spaces. As the water evaporates, the minerals precipitate out, forming crystals within the geode. The most common crystals found inside geodes are quartz, amethyst, calcite, and celestite. These interiors remain hidden until someone decides to break a rock open, which adds an element of surprise and discovery to the process.
1.1. The Allure of Unveiling Hidden Beauty
The draw of cracking open a geode lies in the surprise of what you might find inside. It’s like unwrapping a gift from the earth. The geological process creates a unique interior in each geode, so no two are the same. Breaking a geode open offers the thrill of revealing something that has been hidden for millennia.
1.2. Educational and Decorative Value
Geodes are not just pretty rocks; they also have educational value. They teach us about mineral formation, geological processes, and the patience of nature. For educators, geodes provide a tangible, hands-on way to teach earth science. For collectors, they represent a unique addition to their assortment of geological specimens. Geodes can be used as decorative pieces, adding a touch of natural elegance to any space. Displaying geodes in your home or garden can spark conversations and inspire a sense of wonder about the natural world.
1.3. Types of Geodes and Their Unique Interiors
Geodes vary widely in size, shape, and the types of crystals they contain. Some are small enough to fit in your palm, while others can be as large as a basketball. The shape of a geode is often determined by the shape of the cavity in which it formed.
- Quartz Geodes: The most common type, often featuring clear or milky white quartz crystals.
- Amethyst Geodes: Showcasing vibrant purple crystals, highly prized for their beauty and metaphysical properties.
- Calcite Geodes: Containing a variety of crystal forms and colors, including white, yellow, and orange.
- Celestite Geodes: Known for their delicate blue crystals, often found in Madagascar.
- Agate Geodes: With banded layers of chalcedony, creating intricate patterns and colors.
2. Essential Tools for Breaking Rocks and Geodes Open
Having the right tools is crucial for safely and effectively breaking a rock open to reveal its hidden contents.
2.1. Safety Gear: Protecting Yourself First
| Gear | Description | Why It’s Important |
|---|---|---|
| Safety Goggles | Protect your eyes from flying rock fragments and dust particles. Look for goggles that provide a snug fit and meet ANSI Z87.1 standards for impact resistance. | Prevents eye injuries, which are common when breaking rocks. |
| Work Gloves | Shield your hands from sharp edges and provide a better grip on tools. Choose gloves made of durable material such as leather or reinforced fabric. | Protects against cuts, abrasions, and blisters. |
| Dust Mask | Prevents inhalation of fine dust particles that can be harmful to your lungs. Opt for a mask with a NIOSH rating of N95 or higher. | Reduces the risk of respiratory irritation and long-term lung damage. |
| Ear Protection | Use earplugs or earmuffs to reduce noise exposure, especially when using power tools or striking rocks with force. | Minimizes the risk of hearing damage from loud noises. |
2.2. Manual Tools: Hammers, Chisels, and More
| Tool | Description | Best Use |
|---|---|---|
| Geological Hammer | A specialized hammer with a square head for breaking rocks and a pointed tip for chipping. | Breaking rocks and chipping away at the outer layers of geodes. |
| Stone Chisel | A hardened steel tool with a beveled edge, used to split rocks along a desired line. | Creating controlled breaks in geodes and other rocks. |
| Brick Hammer | Features a broad, flat head and a chisel edge, ideal for breaking bricks and stones. | Breaking larger rocks and shaping stones for landscaping. |
| Screwdriver (Flat) | Can be used as a makeshift chisel in a pinch, but is less effective and more prone to damage. | Lightly tapping along the surface of small geodes to create a crack. |
| Geode Cracker | A specialized tool that applies even pressure around a geode, causing it to crack open cleanly. | Opening geodes without shattering them, preserving the crystals inside. |
| Pry Bar | A long, metal bar with a flattened end, used to lever rocks apart. | Separating large rocks or prying open fissures. |
2.3. Power Tools: Slab Saws and Tile Saws
| Tool | Description | Best Use |
|---|---|---|
| Slab Saw | A large, specialized saw with a diamond blade, used to make precise cuts through rocks and minerals. Requires coolant (usually oil or water) to prevent overheating. | Cutting geodes in half to reveal the interior, creating slabs for polishing and display. |
| Wet Tile Saw | A smaller, more affordable saw with a diamond blade, designed for cutting ceramic and stone tiles. Uses water as a coolant. | Cutting smaller geodes and stones, trimming edges, and shaping rocks for landscaping. |
| Angle Grinder | A versatile power tool that can be fitted with various cutting and grinding discs. Use with caution and always wear safety glasses and a dust mask. | Grinding down rough edges, shaping stones, and cutting small rocks. |
2.4. Additional Supplies for a Smooth Process
- Work Surface: A sturdy table or workbench to provide a stable platform for breaking rocks.
- Towels or Cloths: To cushion rocks and prevent them from rolling around during the breaking process.
- Brush: A soft-bristled brush to clean dust and debris from the crystals after opening the geode.
- Display Cases: To showcase your prized specimens and protect them from damage.
3. Step-by-Step Guide: How to Break a Rock Open Safely and Effectively
Breaking a rock open, especially a geode, can be a thrilling experience. Here’s how to do it safely and effectively:
3.1. Preparing Your Workspace
Before you start, prepare your workspace to ensure a safe and efficient process. Choose a well-lit area with good ventilation. Cover your work surface with a sturdy mat or thick cloth to protect it from scratches and absorb any impact. Make sure you have all your tools and safety gear within easy reach.
3.2. Assessing the Rock or Geode
Examine the rock or geode to identify any natural weak points or existing cracks. This will help you determine the best approach for breaking it open. If you’re working with a geode, look for any areas where the outer shell seems thinner or more brittle. These are good spots to target.
3.3. Method 1: Using a Hammer and Chisel
This is a classic and straightforward method for breaking open rocks and geodes.
- Position the Rock: Place the rock on your prepared work surface, ensuring it is stable and won’t roll around.
- Place the Chisel: Position the chisel on the spot where you want to create a break. If you’re trying to split a rock in half, start by placing the chisel along the center line.
- Tap Gently: Use the hammer to gently tap the chisel, creating a small notch or indentation.
- Increase Force Gradually: Increase the force of your hammer blows, gradually deepening the notch. Avoid hitting the chisel too hard at once, as this can cause the rock to shatter unexpectedly.
- Rotate and Repeat: Rotate the rock and repeat the process on the opposite side, creating a corresponding notch.
- Split the Rock: Once you have notches on both sides, place the chisel in one of the notches and strike it firmly with the hammer. The rock should split open along the line of the notches.
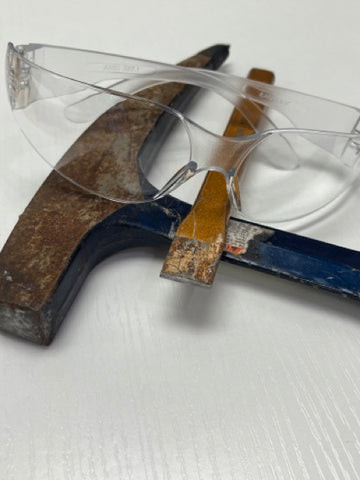 Geode cracking supplies
3.4. Method 2: Employing a Geode Cracker
A geode cracker is a specialized tool designed to break open geodes without damaging the crystals inside.
- Position the Geode: Place the geode in the chain jaws of the geode cracker.
- Tighten the Cutter: Tighten the cutter gradually, applying even pressure around the geode.
- Crack the Geode: Continue tightening the cutter until the geode cracks open.
- Remove the Geode: Carefully remove the geode from the cracker and examine the interior.
3.5. Method 3: Utilizing a Slab Saw
A slab saw is a power tool used to make precise cuts through rocks and minerals.
- Prepare the Saw: Fill the saw’s reservoir with coolant (usually oil or water).
- Secure the Rock: Secure the rock in the saw’s vise or holding mechanism.
- Make the Cut: Slowly lower the saw blade into the rock, allowing the coolant to lubricate and cool the blade.
- Complete the Cut: Continue cutting until the rock is completely divided.
- Clean the Rock: Remove the rock from the saw and clean it with a brush and water to remove any coolant residue.
3.6. Tips for Minimizing Damage to Crystals
- Use a Geode Cracker: This tool applies even pressure around the geode, reducing the risk of shattering the crystals inside.
- Tap Gently: When using a hammer and chisel, tap gently and increase the force gradually. Avoid hitting the chisel too hard at once.
- Cut Slowly: When using a slab saw, cut slowly and steadily, allowing the blade to do the work. Avoid forcing the blade through the rock.
- Clean Carefully: After opening the rock, clean the crystals carefully with a soft-bristled brush and water. Avoid using harsh chemicals or abrasive cleaners.
4. Safety First: Essential Precautions When Breaking Open Rocks
Safety should always be your top priority when breaking open rocks. Rocks can shatter unexpectedly, sending sharp fragments flying through the air. Dust particles can also be hazardous to your lungs if inhaled. By taking the necessary precautions, you can minimize the risk of injury and ensure a safe and enjoyable experience.
4.1. Eye Protection: The Importance of Safety Goggles
| Risk | Protection Needed | Type of Goggles Recommended | Key Features to Look For |
|---|---|---|---|
| Flying Rock Fragments and Debris | Eye Protection | Impact-resistant safety goggles | ANSI Z87.1 certification, snug fit, adjustable straps, clear or tinted lenses (depending on lighting conditions), anti-fog coating (optional) |
4.2. Hand Protection: Choosing the Right Gloves
| Risk | Protection Needed | Type of Gloves Recommended | Key Features to Look For |
|---|---|---|---|
| Sharp Edges and Abrasions | Hand Protection | Heavy-duty work gloves | Durable material (leather, reinforced fabric), snug fit, good grip, cut resistance, puncture resistance, abrasion resistance |
4.3. Respiratory Protection: Preventing Dust Inhalation
| Risk | Protection Needed | Type of Mask Recommended | Key Features to Look For |
|---|---|---|---|
| Inhalation of Fine Dust | Respiratory | N95 or P100 respirator mask | NIOSH certification, snug fit, adjustable straps, valve for easy breathing (optional), multiple layers of filtration, replaceable filters (for extended use) |
4.4. Creating a Safe Work Environment
- Work in a Well-Ventilated Area: Breaking rocks can generate dust and fumes, so it’s important to work in an area with good airflow. Open windows and doors, or use a fan to circulate the air.
- Keep a Clean Workspace: Clear your work area of any clutter or obstacles that could trip you or get in the way. Keep your tools organized and within easy reach.
- Supervise Children and Pets: Keep children and pets away from your work area to prevent accidents.
- Store Materials Properly: Store rocks, tools, and other materials in a safe and secure location when not in use.
5. Exploring Different Types of Rocks and Their Properties
Understanding the different types of rocks and their properties can enhance your experience of breaking them open.
5.1. Sedimentary Rocks: Layers of History
Sedimentary rocks are formed from the accumulation and cementation of sediments, such as mineral grains, rock fragments, and organic matter. They often exhibit distinct layers or bands, reflecting the different stages of deposition.
- Sandstone: Composed of sand-sized grains of quartz, feldspar, and other minerals. Sandstone is relatively soft and easy to break, making it a good choice for beginners.
- Limestone: Composed primarily of calcium carbonate, often derived from the shells of marine organisms. Limestone is also relatively soft and easy to break, but it can be more brittle than sandstone.
- Shale: Composed of fine-grained clay minerals and organic matter. Shale is very soft and easily broken, but it tends to crumble rather than split cleanly.
5.2. Igneous Rocks: Born of Fire
Igneous rocks are formed from the cooling and solidification of molten rock, either magma (below the surface) or lava (above the surface). They are generally hard and dense, with interlocking crystals.
- Granite: A coarse-grained igneous rock composed of quartz, feldspar, and mica. Granite is very hard and durable, making it difficult to break.
- Basalt: A fine-grained igneous rock composed of plagioclase feldspar and pyroxene. Basalt is also hard and durable, but it can be more brittle than granite.
- Obsidian: A volcanic glass formed from rapidly cooled lava. Obsidian is very hard and brittle, and it can break with sharp edges.
5.3. Metamorphic Rocks: Transformed by Pressure and Heat
Metamorphic rocks are formed when existing rocks are transformed by heat, pressure, or chemical reactions. They often exhibit distinct textures and mineral alignments.
- Marble: A metamorphic rock formed from limestone or dolostone. Marble is relatively soft and easy to break, but it can be more brittle than limestone.
- Slate: A metamorphic rock formed from shale. Slate is very fine-grained and easily split into thin sheets.
- Gneiss: A metamorphic rock with a banded or foliated texture, formed from granite or sedimentary rocks. Gneiss is hard and durable, but it can be split along the foliation planes.
5.4. Identifying Rocks by Color, Texture, and Hardness
| Property | Description | How to Use it |
|---|---|---|
| Color | The color of a rock can be influenced by its mineral composition, chemical weathering, and the presence of impurities. | Observe the overall color of the rock, as well as any variations or patterns. Note the presence of any secondary colors or staining. Compare the color to known rock samples or color charts to narrow down the possibilities. Be aware that color alone is not always a reliable indicator, as many different types of rocks can share similar colors. For example, iron oxides can impart a reddish or brownish color to a wide range of rocks, while organic matter can darken rocks to shades of gray or black. |
| Texture | The texture of a rock refers to the size, shape, and arrangement of its constituent particles or crystals. It can be described as coarse-grained, fine-grained, glassy, porphyritic, or foliated. | Examine the rock closely, using a magnifying glass if necessary, to observe the size and shape of the individual grains or crystals. Determine whether the texture is uniform or variable. Note the presence of any distinctive features, such as vesicles (small cavities), amygdules (mineral-filled vesicles), or flow banding. Compare the texture to known rock samples or diagrams to help identify the rock. Different rock types have characteristic textures that can provide clues to their origin and formation. For example, sedimentary rocks often exhibit layered or banded textures, while igneous rocks can have coarse-grained or glassy textures. |
| Hardness | The hardness of a rock is its resistance to scratching or abrasion. It is typically measured using the Mohs hardness scale, which ranges from 1 (talc) to 10 (diamond). | Perform a scratch test using a known mineral or object with a defined hardness (e.g., a fingernail, a copper penny, a steel nail). Scratch the surface of the rock with the test object and observe whether it leaves a visible scratch. Compare the hardness of the rock to the Mohs hardness scale to estimate its hardness value. For example, if the rock can be scratched by a fingernail (hardness 2.5), it is softer than gypsum (hardness 2). If it can scratch glass (hardness 5.5), it is harder than apatite (hardness 5). Hardness can be a useful property for distinguishing between different types of rocks, as some minerals and rock types are consistently harder or softer than others. |
6. The Geological Significance of Rocks in Landscapes
Rocks play a crucial role in shaping landscapes, influencing soil formation, water drainage, and the distribution of plant and animal life.
6.1. Rocks as Building Blocks of Landforms
Rocks form the foundation of many landforms, such as mountains, cliffs, and valleys. Their resistance to weathering and erosion determines the shape and stability of these features.
- Mountains: Formed by tectonic uplift and volcanic activity, mountains are composed of hard, durable rocks such as granite and basalt.
- Cliffs: Formed by erosion along coastlines or riverbanks, cliffs are often composed of sedimentary rocks such as sandstone and limestone.
- Valleys: Formed by erosion from rivers or glaciers, valleys are often filled with sediment and alluvial deposits.
6.2. The Role of Rocks in Soil Formation
Rocks weather and break down over time, contributing to the formation of soil. The mineral composition of the rocks influences the fertility and nutrient content of the soil.
- Weathering: The process of breaking down rocks into smaller particles through physical, chemical, and biological processes.
- Erosion: The process of transporting weathered material by wind, water, or ice.
- Soil Horizons: The distinct layers of soil that develop over time, each with its own unique properties.
6.3. Rocks and Water Drainage: Permeability and Porosity
The permeability and porosity of rocks affect how water flows through the landscape. Permeable rocks allow water to pass through easily, while porous rocks can hold large amounts of water.
- Permeability: The ability of a rock or soil to transmit fluids.
- Porosity: The percentage of void space in a rock or soil.
- Aquifers: Underground layers of permeable rock or sediment that hold groundwater.
6.4. Rockscapes and Ecosystems: A Symbiotic Relationship
Rocks provide habitat for a variety of plants and animals. Lichens and mosses can grow on rocks, breaking them down further and contributing to soil formation.
- Lichens: Symbiotic organisms composed of a fungus and an alga.
- Mosses: Small, non-vascular plants that grow in moist environments.
- Rock Outcrops: Areas where bedrock is exposed at the surface, providing habitat for specialized plants and animals.
7. Creative Uses for Broken Rocks in Landscaping
Broken rocks can be repurposed in a variety of creative ways to enhance your landscape design.
7.1. Rock Gardens: A Showcase of Natural Beauty
Rock gardens are a popular way to display a variety of rocks and plants in a naturalistic setting.
- Alpine Gardens: Rock gardens that feature plants from high-altitude environments.
- Xeric Gardens: Rock gardens that feature drought-tolerant plants.
- Japanese Gardens: Rock gardens that incorporate traditional Japanese design principles.
7.2. Pathways and Stepping Stones: Durable and Aesthetically Pleasing
Broken rocks can be used to create durable and aesthetically pleasing pathways and stepping stones.
- Flagstone Pathways: Pathways made from large, flat pieces of stone.
- Gravel Pathways: Pathways made from small, crushed rocks.
- Stepping Stone Pathways: Pathways made from individual stones placed at regular intervals.
7.3. Retaining Walls: Functional and Decorative
Broken rocks can be used to build retaining walls that prevent soil erosion and create level surfaces.
- Dry-Stack Retaining Walls: Retaining walls built without mortar.
- Mortared Retaining Walls: Retaining walls built with mortar.
- Gabion Walls: Retaining walls built from wire cages filled with rocks.
7.4. Water Features: Adding Sound and Movement
Broken rocks can be incorporated into water features such as waterfalls, ponds, and streams.
- Waterfalls: Cascades of water that flow over rocks.
- Ponds: Still bodies of water that reflect the surrounding landscape.
- Streams: Flowing bodies of water that meander through the landscape.
8. Where to Find Rocks for Your Projects
Finding the right rocks for your landscaping projects can be an adventure in itself.
8.1. Local Quarries and Stone Yards: A Direct Source
Local quarries and stone yards are a great place to find a wide variety of rocks at competitive prices.
- Quarries: Sites where rocks are extracted from the earth.
- Stone Yards: Businesses that sell rocks and other landscaping materials.
- Bulk Purchases: Buying rocks in large quantities can save you money.
8.2. Landscaping Supply Stores: Convenience and Variety
Landscaping supply stores offer a convenient way to find rocks and other landscaping materials.
- Retail Locations: Stores with physical locations where you can browse and purchase materials.
- Online Stores: Websites where you can order materials online and have them delivered to your home.
- Delivery Services: Many landscaping supply stores offer delivery services for large orders.
8.3. Collecting Rocks in Nature: Ethical Considerations
Collecting rocks in nature can be a rewarding experience, but it’s important to do so ethically and responsibly.
- Obtain Permission: Always obtain permission from the landowner before collecting rocks on private property.
- Follow Regulations: Follow all local, state, and federal regulations regarding rock collecting.
- Minimize Impact: Minimize your impact on the environment by collecting only a small amount of rock and avoiding sensitive areas.
- Leave No Trace: Pack out all trash and debris, and leave the area as you found it.
8.4. Rockscapes.net: Your Partner in Landscape Design
For landscape designers and homeowners, rockscapes.net is a great online platform. From choosing the right stones to installation to maintaining rockscapes, rockscapes.net offers the resources and expertise you need to create stunning and sustainable landscapes.
9. The Art of Rock Arrangement: Creating Visually Appealing Rockscapes
Creating visually appealing rockscapes requires careful planning, attention to detail, and an understanding of design principles.
9.1. Understanding Design Principles: Balance, Proportion, and Harmony
- Balance: Creating a sense of equilibrium in the landscape by distributing elements evenly.
- Proportion: Ensuring that the size and scale of elements are in harmony with each other.
- Harmony: Creating a sense of unity and coherence in the landscape by using colors, textures, and forms that complement each other.
9.2. Choosing the Right Rocks for Your Design Style
The type of rocks you choose should complement your overall design style.
- Naturalistic Design: Using rocks that mimic natural formations and textures.
- Formal Design: Using rocks that are symmetrical and geometric.
- Eclectic Design: Combining rocks of different types and styles to create a unique look.
9.3. Placement Techniques: Creating Depth and Interest
The way you place rocks can create depth and interest in your landscape.
- Grouping: Arranging rocks in clusters to create a sense of visual weight.
- Layering: Stacking rocks to create vertical interest and depth.
- Angling: Tilting rocks at different angles to create a sense of movement and dynamism.
9.4. Incorporating Plants and Other Elements
Plants and other elements can enhance the beauty of your rockscapes.
- Groundcover Plants: Plants that spread horizontally and cover the ground.
- Accent Plants: Plants that provide focal points and add color.
- Water Features: Adding water features such as ponds and streams can create a soothing and tranquil atmosphere.
10. Frequently Asked Questions (FAQs) About Breaking Rocks Open
10.1. What is the best way to break a geode open without damaging the crystals inside?
The best way to break a geode open without damaging the crystals inside is by using a geode cracker tool. This tool applies even pressure around the geode, reducing the risk of shattering the crystals.
10.2. Is it safe to break rocks open with a hammer and chisel?
Yes, it is generally safe to break rocks open with a hammer and chisel, as long as you follow safety precautions like wearing safety goggles and gloves.
10.3. Can I use a regular hammer instead of a geological hammer?
While you can use a regular hammer, a geological hammer is specifically designed for breaking rocks, with a specialized head and handle for efficient and safe use.
10.4. What kind of safety goggles should I wear when breaking rocks?
When breaking rocks, you should wear impact-resistant safety goggles that meet ANSI Z87.1 standards to protect your eyes from flying fragments.
10.5. How can I identify a geode before breaking it open?
Identifying a geode before breaking it open can be tricky, but geodes are typically spherical or oblong in shape, with a rough, bumpy exterior and a lighter weight than solid rocks of similar size.
10.6. What types of crystals are commonly found inside geodes?
Common crystals found inside geodes include quartz, amethyst, calcite, and celestite. Each type offers a unique aesthetic appeal, perfect for collectors and decorators alike.
10.7. Can I use a wet tile saw to cut geodes?
Yes, a wet tile saw can be used to cut geodes, especially smaller ones, as the water-cooled blade minimizes dust and heat, providing a smoother cut.
10.8. What should I do if a rock shatters when I’m trying to break it open?
If a rock shatters when you’re trying to break it open, stop immediately and carefully collect the fragments. Wear gloves to protect your hands from sharp edges.
10.9. How can I clean the crystals inside a geode after breaking it open?
To clean the crystals inside a geode after breaking it open, use a soft-bristled brush and water. Avoid using harsh chemicals or abrasive cleaners, as these can damage the crystals.
10.10. What are some creative uses for broken rocks in landscaping?
Creative uses for broken rocks in landscaping include creating rock gardens, pathways, retaining walls, and water features. These elements not only enhance the aesthetic appeal of your landscape but also provide practical solutions for erosion control and water management.
Ready to uncover the beauty of natural stone and elevate your landscape design? Visit rockscapes.net today for inspiration, expert advice, and a wide selection of rocks and landscaping materials. Let us help you create the outdoor oasis of your dreams. Check out our landscape boulders, decorative rocks, and garden stones.