Unveiling the prehistoric world hidden within rocks can be an exciting adventure. How To Break Open A Fossil Rock is a skill that combines geological understanding, careful technique, and a touch of patience, and here at rockscapes.net, we’re here to guide you through this process safely and effectively. By learning proper extraction methods and understanding rock types, you can discover ancient treasures and showcase your stunning finds.
1. What is a Fossil Rock and Why Break It Open?
A fossil rock is a sedimentary rock containing fossilized remains of ancient plants and animals. Breaking open these rocks can reveal well-preserved fossils that offer insights into prehistoric life and geological history.
1.1 Why Break Open a Fossil Rock?
There are several compelling reasons to break open a fossil rock:
- Discovery: Uncover hidden fossils that may not be visible on the surface.
- Preservation: Expose fossils to better preserve and protect them from weathering.
- Education: Learn about ancient life forms and geological processes.
- Collection: Add unique and interesting specimens to your fossil collection.
- Aesthetics: Display beautifully preserved fossils for their aesthetic appeal.
1.2 Types of Fossil-Bearing Rocks
Understanding the type of rock you’re dealing with is essential for successful fossil extraction. The most common types of fossil-bearing rocks include:
- Shale: A fine-grained sedimentary rock formed from compacted mud or clay. Fossils in shale are often well-preserved but can be delicate.
- Limestone: A sedimentary rock composed mainly of calcium carbonate. Limestone can contain a wide variety of marine fossils.
- Sandstone: A sedimentary rock made of cemented sand grains. Sandstone fossils are often molds or casts of organisms.
- Concretions: Hard, compact masses of sedimentary rock that often contain fossils.
2. Essential Tools and Equipment for Fossil Rock Breaking
Having the right tools and equipment is crucial for safely and effectively breaking open fossil rocks. Here’s a list of essentials:
2.1 Safety Gear
- Safety Glasses: Protect your eyes from flying rock fragments.
- Gloves: Protect your hands from sharp edges and impacts.
- Dust Mask: Prevent inhalation of fine rock particles.
- Sturdy Boots: Provide stability and protection on uneven terrain.
2.2 Rock Breaking Tools
- Geologist’s Hammer: A specialized hammer with a square head for breaking rocks and a pointed tip for chipping.
- Cold Chisels: Hardened steel chisels for splitting and breaking rocks. Different sizes offer versatility.
- Sledgehammer: For breaking large, resistant rocks.
- Rock Pick: Useful for prying and splitting rocks along natural fractures.
2.3 Fossil Extraction Tools
- Small Chisels: For delicate work around fossils.
- Screwdrivers: For gentle prying and cleaning.
- Brushes: Soft-bristled brushes for removing loose matrix.
- Dental Picks: For detailed cleaning and preparation.
2.4 Other Useful Items
- Magnifying Glass: For examining small fossils.
- Notebook and Pencil: For recording location and find information.
- Camera: For documenting your discoveries.
- Collection Bags: For safely storing your fossils.
- First Aid Kit: For minor injuries.
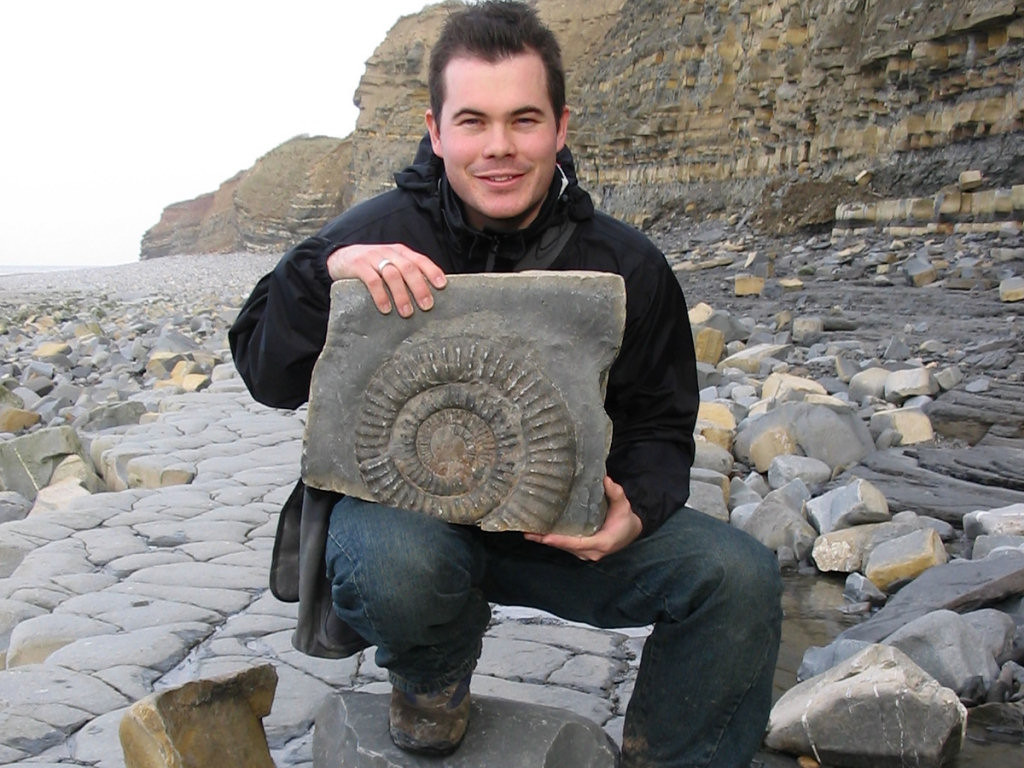 Roy Shepherd fossil hunting
2.5 Where to Acquire Tools
These tools can be found at:
- Rock Hounding and Mineralogy Shops: Offer specialized geological tools and equipment.
- Hardware Stores: Provide basic tools like hammers, chisels, and safety gear.
- Online Retailers: Offer a wide selection of tools and equipment with detailed descriptions and reviews.
3. Identifying Promising Fossil Rocks
Not all rocks contain fossils, so knowing how to identify promising specimens is essential.
3.1 Recognizing Sedimentary Rocks
Fossils are primarily found in sedimentary rocks. Look for layered structures, grains, and textures that indicate sediment accumulation.
3.2 Identifying Key Indicators
- Visible Fossils: Surface fossils, such as shells or plant impressions, indicate potential finds within the rock.
- Layering: Sedimentary rocks often have distinct layers that can contain concentrations of fossils.
- Color Variations: Changes in color can indicate different sediment compositions and potential fossil-bearing layers.
- Weight: Fossil-bearing rocks may be heavier than non-fossiliferous rocks due to mineral replacement.
3.3 Geological Maps and Local Knowledge
Consult geological maps to identify areas known for fossil-bearing formations. Local rock and mineral clubs, as well as guides, can provide valuable insights into the best fossil-hunting locations.
4. Safety Precautions and Ethical Considerations
Before you start breaking rocks, it’s important to understand the safety precautions and ethical considerations involved.
4.1 Personal Safety
- Eye Protection: Always wear safety glasses to protect against flying rock fragments.
- Hand Protection: Use gloves to protect your hands from sharp edges and impacts.
- Respiratory Protection: Wear a dust mask to avoid inhaling fine rock particles.
- Foot Protection: Wear sturdy boots to provide stability and protection.
4.2 Environmental Responsibility
- Minimize Impact: Avoid excessive digging and disturbance of the surrounding environment.
- Leave No Trace: Remove all trash and debris from the site.
- Respect Wildlife: Avoid disturbing plants and animals in the area.
4.3 Legal and Ethical Considerations
- Private Property: Obtain permission before collecting on private land.
- Public Lands: Check regulations for fossil collecting on public lands, as some areas may be restricted.
- Scientific Value: Report significant finds to local museums or geological societies.
- Commercial Collecting: Be aware of regulations regarding commercial fossil collecting, which may require permits.
- Preservation: Avoid damaging or destroying fossils that are not collected.
5. Techniques for Breaking Open Fossil Rocks
Once you’ve identified a promising fossil rock and taken the necessary safety precautions, it’s time to start breaking it open.
5.1 Assessing the Rock
Examine the rock for natural fractures and weak points. Use this information to plan your approach.
5.2 Using a Geologist’s Hammer and Chisel
- Positioning: Place the chisel on a weak point or along a fracture.
- Striking: Strike the chisel firmly with the geologist’s hammer.
- Control: Use controlled strikes to avoid shattering the rock.
- Patience: Work slowly and methodically, alternating between different points to gradually split the rock.
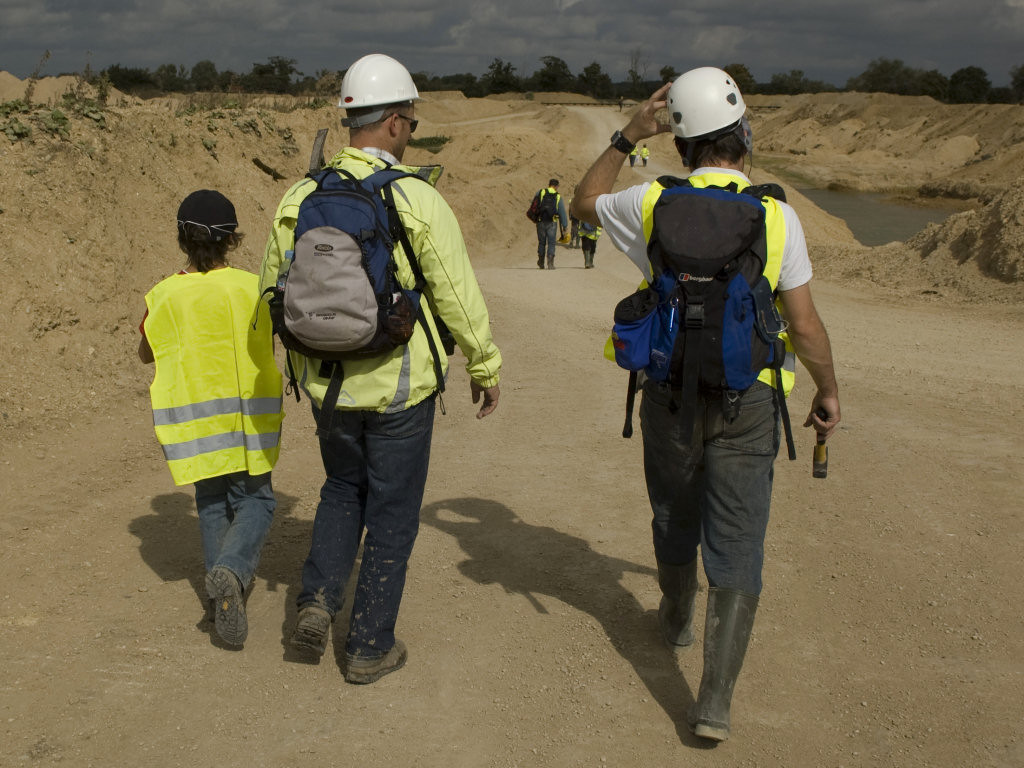 Roy Shepherd & Bill Verkaik at Shorencote quarry
5.3 Breaking Concretions
Concretions are often very hard and require more force to break open.
- Sledgehammer: Use a sledgehammer to strike the concretion firmly.
- Wedging: Drive chisels into cracks to gradually split the concretion.
- Persistence: Be prepared to work for an extended period, as concretions can be very resistant.
5.4 Alternative Methods
- Hydraulic Rock Splitters: These tools use hydraulic pressure to split rocks and are ideal for larger specimens.
- Diamond Saws: Offer precise cutting for revealing fossils without damaging them, but require safety equipment.
6. Fossil Extraction and Preservation Techniques
Once you’ve broken open the rock, it’s time to extract and preserve any fossils you find.
6.1 Exposing the Fossil
- Gentle Cleaning: Use soft brushes and dental picks to remove loose matrix from around the fossil.
- Acid Preparation: In some cases, weak acids can be used to dissolve the matrix, but this should only be done by experienced individuals with proper safety equipment.
6.2 Stabilization
- Consolidants: Apply consolidants, such as Paraloid B-72, to stabilize fragile fossils.
- Adhesives: Use adhesives, such as cyanoacrylate, to repair cracks and breaks.
6.3 Documentation
- Photography: Take detailed photos of the fossil before and after preparation.
- Labeling: Create labels with information about the fossil, including location, date, and geological formation.
7. Displaying and Storing Your Fossil Finds
Proper display and storage are essential to preserve your fossils for future enjoyment and study.
7.1 Display Options
- Display Cases: Protect fossils from dust and damage while showcasing them.
- Shadow Boxes: Create visually appealing displays with fossils and other artifacts.
- Open Shelves: Allow easy access to fossils but require regular dusting.
7.2 Storage Solutions
- Acid-Free Boxes: Protect fossils from chemical degradation.
- Padding: Use foam or cotton to cushion fossils and prevent damage.
- Climate Control: Store fossils in a cool, dry place to prevent deterioration.
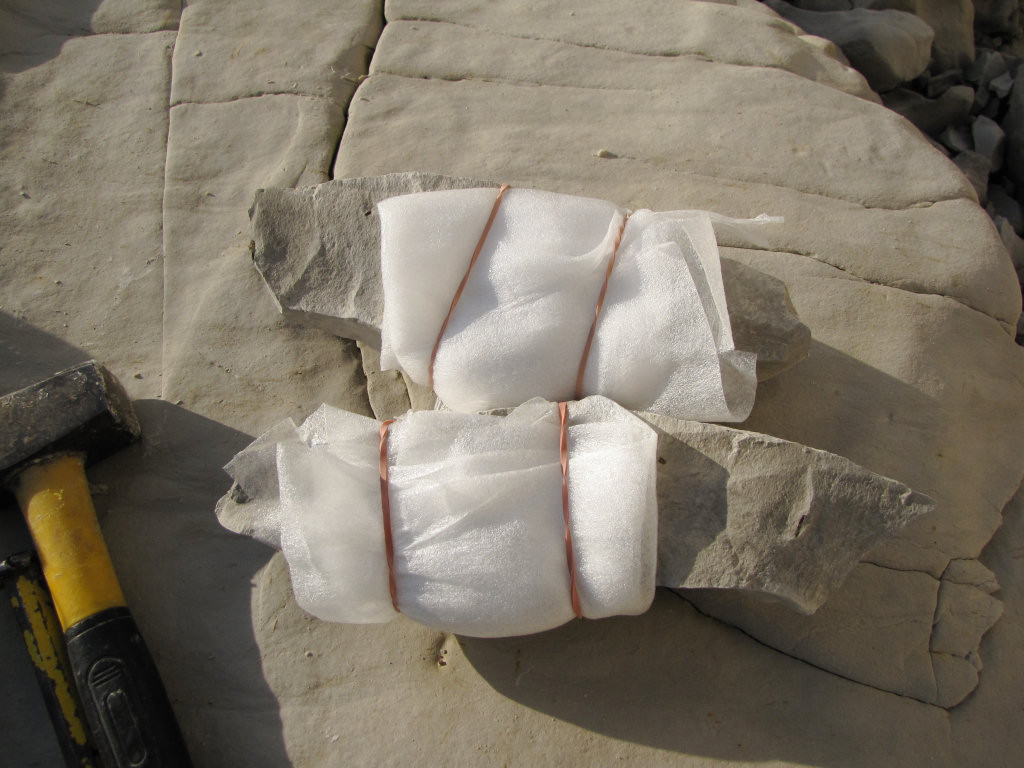 Foam wrapped fossil
7.3 Labeling and Cataloging
- Detailed Labels: Include information about the fossil’s origin, date of discovery, and geological context.
- Cataloging System: Create a system for organizing and tracking your fossil collection.
8. Advanced Fossil Preparation Techniques
For serious enthusiasts, advanced fossil preparation techniques can reveal stunning details and improve preservation.
8.1 Air Abrasive Preparation
- Precision: Air abrasives use a stream of abrasive particles to remove matrix with precision.
- Equipment: Requires specialized equipment and training.
8.2 Acid Preparation
- Matrix Removal: Weak acids dissolve the matrix, revealing delicate fossils.
- Safety: Requires proper safety equipment and experience.
8.3 Microscopic Preparation
- Detailed Work: Microscopes are used for detailed cleaning and preparation of small fossils.
- Tools: Requires specialized tools, such as micro chisels and dental picks.
9. Finding Fossil Hunting Locations in the USA
The USA offers a wealth of fossil-hunting opportunities. Here are some notable locations:
9.1 Western USA
- Green River Formation, Wyoming: Known for well-preserved fish and plant fossils.
- John Day Fossil Beds National Monument, Oregon: Features a diverse collection of plant and animal fossils from the Cenozoic era.
- Agate Fossil Beds National Monument, Nebraska: Contains mammal fossils from the Miocene epoch.
- La Brea Tar Pits, California: Famous for Ice Age mammal fossils.
9.2 Eastern USA
- দৌড় Brook Formation, Massachusetts: Known for its diverse assemblage of Triassic dinosaur footprints.
- Calvert Cliffs, Maryland: Features Miocene-era marine fossils, including shark teeth and shells.
- Penn Dixie Fossil Park, New York: Contains Devonian-period marine fossils.
9.3 Southern USA
- Waco Mammoth National Monument, Texas: Home to the remains of Columbian mammoths.
- Fossil Rim Wildlife Center, Texas: Offers guided fossil tours.
- Big Bend National Park, Texas: Contains Cretaceous-period dinosaur fossils.
9.4 Resources for Finding Locations
- Geological Surveys: State geological surveys provide maps and information on fossil-bearing formations.
- Rock and Mineral Clubs: Offer field trips and local expertise.
- Fossil Guidebooks: Provide detailed information on specific locations.
10. Understanding Fossil Identification and Classification
Accurate identification and classification of your fossil finds will enhance your understanding and appreciation of prehistoric life.
10.1 Basic Fossil Groups
- Invertebrates: Fossils of animals without backbones, such as trilobites, ammonites, and brachiopods.
- Vertebrates: Fossils of animals with backbones, such as dinosaurs, mammals, and fish.
- Plants: Fossils of ancient plants, such as ferns, trees, and algae.
- Trace Fossils: Evidence of ancient life, such as footprints, burrows, and coprolites.
10.2 Identification Resources
- Field Guides: Provide illustrations and descriptions of common fossils.
- Museums: Offer identification services and educational programs.
- Online Databases: Provide access to fossil images and information.
- Expert Consultation: Contact paleontologists or experienced collectors for assistance.
10.3 Classifying Fossils
- Taxonomy: Understand the hierarchical system of classifying organisms, including kingdom, phylum, class, order, family, genus, and species.
- Nomenclature: Learn the rules for naming fossils and using scientific names.
11. Joining Fossil Clubs and Societies
Joining fossil clubs and societies can provide valuable resources, networking opportunities, and educational experiences.
11.1 Benefits of Membership
- Field Trips: Participate in organized fossil-hunting trips.
- Workshops: Learn new preparation and identification techniques.
- Lectures: Attend presentations by experts in the field.
- Networking: Connect with other fossil enthusiasts.
- Resources: Access journals, newsletters, and online forums.
11.2 Finding Local Clubs
- Online Directories: Search online directories for fossil clubs in your area.
- Museums: Contact local museums for information on clubs and societies.
- Geological Surveys: Check with state geological surveys for local resources.
12. Documenting and Sharing Your Discoveries
Documenting and sharing your fossil discoveries can contribute to scientific knowledge and inspire others.
12.1 Keeping a Detailed Record
- Location: Record the exact location where the fossil was found, including GPS coordinates.
- Date: Note the date of discovery.
- Geological Context: Describe the geological formation and surrounding rocks.
- Photographs: Take detailed photos of the fossil in situ and after preparation.
- Description: Provide a detailed description of the fossil, including its size, shape, and distinguishing features.
12.2 Sharing Your Finds
- Social Media: Share photos and stories of your discoveries on social media platforms.
- Online Forums: Participate in online fossil forums and share your knowledge.
- Museums: Donate significant finds to local museums.
- Publications: Publish your research in scientific journals.
13. The Future of Fossil Hunting and Paleontology
Fossil hunting and paleontology continue to evolve with new technologies and discoveries.
13.1 Technological Advances
- 3D Scanning: Create digital models of fossils for research and display.
- CT Scanning: Examine the internal structure of fossils without damaging them.
- DNA Analysis: Extract and analyze DNA from ancient fossils.
13.2 Emerging Trends
- Citizen Science: Participate in research projects and contribute to scientific discoveries.
- Virtual Paleontology: Explore virtual fossil collections and participate in online research.
- Ethical Collecting: Promote responsible fossil collecting and preservation.
13.3 How to Stay Informed
- Scientific Journals: Read the latest research in paleontology.
- Museums: Visit museums and attend educational programs.
- Online Resources: Explore online databases, forums, and educational websites.
- Conferences: Attend paleontology conferences and workshops.
14. Conclusion: Unleash Your Inner Paleontologist
Breaking open a fossil rock is more than just an activity; it’s an adventure into the Earth’s ancient past. By following these steps and guidelines, you can safely and successfully uncover the hidden treasures within these rocks. At rockscapes.net, we encourage you to embrace the thrill of discovery and share your findings with the world. Happy fossil hunting!
Remember to visit rockscapes.net for more inspiration and detailed guides on landscape design with rocks. Explore our diverse range of rock types and discover how to create stunning outdoor spaces that celebrate the beauty of nature.
Address: 1151 S Forest Ave, Tempe, AZ 85281, United States.
Phone: +1 (480) 965-9011.
Website: rockscapes.net.
FAQ: Breaking Open Fossil Rocks
1. Is it legal to break open rocks to find fossils?
Regulations vary depending on the location. Always check local laws and obtain permission before collecting on private land.
2. What is the best type of rock to find fossils in?
Sedimentary rocks, such as shale, limestone, and sandstone, are the most likely to contain fossils.
3. What tools do I need to break open a fossil rock?
Essential tools include safety glasses, gloves, a geologist’s hammer, and chisels.
4. How can I identify a promising fossil rock?
Look for sedimentary rocks with layering, color variations, and visible fossils on the surface.
5. What safety precautions should I take when breaking open rocks?
Always wear safety glasses, gloves, and a dust mask to protect yourself from injury and dust inhalation.
6. How do I extract a fossil from a rock?
Use small chisels, dental picks, and brushes to carefully remove the matrix around the fossil.
7. How do I preserve a fossil after extraction?
Apply consolidants to stabilize fragile fossils and adhesives to repair cracks and breaks.
8. Where can I find good fossil-hunting locations in the USA?
Some popular locations include the Green River Formation in Wyoming, the Calvert Cliffs in Maryland, and the Waco Mammoth National Monument in Texas.
9. How do I identify the fossils I find?
Use field guides, museums, online databases, and expert consultation to identify your fossils.
10. What should I do if I find a significant or rare fossil?
Report your find to a local museum or geological society to ensure its scientific value is recognized.