Building a glider rocker combines the satisfaction of DIY with the comfort of a relaxing outdoor seating option. This guide, brought to you by rockscapes.net, provides a detailed, step-by-step approach to constructing your own glider rocker, ensuring a smooth and enjoyable project. Embrace the beauty of natural elements and create a stunning outdoor piece with our landscaping rock recommendations and expert advice.
1. Understanding the Glider Rocker Appeal
Why are glider rockers so appealing, and what makes them a worthwhile addition to your outdoor space?
Glider rockers offer a unique combination of gentle motion, comfort, and aesthetic appeal, making them a perfect addition to any porch, patio, or garden. Their smooth gliding action provides a soothing and relaxing experience.
1.1 The Comfort Factor
Glider rockers are designed for comfort, with ergonomic features that support your back and promote relaxation.
1.2 Aesthetic Versatility
They come in a variety of styles and materials, allowing you to customize them to match your existing outdoor decor. Natural materials, like those available at rockscapes.net, can beautifully complement your landscaping.
1.3 The DIY Advantage
Building your own glider rocker gives you complete control over the design, materials, and finish, ensuring a personalized touch. Plus, it’s a rewarding project that can enhance your woodworking skills.
2. Planning Your Glider Rocker Project
Before you begin, careful planning is essential for a successful glider rocker build.
2.1 Design Considerations
Choose a design that complements your style and outdoor space. Consider factors like seat height, backrest angle, and armrest placement.
2.2 Material Selection
Select durable and weather-resistant materials. Popular choices include cedar, redwood, and treated pine. Incorporating natural stone elements from rockscapes.net can add a unique touch.
2.3 Essential Tools and Equipment
Gather all the necessary tools, including a saw, drill, sander, and measuring tools. Having the right equipment will make the project smoother and more efficient.
2.4 Budgeting
Estimate the cost of materials, hardware, and finishing supplies to ensure you stay within your budget.
3. Essential Materials and Tools
What are the core materials and tools you will need to build your glider rocker, and where can you source them?
Having the right materials and tools is crucial for a successful and enjoyable glider rocker build. Sourcing high-quality lumber and hardware will ensure the durability and longevity of your project.
3.1 Lumber Selection
Choose weather-resistant wood like cedar, redwood, or treated pine. Cedar is naturally rot-resistant and offers a beautiful aesthetic.
3.2 Glider Hardware Kits
Purchase a high-quality glider hardware kit that includes the necessary brackets, bearings, and connecting hardware. Ensure the kit is designed for outdoor use.
3.3 Fasteners
Use galvanized or stainless steel screws and bolts to prevent rust and corrosion. Different sizes will be needed for various parts of the project.
3.4 Essential Tools
- Saw: A table saw or circular saw for cutting lumber.
- Drill: For drilling pilot holes and driving screws.
- Sander: For smoothing rough edges and surfaces.
- Measuring Tools: A tape measure, square, and level for accurate measurements.
- Clamps: For holding pieces together while gluing and fastening.
- Safety Gear: Safety glasses and a dust mask to protect yourself during the build.
4. Step-by-Step Guide: Building Your Glider Rocker
How do you assemble a glider rocker from start to finish, including crucial tips for each step?
This comprehensive guide will walk you through each step of building your glider rocker, from cutting the pieces to assembling the final product.
4.1 Cutting the Components
Following your chosen design plan, cut all the necessary pieces from your selected lumber. Accuracy is key to ensure proper fit and alignment.
4.2 Assembling the Seat and Backrest
Construct the seat and backrest frames, ensuring they are square and sturdy. Use wood glue and screws for a strong bond.
4.3 Attaching the Armrests
Attach the armrests to the seat frame, ensuring they are level and comfortable. Consider adding padding for extra comfort.
4.4 Building the Glider Base
Construct the glider base according to the hardware kit instructions. This is a critical step for smooth gliding motion.
4.5 Connecting the Seat to the Base
Attach the seat assembly to the glider base using the provided hardware. Ensure all connections are secure and allow for smooth movement.
4.6 Finishing Touches
Sand all surfaces smooth and apply a weather-resistant finish, such as paint, stain, or sealant. This will protect the wood and enhance its appearance.
5. Incorporating Rockscapes Elements
How can you integrate rockscapes and stone accents to enhance the design of your glider rocker?
Integrating rockscapes elements into your glider rocker design can add a unique and natural touch, blending seamlessly with your outdoor environment.
5.1 Stone Accents
Incorporate small stone accents into the armrests or base of the glider rocker. This adds visual interest and a touch of natural beauty.
5.2 Rock Base
Create a rock base for your glider rocker, providing a stable and aesthetically pleasing foundation. Use various sizes and types of rocks for a natural look.
5.3 Landscaping Integration
Surround your glider rocker with landscaping rocks and plants to create a cohesive and inviting outdoor space. Rockscapes.net offers a wide selection of landscaping rocks to suit any style.
6. Understanding Glider Rocker Mechanics
What are the key mechanical principles behind a glider rocker, and how do they ensure smooth motion?
Understanding the mechanics of a glider rocker can help you troubleshoot any issues and ensure smooth, consistent motion.
6.1 The Gliding Mechanism
The gliding mechanism consists of a series of linkages and bearings that allow the seat to move smoothly back and forth.
6.2 Weight Distribution
Proper weight distribution is crucial for balanced gliding. Ensure the seat is centered over the base and that the weight is evenly distributed.
6.3 Maintenance
Regularly lubricate the moving parts to ensure smooth motion and prevent wear and tear. Check and tighten all connections periodically.
7. Optimizing for Comfort and Ergonomics
How can you adjust the design of your glider rocker to maximize comfort and support?
Optimizing your glider rocker for comfort and ergonomics will ensure it becomes your favorite spot for relaxation.
7.1 Seat Height and Angle
Adjust the seat height and angle to provide optimal support for your legs and back.
7.2 Backrest Support
Consider adding lumbar support to the backrest for enhanced comfort.
7.3 Armrest Placement
Position the armrests at a comfortable height and angle to reduce strain on your arms and shoulders.
7.4 Cushioning and Padding
Add cushions and padding to the seat, backrest, and armrests for extra comfort.
8. Safety Considerations
What safety precautions should you take during the build process and when using your glider rocker?
Safety should always be a top priority when building and using your glider rocker.
8.1 Construction Safety
Wear safety glasses and a dust mask when cutting, sanding, and drilling. Use caution when operating power tools.
8.2 Glider Rocker Stability
Ensure the glider rocker is stable and will not tip over. Test it thoroughly before use.
8.3 Weight Capacity
Be aware of the weight capacity of your glider rocker and avoid exceeding it.
8.4 Child Safety
Supervise children when they are using the glider rocker to prevent accidents.
9. Customization and Personalization
What creative modifications can you make to your glider rocker to reflect your personal style?
Customizing your glider rocker allows you to create a truly unique piece that reflects your personal style and enhances your outdoor space.
9.1 Paint and Stain
Choose colors and finishes that complement your outdoor decor. Experiment with different painting techniques and staining methods.
9.2 Fabric Selection
Select weather-resistant fabrics for cushions and padding. Consider patterns, textures, and colors that reflect your style.
9.3 Engraving and Detailing
Add engraved details or decorative elements to the wood for a personalized touch.
9.4 Unique Rock Accents
Incorporate unique rock accents, such as mosaic patterns or embedded stones, to create a one-of-a-kind design.
10. Maintenance and Care
How can you maintain your glider rocker to ensure its longevity and aesthetic appeal?
Proper maintenance and care will keep your glider rocker looking its best and ensure it lasts for years to come.
10.1 Regular Cleaning
Clean your glider rocker regularly with a mild soap and water solution.
10.2 Protecting from the Elements
Cover your glider rocker when not in use to protect it from the sun, rain, and snow.
10.3 Lubrication
Lubricate the moving parts regularly to ensure smooth motion.
10.4 Inspecting and Repairing
Inspect your glider rocker periodically for signs of wear and tear. Repair any damage promptly to prevent further issues.
11. Glider Rocker Styles and Designs
What are the different styles of glider rockers available, and which one suits your taste?
Exploring different glider rocker styles can help you choose a design that perfectly complements your outdoor space and personal taste.
11.1 Traditional Glider Rockers
Traditional glider rockers feature classic designs with curved lines and timeless appeal.
11.2 Modern Glider Rockers
Modern glider rockers incorporate sleek lines, minimalist designs, and contemporary materials.
11.3 Adirondack Glider Rockers
Adirondack glider rockers combine the iconic Adirondack chair design with the smooth motion of a glider.
11.4 Porch Glider Rockers
Porch glider rockers are designed for use on porches and feature comfortable seating and sturdy construction.
12. Troubleshooting Common Issues
What are the common problems encountered when building or using a glider rocker, and how can you fix them?
Addressing common issues can help you maintain your glider rocker and ensure smooth operation.
12.1 Squeaking Sounds
Squeaking sounds can be caused by friction between moving parts. Lubricate the joints and bearings to eliminate squeaks.
12.2 Uneven Gliding
Uneven gliding can be caused by misalignment or uneven weight distribution. Adjust the hardware and ensure the seat is centered.
12.3 Loose Connections
Loose connections can cause instability and unsafe operation. Tighten all screws and bolts regularly.
12.4 Wood Rot
Wood rot can occur in damp or humid conditions. Protect the wood with a weather-resistant finish and store the glider rocker in a dry place when not in use.
13. Finding Inspiration for Your Project
Where can you find inspiration and design ideas for your DIY glider rocker project?
Finding inspiration is a crucial step in creating a glider rocker that perfectly matches your style and outdoor space.
13.1 Online Resources
Explore websites, blogs, and social media platforms for design ideas and project inspiration.
13.2 Home and Garden Magazines
Browse home and garden magazines for articles and images featuring glider rockers and outdoor furniture.
13.3 Local Craft Fairs
Visit local craft fairs and woodworking shows to see handcrafted glider rockers and get ideas from experienced builders.
13.4 Rockscapes.net Gallery
Visit rockscapes.net for inspiration on integrating natural stone elements into your glider rocker design.
14. The Benefits of DIY Projects
What are the advantages of building your own glider rocker versus buying one?
Embarking on a DIY glider rocker project offers numerous benefits, combining cost savings with the satisfaction of creating something unique and personalized.
14.1 Cost Savings
Building your own glider rocker can be significantly cheaper than buying a pre-made one.
14.2 Customization
DIY projects allow you to customize the design, materials, and finish to match your specific preferences.
14.3 Skill Development
Building a glider rocker can enhance your woodworking skills and provide a sense of accomplishment.
14.4 Environmental Benefits
DIY projects often involve using sustainable materials and reducing waste, making them environmentally friendly.
15. Tools for Accurate Measurement and Cutting
What tools are essential for achieving precise measurements and cuts in your glider rocker project?
Achieving accurate measurements and cuts is essential for a well-built and functional glider rocker.
15.1 Tape Measure
A high-quality tape measure is essential for accurate measurements.
15.2 Speed Square
A speed square helps ensure accurate angles and square cuts.
15.3 Level
A level is crucial for ensuring the glider rocker is level and stable.
15.4 Table Saw or Circular Saw
A table saw or circular saw provides precise and clean cuts.
15.5 Miter Saw
A miter saw is ideal for making accurate angle cuts.
16. Choosing the Right Wood Finish
How do you select the appropriate wood finish to protect and enhance the beauty of your glider rocker?
Selecting the right wood finish is crucial for protecting your glider rocker from the elements and enhancing its natural beauty.
16.1 Types of Wood Finishes
Explore different types of wood finishes, including paints, stains, and sealants.
16.2 Weather Resistance
Choose a finish that is weather-resistant and provides protection from the sun, rain, and snow.
16.3 Aesthetic Considerations
Select a finish that complements your outdoor decor and enhances the natural beauty of the wood.
16.4 Application Techniques
Follow the manufacturer’s instructions for proper application techniques to ensure a durable and long-lasting finish.
17. Incorporating Natural Elements
How can you integrate natural elements, like wood and stone, to create a harmonious outdoor setting for your glider rocker?
Incorporating natural elements into your outdoor space can create a serene and inviting atmosphere around your glider rocker.
17.1 Wood Selection
Choose wood species that complement your landscape and provide a natural aesthetic.
17.2 Stone Accents
Incorporate stone accents, such as landscaping rocks from rockscapes.net, to add texture and visual interest.
17.3 Plant Integration
Surround your glider rocker with plants and flowers to create a lush and inviting environment.
17.4 Natural Pathways
Create natural pathways leading to your glider rocker using stepping stones or gravel.
18. Understanding Woodworking Joints
What are the different types of woodworking joints, and which ones are best suited for building a glider rocker?
Understanding different woodworking joints can help you create a strong and durable glider rocker.
18.1 Types of Woodworking Joints
Explore different types of woodworking joints, including butt joints, lap joints, mortise and tenon joints, and dovetail joints.
18.2 Joint Strength
Consider the strength and stability required for each joint when building your glider rocker.
18.3 Ease of Construction
Choose joints that are appropriate for your skill level and easy to construct.
18.4 Aesthetic Appeal
Select joints that complement the overall design and aesthetic of your glider rocker.
19. Maximizing Space with Your Glider Rocker
How can you effectively integrate a glider rocker into a small porch or patio space?
Integrating a glider rocker into a small space requires careful planning and creative design solutions.
19.1 Compact Designs
Choose a compact glider rocker design that fits comfortably in your space.
19.2 Space-Saving Furniture
Incorporate other space-saving furniture, such as folding tables and stackable chairs.
19.3 Vertical Gardening
Utilize vertical gardening techniques to maximize space and add greenery to your outdoor area.
19.4 Multi-Functional Furniture
Select multi-functional furniture that serves multiple purposes, such as a storage bench that doubles as seating.
20. Eco-Friendly Glider Rocker Options
What sustainable materials and practices can you use to create an eco-friendly glider rocker?
Creating an eco-friendly glider rocker involves using sustainable materials and adopting environmentally conscious practices.
20.1 Sustainable Wood Sources
Choose wood from sustainably managed forests or reclaimed wood.
20.2 Eco-Friendly Finishes
Select non-toxic and eco-friendly wood finishes.
20.3 Recycled Materials
Incorporate recycled materials, such as recycled plastic lumber, into your glider rocker design.
20.4 Local Sourcing
Source materials locally to reduce transportation costs and carbon emissions.
21. Understanding Load Distribution
How does load distribution affect the design and stability of your glider rocker?
Understanding load distribution is crucial for designing a stable and safe glider rocker.
21.1 Weight Distribution
Ensure the weight is evenly distributed across the frame and base of the glider rocker.
21.2 Stress Points
Identify and reinforce stress points to prevent structural failure.
21.3 Material Strength
Choose materials that can withstand the expected loads and stresses.
21.4 Joint Integrity
Use strong and reliable joints to distribute loads effectively.
22. Tools for Wood Bending
What tools and techniques can you use to bend wood for curved elements in your glider rocker design?
Bending wood can add elegance and unique design elements to your glider rocker.
22.1 Steam Bending
Use steam bending to soften wood and mold it into curved shapes.
22.2 Lamination
Laminate thin strips of wood together to create curved components.
22.3 Kerf Cutting
Make a series of closely spaced cuts in the wood to allow it to bend.
22.4 Forms and Clamps
Use forms and clamps to hold the wood in the desired shape while it dries.
23. Creating a Glider Rocker for All Seasons
How can you design a glider rocker that is comfortable and functional in various weather conditions?
Designing a glider rocker for all seasons requires careful consideration of materials, finishes, and accessories.
23.1 Weather-Resistant Materials
Choose materials that can withstand extreme temperatures, moisture, and UV exposure.
23.2 Removable Cushions
Use removable cushions and padding that can be easily stored during inclement weather.
23.3 Protective Covers
Provide protective covers to shield the glider rocker from the elements.
23.4 Sun Protection
Incorporate sun protection, such as awnings or umbrellas, to provide shade during hot summer months.
24. Adding Comfort with Cushions and Pillows
How can you select the right cushions and pillows to enhance the comfort and aesthetic appeal of your glider rocker?
Cushions and pillows can significantly enhance the comfort and style of your glider rocker.
24.1 Fabric Selection
Choose weather-resistant fabrics that are durable and easy to clean.
24.2 Cushion Fillings
Select cushion fillings that provide adequate support and comfort.
24.3 Pillow Sizes and Shapes
Experiment with different pillow sizes and shapes to create a visually appealing arrangement.
24.4 Color Coordination
Coordinate the colors and patterns of your cushions and pillows with your outdoor decor.
25. Achieving a Smooth Gliding Motion
What adjustments can you make to ensure a smooth and effortless gliding motion in your glider rocker?
Achieving a smooth gliding motion is essential for the comfort and enjoyment of your glider rocker.
25.1 Hardware Alignment
Ensure the glider hardware is properly aligned and securely fastened.
25.2 Lubrication
Lubricate the moving parts regularly to reduce friction and ensure smooth motion.
25.3 Weight Balance
Adjust the weight balance to ensure even distribution and prevent wobbling.
25.4 Spring Tension
Adjust the spring tension, if applicable, to achieve the desired gliding resistance.
26. Understanding Different Wood Types
What are the properties of different wood types, and which ones are best suited for outdoor furniture like glider rockers?
Understanding the properties of different wood types can help you select the best material for your glider rocker.
26.1 Cedar
Cedar is naturally rot-resistant and offers a beautiful aesthetic.
26.2 Redwood
Redwood is durable, weather-resistant, and has a rich color.
26.3 Treated Pine
Treated pine is affordable and resistant to decay and insects.
26.4 Teak
Teak is highly durable, weather-resistant, and has a luxurious appearance.
27. Building a Glider Rocker with Storage
How can you integrate storage compartments into your glider rocker design to maximize functionality?
Adding storage to your glider rocker can provide convenient space for storing cushions, blankets, and other outdoor essentials.
27.1 Under-Seat Storage
Incorporate storage compartments under the seat of the glider rocker.
27.2 Armrest Storage
Integrate storage pockets or compartments into the armrests.
27.3 Hidden Compartments
Design hidden compartments for storing valuables or personal items.
27.4 Hinged Lids
Use hinged lids to provide easy access to the storage compartments.
28. Caring for Your Glider Rocker in Winter
What steps should you take to protect your glider rocker during the winter months?
Proper winter care can help prolong the life and beauty of your glider rocker.
28.1 Cleaning
Clean the glider rocker thoroughly before storing it for the winter.
28.2 Covering
Cover the glider rocker with a protective cover to shield it from the elements.
28.3 Storing
Store the glider rocker in a dry, sheltered location, such as a garage or shed.
28.4 Maintenance
Inspect the glider rocker periodically for signs of damage and make any necessary repairs.
29. The Art of Wood Sanding
What sanding techniques and tools are essential for achieving a smooth and flawless finish on your glider rocker?
Proper sanding is essential for achieving a smooth and professional finish on your glider rocker.
29.1 Sandpaper Grits
Use a progression of sandpaper grits, starting with coarse and ending with fine.
29.2 Sanding Tools
Utilize sanding blocks, orbital sanders, and detail sanders for different areas of the glider rocker.
29.3 Sanding Techniques
Sand with the grain to avoid scratches and swirl marks.
29.4 Dust Removal
Remove dust regularly to ensure a clean and smooth surface.
30. Understanding Wood Expansion and Contraction
How does wood expansion and contraction affect the design and construction of your glider rocker, especially in varying climates?
Understanding wood expansion and contraction is crucial for building a durable and long-lasting glider rocker.
30.1 Wood Movement
Account for wood movement when designing and constructing your glider rocker.
30.2 Joint Design
Use joints that allow for wood movement without compromising strength.
30.3 Material Selection
Choose wood species that are stable and resistant to warping and cracking.
30.4 Moisture Content
Control the moisture content of the wood to minimize expansion and contraction.
31. Building a Glider Rocker with a Footrest
How can you integrate a comfortable and functional footrest into your glider rocker design?
Adding a footrest to your glider rocker can enhance comfort and relaxation.
31.1 Attached Footrest
Design an attached footrest that moves with the glider rocker.
31.2 Detachable Footrest
Create a detachable footrest that can be used independently.
31.3 Adjustable Footrest
Incorporate an adjustable footrest that can be customized to different heights.
31.4 Padded Footrest
Add padding to the footrest for extra comfort.
32. Incorporating Ergonomic Design Principles
How can you apply ergonomic design principles to create a glider rocker that promotes comfort and reduces strain?
Ergonomic design principles can help you create a glider rocker that is comfortable, supportive, and reduces strain on your body.
32.1 Seat Height
Design the seat height to allow your feet to rest comfortably on the ground.
32.2 Backrest Angle
Incorporate a backrest angle that provides optimal support for your spine.
32.3 Lumbar Support
Add lumbar support to the backrest to promote proper posture.
32.4 Armrest Height
Position the armrests at a comfortable height to reduce strain on your arms and shoulders.
33. Understanding Hardware Options
What types of hardware are available for building a glider rocker, and which ones are best suited for your project?
Choosing the right hardware is essential for building a durable and functional glider rocker.
33.1 Glider Brackets
Select high-quality glider brackets that provide smooth and reliable motion.
33.2 Screws and Bolts
Use galvanized or stainless steel screws and bolts for corrosion resistance.
33.3 Washers and Nuts
Choose appropriate washers and nuts to secure the connections.
33.4 Hinges and Latches
Incorporate durable hinges and latches for storage compartments.
34. Designing for Durability
What design and construction techniques can you use to ensure your glider rocker lasts for many years?
Designing for durability involves selecting the right materials, using appropriate construction techniques, and providing proper maintenance.
34.1 Material Selection
Choose durable and weather-resistant materials.
34.2 Joint Strength
Use strong and reliable joints.
34.3 Protective Finishes
Apply protective finishes to shield the wood from the elements.
34.4 Regular Maintenance
Provide regular maintenance to prevent damage and prolong the life of the glider rocker.
35. Building a Miniature Glider Rocker
How can you adapt the glider rocker design to create a smaller version for children or decorative purposes?
Building a miniature glider rocker can be a fun and rewarding project.
35.1 Scale Down the Design
Scale down the dimensions of the glider rocker to create a smaller version.
35.2 Simplify the Construction
Simplify the construction techniques to make the project more manageable.
35.3 Use Lighter Materials
Use lighter materials to reduce the weight of the glider rocker.
35.4 Focus on Safety
Prioritize safety when building a miniature glider rocker for children.
36. Upcycling Materials for Your Glider Rocker
How can you use upcycled materials to build a unique and eco-friendly glider rocker?
Using upcycled materials can add character and sustainability to your glider rocker project.
36.1 Reclaimed Wood
Use reclaimed wood from old buildings or furniture.
36.2 Pallet Wood
Incorporate pallet wood into your glider rocker design.
36.3 Recycled Plastic
Use recycled plastic lumber for the frame and base.
36.4 Salvaged Hardware
Utilize salvaged hardware from old projects or discarded items.
37. Combining Wood and Metal
How can you combine wood and metal elements to create a stylish and durable glider rocker?
Combining wood and metal can add a modern and industrial touch to your glider rocker.
37.1 Metal Frame
Use a metal frame for strength and durability.
37.2 Wood Seat and Backrest
Incorporate a wood seat and backrest for comfort and aesthetic appeal.
37.3 Metal Accents
Add metal accents, such as bolts, rivets, and plates, for visual interest.
37.4 Powder Coating
Use powder coating to protect the metal from corrosion and enhance its appearance.
38. Adding a Canopy
How can you design a glider rocker with a canopy for added shade and privacy?
Adding a canopy to your glider rocker can provide shade, privacy, and protection from the elements.
38.1 Frame Design
Design a sturdy frame to support the canopy.
38.2 Fabric Selection
Choose a weather-resistant fabric for the canopy.
38.3 Adjustable Canopy
Incorporate an adjustable canopy that can be tilted to provide optimal shade.
38.4 Removable Canopy
Design a removable canopy that can be easily stored during inclement weather.
39. Integrating Lighting
How can you integrate lighting into your glider rocker design to enhance ambiance and functionality?
Adding lighting to your glider rocker can create a warm and inviting ambiance and enhance its functionality during evening hours.
39.1 LED Strips
Incorporate LED strips along the frame or under the seat.
39.2 Solar Lights
Use solar lights to provide eco-friendly illumination.
39.3 String Lights
Drape string lights around the glider rocker for a festive look.
39.4 Integrated Lamps
Design integrated lamps into the armrests or canopy.
40. The Importance of Pre-Drilling
Why is pre-drilling essential when assembling your glider rocker, and how does it contribute to the project’s success?
Pre-drilling is a crucial step in woodworking that helps prevent wood splitting and ensures strong, accurate connections.
40.1 Prevents Splitting
Pre-drilling prevents the wood from splitting when driving in screws or bolts.
40.2 Ensures Alignment
Pre-drilling helps ensure accurate alignment of the components.
40.3 Facilitates Assembly
Pre-drilling makes it easier to drive in screws and bolts, facilitating the assembly process.
40.4 Strengthens Joints
Pre-drilling strengthens the joints by providing a pilot hole for the fasteners.
41. Frequently Asked Questions (FAQs) About Building a Glider Rocker
41.1 What type of wood is best for a glider rocker?
Weather-resistant woods like cedar, redwood, or treated pine are best for outdoor glider rockers due to their durability and resistance to rot and insects.
41.2 How do I ensure a smooth gliding motion?
Use high-quality glider hardware, ensure proper alignment, and regularly lubricate the moving parts to maintain a smooth gliding motion.
41.3 What tools do I need to build a glider rocker?
Essential tools include a saw, drill, sander, measuring tools, clamps, and safety gear like safety glasses and a dust mask.
41.4 How can I customize my glider rocker?
Customize your glider rocker with paint, stain, fabric selection, engraving, and unique rock accents to reflect your personal style.
41.5 How do I maintain my glider rocker?
Regularly clean the glider rocker, protect it from the elements, lubricate moving parts, and inspect for wear and tear to ensure longevity.
41.6 Can I build a glider rocker from recycled materials?
Yes, you can use reclaimed wood, pallet wood, recycled plastic lumber, and salvaged hardware to build an eco-friendly glider rocker.
41.7 How do I add storage to a glider rocker?
Incorporate under-seat storage, armrest storage, or hidden compartments with hinged lids for convenient storage.
41.8 What safety precautions should I take?
Wear safety glasses and a dust mask during construction, ensure glider rocker stability, be aware of the weight capacity, and supervise children when using it.
41.9 How do I protect my glider rocker in the winter?
Clean the glider rocker, cover it with a protective cover, store it in a dry location, and inspect for damage.
41.10 What are some common issues and how do I fix them?
Common issues include squeaking sounds (lubricate joints), uneven gliding (adjust hardware), and loose connections (tighten screws and bolts).
Ready to create your dream outdoor space? Visit rockscapes.net for inspiration, expert advice, and the perfect landscaping rocks to complement your new glider rocker. Contact us today and let us help you transform your backyard into a tranquil retreat! Address: 1151 S Forest Ave, Tempe, AZ 85281, United States. Phone: +1 (480) 965-9011. Website: rockscapes.net.
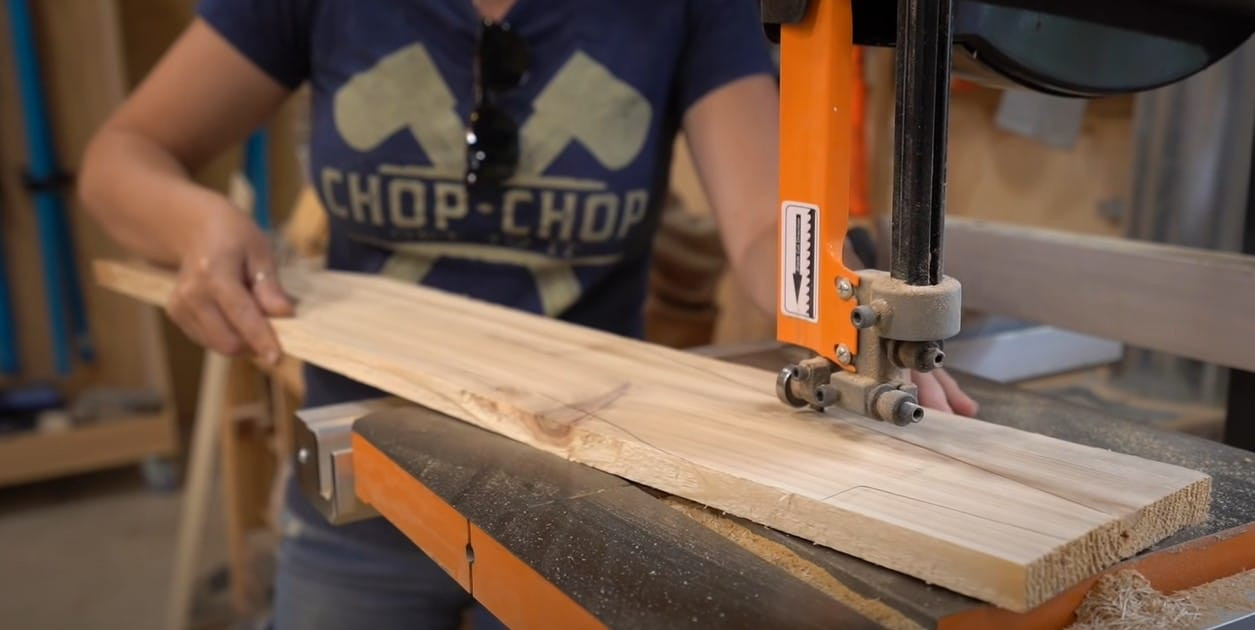 DIY Glider BenchHere, the image shows the meticulous rounding of edges on the glider bench pieces, emphasizing attention to detail for a smooth finish.
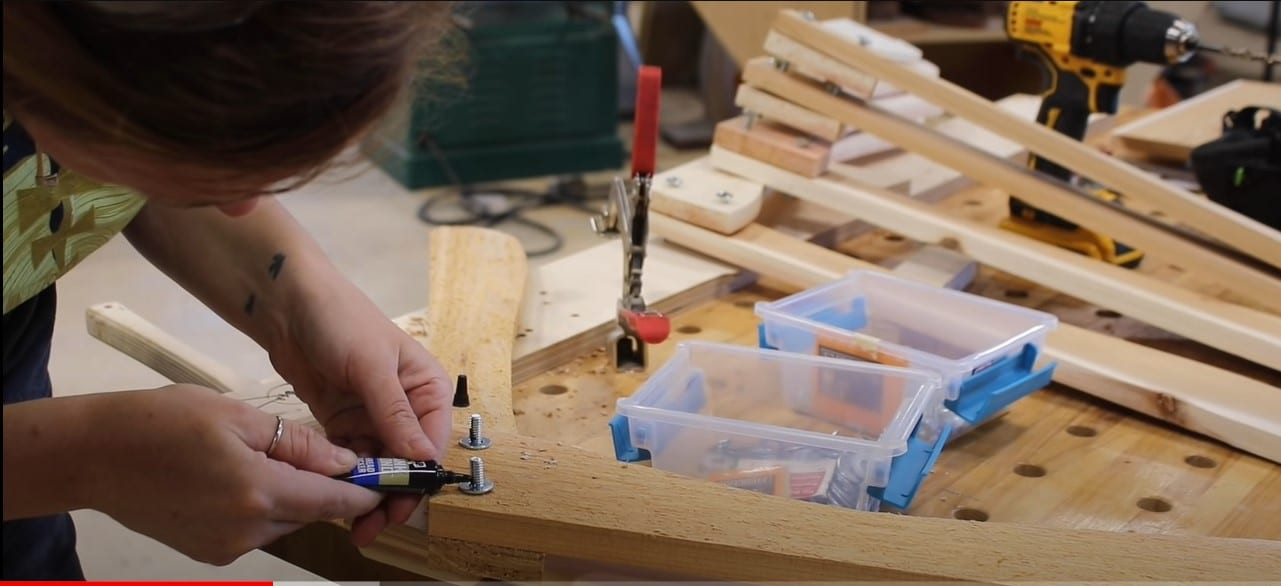 Assembling the Base of the Glider BenchThe photograph displays the assembly of the glider bench base, highlighting the use of galvanized hardware to prevent rust and ensure durability in outdoor conditions.
This image shows the attachment of slats to the glider bench seat, demonstrating the use of spacers and a brad nailer for efficient and even spacing.
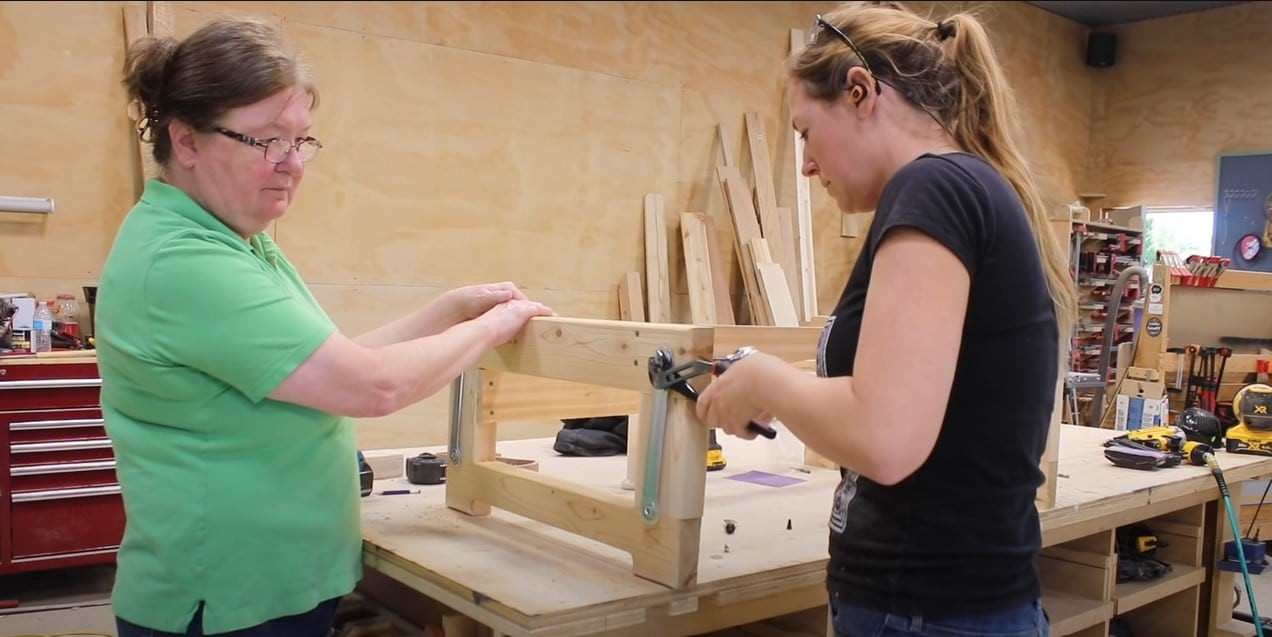
The photograph displays the glider bench arms being attached, illustrating the importance of leveling for comfort and stability.
Featured here is the creation of the glider bench base, emphasizing precision in cutting and sanding techniques for a smooth finish.
 Assembling the Glider Bench Base Using Mortise and TenonThe mortise and tenon method of assembly for the glider bench base, demonstrating a strong and durable woodworking technique.
 Glider Bench Gliding FeatureThis image highlights the gliding hardware used to create the glider feature in the bench, showcasing the mechanism that provides smooth motion.