Building a rock column is a fantastic way to add a touch of natural elegance and structural interest to your landscape, and at rockscapes.net, we’re dedicated to providing you with the knowledge and resources to make your hardscaping dreams a reality. This comprehensive guide will walk you through the process of constructing a stunning rock column, ensuring a durable and aesthetically pleasing addition to your outdoor space. Discover how to create captivating stone features and vertical rock elements by following our expert advice.
1. Understanding Rock Columns and Their Appeal
Rock columns aren’t just decorative; they’re statements. They add height, texture, and a sense of permanence to your landscape. But what makes them so appealing?
- Aesthetic Versatility: Rock columns complement various architectural styles and garden designs, from rustic to contemporary.
- Natural Integration: Using natural stone seamlessly blends your hardscape with the surrounding environment.
- Structural Accent: They can serve as focal points, define spaces, or support other landscape features like pergolas or lighting fixtures.
- Increased Property Value: Well-designed rock features enhance curb appeal and increase property value.
According to landscape architects at Arizona State University’s Herberger Institute for Design and the Arts, incorporating natural elements like stone columns can significantly enhance the perceived value and aesthetic appeal of a property.
2. Planning Your Rock Column Project
Before you start hauling rocks, careful planning is essential for a successful project.
2.1. Define Your Vision
What style are you aiming for? A towering, rugged column or a shorter, more refined one? Consider the overall aesthetic of your landscape and choose stones that complement it.
2.2. Determine the Location
- Accessibility: Ensure easy access for materials and equipment.
- Soil Conditions: Check for stable ground. Unstable soil may require additional foundation work.
- Proximity to Utilities: Call 811 before digging to locate underground utilities.
- Visibility: Choose a location where the column will be prominently displayed and enjoyed.
2.3. Select Your Stone
Choosing the right stone is critical for both aesthetics and structural integrity. Consider these factors:
- Stone Type:
- Granite: Durable and weather-resistant, suitable for a formal look.
- Limestone: Offers a softer, more natural appearance, often with interesting textures.
- Sandstone: Provides warm colors and a rustic feel, but can be more porous.
- Slate: Creates a layered, contemporary look with its flat, плиточный shape.
- Fieldstone: Irregularly shaped stones that create a natural, rustic appearance.
- Size and Shape: Choose stones that are manageable to lift and stack, with a variety of sizes for a natural look.
- Color and Texture: Select stones that complement your landscape and architectural style.
Rockscapes.net offers a wide variety of natural stones, each with unique characteristics to suit your project’s needs.
2.4. Design Considerations
- Height and Diameter: Consider the proportions of your column in relation to its surroundings. A general guideline is to keep the height no more than 4-5 times the base diameter.
- Shape: Will your column be perfectly cylindrical or slightly tapered? Tapering can add visual interest and stability.
- Capstone: A capstone adds a finishing touch and protects the top of the column from water damage.
- Lighting: Integrate lighting to highlight the column at night and create a dramatic effect.
2.5. Essential Tools and Materials
Gathering the right tools and materials will streamline the construction process.
- Safety Gear: Work gloves, safety glasses, and a dust mask are essential.
- Measuring Tools: Tape measure, level, and carpenter’s square.
- Digging Tools: Shovel, pickaxe, and tamper.
- Cutting and Shaping Tools: Masonry saw, chisel, and hammer.
- Adhesive: Exterior-grade construction adhesive.
- Gravel: For the base foundation.
- Landscape Fabric: To prevent weed growth.
- Mortar Mix (Optional): For added stability and a more traditional look.
3. Preparing the Foundation
A solid foundation is crucial for the stability and longevity of your rock column.
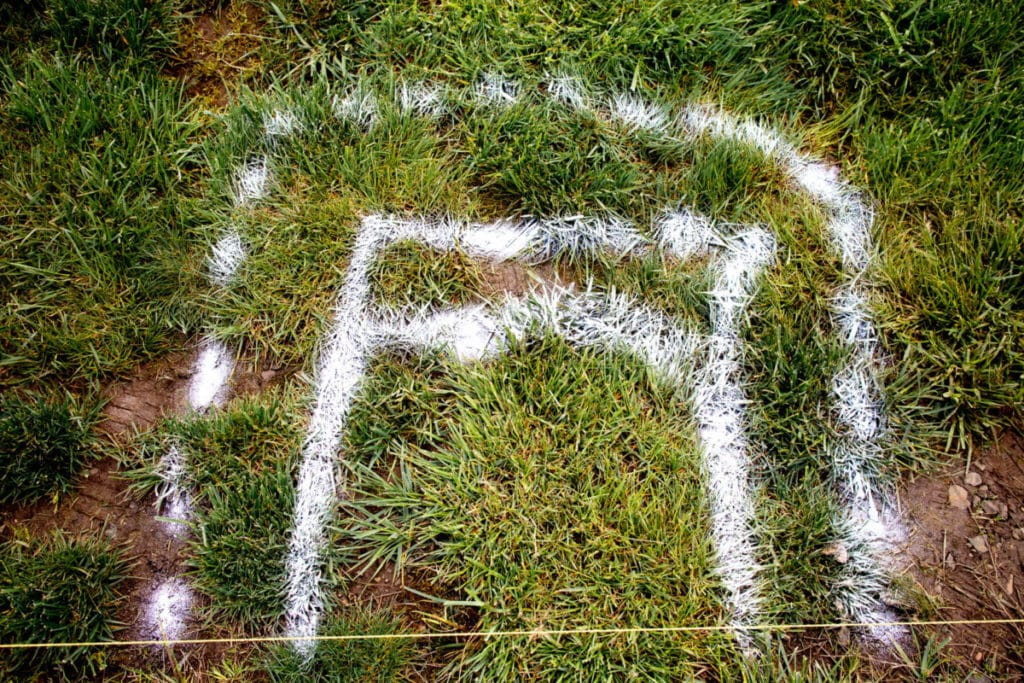
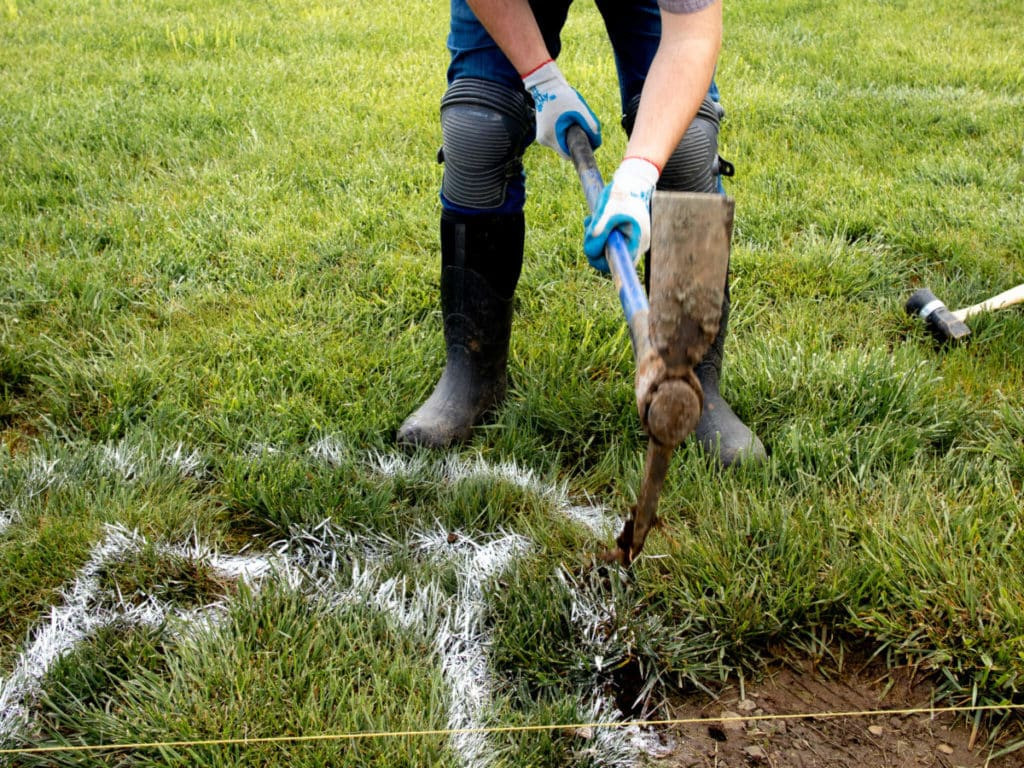
3.1. Excavation
- Dig a circular or square hole at least 12 inches deep and wider than the base of your column. The exact dimensions will depend on the size of your column.
3.2. Base Layer
- Line the excavation with landscape fabric to prevent weed growth.
- Pour a 6-inch layer of compacted gravel into the hole to provide drainage and a stable base.
3.3. Leveling
- Use a level to ensure the gravel base is perfectly level. This is essential for preventing your column from leaning.
3.4. Concrete Pad (Optional)
- For added stability, especially in unstable soil, pour a concrete pad on top of the gravel base.
- Allow the concrete to cure completely before proceeding.
According to civil engineering experts at the University of Arizona’s College of Engineering, a well-prepared foundation is the single most important factor in the stability of any stone structure.
4. Building the Rock Column: A Step-by-Step Guide
Now that the foundation is ready, it’s time to start building your rock column.
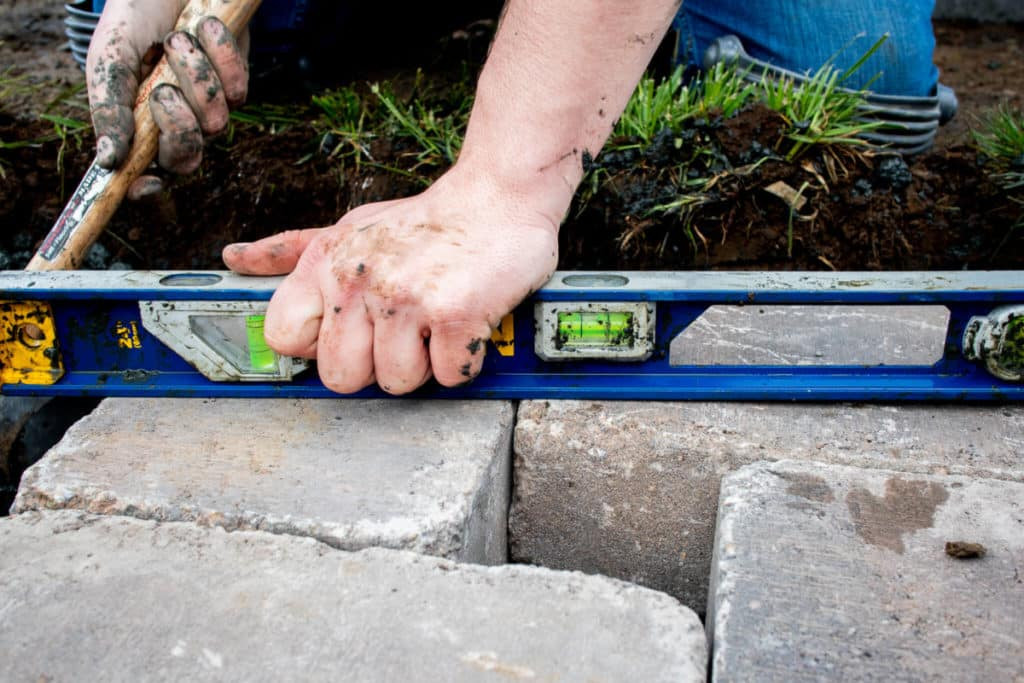
4.1. Laying the First Course
- Select your largest and most stable stones for the first course.
- Dry-fit the stones to ensure they fit together snugly and create a level base.
- Apply construction adhesive to the bottom of each stone and carefully place it on the foundation.
- Use a level to check that each stone is level and adjust as needed.
 First course of rock columnThis image illustrates the importance of a stable and level first course for a rock column.
4.2. Stacking Subsequent Courses
- Choose stones that interlock and create a visually appealing pattern.
- Apply construction adhesive to the top of each stone in the previous course.
- Carefully place the next stone, ensuring it is level and stable.
- Stagger the joints between courses to increase stability and create a more natural look.
- Use smaller stones to fill gaps and create a tight, cohesive structure.
 Building a rock column baseThis image highlights the process of carefully stacking stones to build a solid rock column base.
4.3. Mortar Application (Optional)
- If using mortar, mix it according to the manufacturer’s instructions.
- Apply mortar to the joints between stones, using a trowel to create a smooth, even finish.
- Remove any excess mortar with a damp sponge.
4.4. Maintaining Verticality
- Use a level frequently to check the verticality of the column.
- Adjust stones as needed to maintain a plumb line.
- For taller columns, use temporary bracing to prevent movement during construction.
 Ensuring the rock column is levelThis image emphasizes the importance of using a level to ensure each stone is properly aligned for a stable rock column.
4.5. Creating Visual Interest
- Incorporate stones of varying sizes, shapes, and colors to create a natural, organic look.
- Angle some stones slightly to add texture and depth.
- Leave some small gaps between stones to create planting pockets for succulents or other small plants.
4.6. Capping the Column
- Select a capstone that is appropriately sized and complements the style of the column.
- Apply a generous amount of construction adhesive to the top of the column.
- Carefully place the capstone, ensuring it is centered and level.
- Allow the adhesive to cure completely before adding any weight to the capstone.
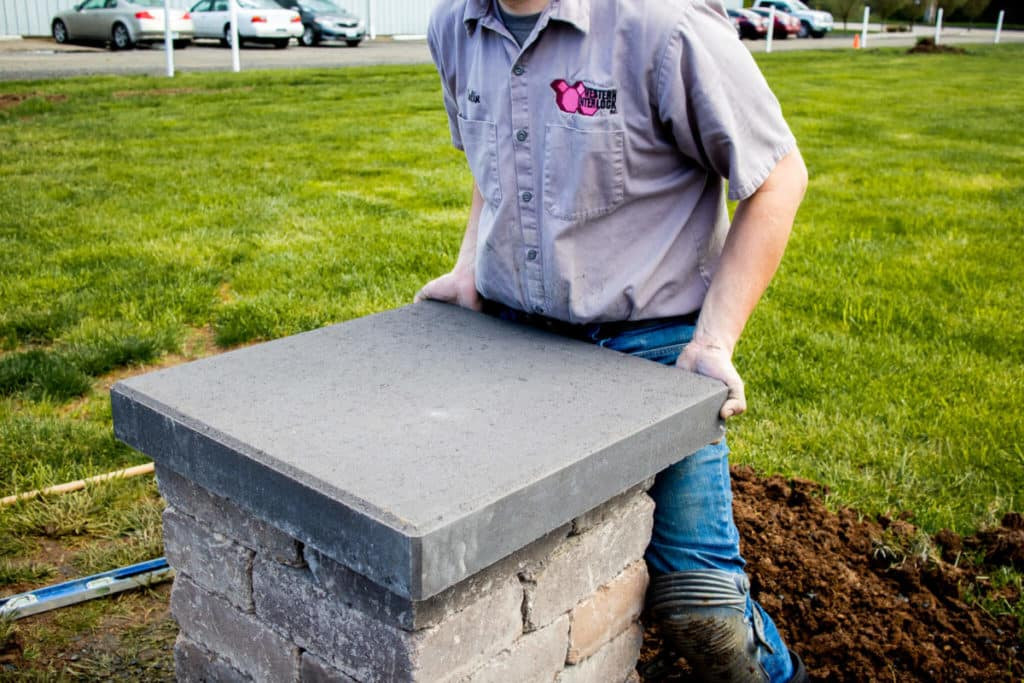 Completing the rock column with a capstoneThis image demonstrates how a capstone is carefully placed to complete the rock column.
5. Enhancing Your Rock Column
Once your rock column is built, consider these enhancements to make it even more stunning.
5.1. Lighting
- Uplighting: Place spotlights at the base of the column to highlight its texture and shape.
- Integrated Lighting: Incorporate low-voltage lighting into the column itself for a subtle, ambient glow.
- Solar Lighting: Use solar-powered lights for an eco-friendly and energy-efficient option.
5.2. Planting
- Crevice Gardens: Plant succulents, sedums, or other small plants in the gaps between stones.
- Vines: Train climbing vines to grow up the column for a romantic, overgrown look.
- Base Plantings: Surround the base of the column with complementary plants to soften its edges.
5.3. Water Features
- Waterfalls: Create a small waterfall that cascades down the side of the column.
- Fountains: Integrate a fountain into the top of the column for a dramatic effect.
- Ponds: Surround the base of the column with a small pond or reflecting pool.
5.4. Decorative Elements
- Metal Accents: Add metal bands or other decorative elements to the column for a modern touch.
- Wood Accents: Incorporate pieces of driftwood or other natural wood elements for a rustic look.
- Sculptures: Place a small sculpture on top of the capstone for a focal point.
6. Maintenance and Care
Proper maintenance will ensure your rock column remains beautiful for years to come.
6.1. Cleaning
- Periodically clean the column with a gentle brush and water to remove dirt and debris.
- Avoid using harsh chemicals or pressure washers, which can damage the stone.
6.2. Weed Control
- Regularly remove weeds growing around the base of the column.
- Apply a pre-emergent herbicide to prevent weed growth.
6.3. Repairs
- Inspect the column regularly for any signs of damage or instability.
- Repair any cracks or loose stones promptly to prevent further deterioration.
- Reapply sealant as needed to protect the stone from water damage.
6.4. Winter Protection
- In cold climates, protect the column from freeze-thaw cycles by covering it with a tarp or applying a sealant.
- Remove any snow or ice that accumulates on the column.
7. Inspiration and Ideas from Rockscapes.net
Ready to get inspired? Rockscapes.net is your ultimate resource for rock column design ideas and inspiration.
- Browse our gallery of stunning rock column projects: Discover a wide range of styles, materials, and design ideas.
- Read our blog for expert tips and advice: Learn from our team of experienced landscape designers and stone masons.
- Connect with us on social media: Share your own rock column projects and get feedback from our community.
- Visit our showroom: See our wide selection of natural stones in person and get personalized advice from our experts.
Rockscapes.net is committed to helping you create the landscape of your dreams. Visit our website at rockscapes.net or call us at +1 (480) 965-9011 to learn more. Our address is 1151 S Forest Ave, Tempe, AZ 85281, United States.
8. Addressing Common Challenges
Building a rock column can present some challenges. Here’s how to overcome them:
- Unstable Soil: If your soil is unstable, consider using a larger foundation or adding a concrete pad for extra support.
- Heavy Stones: Use a dolly or other lifting equipment to move heavy stones. Enlist the help of a friend or family member.
- Leveling Issues: Take your time and use a level frequently to ensure each stone is properly aligned. Shim stones as needed to achieve a level surface.
- Weather Conditions: Avoid working in extreme weather conditions, such as heavy rain or freezing temperatures.
9. The Environmental Benefits of Rock Columns
Beyond their aesthetic appeal, rock columns offer several environmental benefits:
- Sustainable Materials: Natural stone is a sustainable and environmentally friendly building material.
- Reduced Water Consumption: Rock gardens and stone features require less water than traditional lawns and gardens.
- Habitat Creation: Rock columns can provide habitat for beneficial insects, birds, and other wildlife.
- Erosion Control: Stone features can help to prevent soil erosion and stabilize slopes.
According to the U.S. Environmental Protection Agency (EPA), incorporating sustainable landscaping practices like using natural stone can significantly reduce your environmental footprint.
10. Frequently Asked Questions (FAQs) About Building Rock Columns
- How much does it cost to build a rock column?
The cost varies depending on the type of stone, size of the column, and whether you hire a professional. DIY projects can range from $200 to $1000, while professional installations can cost several thousand dollars. - What is the best type of adhesive to use for building a rock column?
Use an exterior-grade construction adhesive specifically designed for bonding stone and masonry. Look for products that are waterproof and weather-resistant. - How tall can I build a rock column?
The height depends on the stability of the foundation and the size of the stones. As a general rule, keep the height no more than 4-5 times the base diameter. - Do I need to use mortar to build a rock column?
Mortar is optional, but it can add stability and a more traditional look. Construction adhesive is a good alternative for a more natural appearance. - How do I prevent my rock column from leaning?
Ensure a solid, level foundation and use a level frequently during construction to maintain verticality. - Can I build a rock column on a slope?
Yes, but you will need to create a level foundation and possibly build a retaining wall to support the column. - How do I integrate lighting into a rock column?
You can use uplighting, integrated lighting, or solar lighting. Consult with an electrician to ensure safe and proper installation. - What plants are best for growing in a rock column?
Succulents, sedums, alpine plants, and other drought-tolerant species are ideal for growing in rock columns. - How do I clean a rock column?
Use a gentle brush and water to remove dirt and debris. Avoid using harsh chemicals or pressure washers. - How do I protect my rock column from winter damage?
Cover the column with a tarp or apply a sealant to protect it from freeze-thaw cycles.
Building a rock column is a rewarding project that can add beauty, value, and environmental benefits to your landscape. With careful planning, the right materials, and a little elbow grease, you can create a stunning focal point that will be enjoyed for years to come. Visit rockscapes.net today for all your stone and landscape design needs! Our address is 1151 S Forest Ave, Tempe, AZ 85281, United States. Feel free to call us at +1 (480) 965-9011. Let us help you transform your outdoor space into a masterpiece.