Is your rocking chair looking a little worse for wear? Cleaning your rocking chair is simpler than you might think, and rockscapes.net is here to guide you through it. We will help you maintain its beauty and extend its lifespan. From tackling everyday dust to banishing stubborn stains, this guide offers solutions for every cleaning need, ensuring your beloved rocking chair remains a comfortable and stylish centerpiece in your home, or even as a beautiful accent on your Arizona landscape.
1. Understanding Your Rocking Chair
Before diving into cleaning, it’s crucial to understand what kind of rocking chair you have. Different materials require different cleaning methods. From the type of wood to the upholstery fabric, each component needs specific care to avoid damage and ensure longevity. Here’s a breakdown of common types and their unique needs:
1.1 Types of Rocking Chairs
-
Wooden Rocking Chairs: These can be made from various types of wood like oak, maple, pine, or even more exotic hardwoods. The finish (varnished, painted, or raw) will dictate the cleaning approach.
-
Upholstered Rocking Chairs: These chairs feature fabric coverings that can range from cotton and linen to more durable synthetic blends. Some may even be leather or faux leather.
-
Wicker or Rattan Rocking Chairs: These are popular for their lightweight and airy feel, often used in sunrooms or patios. Their woven structure requires special attention to avoid damage.
-
Metal Rocking Chairs: Often made of wrought iron or steel, these are durable but can be prone to rust if not properly maintained.
1.2 Identifying the Materials
Knowing the exact material of your rocking chair is essential. Check for any manufacturer’s labels or tags that provide this information. If you’re unsure, here are a few tips:
-
Wood: Look for the grain pattern. Hardwoods like oak and maple have tighter grains, while softwoods like pine have more visible knots.
-
Upholstery: Test a hidden area with a drop of water. Natural fibers like cotton and linen will absorb water quickly, while synthetics will repel it.
-
Wicker/Rattan: These materials are easily identifiable by their woven texture. Rattan is typically smoother and more uniform than wicker.
-
Metal: A magnet will stick to steel and iron. Wrought iron often has a more decorative, ornate design compared to simpler steel frames.
1.3 Why Proper Cleaning Matters
Regular cleaning is not just about aesthetics; it’s about preserving the integrity of your rocking chair. Dust, dirt, and spills can accumulate over time, leading to:
- Fabric Deterioration: Dirt particles can act as abrasives, wearing down fabric fibers and causing them to fade or tear.
- Wood Damage: Moisture and grime can penetrate wood finishes, leading to warping, cracking, or discoloration.
- Rust and Corrosion: Metal chairs can rust if exposed to moisture, weakening the structure and making them unsafe.
- Allergen Buildup: Dust mites, pet dander, and mold can thrive in unclean furniture, triggering allergies and respiratory issues.
Understanding these factors underscores the importance of a tailored cleaning approach that considers the specific materials and potential vulnerabilities of your rocking chair. Rockscapes.net aims to provide you with the knowledge and tools to maintain your furniture, ensuring it remains a cherished piece for years to come.
2. Essential Cleaning Supplies
To effectively clean your rocking chair, you’ll need to gather the right supplies. Having these items on hand will make the cleaning process smoother and more efficient, while also ensuring you don’t damage the chair’s materials.
2.1 Basic Cleaning Tools
-
Vacuum Cleaner with Attachments: A vacuum cleaner is essential for removing dust, dirt, and debris from all types of rocking chairs. Use a brush attachment for upholstery and a crevice tool for hard-to-reach areas.
-
Microfiber Cloths: These are ideal for wiping surfaces without leaving lint or streaks. They’re gentle on all materials and highly absorbent.
-
Soft-Bristled Brush: A soft brush is useful for loosening dirt from textured surfaces like wicker or carved wood.
-
Buckets: You’ll need at least two buckets – one for clean water and another for your cleaning solution.
-
Spray Bottles: These are handy for applying cleaning solutions evenly and lightly.
2.2 Cleaning Solutions
-
Mild Dish Soap: A few drops of mild dish soap mixed with water is a versatile cleaner for most surfaces. It’s gentle yet effective at removing grime.
-
White Vinegar: Diluted white vinegar is a natural disinfectant and deodorizer. It’s great for cleaning wood and can also help remove stains from fabric.
-
Baking Soda: Baking soda is an excellent odor absorber and mild abrasive. It can be used to create a paste for tackling tough stains.
-
Rubbing Alcohol: Useful for removing ink stains and disinfecting surfaces. Always test in an inconspicuous area first.
-
Upholstery Cleaner: For upholstered chairs, choose a cleaner specifically designed for the fabric type. Follow the manufacturer’s instructions carefully.
2.3 Protective Gear
-
Gloves: Protect your hands from harsh cleaning chemicals and potential irritants.
-
Mask: If you’re using strong cleaning solutions, a mask can help prevent inhalation of fumes.
2.4 Optional Supplies
-
Leather Conditioner: If your rocking chair has leather components, a leather conditioner will help keep the material supple and prevent cracking.
-
Wood Polish: For wooden chairs, a good quality wood polish can restore shine and protect the finish.
-
Stain Remover: A commercial stain remover can be useful for tackling stubborn stains on upholstery.
By gathering these essential supplies, you’ll be well-prepared to tackle any cleaning challenge your rocking chair presents. Remember to always test cleaning solutions in an inconspicuous area first to ensure they don’t damage the material. Rockscapes.net encourages you to prioritize safety and gentleness when cleaning your furniture, ensuring it remains a beautiful and comfortable part of your home.
3. Step-by-Step Cleaning Guides for Different Materials
Cleaning your rocking chair effectively requires a tailored approach based on its material. Here are detailed, step-by-step guides for cleaning wooden, upholstered, wicker/rattan, and metal rocking chairs.
3.1 Cleaning Wooden Rocking Chairs
Wooden rocking chairs can accumulate dust and grime, affecting their appearance. Here’s how to clean them properly:
-
Dusting:
- Use a microfiber cloth or a soft-bristled brush to dust the entire chair, paying attention to carvings and crevices.
- A vacuum cleaner with a brush attachment can also be used for this step.
-
Washing:
- Mix a few drops of mild dish soap with warm water in a bucket.
- Dip a microfiber cloth into the soapy water, wring it out thoroughly, and wipe down the wooden surfaces.
- Avoid getting the wood too wet, as this can damage the finish.
-
Rinsing:
- Dampen a clean microfiber cloth with plain water and wipe the chair again to remove any soap residue.
-
Drying:
- Use a dry microfiber cloth to thoroughly dry the chair.
- Allow the chair to air dry completely before using it.
-
Polishing (Optional):
- Apply a wood polish or wax according to the manufacturer’s instructions to restore shine and protect the wood.
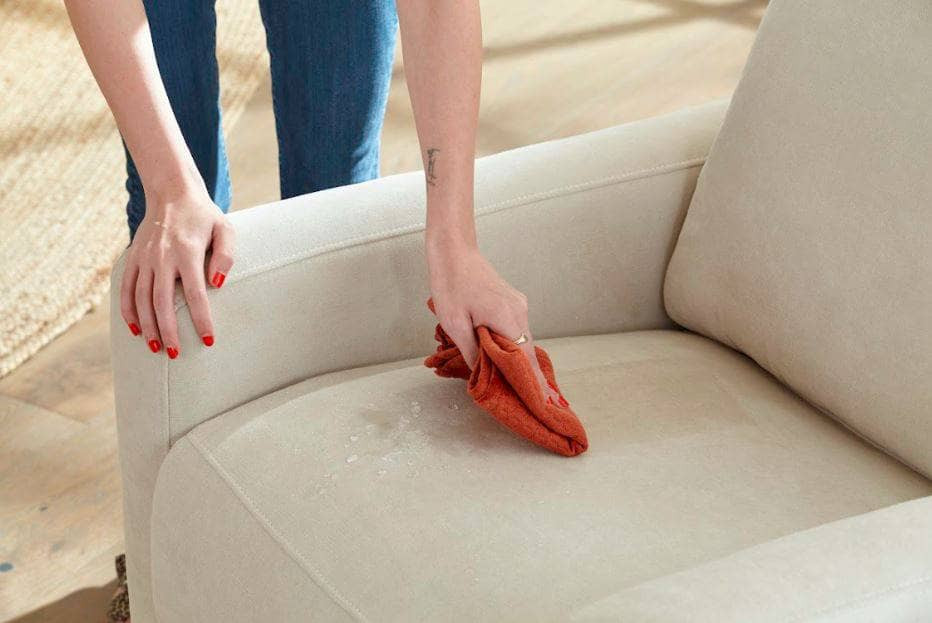
3.2 Cleaning Upholstered Rocking Chairs
Upholstered rocking chairs require extra care to remove stains and odors. Here’s a comprehensive guide:
-
Vacuuming:
- Use a vacuum cleaner with an upholstery attachment to remove loose dirt, dust, and debris from the fabric.
- Pay special attention to seams and crevices where dirt tends to accumulate.
-
Spot Cleaning:
- Identify any stains and treat them individually.
- For water-based stains, blot the area with a clean, damp cloth.
- For oil-based stains, apply a small amount of dish soap to a damp cloth and gently blot the stain.
- For tougher stains, use a commercial upholstery cleaner, following the manufacturer’s instructions. Always test in an inconspicuous area first.
-
General Cleaning:
- Mix a small amount of mild dish soap with warm water in a bucket.
- Dip a clean microfiber cloth into the soapy water, wring it out well, and gently blot the upholstery.
- Avoid soaking the fabric, as this can lead to mold and mildew.
-
Rinsing:
- Dampen a clean microfiber cloth with plain water and blot the upholstery to remove any soap residue.
-
Drying:
- Use a dry towel to blot the upholstery as much as possible.
- Allow the chair to air dry completely. You can use a fan to speed up the drying process.
- Avoid using the chair until it is completely dry.
-
Deodorizing (Optional):
- Sprinkle baking soda over the upholstery and let it sit for a few hours or overnight.
- Vacuum up the baking soda to remove any lingering odors.
 Cleaning a rocking chair with a handheld vacuum
3.3 Cleaning Wicker or Rattan Rocking Chairs
Wicker and rattan chairs require gentle cleaning to prevent damage to the woven fibers:
-
Dusting:
- Use a soft-bristled brush or a vacuum cleaner with a brush attachment to remove dust and dirt from the woven surfaces.
- Pay attention to the crevices where dirt can accumulate.
-
Washing:
- Mix a small amount of mild dish soap with warm water in a bucket.
- Dip a soft cloth or sponge into the soapy water, wring it out well, and gently wipe down the wicker or rattan.
- Avoid soaking the material, as this can cause it to warp or crack.
-
Rinsing:
- Dampen a clean cloth or sponge with plain water and wipe the chair again to remove any soap residue.
-
Drying:
- Use a dry cloth to wipe the chair as much as possible.
- Allow the chair to air dry completely. Place it in a well-ventilated area or use a fan to speed up the drying process.
-
Sealing (Optional):
- Apply a sealant specifically designed for wicker or rattan to protect the material from moisture and prevent cracking.
3.4 Cleaning Metal Rocking Chairs
Metal rocking chairs are durable but can be prone to rust if not properly maintained:
-
Dusting:
- Use a microfiber cloth to wipe down the metal surfaces and remove dust and dirt.
-
Washing:
- Mix a small amount of mild dish soap with warm water in a bucket.
- Dip a cloth or sponge into the soapy water, wring it out well, and wipe down the metal surfaces.
-
Rinsing:
- Dampen a clean cloth or sponge with plain water and wipe the chair again to remove any soap residue.
-
Drying:
- Use a dry cloth to thoroughly dry the metal surfaces.
- Pay attention to joints and crevices where water can accumulate.
-
Rust Prevention:
- Inspect the chair for any signs of rust.
- If you find rust, use a wire brush to remove it.
- Apply a rust-resistant primer and paint to protect the metal.
-
Waxing (Optional):
- Apply a thin layer of car wax to the metal surfaces to protect them from moisture and prevent rust.
By following these detailed cleaning guides, you can ensure that your rocking chair remains in excellent condition, regardless of its material. Rockscapes.net encourages regular maintenance to prolong the life of your furniture and keep it looking its best.
4. Tackling Common Stains
Even with regular cleaning, stains can happen. Knowing how to address common stains quickly and effectively can save your rocking chair from permanent damage. Here are some tips for tackling frequent culprits.
4.1 Food and Drink Stains
Food and drink spills are common, especially in households with children. Here’s how to handle them:
-
Act Quickly:
- The faster you address the spill, the easier it will be to remove the stain.
-
Blot, Don’t Rub:
- Use a clean, white cloth or paper towel to blot the spill. Rubbing can spread the stain and damage the fabric.
-
Mild Soap Solution:
- Mix a few drops of mild dish soap with warm water.
- Dampen a clean cloth with the solution and gently blot the stain.
-
Rinse and Dry:
- Dampen a clean cloth with plain water and blot the area to remove soap residue.
- Dry the area with a clean towel or allow it to air dry.
For specific food and drink stains:
- Coffee and Tea: Mix equal parts white vinegar and water. Apply to the stain, let it sit for a few minutes, and then blot with a clean cloth.
- Wine: Sprinkle baking soda on the stain to absorb the liquid. After a few hours, vacuum up the baking soda.
- Grease: Apply cornstarch to the stain to absorb the grease. After a few hours, vacuum up the cornstarch.
4.2 Ink Stains
Ink stains can be particularly stubborn, but they can often be removed with the right approach:
-
Rubbing Alcohol:
- Dampen a cotton ball with rubbing alcohol.
- Gently blot the ink stain, working from the outside in.
- Avoid rubbing, as this can spread the ink.
-
Blot with Clean Cloth:
- Use a clean cloth to blot the area and absorb the ink.
-
Repeat if Necessary:
- Repeat the process until the stain is removed.
-
Rinse and Dry:
- Dampen a clean cloth with plain water and blot the area to remove any alcohol residue.
- Dry the area with a clean towel or allow it to air dry.
4.3 Pet Stains
Pet stains require special attention to remove both the stain and the odor:
-
Absorb Excess Liquid:
- Blot up as much of the stain as possible with a clean cloth or paper towel.
-
Enzyme Cleaner:
- Apply an enzyme cleaner specifically designed for pet stains. These cleaners break down the enzymes in pet urine and feces, effectively removing the stain and odor.
- Follow the manufacturer’s instructions.
-
Baking Soda:
- Sprinkle baking soda over the area and let it sit for several hours or overnight.
- Vacuum up the baking soda to remove any remaining odor.
-
Vinegar Solution:
- Mix equal parts white vinegar and water.
- Apply to the stain, let it sit for a few minutes, and then blot with a clean cloth.
- This helps neutralize odors and disinfect the area.
4.4 Mold and Mildew
Mold and mildew can grow on rocking chairs in damp environments. Here’s how to remove them:
-
Vinegar Solution:
- Mix equal parts white vinegar and water in a spray bottle.
- Spray the affected area and let it sit for 10-15 minutes.
-
Scrub Gently:
- Use a soft-bristled brush to gently scrub the area and remove the mold or mildew.
-
Rinse and Dry:
- Dampen a clean cloth with plain water and wipe the area to remove any vinegar residue.
- Dry the area thoroughly with a clean towel or allow it to air dry in a well-ventilated area.
-
Prevention:
- Keep the area well-ventilated and dry to prevent mold and mildew from returning.
- Consider using a dehumidifier in damp environments.
By knowing how to tackle these common stains, you can keep your rocking chair looking its best and prolong its lifespan. Rockscapes.net encourages proactive stain management to maintain the beauty and comfort of your furniture.
5. Deep Cleaning Techniques
While regular spot cleaning and dusting are essential, deep cleaning your rocking chair periodically can help maintain its appearance and hygiene. Here are some effective deep-cleaning techniques for different types of rocking chairs.
5.1 Deep Cleaning Wooden Rocking Chairs
For wooden rocking chairs, deep cleaning involves removing built-up grime and restoring the wood’s natural luster.
-
Prepare the Area:
- Move the rocking chair to a well-ventilated area or outdoors.
- Cover the surrounding floor with a drop cloth to protect it from spills.
-
Thorough Dusting:
- Use a vacuum cleaner with a brush attachment to remove all loose dirt and dust from the chair.
- Pay attention to carvings, crevices, and joints.
-
Cleaning Solution:
- Mix a small amount of mild dish soap with warm water.
- For a natural cleaning solution, mix equal parts white vinegar and water.
-
Apply the Solution:
- Dip a soft cloth into the cleaning solution, wring it out thoroughly, and wipe down all wooden surfaces.
- Avoid getting the wood too wet.
-
Scrubbing:
- For stubborn grime, use a soft-bristled brush to gently scrub the affected areas.
- Work in the direction of the wood grain.
-
Rinsing:
- Dampen a clean cloth with plain water and wipe the chair again to remove any soap or vinegar residue.
-
Drying:
- Use a dry cloth to thoroughly dry the chair.
- Allow the chair to air dry completely before applying any polish or wax.
-
Wood Polish or Wax:
- Apply a high-quality wood polish or wax to restore the wood’s shine and protect it from moisture.
- Follow the manufacturer’s instructions for application.
5.2 Deep Cleaning Upholstered Rocking Chairs
Deep cleaning upholstered rocking chairs involves removing embedded dirt, stains, and odors from the fabric.
-
Prepare the Area:
- Move the rocking chair to a well-ventilated area.
- Cover the surrounding floor with a drop cloth.
-
Thorough Vacuuming:
- Use a vacuum cleaner with an upholstery attachment to remove all loose dirt and dust from the fabric.
- Pay attention to seams, crevices, and under the cushions.
-
Steam Cleaning (Optional):
- A steam cleaner can be used to sanitize and refresh the upholstery.
- Follow the manufacturer’s instructions carefully and test in an inconspicuous area first.
-
Upholstery Cleaner:
- Choose an upholstery cleaner specifically designed for your fabric type.
- Test the cleaner in an inconspicuous area to ensure it doesn’t damage the fabric.
-
Apply the Cleaner:
- Follow the manufacturer’s instructions for applying the upholstery cleaner.
- Use a soft brush or cloth to gently work the cleaner into the fabric.
-
Extract the Cleaner:
- Use a clean, damp cloth to blot the fabric and remove the cleaner.
- Repeat this process until no more cleaner is extracted.
-
Drying:
- Use a dry towel to blot the upholstery as much as possible.
- Allow the chair to air dry completely. You can use a fan to speed up the drying process.
- Avoid using the chair until it is completely dry.
-
Deodorizing (Optional):
- Sprinkle baking soda over the upholstery and let it sit for a few hours or overnight.
- Vacuum up the baking soda to remove any lingering odors.
 A glider rocking chair with a neutral-toned fabric, suitable for a modern nursery
5.3 Deep Cleaning Wicker or Rattan Rocking Chairs
Deep cleaning wicker or rattan chairs involves removing dirt and mildew from the woven fibers and protecting the material from damage.
-
Prepare the Area:
- Move the rocking chair to a well-ventilated area or outdoors.
- Cover the surrounding floor with a drop cloth.
-
Thorough Dusting:
- Use a soft-bristled brush or a vacuum cleaner with a brush attachment to remove all loose dirt and dust from the woven surfaces.
- Pay attention to the crevices where dirt can accumulate.
-
Cleaning Solution:
- Mix a small amount of mild dish soap with warm water.
- For mildew removal, mix equal parts white vinegar and water.
-
Apply the Solution:
- Dip a soft cloth or sponge into the cleaning solution, wring it out well, and gently wipe down the wicker or rattan.
- Avoid soaking the material, as this can cause it to warp or crack.
-
Scrubbing:
- Use a soft-bristled brush to gently scrub the affected areas, paying attention to mildew spots and dirt buildup.
-
Rinsing:
- Dampen a clean cloth or sponge with plain water and wipe the chair again to remove any soap or vinegar residue.
-
Drying:
- Use a dry cloth to wipe the chair as much as possible.
- Allow the chair to air dry completely. Place it in a well-ventilated area or use a fan to speed up the drying process.
-
Sealing (Optional):
- Apply a sealant specifically designed for wicker or rattan to protect the material from moisture and prevent cracking.
- Follow the manufacturer’s instructions for application.
5.4 Deep Cleaning Metal Rocking Chairs
Deep cleaning metal rocking chairs involves removing rust, grime, and old paint, and protecting the metal from further damage.
-
Prepare the Area:
- Move the rocking chair to a well-ventilated area or outdoors.
- Cover the surrounding floor with a drop cloth.
-
Remove Rust:
- Use a wire brush or sandpaper to remove any rust from the metal surfaces.
- Wear gloves and eye protection during this process.
-
Cleaning Solution:
- Mix a small amount of mild dish soap with warm water.
- For stubborn grime, use a degreaser specifically designed for metal.
-
Apply the Solution:
- Dip a cloth or sponge into the cleaning solution, wring it out well, and wipe down the metal surfaces.
- For degreasers, follow the manufacturer’s instructions.
-
Rinsing:
- Dampen a clean cloth or sponge with plain water and wipe the chair again to remove any soap or degreaser residue.
-
Drying:
- Use a dry cloth to thoroughly dry the metal surfaces.
- Pay attention to joints and crevices where water can accumulate.
-
Priming and Painting (Optional):
- Apply a rust-resistant primer to the metal surfaces.
- Follow with a coat of paint designed for outdoor use.
- This will protect the metal from moisture and prevent rust.
-
Waxing (Optional):
- Apply a thin layer of car wax to the metal surfaces to protect them from moisture and prevent rust.
By following these deep cleaning techniques, you can ensure that your rocking chair remains in excellent condition, regardless of its material. Rockscapes.net encourages regular maintenance to prolong the life of your furniture and keep it looking its best, which makes it a great piece for your outdoor living space.
6. Maintenance Tips to Keep Your Rocking Chair Clean
Regular maintenance is key to keeping your rocking chair clean and in good condition. By following these tips, you can prevent the buildup of dirt and grime and extend the lifespan of your furniture.
6.1 Regular Dusting and Vacuuming
- Dust Weekly: Use a microfiber cloth or a soft-bristled brush to dust your rocking chair at least once a week. This prevents dust from settling into the fabric or wood.
- Vacuum Regularly: Vacuum your rocking chair with an upholstery attachment every two weeks. Pay attention to seams, crevices, and under the cushions.
6.2 Use Protective Covers
- Slipcovers: Consider using slipcovers to protect your rocking chair from spills, stains, and pet hair. Slipcovers are easy to remove and wash, making them a convenient way to keep your chair clean.
- Waterproof Pads: For upholstered chairs, use waterproof pads under the cushions to protect them from spills and accidents.
6.3 Promptly Clean Spills
- Act Fast: Clean spills as soon as they happen. The longer a spill sits, the harder it will be to remove the stain.
- Blot, Don’t Rub: Use a clean, white cloth to blot the spill. Rubbing can spread the stain and damage the fabric.
6.4 Avoid Eating and Drinking on the Chair
- Designated Areas: Encourage family members to avoid eating and drinking on the rocking chair. Designate specific areas for meals and snacks.
- Use Coasters and Placemats: If you do eat or drink on the chair, use coasters and placemats to protect it from spills and stains.
6.5 Protect from Sunlight and Moisture
- Sunlight: Avoid placing your rocking chair in direct sunlight, as this can cause the fabric to fade and the wood to dry out.
- Moisture: Keep your rocking chair away from sources of moisture, such as humidifiers or leaky windows. Moisture can lead to mold and mildew growth.
6.6 Store Properly
- Indoor Storage: If you need to store your rocking chair, keep it indoors in a dry, well-ventilated area.
- Cover the Chair: Cover the chair with a breathable fabric to protect it from dust and dirt.
6.7 Professional Cleaning
- Consider Professional Cleaning: For deep cleaning or stubborn stains, consider hiring a professional upholstery cleaner. They have the expertise and equipment to safely and effectively clean your rocking chair.
- Frequency: Aim to have your rocking chair professionally cleaned every 12-18 months.
By following these maintenance tips, you can keep your rocking chair clean, comfortable, and in good condition for years to come. Rockscapes.net encourages proactive care to maintain the beauty and longevity of your furniture.
7. Safety Precautions
When cleaning your rocking chair, it’s important to take certain safety precautions to protect yourself and your furniture. Here are some essential safety tips to keep in mind.
7.1 Read Manufacturer’s Instructions
- Check the Label: Always start by reading the manufacturer’s instructions for cleaning your rocking chair. This will provide specific guidance on the best cleaning methods and products for your furniture.
- Follow Recommendations: Follow the manufacturer’s recommendations to avoid damaging the chair or voiding any warranties.
7.2 Test Cleaning Solutions
- Inconspicuous Area: Before applying any cleaning solution to the entire chair, test it in an inconspicuous area, such as the back or underside.
- Observe Results: Observe the area for any signs of discoloration, damage, or staining. If the solution causes any adverse effects, discontinue use.
7.3 Use Proper Ventilation
- Open Windows: When cleaning with chemicals, open windows and doors to provide proper ventilation.
- Use Fans: Use fans to circulate air and prevent the buildup of fumes.
7.4 Wear Protective Gear
- Gloves: Wear gloves to protect your hands from harsh chemicals and irritants.
- Mask: If you’re using strong cleaning solutions, wear a mask to prevent inhalation of fumes.
- Eye Protection: Wear eye protection, such as goggles, to prevent chemicals from splashing into your eyes.
7.5 Avoid Over-Wetting
- Damp Cloths: Use damp cloths instead of soaking the furniture with water.
- Dry Thoroughly: Dry the furniture thoroughly after cleaning to prevent mold and mildew growth.
7.6 Dispose of Cleaning Products Properly
- Follow Instructions: Follow the manufacturer’s instructions for disposing of cleaning products.
- Avoid Mixing: Never mix different cleaning products together, as this can create hazardous fumes.
7.7 Keep Children and Pets Away
- Supervise Cleaning: Keep children and pets away from the area while you’re cleaning.
- Store Products Safely: Store cleaning products in a safe place, out of reach of children and pets.
7.8 Be Mindful of Electrical Safety
- Unplug Equipment: When cleaning electrical components, such as steam cleaners, unplug the equipment before starting.
- Avoid Water: Avoid getting water near electrical outlets or equipment.
By following these safety precautions, you can clean your rocking chair effectively and safely, protecting yourself and your furniture from harm. Rockscapes.net emphasizes the importance of safety when maintaining your home and furnishings.
8. Rocking Chair Repair Tips
In addition to cleaning, knowing how to repair common issues can extend the life of your rocking chair. Here are some basic repair tips to keep your chair in top condition.
8.1 Tightening Loose Joints
Loose joints are a common problem in rocking chairs, especially wooden ones. Here’s how to fix them:
-
Identify Loose Joints:
- Inspect the chair to identify any loose joints.
-
Clean the Joints:
- Remove any old glue or debris from the joints using a scraper or sandpaper.
-
Apply Wood Glue:
- Apply a small amount of wood glue to the joint.
-
Clamp the Joint:
- Use clamps to hold the joint together tightly.
-
Allow to Dry:
- Allow the glue to dry completely according to the manufacturer’s instructions (usually 24 hours).
-
Remove Clamps:
- Remove the clamps and test the joint to ensure it is secure.
8.2 Repairing Scratches and Dents
Scratches and dents can detract from the appearance of your rocking chair. Here’s how to repair them:
-
Clean the Area:
- Clean the area around the scratch or dent with a damp cloth.
-
Apply Wood Filler:
- Apply a small amount of wood filler to the scratch or dent.
-
Allow to Dry:
- Allow the wood filler to dry completely.
-
Sand the Area:
- Sand the area smooth with fine-grit sandpaper.
-
Apply Finish:
- Apply a finish that matches the original finish of the chair.
8.3 Replacing Worn Upholstery
If the upholstery on your rocking chair is worn or damaged, you may need to replace it. Here’s a basic guide:
-
Remove Old Upholstery:
- Carefully remove the old upholstery from the chair.
-
Use as a Template:
- Use the old upholstery as a template to cut new fabric.
-
Attach New Fabric:
- Attach the new fabric to the chair using staples or tacks.
-
Ensure Tight Fit:
- Ensure that the fabric is pulled tight and smooth.
-
Trim Excess Fabric:
- Trim any excess fabric.
8.4 Fixing Squeaky Rockers
Squeaky rockers can be annoying. Here’s how to fix them:
-
Identify the Source:
- Rock the chair back and forth to identify the source of the squeak.
-
Apply Lubricant:
- Apply a lubricant, such as WD-40 or silicone spray, to the area where the rockers contact the chair frame.
-
Work the Lubricant:
- Rock the chair back and forth to work the lubricant into the joint.
-
Repeat if Necessary:
- Repeat the process until the squeak is gone.
8.5 Replacing Missing Hardware
Missing hardware, such as screws or bolts, can compromise the stability of your rocking chair. Here’s how to replace them:
-
Identify Missing Hardware:
- Identify any missing screws or bolts.
-
Find Replacement Hardware:
- Find replacement hardware that matches the original hardware in size and style.
-
Attach Replacement Hardware:
- Attach the replacement hardware to the chair.
-
Ensure Tight Fit:
- Ensure that the hardware is tightened securely.
By following these repair tips, you can keep your rocking chair in good condition and extend its lifespan. rockscapes.net encourages proactive maintenance and repair to maintain the beauty and functionality of your furniture.
9. Environmentally Friendly Cleaning Options
For those looking to reduce their environmental impact, several eco-friendly cleaning options are available. These methods use natural ingredients that are safe for your family and the planet.
9.1 Vinegar-Based Cleaners
Vinegar is a versatile and effective natural cleaner. Its acidity helps to break down dirt, grime, and mildew.
-
All-Purpose Cleaner:
- Mix equal parts white vinegar and water in a spray bottle.
- Use this solution to clean wooden and metal surfaces.
-
Mildew Remover:
- Apply undiluted white vinegar to areas affected by mold and mildew.
- Let it sit for 10-15 minutes, then scrub with a brush.
-
Odor Neutralizer:
- Place a bowl of white vinegar in the room to absorb odors.
9.2 Baking Soda
Baking soda is a mild abrasive and deodorizer. It’s great for removing stains and neutralizing odors.
-
Stain Remover:
- Create a paste of baking soda and water.
- Apply the paste to stains and let it sit for a few hours.
- Scrub gently and rinse with water.
-
Odor Absorber:
- Sprinkle baking soda on upholstery to absorb odors.
- Let it sit for a few hours, then vacuum it up.
9.3 Lemon Juice
Lemon juice is a natural disinfectant and degreaser. Its acidity helps to cut through grease and grime.
-
Wood Cleaner:
- Mix lemon juice with olive oil to create a wood polish.
- Apply the polish to wooden surfaces and buff with a cloth.
-
Disinfectant:
- Use lemon juice to disinfect surfaces and kill bacteria.
9.4 Castile Soap
Castile soap is a gentle, plant-based soap that can be used for a variety of cleaning tasks.
-
All-Purpose Cleaner:
- Mix a small amount of Castile soap with water.
- Use this solution to clean various surfaces.
-
Upholstery Cleaner:
- Mix Castile soap with water and gently blot upholstery.
9.5 Essential Oils
Essential oils have antimicrobial and antiseptic properties. They can be added to cleaning solutions to boost their effectiveness and add a pleasant scent.
-
Tea Tree Oil:
- Add a few drops of tea tree oil to your cleaning solution to kill bacteria and fungi.
-
Lavender Oil:
- Add a few drops of lavender oil to your cleaning solution