White rocks can dramatically enhance your landscape, but they require proper cleaning to maintain their pristine appearance. This comprehensive guide from rockscapes.net provides expert tips and tricks for cleaning white rocks, ensuring they remain a stunning feature of your outdoor space. Keep reading to discover the secrets to sparkling white rock landscaping.
Introduction
White landscape rocks offer a pristine, polished aesthetic to gardens and yards, however, maintaining their brightness requires knowing the best methods. At rockscapes.net, we understand the challenges of keeping these stones clean and vibrant, and we’re here to provide effective solutions. From gentle washing techniques to tackling stubborn stains, we’ll guide you through every step to revitalize your landscape. Discover our practical advice and turn your faded, dirty rocks into eye-catching features. Explore the best techniques for landscape rock cleaning, stone maintenance, and decorative stone upkeep to keep your outdoor spaces looking their best.
1. Understanding White Rock Varieties and Their Unique Needs
Not all white rocks are created equal. Different types have varying porosities and compositions, which affect how they react to cleaning methods. Knowing your rock type is the first step in effective cleaning.
1.1. Types of White Landscape Rocks
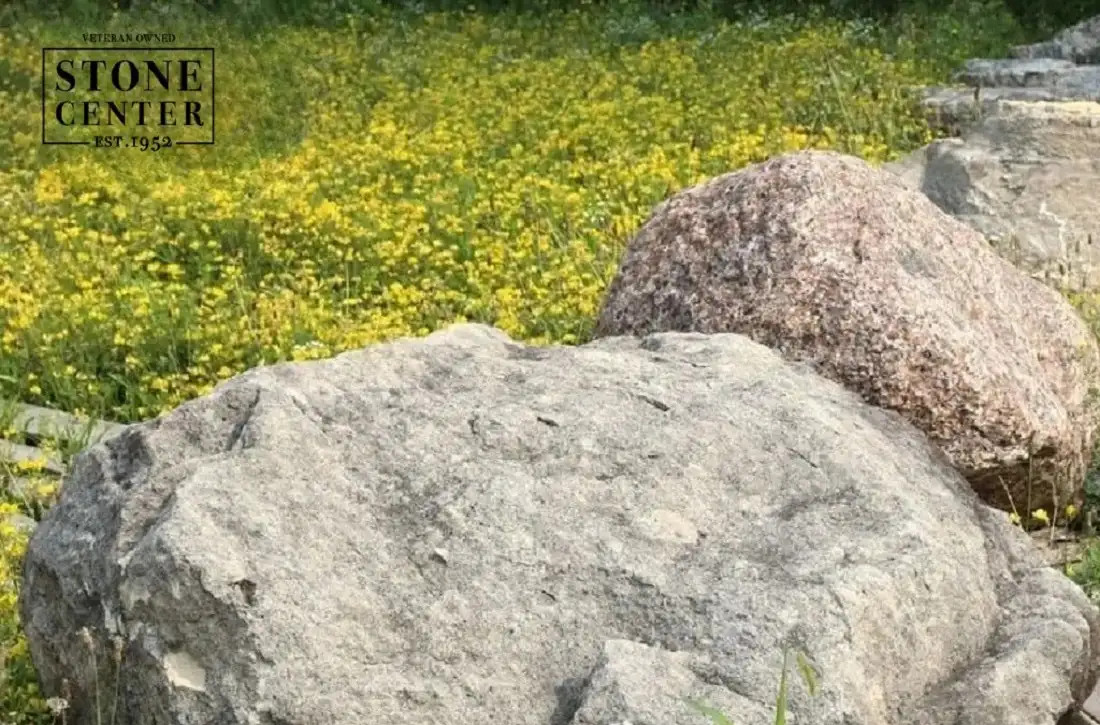
- Marble Chips: Highly prized for their brilliant white color and crystalline structure, marble chips add elegance to any landscape. However, their porous nature makes them susceptible to staining from organic matter and algae.
- Quartzite: Known for its durability and sparkling appearance, quartzite is less porous than marble. Its natural resistance to weathering makes it a popular choice, though it can still accumulate dirt and mineral deposits over time.
- Dolomite: This sedimentary rock features a subtle, creamy white hue. Dolomite is relatively hard but can be prone to discoloration from iron and other minerals in the soil.
- Calcite: Similar in appearance to marble, calcite is another soft, porous rock that requires gentle cleaning methods. Its bright white color makes it a favorite for decorative ground cover.
- White River Rock: Smooth and rounded, white river rocks create a natural, serene look. Their non-porous surface makes them easier to clean than other types of white rock, but they can still develop algae and stains.
1.2. How Porosity Affects Cleaning
The porosity of a rock determines how easily it absorbs liquids and stains. Highly porous rocks like marble and calcite require more frequent and careful cleaning to prevent deep-seated discoloration. Non-porous rocks like quartzite and river rock are more resistant to staining and can be cleaned with more aggressive methods if necessary.
1.3. Identifying Your Rocks for Optimal Cleaning Strategies
Take a closer look at your stones to determine the best cleaning approach. Marble and Calcite benefit from gentle cleaning solutions and methods due to their porosity, to avoid damage. Quartzite and River Rock are more durable and can withstand more vigorous cleaning techniques. Dolomite requires special attention to prevent discoloration from iron and other minerals.
2. Assessing the Level of Cleaning Needed
Before you grab your cleaning supplies, take a moment to assess the condition of your white rocks. Determine the types of stains, the extent of the buildup, and any other factors that might influence your cleaning approach.
2.1. Types of Stains Commonly Found on White Rocks
- Organic Stains: These include algae, moss, mold, and mildew. They often appear as green, black, or brown discoloration.
- Mineral Deposits: Hard water and soil can leave behind calcium, iron, and other mineral deposits. These appear as white or rusty stains.
- Dirt and Debris: General accumulation of dirt, leaves, and other organic matter.
- Rust Stains: Occur when metal objects come into contact with the rocks, leaving unsightly orange or brown marks.
2.2. Determining the Extent of Buildup
- Light Buildup: A thin layer of dirt or algae that can be easily removed with gentle cleaning methods.
- Moderate Buildup: More significant staining that requires scrubbing and potentially stronger cleaning solutions.
- Heavy Buildup: Thick layers of algae, mineral deposits, or stubborn stains that may require multiple cleaning treatments or professional assistance.
2.3. Environmental Factors Influencing Cleaning Needs
- Climate: Humid climates promote algae and moss growth, requiring more frequent cleaning.
- Proximity to Vegetation: Trees and shrubs can drop leaves and sap, leading to organic stains.
- Water Source: Hard water can cause mineral deposits, while acidic water can erode certain types of rock.
- Soil Type: Soil rich in iron or other minerals can cause discoloration.
3. Essential Tools and Materials for Cleaning White Rocks
Having the right tools and materials on hand will make the cleaning process more efficient and effective. Here’s a list of essentials to gather before you begin.
3.1. Basic Cleaning Tools
- Garden Hose with Adjustable Nozzle: Provides a gentle rinse or a powerful spray for removing loose debris.
- Stiff-Bristle Brush or Broom: For scrubbing away dirt, algae, and other buildup.
- Soft-Bristle Brush: For delicate surfaces that could be damaged by a stiff brush.
- Bucket: For mixing cleaning solutions.
- Protective Gloves: To protect your hands from harsh chemicals and rough surfaces.
- Rake or Leaf Blower: For removing loose debris before cleaning.
- Small Brush or Old Toothbrush: For cleaning crevices and hard-to-reach areas.
- Pressure Washer (Optional): For heavy-duty cleaning, but use with caution to avoid damaging the rocks.
3.2. Safe and Effective Cleaning Solutions
- Mild Dish Soap and Water: A general-purpose cleaner for removing dirt and grime.
- White Vinegar and Water (1:1 Ratio): An eco-friendly solution for algae and mineral deposits.
- Baking Soda Paste: For stubborn stains, mix baking soda with water to form a paste.
- Hydrogen Peroxide: For whitening and removing stains on porous rocks.
- Bleach Solution (Use Cautiously: 1 Part Bleach to 10 Parts Water): For disinfecting and removing severe stains, but use sparingly and with proper protection.
- Commercial Stone Cleaners: Specially formulated to clean and protect natural stone surfaces.
3.3. Safety Gear for Handling Cleaning Agents
- Protective Gloves: Essential for protecting your skin from irritation and chemical exposure.
- Safety Goggles: To prevent splashes and fumes from entering your eyes.
- Respirator Mask (Optional): For working with bleach or other strong chemicals in a well-ventilated area.
- Protective Clothing: To shield your skin from splashes and debris.
 Essential cleaning tools for white rocks, including brushes, hoses, and protective gear.
4. Step-by-Step Guide to Cleaning White Rocks
Now that you have your tools and materials, it’s time to get to work. Follow these steps for a thorough and effective cleaning process.
4.1. Preparing the Area
- Remove Loose Debris: Use a rake, leaf blower, or broom to clear away leaves, twigs, and other debris from around the rocks.
- Protect Surrounding Plants: Cover any nearby plants with plastic sheeting or tarps to prevent them from being exposed to cleaning solutions.
- Clear Obstacles: Move any furniture, decorations, or other items that might obstruct your cleaning process.
4.2. Rinsing the Rocks
- Initial Rinse: Use a garden hose with an adjustable nozzle to rinse the rocks, starting from the top and working your way down. This will remove loose dirt and debris.
- Pressure Washing (Optional): If you’re using a pressure washer, be cautious and start with a low-pressure setting to avoid damaging the rocks. Keep the nozzle at a safe distance and move it in a sweeping motion.
4.3. Applying Cleaning Solutions
- Mild Soap Solution: Mix a small amount of mild dish soap with water in a bucket. Use a stiff-bristle brush to scrub the rocks with the solution.
- Vinegar Solution: For algae and mineral deposits, mix equal parts white vinegar and water in a spray bottle. Spray the solution onto the rocks and let it sit for 10-15 minutes before scrubbing.
- Baking Soda Paste: For stubborn stains, mix baking soda with water to form a thick paste. Apply the paste to the stained areas and let it sit for 30 minutes before scrubbing.
- Bleach Solution (Use Cautiously): For severe stains or disinfecting, mix one part bleach with ten parts water in a bucket. Apply the solution to the rocks with a brush, let it sit for a few minutes, and then rinse thoroughly. Always wear protective gloves and eye protection when working with bleach.
- Hydrogen Peroxide: For whitening, mix one part 3% hydrogen peroxide with two parts water. Apply to the surface with a brush and let it sit for 10-15 minutes before scrubbing.
4.4. Scrubbing Techniques for Different Rock Types
- Porous Rocks (Marble, Calcite): Use a soft-bristle brush and gentle scrubbing motions to avoid scratching or damaging the surface.
- Non-Porous Rocks (Quartzite, River Rock): Use a stiff-bristle brush and more vigorous scrubbing motions to remove stubborn buildup.
- All Rock Types: Pay attention to crevices and hard-to-reach areas. Use a small brush or old toothbrush to clean these areas thoroughly.
4.5. Rinsing and Drying
- Final Rinse: After scrubbing, rinse the rocks thoroughly with a garden hose to remove any remaining dirt and cleaning solution.
- Drying: Allow the rocks to air dry completely. This will help prevent water spots and ensure a polished look. You can also use a leaf blower or dry towel to speed up the drying process.
5. Addressing Stubborn Stains and Discoloration
Sometimes, standard cleaning methods aren’t enough to tackle stubborn stains and discoloration. Here are some additional techniques to try.
5.1. Using Bleach Safely and Effectively
- Dilution: Always dilute bleach with water according to the recommended ratio (1 part bleach to 10 parts water).
- Application: Apply the bleach solution to the stained areas with a brush or sponge.
- Soaking: For heavily stained rocks, you can soak them in a bleach solution for several hours or overnight.
- Rinsing: Rinse the rocks thoroughly with water after soaking to remove all traces of bleach.
- Safety Precautions: Always wear protective gloves, eye protection, and a respirator mask when working with bleach. Work in a well-ventilated area and avoid contact with skin and clothing.
5.2. Hydrogen Peroxide for Whitening
- Application: Apply 3% hydrogen peroxide directly to the stained areas with a brush or sponge.
- Exposure: Let the hydrogen peroxide sit for 10-15 minutes to lift the stain.
- Scrubbing: Scrub the area with a soft-bristle brush to remove the loosened stain.
- Rinsing: Rinse the rocks thoroughly with water after scrubbing.
5.3. Baking Soda Paste for Deep Stains
- Preparation: Mix baking soda with water to form a thick paste.
- Application: Apply the paste to the stained areas and let it sit for 30 minutes or longer.
- Scrubbing: Scrub the area with a stiff-bristle brush to remove the loosened stain.
- Rinsing: Rinse the rocks thoroughly with water after scrubbing.
5.4. Using Commercial Stone Cleaners
Commercial stone cleaners are formulated to treat stains. Always read the instructions. When in doubt, test the product on an inconspicuous area of the stone first to ensure it does not cause any damage or discoloration.
6. Preventing Future Stains and Maintaining White Rocks
Once you’ve cleaned your white rocks, it’s essential to take steps to prevent future stains and maintain their pristine appearance.
6.1. Regular Maintenance Schedule
- Weekly: Remove loose debris with a rake or leaf blower.
- Monthly: Rinse the rocks with a garden hose to remove surface dirt and grime.
- Quarterly: Scrub the rocks with a mild soap solution to prevent algae and mineral deposits.
- Annually: Perform a deep cleaning with a stronger cleaning solution if needed.
6.2. Applying Stone Sealers
- Selection: Choose a stone sealer specifically formulated for your type of rock.
- Preparation: Clean the rocks thoroughly and allow them to dry completely before applying the sealer.
- Application: Apply the sealer according to the manufacturer’s instructions. Use a brush, roller, or sprayer to apply an even coat.
- Drying Time: Allow the sealer to dry completely before exposing the rocks to water or other elements.
6.3. Controlling Algae and Moss Growth
- Sunlight: Ensure that the rocks receive adequate sunlight, as algae and moss thrive in shady areas.
- Drainage: Improve drainage around the rocks to prevent water from pooling and promoting algae growth.
- Algaecides: Use a commercial algaecide to kill existing algae and prevent future growth. Be sure to choose an algaecide that is safe for use around plants and pets.
- Copper Sulfate: Copper sulfate can be used to kill algae, but it should be used with caution as it can be toxic to aquatic life and some plants.
6.4. Minimizing Contact with Staining Agents
- Iron: Avoid placing metal objects directly on the rocks, as they can cause rust stains.
- Organic Matter: Keep the rocks free from leaves, twigs, and other organic matter that can stain the surface.
- Fertilizers: Avoid using fertilizers near the rocks, as they can cause discoloration.
- Sprinklers: Adjust sprinklers to avoid spraying the rocks, as hard water can cause mineral deposits.
 Clean white rocks enhancing a garden, showcasing the impact of proper maintenance.
7. Eco-Friendly Cleaning Options
If you’re concerned about the environmental impact of cleaning solutions, there are several eco-friendly options to consider.
7.1. Vinegar and Water Solution
Vinegar is a natural disinfectant and cleaning agent that is safe for use around plants and pets. Mix equal parts white vinegar and water in a spray bottle and use it to clean algae, mineral deposits, and other stains.
7.2. Baking Soda
Baking soda is a mild abrasive that can be used to scrub away stubborn stains. Mix baking soda with water to form a paste and apply it to the stained areas.
7.3. Plant-Safe Cleaning Solutions
When learning how to clean landscape rocks without harming plants, opt for environmentally friendly options. A diluted white vinegar and water solution (1:1) makes a natural rock cleaner, minimizing the risk of plant damage.
7.4. Avoiding Harsh Chemicals
By using natural cleaning solutions and following a regular maintenance schedule, you can avoid the need for harsh chemicals that can harm the environment.
8. How to Choose the Right Cleaning Method?
Knowing what type of white rocks you have, identifying the kind and amount of stains, and considering environmental aspects is essential. Gentle cleaning is perfect for light buildup on porous rocks; scrubbing works well on harder rocks; spot treatments can remove stubborn stains, and preventive care ensures rocks stay clean.
9. Professional Cleaning Services
Although DIY methods can be effective, hiring professional cleaning services can provide more thorough and long-lasting results, especially for large or complex landscapes.
9.1. Benefits of Hiring Professionals
- Expertise: Professionals have the knowledge and experience to clean white rocks effectively without causing damage.
- Equipment: Professionals have access to specialized equipment, such as high-pressure washers and commercial-grade cleaning solutions.
- Time Savings: Hiring professionals saves you time and effort, allowing you to focus on other tasks.
- Long-Term Results: Professional cleaning services can provide long-lasting results, helping to keep your white rocks looking their best for years to come.
9.2. Finding a Reputable Cleaning Service
- Ask for Referrals: Ask friends, neighbors, or local nurseries for recommendations.
- Check Online Reviews: Read online reviews to get an idea of the quality of service provided by different companies.
- Verify Credentials: Make sure the company is licensed and insured.
- Get Multiple Quotes: Get quotes from several companies to compare prices and services.
- Ask Questions: Ask the company about their cleaning methods, products, and safety precautions.
10. Revitalize Your Landscape with Rockscapes.net
Maintaining the beauty of your white rocks is essential for enhancing your outdoor space. At rockscapes.net, we’re dedicated to providing you with the expertise and resources to achieve stunning landscape transformations.
10.1. Explore Design Ideas
Visit rockscapes.net for inspiration and innovative design concepts if you’re looking for ways to integrate beautifully cleaned white rocks into your landscape. Discover a plethora of ideas to suit your taste and enhance your home’s appeal.
10.2. Discover Stone Varieties
Learn about the diverse types of rocks available and how each can uniquely enhance your landscape by visiting rockscapes.net. Our extensive selection ensures you’ll find the perfect stone to complement your outdoor aesthetic.
10.3. Expert Advice
Get professional advice on selecting, installing, and maintaining rock landscapes from our team of experts at rockscapes.net. We offer personalized consultations to guide you through every step of the process.
10.4. Contact Us
Ready to transform your landscape with the beauty of white rocks? Contact rockscapes.net today. Visit our website or give us a call to explore your options and start your journey toward a stunning outdoor space. Let us help you create the landscape of your dreams!
Address: 1151 S Forest Ave, Tempe, AZ 85281, United States.
Phone: +1 (480) 965-9011.
Website: rockscapes.net.
10.5. Transform Your Outdoor Space
With the right knowledge and resources, maintaining the pristine beauty of your white rocks is within reach. Trust rockscapes.net to assist you in creating a stunning and welcoming outdoor environment that you can enjoy for years.
FAQ: Cleaning White Rocks
1. Why do my white rocks turn green?
Green discoloration on white rocks is typically caused by algae growth. Algae thrive in damp, shady environments. Regular cleaning and ensuring proper drainage can help prevent algae growth.
2. Can I use bleach to clean white rocks?
Yes, bleach can be used to clean white rocks, but it should be used cautiously. Always dilute bleach with water (1 part bleach to 10 parts water) and wear protective gear. Rinse the rocks thoroughly after cleaning to remove all traces of bleach.
3. How often should I clean my white rocks?
The frequency of cleaning depends on the environment and the type of rock. Generally, a monthly rinse and a quarterly scrub with mild soap are sufficient. Perform a deep cleaning annually or as needed.
4. What is the best way to remove rust stains from white rocks?
Baking soda paste or a commercial rust remover can be used to remove rust stains. Apply the paste or remover to the stained area, let it sit for a while, and then scrub with a brush. Rinse thoroughly after cleaning.
5. Can I use a pressure washer to clean white rocks?
Yes, a pressure washer can be used, but use it with caution. Start with a low-pressure setting to avoid damaging the rocks. Keep the nozzle at a safe distance and move it in a sweeping motion.
6. How do I prevent mineral deposits on white rocks?
To prevent mineral deposits, adjust sprinklers to avoid spraying the rocks. If you have hard water, consider using a water softener. Regularly rinse the rocks to remove mineral buildup.
7. Are there any eco-friendly ways to clean white rocks?
Yes, vinegar and water solution and baking soda are eco-friendly options. Vinegar is a natural disinfectant, while baking soda is a mild abrasive that can scrub away stains.
8. How do I clean white rocks without killing plants?
Use plant-safe cleaning solutions like diluted white vinegar and water. Protect nearby plants by covering them with plastic sheeting or tarps during cleaning.
9. What is a stone sealer and why should I use it?
A stone sealer is a protective coating that helps prevent stains and water damage. Applying a stone sealer can extend the life of your white rocks and make them easier to clean. Choose a sealer specifically formulated for your type of rock.
10. How do I keep my white rocks looking white?
Regular maintenance, including removing debris, rinsing, and scrubbing, is key to keeping white rocks looking white. Applying a stone sealer and controlling algae and moss growth can also help.