Are you eager to add a personal touch to your garden or create unique art pieces? How To Color Rocks is a fantastic way to unleash your creativity, and at rockscapes.net, we provide you with all the insights and materials you need to get started. Whether you’re looking to create vibrant garden accents, personalized gifts, or simply enjoy a relaxing hobby, we’ll guide you through every step, from choosing the right rocks to mastering advanced coloring techniques. Get ready to transform ordinary stones into eye-catching rock art, explore various painting ideas, and discover the best sealing methods for lasting beauty.
1. Why Color Rocks? The Benefits and Creative Possibilities
Coloring rocks offers a myriad of benefits, making it a popular and rewarding activity for people of all ages. It’s not just about adding color; it’s about transforming ordinary stones into personalized art pieces that can enhance your living space, serve as unique gifts, or simply bring joy to your creative process.
1.1 Therapeutic and Relaxing
Coloring rocks can be incredibly therapeutic. The repetitive motion of painting and the focus on color and design can help reduce stress and anxiety. According to a study by the American Art Therapy Association, engaging in art activities like rock painting can lower cortisol levels, the hormone associated with stress. The process allows you to unwind and express yourself, making it a perfect hobby for relaxation.
1.2 Creative Expression
Rocks provide a unique canvas for artistic expression. Unlike traditional paper or canvas, each rock has its own shape, texture, and character, which can inspire different designs and painting techniques. You can experiment with various colors, patterns, and themes to create one-of-a-kind pieces. From simple, colorful designs to intricate mandalas and detailed landscapes, the possibilities are endless.
1.3 Personalized Gifts
Hand-painted rocks make thoughtful and personalized gifts. Whether it’s a birthday, holiday, or just a token of appreciation, a custom-painted rock shows that you put time and effort into creating something special. You can tailor the design to the recipient’s interests, creating a meaningful keepsake they will cherish.
1.4 Home and Garden Decor
Colored rocks can be used to enhance your home and garden decor. They can add a pop of color to your garden beds, create whimsical accents in potted plants, or serve as decorative elements in your living room. Painted rocks can also be used to mark garden rows, create unique pathway stones, or add a personal touch to water features.
1.5 Educational Activity
Rock painting is an excellent educational activity for children. It encourages creativity, improves fine motor skills, and teaches color theory. Painting rocks can also be a fun way to learn about nature and geology, as you can discuss the different types of rocks and their origins.
1.6 Community Engagement
Rock painting has become a popular community activity. Many local groups organize rock hunts, where participants paint rocks and hide them for others to find. This fosters a sense of community and encourages people to explore their local area. Finding a beautifully painted rock can brighten someone’s day and spread joy.
1.7 Connection to Nature
Working with natural materials like rocks connects you to the environment. It encourages you to appreciate the beauty of nature and find creative inspiration in the world around you. By transforming ordinary rocks into art, you’re celebrating the natural world and bringing a piece of it into your home.
2. Gathering Your Materials: What You Need to Get Started
Before you start coloring rocks, it’s essential to gather the right materials. Having the necessary supplies on hand will make the process smoother and more enjoyable. Here’s a comprehensive list of what you’ll need:
- Rocks: Smooth, flat rocks are ideal for painting. You can collect them from beaches, rivers, or purchase them from landscaping supply stores.
- Paints: Acrylic paints are the most popular choice due to their vibrant colors, durability, and ease of use.
- Paintbrushes: A variety of brush sizes will help you create different details and effects.
- Sealer: A clear acrylic sealer will protect your painted rocks from the elements and prevent the paint from chipping or fading.
- Primer: Applying a primer to your rocks before painting can help the colors stand out and adhere better.
- Palette: A palette or plate for holding your paints.
- Water container: For cleaning your brushes.
- Paper towels: For wiping up spills and drying brushes.
- Pencils: For sketching your designs before painting.
- Eraser: For correcting any mistakes in your sketches.
- Detailing tools: Fine-tipped markers or paint pens for adding intricate details.
3. Step-by-Step Guide on How to Color Rocks
Coloring rocks is a fun and easy activity that anyone can enjoy. Follow these simple steps to create beautiful painted rocks:
3.1 Step 1: Finding the Right Rocks
The foundation of any great rock painting project starts with selecting the right rocks. When searching for rocks to paint, consider the following:
- Smooth Surface: Opt for rocks with a smooth surface, as they are easier to paint and allow for more detailed designs.
- Flat Shape: Flat rocks provide a stable canvas and are ideal for intricate artwork.
- Size: Choose a size that is comfortable to hold and work with. Smaller rocks are great for simple designs, while larger rocks can accommodate more elaborate artwork.
Where to Find Rocks:
- Nature: Beaches, riverbeds, and forests are excellent places to find natural rocks. However, be mindful of local regulations and avoid taking rocks from protected areas.
- Landscaping Supply Stores: These stores offer a variety of rocks in different sizes and shapes, often at affordable prices. At rockscapes.net, we can direct you to local suppliers and help you choose the best options for your project.
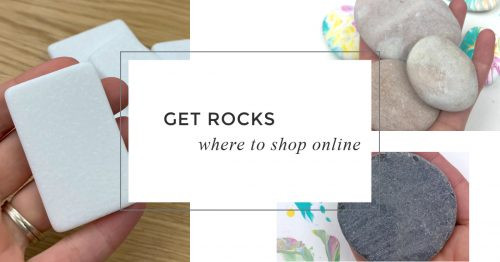
- Online Retailers: If you prefer the convenience of online shopping, numerous retailers sell rocks specifically for painting.
3.2 Step 2: Cleaning and Preparing Your Rocks
Before you start painting, it’s important to clean your rocks thoroughly. Use a scrub brush and warm, soapy water to remove any dirt, debris, or loose particles. Rinse the rocks well and allow them to dry completely before proceeding.
Optional: Priming Your Rocks
Applying a primer to your rocks can create a smooth, even surface that helps the paint adhere better and the colors stand out. Use a white or light-colored primer and apply a thin, even coat to the rocks. Let the primer dry completely before moving on to the next step.
3.3 Step 3: Sketching Your Design
Before you start painting, it’s helpful to sketch your design on the rock using a pencil. This allows you to plan your artwork and make any necessary adjustments before applying the paint. Keep your sketch light and simple, as you don’t want it to show through the paint.
3.4 Step 4: Painting Your Rocks
Now comes the fun part: painting your rocks. Use acrylic paints, which are durable, water-resistant, and available in a wide range of colors. Apply the paint in thin, even layers, allowing each layer to dry completely before adding the next. This will help prevent the paint from bleeding or smudging.
Tips for Painting:
- Start with the Background: If your design includes a background, paint it first and let it dry before adding any details.
- Use Multiple Coats: For vibrant, opaque colors, apply multiple coats of paint, allowing each coat to dry before applying the next.
- Vary Brush Sizes: Use larger brushes for covering large areas and smaller brushes for adding fine details.
- Clean Your Brushes Regularly: Keep your brushes clean by rinsing them in water after each use. This will help prevent the colors from mixing and keep your brushes in good condition.
3.5 Step 5: Adding Details and Embellishments
Once the base layers of paint are dry, you can add details and embellishments to your rocks. Use fine-tipped markers, paint pens, or small brushes to create intricate designs, patterns, or lettering. You can also add embellishments such as glitter, beads, or stickers to give your rocks a unique touch.
3.6 Step 6: Sealing Your Painted Rocks
To protect your painted rocks from the elements and prevent the paint from chipping or fading, it’s essential to seal them with a clear acrylic sealer. Apply the sealer in thin, even layers, following the manufacturer’s instructions. Allow the sealer to dry completely before handling or displaying your rocks.
Types of Sealers:
- Spray-On Sealers: These are easy to apply and provide a smooth, even finish.
- Brush-On Sealers: These offer more control and are ideal for sealing intricate designs.
- Resin Sealers: For a glossy, glass-like finish, consider using resin sealers.
4. Creative Ideas for Coloring Rocks
The possibilities for coloring rocks are endless. Here are some creative ideas to inspire your next project:
4.1 Nature-Themed Rocks
Paint rocks with nature-inspired designs, such as flowers, leaves, trees, animals, or landscapes. These rocks can add a touch of natural beauty to your garden or home decor.
- Floral Designs: Paint colorful flowers like daisies, roses, or sunflowers on your rocks.
- Animal Portraits: Create realistic or whimsical portraits of animals such as birds, butterflies, or ladybugs.
- Landscape Scenes: Paint miniature landscapes with mountains, trees, and rivers.
4.2 Inspirational Messages
Write inspirational quotes, affirmations, or messages of encouragement on your rocks. These rocks can serve as daily reminders to stay positive and motivated.
- Motivational Quotes: Paint rocks with uplifting quotes like “Believe in yourself,” “You are amazing,” or “Never give up.”
- Affirmations: Write positive affirmations such as “I am strong,” “I am capable,” or “I am loved.”
- Kindness Rocks: Create rocks with messages of kindness and leave them in public places for others to find.
4.3 Mandala Rocks
Create intricate mandala designs on your rocks using dot painting techniques. Mandalas are geometric patterns that symbolize harmony and balance, making them a popular choice for rock painting.
- Dot Painting: Use dotting tools or the end of a paintbrush to create precise dots of paint in concentric circles.
- Geometric Patterns: Create symmetrical patterns using geometric shapes such as circles, triangles, and squares.
- Color Combinations: Experiment with different color combinations to create visually stunning mandalas.
4.4 Character Rocks
Paint rocks to resemble your favorite characters from books, movies, or cartoons. These rocks can be a fun addition to your bookshelf or desk.
- Cartoon Characters: Paint rocks with characters from popular cartoons such as Mickey Mouse, SpongeBob SquarePants, or Peppa Pig.
- Movie Characters: Create rocks with characters from your favorite movies, such as Harry Potter, Star Wars, or Marvel superheroes.
- Book Characters: Paint rocks with characters from classic books, such as Alice in Wonderland, The Cat in the Hat, or The Very Hungry Caterpillar.
4.5 Holiday-Themed Rocks
Create rocks with holiday-themed designs for special occasions such as Christmas, Easter, Halloween, or Thanksgiving. These rocks can be used as decorations or gifts.
- Christmas Rocks: Paint rocks with Christmas trees, snowmen, Santa Claus, or reindeer.
- Easter Rocks: Create rocks with Easter eggs, bunnies, chicks, or flowers.
- Halloween Rocks: Paint rocks with pumpkins, ghosts, bats, or spiders.
- Thanksgiving Rocks: Create rocks with turkeys, cornucopias, or autumn leaves.
4.6 Pet Rocks
Paint rocks to resemble your favorite pets, such as cats, dogs, or birds. These rocks can be a fun way to celebrate your furry or feathered friends.
- Cat Rocks: Paint rocks with different breeds of cats, such as Siamese, Persian, or Maine Coon.
- Dog Rocks: Create rocks with different breeds of dogs, such as Labrador, Golden Retriever, or Bulldog.
- Bird Rocks: Paint rocks with different types of birds, such as robins, blue jays, or cardinals.
5. Advanced Techniques for Coloring Rocks
Once you’ve mastered the basics of rock painting, you can explore more advanced techniques to take your artwork to the next level.
5.1 Blending Colors
Blending colors can create smooth transitions and add depth to your designs. Use a soft brush and a light touch to blend the edges of different colors together.
5.2 Shading and Highlighting
Adding shading and highlighting can create a sense of dimension and realism in your artwork. Use darker shades of paint to create shadows and lighter shades to create highlights.
5.3 Dot Painting
Dot painting is a technique that involves creating intricate designs using dots of paint. Use dotting tools or the end of a paintbrush to create precise dots in various sizes and colors.
5.4 Pour Painting
Pour painting is a technique that involves pouring different colors of paint onto a rock and allowing them to mix and blend together. This can create unique and abstract designs.
5.5 Alcohol Ink
Alcohol ink is a vibrant and versatile medium that can be used to create stunning effects on rocks. Apply alcohol ink to your rocks using a brush, dropper, or spray bottle, and watch as the colors blend and swirl together.
6. The Best Paints for Coloring Rocks
Choosing the right paints is crucial for achieving the best results when coloring rocks. Here are some of the best types of paints to use:
6.1 Acrylic Paints
Acrylic paints are the most popular choice for rock painting due to their vibrant colors, durability, and ease of use. They are water-based, non-toxic, and dry quickly, making them ideal for both beginners and experienced artists.
Pros of Acrylic Paints:
- Vibrant colors
- Durable and water-resistant
- Easy to use and clean up
- Wide range of colors and finishes available
Cons of Acrylic Paints:
- Can be prone to chipping if not sealed properly
- May require multiple coats for opaque coverage
6.2 Oil Paints
Oil paints offer rich, vibrant colors and a smooth, blendable texture. However, they take much longer to dry than acrylic paints and require the use of solvents for cleanup.
Pros of Oil Paints:
- Rich, vibrant colors
- Smooth, blendable texture
- Excellent lightfastness
Cons of Oil Paints:
- Long drying time
- Requires solvents for cleanup
- Can be more expensive than acrylic paints
6.3 Paint Pens
Paint pens are a convenient and versatile option for adding fine details and lettering to your painted rocks. They are available in a variety of colors and tip sizes, making them ideal for creating intricate designs.
Pros of Paint Pens:
- Precise and easy to control
- Ideal for adding fine details and lettering
- Available in a variety of colors and tip sizes
Cons of Paint Pens:
- Can be more expensive than traditional paints
- May require multiple coats for opaque coverage
6.4 Chalk Paints
Chalk paints offer a matte finish and a vintage look, making them a popular choice for creating rustic or shabby-chic designs on rocks.
Pros of Chalk Paints:
- Matte finish
- Vintage look
- Easy to distress and layer
Cons of Chalk Paints:
- Not as durable as acrylic paints
- Requires sealing to protect the finish
7. How to Seal Painted Rocks for Protection and Longevity
Sealing your painted rocks is essential for protecting them from the elements and preventing the paint from chipping or fading. Here’s how to seal your painted rocks properly:
7.1 Choosing the Right Sealer
Select a clear acrylic sealer that is designed for outdoor use. These sealers are water-resistant, UV-resistant, and will provide long-lasting protection for your painted rocks.
7.2 Applying the Sealer
Apply the sealer in thin, even layers, following the manufacturer’s instructions. Use a spray-on sealer for a smooth, even finish, or a brush-on sealer for more control.
7.3 Drying Time
Allow the sealer to dry completely before handling or displaying your rocks. The drying time will vary depending on the type of sealer and the environmental conditions.
7.4 Multiple Coats
For added protection, apply multiple coats of sealer, allowing each coat to dry before applying the next.
8. Rockscapes.net: Your Partner in Rock Art and Landscape Design
At rockscapes.net, we are passionate about helping you create beautiful and inspiring rock art and landscape designs. Whether you’re a beginner or an experienced artist, we have the resources and expertise to help you achieve your creative goals.
8.1 Inspiration and Ideas
Explore our website for a wealth of inspiration and ideas for coloring rocks. Browse our gallery of painted rock designs, read our step-by-step tutorials, and discover new techniques and materials to enhance your artwork.
8.2 High-Quality Materials
We offer a wide selection of high-quality paints, sealers, brushes, and other materials for coloring rocks. Shop with confidence knowing that you’re getting the best products for your project.
8.3 Expert Advice
Our team of experienced artists and landscape designers is here to provide expert advice and support. Contact us with your questions, and we’ll be happy to help you with your project.
8.4 Community
Join our community of rock art enthusiasts and share your creations, connect with other artists, and participate in contests and events.
8.5 Custom Rock Art and Landscape Design Services
Looking for a unique, custom-designed rock feature for your home or garden? We offer custom rock art and landscape design services to bring your vision to life.
Our Services Include:
- Custom painted rocks for gardens, homes, and events
- Landscape design consultation and installation
- Rock garden design and installation
- Water feature design and installation
- Custom rock engraving and carving
9. Safety Tips for Coloring Rocks
While coloring rocks is a fun and creative activity, it’s important to follow some safety tips to protect yourself and others.
9.1 Use Non-Toxic Materials
Choose non-toxic paints, sealers, and other materials that are safe for you and the environment. Look for products that are labeled as non-toxic and conform to safety standards.
9.2 Work in a Well-Ventilated Area
When painting or sealing rocks, work in a well-ventilated area to avoid inhaling harmful fumes. Open windows and doors or use a fan to circulate the air.
9.3 Wear Protective Gear
Wear gloves and eye protection when painting or sealing rocks to protect your skin and eyes from irritation.
9.4 Supervise Children
Supervise children closely when they are coloring rocks to ensure they are using the materials safely and responsibly.
9.5 Dispose of Materials Properly
Dispose of used paints, sealers, and other materials properly according to local regulations. Do not pour paints or solvents down the drain.
10. FAQ: Your Questions About How to Color Rocks Answered
Here are some frequently asked questions about how to color rocks:
10.1 What kind of rocks are best for painting?
Smooth, flat rocks are best for painting. They provide a stable canvas and are easier to paint on.
10.2 What kind of paint should I use for rock painting?
Acrylic paints are the most popular choice for rock painting due to their vibrant colors, durability, and ease of use.
10.3 Do I need to seal my painted rocks?
Yes, sealing your painted rocks is essential for protecting them from the elements and preventing the paint from chipping or fading.
10.4 How do I seal my painted rocks?
Apply a clear acrylic sealer in thin, even layers, following the manufacturer’s instructions.
10.5 How long does it take for painted rocks to dry?
The drying time will vary depending on the type of paint and sealer you use, as well as the environmental conditions. Generally, it takes 24-48 hours for painted rocks to dry completely.
10.6 Can I use oil paints for rock painting?
Yes, you can use oil paints for rock painting, but they take much longer to dry than acrylic paints and require the use of solvents for cleanup.
10.7 Can I use markers for rock painting?
Yes, you can use paint pens or markers for adding fine details and lettering to your painted rocks.
10.8 How do I clean my painted rocks?
Gently wipe your painted rocks with a damp cloth to remove any dirt or debris. Avoid using harsh chemicals or abrasive cleaners, as they can damage the paint and sealer.
10.9 Can I leave my painted rocks outside?
Yes, you can leave your painted rocks outside, but it’s important to seal them properly to protect them from the elements.
10.10 How do I get started with rock painting?
Gather your materials, clean and prepare your rocks, sketch your design, paint your rocks, and seal them for protection.
11. Transform Your Space with Rockscapes.net
Ready to elevate your landscape or add a personal touch to your home with beautifully colored rocks? At rockscapes.net, we offer everything you need to bring your vision to life. From premium rocks and high-quality paints to expert guidance and inspiring design ideas, we’re your one-stop destination for all things rock art.
Explore our extensive collection of rocks, perfect for any project, big or small. Discover vibrant acrylic paints that bring your creations to life and durable sealers that ensure your artwork stands the test of time. Our easy-to-follow tutorials and expert tips will help you master the art of rock coloring, whether you’re a seasoned artist or just starting out.
Transform your garden into a serene oasis with nature-themed rock designs, or create a whimsical indoor display with character-inspired rocks. The possibilities are endless!
Visit rockscapes.net today and let us help you unlock your creative potential. Our friendly team is ready to assist you with any questions and provide personalized recommendations to suit your unique style and needs.
Address: 1151 S Forest Ave, Tempe, AZ 85281, United States
Phone: +1 (480) 965-9011
Website: rockscapes.net
 Collection of Colorful Painted Rocks with Floral Designs
 Handmade Rocks for Crafting and Rock Painting on rockscapes.net
 Variety of Rock Painting Supplies Available on rockscapes.net
 Inspiring Rock Painting Ideas and Designs at rockscapes.net
 Learn How to Seal Painted Rocks with Techniques on rockscapes.net
 Tips for Choosing the Best Paint Sealer for Your Rocks on rockscapes.net
 How to Create Glossy Resin-Sealed Rocks – Tutorial on rockscapes.net
 Learn How to Hide Your Painted Rocks Around Town with Tips on rockscapes.net