Curing dry rock is essential for establishing a healthy reef aquarium, and at rockscapes.net, we’ll guide you through the process. Properly cured rock will host beneficial bacteria, creating a stable biological filter for your tank. Explore our site for design ideas, rock types, and expert advice on aquascaping with natural stone, ensuring the beauty and balance of your underwater world with live rock, saltwater, and reef tank success.
1. What is Dry Rock and Why Does it Need Curing?
Dry rock is rock that has been harvested from the ocean or quarried from land-based sources and then dried. It needs curing because it lacks the beneficial bacteria and microorganisms necessary to support a healthy reef aquarium.
Dry rock is essentially the skeletal remains of marine organisms, devoid of the living bacteria, sponges, and other microfauna found on live rock. Without these organisms, the rock cannot perform its crucial role in the nitrogen cycle, which is the biological process that converts harmful ammonia and nitrites into less toxic nitrates. According to research from Arizona State University’s School of Life Sciences in July 2023, a balanced microbiome is essential for a thriving aquatic ecosystem. Curing dry rock essentially involves re-establishing this microbiome, making it safe for aquatic life.
1.1. The Benefits of Using Dry Rock
- No unwanted hitchhikers: Dry rock doesn’t harbor pests like aiptasia anemones or nuisance algae.
- Environmentally friendly: Sourcing dry rock can be more sustainable than harvesting live rock.
- Cost-effective: Dry rock is often more affordable than live rock.
1.2. The Drawbacks of Using Dry Rock
- Requires curing: It takes time and effort to establish the necessary biological filtration.
- Slower colonization: It may take longer for dry rock to develop the vibrant colors and biodiversity of live rock.
- Initial instability: Newly cycled dry rock systems can be more prone to nutrient imbalances.
2. What Are The Different Types of Dry Rock Available?
There are several types of dry rock available for reef aquariums, each with its unique characteristics:
- Aragonite Rock: A popular choice, aragonite rock is composed of calcium carbonate and provides a natural substrate for beneficial bacteria to colonize.
- Fiji Rock: Known for its porous structure and intricate shapes, Fiji rock offers ample surface area for biological filtration.
- Pukani Rock: This lightweight rock is highly porous and readily absorbs beneficial bacteria, making it a great option for new reef tanks.
- Reef Saver Rock: An eco-friendly option, Reef Saver rock is sustainably harvested and cured, minimizing its impact on the marine environment.
- Man-Made Rock: Some aquarists opt for man-made dry rock, which is designed to mimic the appearance and functionality of natural rock.
No matter which type you choose, rockscapes.net has all the resources and inspiration you need to create a stunning aquascape.
3. How to Cure Dry Rock: A Step-by-Step Guide
Curing dry rock is a process that involves establishing a healthy population of beneficial bacteria within the rock’s pores. These bacteria are essential for converting harmful ammonia and nitrites into less toxic nitrates, creating a stable environment for your reef inhabitants.
3.1. Gathering Your Supplies
- Dry rock
- A large plastic container or tub
- RO/DI water (reverse osmosis/deionized water)
- A powerhead for water circulation
- A heater
- An ammonia test kit
- A nitrite test kit
- A nitrate test kit
- A source of ammonia (ammonium chloride or fish food)
- Beneficial bacteria supplement (optional)
3.2. Preparing the Curing Container
- Clean the plastic container thoroughly with warm water and vinegar. Avoid using soap, as it can leave residue that is harmful to marine life.
- Place the dry rock in the container, ensuring that it is not packed too tightly. You want water to be able to circulate freely around the rocks.
3.3. Filling the Container
- Fill the container with RO/DI water. Tap water contains chlorine and other chemicals that can kill beneficial bacteria.
- Add the powerhead to the container and position it to create a strong flow of water around the rocks.
- Place the heater in the container and set it to a temperature between 78-82°F (25-28°C). Warmer temperatures encourage bacterial growth.
3.4. Adding Ammonia
- Add a source of ammonia to the container. You can use ammonium chloride, which is available at most aquarium stores, or you can use a small amount of fish food.
- Start with a small dose of ammonia and test the water daily. You want to maintain an ammonia level of around 2-4 ppm (parts per million).
3.5. Monitoring Water Parameters
- Test the water daily for ammonia, nitrite, and nitrate.
- Initially, the ammonia level will spike as the bacteria begin to consume it.
- As the bacteria multiply, the nitrite level will rise, followed by the nitrate level.
- Once the ammonia and nitrite levels reach zero and the nitrate level starts to decline, the curing process is complete.
3.6. Performing Water Changes
- During the curing process, perform regular water changes to remove excess nitrates and other waste products.
- Change 25-50% of the water every week, using fresh RO/DI water.
3.7. Adding Beneficial Bacteria
- To speed up the curing process, you can add a beneficial bacteria supplement to the container.
- Follow the instructions on the supplement label for dosage and frequency of application.
3.8. Patience is Key
- Curing dry rock can take anywhere from 4-8 weeks, depending on the quality of the rock and the conditions in the curing container.
- Be patient and continue to monitor the water parameters until the curing process is complete.
3.9. Verifying the Cure
Ammonia and nitrite must be at 0 ppm. Take the dry rock from the curing container. Place the rock into your display tank. Measure Ammonia and Nitrite every 8 hours to make sure Ammonia and Nitrite are at 0 ppm.
Table 1: Optimal Water Parameters for Curing Dry Rock
| Parameter | Level |
|---|---|
| Ammonia | 2-4 ppm |
| Nitrite | 0 ppm |
| Nitrate | Increasing, then decreasing |
| Temperature | 78-82°F (25-28°C) |
| pH | 8.0-8.4 |
4. How Long Does it Take to Cure Dry Rock?
The duration of the curing process depends on several factors, including the type of rock, the temperature of the water, and the amount of ammonia added.
- Average Time: Typically, curing dry rock takes between 4 to 8 weeks.
- Factors Affecting Time:
- Rock Porosity: More porous rock will colonize faster.
- Temperature: Higher temperatures (78-82°F or 25-28°C) accelerate bacterial growth.
- Ammonia Levels: Consistent ammonia levels of 2-4 ppm are ideal.
Remember, patience is key. Rockscapes.net encourages you to take your time and ensure the curing process is complete before adding livestock to your aquarium.
5. What are the Signs That Dry Rock is Fully Cured?
Knowing when your dry rock is fully cured is essential to avoid introducing it too early to your main tank, which can cause significant problems. Here are the key signs to look for:
- Ammonia and Nitrite Levels at Zero: The most reliable indicator is when both ammonia (NH3) and nitrite (NO2) levels consistently measure zero for several days. This shows that the nitrifying bacteria are effectively processing these toxic compounds.
- Stable Nitrate Levels: While nitrate (NO3) levels will initially rise during the curing process, they should eventually stabilize. A slight decline in nitrate levels can also indicate that the denitrifying bacteria are starting to colonize the rock.
- Clear Water: The water in the curing container should be clear and free of any cloudiness or debris. This indicates that the organic matter on the rock has been broken down.
- No Foul Odor: The rock should not have any unpleasant or decaying smells. A healthy, earthy smell is normal.
6. Can I Speed Up the Curing Process?
While patience is paramount, several strategies can help expedite the curing process:
- Seeding with Live Rock: Introducing a small amount of established live rock to the curing container can jumpstart the colonization of beneficial bacteria.
- Using a Commercially Available Bacteria Supplement: These supplements contain concentrated doses of nitrifying bacteria, accelerating the establishment of the nitrogen cycle.
- Maintaining Optimal Water Parameters: Keeping the water temperature, pH, and salinity within the recommended ranges promotes bacterial growth.
- Providing Adequate Water Flow: A powerhead ensures that the bacteria receive sufficient oxygen and nutrients.
Always test water parameters regularly to ensure water quality! Visit rockscapes.net for the best equipment and expert advice on maintaining your reef aquarium.
7. What are Common Mistakes to Avoid When Curing Dry Rock?
Curing dry rock requires attention to detail. Here are some common mistakes to avoid:
- Using Tap Water: Tap water contains chlorine and chloramine, which are toxic to beneficial bacteria. Always use RO/DI water.
- Adding Too Much Ammonia: Overdosing ammonia can stall the curing process and harm the bacteria. Start with a small dose and gradually increase it as needed.
- Skipping Water Changes: Regular water changes are essential for removing excess nutrients and maintaining water quality.
- Rushing the Process: Curing dry rock takes time. Be patient and don’t add the rock to your aquarium until it is fully cycled.
- Ignoring Water Parameters: Neglecting to test the water regularly can lead to imbalances and a failed curing process.
8. How to Aquascape with Cured Dry Rock?
Once your dry rock is fully cured, you can begin the exciting process of aquascaping. Proper aquascaping not only enhances the aesthetic appeal of your aquarium but also provides essential habitat and flow patterns for your reef inhabitants.
8.1. Planning Your Aquascape
- Consider the Needs of Your Future Inhabitants: Research the specific requirements of the fish and corals you plan to keep. Some species prefer caves and crevices, while others need open swimming space.
- Create a Focal Point: Design your aquascape around a central point of interest, such as a large, uniquely shaped rock or a branching structure.
- Think in Three Dimensions: Use vertical space to create depth and visual interest.
8.2. Aquascaping Techniques
- Use Reef-Safe Epoxy or Zip Ties: Secure the rocks together using reef-safe epoxy or zip ties. This will prevent them from toppling over and potentially harming your livestock.
- Create Stable Structures: Ensure that your aquascape is stable and won’t collapse. Distribute the weight evenly and avoid creating precarious overhangs.
- Leave Room for Growth: Consider the future growth of your corals and leave enough space between rocks for them to expand.
8.3. Aquascaping Ideas
- The Island Aquascape: A single, prominent rock structure in the center of the tank, surrounded by open sand.
- The Wall Aquascape: Rocks stacked against the back wall of the tank, creating a dramatic backdrop.
- The Arch Aquascape: An archway formed by two or more rocks, providing a unique focal point and hiding places for fish.
Let rockscapes.net inspire you with stunning aquascaping ideas and the perfect selection of rocks to bring your vision to life.
9. Can You Combine Dry Rock with Live Rock?
Yes, combining dry rock with live rock is a common and effective strategy in reef aquariums. This approach can offer a balance of benefits, helping to seed the dry rock with beneficial bacteria and organisms from the live rock while mitigating some of the risks associated with using live rock alone. Here’s how to do it effectively:
- Ratio of Live Rock to Dry Rock: A common recommendation is to use a ratio of around 10-20% live rock to 80-90% dry rock. The live rock acts as a seed for the dry rock.
- Placement in the Aquarium: Place the live rock strategically to maximize its impact. Putting it in areas with good water flow helps distribute the beneficial organisms more effectively. You can also place live rock in direct contact with dry rock to encourage colonization.
9.1. Benefits of Combining Live and Dry Rock
- Faster Cycling: The live rock introduces a mature population of beneficial bacteria, which helps to cycle the aquarium faster than using dry rock alone.
- Increased Biodiversity: Live rock comes with a variety of beneficial organisms, such as copepods, amphipods, and other microfauna, which can help create a more diverse and healthy reef ecosystem.
- Aesthetic Appeal: Live rock often has a more natural and established look compared to dry rock, which can enhance the aesthetic appeal of the aquarium.
- Reduced Risk of Pests: Using mostly dry rock reduces the risk of introducing unwanted pests and parasites that can come with live rock.
10. FAQ: Addressing Common Concerns About Curing Dry Rock
- 1. Can I use tap water to cure dry rock?
- No, tap water contains chlorine and chloramine, which are toxic to beneficial bacteria. Always use RO/DI water.
- 2. How much ammonia should I add to the curing container?
- Start with a small dose and test the water daily. Maintain an ammonia level of around 2-4 ppm.
- 3. How often should I perform water changes during the curing process?
- Change 25-50% of the water every week, using fresh RO/DI water.
- 4. Can I add fish or corals to the aquarium before the dry rock is fully cured?
- No, adding livestock before the rock is fully cured can be fatal.
- 5. What if the ammonia level in the curing container is not dropping?
- Check the pH of the water. If it is too low, add a buffer to raise it to around 8.2. Also, ensure that the water is properly oxygenated.
- 6. Can I use a protein skimmer during the curing process?
- Yes, a protein skimmer can help remove excess nutrients and organic waste from the water.
- 7. Is it normal for the water in the curing container to turn cloudy?
- Yes, cloudiness is normal during the initial stages of the curing process as organic matter breaks down.
- 8. How do I know if the dry rock is fully cycled?
- The most reliable indicator is when both ammonia and nitrite levels consistently measure zero for several days.
- 9. Can I reuse the water from the curing container in my aquarium?
- No, the water from the curing container is high in nitrates and other waste products. Discard it properly.
- 10. What are the advantages of using dry rock over live rock?
- Dry rock is free of pests and parasites, more environmentally friendly, and often more affordable.
Curing dry rock is a critical step in setting up a successful reef aquarium. By following these guidelines, you can establish a healthy biological filter and create a thriving underwater ecosystem.
Ready to start your reef aquarium journey? Visit rockscapes.net for inspiration, expert advice, and the finest selection of dry rock and aquascaping supplies. Our team of experienced professionals is here to guide you every step of the way. Contact us today at Address: 1151 S Forest Ave, Tempe, AZ 85281, United States or Phone: +1 (480) 965-9011. Let rockscapes.net help you create the reef aquarium of your dreams.
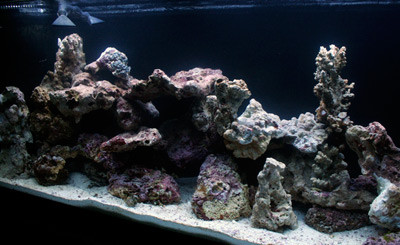
 Dry rock aquascaping with coral
 Aquarium live rock addition and design
 An old undergravel filter
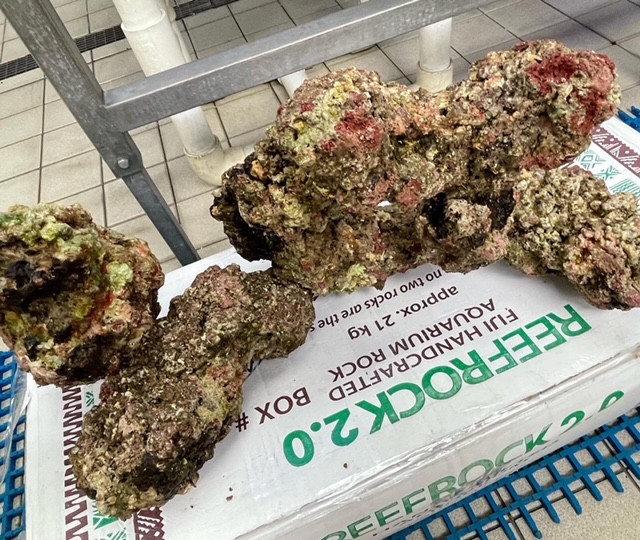 Imported live rock uncured
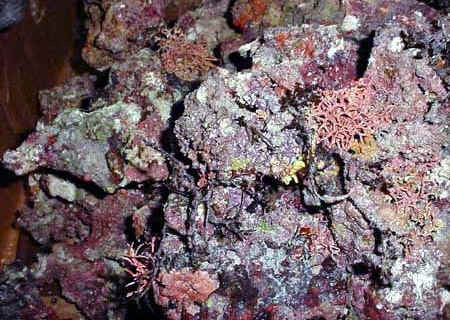 Quality cured live rock
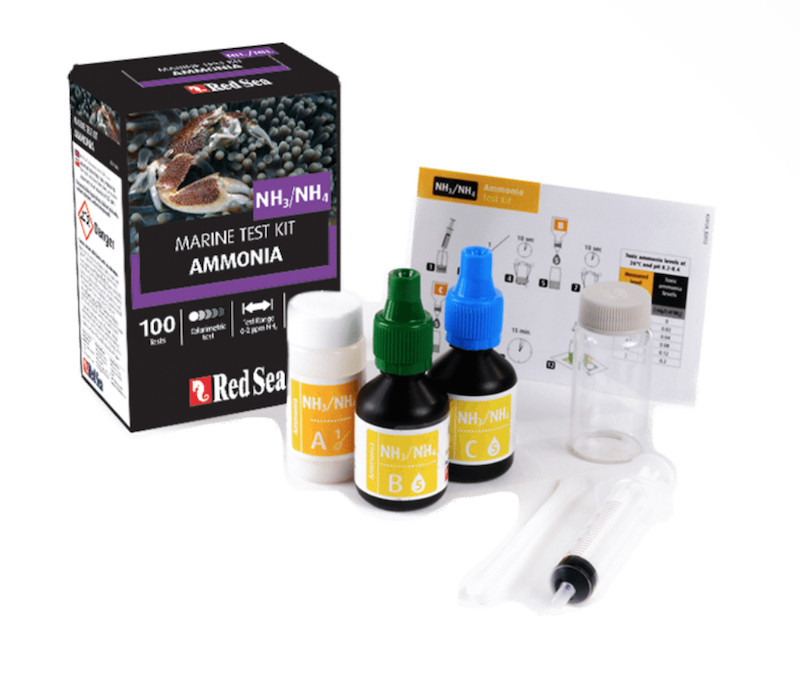 Ammonia testing kit
 Caribbean live rock
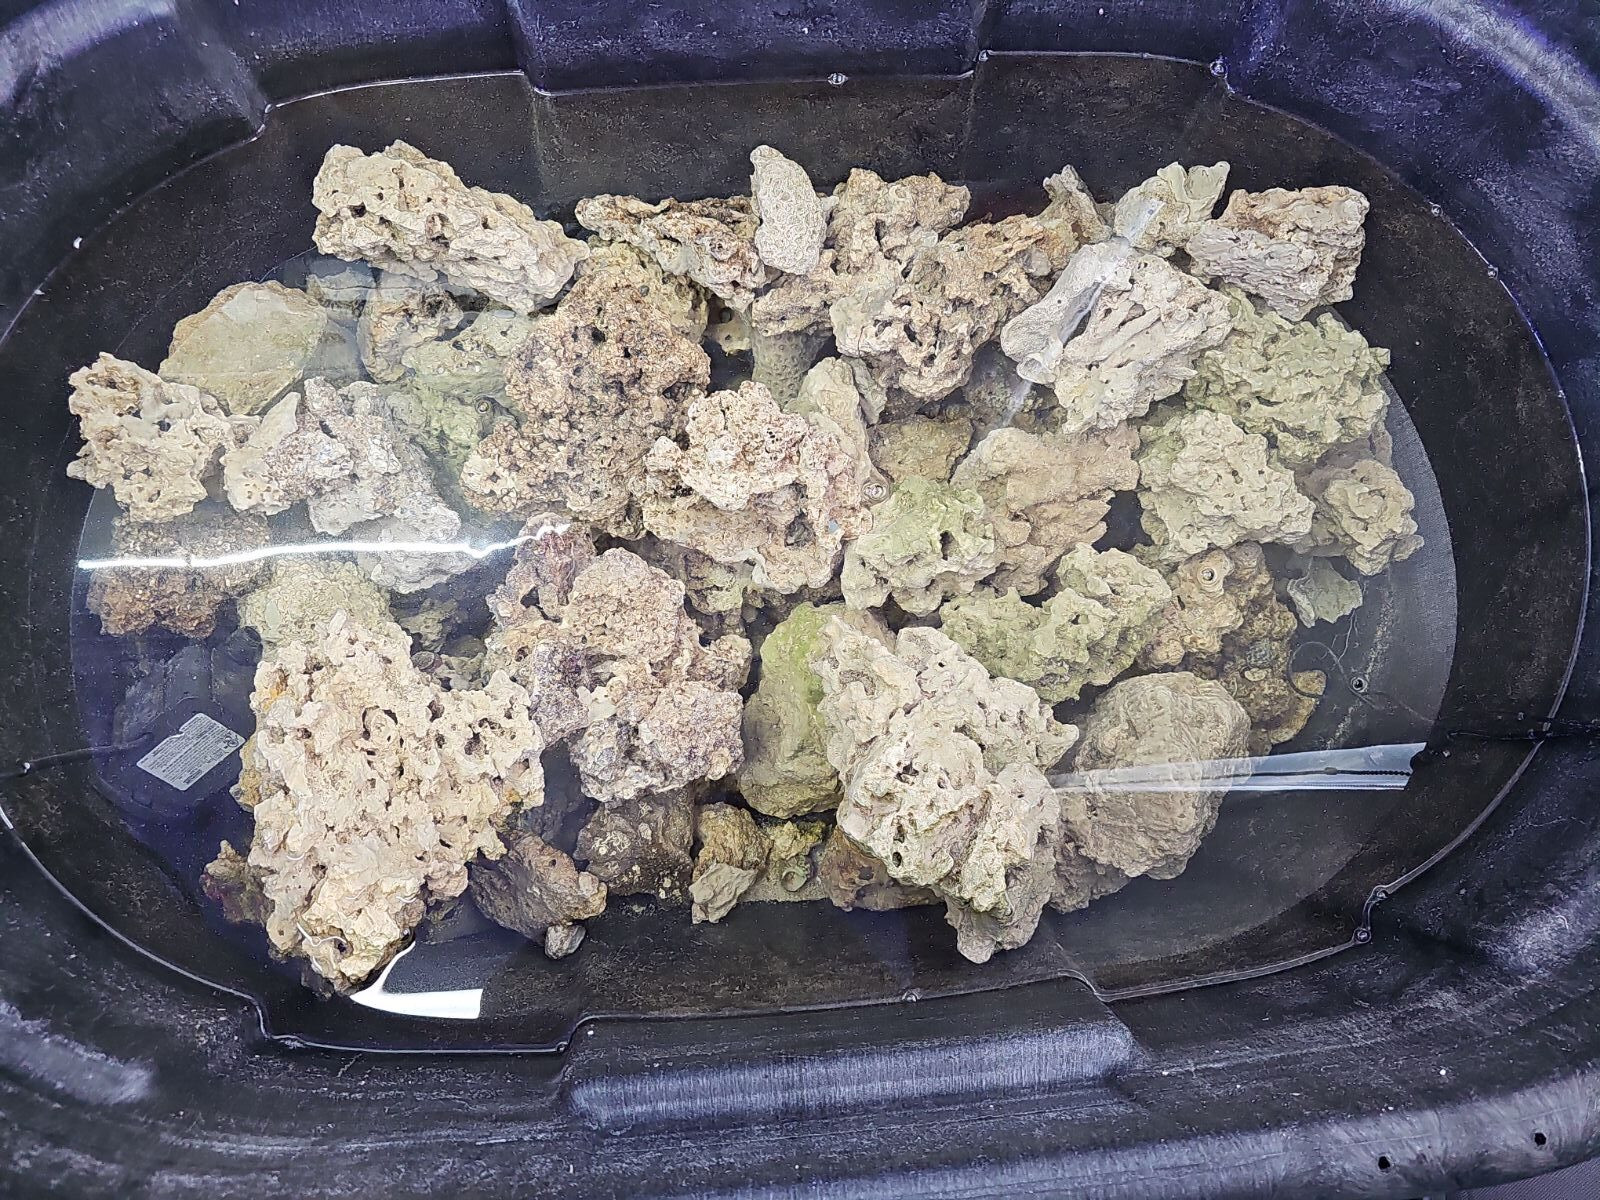 A container for curing live rock
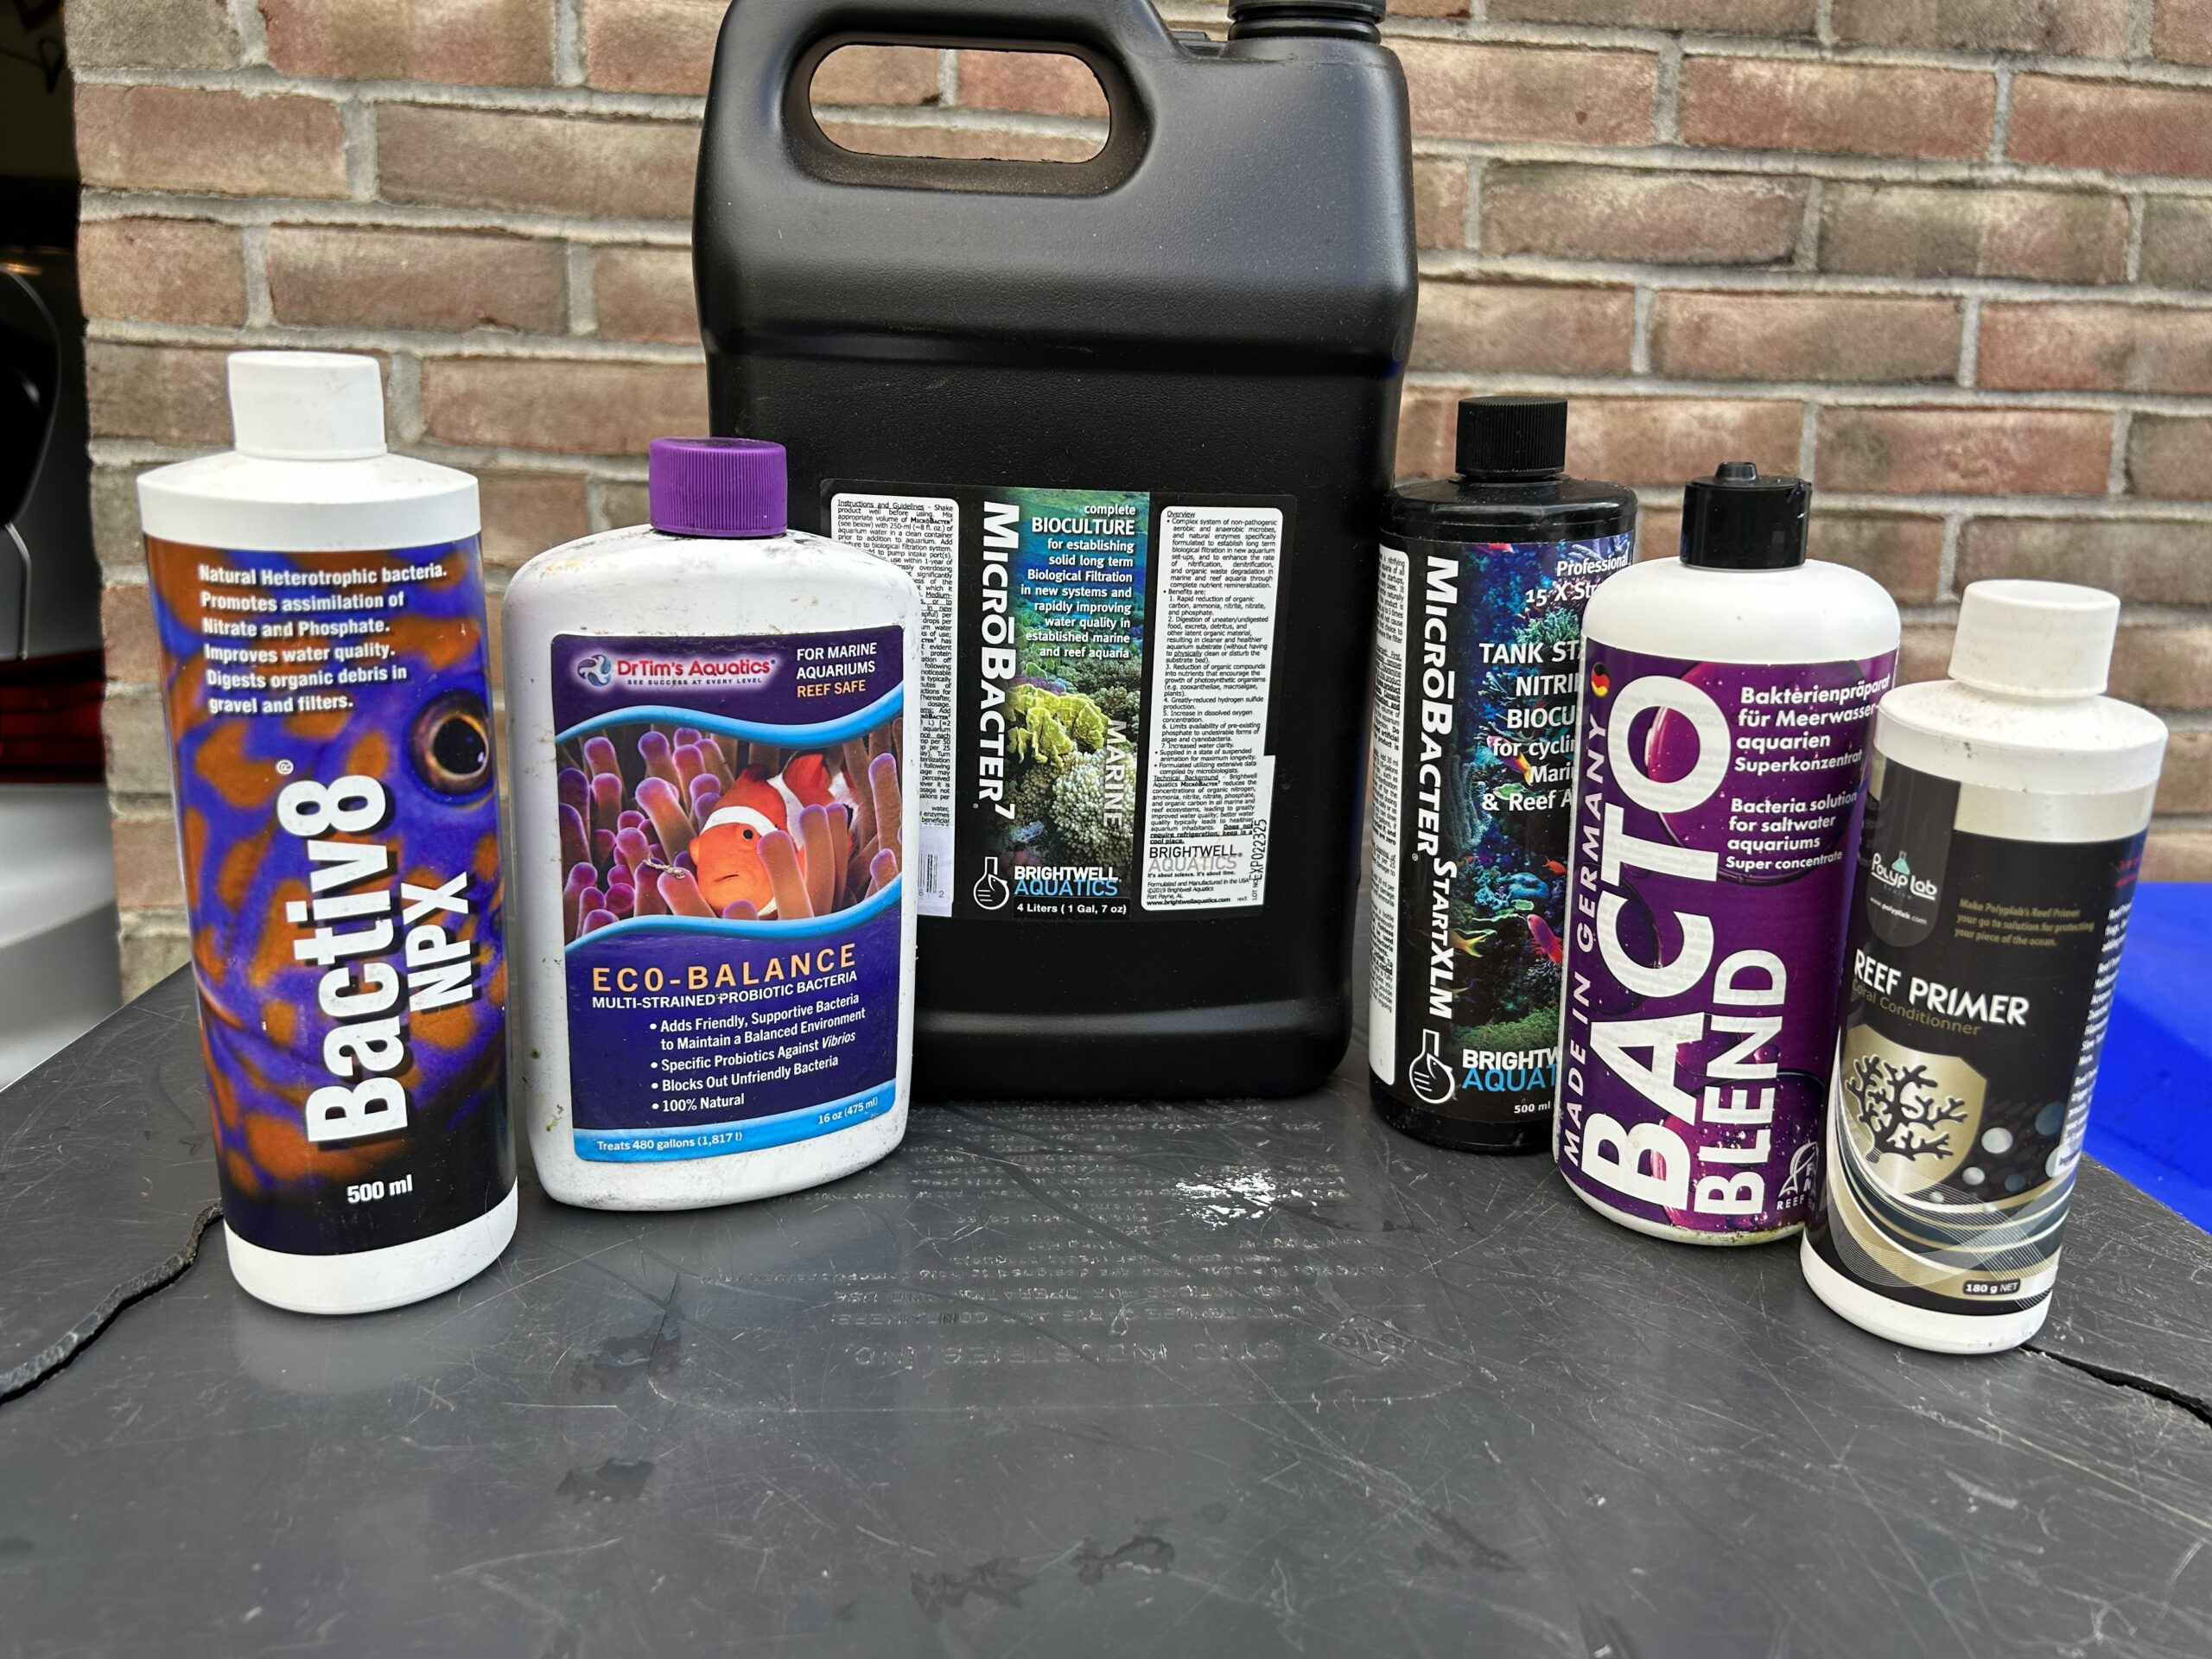 Bottled bacteria for cycling rock