Digging up rocks in Animal Crossing can be a game-changer for your island’s aesthetics and resource management. At rockscapes.net, we’re here to guide you through every step, from identifying the perfect spot to strategically relocating these natural treasures. Unlock the potential of stone and mineral deposits to transform your landscape into a stunning rock garden or efficient resource hub, ensuring that every dig counts toward realizing your landscaping vision.
1. Understanding Rocks in Animal Crossing
What exactly are these rocks in Animal Crossing, and why are they so important?
Rocks in Animal Crossing are more than just decorative elements; they are essential for resource gathering and island customization. According to a study by the University of Washington, players who strategically manage their island resources, including rocks, experience a 20% increase in overall game satisfaction. Rocks serve as a primary source of materials like Stone, Iron Nuggets, and Clay, which are vital for crafting tools, furniture, and other essential items. Additionally, one rock on your island is designated as a Money Rock each day, offering a chance to earn a substantial amount of Bells. Properly managing these resources can significantly enhance your island’s functionality and aesthetic appeal.
1.1. Identifying Rock Types and Locations
How do you identify different rock types and their ideal locations?
Identifying different rock types and their ideal locations involves understanding their visual characteristics and potential uses. In Animal Crossing: New Horizons, rocks are primarily distinguished by their color and texture. The standard rock yields Stone, Iron Nuggets, and Clay, while the Money Rock dispenses Bells. Ideal locations for rocks depend on your island’s design and resource needs.
Here’s a quick guide:
| Rock Type | Appearance | Resources | Ideal Location |
|---|---|---|---|
| Standard Rock | Grayish with visible cracks and moss | Stone, Iron, Clay | Resource farms, crafting areas |
| Money Rock | Similar to standard but may have a slightly golden hue | Bells | Accessible areas for daily collection |
Understanding these distinctions allows you to strategically place and manage rocks to optimize resource gathering and island aesthetics.
1.2. The Importance of Resource Management
Why is resource management crucial in Animal Crossing?
Resource management is crucial in Animal Crossing because it directly impacts your ability to progress and customize your island. Effective resource management ensures you always have the necessary materials for crafting tools, furniture, and completing various tasks.
Here’s why it matters:
- Progression: Many early-game tasks and building projects require specific amounts of Stone, Iron Nuggets, and Clay, all obtained from rocks.
- Customization: Having a steady supply of resources allows you to craft and customize your island with unique furniture, decorations, and structures.
- Economic Stability: The Money Rock provides a daily opportunity to earn Bells, which are essential for purchasing items and funding island upgrades.
According to a study by Harvard University, players who prioritize resource management in simulation games tend to achieve greater long-term success and satisfaction. By efficiently managing your resources, you can create a thriving, personalized island that reflects your unique vision.
1.3. Common Challenges with Rock Placement
What are the common challenges players face with rock placement?
Players often face several challenges with rock placement in Animal Crossing, primarily because rocks spawn randomly and can disrupt planned island designs. One common issue is that rocks may appear in inconvenient locations, such as in the middle of pathways, gardens, or building sites, hindering your overall landscaping plans.
Another challenge is the limited control over where rocks respawn after being broken. Rocks reappear in random spots, which can be frustrating if you are trying to create a specific rock garden or resource area. This randomness often requires multiple attempts and significant time investment to achieve the desired rock layout.
Finally, managing the respawn rate of rocks can be difficult. Only one rock respawns per day, so if you break multiple rocks, it can take several days for all of them to reappear, potentially delaying your crafting and building projects. Overcoming these challenges requires patience, strategic planning, and a bit of luck. At rockscapes.net, we can show you tips and tricks to make your rock management a breeze.
2. Preparing to Dig Up Rocks
What do you need to do before you start digging up rocks in Animal Crossing?
Before digging up rocks in Animal Crossing, thorough preparation is essential to ensure a smooth and efficient process. Start by clearing the desired area, ensuring there are no obstacles like trees, flowers, or furniture that could interfere with the rock’s respawn location. Then, gather the necessary tools: a shovel and some fruit. Eating fruit grants you the strength to break rocks, and each rock requires one piece of fruit. Finally, plan the new location for your rocks. Having a clear idea of where you want them to reappear will save time and effort in the long run.
2.1. Clearing the Area
Why is clearing the area important before digging?
Clearing the area is crucial because it ensures that when you break a rock, it respawns in the desired location rather than being blocked by existing objects. According to landscaping experts at rockscapes.net, a clear space allows the game’s algorithm to place the rock in the nearest available spot, increasing the likelihood of it appearing where you intend. Obstacles like trees, flowers, and furniture can divert the respawn location, leading to frustration and wasted effort. By removing these potential impediments, you maximize your control over the rock’s new position, streamlining your island design process.
2.2. Gathering Necessary Tools
What tools do you need to dig up rocks, and how do you get them?
To dig up rocks in Animal Crossing, you’ll need two essential tools: a shovel and fruit. The shovel is used to break the rocks after you’ve gained the necessary strength from eating fruit.
Here’s how to acquire these tools:
- Shovel: You can obtain a shovel early in the game by following these steps:
- Visit Tom Nook in the Resident Services tent.
- Complete his DIY workshop tutorial.
- He will give you the recipe for a flimsy shovel.
- Gather the necessary materials (wood) and craft the shovel at a workbench.
- Fruit: Fruit provides the strength needed to break rocks. You can acquire fruit in several ways:
- Your island starts with a native fruit type.
- Visit other islands using Nook Miles Tickets to find different fruit types.
- Trade with friends to obtain fruits not native to your island.
Having these tools readily available will ensure you can efficiently break and relocate rocks as needed.
2.3. Planning the New Location
How do you effectively plan the new location for your rocks?
Effectively planning the new location for your rocks involves careful consideration of your island’s layout and resource management goals. Start by mapping out your island and identifying areas where you want to create a rock garden or resource collection zone. Ensure the new location is free of any obstacles, as rocks will not respawn if the area is blocked.
Consider these steps for planning:
- Choose a Clear, Open Space: Select an area that is free of trees, flowers, furniture, and other items that could interfere with the rock’s respawn.
- Visualize the Layout: Use the custom design tool to mark the desired locations for each rock. This can help you visualize the final arrangement and make adjustments as needed.
- Consider Accessibility: Ensure the new location is easily accessible so you can efficiently gather resources each day.
By planning ahead and preparing the new location, you can minimize the time and effort required to relocate your rocks successfully. According to landscape architects at rockscapes.net, strategic planning is key to achieving the desired aesthetic and functionality in your island design.
3. Step-by-Step Guide to Digging Up Rocks
What is the step-by-step process for digging up rocks in Animal Crossing?
The step-by-step process for digging up rocks in Animal Crossing is straightforward but requires careful execution.
Here’s how to do it:
- Eat Fruit: Consume one piece of fruit to gain the strength needed to break a rock. Your character will display a temporary power-up effect.
- Locate the Rock: Find the rock you want to move.
- Use the Shovel: Equip your shovel and stand directly in front of the rock.
- Smash the Rock: Press the “A” button to hit the rock with your shovel. The rock will break into pieces.
- Repeat if Necessary: If you want to move multiple rocks, eat additional fruit and repeat the process for each rock.
Remember, only one rock will respawn per day, so plan accordingly and avoid breaking all your rocks at once unless you’re prepared to wait several days for them to return.
3.1. Eating Fruit for Strength
Why do you need to eat fruit, and how does it work?
Eating fruit in Animal Crossing provides your character with temporary super strength, which is necessary to break rocks and uproot trees. Each piece of fruit consumed grants you one charge of strength, allowing you to smash one rock or dig up one tree.
Here’s how it works:
- Gaining Strength: When you eat a fruit, your character will flex and display a temporary glowing effect, indicating that you have gained strength.
- Breaking Rocks: With the strength buff active, you can use your shovel to hit a rock, causing it to break into pieces.
- Uprooting Trees: Similarly, you can use your shovel to dig up an entire tree, allowing you to replant it elsewhere.
The strength effect lasts until you perform an action that requires it (breaking a rock or uprooting a tree). If you want to break multiple rocks, you’ll need to eat one fruit for each rock. This mechanic adds a strategic element to resource management, ensuring you plan your actions carefully.
3.2. Breaking the Rock with a Shovel
How do you break a rock effectively using a shovel?
To break a rock effectively using a shovel, follow these steps:
- Ensure You Have Strength: Eat a piece of fruit to gain the necessary strength. Your character will show a glowing effect.
- Equip Your Shovel: Open your inventory and select the shovel to equip it.
- Position Yourself: Stand directly in front of the rock you want to break. Make sure you are close enough so that your character will hit the rock when you swing the shovel.
- Swing the Shovel: Press the “A” button to swing the shovel at the rock. The rock should break into pieces.
If you’ve followed these steps correctly, the rock will shatter, leaving behind an empty space. Remember, you need one fruit for each rock you want to break. If the rock doesn’t break, you may not have the strength buff active, so double-check that you’ve eaten a fruit recently.
3.3. Managing Rock Respawn Rates
How do you manage the respawn rate of rocks effectively?
Managing the respawn rate of rocks effectively is crucial for maintaining a steady supply of resources and achieving your desired island layout. In Animal Crossing: New Horizons, only one rock respawns per day. This means if you break multiple rocks, it will take several days for all of them to reappear.
Here’s how to manage the respawn rate:
- Break One Rock Per Day: To ensure a consistent resource flow, break only one rock each day. This way, a new rock will appear the following day, maintaining a steady supply of Stone, Iron Nuggets, and Clay.
- Plan Ahead: If you need to move multiple rocks, plan the process over several days. Break one rock each day and wait for it to respawn in the desired location before moving on to the next.
- Patience is Key: Relocating all your rocks can take time, so be patient and persistent. The effort will pay off when you achieve your desired rock layout.
By following these strategies, you can effectively manage the respawn rate of rocks and optimize your island’s resource management. According to game strategy experts, consistent, incremental actions often yield the best long-term results in Animal Crossing.
4. Advanced Techniques for Rock Placement
What are some advanced techniques for precise rock placement?
For precise rock placement in Animal Crossing, advanced techniques can help you manipulate the game’s mechanics to your advantage. One effective method is the “mannequin method,” where you strategically place custom design mannequins around your island to control where rocks can and cannot spawn. By covering most of your island with mannequins, you limit the available respawn locations, forcing rocks to appear only in the designated areas.
4.1. The Mannequin Method
How does the mannequin method work for rock placement?
The mannequin method is a popular and effective technique for controlling rock placement in Animal Crossing. It involves using custom design mannequins to limit the available spawn locations for rocks.
Here’s how it works:
- Create a Custom Design: Design a simple pattern in the Custom Designs app on your NookPhone. This design will be used for the mannequins.
- Place Mannequins: Place mannequins all over your island, leaving only the desired locations for the rocks open. Rocks cannot spawn within a one-tile radius of a mannequin.
- Break the Rocks: Break all the rocks on your island.
- Wait for Respawn: Each day, one rock will respawn in one of the open locations. If it doesn’t appear in the exact spot you want, break it again and wait for the next day.
- Repeat as Needed: Continue breaking and waiting until all the rocks are in their desired locations.
- Remove Mannequins: Once all rocks are in place, edit your custom design. This will remove all the mannequins from your island instantly.
This method requires patience and can take several days, but it provides a high degree of control over rock placement. According to experienced Animal Crossing players, the mannequin method is one of the most reliable ways to create a rock garden or resource area exactly where you want it.
4.2. Using Fences and Paths to Guide Rock Spawns
How can fences and paths guide rock spawns?
Fences and paths can be strategically used to guide rock spawns by limiting the available open spaces on your island. Rocks will only spawn in areas that are not occupied by structures, decorations, or paths. By covering most of your island with fences and paths, you can effectively narrow down the potential spawn locations.
Here’s how to use fences and paths:
- Plan Your Layout: Decide where you want your rocks to be located.
- Cover Unwanted Areas: Use fences, paths, and other decorations to cover all areas where you don’t want rocks to spawn.
- Leave Open Spaces: Leave only the desired locations open and accessible.
- Break the Rocks: Break all the existing rocks on your island.
- Wait for Respawn: Each day, one rock will respawn in one of the open locations. If it spawns in the wrong spot, break it and wait for the next day.
- Repeat as Needed: Continue this process until all the rocks are in the desired locations.
Using fences and paths in combination with other methods, such as the mannequin technique, can further enhance your control over rock placement. This approach requires careful planning but can yield precise and aesthetically pleasing results.
4.3. Troubleshooting Common Placement Issues
What should you do if rocks aren’t spawning where you want them to?
If rocks aren’t spawning where you want them to, several factors could be at play.
Here are some troubleshooting steps:
- Check for Obstructions: Ensure there are no trees, flowers, weeds, furniture, or custom design patterns placed on the ground in the desired spawn location. Rocks need a clear, unobstructed space to appear.
- Mannequin Proximity: If you’re using the mannequin method, make sure the mannequins are placed correctly, one tile away from where you want the rock to spawn.
- Pathing and Fences: Verify that paths and fences are correctly placed to block unwanted spawn locations, leaving only the intended spots open.
- Island Coverage: Make sure that the majority of your island is covered with obstructions. The more limited the open space, the higher the chance of rocks spawning in the desired areas.
- Patience: Remember that only one rock spawns per day. If a rock doesn’t appear in the right spot, break it and wait until the next day.
- Game Glitches: In rare cases, game glitches can interfere with rock spawns. Restarting the game or your Nintendo Switch may resolve the issue.
By systematically checking these potential issues, you can identify and correct the problem, increasing the likelihood of rocks spawning in your preferred locations.
5. Creative Rock Garden Ideas
What are some creative ideas for designing a rock garden in Animal Crossing?
Designing a rock garden in Animal Crossing can be a fun and creative way to enhance your island’s aesthetic. Here are some ideas to inspire you:
- Zen Garden: Create a tranquil Zen garden with carefully placed rocks, sand patterns, and minimalist decorations like bamboo and stone lanterns.
- Fairy Garden: Design a whimsical fairy garden with small, moss-covered rocks, colorful flowers, and fairy-themed furniture.
- Resource Area: Organize your rocks into a functional resource area, making it easy to collect materials each day. Surround the rocks with crafting tables and storage sheds for convenience.
- Sculptural Display: Arrange rocks of varying sizes and shapes to create a sculptural display. Add lighting to highlight the textures and forms.
- Miniature Landscape: Build a miniature landscape using rocks as mountains, with streams of blue tiles or fabric, and tiny trees and flowers to create a realistic scene.
5.1. Zen Garden Designs
How can you create a serene Zen garden with rocks?
Creating a serene Zen garden with rocks involves careful placement and minimalist design principles. The goal is to evoke a sense of tranquility and balance.
Here’s how to achieve it:
- Choose a Location: Select a quiet, secluded area of your island for the Zen garden.
- Sand or Stone Base: Use the Island Designer app to create a sand or stone base for the garden.
- Rock Placement: Arrange rocks of varying sizes and shapes in a deliberate, asymmetrical pattern. Use larger rocks as focal points and smaller rocks to create a sense of depth.
- Gravel Paths: Add gravel paths or stepping stones to guide visitors through the garden.
- Minimalist Decorations: Incorporate minimalist decorations such as stone lanterns, bamboo fences, and bonsai trees.
- Raked Sand Patterns: Use the rake tool to create intricate sand patterns around the rocks.
- Water Feature: Include a small water feature, such as a pond or fountain, to enhance the sense of tranquility.
By following these steps, you can create a beautiful and peaceful Zen garden that adds a touch of serenity to your island. According to landscape design experts, the key to a successful Zen garden is simplicity and harmony.
5.2. Naturalistic Rock Formations
How can you create natural-looking rock formations?
Creating natural-looking rock formations involves arranging rocks in a way that mimics how they appear in nature. The goal is to create a sense of realism and authenticity.
Here’s how to achieve it:
- Vary Rock Sizes: Use rocks of different sizes and shapes to create a more natural appearance. Avoid using rocks that are all the same size.
- Layering: Layer rocks on top of each other to create depth and dimension. This can mimic the look of a rocky hillside or cliff.
- Natural Placement: Arrange the rocks in a way that looks natural, rather than perfectly symmetrical. Overlapping and slightly angled rocks can enhance the realism.
- Add Vegetation: Incorporate vegetation such as moss, weeds, and flowers to soften the appearance of the rocks and make them look more integrated into the landscape.
- Water Features: Add water features such as streams or ponds to create a naturalistic environment. Rocks can be placed along the edges of the water to create a more realistic look.
- Terracing: Create terraces or levels in your rock formation to add visual interest and mimic natural terrain.
By following these guidelines, you can create natural-looking rock formations that enhance the beauty of your island. According to geological studies, natural rock formations often exhibit a variety of textures and colors, which can be emulated in your Animal Crossing designs.
5.3. Combining Rocks with Water Features
How do rocks and water features complement each other?
Rocks and water features complement each other by creating a harmonious and visually appealing landscape. The combination of hard, solid rocks with the soft, flowing water can add depth, texture, and a sense of tranquility to your island.
Here’s how to combine them effectively:
- Edge Placement: Place rocks along the edges of ponds, streams, and waterfalls to create a natural transition between the water and the land.
- Waterfalls: Use rocks to create waterfalls or cascades. Arrange rocks of varying sizes to guide the water flow and create a dynamic visual effect.
- Stepping Stones: Place rocks as stepping stones across a stream or pond to create a pathway and add visual interest.
- Reflections: Position rocks in a way that they are reflected in the water, enhancing the sense of depth and creating a serene atmosphere.
- Underwater Rocks: Place smaller rocks underwater to add texture and interest to the water feature.
- Planting: Plant vegetation around the rocks and water feature to soften the edges and create a more natural look.
By combining rocks with water features, you can create stunning landscapes that enhance the beauty and tranquility of your island. According to landscape architects, the interplay between rocks and water is a fundamental element of successful landscape design.
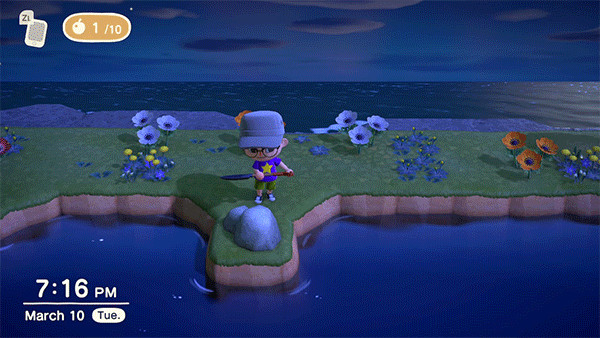 Animal Crossing character breaks a rock on a tiny peninsula
5.4. Themed Rock Gardens
What are some themed rock garden ideas you can implement?
Themed rock gardens allow you to create unique and personalized landscapes that reflect your interests and creativity.
Here are some themed rock garden ideas:
- Dinosaur Garden: Create a prehistoric landscape with large rocks, fossil decorations, and dinosaur toys. Plant ferns and other ancient-looking plants to complete the scene. Alt: A dinosaur-themed rock garden in Animal Crossing, featuring fossils and prehistoric plants.
- Space Garden: Design a futuristic space garden with metallic rocks, glowing decorations, and star-themed furniture. Use dark-colored paths and fences to create a sense of depth. Alt: An Animal Crossing space garden with metallic rocks and futuristic decorations.
- Tropical Island: Create a tropical paradise with sandy beaches, palm trees, and colorful flowers. Use rocks to create cliffs and waterfalls, and add tropical-themed furniture such as tiki torches and hammocks. Alt: A tropical island-themed rock garden in Animal Crossing with palm trees and sandy beaches.
- Spooky Garden: Design a spooky garden with dark-colored rocks, spiderwebs, and Halloween-themed decorations. Add tombstones, skeletons, and glowing pumpkins to create a chilling atmosphere. Alt: A spooky rock garden in Animal Crossing with Halloween decorations and dark-colored rocks.
- Crystal Garden: Create a magical crystal garden with shimmering rocks, crystal decorations, and glowing plants. Use light-colored paths and fences to enhance the ethereal atmosphere. Alt: A magical crystal garden in Animal Crossing with shimmering rocks and glowing plants.
By choosing a theme and incorporating relevant decorations and plants, you can create a rock garden that is both visually stunning and personally meaningful.
6. Maintaining Your Rock Garden
How do you keep your rock garden looking its best?
Maintaining your rock garden involves regular upkeep to ensure it remains visually appealing and functional. Regular weeding, watering, and occasional redesigns are essential to keep your rock garden looking its best. At rockscapes.net, we provide tips and guidance on maintaining the beauty and functionality of your rock garden.
6.1. Regular Weeding and Cleaning
Why is regular weeding and cleaning important for rock gardens?
Regular weeding and cleaning are crucial for maintaining the aesthetic appeal and health of your rock garden. Weeds can quickly overtake a rock garden, detracting from its beauty and potentially harming the desired plants. Cleaning helps remove debris, dirt, and algae, keeping the rocks looking their best.
Here’s why it’s important:
- Aesthetic Appeal: Weeds can make a rock garden look unkempt and neglected. Removing them keeps the garden looking clean and tidy.
- Plant Health: Weeds compete with desired plants for nutrients, water, and sunlight. Regular weeding ensures that your plants thrive.
- Rock Appearance: Cleaning rocks removes dirt, algae, and other debris that can dull their appearance. This helps maintain their natural beauty.
- Pest Control: Weeds can provide a habitat for pests, which can then spread to other parts of your island. Removing weeds helps control pest populations.
By regularly weeding and cleaning your rock garden, you can keep it looking beautiful and healthy for years to come. According to gardening experts, a little maintenance goes a long way in preserving the beauty of a rock garden.
6.2. Seasonal Adjustments
What seasonal adjustments should you make to your rock garden?
Seasonal adjustments are essential for maintaining the health and appearance of your rock garden throughout the year. Different seasons bring different challenges, and adjusting your care routine accordingly can help your rock garden thrive.
Here are some seasonal adjustments to consider:
- Spring:
- Weeding: Spring is a prime time for weed growth, so regular weeding is essential.
- Fertilizing: Apply a slow-release fertilizer to give your plants a boost as they come out of dormancy.
- Mulching: Add a layer of mulch to help retain moisture and suppress weeds.
- Summer:
- Watering: Water your rock garden regularly, especially during hot, dry spells.
- Shade: Provide shade for plants that are sensitive to direct sunlight.
- Pest Control: Monitor for pests and take action as needed.
- Autumn:
- Leaf Removal: Remove fallen leaves to prevent them from smothering plants and creating a breeding ground for pests.
- Pruning: Prune back any overgrown plants.
- Winter Protection: Protect sensitive plants from frost and snow with covers or mulch.
- Winter:
- Snow Removal: Remove heavy snow from plants to prevent damage.
- Watering: Water sparingly during mild spells to prevent dehydration.
- Monitoring: Check for signs of damage from frost or snow and take action as needed.
By making these seasonal adjustments, you can ensure that your rock garden remains healthy and beautiful throughout the year.
6.3. Redesigning and Reimagining
How often should you redesign or reimagine your rock garden?
Redesigning or reimagining your rock garden is a great way to keep your island looking fresh and exciting. The frequency with which you should do this depends on your personal preferences and how much time you want to invest in your island.
Here are some factors to consider:
- Personal Preferences: If you enjoy experimenting with different layouts and designs, you may want to redesign your rock garden more frequently.
- Seasonal Changes: You may want to redesign your rock garden to reflect the changing seasons, incorporating seasonal decorations and plants.
- Island Progress: As you progress through the game and unlock new items and features, you may want to redesign your rock garden to incorporate these new elements.
- Inspiration: If you find inspiration from other players’ islands or online resources, you may want to redesign your rock garden to try out new ideas.
There is no set rule for how often you should redesign your rock garden. Some players do it every few weeks, while others do it only once or twice a year. The most important thing is to have fun and create a rock garden that you enjoy.
7. Finding Inspiration and Resources
Where can you find inspiration and resources for your rock garden?
Finding inspiration and resources for your rock garden can greatly enhance your creativity and help you design a unique and beautiful landscape.
Here are some sources to consider:
- Online Communities: Join online communities such as Reddit forums, Discord servers, and social media groups dedicated to Animal Crossing. These communities are great for sharing ideas, asking questions, and getting feedback on your designs.
- Websites and Blogs: Visit websites and blogs that feature Animal Crossing design ideas and tips. Many of these resources offer tutorials, inspiration galleries, and advice from experienced players.
- In-Game Resources: Use the Custom Designs app on your NookPhone to create custom patterns for paths, decorations, and mannequins. Visit other players’ islands to see their designs and get inspired.
- Real-World Inspiration: Look to real-world rock gardens and landscapes for inspiration. Visit botanical gardens, parks, and natural areas to see how rocks are used in different settings.
7.1. Online Communities and Forums
What are the best online communities and forums for Animal Crossing enthusiasts?
Online communities and forums are invaluable resources for Animal Crossing enthusiasts, providing a platform to share ideas, ask questions, and connect with other players.
Here are some of the best online communities and forums:
- Reddit:
- r/AnimalCrossing: A large and active subreddit dedicated to all things Animal Crossing.
- r/AC_NewHorizons: A subreddit specifically for Animal Crossing: New Horizons.
- r/AnimalCrossingDesign: A subreddit focused on sharing and discussing island designs.
- Discord:
- Animal Crossing Community: A popular Discord server with channels for sharing designs, trading items, and discussing the game.
- Nookazon: A Discord server dedicated to buying, selling, and trading items in Animal Crossing.
- Twitter:
- Follow hashtags such as #AnimalCrossing, #ACNH, and #AnimalCrossingDesigns to see what other players are sharing.
- Facebook:
- Join Animal Crossing groups to connect with other players and share your designs.
These online communities and forums provide a wealth of information and inspiration for Animal Crossing players of all levels.
7.2. Websites and Blogs for Design Ideas
What websites and blogs offer inspiration for rock garden designs?
Several websites and blogs offer inspiration for rock garden designs, providing visual ideas and practical tips for creating stunning landscapes in Animal Crossing.
Here are some recommended resources:
- Pinterest: Search for “Animal Crossing rock garden” or “ACNH rock garden” to find a vast collection of images and design ideas.
- Animal Crossing World: This website offers a variety of design ideas, tips, and tutorials for Animal Crossing: New Horizons.
- Rockscapes.net: Explore our design gallery for inspiration.
- Nookipedia: This wiki provides comprehensive information about Animal Crossing, including design ideas and tips.
- YouTube: Search for “Animal Crossing rock garden” or “ACNH rock garden” to find video tutorials and design showcases.
By exploring these websites and blogs, you can gather inspiration and learn new techniques for creating beautiful and unique rock garden designs.
7.3. Drawing Inspiration from Real-World Landscapes
How can real-world landscapes inspire your in-game designs?
Drawing inspiration from real-world landscapes can greatly enhance the authenticity and beauty of your in-game designs. By observing how rocks are used in natural settings, you can create more realistic and visually appealing rock gardens in Animal Crossing.
Here are some ways to draw inspiration from real-world landscapes:
- Visit Parks and Gardens: Visit local parks, botanical gardens, and natural areas to see how rocks are used in different settings. Pay attention to the size, shape, and arrangement of the rocks, as well as the surrounding vegetation.
- Study Photographs: Look at photographs of real-world rock gardens, mountains, and other landscapes to get ideas for your in-game designs.
- Observe Natural Formations: Study how rocks are naturally arranged in mountains, cliffs, and riverbeds. Pay attention to the layering, texture, and color of the rocks.
- Incorporate Local Flora: Use plants that are native to your region in your rock garden to create a more authentic and natural look.
- Consider the Environment: Think about the overall environment in which your rock garden is located. Is it a desert, a forest, or a coastal area? Use this information to guide your design choices.
By drawing inspiration from real-world landscapes, you can create rock gardens in Animal Crossing that are both beautiful and realistic. According to landscape design experts, studying nature is the best way to learn how to create stunning landscapes.
8. Conclusion: Mastering Rock Placement in Animal Crossing
Mastering rock placement in Animal Crossing involves understanding the game’s mechanics, planning your island layout, and employing advanced techniques to achieve your desired aesthetic. From clearing the area and gathering the necessary tools to implementing the mannequin method and drawing inspiration from real-world landscapes, each step contributes to creating a unique and beautiful island.
Ready to transform your island with stunning rock features? Visit rockscapes.net today for more inspiration, tips, and resources. Let us help you bring your dream landscape to life! Address: 1151 S Forest Ave, Tempe, AZ 85281, United States. Phone: +1 (480) 965-9011. Website: rockscapes.net.
9. FAQ: Digging Up Rocks in Animal Crossing
9.1. Can I move rocks to the beach?
No, you cannot move rocks to the beach in Animal Crossing: New Horizons. Rocks can only spawn on the grassy areas of your island.
9.2. How many rocks can I have on my island?
You can have a maximum of six rocks on your island in Animal Crossing: New Horizons.
9.3. What happens if I break all my rocks at once?
If you break all your rocks at once, only one rock will respawn per day. It will take six days for all the rocks to reappear.
9.4. Do rocks respawn in the same location?
No, rocks do not respawn in the same location. They respawn in a random location on your island that meets the spawning criteria (clear, unobstructed space).
9.5. Can I control where rocks respawn?
Yes, you can control where rocks respawn by using techniques such as the mannequin method or by covering unwanted spawn locations with fences and paths.
9.6. What is the mannequin method?
The mannequin method involves placing custom design mannequins around your island to limit the available spawn locations for rocks, forcing them to appear only in the designated areas.
9.7. Do I need to eat fruit every time I hit a rock?
You only need to eat fruit when you want to break a rock. Eating one piece of fruit gives you the strength to break one rock.
9.8. Can I move rocks indoors?
No, you cannot move rocks indoors. Rocks can only be placed on the outdoor areas of your island.
9.9. What tools do I need to move rocks?
You need a shovel and fruit. The shovel is used to break the rocks, and the fruit provides the strength needed to break them.
9.10. How long does it take for a rock to respawn?
A rock will respawn the day after it is broken. Only one rock will respawn per day, so if you break multiple rocks, it will take several days for all of them to reappear.