Dot painting on rocks is a captivating art form that transforms ordinary stones into mesmerizing masterpieces. At rockscapes.net, we’ll guide you through the process of How To Dot Paint On Rocks, turning them into eye-catching accents for your landscape. Dot art is a great way to decorate stones.
1. What Is Dot Painting On Rocks and Why Is It So Popular?
Dot painting on rocks involves using various tools to create intricate patterns and designs with dots of paint on the surface of rocks. Dot painting has gained massive popularity due to its accessibility, therapeutic benefits, and the stunning visual effects that can be achieved. This art form allows both beginners and experienced artists to transform ordinary stones into decorative pieces, personalized gifts, or even unique garden ornaments. The beauty of dot painting lies in its simplicity; with just a few basic supplies and a little patience, anyone can create impressive designs that reflect their personal style and creativity. The rise of social media platforms like Pinterest and Instagram has further fueled the trend, with countless users sharing their dot-painted rock creations and inspiring others to try this engaging craft.
1.1. Therapeutic Benefits of Dot Painting
The repetitive nature of dot painting can be incredibly calming and meditative. Focusing on the precise placement of each dot helps to reduce stress and anxiety, promoting mindfulness and a sense of relaxation. Many artists find that the process of dot painting allows them to disconnect from daily stressors and enter a state of flow, enhancing their overall well-being.
1.2. Creative Expression
Dot painting provides a versatile medium for creative expression. Whether you prefer geometric patterns, floral designs, or abstract compositions, the possibilities are endless. The ability to customize colors, dot sizes, and arrangements allows artists to create truly unique and personalized pieces.
1.3. Community and Sharing
The dot painting community is vibrant and supportive, with artists from around the world sharing their techniques, tips, and inspiration online. Platforms like Instagram and Facebook groups dedicated to rock painting provide a space for artists to connect, collaborate, and showcase their work. This sense of community fosters creativity and encourages beginners to explore their artistic potential.
1.4. Accessibility and Affordability
One of the main reasons for the popularity of dot painting is its accessibility. The required supplies are relatively inexpensive and easy to obtain, making it a great hobby for people of all ages and skill levels. Rocks can be found in your backyard, local parks, or craft stores, and dotting tools can range from household items like toothpicks and skewers to specialized kits available online.
2. Understanding the Basics of Dot Painting
Before diving into intricate designs, it’s crucial to understand the basic techniques and principles of dot painting. This involves selecting the right type of rocks, preparing the surface, choosing appropriate paints, and mastering the dotting tools. By grasping these fundamentals, you’ll be well-equipped to create stunning dot art on rocks.
2.1. Selecting the Right Rocks
The type of rock you choose can significantly impact the final result of your dot painting. Here are some factors to consider when selecting rocks:
- Surface Smoothness: Opt for rocks with a smooth, even surface to ensure that the dots adhere properly and create a clean, crisp look. Rough or porous rocks can cause the paint to bleed or spread, making it difficult to achieve precise dots.
- Shape and Size: The shape and size of the rock will influence the design you can create. Larger, flatter rocks are ideal for intricate mandala patterns, while smaller, rounder rocks are perfect for simpler designs or decorative accents.
- Color: The natural color of the rock can complement or contrast with your chosen paints. Light-colored rocks provide a neutral canvas for vibrant designs, while darker rocks can create a dramatic effect.
2.2. Preparing the Rock Surface
Proper preparation of the rock surface is essential for ensuring the longevity and vibrancy of your dot painting. Follow these steps to prepare your rocks:
- Cleaning: Wash the rocks thoroughly with soap and water to remove any dirt, dust, or debris. Use a scrub brush to clean textured surfaces and rinse well.
- Drying: Allow the rocks to dry completely before painting. You can speed up the drying process by placing them in a warm, dry area or using a hairdryer.
- Priming (Optional): Applying a primer to the rock surface can help the paint adhere better and create a more uniform base. Choose a primer that is compatible with your chosen paints and apply a thin, even coat. Let it dry completely before proceeding.
2.3. Choosing the Right Paints
Selecting the right type of paint is crucial for achieving the desired effect in your dot painting. Here are some popular options:
- Acrylic Paints: Acrylic paints are a popular choice for rock painting due to their versatility, durability, and wide range of colors. They dry quickly, are water-resistant, and can be easily layered to create depth and dimension.
- Acrylic Paint Pens: Acrylic paint pens, such as Posca pens, are ideal for creating fine details and intricate patterns. They offer precise control and come in a variety of tip sizes.
- Enamel Paints: Enamel paints provide a glossy, durable finish that is resistant to fading and chipping. They are a good option for outdoor projects that will be exposed to the elements.
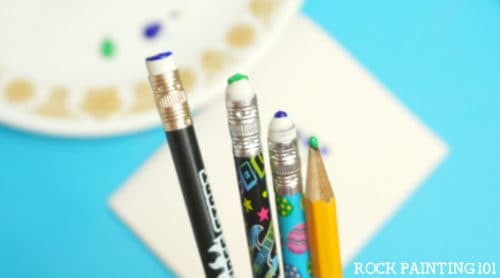
2.4. Dotting Tools
Dotting tools are essential for creating consistent, uniform dots in your rock painting. Here are some common options:
- DIY Tools: Many household items can be used as dotting tools, including toothpicks, skewers, pencil erasers, and the ends of paintbrushes. Experiment with different sizes and shapes to create a variety of dot sizes.
- Nail Art Dotting Tools: Nail art dotting tools are specifically designed for creating small, precise dots. They come in a variety of sizes and are relatively inexpensive.
- Professional Dotting Tool Sets: Professional dotting tool sets typically include a range of sizes and shapes, allowing for greater precision and control. These sets can be purchased online or at craft stores.
 Dot painting for beginners. Learn how to paint rocks with this dotted rock technique. Perfect for rock painting beginners. From dotting tools to simple dotting techniques.
3. Essential Tools and Materials for Dot Painting
To get started with dot painting on rocks, you’ll need a few essential tools and materials. Having these items on hand will make the process smoother and more enjoyable.
3.1. List of Necessary Supplies
- Rocks: Smooth, flat rocks in various sizes and shapes.
- Acrylic Paints: A selection of acrylic paints in your favorite colors.
- Acrylic Paint Pens: Fine-tipped acrylic paint pens for detailed work.
- Dotting Tools: A set of dotting tools in various sizes.
- Paintbrushes: Small paintbrushes for base coating and blending.
- Palette: A palette or plate for holding and mixing paints.
- Water Container: A container of water for cleaning brushes.
- Paper Towels: Paper towels for wiping brushes and cleaning up spills.
- Primer (Optional): Primer for preparing the rock surface.
- Sealer (Optional): Sealer for protecting the finished design.
- Pencils: Pencils for sketching out designs.
- Eraser: An eraser for correcting mistakes.
- Ruler: A ruler for measuring and creating straight lines.
3.2. Where to Find Quality Supplies
You can find quality dot painting supplies at a variety of locations:
- Craft Stores: Craft stores like Michaels and Hobby Lobby offer a wide selection of acrylic paints, dotting tools, and other art supplies.
- Online Retailers: Online retailers like Amazon and Etsy provide a vast range of dot painting supplies, often at competitive prices.
- Art Supply Stores: Local art supply stores may carry higher-quality paints and tools for more experienced artists.
- Rockscapes.net: Visit rockscapes.net for curated collections of rocks and complementary supplies that enhance your dot painting experience. Our selection ensures you find the perfect foundation for your artistic endeavors.
4. Step-by-Step Guide to Dot Painting on Rocks
Follow these steps to create beautiful dot paintings on rocks:
4.1. Preparing the Rock
- Clean the Rock: Wash the rock with soap and water, then let it dry completely.
- Prime (Optional): Apply a thin, even coat of primer to the rock surface and let it dry. This step is particularly useful if you want to ensure better paint adhesion and a uniform base.
4.2. Sketching Your Design (Optional)
- Sketch Lightly: Use a pencil to lightly sketch your design onto the rock. This will serve as a guide for your dot placement. For beginners, simple patterns like spirals, hearts, or geometric shapes are easier to manage.
- Correct Mistakes: Use an eraser to correct any mistakes or adjust the design as needed.
4.3. Applying the Base Coat (Optional)
- Choose a Color: Select a base coat color that complements your design. Light colors work well for vibrant designs, while dark colors can create a dramatic effect.
- Apply Evenly: Use a paintbrush to apply a thin, even coat of acrylic paint to the entire rock surface.
- Let Dry: Allow the base coat to dry completely before proceeding.
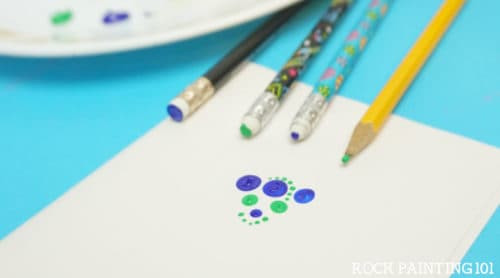
4.4. Creating Your Dot Design
- Select Dotting Tool: Choose a dotting tool that is appropriate for the size of the dots you want to create. Start with larger tools for the initial layers and smaller tools for finer details.
- Load Paint: Dip the tip of the dotting tool into the paint, ensuring that you have a small, even amount of paint on the tool. Avoid overloading the tool, as this can cause the paint to spread or bleed.
- Apply Dots: Gently press the dotting tool onto the rock surface, applying even pressure to create a clean, round dot. Lift the tool straight up to avoid smudging the dot.
- Repeat: Repeat the process, creating dots according to your design. Vary the size, color, and spacing of the dots to add interest and dimension to your artwork.
- Layering: Allow each layer of dots to dry before adding the next layer. This will prevent the colors from mixing and ensure that the dots remain crisp and defined.
4.5. Adding Details with Paint Pens
- Fine Details: Use acrylic paint pens to add fine details and intricate patterns to your dot painting. The fine tips of the pens allow for precise control and clean lines.
- Outlining: Use paint pens to outline certain areas of your design, creating contrast and highlighting specific elements.
- Accents: Add small dots, lines, or other accents to enhance the overall look of your dot painting.
4.6. Sealing Your Artwork (Optional)
- Choose a Sealer: Select a sealer that is appropriate for your chosen paints and the intended use of your dot painting. Acrylic sealers are a good option for indoor projects, while enamel sealers provide greater protection for outdoor projects.
- Apply Evenly: Apply a thin, even coat of sealer to the entire rock surface, following the manufacturer’s instructions.
- Let Dry: Allow the sealer to dry completely before handling or displaying your dot painting.
 Dot painting for beginners. Learn how to paint rocks with this dotted rock technique. Perfect for rock painting beginners. From dotting tools to simple dotting techniques.
5. Dot Painting Techniques and Tips
Mastering a few key techniques can greatly enhance your dot painting skills. Here are some tips to help you create stunning dot art on rocks:
5.1. Creating Consistent Dots
To create consistent dots, follow these tips:
- Even Pressure: Apply even pressure to the dotting tool when pressing it onto the rock surface.
- Consistent Paint Load: Ensure that you have a consistent amount of paint on the dotting tool each time you create a dot.
- Vertical Application: Hold the dotting tool perpendicular to the rock surface to create a round, even dot.
- Practice: Practice creating dots on a piece of paper or cardboard before applying them to the rock.
5.2. Dot Spacing and Alignment
Proper dot spacing and alignment are crucial for creating visually appealing designs. Here are some tips to consider:
- Symmetry: Use a ruler or compass to create symmetrical patterns, such as mandalas.
- Balance: Balance the spacing between dots to create a harmonious and visually pleasing design.
- Overlapping: Overlap dots to create depth and dimension in your artwork.
- Contrast: Vary the spacing between dots to create contrast and highlight certain areas of your design.
5.3. Color Blending Techniques
Color blending can add depth and dimension to your dot painting. Here are some techniques to try:
- Layering: Layer different colors of dots to create subtle gradients and color transitions.
- Mixing on the Rock: Mix two colors of paint directly on the rock surface to create unique color combinations.
- Dry Brushing: Use a dry brush to blend the edges of dots, creating a soft, diffused effect.
5.4. Working with Different Paint Types
Each type of paint has its own unique properties and requires different techniques. Here are some tips for working with different paint types:
- Acrylics: Acrylic paints dry quickly and can be easily layered. Use a wet brush to blend the edges of dots before they dry.
- Paint Pens: Paint pens offer precise control and are ideal for fine details. Shake the pen well before use and prime the tip by pressing it down on a piece of paper.
- Enamels: Enamel paints provide a glossy, durable finish. Allow them to dry completely before applying a sealer.
5.5. Correcting Mistakes
Mistakes are inevitable, but they can be easily corrected with a few simple techniques:
- Wet Paint: If the paint is still wet, use a damp brush or paper towel to wipe away the mistake.
- Dry Paint: If the paint is dry, use a craft knife or sandpaper to carefully remove the mistake.
- Cover Up: Cover the mistake with a new layer of paint, blending it seamlessly with the surrounding area.
6. Dot Painting Ideas and Inspiration
Explore these dot painting ideas to spark your creativity and inspire your next project:
6.1. Mandala Designs
Mandala designs are intricate, symmetrical patterns that radiate from a central point. They are a popular choice for dot painting due to their visual complexity and therapeutic benefits.
- Start with a Center Point: Begin by creating a small dot in the center of the rock.
- Create Concentric Circles: Use a compass or ruler to create concentric circles around the center point.
- Add Intricate Patterns: Fill in the circles with intricate dot patterns, varying the size, color, and spacing of the dots to create a visually stunning design.
6.2. Nature-Inspired Themes
Nature-inspired themes are a great way to bring the beauty of the outdoors into your dot painting. Consider painting flowers, leaves, animals, or landscapes.
- Flowers: Paint colorful flowers with intricate petal patterns, using different sizes and colors of dots to create depth and dimension.
- Leaves: Create realistic-looking leaves by varying the color and spacing of the dots to mimic the natural veins and textures.
- Animals: Paint adorable animals with detailed features, using small dots to create fur, feathers, or scales.
- Landscapes: Create serene landscapes with rolling hills, towering mountains, and sparkling bodies of water, using different colors and sizes of dots to capture the beauty of nature.
6.3. Geometric Patterns
Geometric patterns are a simple yet effective way to create visually appealing dot paintings. Consider painting stripes, chevrons, triangles, or other geometric shapes.
- Stripes: Paint colorful stripes in varying widths and colors, using a ruler to ensure straight lines.
- Chevrons: Create dynamic chevron patterns by alternating the direction of the dots, using different colors to add interest.
- Triangles: Paint geometric triangles in different sizes and orientations, using contrasting colors to create a bold and modern look.
6.4. Abstract Art
Abstract art allows you to express your creativity and emotions without the constraints of realism. Experiment with different colors, shapes, and patterns to create unique and expressive dot paintings.
- Random Dots: Apply dots randomly to the rock surface, varying the size, color, and spacing to create a dynamic and unpredictable design.
- Color Gradients: Create smooth color gradients by blending different colors of dots together, using a dry brush to soften the edges.
- Textural Effects: Add textural effects by layering dots in different sizes and densities, creating a tactile and visually interesting surface.
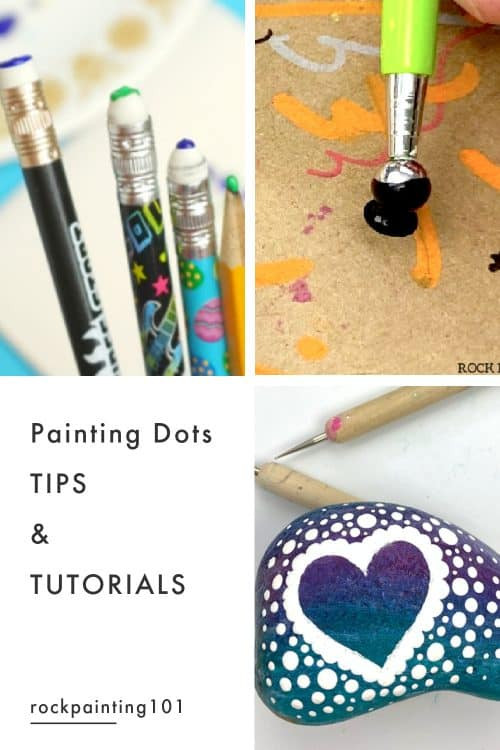 painting dots tips and tricks
6.5. Themed Rocks for Special Occasions
Themed rocks can be great for decorating for holidays or creating gifts.
- Holiday Rocks: Create specialized stones for holidays like Easter or Christmas.
- Personalized Gifts: Giving personalized rocks that have names or initials on them is a great gift idea.
7. Advanced Techniques for Experienced Artists
For experienced artists looking to take their dot painting skills to the next level, here are some advanced techniques to explore:
7.1. Creating 3D Effects
Create the illusion of depth and dimension by layering dots in different sizes and colors, using shadows and highlights to create a sense of perspective.
- Layering: Layer smaller dots on top of larger dots to create a raised effect.
- Shadows: Use darker colors to create shadows, adding depth and dimension to your artwork.
- Highlights: Use lighter colors to create highlights, accentuating certain areas of your design.
7.2. Incorporating Mixed Media
Combine dot painting with other art mediums, such as watercolor, ink, or collage, to create mixed-media masterpieces.
- Watercolor: Apply a watercolor wash to the rock surface before adding dots, creating a soft, ethereal background.
- Ink: Use ink to outline certain areas of your design, adding contrast and definition.
- Collage: Collage different materials, such as paper, fabric, or beads, onto the rock surface, creating a textured and multi-dimensional artwork.
7.3. Working on Large-Scale Projects
Expand your dot painting skills by working on larger-scale projects, such as murals, garden stones, or decorative panels.
- Murals: Create stunning dot-painted murals on walls, fences, or other large surfaces, using a variety of colors and patterns to create a visually impactful artwork.
- Garden Stones: Decorate garden stones with intricate dot patterns, adding beauty and personality to your outdoor space.
- Decorative Panels: Create decorative panels with dot-painted designs, using them to adorn your walls, doors, or furniture.
7.4. Developing Your Unique Style
Experiment with different techniques, colors, and patterns to develop your own unique dot painting style. Draw inspiration from other artists, but don’t be afraid to break the rules and create something truly original.
- Experimentation: Try new techniques and materials to discover what works best for you.
- Inspiration: Draw inspiration from other artists, but don’t be afraid to put your own spin on their ideas.
- Originality: Develop your own unique style by combining different elements and techniques in new and innovative ways.
8. Caring for Your Dot Painted Rocks
Proper care is essential for preserving the beauty and longevity of your dot-painted rocks. Here are some tips to consider:
8.1. Cleaning and Maintenance
Clean your dot-painted rocks regularly with a soft, damp cloth to remove any dust or dirt. Avoid using harsh chemicals or abrasive cleaners, as they can damage the paint and sealer.
8.2. Protecting from the Elements
If you plan to display your dot-painted rocks outdoors, protect them from the elements by applying a weather-resistant sealer. This will help to prevent fading, chipping, and other damage caused by sun, rain, and temperature changes.
8.3. Storage Tips
When storing your dot-painted rocks, keep them in a cool, dry place away from direct sunlight. Wrap them in soft cloth or bubble wrap to protect them from scratches and other damage.
9. Where to Showcase and Sell Your Dot Painted Rocks
If you’re proud of your dot painting creations and want to share them with the world, here are some places to showcase and sell your artwork:
9.1. Online Platforms
Online platforms like Etsy, eBay, and Amazon provide a vast marketplace for selling handmade crafts, including dot-painted rocks. Create a professional-looking online store, take high-quality photos of your artwork, and write compelling descriptions to attract potential buyers.
9.2. Local Craft Fairs and Markets
Local craft fairs and markets are a great way to connect with potential customers in person and showcase your dot-painted rocks. Set up a visually appealing booth, display your artwork in an organized and attractive manner, and engage with visitors to promote your creations.
9.3. Art Galleries and Exhibitions
If you’re an experienced artist with a unique dot painting style, consider submitting your artwork to art galleries and exhibitions. This can provide exposure to a wider audience and potentially lead to sales and commissions.
9.4. Social Media
Social media platforms like Instagram, Facebook, and Pinterest are powerful tools for showcasing your dot-painted rocks and connecting with potential customers. Share high-quality photos of your artwork, engage with followers, and use relevant hashtags to increase your visibility.
10. Frequently Asked Questions (FAQs) About Dot Painting on Rocks
Here are some frequently asked questions about dot painting on rocks:
10.1. What kind of rocks are best for dot painting?
Smooth, flat rocks are best for dot painting.
10.2. What kind of paint should I use for dot painting?
Acrylic paints are a popular choice.
10.3. What tools do I need for dot painting?
Dotting tools, paintbrushes, and paint pens are essential.
10.4. How do I create consistent dots?
Apply even pressure and use a consistent amount of paint.
10.5. How do I correct mistakes in dot painting?
Use a damp brush or craft knife to remove mistakes.
10.6. How do I protect my dot-painted rocks from the elements?
Apply a weather-resistant sealer.
10.7. How do I clean my dot-painted rocks?
Use a soft, damp cloth to clean them.
10.8. Where can I find inspiration for dot painting designs?
Online platforms, nature, and geometric patterns are great sources of inspiration.
10.9. Can I sell my dot-painted rocks?
Yes, you can sell them on online platforms, at craft fairs, and in art galleries.
10.10. What are some advanced techniques for dot painting?
Creating 3D effects and incorporating mixed media are advanced techniques.
Ready to explore the endless possibilities of dot painting on rocks? Visit rockscapes.net for more inspiration, high-quality supplies, and expert advice. Start your dot painting journey today and transform ordinary stones into extraordinary works of art! Contact us at 1151 S Forest Ave, Tempe, AZ 85281, United States or call +1 (480) 965-9011. Let rockscapes.net be your guide to creating stunning dot-painted landscapes and personalized rock art.