Dremeling rocks opens up a world of creative possibilities, from crafting personalized garden accents to designing unique jewelry. At rockscapes.net, we provide the knowledge and inspiration you need to transform ordinary stones into extraordinary works of art. Learn how to choose the right tools, master essential techniques, and discover project ideas that will ignite your imagination. Dive into the art of rock carving and engraving, and let your creativity flow with rockscapes.net.
1. What is Dremeling Rocks and Why Should You Try It?
Dremeling rocks involves using a Dremel rotary tool to cut, carve, engrave, polish, or drill into stones, and it’s a fantastic way to personalize your rockscapes. This hobby is gaining popularity, blending artistry with the earth’s natural beauty. Dremeling allows you to create unique pieces for your home, garden, or even personalized gifts.
Why Dremel Rocks?
- Creativity Unleashed: Turn plain rocks into personalized masterpieces.
- Therapeutic Hobby: Engage in a relaxing and fulfilling activity.
- Unique Decor: Craft one-of-a-kind items for your home and garden.
- Personalized Gifts: Create meaningful, handmade presents.
- Accessibility: Dremel tools are versatile and relatively easy to use.
- Versatility: Rocks are free and abundant, offering a sustainable art medium.
What Can You Create by Dremeling Rocks?
- Engraved Stones: Add inspirational quotes or names to stones.
- Rock Jewelry: Drill holes to make pendants, earrings, and bracelets.
- Garden Markers: Label plants with stylish, hand-carved stones.
- Decorative Accents: Create unique paperweights or desk ornaments.
- Sculptural Pieces: Shape rocks into miniature sculptures or art pieces.
- Personalized Pet Rocks: Design fun, customized pet rocks for kids.
 Carving river rocks with a Dremel using a rotary tool to shape the stone
2. What Tools and Materials Do You Need to Dremel Rocks?
To start dremeling rocks, you’ll need a few essential tools and materials. Having the right equipment will make the process smoother and safer, helping you achieve the best results.
Essential Tools and Materials
- Dremel Rotary Tool: A cordless Dremel 8220 or similar model with adjustable speed settings is ideal.
- Assorted Bits:
- Diamond Bits: For harder stones like granite and quartz.
- Silicon Carbide Grinding Stones: Best for softer rocks like sandstone and soapstone.
- Engraving Cutters: For detailed carving and etching.
- Polishing Wheels: To give your finished pieces a smooth, shiny finish.
- Safety Gear:
- Safety Glasses: To protect your eyes from flying debris.
- Dust Mask: To avoid inhaling rock dust.
- Gloves: To protect your hands and improve grip.
- Water Source: A bowl of water to cool the rock and bits during use.
- Rocks: River rocks, pebbles, or any stones suitable for your project.
- Pencils: For sketching designs onto the rocks.
- Rags: For cleaning and polishing.
- Beeswax: To enhance the finish and make the design stand out.
Optional Tools
- Flexible Shaft Attachment: For more precise control and intricate designs.
- Work Light: To illuminate your work area for better visibility.
- Bench Vise: To securely hold rocks in place while you work.
- Magnifying Glass: For detailed inspection of your work.
Where to Source Materials
- Rocks: Collect from riverbeds, beaches, or purchase from garden centers and landscaping suppliers. In Arizona, the Salt River and local quarries offer diverse rock options.
- Dremel Tools and Bits: Hardware stores like Home Depot, Lowe’s, and online retailers like Amazon.
- Safety Gear: Hardware stores and safety supply stores.
- Beeswax: Craft stores or online retailers.
 Gather the necessary materials, including a Dremel tool, various attachments, water, and rocks, to start your rock carving project
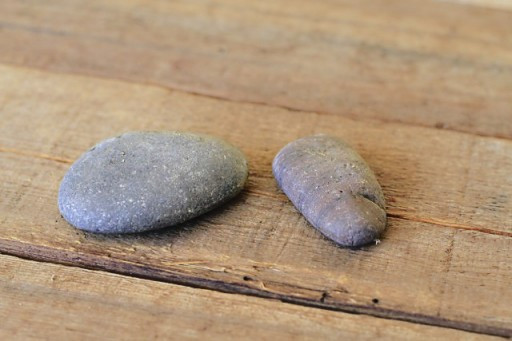
3. How to Prepare Your Rocks Before Dremeling?
Proper preparation is key to successful rock dremeling. Cleaning and prepping your rocks ensures better results and prolongs the life of your Dremel bits.
Steps for Preparing Rocks
-
Cleaning:
- Wash the rocks thoroughly with soap and water to remove dirt, debris, and any loose particles.
- Use a scrub brush to dislodge stubborn grime.
- Rinse well and allow the rocks to dry completely before proceeding.
-
Inspection:
- Examine each rock for cracks, weak spots, or imperfections that could affect the carving process.
- Choose solid, stable rocks that can withstand the dremeling process.
-
Design Planning:
- Decide on your design or pattern.
- Sketch your design lightly onto the rock using a pencil. This provides a guideline to follow while dremeling.
-
Safety Setup:
- Set up your work area in a well-ventilated space.
- Ensure you have adequate lighting to see your work clearly.
- Gather all your tools and materials within easy reach.
- Wear safety glasses, a dust mask, and gloves to protect yourself.
Tips for Choosing the Right Rocks
- Type of Rock: Softer rocks like sandstone, soapstone, and limestone are easier to carve. Harder rocks like granite, basalt, and quartz require more patience and diamond-tipped bits.
- Size and Shape: Choose rocks that are comfortable to hold and work with. Consider the shape in relation to your design.
- Surface Texture: Smooth surfaces are ideal for detailed engraving, while rougher textures can add character to your finished piece.
Safety Precautions
- Always wear safety glasses to protect your eyes from flying debris.
- Use a dust mask to avoid inhaling rock dust.
- Work in a well-ventilated area to minimize dust exposure.
- Keep a bowl of water nearby to cool the rock and Dremel bits, preventing overheating.
4. What Are the Basic Dremeling Techniques for Rocks?
Mastering basic dremeling techniques is crucial for creating detailed and professional-looking rock art. These techniques will help you control the Dremel tool and achieve the desired effects on various types of rocks.
Essential Dremeling Techniques
-
Etching:
- Use a fine-tipped engraving cutter.
- Hold the Dremel like a pencil and apply light pressure.
- Follow your sketched design, making shallow cuts.
- Multiple passes may be needed to achieve the desired depth.
-
Carving:
- Select a silicon carbide grinding stone for softer rocks or a diamond bit for harder rocks.
- Hold the Dremel at a slight angle to the rock surface.
- Use a sweeping motion to remove material gradually.
- Periodically dip the rock and bit in water to cool them down.
-
Engraving:
- Use a pointed engraving bit.
- Apply gentle pressure to create deeper, more defined lines.
- Move the Dremel slowly and steadily for precise results.
- Practice on scrap rocks to get a feel for the pressure and speed needed.
-
Drilling:
- Use a diamond-tipped drill bit.
- Start with a low speed to create a pilot hole.
- Gradually increase the speed while applying consistent pressure.
- Keep the rock and bit wet to prevent overheating and reduce dust.
- Drill in short bursts, allowing the bit to cool down.
-
Polishing:
- Use a polishing wheel or felt tip attachment.
- Apply a small amount of polishing compound to the wheel.
- Use light pressure and a consistent motion to buff the surface.
- This technique brings out the natural luster of the rock.
Tips for Controlling the Dremel Tool
- Grip: Hold the Dremel tool firmly but comfortably, like a pencil.
- Speed: Start with a low speed and gradually increase as needed. Higher speeds are suitable for harder materials and larger removals, while lower speeds are better for detailed work.
- Pressure: Apply consistent, light pressure. Avoid forcing the tool, as this can cause it to slip or damage the rock.
- Motion: Use smooth, controlled movements. Avoid jerky or erratic motions, which can result in uneven cuts.
- Cooling: Regularly dip the rock and bit in water to prevent overheating. Overheating can damage the bit and cause the rock to crack.
Practicing Techniques
- Start with Softer Rocks: Begin with softer rocks like sandstone or soapstone to get a feel for the tool and techniques.
- Scrap Rocks: Practice on scrap rocks before working on your final project.
- Simple Designs: Start with simple designs and gradually move to more complex patterns as you gain confidence.
- Take Breaks: Avoid fatigue by taking frequent breaks. This also helps maintain focus and precision.
 Demonstration of carving river rocks with a Dremel, showcasing the etching process on the stone surface
5. How to Choose the Right Dremel Bits for Different Rocks?
Selecting the correct Dremel bits for different types of rocks is essential for efficient and effective carving, engraving, and polishing. The right bit can make a significant difference in the quality of your work and the lifespan of your tools.
Types of Dremel Bits and Their Uses
-
Diamond Bits:
- Material: Made with industrial diamonds bonded to a metal base.
- Use: Ideal for hard rocks like granite, quartz, agate, and basalt.
- Shapes: Available in various shapes such as points, cones, and wheels for different carving and engraving tasks.
- Benefits: Durable and long-lasting, providing precise cuts and smooth finishes on hard materials.
-
Silicon Carbide Grinding Stones:
- Material: Made from silicon carbide abrasive.
- Use: Suitable for softer rocks like sandstone, soapstone, limestone, and shale.
- Shapes: Come in shapes like cylinders, cones, and discs for grinding and shaping.
- Benefits: Effective for removing material quickly on softer rocks, but may wear down faster than diamond bits on harder materials.
-
Engraving Cutters:
- Material: High-speed steel or carbide.
- Use: Designed for detailed engraving, etching, and fine line work on various rock types.
- Shapes: Available in pointed, round, and flame shapes for different engraving effects.
- Benefits: Provide precise control for creating intricate designs and lettering.
-
Polishing Wheels and Tips:
- Material: Felt, cloth, or rubber.
- Use: Used with polishing compounds to smooth and polish rock surfaces.
- Shapes: Include wheels, points, and cones for polishing different areas and contours.
- Benefits: Create a glossy, professional finish, enhancing the natural beauty of the rock.
-
Drill Bits:
- Material: Diamond-tipped.
- Use: Specifically designed for drilling holes in rocks for jewelry making, mounting, or other decorative purposes.
- Sizes: Available in various sizes to create different diameter holes.
- Benefits: Provide clean, precise holes without cracking or damaging the rock.
Rock Hardness and Bit Selection
| Rock Type | Hardness (Mohs Scale) | Recommended Bit(s) |
|---|---|---|
| Soapstone | 1-2 | Silicon Carbide Grinding Stones, Engraving Cutters |
| Sandstone | 6-7 | Silicon Carbide Grinding Stones, Engraving Cutters |
| Limestone | 3-4 | Silicon Carbide Grinding Stones, Engraving Cutters |
| Shale | 3-4 | Silicon Carbide Grinding Stones, Engraving Cutters |
| Granite | 6-7 | Diamond Bits, Engraving Cutters |
| Quartz | 7 | Diamond Bits, Engraving Cutters |
| Agate | 6.5-7 | Diamond Bits, Engraving Cutters |
| Basalt | 5-6 | Diamond Bits, Engraving Cutters |
Tips for Maintaining Dremel Bits
- Cleaning: Clean bits after each use with a brush and water to remove rock dust and debris.
- Cooling: Prevent overheating by regularly dipping bits in water during use.
- Storage: Store bits in a dry, organized container to prevent damage and corrosion.
- Replacement: Replace worn or damaged bits promptly to maintain performance and prevent damage to your Dremel tool.
 Use the appropriate Dremel diamond bit attachment for carving harder rocks, ensuring efficient and precise results
6. How to Dremel Rocks Safely?
Safety should always be a top priority when dremeling rocks. Taking the necessary precautions protects you from potential injuries and ensures a more enjoyable and productive crafting experience.
Essential Safety Measures
-
Eye Protection:
- Always wear safety glasses or goggles to protect your eyes from flying rock fragments and dust.
- Ensure the eye protection fits snugly and provides full coverage.
-
Respiratory Protection:
- Wear a dust mask or respirator to prevent inhaling rock dust, which can cause respiratory irritation or long-term health issues.
- Choose a mask rated for fine particles.
-
Hand Protection:
- Wear gloves to protect your hands from abrasions and cuts.
- Gloves also provide a better grip on the rock and Dremel tool.
-
Ventilation:
- Work in a well-ventilated area to minimize dust exposure.
- If possible, use a dust collection system to remove airborne particles.
-
Tool Safety:
- Inspect the Dremel tool and bits before each use to ensure they are in good working condition.
- Follow the manufacturer’s instructions for operating and maintaining the Dremel tool.
- Use the correct bit for the type of rock you are working with.
- Ensure the bit is securely attached to the Dremel tool.
-
Work Area Safety:
- Keep your work area clean and organized to prevent accidents.
- Ensure adequate lighting to see your work clearly.
- Secure the rock in place with a vise or clamp to prevent it from slipping.
-
Cooling:
- Regularly dip the rock and Dremel bit in water to prevent overheating.
- Overheated bits can become damaged and cause burns.
-
Speed Control:
- Start with a low speed and gradually increase as needed.
- High speeds can cause the rock to shatter or the bit to break.
First Aid for Common Injuries
- Cuts: Clean the wound thoroughly with soap and water. Apply a bandage to protect the cut. Seek medical attention if the cut is deep or bleeding does not stop.
- Eye Injuries: Flush the eye with water for at least 15 minutes. Seek medical attention immediately if you experience pain, blurred vision, or persistent irritation.
- Inhalation of Dust: Move to a well-ventilated area and drink plenty of water. Seek medical attention if you experience persistent coughing, shortness of breath, or chest pain.
- Burns: Cool the burned area with cold water for several minutes. Apply a sterile bandage. Seek medical attention if the burn is severe or covers a large area.
Resources for Safety Information
- Dremel User Manual: Provides detailed safety instructions and guidelines for using Dremel tools.
- Occupational Safety and Health Administration (OSHA): Offers information on workplace safety standards and practices.
- Local Safety Supply Stores: Provide a range of safety equipment and advice on proper usage.
7. What Are Some Creative Ideas for Dremeling Rocks?
Dremeling rocks opens up a world of creative possibilities. Whether you’re looking to add a personal touch to your garden, create unique jewelry, or craft personalized gifts, here are some inspiring ideas to get you started.
Rock Carving Project Ideas
-
Engraved Inspirational Stones:
- Concept: Carve inspirational words or quotes onto smooth river rocks.
- Use: Place them in your garden, on your desk, or give them as gifts.
- Technique: Use a fine-tipped engraving cutter to etch the letters. Apply beeswax to highlight the design.
-
Personalized Garden Markers:
- Concept: Create custom garden markers by carving plant names onto flat stones.
- Use: Label herbs, vegetables, or flowers in your garden.
- Technique: Use a silicon carbide grinding stone for softer rocks or a diamond bit for harder rocks.
-
Rock Jewelry:
- Concept: Drill holes in small, decorative rocks to create pendants, earrings, or bracelets.
- Use: Wear your unique creations or give them as personalized gifts.
- Technique: Use a diamond-tipped drill bit. Add suede lace or metal findings to complete the jewelry.
-
Decorative Rock Paperweights:
- Concept: Carve interesting patterns or designs onto larger rocks to create unique paperweights.
- Use: Add a touch of nature to your desk or office.
- Technique: Use a combination of engraving and carving techniques. Polish the surface for a smooth finish.
-
Custom Pet Rocks:
- Concept: Design fun, personalized pet rocks for kids by carving faces, names, or other decorative elements.
- Use: Provide a creative and engaging activity for children.
- Technique: Use engraving cutters and polishing wheels. Add paint for extra detail.
-
Miniature Rock Sculptures:
- Concept: Shape rocks into miniature sculptures or art pieces using carving and grinding techniques.
- Use: Display as decorative accents in your home or garden.
- Technique: Use a variety of bits to achieve different shapes and textures.
Integrating Rock Art into Landscaping
- Rock Gardens: Incorporate carved or engraved rocks into rock gardens to add personalized elements.
- Pathways: Use engraved stones to create unique pathway markers or stepping stones.
- Water Features: Add carved rocks around water features to enhance their natural beauty.
Finding Inspiration
- Online Resources: Explore websites like Pinterest, Instagram, and rockscapes.net for project ideas and inspiration.
- Local Craft Fairs: Visit local craft fairs and art shows to see examples of rock art and get ideas from other artists.
- Nature Walks: Take walks in nature to find unique rocks and gather inspiration from the natural environment.
 Finished carved rock, polished and ready to be used as a gift or decorative piece
8. How to Finish and Polish Your Dremeled Rocks?
Finishing and polishing are essential steps in the rock dremeling process. These techniques enhance the appearance of your carved rocks, bringing out their natural beauty and adding a professional touch.
Steps for Finishing and Polishing Rocks
-
Cleaning:
- Thoroughly clean the carved rock to remove any remaining dust, debris, or residue from the dremeling process.
- Use a soft brush and water to gently scrub the surface.
- Rinse the rock and allow it to dry completely before proceeding.
-
Sanding (Optional):
- If the rock surface is rough or uneven, use fine-grit sandpaper to smooth it.
- Wrap the sandpaper around a sanding block for better control.
- Sand in a circular motion, applying light pressure.
- Rinse the rock to remove any sanding dust.
-
Applying Beeswax or Polish:
- Use a clean rag to apply a small amount of beeswax or rock polish to the surface of the rock.
- Beeswax enhances the color and brings out the natural luster of the rock.
- Rock polish provides a glossy, protective finish.
-
Buffing:
- Attach a polishing wheel or felt tip to your Dremel tool.
- Apply light pressure and use a consistent motion to buff the surface of the rock.
- Buff until the rock achieves the desired level of shine.
- For beeswax, buff until the surface is smooth and no longer sticky.
-
Sealing (Optional):
- To protect the finish and prevent staining, apply a sealant specifically designed for rocks.
- Follow the manufacturer’s instructions for application.
- Allow the sealant to dry completely before handling the rock.
Tips for Achieving a Professional Finish
- Start with Cleanliness: Ensure the rock is thoroughly cleaned before applying any finishing products.
- Use the Right Products: Choose high-quality beeswax, rock polish, or sealants specifically designed for use on stone.
- Apply Thin Coats: Apply thin, even coats of beeswax or polish to avoid buildup and ensure a smooth finish.
- Buff Thoroughly: Spend time buffing the surface to achieve a professional-looking shine.
- Patience: Allow each coat to dry completely before applying the next.
Troubleshooting Common Polishing Issues
- Streaks or Smears: These can be caused by applying too much polish or not buffing thoroughly enough. Try using a clean polishing wheel and buffing the surface again.
- Dull Finish: This can be due to using the wrong type of polish or not buffing for long enough. Ensure you are using a polish specifically designed for rocks and spend more time buffing the surface.
- Uneven Finish: This can be caused by an uneven rock surface. Use sandpaper to smooth the surface before polishing.
9. What Are Advanced Techniques and Tips for Dremeling Rocks?
Once you’ve mastered the basics of dremeling rocks, you can explore advanced techniques to create more intricate and professional-looking pieces. These techniques require practice and precision but can significantly enhance the quality of your rock art.
Advanced Dremeling Techniques
-
Layered Carving:
- Concept: Carve multiple layers into the rock to create depth and dimension.
- Technique: Start by carving the background layer, then gradually work your way up to the foreground details. Use different bit sizes and shapes to achieve varying depths.
-
Detailed Shading:
- Concept: Use shading techniques to add highlights and shadows to your carvings.
- Technique: Use a fine-tipped engraving cutter to create small, closely spaced lines. Vary the pressure and spacing of the lines to create different shades.
-
Inlay Work:
- Concept: Create recesses in the rock and fill them with contrasting materials such as epoxy resin, metal, or other stones.
- Technique: Carefully carve out the desired shapes using a Dremel tool. Clean the recesses and fill them with your chosen material. Allow the material to dry or harden, then sand and polish the surface.
-
Creating Texture:
- Concept: Add texture to your rock carvings to create visual interest and tactile appeal.
- Technique: Use a variety of bits and techniques to create different textures. For example, use a ball-shaped bit to create a stippled effect, or a coarse grinding stone to create a rough, weathered look.
-
Using Stencils:
- Concept: Use stencils to create precise, repeatable designs on your rocks.
- Technique: Create or purchase stencils with your desired designs. Secure the stencil to the rock surface and trace the design with a pencil. Use a Dremel tool to carve along the traced lines.
Tips for Achieving Precision
- Use a Flexible Shaft Attachment: A flexible shaft attachment provides greater control and maneuverability, allowing you to work on intricate details with ease.
- Magnification: Use a magnifying glass or visor to see fine details more clearly.
- Practice Regularly: The more you practice, the better you will become at controlling the Dremel tool and achieving precise results.
- Take Breaks: Avoid fatigue by taking frequent breaks. This helps maintain focus and precision.
Correcting Mistakes
- Small Mistakes: Small mistakes can often be corrected by carefully carving away the surrounding material or using a smaller bit to refine the area.
- Larger Mistakes: Larger mistakes may be more difficult to correct. Consider incorporating the mistake into your design or starting over with a new rock.
- Filling Mistakes: If you accidentally carve too deeply, you can fill the mistake with epoxy resin or another material that matches the color of the rock.
 Use a Dremel polishing wheel attachment to add beeswax and achieve a polished look on the carved rock
10. How Can Rockscapes.Net Help You With Your Rock Dremeling Projects?
At rockscapes.net, we are dedicated to providing you with the resources, inspiration, and expertise you need to create stunning rock art. Whether you’re a beginner or an experienced rock carver, our website offers a wealth of information and services to support your creative journey.
How Rockscapes.Net Can Assist You
-
Inspiration and Ideas:
- Project Galleries: Browse our extensive galleries of rock carving projects to find inspiration for your own creations.
- Design Tutorials: Access step-by-step tutorials and guides that walk you through various rock carving techniques and projects.
-
Information and Expertise:
- Comprehensive Guides: Read our detailed guides on choosing the right tools, preparing rocks, mastering dremeling techniques, and finishing your projects.
- Expert Advice: Get tips and advice from experienced rock carvers and artists.
- Rock Identification: Use our resources to identify different types of rocks and learn about their properties.
-
Community and Support:
- Forums: Join our online forums to connect with other rock carving enthusiasts, share your projects, ask questions, and get feedback.
- Workshops and Classes: Participate in our workshops and classes to learn new skills and techniques from expert instructors.
-
Resources and Supplies:
- Recommended Tools and Materials: Find recommendations for the best Dremel tools, bits, polishing compounds, and other supplies.
- Supplier Directory: Access our directory of trusted suppliers for rocks, tools, and materials.
Rockscapes.Net Success Stories
- Case Study 1: Sarah, a beginner, used our step-by-step tutorial to create personalized garden markers for her herbs. She found the detailed instructions and tool recommendations invaluable.
- Case Study 2: John, an experienced rock carver, found inspiration in our project galleries to create a series of intricate rock sculptures for his garden. He also benefited from the expert advice in our forums.
- Case Study 3: Emily, a jewelry maker, used our guide on drilling rocks to create unique rock pendants. She found the tips on choosing the right drill bits and cooling techniques essential for success.
Ready to transform ordinary stones into extraordinary art? Visit rockscapes.net today and unlock your creative potential. Explore our project galleries, read our comprehensive guides, and join our community of rock carving enthusiasts.
For personalized assistance and expert advice, contact us at:
Address: 1151 S Forest Ave, Tempe, AZ 85281, United States
Phone: +1 (480) 965-9011
Website: rockscapes.net
FAQ: How to Dremel Rocks
-
What is a Dremel, and why is it useful for carving rocks?
A Dremel is a versatile rotary tool that can be used for cutting, carving, grinding, polishing, and drilling. It’s useful for carving rocks because it offers precision, control, and the ability to work with various materials using different attachments.
-
What types of rocks are best suited for dremeling?
Softer rocks like sandstone, soapstone, and limestone are easier to carve. Harder rocks like granite, quartz, and agate can also be dremeled but require diamond-tipped bits and more patience.
-
What safety precautions should I take when dremeling rocks?
Always wear safety glasses to protect your eyes from flying debris and a dust mask to avoid inhaling rock dust. Work in a well-ventilated area and wear gloves to protect your hands.
-
What Dremel bits should I use for different rock types?
Use silicon carbide grinding stones for softer rocks and diamond bits for harder rocks. Engraving cutters are suitable for detailed work, while polishing wheels are used for finishing.
-
How do I prepare rocks before dremeling?
Clean the rocks thoroughly with soap and water to remove dirt and debris. Inspect for cracks or weak spots. Sketch your design onto the rock with a pencil.
-
What are the basic techniques for dremeling rocks?
Essential techniques include etching, carving, engraving, drilling, and polishing. Practice these techniques on scrap rocks before working on your final project.
-
How do I drill a hole in a rock with a Dremel?
Use a diamond-tipped drill bit. Start with a low speed to create a pilot hole, then gradually increase the speed while applying consistent pressure. Keep the rock and bit wet to prevent overheating.
-
How do I polish a dremeled rock?
Use a polishing wheel or felt tip attachment with a polishing compound. Apply light pressure and a consistent motion to buff the surface until the rock achieves the desired level of shine.
-
How do I correct mistakes when dremeling rocks?
Small mistakes can be corrected by carefully carving away the surrounding material or using a smaller bit to refine the area. Larger mistakes may require incorporating the mistake into your design or starting over.
-
Where can I find inspiration and resources for rock dremeling projects?
Explore websites like Pinterest, Instagram, and rockscapes.net for project ideas. Join online forums to connect with other rock carving enthusiasts, or visit local craft fairs and art shows for inspiration.