Dyeing rock salt can transform ordinary stones into vibrant landscaping features, and rockscapes.net is here to show you how. This guide will provide you with the information needed to create eye-catching designs, incorporating a variety of stunning, dyed rock salt options into your landscape.
1. What is Dyed Rock Salt and Why Use It?
Dyed rock salt is exactly what it sounds like: rock salt that has been colored using various dyes. Using dyed rock salt in landscaping can add a unique and vibrant touch to any outdoor space.
What are the Benefits of Using Dyed Rock Salt?
Here’s why you might consider using dyed rock salt:
- Aesthetic Appeal: It adds color and visual interest to landscapes, gardens, and walkways.
- Versatility: Available in various colors, it can complement different design themes.
- Cost-Effective: It is generally an affordable way to enhance the look of your outdoor areas.
- Easy to Use: Simple application makes it a great option for DIY projects.
- Sensory Play: Perfect for creating colorful sensory bins and educational activities for children.
- Craft Projects: Adds sparkle and color to various craft projects, making them more visually appealing.
- Themed Events: Ideal for decorations at themed parties and events, providing a unique and festive touch.
- Seasonal Decor: Great for creating seasonal displays, such as winter decorations or colorful spring arrangements.
- Home Decor: Can be used in decorative bowls, vases, and other home decor items to add a pop of color.
- Educational Activities: Helps teach children about colors and textures in a fun and engaging way.
- Stress Relief: Handling and arranging the colored salt can be a calming and therapeutic activity.
- Unique Gifts: Can be used to create personalized and unique gifts for friends and family.
2. What You’ll Need to Dye Rock Salt
Gathering the right materials is the first step to a successful dyeing project. Here’s a comprehensive list:
- Rock Salt: Purchase plain rock salt. You can find this at most hardware stores or online.
- Liquid Watercolors: Liquid watercolors provide vibrant colors and are easy to use.
- Food Coloring: A readily available option for adding color to the salt.
- Powdered Tempera Paint: This can be mixed with water to create a vibrant dye.
- Vinegar: Helps the dye adhere to the salt and prevents the colors from fading.
- Rubbing Alcohol: An alternative to vinegar, it also helps the dye to bind to the salt.
- Zip Lock Bags: For mixing the salt and dye.
- Bowls: To hold the salt while mixing.
- Spoons: For stirring the mixture.
- Baking Sheets: For drying the dyed salt.
- Parchment Paper: To line the baking sheets and prevent sticking.
- Gloves: To protect your hands from the dye.
- Mask: To avoid inhaling any dye particles.
- Spray Bottle: Useful for evenly distributing the dye.
- Measuring Cups and Spoons: To accurately measure the dye and water.
- Paper Towels: For easy cleanup.
- Old Newspapers: To protect your work surface.
- Respirator: To protect from inhaling particles, especially when using powdered dyes.
- Protective Eyewear: To keep dye out of your eyes.
- Apron: To protect your clothes from staining.
3. Step-by-Step Guide to Dyeing Rock Salt
Follow these detailed steps to achieve beautifully dyed rock salt for your landscaping projects.
3.1. Preparation
- Gather Your Supplies: Ensure you have all the necessary materials listed above.
- Protect Your Workspace: Cover your work area with old newspapers or a plastic sheet to prevent staining.
- Wear Protective Gear: Put on gloves, a mask, and an apron to protect your skin and clothing.
3.2. Mixing the Dye
Using Liquid Watercolors
- Pour Rock Salt into a Bag: Add one to two cups of rock salt into a zip lock bag or a bowl.
- Add Liquid Watercolor: Pour a generous amount of liquid watercolor into the bag or bowl. Start with a tablespoon and add more for a more vibrant color.
- Mix Thoroughly: Seal the bag (if using a zip lock bag) and shake vigorously until the salt is evenly coated. If using a bowl, stir well with a spoon.
- Adjust Consistency: If the mixture seems too dry, add a few drops of water at a time until the salt is evenly moist.
Using Food Coloring
- Prepare the Food Coloring Solution: In a small bowl, mix food coloring with a few drops of water and a teaspoon of vinegar or rubbing alcohol. The vinegar or alcohol helps the color adhere to the salt.
- Pour Rock Salt into a Bag: Add one to two cups of rock salt into a zip lock bag or a bowl.
- Add Food Coloring Solution: Pour the food coloring solution into the bag or bowl.
- Mix Thoroughly: Seal the bag (if using a zip lock bag) and shake vigorously until the salt is evenly coated. If using a bowl, stir well with a spoon.
- Adjust Consistency: If the mixture seems too dry, add a few more drops of the food coloring solution until the salt is evenly moist.
Using Powdered Tempera Paint
- Prepare the Tempera Paint Solution: In a small bowl, mix powdered tempera paint with water until you achieve a liquid consistency. Add a teaspoon of vinegar or rubbing alcohol to help the color bind to the salt.
- Pour Rock Salt into a Bag: Add one to two cups of rock salt into a zip lock bag or a bowl.
- Add Tempera Paint Solution: Pour the tempera paint solution into the bag or bowl.
- Mix Thoroughly: Seal the bag (if using a zip lock bag) and shake vigorously until the salt is evenly coated. If using a bowl, stir well with a spoon.
- Adjust Consistency: If the mixture seems too dry, add a few more drops of the tempera paint solution until the salt is evenly moist.
3.3. Drying the Dyed Rock Salt
- Prepare Baking Sheets: Line baking sheets with parchment paper to prevent the salt from sticking.
- Spread the Salt: Pour the dyed rock salt onto the lined baking sheets, spreading it in a thin, even layer.
- Dry the Salt: Allow the salt to dry completely. This may take several hours or overnight. To speed up the drying process, you can place the baking sheets in a low-temperature oven (around 200°F or 93°C) for about 30-60 minutes, checking frequently to ensure it doesn’t burn.
- Check for Dryness: The salt is dry when it is no longer clumpy and the color is set.
3.4. Storing the Dyed Rock Salt
- Ensure Salt is Dry: Make sure the dyed rock salt is completely dry before storing it to prevent clumping and mold growth.
- Store in Airtight Containers: Transfer the dried rock salt into airtight containers, such as jars or plastic containers.
- Label the Containers: Label each container with the color of the salt for easy identification.
- Store in a Cool, Dry Place: Keep the containers in a cool, dry place away from direct sunlight to maintain the color vibrancy.
4. Creative Ways to Use Dyed Rock Salt in Landscaping
Once your rock salt is dyed, the possibilities are endless. Here are some ideas to inspire your landscaping projects:
- Garden Borders: Use different colors to create vibrant borders around flower beds or vegetable gardens.
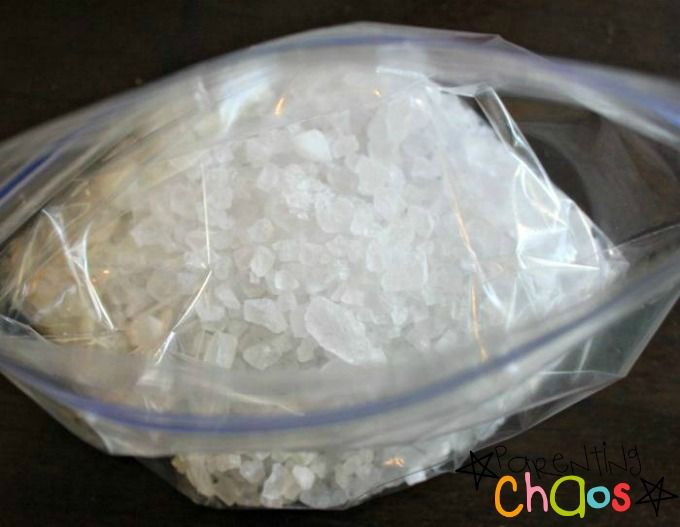 Dyed Rock Salt: A Simple Sensory Experience
alt: Close up of dyed rock salt in a clear glass container, showcasing the various vibrant colors and textures, perfect for sensory play and creative projects.
- Pathways: Design colorful pathways by arranging dyed rock salt in patterns or gradients.
- Focal Points: Create eye-catching focal points in your garden by arranging dyed rock salt around statues, fountains, or other decorative elements.
- Zen Gardens: Add dyed rock salt to Zen gardens to create a calming and visually appealing space. Use a rake to create patterns in the salt for a meditative effect.
- Container Gardens: Enhance the look of potted plants by adding a layer of dyed rock salt on top of the soil. This not only looks great but also helps retain moisture.
- Dry Riverbeds: Simulate a colorful riverbed in your garden by arranging dyed rock salt in a winding pattern. Use different shades of blue and green for a realistic effect.
- Rock Gardens: Integrate dyed rock salt into rock gardens to add pops of color and visual interest among the natural stones.
- Themed Gardens: Create themed gardens based on color palettes, such as a rainbow garden or a monochromatic garden, using dyed rock salt to enhance the theme.
- Holiday Decorations: Use dyed rock salt to create festive holiday decorations in your garden, such as colorful Christmas displays or Halloween-themed arrangements.
- Water Features: Surround ponds or water features with dyed rock salt to add a splash of color and create a visually stunning environment.
- Play Areas: Designate a specific area in your garden for children to play with the dyed rock salt. Provide tools like shovels and buckets for them to create their own colorful landscapes.
- Artistic Installations: Create temporary art installations in your garden using dyed rock salt. Experiment with different patterns, shapes, and colors to express your creativity.
- Edible Gardens: Use dyed rock salt to create decorative borders and pathways in edible gardens, adding a touch of whimsy to your vegetable and herb beds.
5. Safety Tips When Working with Dyed Rock Salt
While dyeing rock salt is a fun and creative activity, it’s important to take necessary safety precautions:
- Wear Protective Gear: Always wear gloves, a mask, and an apron when working with dyes to protect your skin and clothing.
- Work in a Well-Ventilated Area: Ensure you have adequate ventilation to avoid inhaling dye particles.
- Avoid Ingestion: Keep dyed rock salt away from children and pets to prevent accidental ingestion.
- Supervise Children: If children are involved in the dyeing process, ensure they are closely supervised.
- Wash Hands Thoroughly: After handling dyed rock salt, wash your hands thoroughly with soap and water.
- Store Dyes Safely: Store dyes in a secure location, away from children and pets.
- Dispose of Waste Properly: Dispose of any leftover dye and materials according to local regulations.
- Avoid Eye Contact: Wear protective eyewear to prevent dye from getting into your eyes. If dye gets into your eyes, rinse immediately with plenty of water and seek medical attention.
- Use Non-Toxic Dyes: Opt for non-toxic dyes to minimize health risks, especially if children or pets are present.
- Read Product Labels: Always read and follow the instructions and safety guidelines provided on the dye product labels.
- Test Dyes on a Small Area: Before applying the dye to a large batch of rock salt, test it on a small area to ensure the color is what you desire and that there are no adverse reactions.
6. Troubleshooting Common Issues
Even with careful preparation, you might encounter some issues while dyeing rock salt. Here are some common problems and how to solve them:
-
Uneven Color Distribution:
- Problem: Some areas of the rock salt are more intensely colored than others.
- Solution: Ensure you are mixing the salt and dye thoroughly. If using a zip lock bag, shake vigorously. If using a bowl, stir well. You may also need to add more dye to achieve an even color distribution.
-
Color Fading:
- Problem: The dyed rock salt loses its color over time.
- Solution: Add vinegar or rubbing alcohol to the dye mixture. These help the color adhere to the salt and prevent fading. Also, store the dyed rock salt in a cool, dry place away from direct sunlight.
-
Clumping:
- Problem: The dyed rock salt clumps together during the drying process.
- Solution: Ensure the salt is spread in a thin, even layer on the baking sheets. You can also try stirring the salt periodically while it is drying to prevent clumping. Make sure the salt is completely dry before storing it.
-
Dye Staining:
- Problem: The dye stains your hands, clothes, or work surface.
- Solution: Wear gloves, an apron, and work in a protected area. If dye gets on your skin, wash it off immediately with soap and water. For clothes and surfaces, use a stain remover or bleach solution.
-
Salt Not Absorbing Color:
- Problem: The rock salt is not absorbing the dye properly.
- Solution: Ensure the dye mixture is not too diluted. Add more dye to the mixture and try again. You can also try using a different type of dye, such as liquid watercolors or food coloring.
-
Mold Growth:
- Problem: Mold grows on the dyed rock salt during storage.
- Solution: Ensure the rock salt is completely dry before storing it. Store the dyed rock salt in airtight containers in a cool, dry place. If you notice any mold growth, discard the affected salt.
-
Inconsistent Color Results:
- Problem: The colors of the dyed rock salt vary from batch to batch.
- Solution: Use consistent measurements of dye and water for each batch. Also, ensure the rock salt is from the same source and has a consistent texture.
-
Drying Takes Too Long:
- Problem: The dyed rock salt takes a long time to dry.
- Solution: Spread the salt in a thinner layer on the baking sheets. You can also place the baking sheets in a low-temperature oven (around 200°F or 93°C) for about 30-60 minutes, checking frequently to ensure it doesn’t burn.
-
Unpleasant Odor:
- Problem: The dyed rock salt has an unpleasant odor.
- Solution: Use dyes that are odorless or have a pleasant scent. Avoid using dyes with strong chemical odors. Ensure the rock salt is completely dry before storing it to prevent mold growth, which can also cause unpleasant odors.
7. Exploring Different Types of Rock Salt
Understanding the different types of rock salt can help you choose the best option for your dyeing projects:
-
Halite:
- Description: Halite is the mineral name for rock salt, composed of sodium chloride (NaCl). It typically appears as colorless or white crystals but can also be found in shades of blue, purple, pink, or gray due to impurities.
- Uses: Primarily used for de-icing roads, water softening, and as a raw material in the chemical industry.
- Dyeing Properties: Halite is highly suitable for dyeing due to its crystalline structure, which allows it to absorb colors evenly.
-
Evaporated Salt:
- Description: Evaporated salt is produced by evaporating brine (saltwater) in large pans. This process results in fine, uniform crystals that are very pure.
- Uses: Commonly used in the food industry, water conditioning, and as a table salt.
- Dyeing Properties: Evaporated salt dyes well, producing vibrant and consistent colors due to its uniform crystal size and purity.
-
Sea Salt:
- Description: Sea salt is derived from evaporated seawater and contains various minerals such as magnesium, calcium, and potassium. The color and texture can vary depending on the source and processing methods.
- Uses: Popular in culinary applications for its unique flavor profiles and as a natural ingredient in bath products.
- Dyeing Properties: Sea salt can be dyed, but the presence of minerals may affect the final color. It provides a more natural, textured look.
-
Himalayan Pink Salt:
- Description: Mined from the Punjab region of Pakistan, Himalayan pink salt contains trace minerals that give it a distinctive pink color.
- Uses: Used in cooking, spa treatments, and as decorative salt blocks.
- Dyeing Properties: Himalayan pink salt can be dyed, but the existing pink hue will influence the final color. It works best with darker or complementary colors.
-
Epsom Salt:
- Description: Although technically a salt, Epsom salt is magnesium sulfate. It appears as colorless crystals and dissolves easily in water.
- Uses: Commonly used in bath soaks to relieve muscle soreness and as a plant fertilizer.
- Dyeing Properties: Epsom salt can be dyed, but it requires careful handling due to its high solubility. It is best used for decorative purposes rather than applications where it might dissolve.
-
Dendritic Salt:
- Description: Dendritic salt has a unique star-shaped crystal structure, which increases its surface area. This makes it dissolve more quickly than other types of salt.
- Uses: Often used in bath products and as a finishing salt in culinary applications.
- Dyeing Properties: Dendritic salt dyes very well due to its large surface area, resulting in intense and vibrant colors. However, it is more fragile and should be handled with care.
8. The Science Behind Dyeing Rock Salt
Understanding the scientific principles behind dyeing rock salt can help you achieve better results and troubleshoot any issues that may arise.
8.1. Absorption and Adsorption
- Absorption: This is the process by which the dye molecules are drawn into the internal structure of the rock salt. The porosity of the salt crystals allows the dye to penetrate and become trapped within the crystal lattice.
- Adsorption: This involves the dye molecules adhering to the surface of the rock salt. The surface area and texture of the salt crystals play a crucial role in how well the dye adheres to the surface.
8.2. Role of Mordants
- Definition: Mordants are substances that help to fix the dye to the rock salt, improving its colorfastness. Common mordants include vinegar (acetic acid) and rubbing alcohol (isopropyl alcohol).
- Mechanism: Mordants work by forming a chemical bond between the dye molecules and the rock salt. This bond helps to prevent the dye from washing away or fading over time.
8.3. Dye Chemistry
- Types of Dyes: Different types of dyes have different chemical properties that affect their ability to dye rock salt.
- Acid Dyes: These dyes work well with materials that have a positive charge, such as nylon and silk. They can also be used to dye rock salt, especially when a mordant is used to help the dye bind to the salt crystals.
- Basic Dyes: These dyes have a positive charge and are effective on materials with a negative charge. They can be used to dye rock salt, but the results may vary depending on the specific dye and the presence of a mordant.
- Direct Dyes: These dyes can be applied directly to the material without the need for a mordant. They work well on cellulose fibers, such as cotton and linen, and can also be used to dye rock salt with satisfactory results.
- Reactive Dyes: These dyes form a chemical bond with the material, resulting in excellent colorfastness. They are commonly used on cotton and other cellulose fibers, and can also be used to dye rock salt with good results.
- Factors Affecting Dye Uptake:
- pH Levels: The pH of the dye solution can affect the ionization of the dye molecules, which in turn affects their ability to bind to the rock salt.
- Temperature: Higher temperatures can increase the rate of diffusion of the dye molecules, leading to better dye uptake.
- Concentration: The concentration of the dye in the solution affects the intensity of the color. Higher concentrations result in more vibrant colors.
8.4. Crystal Structure of Rock Salt
- Cubic Lattice: Rock salt has a cubic crystal structure, which means that the sodium and chloride ions are arranged in a repeating three-dimensional pattern. This structure allows the dye molecules to penetrate the crystal lattice and become trapped within.
- Porosity: The porosity of the rock salt crystals affects their ability to absorb the dye. More porous crystals will absorb more dye, resulting in more intense colors.
8.5. Environmental Factors
- Humidity: High humidity can slow down the drying process and may lead to clumping of the dyed rock salt.
- UV Exposure: Prolonged exposure to ultraviolet (UV) radiation can cause the dyes to fade over time.
9. Eco-Friendly Dyeing Options
If you’re concerned about the environmental impact of dyeing rock salt, here are some eco-friendly options:
-
Natural Dyes:
- Sources: Use dyes derived from plants, such as turmeric (yellow), beetroot (pink), spinach (green), and red cabbage (purple).
- Process: Extract the dye by boiling the plant material in water, then use the resulting liquid to dye the rock salt.
- Benefits: Natural dyes are non-toxic and biodegradable, making them a sustainable choice.
-
Food-Based Dyes:
- Sources: Utilize food coloring made from natural ingredients, such as vegetable juices and spices.
- Process: Mix the food coloring with water and a mordant (such as vinegar), then use the solution to dye the rock salt.
- Benefits: Food-based dyes are safe for use around children and pets, and they are readily available.
-
Water-Based Dyes:
- Sources: Opt for water-based dyes that are low in volatile organic compounds (VOCs) and other harmful chemicals.
- Process: Follow the manufacturer’s instructions for mixing and applying the dye.
- Benefits: Water-based dyes are less toxic and have a lower environmental impact compared to solvent-based dyes.
-
Recycled Materials:
- Sources: Repurpose materials such as old fabric scraps, tea bags, and coffee grounds to create natural dyes.
- Process: Extract the dye from the recycled materials by boiling them in water, then use the resulting liquid to dye the rock salt.
- Benefits: Using recycled materials reduces waste and promotes a circular economy.
-
DIY Dye Kits:
- Sources: Purchase DIY dye kits that contain natural and non-toxic ingredients.
- Process: Follow the instructions provided in the kit to mix and apply the dye.
- Benefits: DIY dye kits provide a convenient and eco-friendly way to dye rock salt.
-
Minimize Water Usage:
- Process: Use only the amount of water necessary to mix the dye and apply it to the rock salt.
- Benefits: Reducing water usage conserves resources and minimizes the environmental impact of the dyeing process.
-
Proper Disposal:
- Process: Dispose of any leftover dye and materials according to local regulations. Avoid pouring dyes down the drain, as they can contaminate water sources.
- Benefits: Proper disposal prevents pollution and protects the environment.
-
Reusable Containers:
- Process: Use reusable containers for mixing and storing the dyes.
- Benefits: Using reusable containers reduces waste and promotes sustainability.
-
Solar Drying:
- Process: Dry the dyed rock salt in the sun instead of using an oven.
- Benefits: Solar drying reduces energy consumption and lowers your carbon footprint.
10. Advanced Techniques for Dyeing Rock Salt
For those looking to take their dyeing skills to the next level, here are some advanced techniques:
-
Layered Dyeing:
- Description: Create multi-colored effects by dyeing the rock salt in layers.
- Process: Start by dyeing the salt with one color, let it dry, and then dye it again with a different color.
- Benefits: Layered dyeing adds depth and complexity to the colors.
-
Ombre Effect:
- Description: Achieve a gradient effect by gradually blending different shades of the same color.
- Process: Start with a light shade at one end of the salt and gradually increase the intensity of the color towards the other end.
- Benefits: The ombre effect creates a visually appealing transition between colors.
-
Marbling:
- Description: Create a marbled effect by swirling different colors of dye together.
- Process: Add drops of different colored dyes to the salt and gently swirl them together with a toothpick or skewer.
- Benefits: Marbling adds a unique and artistic touch to the dyed rock salt.
-
Tie-Dyeing:
- Description: Apply the tie-dye technique to rock salt by tying it with rubber bands or string before dyeing.
- Process: Divide the salt into sections, tie each section tightly, and then dye the salt with different colors.
- Benefits: Tie-dyeing creates intricate and colorful patterns.
-
Using Stencils:
- Description: Create precise designs by using stencils.
- Process: Place a stencil on the salt and then apply the dye over the stencil.
- Benefits: Using stencils allows you to create detailed and professional-looking designs.
-
Texturing:
- Description: Add texture to the dyed rock salt by mixing it with other materials, such as glitter, sand, or small pebbles.
- Process: Mix the dyed salt with the desired material and then spread it out to dry.
- Benefits: Texturing adds visual interest and dimension to the dyed rock salt.
-
Resist Dyeing:
- Description: Use a resist material, such as wax or glue, to prevent the dye from penetrating certain areas of the salt.
- Process: Apply the resist material to the salt in the desired pattern, then dye the salt. Once the dye is dry, remove the resist material.
- Benefits: Resist dyeing allows you to create intricate and detailed designs.
-
Using Multiple Dyes Simultaneously:
- Description: Apply multiple dyes to the salt at the same time to create unique color combinations.
- Process: Mix different dyes together in a single solution and then apply the solution to the salt.
- Benefits: Using multiple dyes simultaneously allows you to create custom colors and blends.
11. Case Studies: Inspiring Projects with Dyed Rock Salt
Explore how others have used dyed rock salt in creative and innovative ways:
-
Public Art Installation:
- Project: A local artist created a large-scale public art installation using dyed rock salt to depict a landscape scene.
- Details: The artist used various shades of blue and green to create a realistic portrayal of mountains, rivers, and forests. The installation was displayed in a public park and received positive feedback from the community.
-
Community Garden Project:
- Project: A community garden used dyed rock salt to create colorful pathways and borders.
- Details: Volunteers used different colors of salt to create a vibrant and welcoming space for gardeners and visitors. The project helped to beautify the garden and promote community engagement.
-
Educational Sensory Garden:
- Project: A school created an educational sensory garden using dyed rock salt to stimulate the senses.
- Details: The garden included different sections with varying colors and textures of salt, as well as aromatic plants and tactile elements. The garden provided a valuable learning experience for students and helped to promote sensory exploration.
-
Therapeutic Garden for Seniors:
- Project: A senior living facility created a therapeutic garden using dyed rock salt to provide a calming and visually stimulating environment.
- Details: The garden included winding pathways of colorful salt, as well as comfortable seating areas and soothing water features. The garden helped to reduce stress and improve the well-being of the residents.
-
Commercial Landscape Design:
- Project: A landscape designer used dyed rock salt to create a unique and eye-catching design for a commercial property.
- Details: The designer used different colors and patterns of salt to create a visually appealing entrance and outdoor space for the business. The project helped to enhance the property’s curb appeal and attract customers.
12. FAQ: Your Questions About Dyeing Rock Salt Answered
12.1. Can I use regular table salt instead of rock salt?
No, it’s not recommended. Rock salt’s larger crystals work best for dyeing and visual appeal. Table salt is too fine and will clump easily.
12.2. How long does the dyed rock salt last?
With proper care, dyed rock salt can last for several months to a year. Factors like sun exposure and moisture can affect its longevity.
12.3. Is dyed rock salt safe for plants?
While rock salt itself can harm plants, using dyed rock salt sparingly and not directly around plant roots can minimize the risk.
12.4. Can I mix different colors of dye?
Yes, you can mix different colors to create custom shades. Experiment with small batches to achieve the desired color.
12.5. What is the best way to seal dyed rock salt?
Sealing dyed rock salt isn’t generally recommended as it can affect the color and texture. Keeping it dry and out of direct sunlight is the best approach.
12.6. Can I use acrylic paint to dye rock salt?
Yes, acrylic paint can be used, but it may create a less vibrant and more opaque finish compared to liquid watercolors or food coloring.
12.7. How do I prevent the colors from bleeding when it rains?
To prevent colors from bleeding, ensure the dyed rock salt is thoroughly dry before using it outdoors. Adding a mordant like vinegar can also help set the colors.
12.8. Can I use dyed rock salt in aquariums?
No, dyed rock salt is not safe for aquariums as the dyes can be toxic to fish and other aquatic life.
12.9. How do I clean dyed rock salt?
Cleaning dyed rock salt is not recommended, as it can cause the colors to fade or bleed. Instead, replace the salt when it becomes dirty or faded.
12.10. What are some alternative uses for dyed rock salt besides landscaping?
Dyed rock salt can also be used in sensory play for children, craft projects, home décor, and as decorations for themed events.
13. Ready to Transform Your Landscape?
Dyeing rock salt is a simple yet effective way to add personality and flair to your outdoor spaces. Whether you’re creating a vibrant garden border or a colorful pathway, the possibilities are endless. For more inspiration, detailed guides, and expert advice, visit rockscapes.net today. Discover a world of stunning rock salt options and start your landscape transformation now.
We are located at 1151 S Forest Ave, Tempe, AZ 85281, United States and you can reach us at +1 (480) 965-9011 or visit our website at rockscapes.net. Let us help you create the landscape of your dreams.
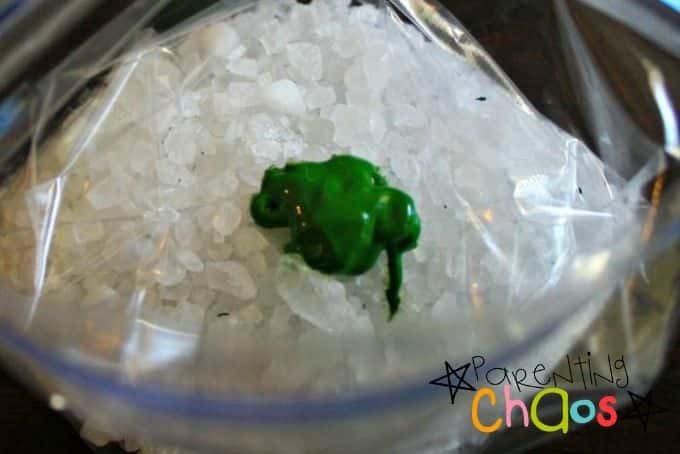 DIY Rainbow Crystals Made with Liquid Water Colors
alt: A child shaking a zip lock bag filled with rock salt and liquid watercolor, creating a vibrant mixture of color for DIY rainbow crystals.