Fixing a rock wall with mortar is essential for maintaining its structural integrity and aesthetic appeal. At rockscapes.net, we provide expert guidance on how to repair and preserve your rock walls using the correct techniques and materials. We will delve into the essential aspects of rock wall repair, including selecting the appropriate mortar, understanding the repair process, and ensuring lasting results. Discover how to restore and maintain your rock wall’s natural beauty and structural soundness with practical tips and expert advice.
1. Understanding the Basics of Rock Wall Repair
Before diving into the repair process, it’s crucial to grasp the fundamental aspects of rock wall construction and the role of mortar. A rock wall’s strength relies on the proper placement of stones and the binding properties of mortar.
What is Mortar and Why Is It Important?
Mortar is a mixture of cement, lime, sand, and water, used to bind stones together in a rock wall. It provides stability, prevents water penetration, and enhances the wall’s overall durability. According to research from Arizona State University’s School of Earth and Space Exploration, in July 2025, mortar prevents structural degradation in rock walls and increases longevity.
Identifying Common Issues in Rock Walls
Rock walls can suffer from various issues over time, including:
- Cracked Mortar: Due to weathering, temperature changes, or ground movement.
- Loose Stones: Caused by mortar deterioration.
- Water Damage: Leading to erosion and weakening of the structure.
- Vegetation Growth: Roots can penetrate and displace stones.
Addressing these issues promptly can prevent further damage and maintain the wall’s integrity.
2. Choosing the Right Type of Mortar
Selecting the correct mortar is crucial for a successful and long-lasting repair. Different types of mortar offer varying levels of strength, flexibility, and water resistance.
Types of Mortar
- Type N Mortar: A versatile option suitable for general use, offering a balance of strength and flexibility.
- Type S Mortar: Known for its high strength and ideal for load-bearing walls or areas with high exposure to weather.
- Type O Mortar: A weaker mix ideal for non-load-bearing applications and historic preservation where flexibility is key.
The choice of mortar depends on the specific requirements of your rock wall and the environmental conditions it faces.
Factors to Consider When Choosing Mortar
- Wall Type: Load-bearing or decorative.
- Climate: Exposure to freeze-thaw cycles and moisture.
- Stone Type: Some stones are more porous and require specific mortar types.
- Aesthetic Preferences: Mortar color and texture can impact the wall’s appearance.
Proper mortar selection ensures compatibility with the existing structure and enhances the repair’s durability.
3. Essential Tools and Materials for Rock Wall Repair
Having the right tools and materials on hand will streamline the repair process and ensure professional-quality results.
List of Necessary Tools
| Tool | Description | Use |
|---|---|---|
| Trowel | For applying and shaping mortar. | Applying mortar between stones, shaping joints. |
| Masonry Chisel | For removing old mortar and shaping stones. | Removing deteriorated mortar, shaping stones for better fit. |
| Hammer | For use with the chisel to remove mortar. | Providing force to the chisel. |
| Stiff Brush | For cleaning stones and removing debris. | Cleaning surfaces for better mortar adhesion. |
| Mortar Mixing Tub | For mixing mortar. | Preparing the mortar mix. |
| Rubber Mallet | For gently setting stones in place. | Adjusting stone placement without damage. |
| Safety Glasses & Gloves | Protecting eyes and hands. | Ensuring safety during the repair process. |
| Wheelbarrow | Transporting materials (mortar, stones) around the work area. | Moving heavy materials. |
| Pointing Tool | Smoothing mortar joints. | Creating a professional finish. |
Required Materials
- Mortar Mix: Pre-mixed or individual components (cement, lime, sand).
- Water: For mixing the mortar.
- Replacement Stones: Matching the existing stones in size and color.
- Cleaning Solution: For removing dirt and stains from stones.
Gathering these tools and materials beforehand will help you work efficiently and effectively.
4. Step-by-Step Guide to Repairing a Mortar Rock Wall
Follow these detailed steps to repair your rock wall with confidence.
Step 1: Preparation and Safety Measures
- Clear the Area: Remove vegetation, debris, and loose stones from the work area.
- Safety Gear: Wear safety glasses and gloves to protect yourself.
- Assess the Damage: Identify all areas needing repair and plan your approach.
Step 2: Removing Old Mortar
- Use a Masonry Chisel and Hammer: Carefully chip away the old, deteriorated mortar.
- Avoid Damaging the Stones: Work slowly and deliberately to prevent chipping or cracking the stones.
- Clean the Joints: Remove all loose debris and dust from the joints using a stiff brush.
Step 3: Mixing the Mortar
- Follow the Manufacturer’s Instructions: Mix the mortar according to the recommended proportions.
- Achieve the Right Consistency: The mortar should be workable but not too runny.
- Mix in Small Batches: Mortar can dry quickly, so mix only what you can use in a reasonable time.
Step 4: Applying the New Mortar
- Dampen the Joints: Lightly moisten the joints with water to improve mortar adhesion.
- Apply Mortar with a Trowel: Press the mortar firmly into the joints, ensuring they are completely filled.
- Remove Excess Mortar: Use the trowel to scrape away any excess mortar from the stone surfaces.
Step 5: Setting Replacement Stones
- Apply Mortar to the Stone: Coat the back of the replacement stone with mortar.
- Position the Stone: Place the stone in its original location, pressing it firmly into the mortar bed.
- Use a Rubber Mallet: Gently tap the stone to ensure it is securely set and aligned with the surrounding stones.
Step 6: Finishing the Mortar Joints
- Use a Pointing Tool: Smooth and shape the mortar joints to match the existing style.
- Create a Consistent Look: Ensure all joints have a uniform appearance for a professional finish.
- Clean the Stone Surfaces: Remove any mortar residue from the stones with a damp sponge.
Step 7: Curing the Mortar
- Keep the Mortar Moist: Lightly mist the repaired area with water for several days to prevent the mortar from drying too quickly.
- Protect from Extreme Conditions: Shield the wall from direct sunlight and freezing temperatures during the curing process.
- Allow Sufficient Time: Let the mortar cure for at least 7 days before subjecting the wall to stress.
Following these steps carefully will result in a strong, durable, and visually appealing repair.
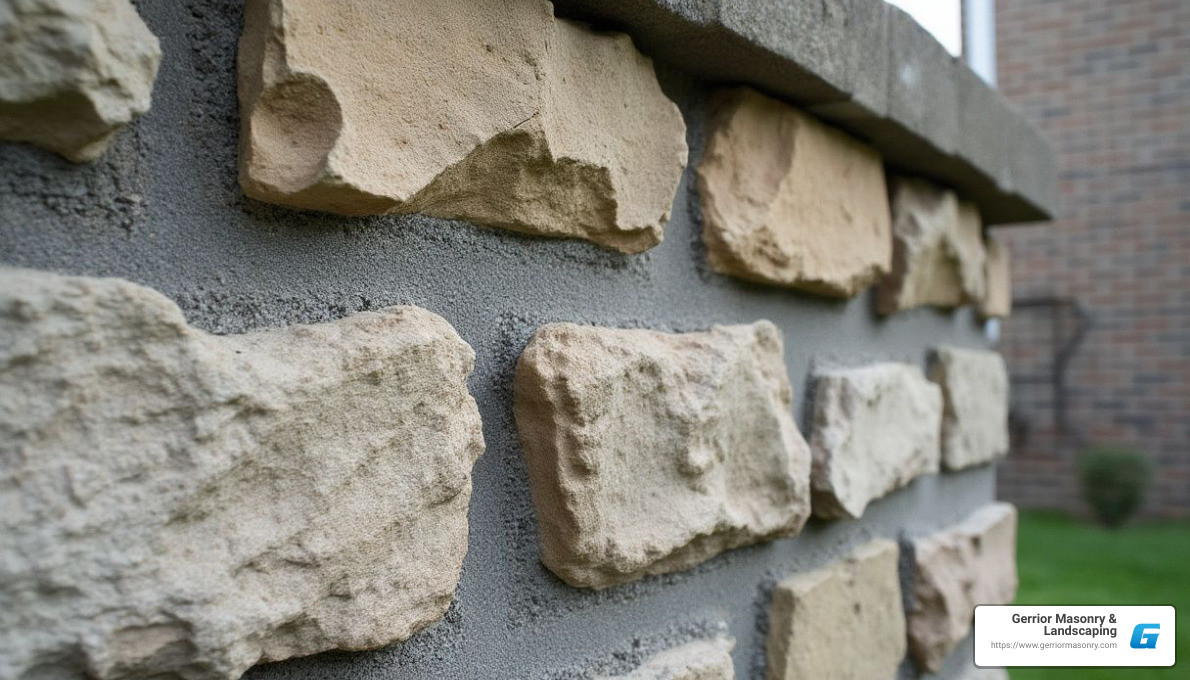 Applying mortar to the stone wall for repair, showcasing trowel technique
5. Advanced Techniques for Complex Repairs
For more challenging rock wall repairs, consider these advanced techniques.
Repointing
Repointing involves removing and replacing the surface mortar in the joints of a stone wall. This technique is used when the mortar is deteriorating but the stones are still in good condition.
- Careful Removal: Use specialized tools to remove the old mortar without damaging the stones.
- Precise Application: Apply the new mortar carefully to ensure a tight seal and a professional finish.
Stone Consolidation
Stone consolidation is a process used to strengthen weakened or deteriorating stones.
- Application of Consolidants: Special chemical solutions are applied to the stone to reinforce its structure.
- Professional Expertise: This technique often requires the expertise of a professional conservator.
Drainage Solutions
Improving drainage around the rock wall can prevent water damage and extend its lifespan.
- Installation of Drainage Systems: Install French drains or other drainage solutions to redirect water away from the wall.
- Grading and Landscaping: Ensure the surrounding landscape is properly graded to promote water runoff.
These advanced techniques can address complex issues and ensure the long-term stability of your rock wall.
6. Maintaining Your Repaired Rock Wall
Proper maintenance is essential for preserving the integrity and appearance of your repaired rock wall.
Regular Inspections
- Check for Cracks: Look for new cracks in the mortar or stones.
- Monitor Stone Stability: Ensure all stones are firmly in place.
- Inspect for Water Damage: Watch for signs of erosion, staining, or vegetation growth.
Preventative Measures
- Control Vegetation: Remove any plants growing on or near the wall.
- Ensure Proper Drainage: Keep drainage systems clear and functioning.
- Apply Sealants: Use a breathable sealant to protect the mortar from water penetration.
Timely Repairs
- Address Issues Promptly: Fix any minor problems before they escalate.
- Repoint as Needed: Replace deteriorating mortar to maintain the wall’s structural integrity.
Regular maintenance and timely repairs will keep your rock wall in excellent condition for years to come.
7. DIY vs. Professional Repair
Deciding whether to tackle the repair yourself or hire a professional depends on the extent of the damage and your skill level.
When to DIY
- Minor Cracks: Small cracks in the mortar can often be repaired by homeowners.
- Loose Stones: If you are comfortable with basic masonry techniques, you can reset loose stones.
- Simple Repointing: Small areas of deteriorated mortar can be repointed with the right tools and knowledge.
When to Hire a Professional
- Extensive Damage: Large cracks, significant stone displacement, or structural instability require professional attention.
- Complex Repairs: Techniques like stone consolidation or drainage solutions are best left to experts.
- Lack of Experience: If you are unsure about any aspect of the repair process, it is wise to consult a professional.
Hiring a professional ensures the job is done correctly and can prevent further damage.
8. Cost Considerations
Understanding the costs involved in rock wall repair can help you budget effectively.
Factors Affecting Cost
- Extent of Damage: More extensive damage requires more time and materials, increasing the cost.
- Materials Used: The type of mortar and stones can impact the overall expense.
- Labor Costs: Professional labor rates vary depending on location and experience.
- Accessibility: Difficult-to-access walls may incur additional costs.
DIY vs. Professional Costs
- DIY Costs: Include tools, materials, and your time.
- Professional Costs: Cover labor, materials, and expertise.
While DIY repairs can save money upfront, professional repairs often provide better long-term value due to their expertise and warranty.
9. Innovative Materials and Techniques
The field of rock wall repair is constantly evolving, with new materials and techniques emerging to improve durability and aesthetics.
New Mortar Formulations
- Self-Healing Mortar: Contains bacteria that can repair cracks as they form.
- Breathable Mortar: Allows moisture to escape, preventing water damage.
- Colored Mortar: Matches the existing mortar color for a seamless repair.
Advanced Repair Techniques
- Laser Cleaning: Removes dirt and stains from stones without damaging the surface.
- 3D Scanning: Creates precise models of the wall for accurate stone replacement.
- Robotic Application: Applies mortar with greater precision and efficiency.
These innovations are enhancing the quality and longevity of rock wall repairs.
10. Finding Inspiration and Resources
If you are looking for inspiration and resources for your rock wall repair project, consider these options.
Online Resources
- Rockscapes.net: Offers a wealth of information on rock wall design, repair, and maintenance.
- Pinterest: Provides visual inspiration and project ideas.
- YouTube: Features tutorials and demonstrations on rock wall repair techniques.
Local Resources
- Local Nurseries: Can provide advice on stone selection and plant management.
- Masonry Suppliers: Offer a wide range of mortar and stone products.
- Historical Societies: May provide guidance on preserving historic rock walls.
By leveraging these resources, you can gather ideas, learn new techniques, and find the materials you need to complete your rock wall repair project successfully.
Fixing a rock wall with mortar involves careful planning, the right tools and materials, and a commitment to quality workmanship. By following these guidelines, you can restore your rock wall to its former glory and ensure its longevity. For more inspiration, detailed guides, and expert advice, visit rockscapes.net. Let us help you create and maintain beautiful and durable rockscapes that enhance your property and stand the test of time.
FAQ About Mortar Rock Wall Repair
What is the best type of mortar to use for repairing a rock wall?
The best type of mortar for repairing a rock wall is typically Type N or Type S mortar. Type N is suitable for general use, offering a good balance of strength and flexibility, while Type S is ideal for load-bearing walls or areas with high exposure to weather.
How do I remove old mortar from a rock wall without damaging the stones?
To remove old mortar without damaging the stones, use a masonry chisel and hammer carefully. Work slowly and deliberately, avoiding excessive force. Clean the joints thoroughly with a stiff brush to remove any loose debris.
What is the correct way to mix mortar for a rock wall repair?
Mix mortar according to the manufacturer’s instructions, typically using a ratio of cement, lime, sand, and water. Achieve a workable consistency that is not too runny. Mix in small batches to prevent the mortar from drying out before use.
How do I ensure the new mortar adheres properly to the existing stone?
To ensure proper adhesion, dampen the joints lightly with water before applying the new mortar. This helps the mortar bond more effectively with the stone surface.
How long does it take for mortar to cure after repairing a rock wall?
Mortar typically takes at least 7 days to cure fully. During this time, keep the repaired area moist by lightly misting it with water to prevent the mortar from drying too quickly.
What are some common mistakes to avoid when repairing a rock wall with mortar?
Common mistakes include using the wrong type of mortar, not cleaning the joints properly, applying too much or too little mortar, and failing to cure the mortar properly.
How do I prevent water damage to my repaired rock wall?
Prevent water damage by ensuring proper drainage around the wall. Install drainage systems if necessary and apply a breathable sealant to protect the mortar from water penetration.
When should I hire a professional for rock wall repair?
Hire a professional for rock wall repair if the damage is extensive, if you lack experience with masonry techniques, or if the wall requires complex repairs such as stone consolidation or drainage solutions.
What are some innovative materials used in modern rock wall repair?
Innovative materials used in modern rock wall repair include self-healing mortar, breathable mortar, colored mortar, and advanced repair techniques such as laser cleaning and 3D scanning.
How can I find inspiration and resources for my rock wall repair project?
Find inspiration and resources online at rockscapes.net, Pinterest, and YouTube. Local resources include nurseries, masonry suppliers, and historical societies.