Getting rid of rocks in Animal Crossing is all about island customization and resource management, and here at rockscapes.net, we can guide you through the process. By strategically breaking rocks, you can reshape your island while ensuring you have a steady supply of essential materials. Let’s explore the best methods for managing those pesky stones, turning your island into a personalized paradise with customized rock arrangements and efficient resource gathering.
1. Understanding Rock Mechanics in Animal Crossing
What Role Do Rocks Play in Animal Crossing?
Rocks are crucial for gathering resources in Animal Crossing. Each day, rocks on your island can be hit with a shovel or axe to yield valuable materials like Stone, Iron Nuggets, Clay, and sometimes even Gold Nuggets or Bells. Efficiently managing these rocks can significantly boost your island’s development and your character’s progression.
How Many Rocks Naturally Generate on My Island?
Typically, your island in Animal Crossing: New Horizons will naturally generate six rocks. These rocks are scattered randomly across your island when you first start the game. Knowing this number is important for planning your island layout and resource management strategies.
Where Can I Find Rocks on My Animal Crossing Island?
Rocks spawn randomly across your island, but they need a clear 3×3 tile space to appear. Rocks won’t spawn on paths, buildings, or other objects. This means you can control where rocks appear by covering areas you don’t want them to spawn in with custom designs, flowers, or furniture.
2. The Process of Removing and Relocating Rocks
How to Break a Rock in Animal Crossing: A Step-by-Step Guide
To break a rock in Animal Crossing, follow these steps:
-
Eat Fruit: Consume a piece of fruit (apple, cherry, orange, peach, pear, or coconut) to gain temporary strength.
-
Equip a Shovel or Axe: Select either a shovel or an axe from your inventory.
-
Smash the Rock: Stand directly in front of the rock and press the “A” button to hit it. Your character will smash the rock into pieces.
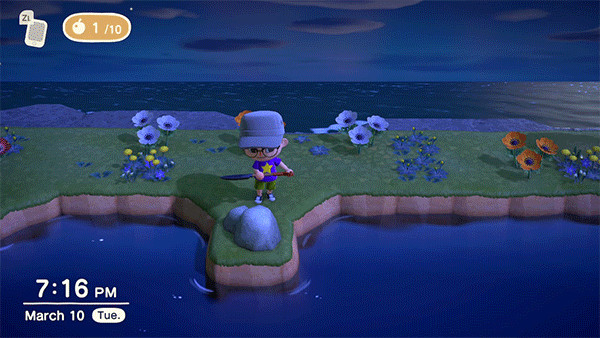 Animal Crossing character breaking a rock with a shovel on a small peninsula.
What Happens When I Break a Rock?
When you break a rock, it disappears entirely from your island. The next day, a new rock will spawn in a random, unoccupied location on your island. This mechanic allows you to strategically relocate rocks to desired spots.
Can I Control Where New Rocks Will Appear?
Yes, you can control where new rocks appear by managing the available spaces on your island. Rocks need a 3×3 space to spawn, so you can cover unwanted areas with:
-
Custom Designs: Place custom design tiles on the ground.
-
Flowers and Trees: Plant flowers or trees densely in areas you want to block.
-
Furniture: Place furniture items to fill up space.
By covering all potential spawn locations except for your desired spots, you can force the new rocks to appear exactly where you want them.
3. Strategic Rock Placement for Island Design
How Can I Use Rocks to Enhance My Island’s Aesthetic?
Rocks can be a fantastic addition to your island’s design. Consider creating:
- Rock Gardens: Group rocks together to form a zen-like rock garden.
- Decorative Accents: Place rocks near waterfalls, cliffs, or gardens to add natural beauty.
- Themed Areas: Use rocks to create themed areas like a mining site or a prehistoric zone.
At rockscapes.net, you’ll find a wealth of design ideas and inspiration to help you make the most of rocks in your landscape.
What Are Some Creative Rock Garden Ideas?
-
Zen Garden: Arrange rocks of varying sizes in a bed of sand or dirt, surrounded by carefully placed plants and water features.
-
Fairy Garden: Incorporate small rocks into a fairy garden, adding miniature furniture, tiny flowers, and whimsical decorations.
-
Japanese Garden: Combine rocks with moss, bamboo, and carefully pruned trees to create a serene Japanese-style garden.
How Can I Maximize Resource Collection from My Rocks?
To maximize resource collection:
-
Prepare the Area: Dig holes behind you to prevent your character from being knocked back after hitting the rock. This allows you to hit the rock repeatedly without moving.
-
Rapid Hits: Hit the rock as fast as possible with your shovel or axe. You can get up to eight items from a single rock each day.
-
Daily Routine: Make hitting your rocks part of your daily routine to ensure a steady supply of resources.
Can I Move Rocks to a Specific Location?
Yes, you can move rocks to a specific location by breaking them and controlling where they respawn. This process requires patience and careful planning:
- Break the Rocks: Eat fruit and break all the rocks on your island.
- Cover Unwanted Areas: Cover all areas where you don’t want rocks to spawn with custom designs, flowers, or furniture.
- Wait for Respawn: Wait for a new rock to spawn in one of the few remaining open spots.
- Repeat: Repeat this process daily until all rocks are in your desired locations.
This method, although time-consuming, ensures precise placement of rocks for your island design.
4. Common Mistakes to Avoid When Managing Rocks
What Happens If I Break All My Rocks at Once?
If you break all your rocks at once, you will only get one new rock spawning each day. This means it will take several days to get all your rocks back. It’s generally better to break one rock at a day to keep a consistent resource flow.
Can Rocks Spawn Too Close to Buildings or Other Structures?
Rocks will not spawn directly next to buildings or structures. They require a clear 3×3 tile space. However, be mindful of potential spawn locations when planning your building placements to avoid unwanted rock appearances.
What Should I Do If a Rock Spawns in an Undesired Location?
If a rock spawns in an undesired location, simply break it again. Continue controlling the spawn locations until the rock appears where you want it. Patience is key in this process.
5. Advanced Techniques for Rock Management
How to Use Mannequins to Control Rock Spawns
Mannequins can be used strategically to control rock spawns:
- Place Mannequins: Place mannequins in a grid pattern across your island, leaving only the desired rock spawn locations open.
- Break Rocks: Break the existing rocks.
- Wait for Respawn: Wait for the rocks to respawn in the open locations.
- Remove Mannequins: Once the rocks are in place, remove the mannequins.
Mannequins act as space fillers, preventing rocks from spawning in those areas.
How Can I Optimize My Island Layout for Rock Farming?
Optimizing your island layout for rock farming involves:
- Centralized Rock Garden: Create a centralized rock garden for easy access and efficient resource collection.
- Clear Pathways: Ensure clear pathways to your rock garden to avoid obstacles and speed up your daily routine.
- Strategic Hole Placement: Place holes behind the rocks to prevent knockback and maximize the number of hits per rock.
What Are the Benefits of Having a Dedicated Rock Area?
Having a dedicated rock area offers several benefits:
- Efficient Resource Collection: Makes it easier to collect resources daily.
- Island Aesthetics: Enhances your island’s design with a dedicated rock feature.
- Controlled Spawns: Allows you to control where new rocks appear, preventing them from spawning in unwanted locations.
6. Exploring Different Rock Types and Their Uses
What Types of Rocks Are Available in Animal Crossing?
In Animal Crossing, the main type of rock is the standard grey rock that yields Stone, Iron Nuggets, Clay, and occasional Gold Nuggets or Bells. While the appearance of these rocks doesn’t vary, their strategic placement and use can significantly impact your island’s design.
How Can I Use Different Rocks to Create Unique Landscapes?
While the rock appearance is uniform, you can create unique landscapes by:
- Varying Placement: Arrange rocks in different patterns and groupings.
- Adding Decorations: Surround rocks with plants, flowers, and other decorative items to create themed areas.
- Creating Elevation: Use cliffs and waterfalls to add verticality to your rock arrangements.
Are There Any Special Rocks or Hidden Rock Features in the Game?
While there aren’t special rock types, Money Rocks are a notable feature. Hitting a Money Rock can yield a surprising amount of Bells, making it a valuable daily activity. Additionally, keep an eye out for rocks that may contain Gold Nuggets, which are essential for crafting valuable items.
7. Utilizing Rocks in DIY Projects and Crafting
What DIY Recipes Require Rocks?
Rocks are a key ingredient in many DIY recipes in Animal Crossing. Some common recipes include:
- Stone Axe: Essential for chopping wood.
- Stone Arch: A decorative item for your island.
- Fossil Doorplate: A unique door decoration.
- Gravestones: Used in cemeteries or spooky-themed areas.
How Can I Efficiently Farm Rocks for Crafting Materials?
To efficiently farm rocks for crafting materials:
- Create a Rock Garden: Centralize your rocks in one area for easy access.
- Prepare for Hitting: Dig holes behind you to prevent knockback.
- Daily Collection: Make hitting rocks part of your daily routine.
- Store Resources: Store the collected materials in your home storage for future crafting projects.
What Are Some Creative DIY Projects Using Rocks?
- Rock Path: Create a natural-looking path using stone.
- Rock Garden Pond: Combine rocks with a water feature for a serene garden.
- Stone Fire Pit: Build a cozy fire pit using stones for a gathering spot.
8. Rock Management for Island Rating and Villager Satisfaction
How Does Rock Placement Affect My Island Rating?
Rock placement can affect your island rating. Well-placed rocks that contribute to the overall aesthetic of your island can improve your rating. Overcrowding or haphazard placement, however, may negatively impact your rating.
Do Villagers Interact with Rocks?
Villagers do not directly interact with rocks in a significant way. However, a well-designed island with thoughtful rock arrangements can contribute to the overall atmosphere and indirectly improve villager satisfaction.
How Can I Ensure My Rock Arrangements Are Aesthetically Pleasing?
To ensure your rock arrangements are aesthetically pleasing:
- Plan Your Layout: Sketch out your island design and rock placements beforehand.
- Consider Balance: Balance the number and placement of rocks with other elements like plants, water features, and buildings.
- Seek Inspiration: Look for inspiration from real-life landscapes and other Animal Crossing islands.
9. Troubleshooting Common Rock-Related Issues
What If a Rock Won’t Spawn?
If a rock won’t spawn, ensure that there are no obstacles in the potential spawn locations. Check for:
- Custom Designs: Remove any custom design tiles.
- Flowers and Trees: Ensure there is sufficient space around plants.
- Furniture: Clear any furniture items.
Rocks require a clear 3×3 tile space to spawn.
What Do I Do If I Accidentally Break a Rock I Wanted to Keep?
If you accidentally break a rock you wanted to keep, don’t worry. A new rock will spawn the next day. Simply wait for it to reappear and continue managing its location.
How Can I Prevent Rocks from Spawning in Unwanted Areas?
To prevent rocks from spawning in unwanted areas, cover those areas with custom designs, flowers, trees, or furniture. This prevents the game from selecting those spots as potential spawn locations.
10. Expert Tips and Tricks for Rock Wrangling
What Are Some Lesser-Known Rock Management Tips?
- Use Transparent Custom Designs: Create transparent custom designs to cover large areas without altering the appearance of the ground.
- Coordinate with Daily Tasks: Combine rock management with other daily tasks, such as watering flowers or collecting resources, to maximize efficiency.
- Time Travel for Faster Results: If you are comfortable with time travel, you can speed up the process of rock relocation by advancing one day at a time.
How Can I Create a Natural-Looking Rock Formation?
To create a natural-looking rock formation:
- Vary Rock Sizes: While you can’t change the size of the rocks, you can create the illusion of variation by placing them at different elevations.
- Incorporate Plants: Surround the rocks with a variety of plants and flowers to create a natural, overgrown look.
- Add Water Features: Include a small pond or stream to enhance the natural appearance of the rock formation.
What Are Some Advanced Island Design Techniques Involving Rocks?
- Cliffside Rock Gardens: Create rock gardens on different levels of cliffs for a dramatic effect.
- Hidden Rock Caves: Design hidden caves behind waterfalls or cliffs, incorporating rocks into the entrance.
- Themed Rock Areas: Create themed areas, such as a dinosaur dig site or a moon rock display, using rocks as a central element.
Implementing these strategies will not only help you manage rocks effectively but also enhance the overall beauty and functionality of your Animal Crossing island.
11. Frequently Asked Questions (FAQs) About Rock Management in Animal Crossing
How many rocks can I have on my Animal Crossing island?
You can have a maximum of six rocks on your Animal Crossing island. This number is consistent across all islands and cannot be increased. Managing these rocks effectively is crucial for resource gathering and island design.
Can I choose the type of rock that spawns on my island?
No, you cannot choose the type of rock that spawns on your island. All rocks are the same standard grey color and yield the same resources. However, you can influence their placement through strategic relocation techniques.
What materials can I get from hitting rocks?
Hitting rocks with a shovel or axe can yield Stone, Iron Nuggets, Clay, Gold Nuggets, and Bells. The type of material you receive is random, but consistent daily interaction with your rocks will ensure a steady supply of these resources.
How often do rocks respawn in Animal Crossing?
Rocks respawn one per day. If you break multiple rocks, only one new rock will appear the following day. This mechanic encourages players to manage their rocks strategically rather than breaking them all at once.
Do rocks respawn in the same place every time?
No, rocks do not respawn in the same place every time. When you break a rock, it will respawn in a random, unoccupied location on your island. You can control where they respawn by covering unwanted areas with designs or objects.
Can I move rocks to the beach?
No, you cannot move rocks to the beach. Rocks will only spawn on the grassy areas of your island and require a clear 3×3 space. The beach is not a valid spawn location for rocks.
What is the best tool to use for hitting rocks?
The best tool to use for hitting rocks is either a shovel or an axe. Both tools work equally well for extracting resources. Choose whichever tool you prefer or have readily available.
How do I stop getting knocked back when hitting rocks?
To stop getting knocked back when hitting rocks, dig two holes behind your character before you start hitting the rock. The holes will prevent you from being pushed back, allowing you to hit the rock repeatedly without moving.
Does the time of year affect the materials I get from rocks?
No, the time of year does not affect the materials you get from rocks. The resources you obtain from rocks remain consistent throughout the year. However, seasonal events may introduce new DIY recipes that require these materials.
Can visitors to my island break my rocks?
Yes, visitors to your island can break your rocks if they have eaten fruit. Be mindful of who you allow to eat fruit on your island, especially if you have carefully arranged your rocks.
Ready to transform your island with stunning rock features? Visit rockscapes.net for endless inspiration, detailed guides, and expert advice on all things landscaping. Our team of professionals can help you design the perfect rock garden, select the best materials, and bring your vision to life. Contact us today at 1151 S Forest Ave, Tempe, AZ 85281, United States, call +1 (480) 965-9011, or explore our website at rockscapes.net. Let us help you create the island of your dreams!