Gluing landscape rocks together allows you to craft unique and durable outdoor features; rockscapes.net can guide you through the best techniques and materials. With the right knowledge, you can create captivating rock formations, secure borders, and eye-catching sculptures that elevate your landscape. Discover the art of rock bonding for landscape enhancement, durable designs, and outdoor art at rockscapes.net.
1. Why Should You Glue Landscape Rocks Together?
Gluing landscape rocks together offers a new dimension to landscape design, enabling you to create stable, secure, and intricate structures. This technique opens up possibilities beyond simply scattering rocks, allowing for the creation of artistic focal points and functional retaining walls.
1.1. Benefits of Rock Bonding
Here are several compelling reasons to consider gluing landscape rocks together:
- Enhanced Stability: Gluing ensures rocks stay in place, preventing collapses or shifts over time.
- Complex Designs: Achieve intricate designs that would be impossible with loose rocks.
- Custom Creations: Build decorative rock walls, borders, fountains, sculptures, and more.
- Repairing Rocks: Restore broken or cracked rocks with sentimental or aesthetic value.
1.2. Examples of Landscape Rock Projects
- Rock Walls and Borders: Create defined garden edges or small retaining walls.
- Water Features: Construct stunning rock fountains, waterfalls, or pond surrounds.
- Outdoor Art: Design unique sculptures and artistic installations.
2. What Types of Adhesives Work Best for Landscape Rocks?
The right adhesive is crucial for a strong, lasting bond. The best choice depends on the size and type of rocks, as well as the intended use of the structure.
2.1. Construction Adhesive
Construction adhesive is excellent for large rocks due to its strength and durability, bonding heavy, uneven stones effectively. Apply a thick layer and firmly press the rocks together, using wire or rope for support during the drying process. Construction adhesive is ideal for creating stable rock walls or borders, according to civil engineering experts.
2.2. Mortar
Mortar, commonly used in masonry, is another option for larger landscape rocks, offering a traditional and robust bonding solution. It requires mixing with water to create a workable paste, which is then applied between the rocks. Mortar not only provides a strong bond but also fills gaps, enhancing the structural integrity of your project.
2.3. Epoxy Resin or Epoxy Putty
These two-part adhesives are ideal for medium-sized rocks, hardening when mixed. Sanding the rocks beforehand creates a rougher texture for better adhesion, states the National Building Museum.
2.4. Super Glue or Hot Glue
Super glue and hot glue are best for small, smooth rocks, such as polished black river rock. These adhesives dry quickly and are easy to use. Clamping the rocks together for a few seconds ensures a secure bond.
2.5. Polyurethane Adhesives
Polyurethane adhesives are known for their flexibility and strong bonding capabilities, making them suitable for various types of rocks. These adhesives can withstand temperature changes and vibrations, ensuring the longevity of your rock structures.
Here’s a quick comparison of adhesive types:
| Adhesive Type | Rock Size | Best Use | Advantages | Disadvantages |
|---|---|---|---|---|
| Construction Adhesive | Large | Rock walls, borders | Strong, durable | Requires support during drying |
| Mortar | Large | Rock walls, borders, filling gaps | Strong bond, fills gaps | Requires mixing, can be messy |
| Epoxy Resin/Putty | Medium | Sculptures, detailed designs | Strong, good for textured surfaces | Requires mixing, may need sanding |
| Super/Hot Glue | Small | Small decorations, quick fixes | Fast-drying, easy to use | Not suitable for heavy loads |
| Polyurethane | All sizes | Versatile projects requiring flexible bonding | Strong, withstands temperature changes and vibrations, durable | Can be more expensive than other adhesives, may require ventilation |
3. How Do You Prepare Landscape Rocks for Gluing?
Proper preparation is essential for a strong and lasting bond. Cleaning the rocks thoroughly ensures that the adhesive can properly adhere to the surface.
3.1. Cleaning the Rocks
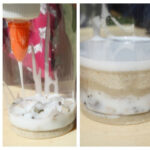
Remove dirt, dust, debris, and moisture from the surface of the rocks with a brush, cloth, or hose. According to landscape maintenance experts, this step is crucial for a cleaner and stronger bond.
3.2. Drying the Rocks
Ensure the rocks are completely dry before applying any adhesive. Moisture can weaken the bond and lead to failure, advises the American Society of Civil Engineers.
3.3. Roughening the Surface
For smoother rocks, consider roughening the surface with sandpaper to provide a better grip for the adhesive. This is particularly important when using epoxy or construction adhesives.
4. What Are The Steps for Gluing Landscape Rocks Together?
Follow these steps for effective rock bonding:
4.1. Select the Right Adhesive
Choose the adhesive that best suits the size and type of rocks you are working with. Refer to the table above for guidance.
4.2. Apply the Adhesive
Apply a generous amount of adhesive to one of the rocks, ensuring full coverage of the contact area. Follow the manufacturer’s instructions for the specific adhesive you are using.
4.3. Press Rocks Together
Firmly press the rocks together and hold them in place. Use wire, rope, or clamps to secure the rocks while the adhesive dries, especially for larger stones.
4.4. Allow Proper Drying Time
Allow the adhesive to dry completely according to the manufacturer’s instructions. This may take anywhere from a few hours to several days, depending on the adhesive.
4.5. Clean Up Excess Adhesive
Once the adhesive is dry, remove any excess with a sharp knife or solvent, being careful not to damage the surrounding rocks.
5. What Safety Precautions Should You Take When Gluing Rocks?
Safety is paramount when working with adhesives. Protect yourself and those around you by following these precautions:
5.1. Wear Protective Gear
Always wear gloves and eye protection when working with adhesives. Some adhesives can be toxic, irritating, or harmful to your skin and eyes.
5.2. Work in a Well-Ventilated Area
Work outdoors or in an area with good air circulation to avoid inhaling harmful fumes. Use a respirator if necessary.
5.3. Follow Product Instructions
Carefully read and follow the safety precautions and instructions on the product label.
5.4. Test the Adhesive
Test the adhesive on a small area of the rocks first to ensure it bonds well and looks good after drying.
6. Creative Project Ideas for Glued Landscape Rocks
Unleash your creativity with these project ideas:
6.1. Rock Sculptures
Create unique sculptures by gluing rocks together in artistic arrangements. This could range from simple stacked designs to more elaborate, abstract forms.
6.2. Garden Borders
Construct decorative and functional garden borders by gluing rocks together to form a continuous edge. This can help define planting beds and pathways.
6.3. Water Features
Build stunning water features such as fountains, waterfalls, and pond surrounds using glued rocks. The adhesive ensures a watertight and durable structure.
6.4. Retaining Walls
Create small retaining walls to prevent soil erosion and add visual interest to your landscape. Glued rocks provide a stable and attractive alternative to traditional retaining wall materials.
7. What Are The Best Types of Rocks to Use for Gluing?
The type of rock you choose can significantly impact the success and aesthetic of your project. Some rocks are better suited for gluing than others due to their texture, porosity, and overall durability.
7.1. River Rocks
River rocks are a popular choice for landscaping due to their smooth, rounded shapes and natural appearance. They are ideal for creating borders, pathways, and decorative features. When gluing river rocks, it’s important to roughen the surface slightly with sandpaper to improve adhesion.
7.2. Flagstone
Flagstone is a type of sedimentary rock that is commonly used for paving and wall construction. Its flat, irregular shape makes it easy to work with and glue together. Flagstone is an excellent choice for creating retaining walls, patios, and walkways.
7.3. Lava Rocks
Lava rocks are lightweight and porous, making them a unique option for landscaping. They can be used to create interesting textures and provide excellent drainage in garden beds. When gluing lava rocks, use an adhesive that is compatible with porous materials.
7.4. Granite
Granite is a durable and visually appealing rock that is often used in high-end landscaping projects. Its strength and resistance to weathering make it an excellent choice for creating long-lasting structures. Gluing granite requires a strong construction adhesive or mortar.
7.5. Slate
Slate is a fine-grained metamorphic rock that is known for its distinctive layering and smooth surface. It is commonly used for roofing, paving, and wall cladding. When gluing slate, ensure that the surfaces are clean and dry to achieve a strong bond.
8. How Can You Maintain and Repair Glued Rock Structures?
Proper maintenance is essential for prolonging the life of your glued rock structures. Regular cleaning and timely repairs can prevent costly damage and ensure that your landscape features remain beautiful and functional.
8.1. Cleaning Glued Rock Structures
Clean your glued rock structures regularly to remove dirt, moss, and other debris. Use a soft brush and mild detergent to gently scrub the surfaces. Avoid using harsh chemicals or abrasive cleaners, as these can damage the adhesive and the rocks themselves.
8.2. Repairing Damaged Areas
Inspect your glued rock structures regularly for signs of damage, such as cracks, loose stones, or weakened adhesive. Repair any damaged areas promptly to prevent further deterioration. Use the same type of adhesive that was originally used to glue the rocks together.
8.3. Preventing Water Damage
Water can be a major cause of damage to glued rock structures, especially in areas with freezing temperatures. Ensure that your structures are properly drained to prevent water from pooling and freezing. Consider applying a sealant to protect the adhesive from moisture.
8.4. Reapplication of Adhesive
Over time, the adhesive used to glue the rocks together may weaken due to exposure to the elements. Reapply adhesive as needed to maintain the structural integrity of your landscape features.
9. How To Choose the Right Colors and Textures of Rocks?
Selecting the right colors and textures of rocks can greatly enhance the aesthetic appeal of your landscape design. Consider the overall style of your garden and choose rocks that complement the existing features.
9.1. Complementary Colors
Choose rocks that complement the colors of your plants, flowers, and other landscape elements. For example, if you have a garden with a lot of green foliage, consider using rocks with warm colors, such as brown or tan, to create a visually appealing contrast.
9.2. Contrasting Colors
Create visual interest by using rocks with contrasting colors. For example, you could use dark gray rocks to create a border around a bed of brightly colored flowers.
9.3. Texture
Consider the texture of the rocks and how it will contribute to the overall look and feel of your landscape. Smooth rocks can create a sense of calm and tranquility, while rough, textured rocks can add a more rugged, natural element.
9.4. Size
Choose rocks of various sizes to create a more dynamic and interesting landscape design. Mix small pebbles with larger boulders to add depth and dimension.
10. How To Incorporate Glued Landscape Rocks Into Your Existing Landscape?
Integrating glued landscape rocks into your existing landscape requires careful planning and execution. Consider the overall style of your garden and choose rocks that complement the existing features.
10.1. Blending with Existing Elements
Blend your glued rock structures seamlessly with the existing elements in your landscape. Use similar colors, textures, and sizes of rocks to create a cohesive and harmonious design.
10.2. Creating Focal Points
Use glued landscape rocks to create focal points in your garden. A striking rock sculpture or a beautifully crafted water feature can draw the eye and add visual interest to your landscape.
10.3. Defining Spaces
Use glued rock structures to define different spaces in your garden. Create a border around a patio or pathway to delineate the area and add a sense of structure.
10.4. Adding Height and Dimension
Use glued rocks to add height and dimension to your landscape. Build a small retaining wall or a raised garden bed to create visual interest and add depth to your garden.
For more inspiration and resources on landscape rock designs, visit rockscapes.net, or visit our showroom at 1151 S Forest Ave, Tempe, AZ 85281, United States. Call us at +1 (480) 965-9011 to discuss your project needs.
FAQ: Gluing Landscape Rocks Together
1. Can I use any type of glue for landscape rocks?
No, you should use adhesives specifically designed for outdoor use and suitable for the type of rock you are working with, such as construction adhesive, epoxy, or mortar.
2. How do I clean landscape rocks before gluing them?
Remove dirt, dust, and debris with a brush, cloth, or hose. Ensure the rocks are completely dry before applying adhesive.
3. What safety precautions should I take when gluing rocks?
Wear gloves and eye protection, work in a well-ventilated area, and follow the manufacturer’s instructions on the adhesive label.
4. How long does it take for the adhesive to dry?
Drying time varies depending on the type of adhesive and environmental conditions. Follow the manufacturer’s instructions for specific drying times.
5. Can I glue rocks together in wet conditions?
It’s best to avoid gluing rocks in wet conditions, as moisture can weaken the bond. Ensure the rocks are dry before applying adhesive.
6. How do I repair a glued rock structure if it breaks?
Clean the broken surfaces, apply fresh adhesive, and hold the pieces together until the adhesive dries. Use supports if necessary.
7. What is the best way to support rocks while the adhesive dries?
Use wire, rope, clamps, or temporary supports to hold the rocks in place until the adhesive is fully cured.
8. Can I paint glued landscape rocks?
Yes, you can paint glued landscape rocks, but use paint that is designed for outdoor use and suitable for the type of rock you are working with.
9. How do I prevent glued rock structures from being damaged by weather?
Ensure proper drainage to prevent water pooling and consider applying a sealant to protect the adhesive from moisture.
10. Where can I find more ideas for using glued landscape rocks in my landscape?
Visit rockscapes.net for a wide range of design ideas, product information, and expert advice on creating stunning landscape features with rocks.
By following these guidelines, you can successfully glue landscape rocks together to create beautiful and durable outdoor features.