Gluing live rock underwater can be tricky, but with the right techniques and products, you can create a stunning and stable aquascape. At rockscapes.net, we’re here to guide you through the process, ensuring your reef thrives with the perfect rock formations. Enhance your aquarium with long-lasting aquascaping adhesives, secure rock bonds, and practical underwater cementing solutions.
1. Understanding the Basics of Gluing Live Rock Underwater
Gluing live rock underwater might seem daunting, but it’s a common practice for reef enthusiasts. The key is understanding the properties of different adhesives and how they react in a marine environment.
1.1. Why Glue Live Rock Underwater?
There are several reasons why you might need to glue live rock underwater:
- Adding New Rock to an Established Tank: Introducing new rock to an existing aquascape without disrupting the entire setup.
- Repairing Aquascapes: Fixing unstable structures or reattaching rocks that have become dislodged.
- Attaching Corals: Securing coral frags or colonies directly onto the rock.
1.2. Challenges of Underwater Gluing
Working underwater presents unique challenges:
- Water Dilution: Water can dilute the adhesive, weakening its bond.
- Limited Visibility: Working in a confined space with limited visibility can make precise application difficult.
- Fish and Invertebrates: Protecting inhabitants from exposure to the adhesive.
1.3. Intended Search Queries Related to Gluing Live Rock Underwater
To fully address user intent, let’s consider these specific search queries:
- Best glue for live rock underwater
- How to attach live rock underwater safely
- Underwater reef tank aquascaping adhesives
- Gluing corals to live rock underwater
- DIY underwater live rock bonding techniques
2. Choosing the Right Adhesive for Underwater Use
Selecting the right adhesive is crucial for a successful underwater bonding experience.
2.1. Cyanoacrylate (CA) Glue
Cyanoacrylate (CA) glue, commonly known as super glue, is a popular choice for aquarium use due to its rapid curing time and effectiveness in wet environments.
- Gel vs. Liquid CA Glue: Gel-based CA glues are preferred for underwater applications because they are less likely to dissolve or disperse in water. Liquid CA glues can be used, but require more careful application.
- Brands and Recommendations: BRS Extra Thick Gel is a reliable option. Many reef enthusiasts also recommend Loctite Gel Control Super Glue for its ease of use and strong bond.
2.2. Epoxy Putty
Epoxy putty is another excellent option, providing a strong and durable bond. It is particularly useful for larger projects or when filling gaps.
- Reef-Safe Epoxy Putty: Ensure the epoxy putty is specifically formulated for reef aquariums to avoid introducing harmful chemicals.
- Application Tips: Knead the epoxy putty until it is a uniform color, then press it firmly between the rocks. It cures underwater but may take several hours to achieve full strength.
2.3. Mortar
For the crazy arches and other rockwork that is synonymous with negative space aquascaping, you will most likely need to use a lot of bonding.
- Marco Mortar: Marco Mortar comes in both a standard beige rock color as well as a purple color to match your CaribSea LifeRock or Real Reef Rock.
- Application Tips: Secure all of the pieces with glue first, support the gravity-defying structures with books or sticks while it all cures. The following day, go back and solidify the joints completely by covering them in eMarco Mortar.
2.4. Adhesives to Avoid
Avoid using standard household adhesives or epoxies that are not labeled as reef-safe. These can leach harmful chemicals into the water, endangering your aquarium inhabitants. Also, do not use epoxy when building your aquascape. While many reefers use epoxy to help hold rocks together, we typically do not recommend using Epoxy for a couple of reasons. Epoxy doesn’t stick very well and it will, therefore, make your structure less sturdy. Epoxy also takes forever to dry and tends to stick out and become an eyesore in your reef. Not to mention it will make your skimmer go nuts.
3. Step-by-Step Guide to Gluing Live Rock Underwater
Follow these steps to ensure a successful underwater gluing process.
3.1. Preparation
- Gather Materials: You’ll need your chosen adhesive (CA gel or epoxy putty), gloves, a plastic scraper or putty knife, and paper towels.
- Turn off Pumps and Powerheads: This prevents the adhesive from being dispersed and allows for a still environment.
- Minimize Disturbances: Avoid feeding or any other activities that might stress the inhabitants.
3.2. Applying CA Gel
- Dry the Surfaces: As much as possible, dry the surfaces of the rocks to be joined. Use a paper towel to dab the areas where you will apply the glue.
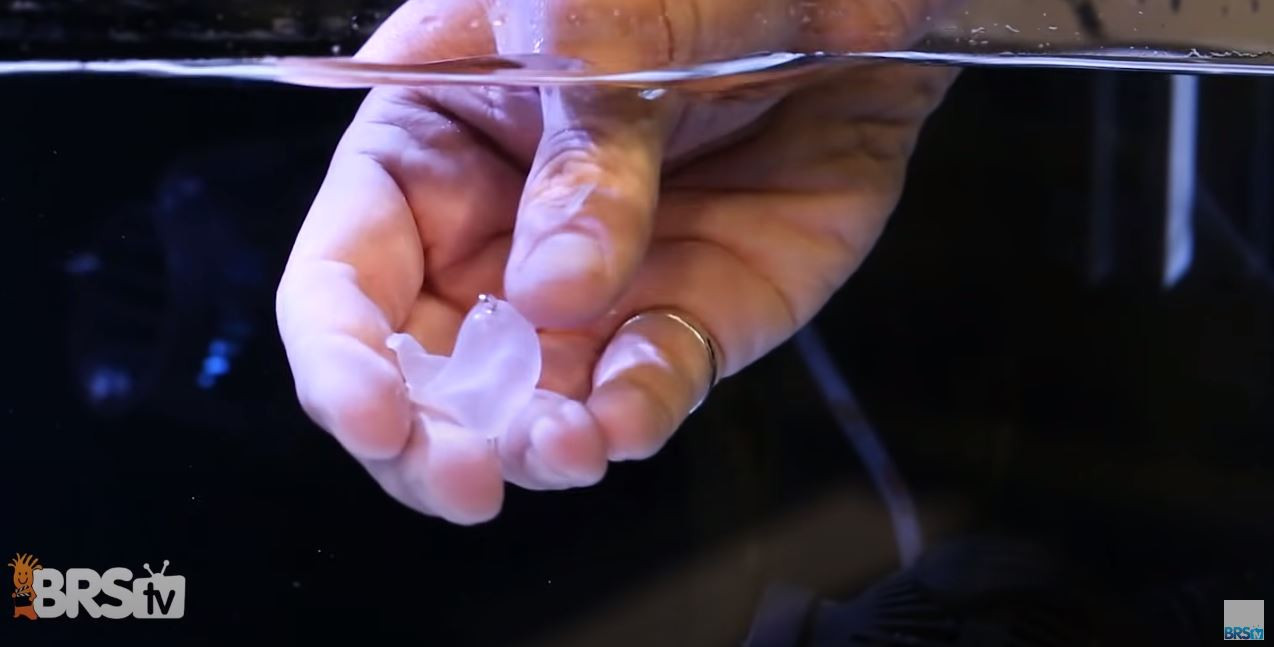 Super Glue Gel being used underwater
- Apply the Glue: Apply a generous amount of CA gel to one of the surfaces.
- Join the Rocks: Press the rocks together firmly for 30-60 seconds. Hold the rocks still until the glue begins to set.
- Curing Time: CA glue typically cures within a few minutes underwater. Avoid disturbing the newly joined rocks for at least an hour.
3.3. Applying Epoxy Putty
- Prepare the Epoxy: Knead the two parts of the epoxy putty together until the color is uniform.
- Apply the Epoxy: Press the epoxy putty firmly between the rocks, ensuring it fills any gaps.
- Shape the Epoxy: Use a plastic scraper or putty knife to smooth the epoxy and remove any excess.
- Curing Time: Epoxy putty can take several hours to fully cure underwater. Provide support if necessary to prevent the rocks from shifting during this time.
3.4. Tips for a Strong Bond
- Surface Preparation: Clean the rock surfaces as much as possible. Use a brush to remove any algae or debris.
- Use Enough Adhesive: Don’t be stingy with the glue or epoxy. A generous amount ensures a strong and lasting bond.
- Support the Structure: For larger or more complex structures, provide temporary support using plastic rods or rubble rock until the adhesive fully cures.
4. Safety Precautions
Safety is paramount when working with adhesives in an aquarium.
4.1. Protecting Aquarium Inhabitants
- Minimize Exposure: Work quickly and carefully to minimize the amount of time the adhesive is in the water.
- Use Reef-Safe Products: Always use adhesives specifically formulated for reef aquariums to avoid introducing harmful chemicals.
- Monitor Water Parameters: After gluing, monitor water parameters such as ammonia, nitrite, and nitrate to ensure they remain within safe levels.
4.2. Personal Safety
- Wear Gloves: Always wear gloves to protect your skin from the adhesive.
- Eye Protection: Consider wearing eye protection to prevent splashes.
- Ventilation: Work in a well-ventilated area to avoid inhaling fumes.
5. Advanced Aquascaping Techniques
Once you’re comfortable with the basics, you can explore more advanced aquascaping techniques.
5.1. Creating Overhangs and Arches
Creating overhangs and arches can add visual interest and create hiding places for fish and invertebrates.
- Use Mortar: Mortar will hold the best out of any adhesive option and it will bond the two rocks together creating a transition.
- Structural Support: Use plastic rods or rubble rock to provide additional support until the adhesive fully cures.
5.2. Attaching Corals to Live Rock
Gluing corals to live rock is a common practice for fragging and propagation.
- Coral Placement: Choose a suitable location for the coral, considering its light and flow requirements.
- Attaching the Coral: Use a small amount of CA gel to attach the coral frag to the rock. Hold it in place for 30-60 seconds until the glue sets.
5.3. Negative Space Aquascaping (NSA)
Negative space aquascaping involves creating open areas and voids within the rock structure to enhance visual appeal and water flow.
- Planning: Plan the aquascape carefully, considering the desired layout and structural integrity.
- Bonding: Use a combination of CA glue and epoxy putty to create strong and stable structures.
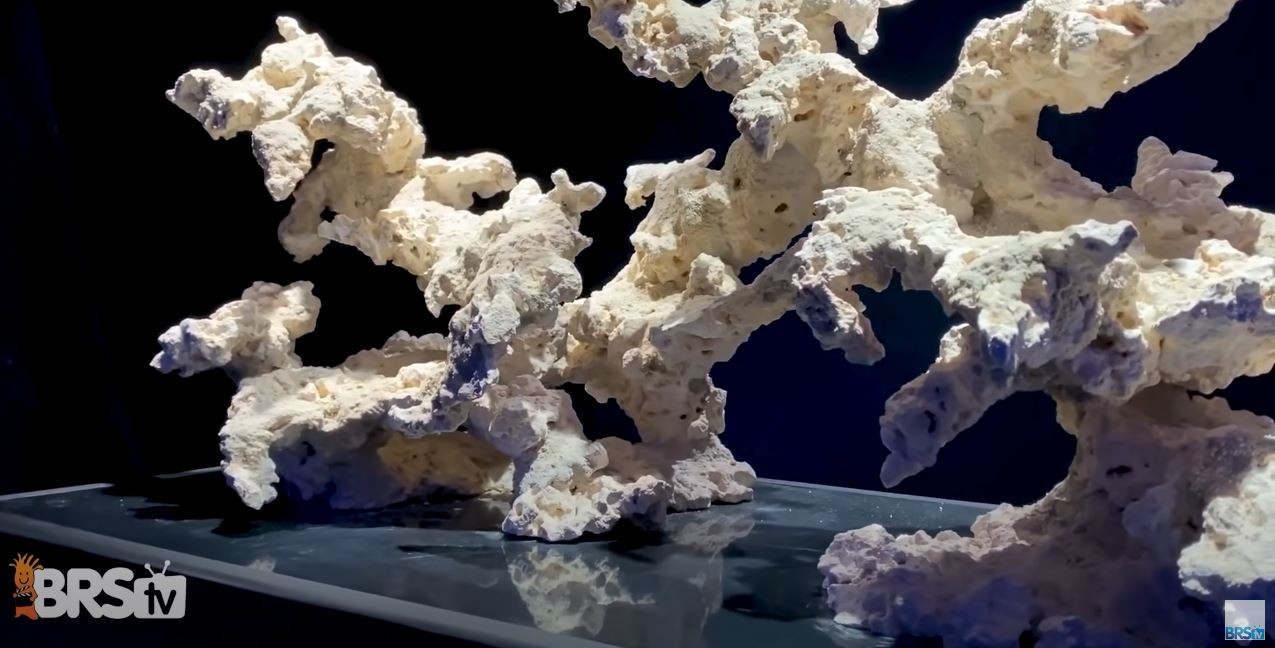 NSA Negative Space Aquascape example
5.4. Utilizing Acrylic Rods
This is not a method that we like to recommend due to its difficulty. While it might seem easy enough to drill through two pieces of rock in the exact position you desire, facts are, it is not easy to execute. The rocks always tend to shift and your better off just using the super glue gel and mortar combo, it works just as well and doesn’t require precision drilling.
- Stacking Large Pillars: In this case, you can just drill the rocks one at a time, then slide them onto a vertical acrylic rod creating a large pillar or single stack of rock. Something very unique and not all that common for home aquariums, this is more of a technique used in large public aquaria-type situations.
6. Maintaining Your Aquascape
Proper maintenance is essential for a healthy and vibrant aquascape.
6.1. Monitoring Stability
Regularly inspect the rock structure for any signs of instability or loose rocks.
- Addressing Issues: If you find any loose rocks, re-glue them promptly to prevent them from falling and potentially harming inhabitants.
6.2. Cleaning and Algae Control
Algae growth can detract from the appearance of your aquascape.
- Manual Removal: Use a brush or scraper to remove algae from the rocks.
- Algae-Eating Inhabitants: Introduce algae-eating fish or invertebrates to help control algae growth.
6.3. Water Quality
Maintain good water quality through regular water changes and monitoring of water parameters.
- Regular Water Changes: Perform regular water changes to remove excess nutrients and maintain stable water chemistry.
- Water Testing: Regularly test water parameters such as ammonia, nitrite, nitrate, pH, alkalinity, and calcium to ensure they are within optimal ranges.
7. Common Mistakes to Avoid
Avoiding these common mistakes can save you time and frustration.
7.1. Using the Wrong Adhesive
Using non-reef-safe adhesives can introduce harmful chemicals into the aquarium.
- Always Use Reef-Safe Products: Ensure that any adhesive you use is specifically formulated for reef aquariums.
7.2. Insufficient Surface Preparation
Failing to properly clean the rock surfaces can weaken the bond.
- Clean Thoroughly: Remove any algae, debris, or loose material from the rock surfaces before applying the adhesive.
7.3. Not Using Enough Adhesive
Being stingy with the adhesive can result in a weak bond.
- Apply Generously: Use a generous amount of adhesive to ensure a strong and lasting bond.
7.4. Disturbing the Structure During Curing
Disturbing the structure before the adhesive has fully cured can weaken the bond.
- Provide Support: Provide temporary support if necessary and avoid disturbing the structure until the adhesive has fully cured.
8. Real-World Examples and Case Studies
Let’s look at some real-world examples to illustrate these techniques.
8.1. Case Study 1: Repairing a Collapsed Aquascape
A reef enthusiast noticed that a section of their aquascape had collapsed.
- Solution: They used CA gel to reattach the rocks, providing temporary support with plastic rods. After the glue had cured, the aquascape was stable and visually appealing.
8.2. Case Study 2: Creating a Negative Space Aquascape
An experienced aquascaper wanted to create a negative space aquascape with arches and overhangs.
- Solution: They used a combination of CA glue and epoxy putty to build the structure, carefully planning the layout and providing structural support where needed. The result was a stunning and dynamic aquascape.
9. The Role of Rockscapes.net
At rockscapes.net, we are dedicated to providing you with the best resources and products for creating stunning and healthy reef aquascapes.
9.1. Inspiration and Ideas
Explore our gallery of aquascape designs to find inspiration for your own aquarium.
- Diverse Styles: From minimalist designs to elaborate structures, we offer a wide range of styles to suit your taste.
9.2. Product Recommendations
We offer a curated selection of reef-safe adhesives, tools, and accessories.
- Top Brands: We only recommend products from trusted brands known for their quality and reliability.
9.3. Expert Advice
Our team of experienced aquarists is here to provide expert advice and support.
- Contact Us: Contact us with any questions or concerns you may have about aquascaping.
10. Frequently Asked Questions (FAQs)
10.1. Can I use regular super glue in my aquarium?
No, you should only use cyanoacrylate (CA) glue that is specifically labeled as reef-safe. Regular super glue may contain additives that are harmful to marine life.
10.2. How long does it take for CA glue to cure underwater?
CA glue typically cures within a few minutes underwater, but it’s best to avoid disturbing the newly joined rocks for at least an hour to ensure a strong bond.
10.3. Is epoxy putty safe for reef aquariums?
Yes, if the epoxy putty is specifically formulated for reef aquariums. Ensure the product is labeled as reef-safe to avoid introducing harmful chemicals.
10.4. How do I prepare live rock for gluing?
Clean the rock surfaces thoroughly to remove any algae, debris, or loose material. Dry the surfaces as much as possible before applying the adhesive.
10.5. Can I glue corals directly to live rock underwater?
Yes, you can use a small amount of CA gel to attach coral frags to live rock underwater. Choose a suitable location for the coral, considering its light and flow requirements.
10.6. What should I do if the glue gets on my skin?
CA glue can bond to skin very quickly. Wash the affected area with soap and water. If the glue doesn’t come off, try using acetone (nail polish remover).
10.7. How can I create a strong bond underwater?
Use a generous amount of reef-safe adhesive, prepare the rock surfaces properly, and provide temporary support if necessary until the adhesive has fully cured.
10.8. What water parameters should I monitor after gluing live rock?
Monitor water parameters such as ammonia, nitrite, and nitrate to ensure they remain within safe levels. Perform regular water changes to maintain good water quality.
10.9. How do I remove excess epoxy putty from my aquascape?
Use a plastic scraper or putty knife to smooth the epoxy and remove any excess before it cures.
10.10. Where can I find inspiration for my aquascape design?
Explore online galleries, forums, and rockscapes.net for inspiration and ideas. Consider different styles, such as minimalist designs, elaborate structures, and negative space aquascapes.
11. Call to Action
Ready to create a breathtaking underwater landscape? Visit rockscapes.net today to discover a wide range of reef-safe adhesives, tools, and expert advice. Let us help you bring your aquascaping vision to life! Contact us at 1151 S Forest Ave, Tempe, AZ 85281, United States or call +1 (480) 965-9011. Explore the beauty of rockscapes.net and transform your aquarium into a stunning reef environment.