How To Grow Rock Candy is a fun and simple science experiment you can do right at home. At rockscapes.net, we’ll guide you through the crystal-growing process, offering tips and tricks for perfect, colorful rock candy every time. This guide will cover everything from the best sugar solutions to creative ideas, including geological formations, for displaying your edible crystals and unique dessert ideas.
1. What Exactly Is Rock Candy and Why Should You Grow It?
Rock candy is large sugar crystals often called “sugar candy” because it is made of large sugar crystals. It is often found in pretty colors and sold in all kinds of candy stores.
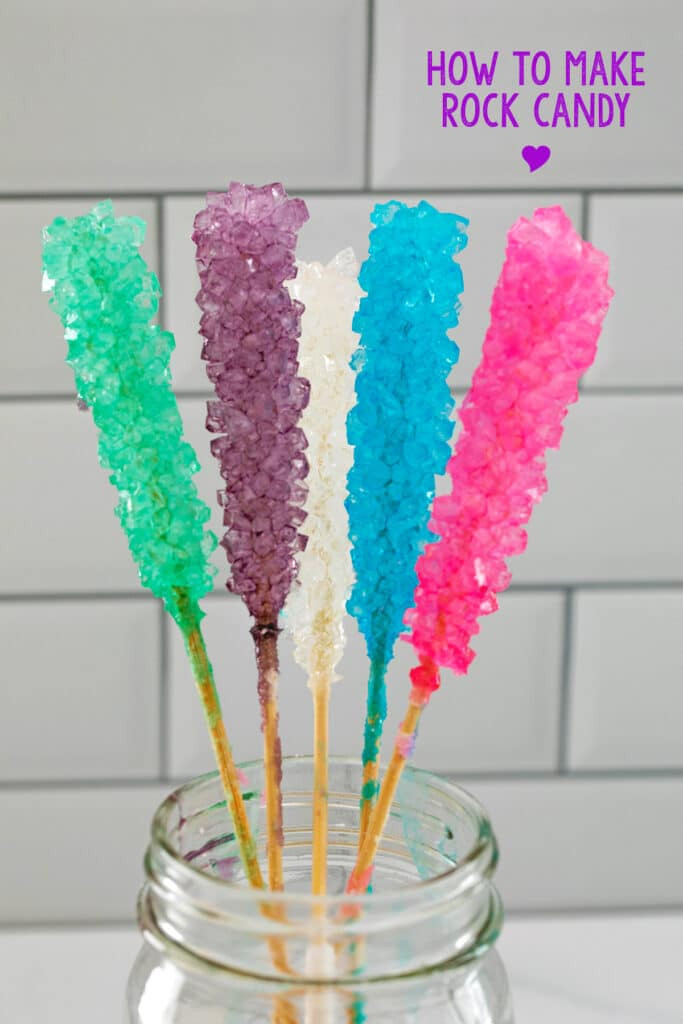 Colorful homemade rock candy crystals in jars, perfect for edible geology
While you can easily purchase rock candy online or in stores, making your own offers several benefits. It’s a fantastic and engaging science experiment, teaching kids about crystallization and solution saturation, principles also found in geological formations. According to research from Arizona State University’s School of Earth and Space Exploration, crystal formation is a fundamental process in geology, mirroring the way minerals form in the earth. Plus, homemade rock candy can be customized with various colors and flavors, perfect for unique cocktails or mocktails, adding a personal touch to celebrations.
2. What Equipment Do I Need to Grow Rock Candy at Home?
To successfully grow rock candy, you’ll need a few key items readily available in most kitchens. Here’s a checklist to get you started:
| Item | Purpose | Alternative Options |
|---|---|---|
| Granulated Sugar | The primary ingredient for crystal formation | Cane sugar |
| Water | To dissolve the sugar and create the supersaturated solution | Distilled water for clearer crystals |
| Food Coloring | To add color to your rock candy | Natural food dyes like beet juice or turmeric |
| Mason Jars | To hold the sugar solution while crystals grow | Clean glass cups or jars |
| Skewers or Candy Sticks | To provide a surface for the crystals to grow on | Wooden skewers, cotton string (weighted at the bottom) |
| Clothespins or Chip Clips | To suspend the skewers in the jars without touching the bottom | Pencils, chopsticks, or any item that can balance the skewer |
3. How Long Does It Take to Grow Rock Candy?
Growing rock candy requires patience, as the crystallization process takes time. While the sugar solution is quick to prepare, the real magic happens over several days.
- Preparation Time: 30 minutes
- Crystallization Time: 6-7 days
During this time, you can observe the crystal growth daily, making it an exciting project for both kids and adults.
4. What Is The Simplest Method For Growing Rock Candy?
Here is a straightforward method to grow your own rock candy:
- Prepare the Skewers: Dip skewers in water, roll in sugar, and let dry. This “seeds” the skewers, giving the crystals something to hold on to.
- Set Up Jars: Clean your jars and attach clothespins to the skewers, balancing them so the skewers hang about an inch from the bottom.
- Make Sugar Solution: Boil 4 cups of water in a large saucepan, then add 10 cups of sugar one cup at a time, stirring until each cup dissolves.
- Simmer and Cool: Let the mixture simmer for 5 minutes, then remove from heat and let it rest for 15 minutes.
- Add Color and Transfer: Divide the mixture into your prepared jars and stir in food coloring.
- Crystallize: Place the skewers into the solution and let the jars sit undisturbed for 6-7 days.
- Remove and Enjoy: Gently crack the hardened sugar on top, wiggle the stick to release, and let the syrup drizzle off.
5. Can I Re-Use Sugar Solution When Growing Rock Candy?
Yes, you can reuse the sugar solution, but with a few adjustments. After removing the rock candy, pour the solution back into a saucepan, bring it to a boil, and add an additional ¼ cup of sugar. Simmer for a few minutes before pouring back into the jar. According to food scientists, reheating and adding more sugar ensures the solution remains supersaturated, which is crucial for further crystal growth.
6. What Are Common Problems When Growing Rock Candy and How Do I Fix Them?
Growing rock candy can be tricky, and several issues may arise. Here are some common problems and how to troubleshoot them:
| Problem | Possible Cause | Solution |
|---|---|---|
| No Crystal Growth | Sugar solution not supersaturated | Put the mixture back in the saucepan, add another cup of sugar, and stir until dissolved. Use new sugar-coated skewers. |
| Crystals Growing at the Bottom | Skewers touching the bottom of the jar | Ensure skewers are suspended about an inch from the bottom. |
| Jar Contamination | Impurities in the jar | Make sure jars are thoroughly cleaned with hot water before use. |
| Moving Jars During Crystallization | Disturbing the solution | Avoid moving the jars once the skewers are in place. |
| Temperature Fluctuations | Inconsistent temperature affecting crystal formation | Keep the jars in a stable, room-temperature environment. |
| Inadequate Seeding | Skewers not properly coated with sugar | Ensure skewers are thoroughly coated with sugar and completely dry before placing them in the solution. |
| Humidity Levels | High humidity affecting the rate of evaporation and crystal formation | Place the jars in a cool, dry place to minimize humidity. A dehumidifier can help control moisture levels in the room. |
| Incomplete Sugar Dissolution | Sugar not fully dissolved in water during the initial heating process | Heat the solution longer, stirring continuously until all sugar granules are completely dissolved. Ensure the solution is clear before removing it from the heat. |
| Overcrowding of Crystals | Too many nucleation sites causing small, dense crystals rather than large ones | Use fewer “seed” crystals on the skewers. A light coating of sugar is sufficient to initiate crystal growth without overwhelming the solution. |
| Uneven Crystal Growth | Inconsistent temperature around the jar | Rotate the jars periodically to ensure all sides are exposed to the same temperature. This can help promote more uniform crystal growth. |
| Use of Tap Water | Minerals and impurities in tap water affecting crystal clarity | Use distilled water for a purer sugar solution. Distilled water contains fewer impurities that can interfere with the crystallization process, resulting in clearer, more defined crystals. |
7. Can I Make Rock Candy Grow Faster?
While patience is key, some suggest placing the jars in the refrigerator to speed up the process, though results may vary. Removing the rock candy after only a couple of days will result in sparser crystals.
8. What Is The Best Way To Store Rock Candy?
Store rock candy in a cool, dry place, wrapped in cellophane wrappers to maintain its quality. Properly stored, it can last up to a year.
9. What Are Some Helpful Tips and Tricks for Growing Rock Candy?
- Ensure mason jars are clean and warm.
- Don’t skip coating the sticks in sugar.
- Make the color darker than you want, as it will lighten as crystals form.
- Use concentrated flavoring to avoid adding too much liquid.
- Avoid moving or jostling the jars once the sticks are in place.
These tips will help you troubleshoot any issues and ensure your rock candy turns out perfectly.
10. How Can I Use My Homegrown Rock Candy?
Your homemade rock candy isn’t just a treat; it’s a versatile element that can enhance various aspects of your life. Here are some creative ways to utilize your sugary creations:
| Usage | Description | Benefits |
|---|---|---|
| Cocktail and Mocktail Stirrers | Use rock candy sticks as stirrers for cocktails or mocktails. As they dissolve, they add sweetness and color to your drinks, making them visually appealing and flavorful. Experiment with different colors and flavors to match your drink themes. | Adds sweetness and visual appeal, customizable flavors, fun for parties and gatherings. |
| Edible Decorations | Incorporate rock candy into your cake decorating or dessert platters. Break them into smaller pieces and use them as edible “gems” to add sparkle and texture. They can also be used to create edible landscapes or geological formations on your desserts, mirroring the natural beauty of rock formations. | Adds unique texture and visual interest, customizable colors, enhances dessert presentations. |
| Party Favors | Wrap individual rock candy sticks in cellophane bags and tie with ribbons for charming party favors. These are especially great for children’s parties or themed events. Customize the colors to match your party’s decor. | Affordable and customizable, delightful for guests, adds a personal touch to celebrations. |
| Science Education | Use the process of growing rock candy as an educational tool. Teach children about saturation, crystallization, and the science behind candy making. This is a fun and engaging way to make learning about chemistry exciting and hands-on. Replicate geological processes on a small scale to demonstrate how crystals form in nature. | Enhances learning experience, promotes interest in science, provides a tangible example of scientific principles. |
| Gifts | Create beautifully packaged rock candy sets as gifts for friends and family. Include a variety of colors and flavors, and present them in decorative jars or boxes. Personalized homemade gifts are always appreciated. Tie a tag with a fun fact about crystal formation or a geological analogy to add an educational touch. | Thoughtful and personal, customizable, conveys care and effort. |
| Themed Events | Tailor your rock candy colors and presentations to match the theme of your event. For a winter-themed party, use white and blue rock candy to mimic icicles. For a garden party, use green and floral-flavored rock candy. | Enhances thematic decor, creates a cohesive visual experience, adds a unique touch to events. |
| Creative Food Projects | Use rock candy to create edible geodes or crystal-inspired art. Melt the sugar and mold it into interesting shapes, then let it harden. These can be used as centerpieces or decorative elements for your food creations. Use different colors and textures to replicate the appearance of various minerals. | Encourages creativity, enhances artistic presentation, offers a unique culinary experience. |
| Geological Demonstrations | Use different colored rock candy to demonstrate the layering of geological strata. Create a “rock” formation using the candy and explain how different layers of sediment accumulate over time to form sedimentary rocks. This can be a great visual aid for teaching earth science. | Simplifies complex concepts, engages visual learners, provides a hands-on educational tool. |
| Sensory Play | Crush different colors of rock candy into small, safe pieces and use them in sensory bins for children to explore. The varying textures and colors of the candy provide a stimulating sensory experience. Ensure that children are supervised to prevent ingestion. | Encourages sensory exploration, develops fine motor skills, provides a fun and engaging activity. |
| Gourmet Sugar | Grind rock candy into a fine powder to use as a gourmet sugar for rimming cocktail glasses or sprinkling on desserts. The unique texture and flavor of rock candy sugar can elevate the taste and presentation of your culinary creations. | Adds a unique flavor and texture, enhances gourmet presentations, versatile for various culinary applications. |
Making your own rock candy is simple as long as you understand the process. It requires patience and a lot of sugar, but the result is a rewarding and versatile treat.
FAQ About Growing Rock Candy
Is growing rock candy a good science project?
Yes, growing rock candy is a great science project that demonstrates crystallization and saturation. It is fun and educational for kids of all ages.
What type of sugar is best for rock candy?
Granulated sugar is the best type of sugar for making rock candy. It dissolves easily and forms clear crystals.
How do I prevent the rock candy from sticking to the bottom of the jar?
Ensure that the skewers are suspended about an inch from the bottom of the jar using clothespins or chip clips.
What can I add to rock candy for flavor?
You can add concentrated flavorings such as vanilla extract, peppermint oil, or fruit extracts to the sugar solution after it has been removed from the heat.
Can I use tap water for rock candy?
It is best to use distilled water for making rock candy to avoid impurities that can affect the clarity of the crystals.
How do I make clear rock candy?
Use distilled water and avoid adding any colorings. Keep the solution as pure as possible to ensure clear crystals.
How long does rock candy last?
Rock candy can last up to a year if stored properly in a cool, dry place, wrapped in cellophane wrappers.
Why is my rock candy cloudy?
Cloudy rock candy can be caused by impurities in the water or sugar. Using distilled water and high-quality sugar can help prevent this.
Can I add citric acid to rock candy?
Adding a small amount of citric acid can help prevent the sugar from crystallizing too quickly, resulting in larger, clearer crystals.
How do I make flavored rock candy?
Add a few drops of concentrated flavoring to the sugar solution after it has cooled slightly, just before pouring it into the jars.
Ready to embark on your rock candy adventure? Explore rockscapes.net for more creative ideas, detailed guides on different types of stones, and expert advice on making your rock candy growing journey a success. Contact us at Address: 1151 S Forest Ave, Tempe, AZ 85281, United States. Phone: +1 (480) 965-9011. Website: rockscapes.net. Let’s grow something amazing together.