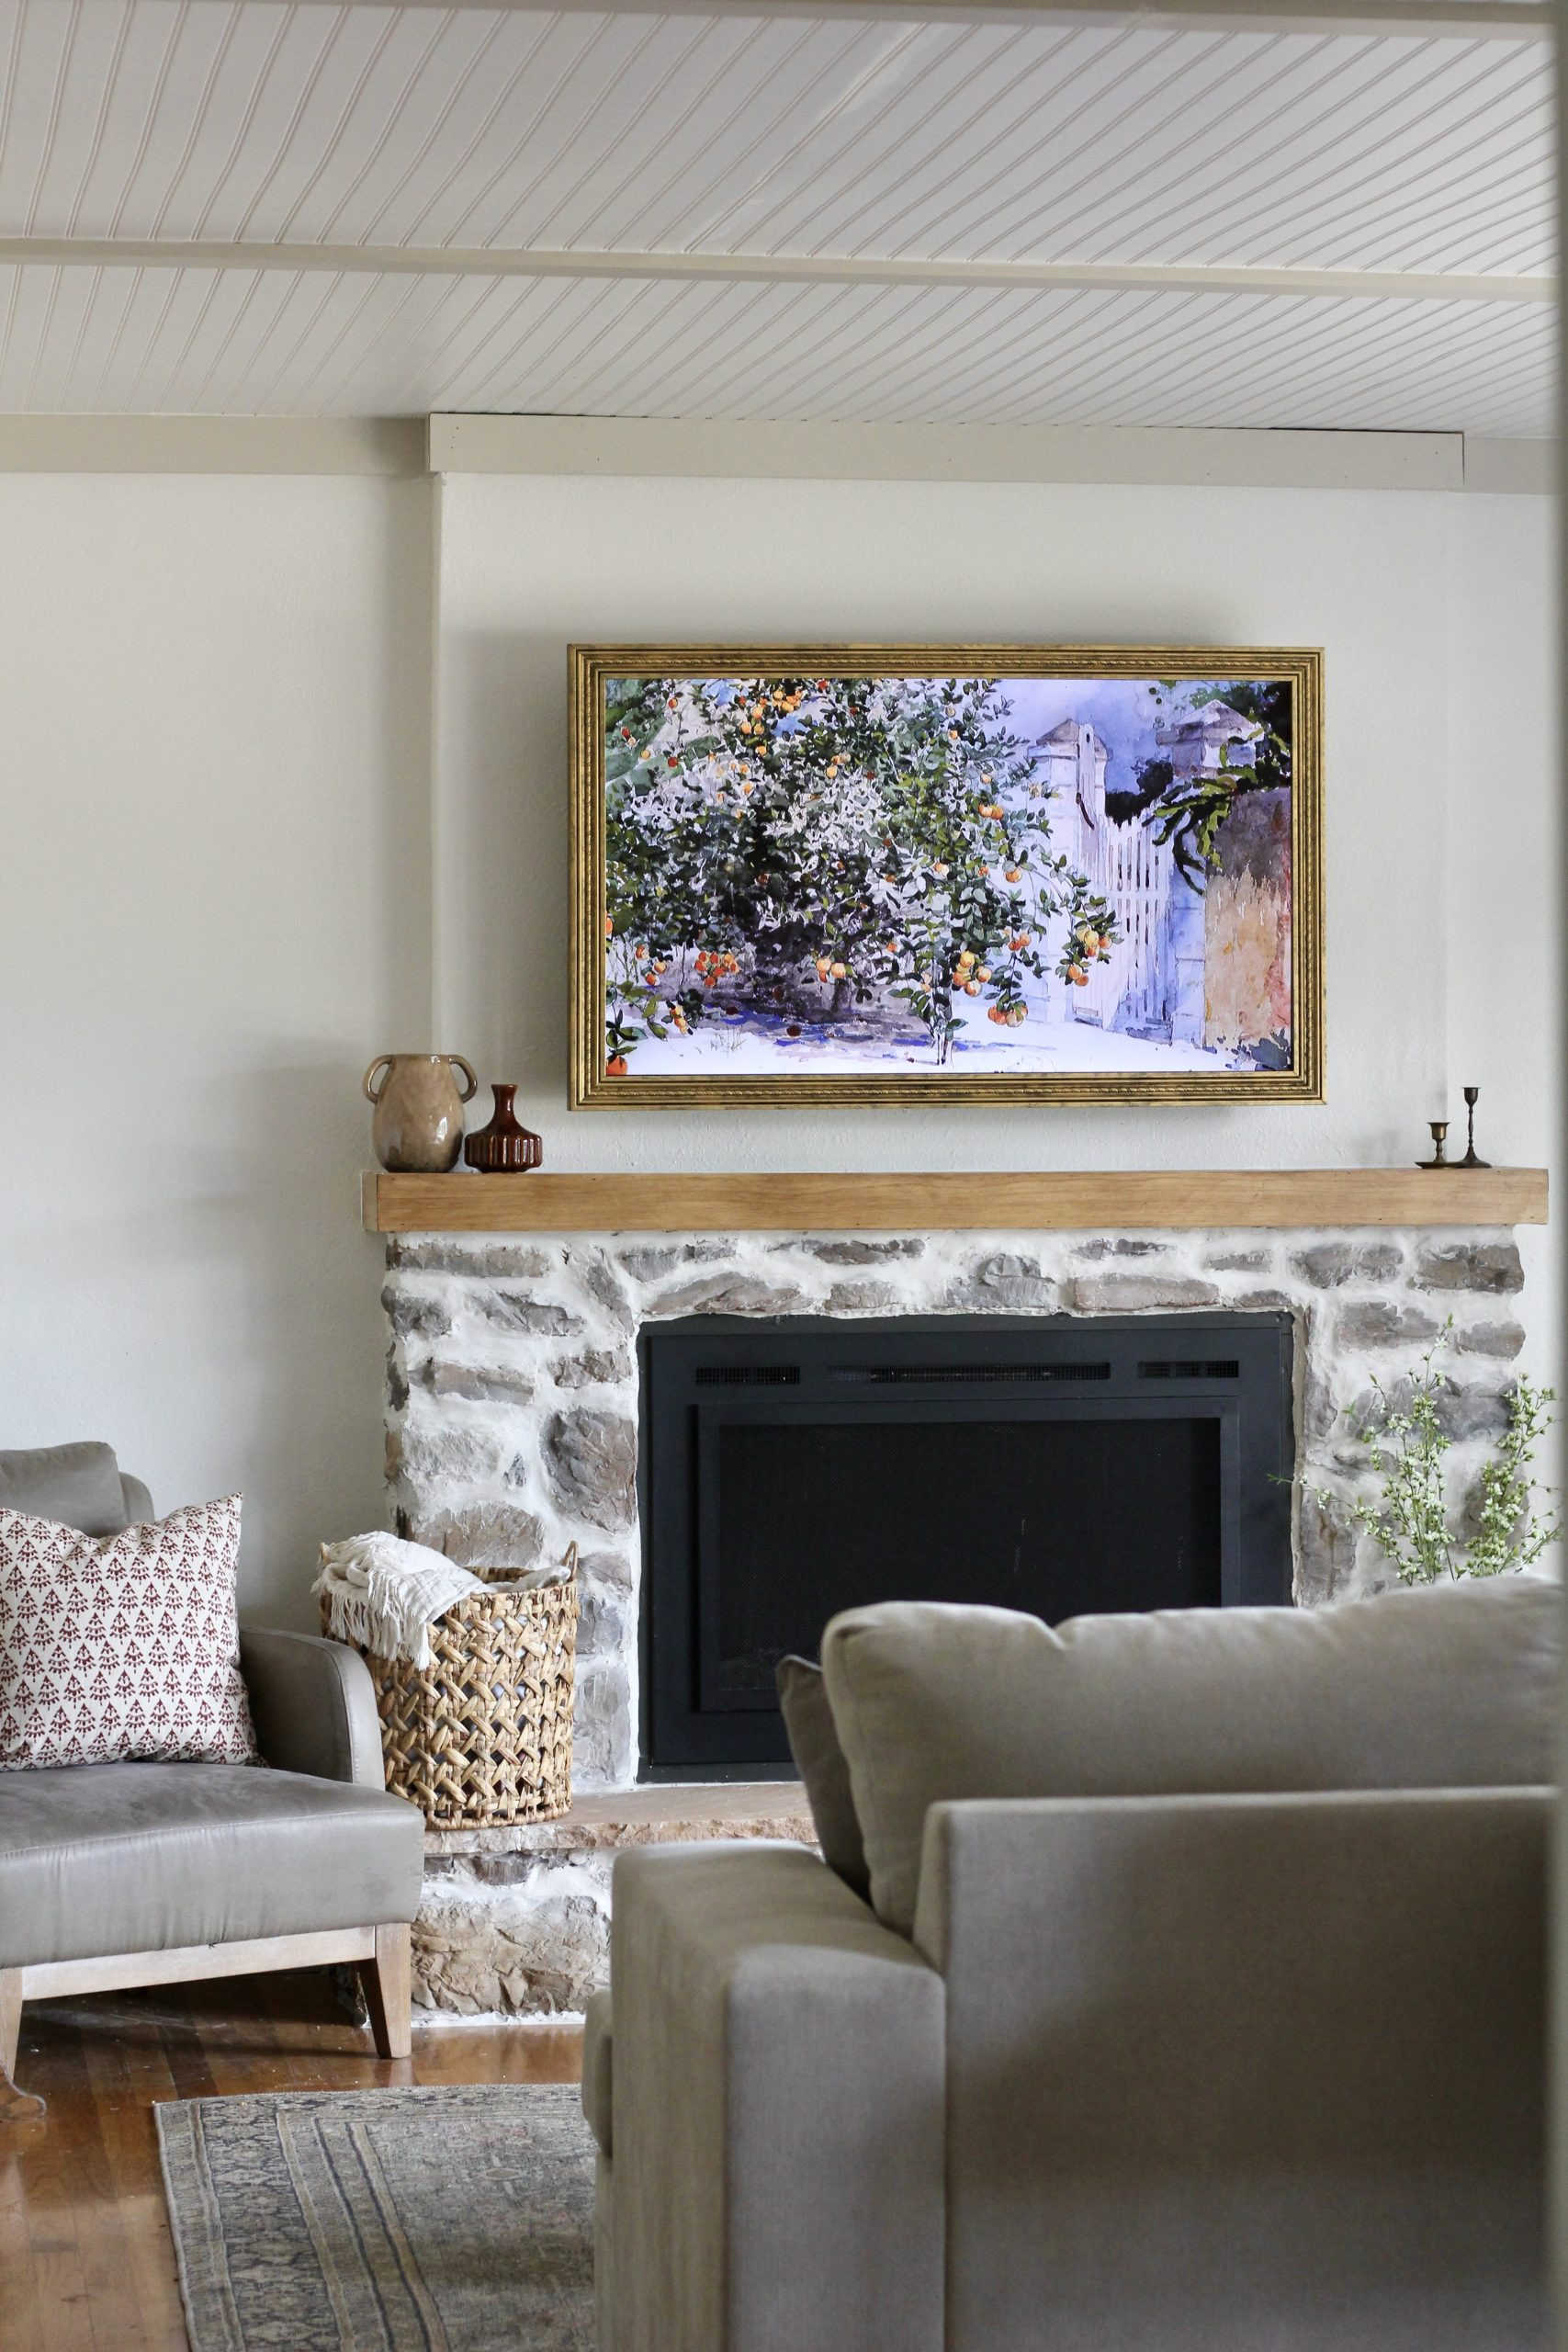
Installing a rock wall fireplace can transform your living space into a cozy and visually stunning haven. At rockscapes.net, we provide you with a comprehensive guide on how to install a rock wall fireplace, ensuring a seamless and rewarding DIY experience. From selecting the right stones to mastering the installation techniques, discover how to create a captivating focal point that enhances your home’s ambiance with natural stone veneer and elegant rock cladding.
1. Why Choose a Rock Wall Fireplace?
Want to infuse your home with rustic charm and timeless elegance? A rock wall fireplace offers a unique combination of aesthetic appeal and functional warmth. Let’s explore why a rock wall fireplace might be the perfect addition to your living space.
What are the aesthetic benefits of a rock wall fireplace?
Rock wall fireplaces provide natural beauty, texture, and character to any room. The organic variations in color, shape, and size of the stones create a visually appealing focal point that complements a range of interior design styles, from rustic to modern.
The use of natural stone can dramatically enhance the aesthetic of a room. According to a study by the American Society of Interior Designers, incorporating natural elements like stone into interior design can improve mood and reduce stress levels.
How does a rock wall fireplace enhance home value?
A well-designed rock wall fireplace can significantly increase your home’s market value. It’s a sought-after feature that appeals to potential buyers, setting your property apart and adding a touch of luxury.
Real estate experts at Zillow note that homes with unique architectural features, such as stone fireplaces, tend to sell for a higher price compared to similar properties without such features.
What are the different styles of rock wall fireplaces?
Rock wall fireplaces come in various styles to suit different tastes:
- Rustic: Features rough, uneven stones for a natural, rugged look.
- Modern: Uses sleek, linear stones for a contemporary feel.
- Stacked Stone: Involves layering stones in a uniform, horizontal pattern.
- Dry-Stacked: Achieves a seamless look by fitting stones tightly together without visible mortar.
Choosing the right style depends on your personal preference and the overall aesthetic of your home. Rockscapes.net offers a wide variety of stone types and styles to match your unique vision.
2. Planning Your Rock Wall Fireplace Installation
Proper planning is crucial for a successful rock wall fireplace installation. From measuring your space to selecting the right materials, careful preparation ensures a smooth and efficient process.
How do I measure the fireplace area accurately?
Measure the height and width of the wall where you plan to install the rock veneer. Add extra measurements for any surrounding areas you wish to cover. Accurate measurements are essential for calculating the amount of stone and mortar you’ll need.
Use a laser measure for precise measurements. According to the National Association of Home Builders, accurate measurements can save up to 10% on material costs by avoiding overestimation and waste.
What tools and materials are needed for the installation?
Gather the following tools and materials:
- Stone veneer
- Cement board
- Mortar (polymer-modified)
- Mesh tape
- Thin-set mortar
- Trowel
- Wet tile saw
- Diamond blade
- Handheld tile saw (optional)
- Angle grinder (optional)
- Chisel
- Hammer
- Level
- Safety glasses
- Gloves
- Buckets
- Paddle mixer attachment for drill
- Construction paper
- Painter’s tape
Investing in high-quality tools ensures a professional finish. A study by the University of Minnesota’s Extension Service found that using the right tools can reduce project completion time by up to 20%.
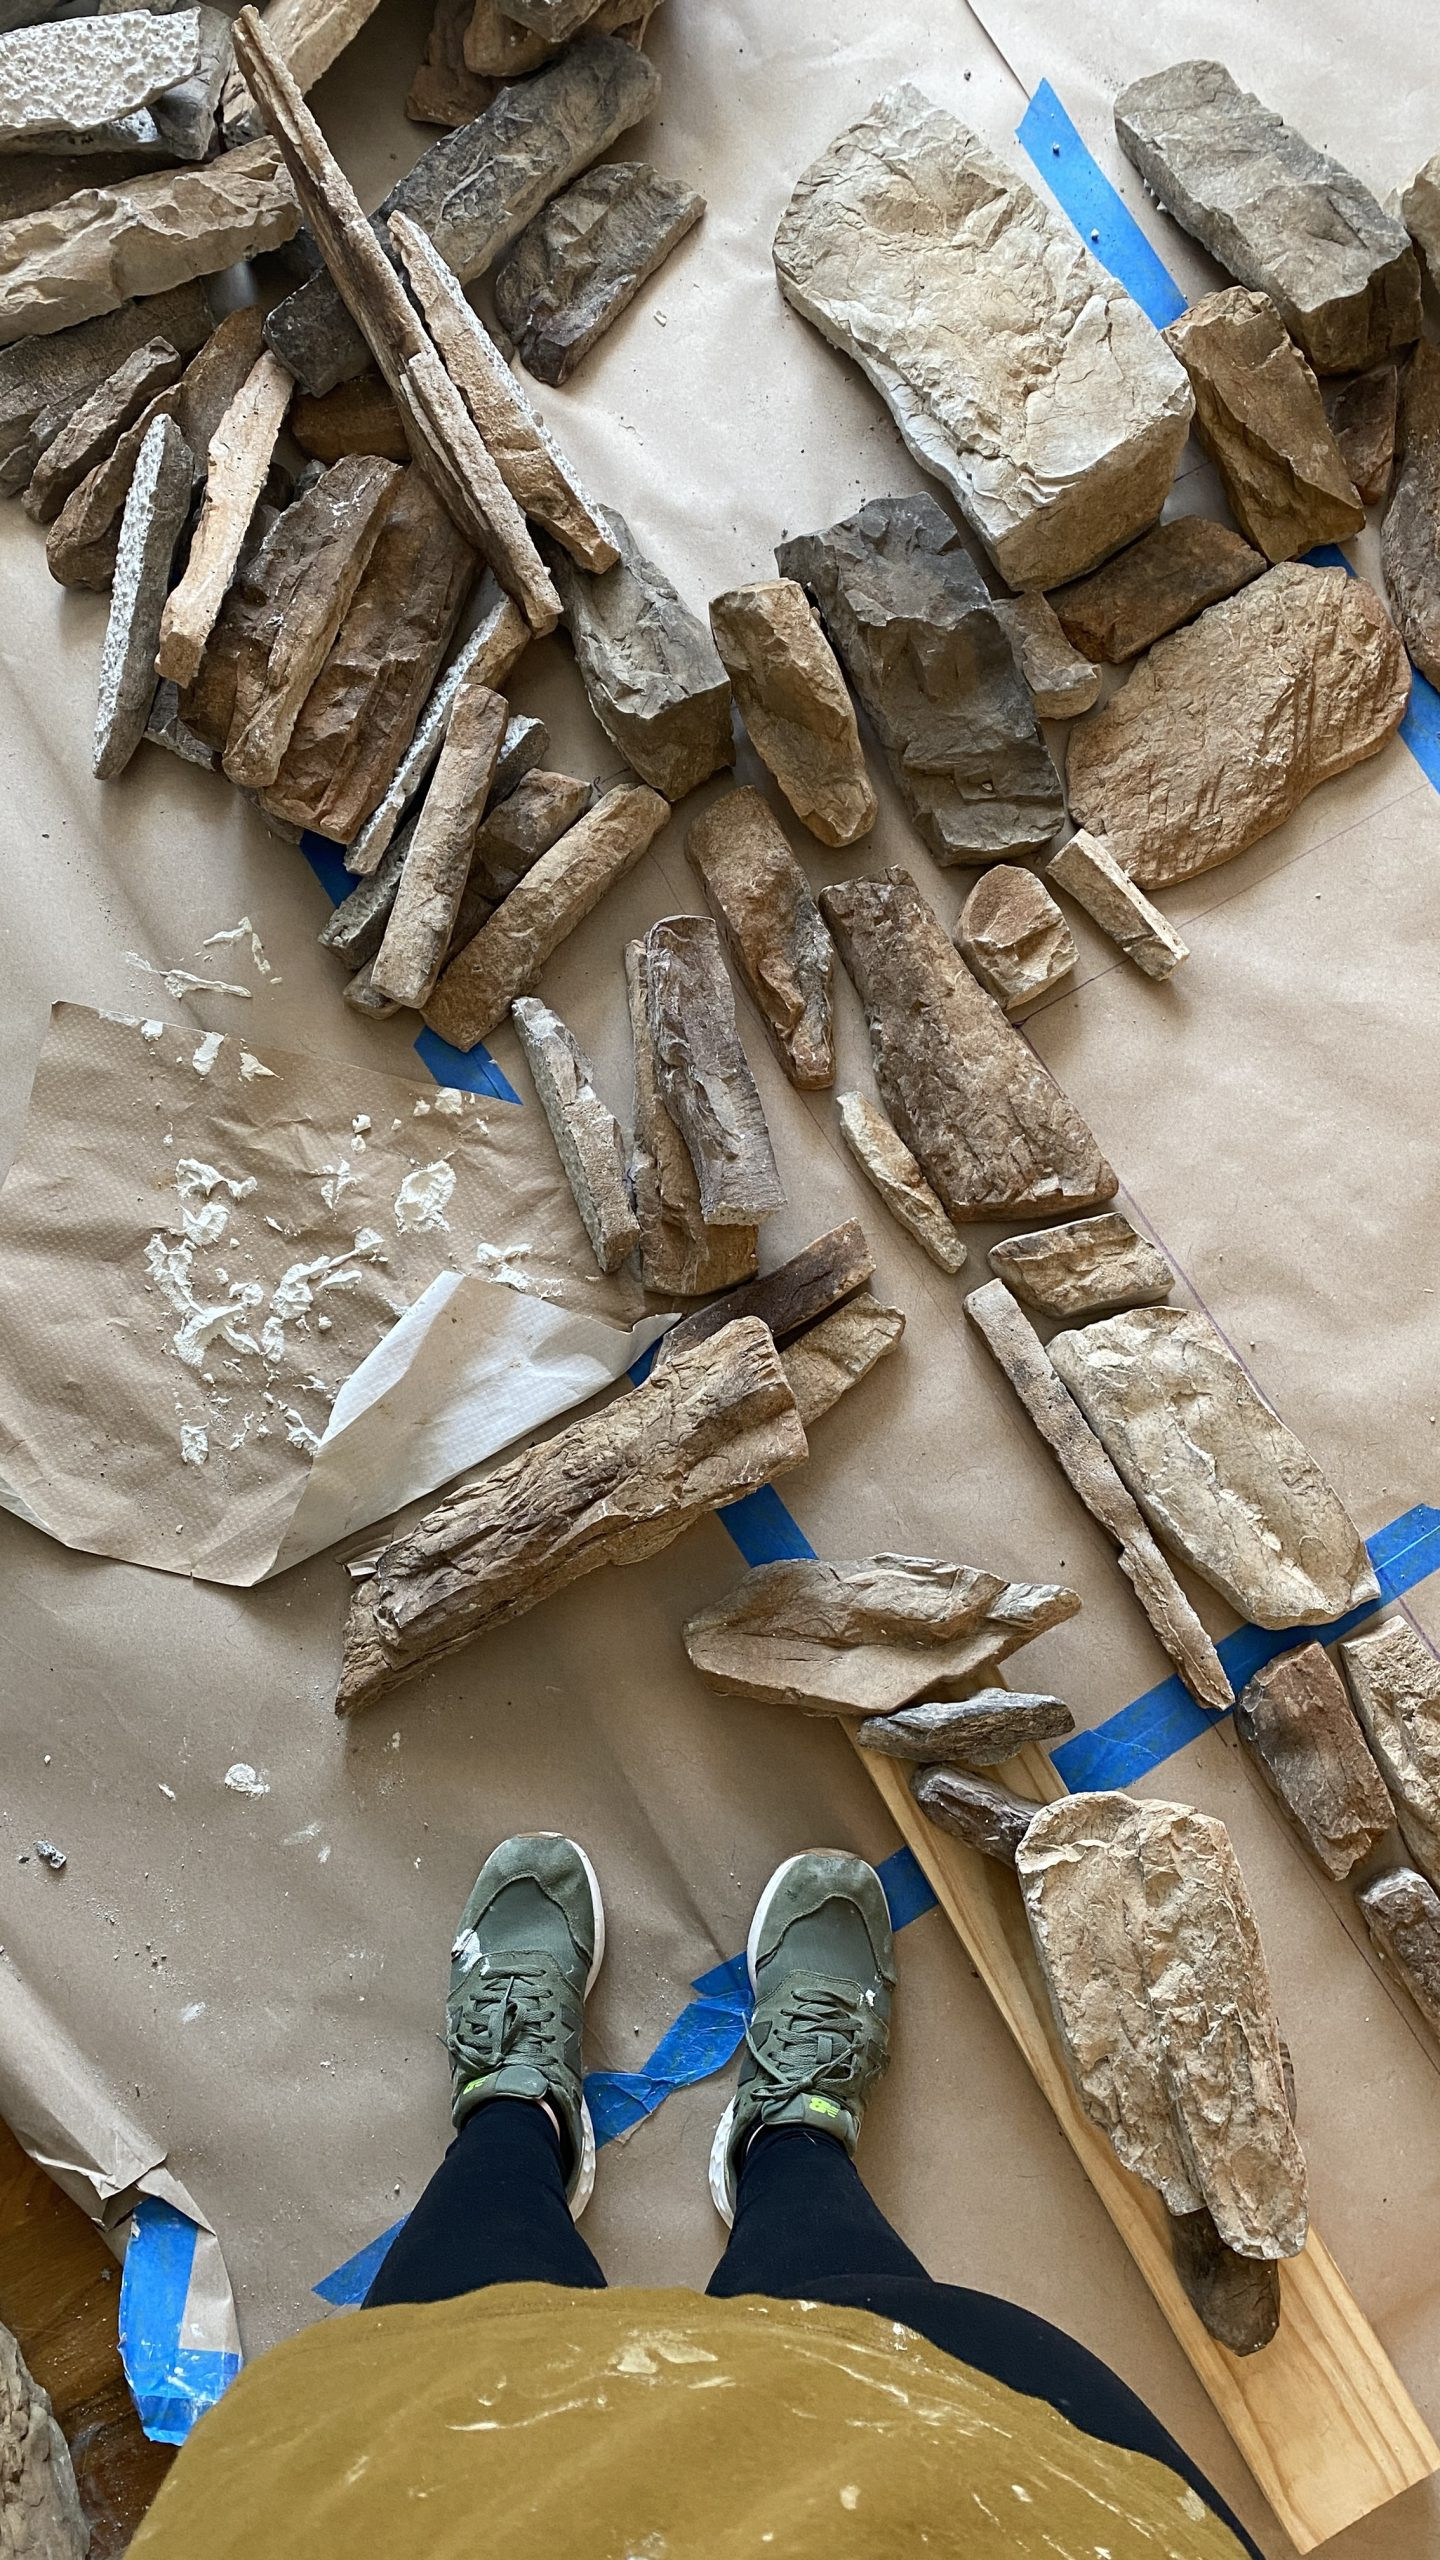
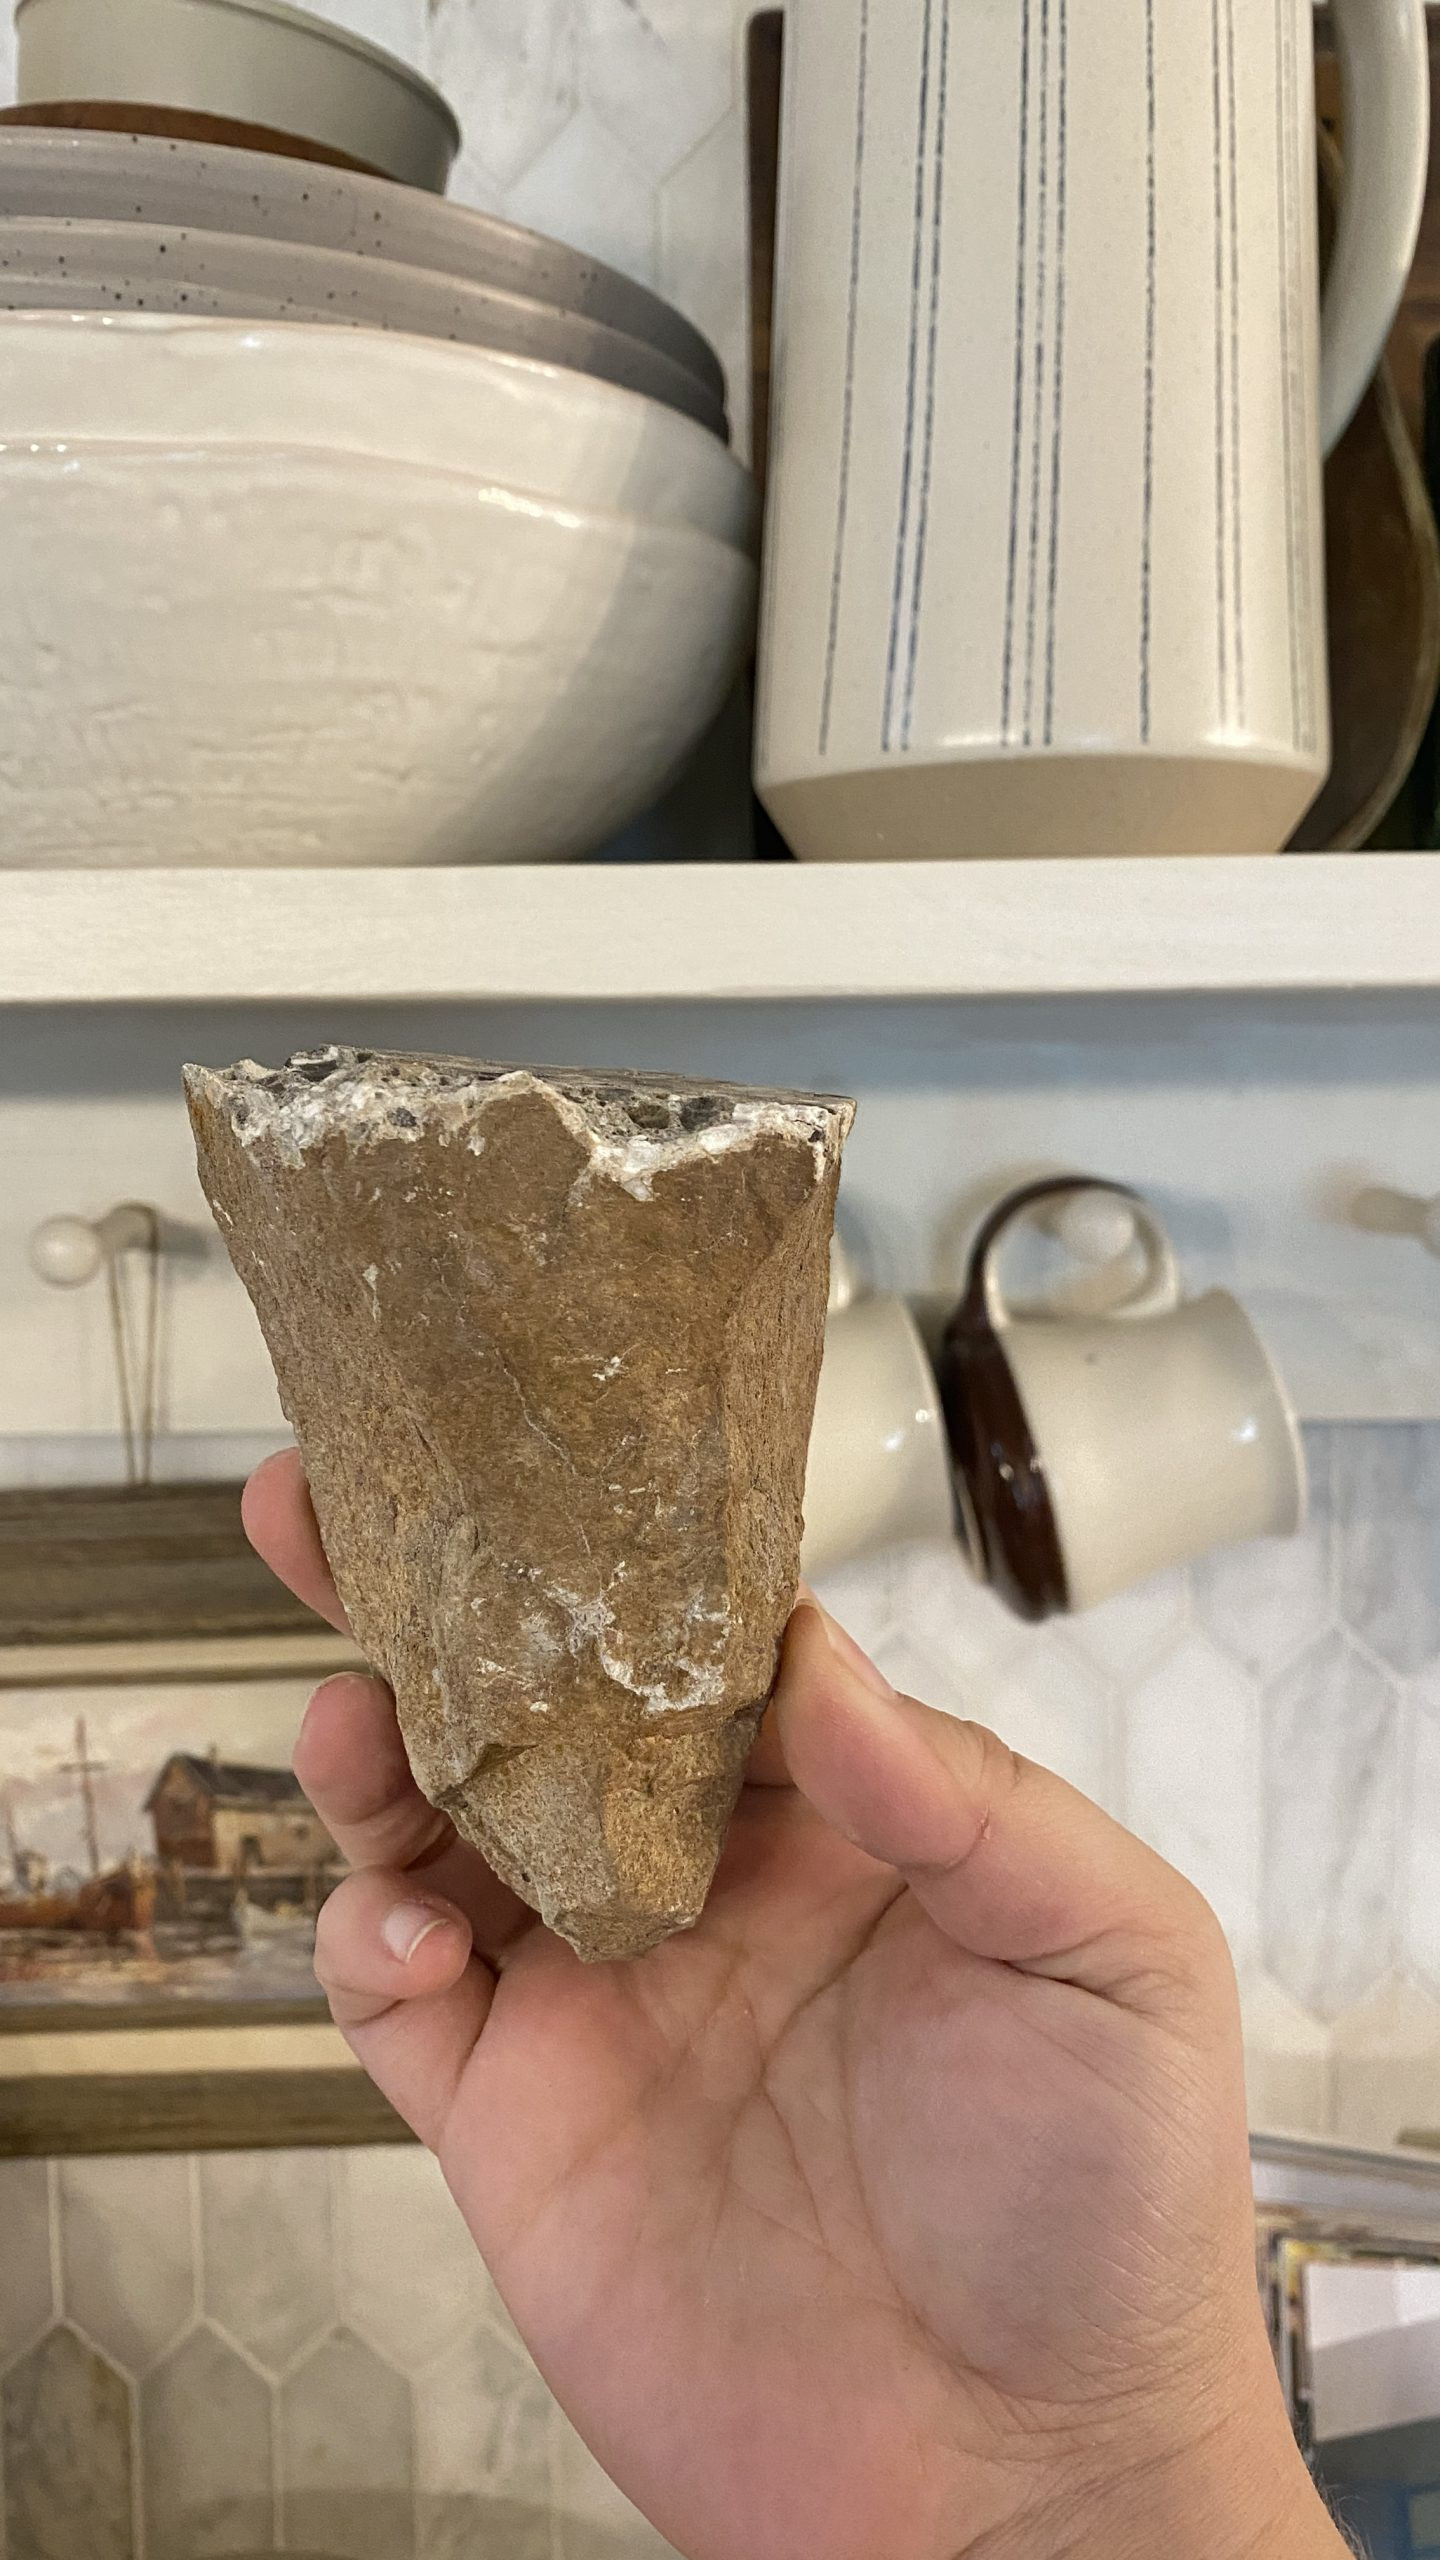
How do I choose the right type of stone veneer?
Consider the following factors when selecting stone veneer:
- Style: Choose a style that complements your home’s design.
- Color: Select colors that match your existing décor.
- Size and Shape: Opt for stones that are easy to handle and install.
- Weight: Ensure the wall can support the weight of the stone veneer.
- Material: Natural stone, manufactured stone
Rockscapes.net offers a diverse selection of stone veneers, including granite, slate, and stacked stone, to suit any design preference.
 Stone Veneer Fireplace Installation: Choosing the Right Stone
3. Preparing the Fireplace Wall
Proper wall preparation is essential for ensuring the stone veneer adheres correctly and the fireplace is structurally sound. Here are the steps to prepare your fireplace wall for rock installation.
How do I install cement board correctly?
Attach cement board to the fireplace frame using screws. Ensure the boards are flush and securely fastened. Cement board provides a stable and moisture-resistant surface for the stone veneer.
Use ½” Hardiebacker for vertical installations, as recommended by building codes. According to the Portland Cement Association, cement board should be installed with a 1/8-inch gap between sheets to allow for expansion and contraction.
How do I reinforce the wall for heavy stone?
For heavier stone veneers, reinforce the wall with additional framing and supports. This ensures the wall can bear the weight without compromising structural integrity.
Consult a structural engineer to determine the necessary reinforcement for your specific project. The International Building Code provides guidelines for wall reinforcement based on the weight and type of veneer being installed.
How do I apply mesh tape and thin-set mortar?
Apply mesh tape over all seams and screw holes in the cement board. Use thin-set mortar to create a smooth, even surface. This prevents cracking and ensures a seamless base for the stone veneer.
Allow the thin-set mortar to dry completely before proceeding with the stone installation. According to manufacturer instructions, thin-set mortar typically requires 24-48 hours to fully cure.
4. Installing the Stone Veneer
With the wall prepared, you’re ready to begin installing the stone veneer. This section provides a step-by-step guide to ensure a professional and aesthetically pleasing result.
How do I mix the polymer-modified mortar?
Mix the polymer-modified mortar according to the manufacturer’s instructions. Use a 5-gallon bucket and a paddle mixer attachment for your drill to achieve a smooth, consistent mixture. Add water gradually to avoid clumping.
Always add water before the powder to prevent clumping. The mortar should have a peanut butter-like consistency for optimal adhesion.
What is the back-buttering technique, and how do I use it?
Back-buttering involves applying mortar to the back of each stone veneer piece before placing it on the wall. This ensures full contact and a strong bond. Use a trowel to apply a generous layer of mortar, making sure to cover the entire surface.
Notch the mortar with the trowel to create grooves that enhance adhesion. Press the stone firmly against the cement board, wiggling it slightly to ensure a secure bond.
How do I ensure proper stone adhesion?
To ensure proper stone adhesion, follow these steps:
- Apply mortar to the cement board and the back of each veneer piece.
- Press the stone firmly against the wall, ensuring the mortar is squishing out of each side.
- Stop every few stones to check that the mortar is adhering to the cement board.
- Add more mortar to any areas where adhesion is lacking.
- Use foam pieces and cardboard to hold heavier stones in place until the mortar sets.
Proper adhesion is crucial for preventing stones from slipping or falling off the wall. Eldorado Stone recommends using their specific type of mortar for optimal results.
How to lay the stone veneer
Starting with the hearth stones, and build around them and then with the corner pieces, working your way up the sides. Distribute a mix of colors and sizes for a more natural, varied appearance.
Use a level to ensure the stones are aligned correctly. Adjust the spacing between the stones according to your personal preference and the desired aesthetic.
 Stone Veneer Fireplace Installation: Applying Mortar
5. Cutting Stone Veneer for a Perfect Fit
Cutting stone veneer is often necessary to achieve a seamless and professional look. Here’s how to cut stone veneer effectively and safely.
Can I use a wet tile saw to cut stone veneer?
Yes, a wet tile saw is ideal for cutting stone veneer. Install a new 7” diamond blade for clean and precise cuts. The water helps to reduce dust and keep the blade cool, preventing damage to the stone.
Cut slowly and steadily to avoid chipping or breaking the stone. For thicker pieces, you may need to flip the stone or hold it at an angle to complete the cut.
How do I use a handheld tile saw for cutting stone?
A handheld tile saw is useful for making cuts that are difficult to achieve with a stationary wet tile saw. This tool hooks up to a garden hose to provide water for cooling and dust control.
Use a handheld tile saw for shaping hearth stone pieces. The mix between a circular saw and a tile saw provides great working experience.
How do I create a natural, rough edge after cutting?
After cutting the stone veneer, use a chisel and hammer to chip away at the edges, creating a natural, rough look. This helps the cut pieces blend seamlessly with the rest of the stone veneer.
Avoid creating perfectly straight lines, as these will look unnatural. Instead, focus on creating irregular edges that mimic the look of natural stone.
6. Grouting and Finishing Touches
Grouting is an essential step in achieving the desired look for your rock wall fireplace. This section covers how to grout your stone veneer and add the finishing touches.
What type of grout should I use for a stone veneer fireplace?
Technically, you will use mortar to fill the joints between the stones. Polymer-modified mortar to fill the joints between the stones. Choose a color that complements the stone veneer and enhances the overall design.
The choice of grout color can significantly impact the final appearance of the fireplace. Lighter grout colors create a more pronounced contrast, while darker colors provide a more subtle, blended look.
How do I apply grout for an overgrouted look?
Overgrouting involves applying more grout than usual, allowing it to spill out in front of the stones. This creates a rustic, textured look that is popular for farmhouse and cottage-style fireplaces.
Apply the grout generously, using a grout float to push it into the joints. Wipe away excess grout from the surface of the stones, leaving the joints filled and slightly overflowing.
How do I clean and maintain the rock wall fireplace?
Clean the rock wall fireplace regularly with a soft brush and a mild detergent solution. Avoid using harsh chemicals or abrasive cleaners, as these can damage the stone veneer.
Inspect the grout and stone veneer periodically for any signs of damage or deterioration. Repair any cracks or loose stones promptly to prevent further issues.
 Stone Veneer Fireplace Installation: Adding Finishing Touches
7. Design Ideas for Your Rock Wall Fireplace
Need some inspiration? Explore these design ideas to create a rock wall fireplace that reflects your personal style and enhances your living space.
What are some popular rock wall fireplace styles?
- Rustic Farmhouse: Features natural, uneven stones with overgrouting for a cozy, lived-in look.
- Modern Minimalist: Uses sleek, linear stones with minimal grout lines for a clean, contemporary feel.
- Coastal Chic: Incorporates light-colored stones and natural textures for a relaxed, beachy vibe.
- Mountain Lodge: Features large, rugged stones with a dry-stacked appearance for a grand, rustic aesthetic.
Consider the overall style of your home when choosing a design. Rockscapes.net offers a variety of stone types and styles to match any design vision.
How can I incorporate a mantel into the design?
A mantel can add both functionality and style to your rock wall fireplace. Choose a mantel made from wood, stone, or metal to complement the stone veneer.
Install the mantel at a comfortable height for displaying decorative items. A mantel can also serve as a focal point for seasonal decorations.
How do I choose the right accessories for my fireplace?
Select accessories that complement the style and color of your rock wall fireplace. Consider adding:
- Fireplace tools
- Candle holders
- Decorative logs
- Artwork
These accessories can enhance the overall aesthetic and create a warm, inviting atmosphere.
8. Addressing Common Challenges
Even with careful planning, you may encounter challenges during your rock wall fireplace installation. Here’s how to address some common issues.
What if the stone veneer is not adhering properly?
If the stone veneer is not adhering properly, ensure you are using the correct type of mortar and applying it generously to both the cement board and the back of the stone. Check that the mortar is not too dry or too wet.
Clean the surfaces thoroughly to remove any dust or debris that may be preventing adhesion. Use foam pieces and cardboard to hold the stones in place until the mortar sets.
How do I handle uneven or oddly shaped stones?
Uneven or oddly shaped stones can add character to your rock wall fireplace, but they can also be challenging to install. Use these stones in areas where you need to fill gaps or create visual interest.
Cut the stones as needed to achieve a proper fit. Use a chisel and hammer to shape the stones and create a natural look.
What if the mortar is cracking or crumbling?
If the mortar is cracking or crumbling, it may be due to improper mixing or application. Ensure you are using the correct ratio of water to mortar and mixing it thoroughly.
Apply the mortar evenly and avoid overworking it. Protect the fireplace from extreme temperatures and moisture during the curing process.
9. Finding the Right Stone Supplier
Choosing the right stone supplier is crucial for ensuring the quality and aesthetic appeal of your rock wall fireplace. Here’s how to find a reliable supplier.
What should I look for in a stone veneer supplier?
Look for a supplier that offers:
- A wide selection of stone types and styles
- High-quality materials
- Competitive prices
- Excellent customer service
- Expert advice and support
A reputable supplier will be able to answer your questions and help you choose the right stone veneer for your project.
How can I verify the quality of the stone veneer?
Inspect the stone veneer carefully for any signs of damage or defects. Check that the stones are consistent in color and texture.
Ask the supplier for samples and references. Read online reviews to get an idea of the supplier’s reputation and customer satisfaction.
Why choose rockscapes.net for your stone veneer needs?
At rockscapes.net, we are committed to providing our customers with the highest quality stone veneer products and exceptional customer service. We offer:
- A vast selection of natural and manufactured stone veneers
- Expert advice and design assistance
- Competitive pricing
- Fast and reliable shipping
- A satisfaction guarantee
Visit rockscapes.net today to explore our extensive collection and start planning your dream rock wall fireplace.
10. Frequently Asked Questions (FAQ)
1. How much does it cost to install a rock wall fireplace?
The cost varies depending on the type of stone, the size of the wall, and whether you hire a professional installer. DIY installations can range from $500 to $2000, while professional installations can cost $2000 to $5000 or more.
2. Can I install a rock wall fireplace on any wall?
Most walls can support a rock wall fireplace, but it’s essential to ensure the wall is structurally sound and properly reinforced, especially for heavier stones.
3. How long does it take to install a rock wall fireplace?
A DIY installation can take 2-5 days, depending on the size and complexity of the project. Professional installations typically take 1-3 days.
4. Do I need a building permit to install a rock wall fireplace?
Check with your local building department to determine if a permit is required. Permits are often necessary for structural changes or modifications to existing fireplaces.
5. How do I clean a rock wall fireplace?
Use a soft brush and a mild detergent solution to clean the stone veneer. Avoid using harsh chemicals or abrasive cleaners.
6. Can I paint or stain stone veneer?
It’s generally not recommended to paint or stain natural stone veneer, as it can damage the stone and alter its natural appearance.
7. How do I repair damaged stone veneer?
Repair minor cracks or chips with a color-matched stone repair kit. Replace severely damaged stones with new ones, following the installation instructions.
8. What is the difference between natural and manufactured stone veneer?
Natural stone veneer is made from real stone, while manufactured stone veneer is made from a blend of cement, aggregates, and pigments. Manufactured stone is typically lighter and less expensive than natural stone.
9. How do I choose the right mortar for stone veneer?
Use a polymer-modified mortar specifically designed for stone veneer. This type of mortar provides excellent adhesion and flexibility, preventing cracking and ensuring a long-lasting installation.
10. Where can I find design inspiration for rock wall fireplaces?
Visit rockscapes.net for a wide range of design ideas and inspiration for your rock wall fireplace. Our gallery features stunning examples of various styles and stone types.
Ready to transform your living space with a stunning rock wall fireplace? Visit rockscapes.net today for inspiration, high-quality materials, and expert advice. Let us help you create a fireplace that adds warmth, elegance, and value to your home. Contact us at +1 (480) 965-9011 or visit our address at 1151 S Forest Ave, Tempe, AZ 85281, United States.